


Your Ultimate Guide to Hanging Wardrobe Rails
At its core, a hanging wardrobe rail is the backbone of any closet. It's the simple, essential structure that keeps your clothes organised, easy to find, and free from wrinkles. But it's more than just a metal bar—choosing the right rail can completely transform your storage space, whether you're working with a small built-in wardrobe or a sprawling walk-in closet.
Unlocking Your Wardrobe's True Potential
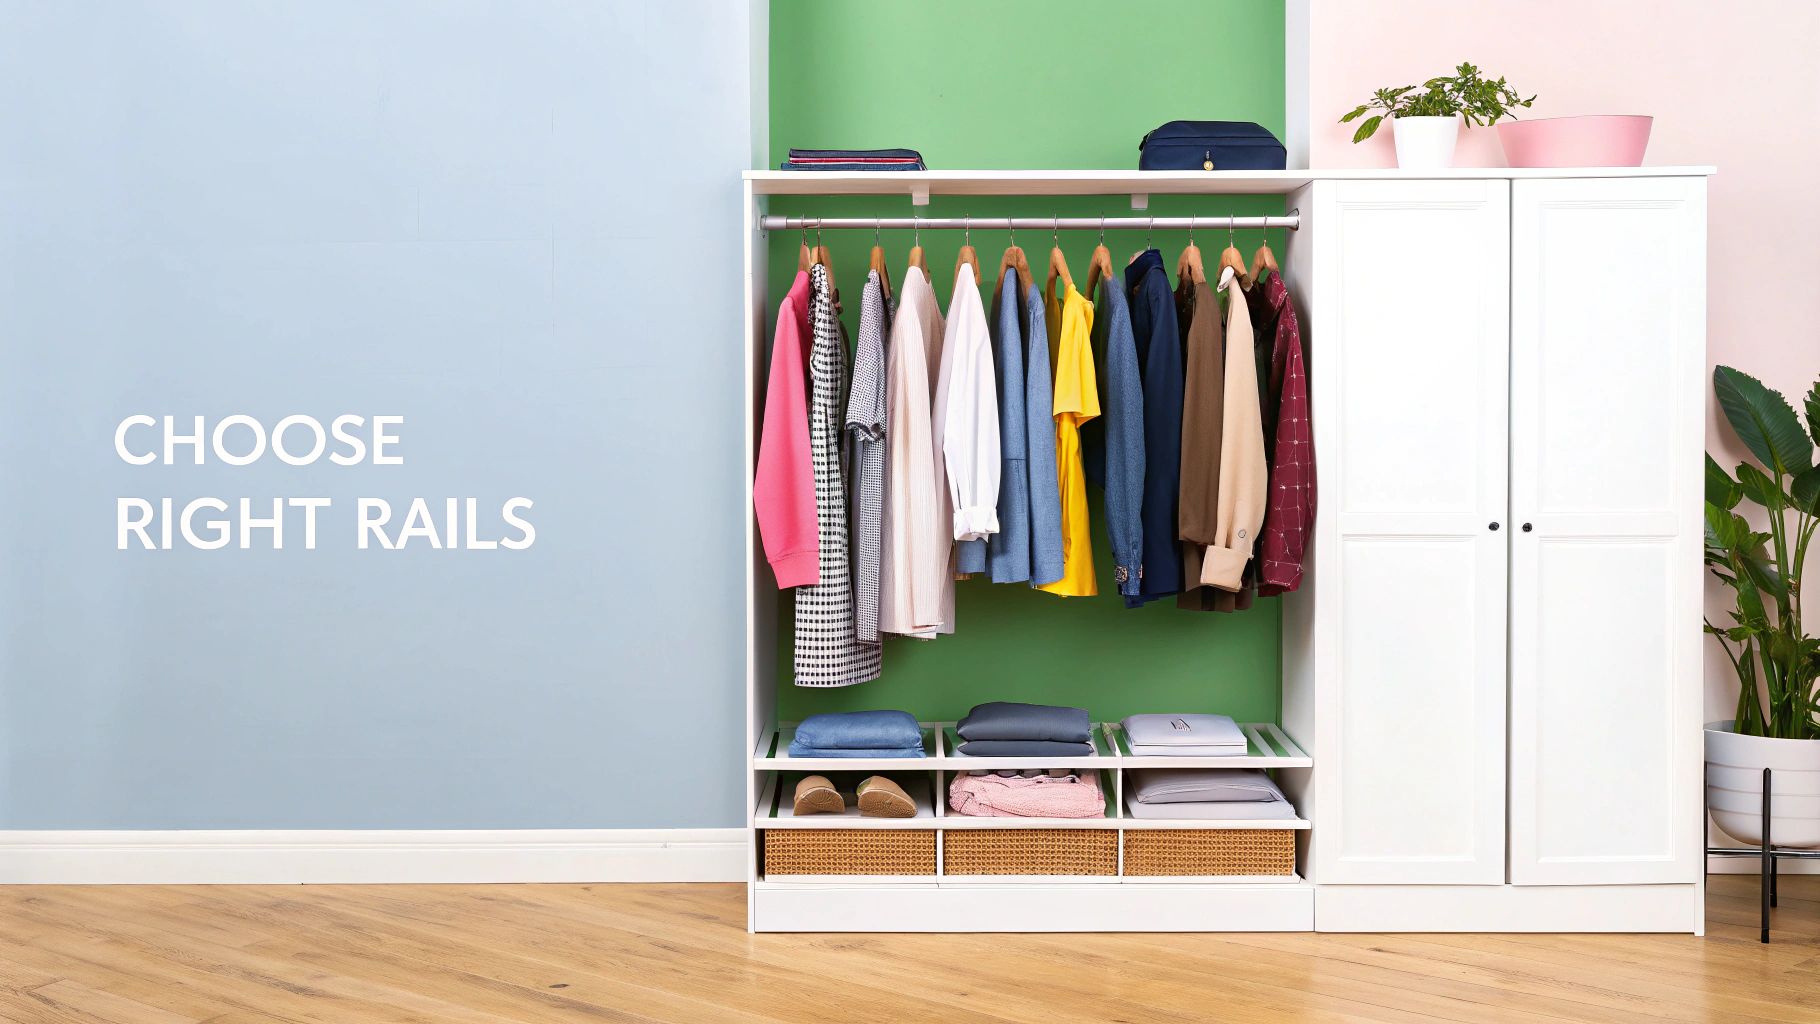
Think of wardrobe rails as the unsung heroes of a well-ordered home. They’re the key component that turns an empty cupboard into a genuinely functional storage system. In modern homes where every inch of space counts, good organisation isn't just a nice-to-have; it's fundamental to creating a calm and clutter-free living area.
The desire for smarter storage solutions has never been greater. In fact, the UK market for closet organisers is expected to grow by 7.5% each year until 2035. This boom isn't just about adding more shelves; it reflects a real shift towards intelligent design where even the humble clothes rail plays a vital part in making our homes work better.
Why Choosing the Right Rail Matters
Getting the rail right is the first step toward a wardrobe that truly works for you. The perfect system can make a world of difference.
- Maximise Vertical Space: By installing double-hanging rails, you can instantly double your capacity for shorter items like shirts, blouses, and folded trousers.
- Prevent Damage: A sturdy rail that doesn’t sag under pressure protects not only your clothes but the integrity of the wardrobe itself.
- Improve Accessibility: A well-planned layout means you can see everything at a glance, making that morning routine just a little bit smoother.
Understanding the role of a hanging rail is the key to making an informed choice. It helps you build a wardrobe that’s perfectly suited to your clothing collection and your daily life.
For a really robust setup, you might want to look at our detailed guide on wall-mounted clothes rail options. But before we get into the nitty-gritty of materials and weight limits, let's have a quick look at the main types of rails you'll come across.
To help you get started, here's a quick summary of the most common rail types and what they're best used for.
Quick Comparison of Wardrobe Rail Types
| Rail Type | Primary Use | Key Benefit |
|---|---|---|
| Fixed Rail | Standard wardrobes, walk-in closets | Simple, strong, and reliable for everyday use. |
| Adjustable Rail | Children's wardrobes, multi-use spaces | Offers flexibility to change height as needs evolve. |
| Pull-Down Rail | High ceilings, accessibility needs | Brings clothes down to a reachable level with ease. |
| Heavy-Duty Rail | Retail displays, large coat collections | Engineered to hold significant weight without bowing. |
This table should give you a good starting point for figuring out which style best fits your needs. Each one has its place, from the straightforward fixed rail to more specialised solutions for tricky spaces.
Comparing Wardrobe Rail Types and Materials
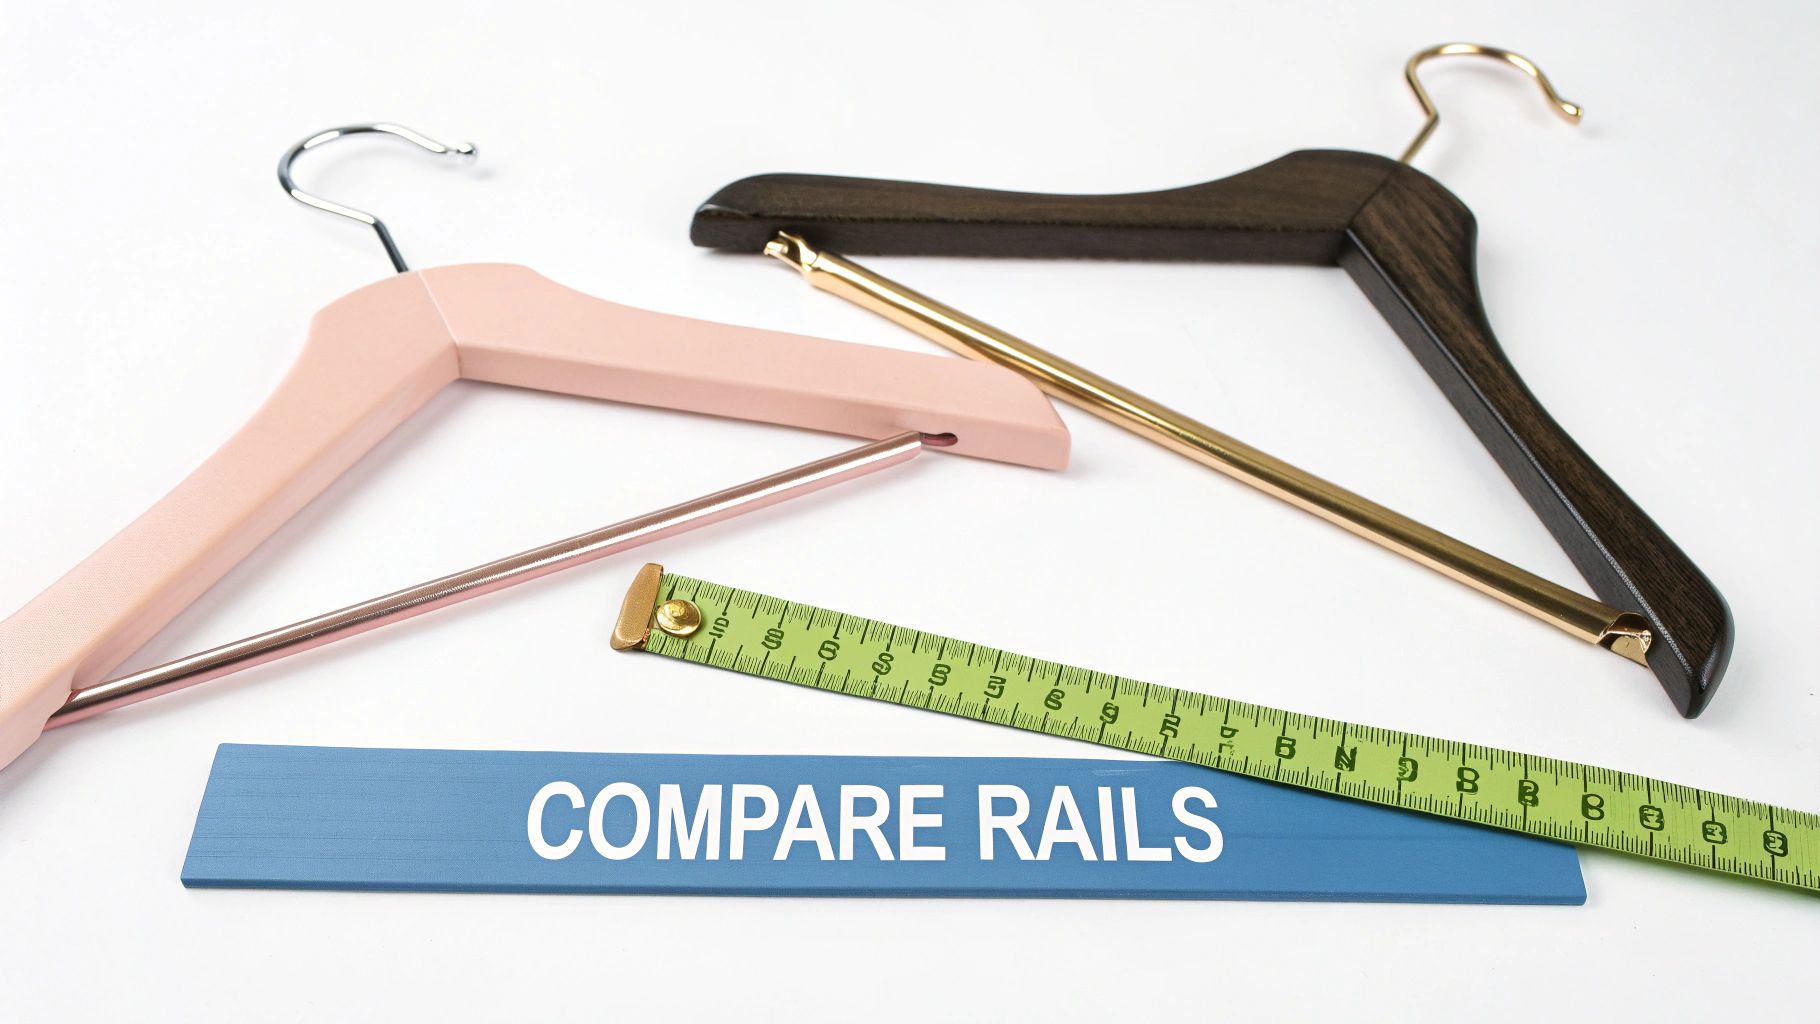
Picking a hanging wardrobe rail isn't as simple as grabbing the first one you see. It’s about finding the right tool for the job. Different designs solve different storage puzzles, and knowing the difference is the key to creating a space that’s truly organised and works for you.
Your most common choice is the standard fixed-length rail. It's the dependable workhorse of the wardrobe world—strong, straightforward, and perfect for most everyday needs. But clever designs now offer some brilliant solutions for those trickier, less conventional spaces.
Take the pull-down rail, for instance. It’s an absolute game-changer for wardrobes with high ceilings. A simple mechanism lets you lower the entire rail to a comfortable height, bringing everything within easy reach. Suddenly, that awkward top shelf space is transformed into prime, accessible hanging storage.
Making the Most of Awkward Spaces
We’ve all seen them: those corner wardrobes where half the space becomes a black hole. A corner rail is shaped specifically to fit into that 90-degree angle, creating a seamless, continuous hanging area that flows around the bend. No more dead zones, just maximised storage.
Shallow cupboards present a similar challenge. A standard rail just won't fit. The solution? A pull-out rail that mounts perpendicular to the back wall. You hang your clothes facing forward and simply slide the rail out to see everything. It's an ingenious fix for narrow spaces. Of course, getting the right look is just as important as the function, and it's worth understanding metal finishes for design projects to make sure your choice complements your overall style.
Selecting the Right Material
The material of your hanging rail directly affects its strength, durability, and how it looks. Think of it like choosing a picture frame—it has to be strong enough to do its job while also suiting the aesthetic of the room. When choosing a material, you need to weigh up its strength, visual appeal, and of course, the cost.
Wardrobe Rail Material Comparison
| Material | Typical Load Capacity | Pros | Cons | Best For |
|---|---|---|---|---|
| Chrome-Plated Steel | 30-45 kg per metre | Very affordable, bright and reflective finish, good scratch resistance. | Can rust in very damp conditions. The plating can flake over time with heavy use. | Everyday domestic wardrobes, walk-in closets, and dry stockrooms. |
| Stainless Steel | 40-60 kg per metre | Excellent rust and corrosion resistance, very strong, long-lasting premium look. | More expensive than chrome-plated options. | Bathrooms, laundry rooms, garages, or any area prone to humidity. |
| Powder-Coated Steel | 30-50 kg per metre | Available in various colours (e.g., black, white, grey), modern matt or satin finish, durable and chip-resistant. | The coating can be scratched by metal hangers over a long period. | Creating a specific aesthetic, retail displays, and modern minimalist wardrobes. |
| Aluminium | 15-25 kg per metre | Lightweight, naturally rust-proof, easy to cut to size. | Not as strong as steel, prone to bending under heavy loads. | Lightweight clothing (shirts, blouses), children's wardrobes, or temporary solutions. |
Each material offers a distinct set of benefits. Your choice ultimately comes down to balancing the demands of your wardrobe—what you’re hanging, where it’s located, and the look you want to achieve.
The right material isn't just about looks; it's a practical decision that ensures your rail can withstand its environment and the weight of your garments for years to come.
Ultimately, whether you need a simple fixed bar or a more dynamic system, the combination of rail type and material defines its performance. For larger-scale needs beyond a single wardrobe, exploring options like those found in our guide to clothing wall racks can provide some great ideas for retail or stockroom applications.
Calculating Load Capacity and Rail Sizing
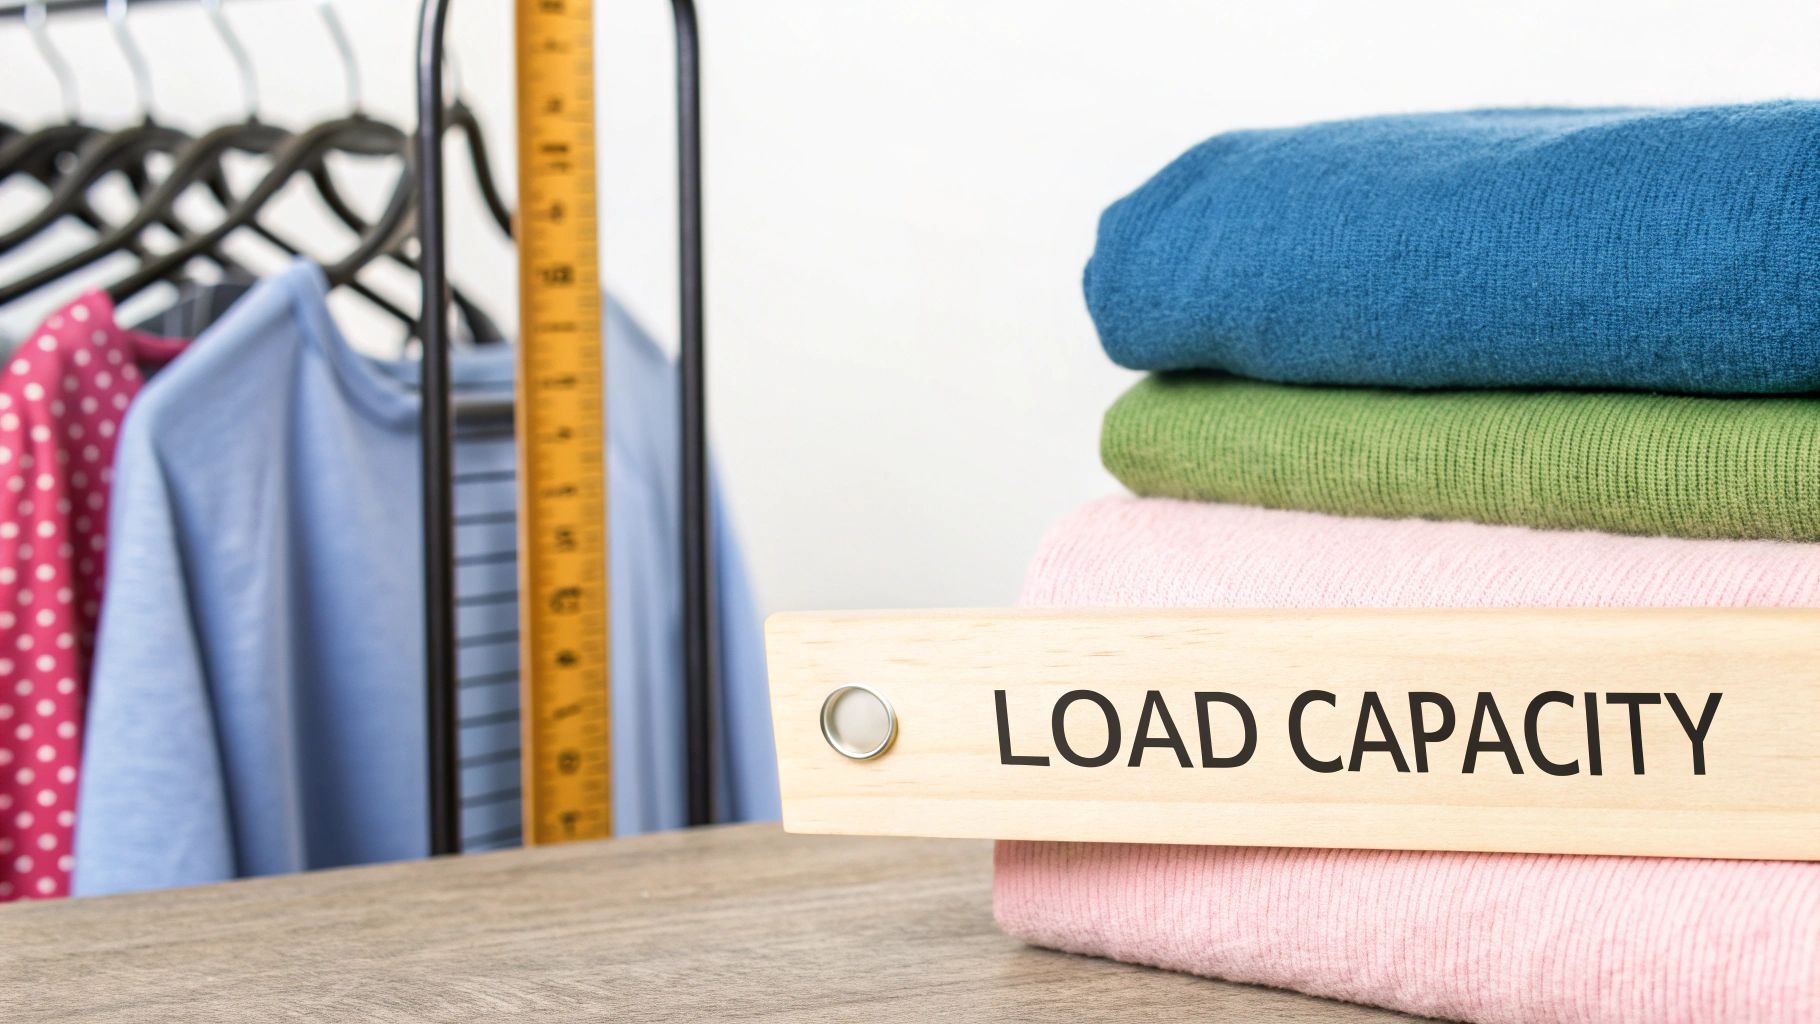
Getting the load capacity right is probably the single most important part of installing a wardrobe rail. Get it wrong, and you're setting yourself up for that dreaded crash in the middle of the night. It's a surprisingly common problem, but thankfully, it's one you can easily avoid with a bit of forethought.
Manufacturers always provide weight ratings, but these numbers can feel a bit abstract. So, let’s put it in real terms: a standard rail rated for 25kg can generally hold about 30 heavy wool coats. If you’re hanging lighter items like shirts, you could fit up to 50 garments. The classic mistake is underestimating just how much your clothes weigh, which leads to a bowed rail that eventually gives up.
To sidestep this, it's worth taking a few minutes to estimate the weight of your own wardrobe. You don't need to be perfectly precise, but a ballpark figure will make choosing the right product a whole lot easier.
Estimating Your Wardrobe's Weight
The simplest way to do this is with a bathroom scale and a sample of your clothes.
- Gather a Sample: Grab a representative bundle of ten similar items – think winter coats, heavy jeans, or dresses.
- Weigh Yourself: First, get your own weight.
- Weigh with the Clothes: Now, hold the bundle of clothes and step back on the scale.
- Do the Maths: Subtract your weight from the combined weight. That's how much the ten items weigh.
- Find the Average: Just divide that number by ten to get the average weight of one garment.
Once you have that average, you can multiply it by the total number of similar items you plan to hang. This quick check gives you a much more realistic target for what your new hanging wardrobe rail needs to handle, ensuring it's up to the job.
Why Rail Diameter and Material Matter
It’s not just about the total weight. The rail's physical dimensions are crucial for its strength and lifespan. A rail’s diameter is directly tied to how well it resists sagging or bowing across its length. Think of it like a structural beam—the thicker it is, the more robust it will be.
Choosing a rail with an appropriate diameter is just as important as its material. A thin steel rail may bend under a load that a thicker, well-supported aluminium rail could handle, proving that design and sizing are key.
For most home wardrobes up to a metre long, a standard 25mm diameter steel rail will do the trick. But if you’re spanning a longer distance or hanging a particularly heavy collection (like a tailor’s stock), moving up to a 30mm or even a 38mm diameter rail is a very sensible move.
When in doubt, always err on the side of caution and go for the stronger option. If you want to dive deeper into what makes for truly durable storage, you can learn more about what goes into making strong clothing rails in our dedicated guide.
How to Mount and Secure Your Wardrobe Rail
You've done the measuring and picked out the perfect rail. Now for the hands-on part. Properly anchoring your hanging wardrobe rail is the final, crucial step to creating a storage system that's built to last. The approach you take will come down to your wardrobe’s design, but the goal is always the same: a rock-solid foundation that can handle the full weight of your clothes.
There are three main ways to get a wardrobe rail mounted. Each one is pretty straightforward, but success really hinges on using the right hardware for the job.
Choosing Your Mounting Method
The most common setup involves fitting the rail between two solid wardrobe side panels, which is typical for built-in or flat-pack wardrobes. For this, you’ll use simple end brackets—one for each side—that screw directly into the internal walls of the unit.
Another popular option is mounting the rail underneath a sturdy shelf. This is a brilliant way to add hanging space without sacrificing existing storage. The brackets are designed to be fixed upwards into the underside of the shelf, creating a secure top-hung system that’s surprisingly strong.
Finally, you can mount your rail directly to a room wall. This is a great solution for creating an open-style wardrobe in an alcove or adding a utility rail in a laundry room. Just be aware that this method demands a bit more thought about what your wall is made of.
A secure installation is non-negotiable. The strength of your rail is only as good as its weakest fixing point. Taking the time to use the correct plugs and screws for your wall type is the difference between a reliable rail and a potential disaster.
Essential Hardware for a Secure Fit
Matching your fixings to the surface you’re drilling into is absolutely vital. You wouldn't use the same anchor for plasterboard as you would for solid brick, and getting it wrong is a recipe for failure.
- For Solid Walls (Brick or Concrete): Go for nylon wall plugs (often called Rawlplugs) and screws of the right size. These expand as the screw goes in, creating an unshakeable grip inside the solid material.
- For Plasterboard (Cavity Walls): Standard plugs are useless here. You’ll need specialised plasterboard fixings like spring toggles or hollow wall anchors. These clever bits of hardware open up behind the board to spread the load and stop it from pulling through.
- For Wood or MDF Panels: Good news—no plugs needed! You can screw the brackets directly into the wood. I always recommend drilling a small pilot hole first; it stops the wood from splitting and makes driving the screw in much easier.
The Golden Rule for Long Rails
If your hanging wardrobe rail spans more than 100cm (around 40 inches), adding a centre support bracket isn't just a good idea—it's essential. This one simple component gives the rail reinforcement right where it needs it most, preventing that dreaded bowing or sagging under the weight of your clothes. Honestly, skipping this step is the number one reason rails fail.
By carefully selecting the right brackets and fixings, you build a support system you can truly rely on. If you're looking at different hardware combinations, you can get a better feel for how to pair a specific clothes rail and brackets for your project in our detailed guide.
Measuring and Spacing for Optimal Layout
Getting your measurements and spacing spot-on is what separates a functional wardrobe from a frustrating one. This is where precision really pays off, turning a basic cupboard into a genuinely efficient storage space. It’s not just about cutting the rail to the right width; it’s about positioning it at the perfect height and depth to make every inch count.
Proper planning prevents all those common headaches, like long dresses dragging on the floor or shirts on a top rail dangling awkwardly over trousers on the bottom one. By following a few simple professional guidelines, you can create a layout that feels intuitive, keeps your clothes in pristine condition, and just makes life easier.
Let’s get into the key numbers you need to know.
Ideal Heights for Single and Double Rails
When you’re installing a single hanging wardrobe rail for longer items, getting the height right is critical. You need enough clearance to stop your clothes from creasing and pooling at the bottom.
- Single Rail Height: Aim to install the rail between 160cm and 180cm from the floor. This sweet spot gives you ample space for overcoats, maxi dresses, and long jackets, letting them hang freely. Before you drill, it's always a smart move to measure your longest garment just to be absolutely certain.
If you’re looking to double your hanging capacity, a two-rail system is the way to go. Here, the spacing between the rails is vital to ensure both levels are easy to get to and practical to use.
- Double Rail Heights: Position the top rail at roughly 210cm from the floor, and place the bottom rail around 105cm. This simple "rule of halves" creates two perfectly balanced zones for shirts, blouses, skirts, and trousers folded over a hanger.
A well-measured layout is the foundation of an organised wardrobe. These standard heights are tried-and-tested benchmarks used by professional fitters to maximise utility and accessibility in any space.
Depth and Clearance Considerations
Finally, don't overlook the depth. Your hangers need enough room to sit straight without your clothes getting squashed against the back wall or caught in the door. A minimum depth of 60cm is the industry recommendation for a standard wardrobe, which allows most hangers to fit comfortably without any fuss.
This diagram shows how the core components and different mounting options—from side panels to under-shelf and wall-mounted fixtures—come together.
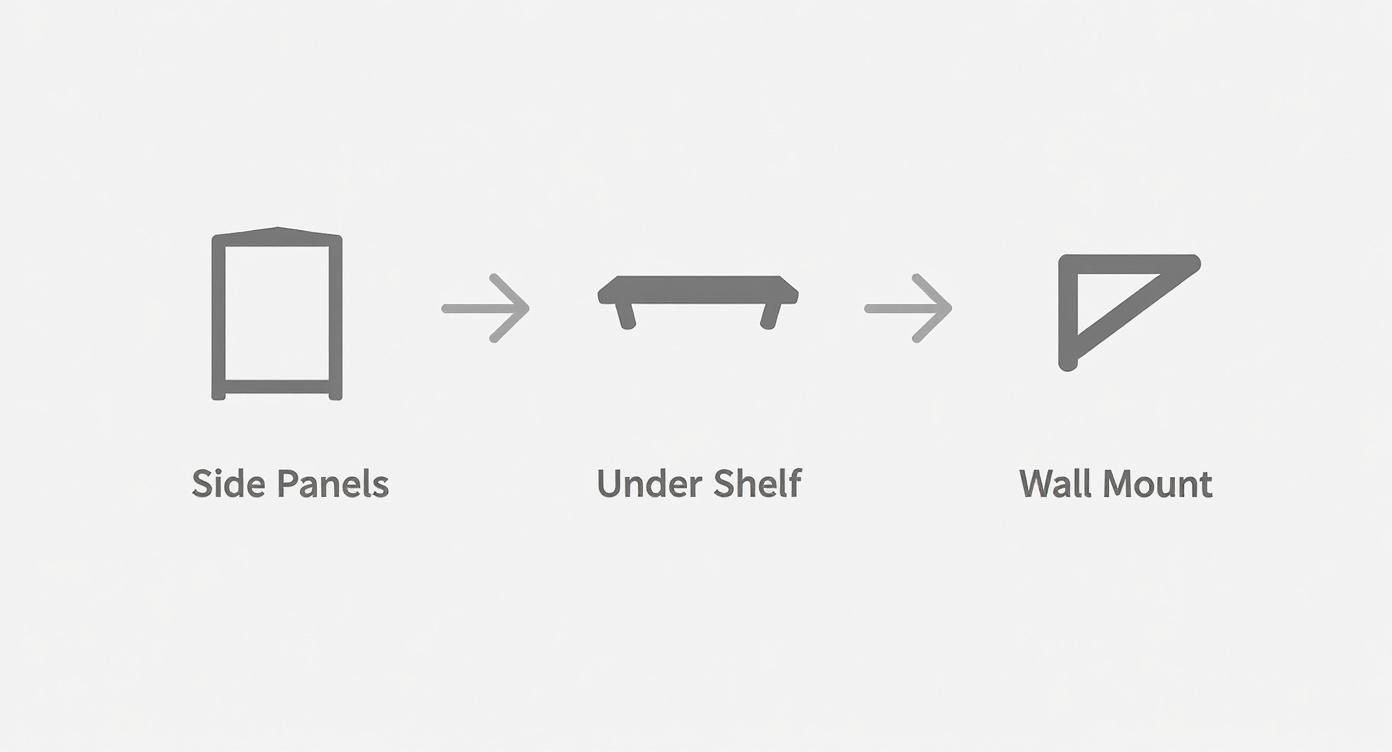
As you can see, different brackets are designed to integrate with various wardrobe structures. It’s a great reminder that choosing the right hardware is essential for a stable and secure installation that will last for years.
Specialized Rails for Commercial Use
When your livelihood depends on managing a constant flow of garments, the standard rail from a DIY shop just won't cut it. For retailers, tailors, and anyone in the fashion business, a hanging wardrobe rail system is more than just storage—it's a crucial part of your daily operations. It’s about keeping valuable stock safe and your workflow smooth.
Commercial settings require something altogether more serious. We're talking about industrial-grade systems, engineered to hold hundreds of kilograms of clothing without a hint of buckling. This is essential whether you're dealing with heavy winter coats or priceless bridal gowns. The priority shifts from simply tidying clothes away to robust, efficient inventory management.
Heavy-Duty Systems for High Volume
In a bustling retail stockroom or a busy tailor’s workshop, every second counts. Heavy-duty rails are built for this reality, typically using thicker gauge steel and reinforced brackets designed to withstand constant, heavy use. Think of them as the backbone of your logistics, allowing staff to find stock quickly and fulfil orders without delay.
Choosing the right system is a smart business move. It prevents costly damage to your garments and stops workflow grinding to a halt because of a collapsed rail. For a deeper dive into what makes these systems so resilient, take a look at our guide on heavy-duty hanging rails.
In a commercial setting, a hanging rail isn't just holding clothes—it's safeguarding assets. A high-quality system is an investment in durability, efficiency, and the professional presentation of your inventory.
The Rise of Automated Storage
For larger-scale operations, the industry is looking towards even more advanced solutions. Automated storage and retrieval systems (ASRS) for garments are becoming increasingly common, especially with the relentless pace of fast fashion.
This sector grew from $1.9 billion to $2.05 billion last year alone, a clear signal that major businesses are chasing agile, high-density storage. These automated setups are completely changing how massive inventories are handled, offering incredible speed and accuracy. The right infrastructure is absolutely key to staying competitive in today's market.
Got Questions? We've Got Answers
Even the most carefully planned project can throw up a few questions. Let's tackle some of the most common queries that pop up when people are choosing and fitting new wardrobe rails.
How Do I Stop My Wardrobe Rail from Sagging?
A sagging rail is a classic problem, but it nearly always comes down to one of two things: the rail is too long for its diameter, or it's simply holding too much weight. The best and simplest fix is to add a centre support bracket.
As a good rule of thumb, any rail longer than 100cm (about 40 inches) really needs that extra support in the middle. If you're going for a really long run, you might even need two, spaced out evenly to keep everything level. It’s also worth making sure the rail itself is up to the job for the clothes you plan to hang.
What’s the Best Height to Install a Wardrobe Rail?
The perfect height all depends on what you're hanging. Getting this right from the start is the secret to a wardrobe that just works, without any fuss.
- Single Rail for Long Garments: If you’re hanging full-length coats and dresses, aim for a height of around 160-180cm from the floor. This gives everything plenty of room to hang freely.
- Double Rail System: For a two-tier setup, the top rail usually sits at about 210cm, with the bottom one positioned at roughly 105cm. This is ideal for getting two rows of shirts, skirts, and folded trousers in one space.
Here's a pro tip: always measure your longest item of clothing before you drill a single hole. It’s a quick check that guarantees you won't have your best coat trailing on the floor.
Can I Fit a Hanging Rail to a Plasterboard Wall?
You certainly can, but you have to use the right fixings—this part is non-negotiable. Standard screws and plugs just won't cut it; they’ll pull straight out of the plasterboard as soon as you add any weight.
What you need are specialised plasterboard fixings, such as hollow wall anchors or spring toggles. These are cleverly designed to open up and grip the back of the board, creating a much stronger anchor point. For the most secure installation possible, find the wooden studs in the wall and drive your screws directly into them.
At Display Guru, we specialise in robust, reliable hanging rails and accessories for both commercial and home settings. Have a look at our collection to find the perfect fit for your project at https://www.displayguru.co.uk.