


Fitted Wardrobe Rails: A Complete Guide to Fitting
Fitted wardrobe rails are far more than just a place to hang your clothes; they're the structural backbone of your entire custom storage setup. They bear the full weight of your garments, day in and day out. That's why getting the choice right—considering everything from material and load capacity to the final finish—is crucial for preventing sagging and ensuring your wardrobe stands the test of time.
A thoughtfully chosen rail doesn't just hold things up; it optimises your space and creates a genuinely functional, organised wardrobe interior.
Why Your Choice of Wardrobe Rail Matters

It’s easy to gloss over the wardrobe rail, treating it as a minor detail to be sorted out after the main structure is designed. From experience, I can tell you this is a mistake. The rail isn't just a passive metal bar; it’s an active, structural element that fundamentally dictates how you use your wardrobe every single day.
A high-quality, properly installed rail makes for a seamless experience. Hangers glide effortlessly. On the flip side, an ill-suited or poorly fitted rail quickly becomes a daily frustration, leading to sagging, jamming hangers, or in the worst-case scenario, complete collapse under the weight of your clothes.
The Foundation of a Functional Wardrobe
Think of the rail as the very foundation of your hanging storage. You wouldn't build a house on weak ground, and you shouldn't expect a flimsy rail to support a wardrobe full of clothes. The right choice is an investment in stability and reliability for years to come.
From a professional standpoint, a few key considerations elevate a rail from a simple accessory to a critical component:
- Load-Bearing Capacity: It absolutely must be strong enough to hold everything from lightweight shirts to a collection of heavy winter coats without bowing. If you want to dive deeper into what makes a rail robust, you can find more detail in our guide on finding a strong clothes rail.
- Material Durability: The material choice dictates its resistance to warping, corrosion, and the general wear and tear of daily use.
- Aesthetic Integration: The finish and style should feel cohesive, complementing the overall design of the wardrobe and the room's decor.
Beyond Simple Storage
A well-planned rail system does so much more than just hold clothes. It’s about maximising every inch of vertical and horizontal space you have. By selecting the correct type and planning its placement carefully, you can create clever solutions like double-hanging sections for shirts and trousers, effectively doubling your storage within the same footprint.
Choosing the right fitted wardrobe rail is an investment in pure functionality. A sagging rail isn't just an eyesore; it's a clear signal that the core component of your hanging storage is failing, compromising the efficiency of the entire wardrobe.
Ultimately, selecting your fitted wardrobe rails deserves real thought. This single decision directly influences the practicality, durability, and overall satisfaction you'll get from your bespoke storage. Making an informed choice now ensures your wardrobe isn't just beautiful on day one, but is truly built to last.
Choosing the Right Materials and Finishes for Your Rails
The material you choose for a fitted wardrobe rail is more than just a minor detail; it’s the backbone of the entire hanging system. Get it right, and you have a rail that won't sag or fail, even after years of use. Get it wrong, and you could be looking at a premature replacement.
Your choice ultimately comes down to balancing longevity, strength, and the final look. Knowing the pros and cons of each material lets you confidently match the hardware to the project, whether you're fitting out a walk-in wardrobe for a client with a heavy coat collection or a simple, elegant rail for a minimalist bedroom.
Getting to Grips with Core Rail Materials
For the most part, you'll be choosing between steel and aluminium. Each has its place, and understanding their distinct properties is key to making the right call. Steel is the traditional workhorse, and for good reason. It’s incredibly rigid and has a high load-bearing capacity, which is why it's the go-to for any heavy-duty job.
Aluminium, on the other hand, is much lighter and naturally resists corrosion. This makes it a fantastic choice for wardrobes in slightly damp or humid environments, like a basement conversion or a laundry room, where rust is a real risk.
- Steel: Its main advantage is pure strength. A quality steel rail is far less likely to bow, even across a wide span. This is non-negotiable for wardrobes that need to hold a lot of weight—think winter jackets, suits, or long dresses.
- Aluminium: While not as tough as steel, it's perfectly strong enough for everyday clothing. Its lighter weight can also make installation a bit easier, especially when you're working with long, wall-to-wall rails.
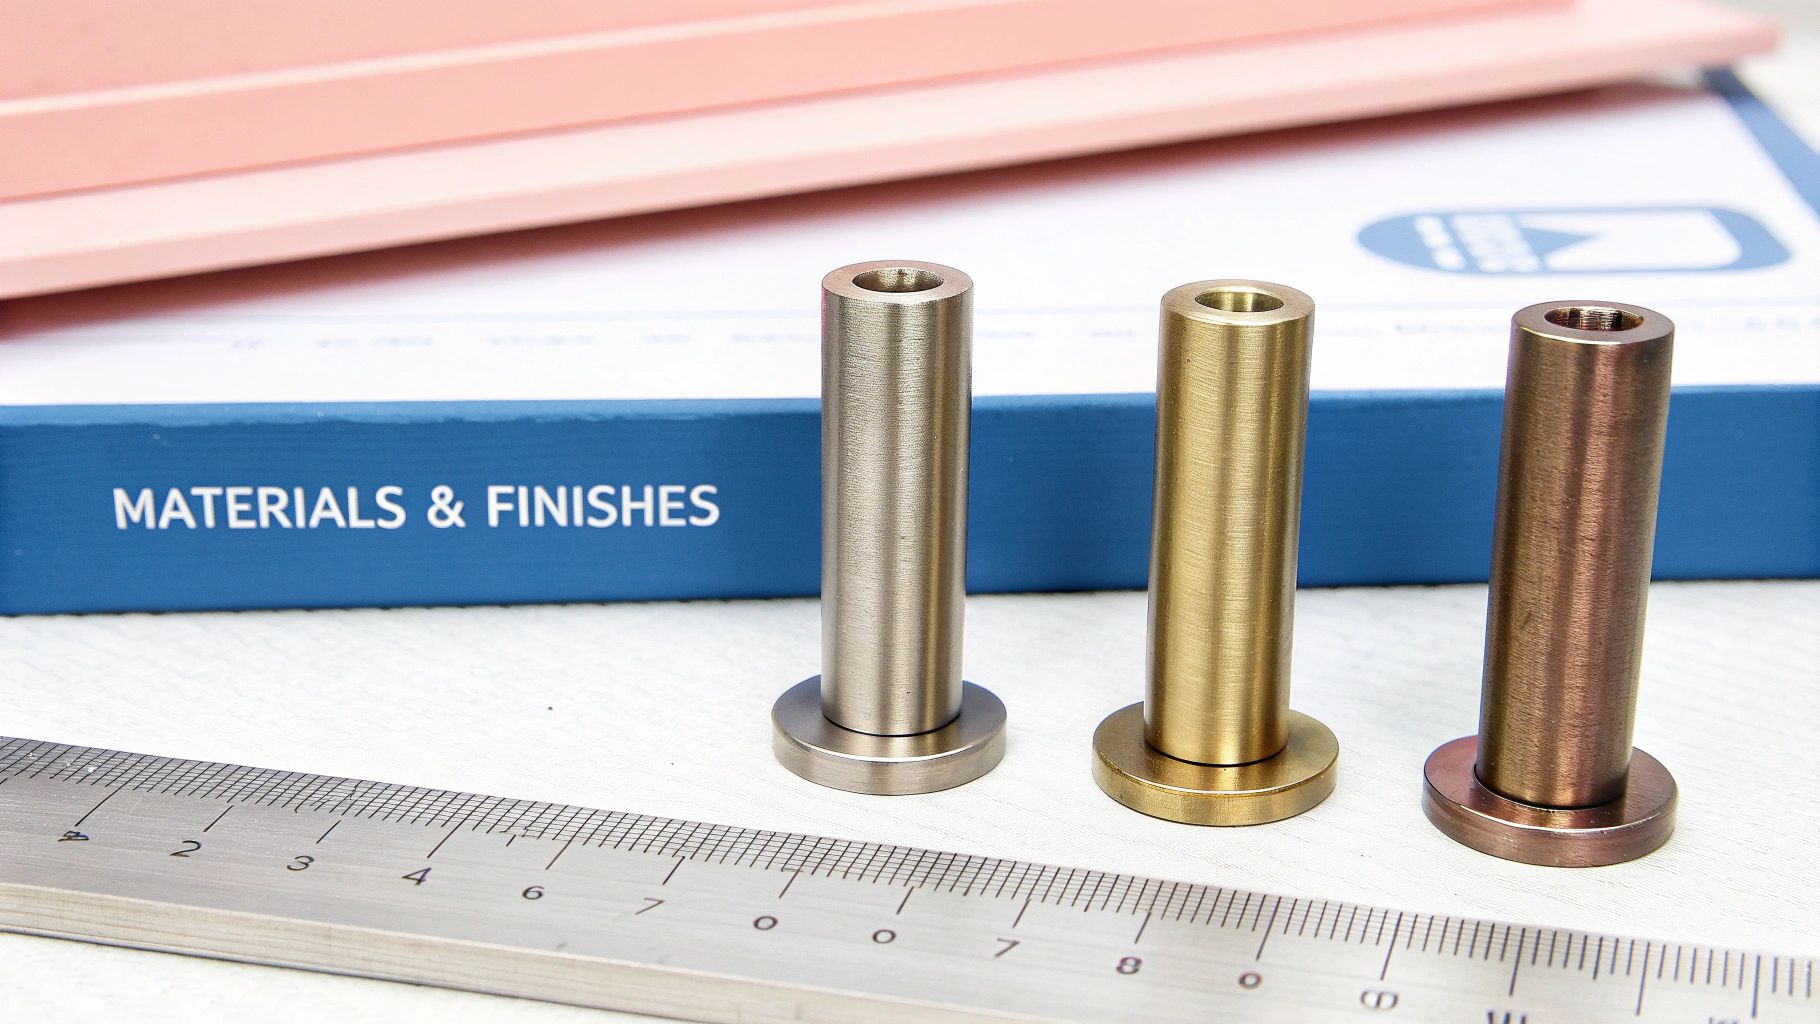
For high-end projects where aesthetics are paramount, you might consider premium materials. Brass, for instance, offers a warm, luxurious feel that can elevate a bespoke wardrobe design from great to exceptional, though it does come with a higher price tag.
A rail's material is its essence. Steel delivers brute strength, aluminium provides lightweight resilience, and brass brings the aesthetic flair. The best choice is always a careful balance between the expected load and the desired finish.
Matching Finishes to Function and Style
A rail’s finish does two jobs at once. First, it acts as a protective shield against scratches and moisture. Second, it plays a huge part in the wardrobe's overall interior design.
The finish is often the first thing a client will notice. Matching it to other hardware, like handles and hinges, creates a cohesive, professional look that speaks to quality craftsmanship. Thankfully, the options today go far beyond basic silver.
Popular Rail Finishes and Their Best Uses
- Polished Chrome: The timeless classic. It’s highly reflective, durable, and a breeze to clean, fitting in with almost any style, from traditional to ultra-modern.
- Brushed Nickel/Satin Chrome: This finish has a softer, more muted look that’s brilliant at hiding fingerprints and minor scuffs. It’s a firm favourite for contemporary and minimalist designs.
- Matte Black: A bold choice that creates a striking contrast, especially against pale wardrobe interiors. It’s become incredibly popular in industrial and modern-luxe schemes. If you're dealing with serious weight, our guide on heavy-duty hanging rails offers more insight into materials built for the task.
- Brass/Bronze: These warmer tones add a touch of vintage elegance. You can get them polished for a bright, new look or aged for an antique feel—perfect for period homes or bespoke joinery.
The demand for high-quality components is on the rise. In fact, the UK furniture market, which includes fitted wardrobes, is valued at around USD 21.9 billion and is expected to keep growing. This trend highlights a clear appetite for well-designed, functional furniture where details like the right wardrobe rail really matter.
Comparison of Wardrobe Rail Materials
To make the selection process a bit more straightforward, it helps to see the main materials compared side-by-side. This table breaks down the key performance factors, helping you align your choice with the specific demands of the project.
| Material | Average Load Capacity | Cost Index (Low-High) | Corrosion Resistance | Ideal Application |
|---|---|---|---|---|
| Steel | High to Very High | Low to Medium | Moderate (finish dependent) | Heavy garments, long spans |
| Aluminium | Medium | Low to Medium | High | Standard clothing, damp areas |
| Brass | Medium to High | High | Very High | High-end bespoke designs |
| Stainless Steel | Very High | High | Excellent | Premium, high-use, humid areas |
In the end, it’s about finding that sweet spot between durability, the client's budget, and their aesthetic vision. For most residential jobs, a quality steel rail with a hard-wearing finish like satin chrome offers an unbeatable mix of performance and value. But for a truly custom installation or one that needs to withstand heavy use, investing in stainless steel or brass will guarantee both superior performance and a standout finish.
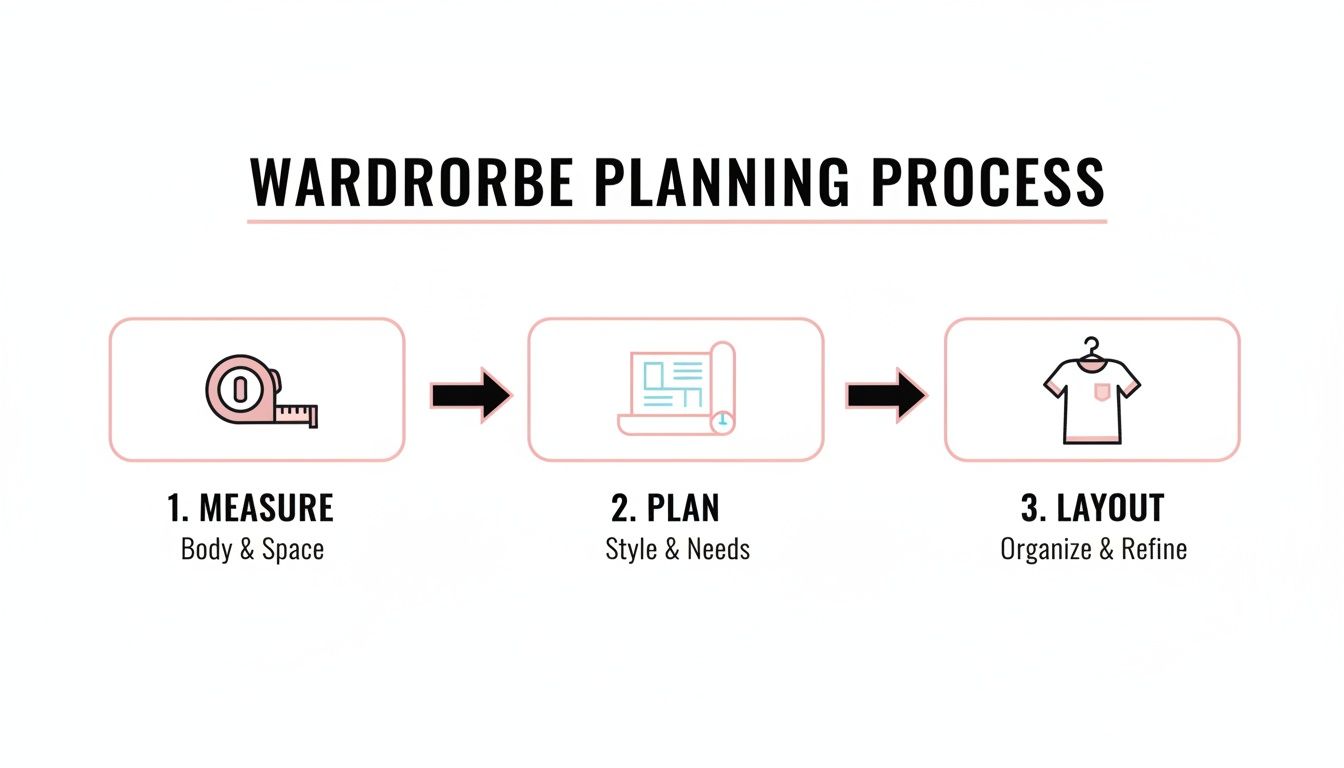
How to Measure and Plan Your Wardrobe Layout
A top-tier fitted wardrobe all comes down to one thing: precision. Before you even think about picking up a drill or cutting a rail, the success of the entire job is decided by how well you measure and plan. This is where you turn a client's brief into a functional, beautiful reality, making sure every last inch of space pulls its weight.
The first walk-through isn't just about getting the basic width, height, and depth. It's a proper survey of the space. Let's be honest, walls in older homes are rarely true, and floors are seldom perfectly level. Using a laser measure alongside a good old-fashioned tape measure is non-negotiable. You need to capture readings at the top, middle, and bottom for both width and height. My rule of thumb? Always work from the smallest measurement. That way, you guarantee your components will slot in without a fight.
Nailing the Measurements for Fitted Wardrobes
Your first job is to map out the raw dimensions. This isn't a quick wall-to-wall check; you need to be thorough to account for every imperfection.
- Width: Measure the space at three different heights—down by the skirting boards, roughly where the main rail will go, and up near the ceiling. Coving and skirting can easily throw your numbers off.
- Height: Do the same for the height. Measure from floor to ceiling on the left, in the centre, and on the right. This will instantly show you if the floor or ceiling has a slope.
- Depth: Check the depth from the back wall to where the front of the wardrobe will sit. Again, measure in a few spots to catch any bows in the back wall.
Make a detailed note of any obstacles. We're talking plug sockets, light switches, radiators, or window sills. These have to be factored into your design from the start, whether you're building around them or arranging for them to be moved. Getting this right from the outset saves a world of headaches later on.
Planning Vertical Space for Maximum Efficiency
With your dimensions locked in, it’s time to plan the vertical layout. This is your chance to really maximise the storage potential. The secret is to think about the kinds of clothes the wardrobe will hold and then assign the right heights for your fitted wardrobe rails.
A well-planned layout isn't just about cramming everything in; it's about making everything easy to get to. The difference between a good wardrobe and a great one is how effortlessly it works for the user every single day.
A classic mistake I often see is a single rail hung too low, leaving a vast, useless gap above it. A double-hanging system is almost always a better use of space for shirts, blouses, folded trousers, and jackets. For more inspiration on getting the most out of a space, these practical walk-in closet organization tips offer some excellent ideas, many of which hinge on smart rail placement.
Standard Rail Height Recommendations
Here are some solid, industry-standard heights to use as your starting point.
| Garment Type | Recommended Rail Height | Notes |
|---|---|---|
| Long Coats & Dresses | 1600mm - 1800mm | Gives plenty of clearance so long garments don't end up crumpled on the floor. |
| Shirts & Trousers | 1050mm - 1100mm | This is the sweet spot for a top rail in a double-hanging setup. |
| Double Hanging | 2100mm - 2200mm (Total) | Position the top rail around 2100mm and the bottom one around 1050mm. |
| Children's Clothes | 750mm - 900mm | A lower height makes clothes accessible and can even allow for three rails in a tall wardrobe. |
Don't forget to account for the thickness of the rail itself and the hangers. I always leave about 80mm of clearance from the top of the rail to the shelf above it. This little bit of extra room makes all the difference when you're trying to get a hanger on or off the rail. Our own guide on selecting a clothes rail for a wall has more detail on the practicalities of mounting.
Creating Layouts for Different Wardrobe Types
Of course, the layout will change depending on the wardrobe's shape and size. A simple wall-to-wall installation is straightforward, but corner units and walk-ins demand a bit more creativity.
In an L-shaped corner wardrobe, the main challenge is making sure the rails don't clash. The best approach is usually to run one rail all the way into the corner and stop the adjoining rail short. This leaves just enough room for the hanging clothes to occupy that corner space without becoming a tangled mess.
With a spacious walk-in wardrobe, you can start thinking in zones. You might dedicate one wall to double-hanging for daily wear, use another for a full-height section to handle long dresses and coats, and then integrate shelves or drawers elsewhere.
The demand for these clever storage solutions is booming. The global fitted wardrobe market was recently valued at around USD 15 billion and is set to grow, especially as people look for space-saving designs in urban homes. This trend underlines just how important it is to use high-quality components, like durable fitted wardrobe rails, to meet what are now very high consumer expectations.
Ultimately, a truly successful layout is a perfect balance of hanging space, shelving, and drawers, creating a system that’s built around the client's lifestyle and their clothes.
A Professional's Guide to Wardrobe Rail Installation
You’ve done the prep work, your measurements are double-checked, and all the components are ready. Now comes the part where planning meets reality: the installation. Getting this right isn't just about screwing a few brackets to a wall. It’s about precision, foresight, and knowing how to handle the inevitable quirks that every job throws at you.
This is the moment that makes or breaks the project. A perfectly level, rock-solid rail will give years of flawless service. A rushed job, on the other hand, means sagging, instability, and a headache for the end-user. Taking the time to get it right is simply non-negotiable.
The planning process, from measuring up to finalising the layout, is the foundation for a successful installation. It ensures every component fits exactly as it should.
Assembling Your Essential Toolkit
Before a single screw goes in, get your tools organised. Having everything you need within arm’s reach keeps the job moving and prevents frustrating interruptions. While no two jobs are identical, a core toolkit will see you through virtually any wardrobe rail installation.
Here’s what I consider non-negotiable:
- A Quality Spirit Level: Don't skimp here. A long level (at least 600mm) is the only way to guarantee your brackets are perfectly aligned. A wobbly rail is a sure sign of an amateur job.
- A Reliable Tape Measure and Pencil: For marking up with absolute precision. You know the old rule: measure twice, drill once. It’s a cliché for a reason.
- A Combi Drill with Appropriate Bits: You'll need a good set of both wood and masonry drill bits, plus a variety of screwdriver heads.
- A Stud Finder: This little device is a lifesaver. It quickly locates the timber studs behind plasterboard, which are always your strongest fixing points.
- The Correct Wall Fixings: This is critical. Standard screws are fine for timber, but you’ll need specific rawlplugs for masonry and heavy-duty hollow wall anchors for plasterboard.
Using the wrong fixings is one of the most common points of failure I see. A rail loaded with clothes exerts a surprising amount of downward and outward force—a simple plasterboard plug just won't cut it.
Mastering Different Mounting Systems
Most wardrobe rails are held up by end brackets, fixed either to the wardrobe’s side panels or directly to the walls. The process itself is straightforward, but it demands accuracy.
Start by marking your desired rail height on both sides. Use your spirit level to draw a faint pencil line between the marks to ensure they're perfectly level. Then, hold each bracket in place and mark the screw holes. Always drill pilot holes to stop the wood from splitting before you drive the screws home. For more insights on this, you can find some transferable principles in guides on achieving ideal mounting positions.
A centre support isn’t just a nice-to-have on long rails; it’s a structural necessity. For any rail longer than 1000mm, skipping a central support bracket is asking for it to sag and eventually fail.
With wider wardrobes, that centre support is non-negotiable. This simple bracket, usually fixed to a shelf above or the back panel, prevents the rail from bowing under the weight of a full set of clothes. I always place it dead in the centre of the span to distribute the load evenly.
Troubleshooting Common Installation Issues
Even with the best planning in the world, you’ll hit snags on site. The mark of a pro is how calmly and effectively they can solve them.
- Uneven Walls: If your spirit level tells you the walls aren't plumb, listen to your level, not the wall. The rail must be perfectly horizontal, even if this creates a tiny visual gap at one end. You can usually hide this with a small, neat fillet.
- Finding a Secure Fixing: What if there's no stud where you need to place a bracket in a plasterboard wall? Don't be tempted to use a standard plug. This is where high-load fixings come in. My go-to solution is spring toggles—they open up behind the board and spread the load over a much wider area.
The demand for quality home solutions is only getting bigger, with bedroom furniture in the UK projected to become a USD 1.15 billion market. This growth is tied to new housing and a strong consumer appetite for smart, space-saving furniture, where a properly installed wardrobe rail is a key feature.
For jobs where you’re mounting directly onto solid walls, our guide on how to fit a wall-mounted hanging rail has extra tips that are just as relevant in a fitted wardrobe context. By anticipating these common problems and having the right kit on hand, you can ensure the installation goes smoothly and the final result is secure, level, and built to last.
Exploring Advanced and Custom Rail Solutions
While a standard fixed rail is the reliable workhorse of most fitted wardrobes, the real design magic happens when you start exploring more dynamic solutions. For clients wanting to squeeze value out of every last cubic inch or just add a touch of modern luxury, advanced and custom fitted wardrobe rails are the way to go. These aren't just about hanging clothes; they're about delivering better functionality and a truly bespoke feel.
One of the most impressive upgrades you can offer is the pull-down wardrobe rail. It's an absolute game-changer for wardrobes with high ceilings, instantly bringing that upper, often-wasted space into play. Instead of fumbling with a step-stool, your client can simply pull the rail down to a comfortable height, grab what they need, and glide it back up. It’s also a fantastic accessibility feature for wheelchair users or anyone with limited mobility.
Illuminating the Wardrobe with Integrated Lighting
Here’s another feature that takes a wardrobe from standard to premium: integrating LED lighting directly into the hanging rail. An LED wardrobe rail might sound like a gimmick, but it's a seriously practical feature that completely transforms the user experience. It's especially effective in walk-in wardrobes or rooms with poor ambient light.
These rails usually come with a motion sensor or a subtle switch, casting clear, even light right onto the clothes. This gets rid of shadows, making it dead easy to tell your navy from your black without flipping on the main room lights. It’s a small touch that adds a huge amount of sophistication and convenience.
A custom rail solution is more than just hardware; it's a direct response to a client's unique space and lifestyle. From pull-down rails that conquer high ceilings to illuminated rails that add clarity, these advanced options define a truly bespoke wardrobe interior.
Creating Solutions for Awkward and Unique Spaces
Straight rails are fine for a standard box room, but as a professional, you're often dealing with unconventional architecture. This is where custom-shaped and adaptable rail systems really prove their worth, offering elegant solutions for tricky corners and sloped ceilings that would otherwise become dead space.
Think about a loft conversion with its angled ceilings. A custom-cut rail can be mounted to follow the slope perfectly, creating a tailored hanging area. For an L-shaped corner wardrobe, specialised corner systems or a smart combination of straight rails can make sure that entire corner is put to good use. For long, uninterrupted spaces, it's worth exploring the potential of a continuous wall-to-wall hanging rail to really maximise the available room.
Innovative Rail Solutions for Bespoke Projects
- Pull-Out Rails: Perfect for shallow or narrow wardrobes. These are mounted perpendicular to the back wall and slide forward, letting you store clothes front-to-back for easy viewing.
- Curved Rails: For those high-end, boutique-style walk-in closets with curved walls, a custom-bent rail creates a seamless, flowing line that standard parts just can't match.
- Multi-Level Systems: Go beyond simple double-hanging. You can design bespoke systems with a mix of fixed and pull-down rails to house a varied collection of garments in one efficient section.
Getting familiar with these advanced options lets you move beyond offering run-of-the-mill storage. You can start creating genuinely innovative and highly functional wardrobe interiors that solve real problems and add a "wow" factor your clients will love every day.
Answering Your Top Questions About Wardrobe Rails
When you're putting the finishing touches on a fitted wardrobe project, the same few questions about rails always seem to crop up. Getting these details sorted is crucial for a build that not only looks great but also holds up to daily life for years to come.
Here are the practical, no-nonsense answers to the questions we get asked most frequently. Think of this as a quick-reference guide to avoid common pitfalls like sagging rails and dodgy fixings.
What's the Maximum Span for a Wardrobe Rail Without Centre Support?
As a professional rule of thumb, you should never span a standard steel or aluminium rail more than 1000mm (1 metre) without adding a centre support. Once you go beyond that metre mark, the risk of the rail bowing under the weight of clothes skyrockets, especially with heavier garments like winter coats.
It's a simple fix. For any length over 1000mm, a central support bracket is non-negotiable if you want to maintain structural integrity. If you're planning a particularly long run—say, over 1800mm—or you know it's going to be packed full, it's best practice to use two evenly spaced supports. It’s a small addition that makes a huge difference in the longevity of the installation.
How Do I Get a Secure Fixing for Rail Brackets on Plasterboard?
Fixing rail brackets straight into plasterboard is a classic mistake and a recipe for disaster. The board itself just doesn't have the strength to take the load. The absolute best method is to use a stud finder, locate the vertical timber studs behind the plasterboard, and drive your screws directly into solid wood.
Of course, the studs are rarely exactly where you need them. If that’s the case, you'll need to turn to heavy-duty plasterboard fixings. Your most reliable options are:
- Spring Toggles: These are brilliant. They have metal wings that pop open behind the plasterboard, spreading the weight over a much larger surface area.
- Hollow Wall Anchors: These work by expanding behind the board, creating an incredibly secure anchor point.
Whichever you choose, always double-check the weight rating on the fixing. You need to be confident it can handle the combined load of the rail plus a full wardrobe of clothes.
Can I Cut Metal Wardrobe Rails to a Custom Size?
Absolutely. In fact, most metal wardrobe rails are specifically designed to be cut down on-site. It's the only way to get that perfect, wall-to-wall fit in a custom build. The right tool for this is a simple hacksaw with a fine-toothed metal blade.
Here’s a tip for getting a really clean, professional cut: mark your measurement precisely around the entire circumference of the rail. Then, wrap a bit of masking tape over the line before you start sawing. This stops the blade from slipping and gives you a much cleaner edge. Once it's cut, take a moment to smooth any sharp burrs with a metal file. It's a small finishing touch that ensures the end brackets slide on perfectly and makes the rail safer to handle.
What's the Real Difference Between Oval and Round Rails?
The main difference isn't about looks—it's about strength and performance. Thanks to its profile, an oval rail is inherently stronger along its vertical axis. This design makes it far more resistant to bending and sagging than a round rail made from the same material.
While a round rail is fine for shorter spans or lighter loads, an oval rail delivers superior performance and durability. This is why you'll find most professionals specify oval rails for high-quality, wide-span, or heavy-duty installations where long-term reliability is the priority.
Essentially, if the wardrobe is going to hold a serious amount of clothing, an oval rail is always the more dependable choice.
At Display Guru, we stock a wide range of high-quality rails and accessories to ensure your projects are built to the highest standards. Explore our collection to find the perfect components for your next installation at https://www.displayguru.co.uk.