


Clothes Rail for Wall: The Ultimate Space-Saving Guide
A wall-mounted clothes rail is a brilliantly simple and effective storage solution. It fixes directly to your wall, freeing up precious floor space and offering a minimalist alternative to clunky, traditional wardrobes. What you get is practical organisation combined with a stylish, open display for your most-loved clothes.
Why Choose a Wall Mounted Clothes Rail
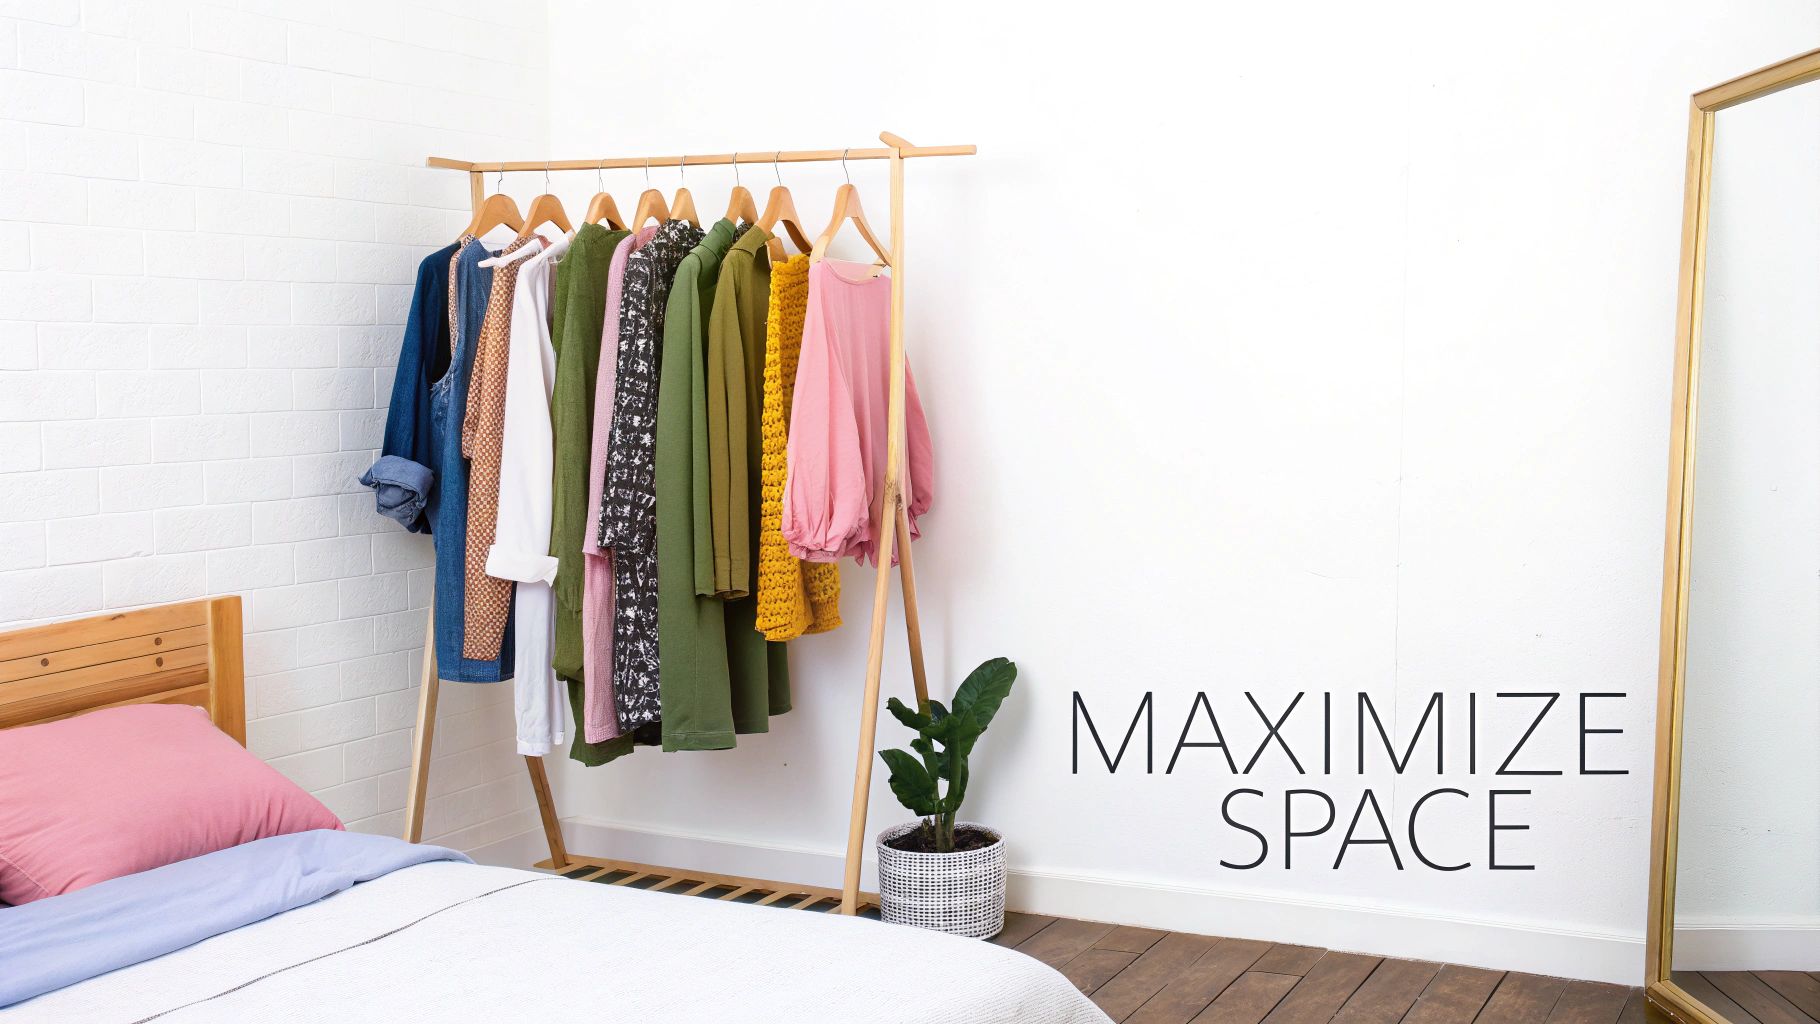
Whether you're designing a modern home or a dynamic retail shop, making the most of every square inch is key. Let's face it, conventional wardrobes can be bulky and visually heavy, often swallowing up a room. This is exactly where a wall-mounted clothes rail comes in, transforming forgotten vertical space into a functional and eye-catching feature.
Think of it as reclaiming your floor. By taking your storage upwards, you instantly create a more open, airy feel—a real game-changer in smaller bedrooms, narrow hallways, or compact city flats. It’s a concept that fits perfectly with the minimalist design ethos that champions clean lines and uncluttered spaces.
The Blend of Function and Form
A clothes rail for a wall does so much more than just hold clothes; it turns them into part of your décor. Instead of hiding your favourite pieces away behind closed doors, an open rail lets you put them on show. This brings a couple of fantastic benefits:
- Practicality: Your go-to items are always in sight and easy to grab, making your morning routine that much smoother.
- Aesthetics: You can arrange clothes by colour, season, or style, creating a personalised visual statement that injects character into your room.
For retailers, the same logic is a powerful merchandising tool. A beautifully styled wall rail can spotlight new collections, tell a brand's story, and create an inviting atmosphere that draws customers in. We’ve got more inspiration in our guide to the different types of clothing wall racks available.
Durability Meets Design
The growing appeal of these fixtures is clear from market trends. As living spaces in the UK get smaller, the demand for smart storage solutions has made wall-mounted rails a household staple. In fact, sturdy metal racks command a significant 31.5% of the garment racks market share in the UK, proving their lasting appeal for both homeowners and businesses.
By choosing a wall-mounted rail, you're not just buying a storage item; you're investing in a versatile solution that declutters your space while elevating its style. It’s a simple change that makes a huge difference.
If you’re on a mission to reclaim space, it’s worth exploring additional ways to maximise bedroom storage to complement your new rail.
Understanding Materials and Load Capacity
When you're choosing a wall-mounted clothes rail, it's easy to focus on how it looks. But the real secret to a rail that lasts is understanding what's going on behind the scenes – the materials, the weight it can handle, and how it connects to your wall.
Getting these technical details right from the start is the difference between a sleek, reliable display and one that could come crashing down. Think of these three elements – material, load capacity, and fixings – as the foundation of your installation.
Choosing the Right Rail Material
The material of the rail doesn't just set the aesthetic tone; it's the primary factor in its overall strength. Each metal has its own personality and purpose, so the trick is to find the one that fits both your design vision and your practical needs.
To help you decide, here's a quick comparison of the most common materials you'll come across.
Comparing Clothes Rail Materials
| Material | Typical Load Capacity | Aesthetic Style | Best For |
|---|---|---|---|
| Industrial Steel | Very High | Raw, Urban, Minimalist | Heavy-duty commercial use, large home wardrobes, hanging bulky items like winter coats. |
| Aluminium | Medium to High | Sleek, Modern, Lightweight | Contemporary retail spaces or modern homes where a clean look is needed without extreme weight demands. |
| Copper / Brass | Medium | Warm, Vintage, Boutique | Creating a statement piece, high-end boutique displays, or adding a decorative touch to a bedroom. |
As you can see, if sheer strength is what you need, it’s hard to beat industrial steel. It’s the workhorse of the retail world for a reason, easily handling the weight of dozens of heavy garments without breaking a sweat. Softer metals like copper, while beautiful, are better suited for lighter, more decorative displays.
It’s vital to remember that a rail's stated load capacity is its maximum potential in perfect conditions. This figure is only achievable if the rail is fixed securely to a suitable wall with the correct hardware. The wall and fixings are just as important as the rail itself.
Calculating Load and Capacity
Before you buy, you need a rough idea of the total weight you plan to hang. You don't have to be exact, but a quick estimate will stop you from overloading the rail later on.
Here’s a simple way to think about it:
- 10 Shirts: Roughly 2.5kg
- 5 Pairs of Jeans: Around 3.5kg
- 5 Heavy Winter Coats: Can easily be 7kg or more
Just add up what you intend to hang to get a baseline figure. A crucial rule of thumb is to always choose a rail with a load capacity that's at least 20-30% higher than your estimate. This buffer gives you a margin of safety and accounts for any new items you might add down the line.
For a deeper dive into what makes a rail genuinely tough, check out our guide to finding strong clothing rails.
Matching Brackets and Fixings to Your Wall
This is where the magic happens – or where it all goes wrong. The connection between the bracket and the wall is the single most critical part of the entire setup. The type of wall you have will determine the exact fixings you need.
Solid brick or concrete walls are the dream scenario. They provide a firm, reliable anchor for heavy-duty screws and plugs, giving you maximum strength.
Plasterboard is a bit trickier. The best approach is to find the wooden studs behind the board and drill directly into them. If that’s not an option, you absolutely must use specialist plasterboard fixings like toggle or anchor bolts. These are designed to spread the load across a wider surface area behind the board. Using standard screws in plasterboard is the number one cause of failed installations.
How to Plan Your Rail Installation
A great clothes rail installation is all about the prep work. Honestly, rushing in with a drill is the quickest way to end up with a wonky rail or, worse, one that comes crashing down. A few minutes spent planning beforehand will save you a world of headaches later and ensure you get a professional-looking, secure result that works perfectly for your space.
First things first: let's figure out the height. There’s no magic number here; it all comes down to what you’ll be hanging. Get this right, and your clothes will hang beautifully without dragging on the floor or looking bunched up.
Measure for Success
Finding that sweet spot for mounting height is part art, part science. The best way to start is to think about the longest garment you intend to display.
- For Long Garments: If you're displaying full-length dresses, long coats, or even trousers hung by the cuff, aim for a height of 165-180cm from the floor to the rail. This gives plenty of drop without anything puddling on the ground.
- For Shorter Items: For rails that will hold shirts, jackets, or trousers folded over a hanger, you can bring it down a bit. Something around 100-120cm usually does the trick.
Don't forget to consider the room's flow. You need to be able to move around comfortably. A good rule of thumb is to leave at least 50-60cm of clear space in front of the rail. This stops the area from feeling tight and ensures you can easily browse and access the clothes. A well-placed rail should complement the room, not get in the way.
One of the most common slip-ups is hanging a rail too high. It might look good, but it's a pain to use. Before you commit, test your chosen height. Can you comfortably reach up to hang and remove items? The aim is storage that's both stylish and practical.
Assess Your Wall and Find Support
The strength of your rail is completely dependent on what it’s fixed into. Different walls need different fixings, so figuring out what you’re working with is absolutely crucial for a safe and secure installation. If you've got solid brick or concrete, you're in luck – that's the gold standard for support.
Most modern interiors, however, feature plasterboard walls. This means you can't just drill anywhere. You need to find the timber studs running vertically behind the plasterboard. A stud finder is a cheap and cheerful tool that's worth its weight in gold here; it'll pinpoint those studs for you. Lightly mark their locations with a pencil – drilling your brackets directly into these will give you the strongest possible anchor. For a deeper dive into mounting options, our guide on wall racks for clothes has some great extra details.
Finally, get your tools ready before you start. It makes the whole process so much smoother when you're not hunting for a spirit level halfway through.
Your Essential Tool Checklist:
- Tape Measure: For getting those heights and widths spot-on.
- Pencil: For marking out where you'll be drilling.
- Spirit Level: The key to a perfectly horizontal rail. No one likes a slant.
- Stud Finder: A must-have for plasterboard walls.
- Power Drill: Make sure you have the right drill bits for your wall type.
A Step-By-Step Installation Guide
So, you’ve picked out the perfect rail and sized up your wall. Now for the most important part: getting it securely installed. A solid fitting is absolutely essential for safety and for the rail to do its job properly. Let's walk through how to handle the two most common wall types you'll encounter—solid masonry and plasterboard—so your rail is sturdy, level, and ready to go.
At its heart, the process is pretty straightforward. You'll be drilling pilot holes, using the right anchors for your specific wall, and then mounting the brackets securely.
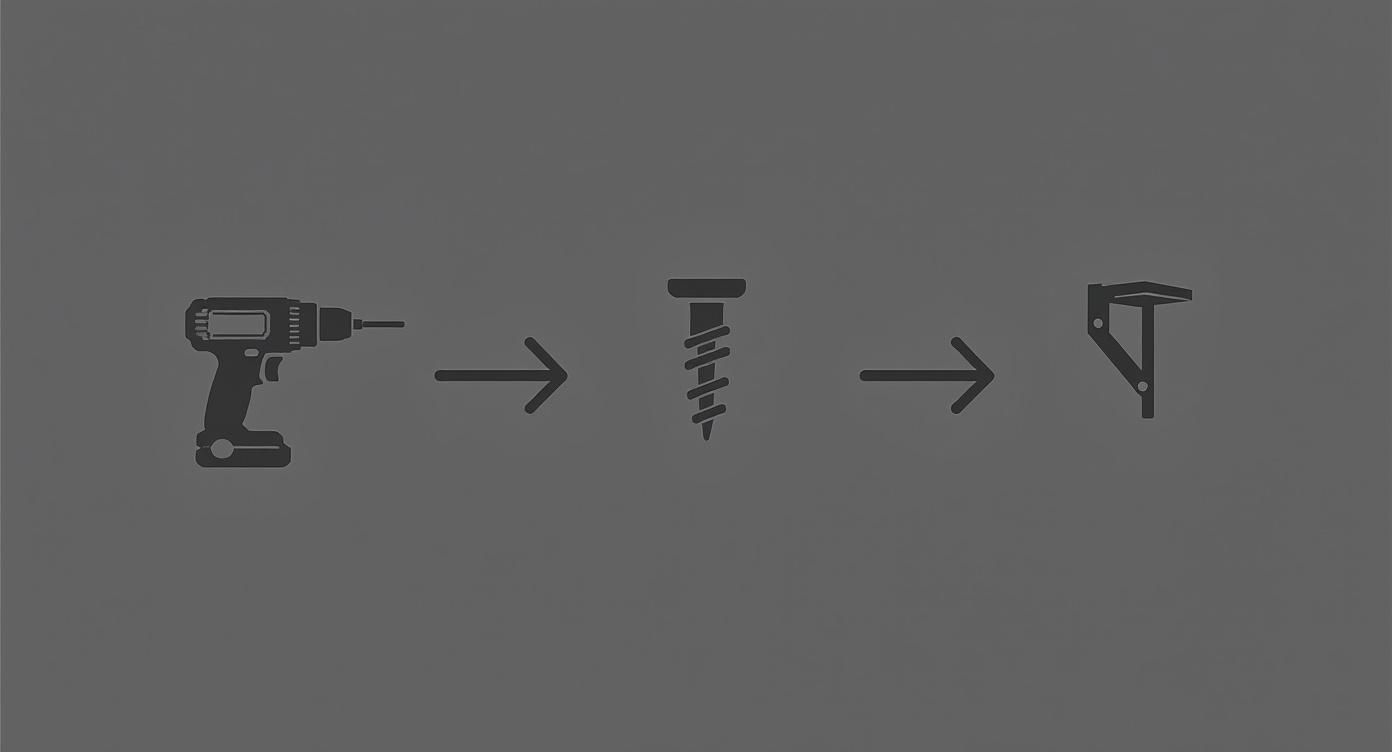
This little sequence shows you the basic flow. A precise drill point, a reliable anchor, and a firmly mounted bracket are the three pillars that give your rail its strength.
Installing on Solid Masonry Walls
Fixing into brick, block, or concrete gives you the strongest foundation you could ask for. These materials provide a fantastic grip, making them the best choice for heavy-duty rails that need to hold a lot of weight.
- Mark Your Points: Grab your spirit level and a pencil to mark exactly where the bracket holes will go. Before you even think about drilling, double-check that your marks are perfectly level.
- Drill the Holes: Pick a masonry drill bit that’s the same size as your wall plugs. Drill to the correct depth and give the hole a quick clean to get rid of any dust.
- Insert Wall Plugs: Gently tap the wall plugs into the holes until they’re sitting flush with the surface. You want them to be snug, not forced.
- Fix the Brackets: Line up the first bracket with its holes and use the screws to attach it to the wall, but don't tighten them all the way just yet. Do the same for the other bracket(s). Now, place the rail on top and use your spirit level one last time to make sure it’s dead straight.
- Final Tightening: Once you're happy everything is level, go ahead and tighten all the screws properly. Just be careful not to overdo it, as you can damage the plug or the bracket.
Installing on Plasterboard Walls
Plasterboard is a different beast entirely. The board itself can't hold much weight, so the trick is to anchor your rail into the strong wooden studs hidden behind it.
- Locate the Studs: Use an electronic stud finder to pinpoint the vertical timber supports where you plan to mount the rail. Mark the centre of each stud with your pencil. It's crucial that your brackets line up with these.
- Drill Pilot Holes: For this, you’ll need a wood drill bit that’s a little smaller than the diameter of your screws. Drilling a pilot hole first stops the timber from splitting when you drive the screw in.
- Mount the Brackets: Now you can fix the brackets directly into the studs with the screws that came with your rail. This direct connection to the wood frame is what provides the real strength.
- Check and Secure: Just like with a solid wall, rest the rail on the brackets and do a final level check before giving the screws that last, firm tighten.
What if you can't mount into a stud? If your ideal spot falls between studs, you absolutely must use specialist heavy-duty plasterboard fixings. Standard wall plugs are not sufficient and will fail. Things like toggle bolts or self-drilling anchors are designed to expand behind the board, spreading the load over a wider area for a secure hold.
If you’re not confident tackling the installation yourself, or if the job seems a bit tricky, it's always best to call in some help. You could look for local professional handyman services to get the job done right.
And for a deeper dive into choosing the best hardware for your setup, our guide on selecting the right clothes rail and brackets has plenty more useful tips.
Styling Your Wall Mounted Clothes Rail
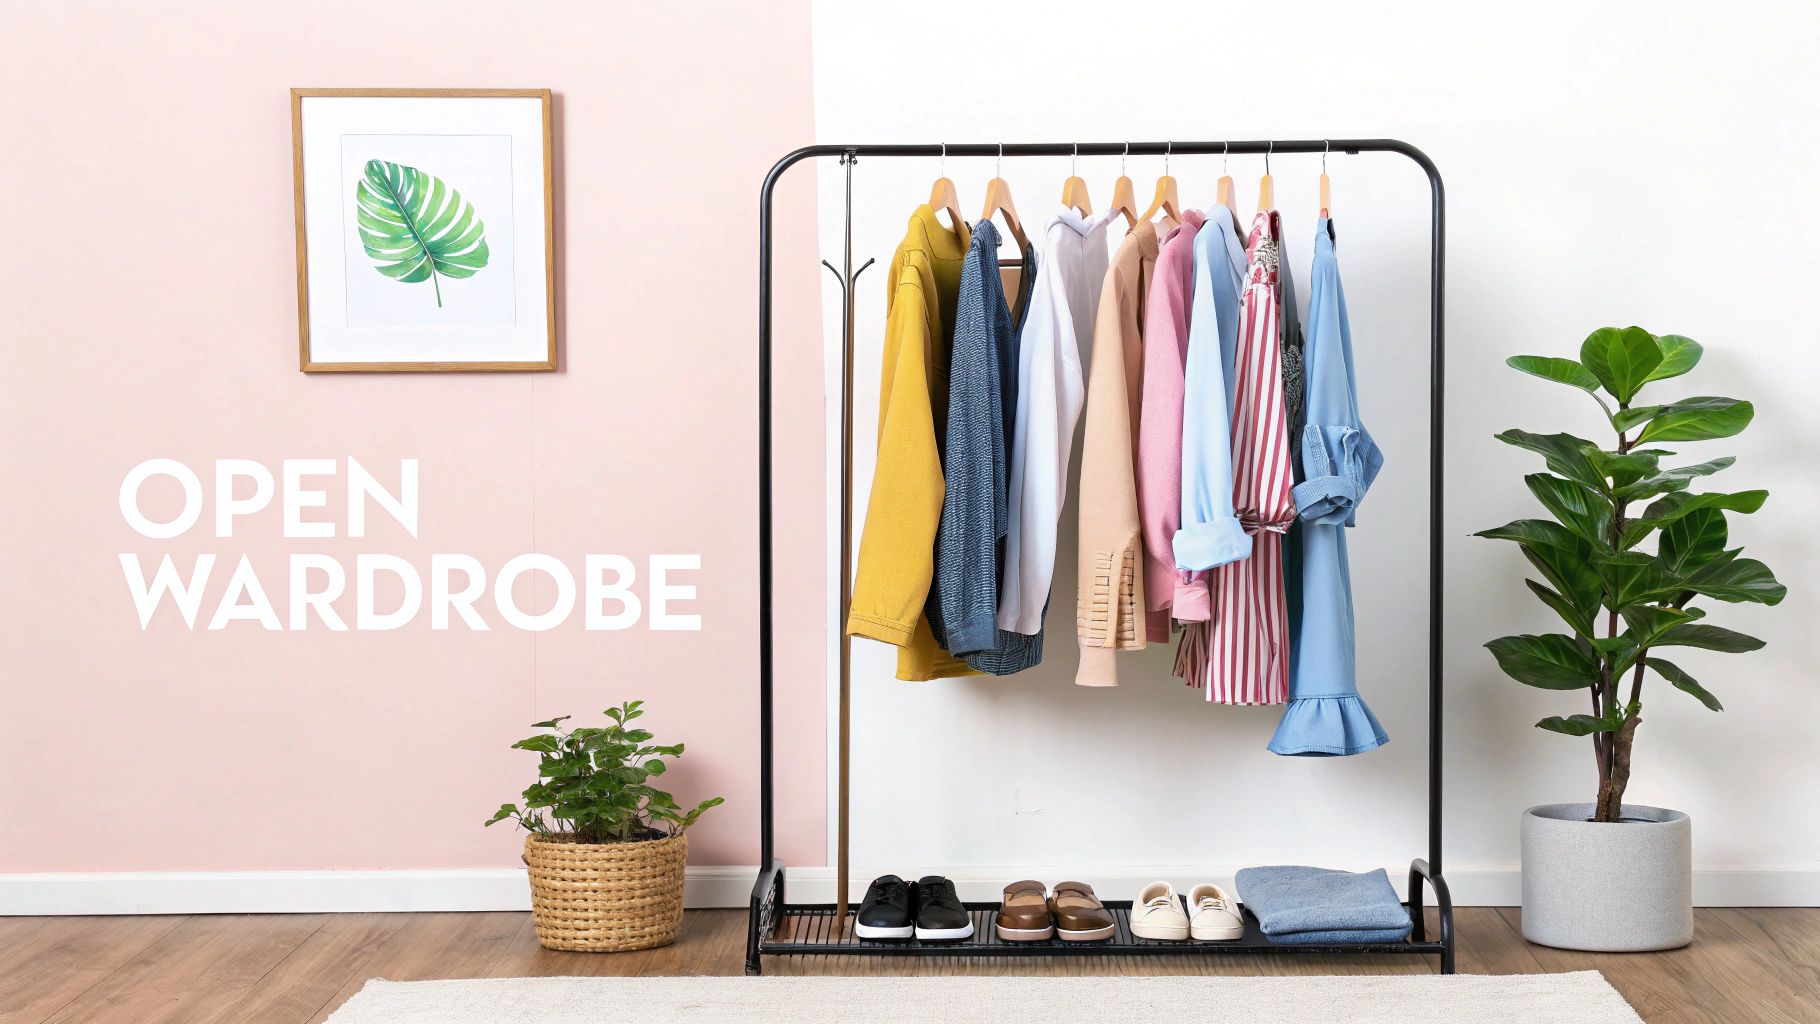
A clothes rail for a wall is so much more than just a place to hang garments. It's a dynamic design feature that can really set the tone for an entire room. Whether you’re using it at home or in a retail space, treating your rail as a canvas for curation transforms it from simple storage into a powerful visual statement.
At home, the rail essentially becomes an "open wardrobe," giving you a brilliant chance to put your personal style on display. It’s an opportunity to turn your favourite clothes into a piece of living art.
This trend fits into a bigger picture of homes needing functional, space-saving solutions. The UK market for wall-mounted storage is definitely on the rise. We're even seeing this in related areas, like advanced textile drying racks, which are projected to grow by 8.1% annually. This points to a clear demand for smarter wall-mounted solutions in modern homes. You can dive into the full research about the drying racks market to see the data for yourself.
Creating a Personalised Home Display
When styling a clothes rail at home, the goal is to create a look that’s both beautiful and practical. The secret is to be intentional with your choices to avoid it looking cluttered or chaotic.
One of the simplest yet most effective tricks is colour-blocking. Grouping your clothes by shade—from whites and neutrals through to vibrant colours—creates a wonderfully calm and organised gradient. Another great approach is to organise by season, keeping your current go-to jackets and shirts right where you need them.
And don't forget the details! Using S-hooks to hang accessories like hats, scarves, and bags from the rail adds another layer of interest. You can also build out the space around the rail to make it feel more integrated.
- Add Greenery: A tall plant placed next to the rail brings in a touch of nature and softens the often industrial feel of the metal.
- Incorporate Art: Hang a framed print above the rail or lean one against the wall behind it. This helps weave the rail into your room's overall décor.
- Use the Floor: Arranging your favourite shoes or a stylish storage box on the floor beneath the rail helps to ground the display and complete the look.
Merchandising for Retail Impact
In a retail setting, a wall-mounted clothes rail is a vital visual merchandising tool. Its job is to grab attention and, ultimately, drive sales. Here, styling is less about personal taste and all about commercial strategy. When done right, a simple rail becomes a curated shopping experience.
The goal is to tell a story with the clothes. A well-styled rail doesn't just show products; it inspires customers by showing them how pieces can be combined to create a complete look, boosting the likelihood of multiple purchases.
Use your rail to spotlight new arrivals or a specific collection. A great way to do this is by creating a capsule display—a small, carefully chosen selection of items like trousers, shirts, and a jacket that work together. This shows customers exactly how to build an outfit. Spacing is also critical. Never overcrowd the rail. Leaving a few centimetres between hangers makes each item feel more valuable and encourages shoppers to stop and browse.
For more expert tips, have a look at our complete guide to visual merchandising guidelines.
Common Questions About Clothes Rails
Even a seemingly simple project can throw up a few questions. When you’re fitting a wall-mounted clothes rail, getting the basics right—like how much weight it can take, what wall types work, and where to position it—is the difference between a solid setup and a disaster waiting to happen. Let's tackle the most common queries so you can get the job done right, first time.
Think of this as your practical, no-nonsense guide to choosing, fitting, and getting the most out of your new rail.
What Is the Maximum Weight a Wall Mounted Clothes Rail Can Hold?
This is the big one, and the honest answer is: it depends. A rail’s true strength isn't just about the rail itself. It’s a three-way partnership between the rail's build quality, the sturdiness of its brackets, and, crucially, the wall you’re fixing it to.
A heavy-duty steel rail might be engineered to hold 50kg or more, which sounds fantastic. But that figure assumes it's bolted firmly into solid brick or a timber wall stud. If you mount that exact same rail onto a plasterboard wall with the wrong fixings, its real-world capacity could drop to as little as 10-15kg.
Think of it like a chain: it's only as strong as its weakest link. Always check the manufacturer's load rating, but remember you'll only achieve that if the rail is installed correctly for your specific wall.
Can I Install a Clothes Rail on a Plasterboard Wall?
Absolutely, but you need to do it properly. Just driving a screw straight into plasterboard is a guaranteed recipe for failure. The material is simply too brittle on its own and will eventually give way, pulling the fixings right out of the wall.
The best-case scenario is to find the vertical wooden studs hidden behind the plasterboard. Driving your screws directly into these studs gives you a rock-solid anchor that can handle some serious weight.
If there isn't a stud exactly where you need one, you'll have to use specialist heavy-duty plasterboard fixings. Don’t even think about skipping this part.
- Toggle Bolts: These clever fixings have spring-loaded 'wings' that fan out behind the board, spreading the weight over a much wider area.
- Self-Drilling Anchors: These are chunky, threaded plugs that bite firmly into the plasterboard, offering a far more secure grip than a standard rawlplug.
Cutting corners on fixings is the single most common reason a rail fails. It’s a simple step that makes all the difference.
How High Should I Mount My Clothes Rail?
There's no single magic number here; it all comes down to what you plan on hanging. Go too low, and long dresses or coats will end up in a heap on the floor. Go too high, and it becomes a pain to reach every day.
Here are a few solid rules of thumb to get you started:
- For Long Garments: If you need to hang full-length dresses, long coats, or trousers, aim for a height of around 165-180cm (65-72 inches) from the floor to the rail.
- For Shorter Items: For a rail that'll mainly hold shirts, jackets, or trousers folded over a hanger, 100-120cm (40-48 inches) is usually plenty.
Thinking of a 'double-hang' system with two rails? Just make sure you leave at least 100cm of clear space between the top rail and the bottom one. This gives everything on the top rail room to hang without getting tangled with what's below.
At Display Guru, we provide durable, stylish garment rails designed for both home and retail use. Explore our full collection and find the perfect storage solution for your space. Shop our wall-mounted clothes rails today!