


A Guide to Wall to Wall Hanging Rail Systems
Think of a wall-to-wall hanging rail as a single, uninterrupted bar that stretches from one side of a room to the other. It's a clever way to turn an entire wall into a massive, open wardrobe without taking up a single inch of floor space. For anyone tight on space in a bedroom, retail shop, or stockroom, this system is a game-changer.
Why Wall to Wall Rails Maximise Your Space
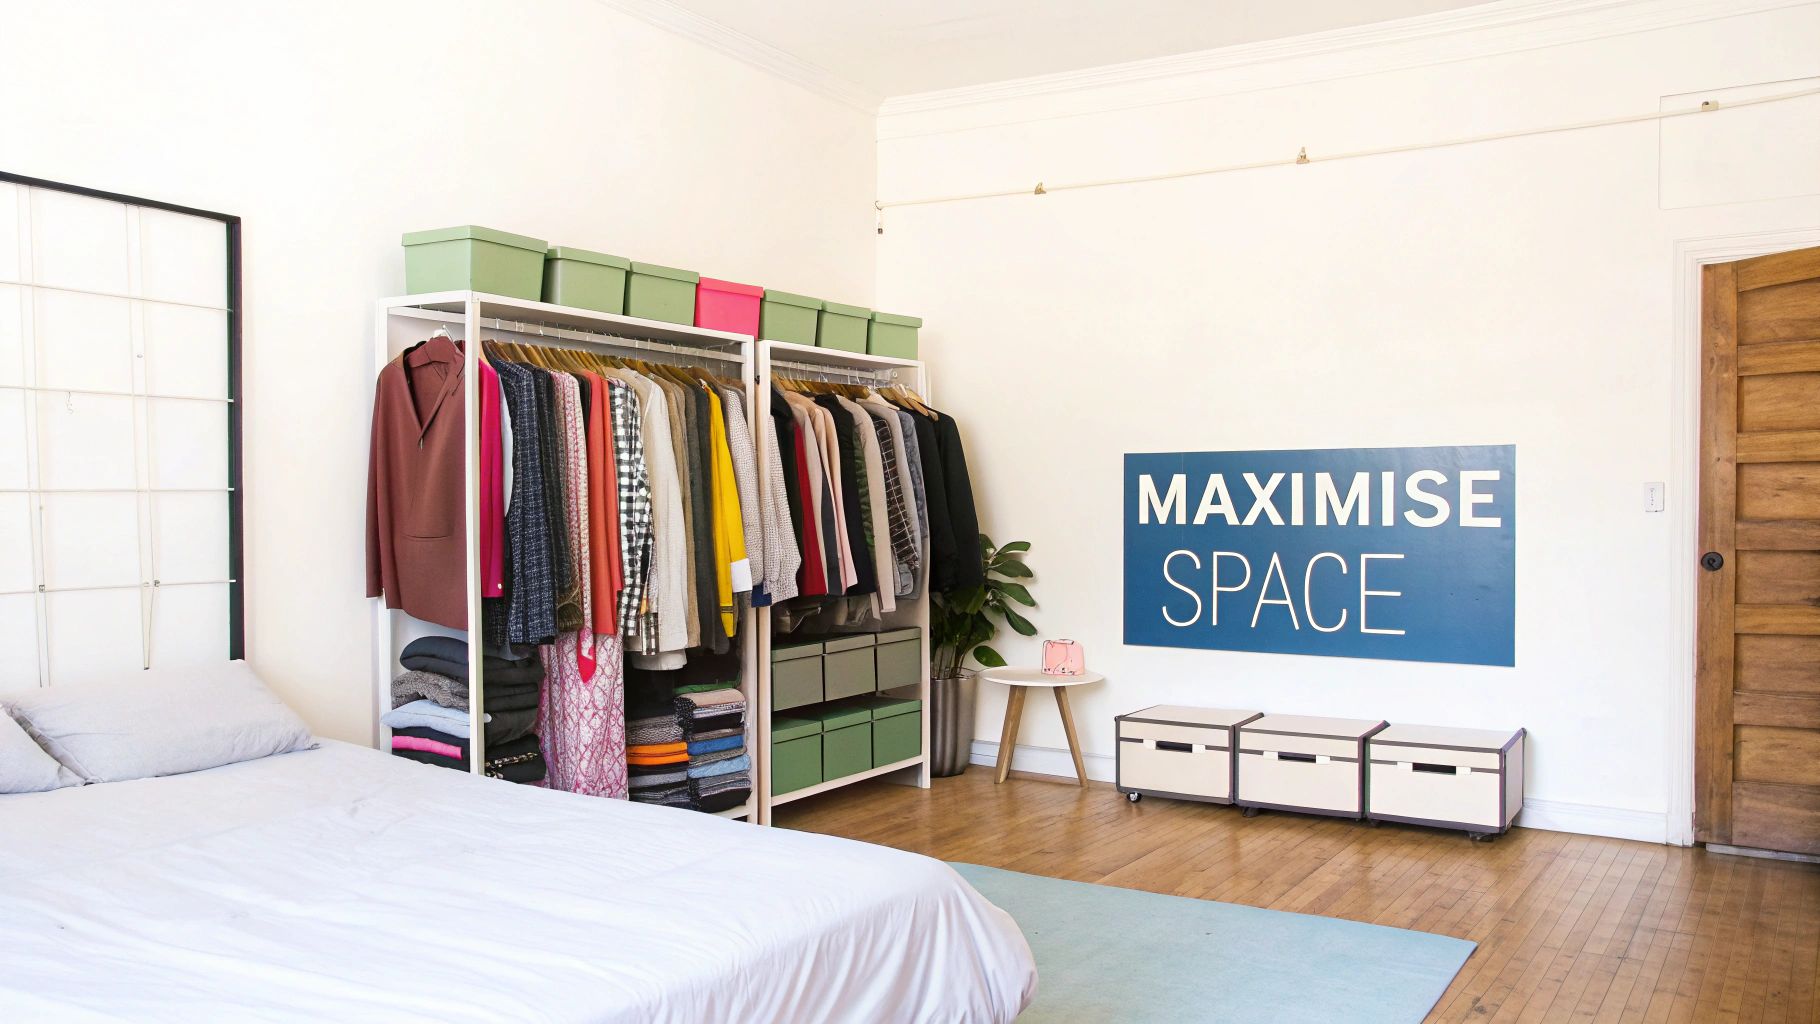
Imagine getting your floor back. That's the real magic of a wall to wall hanging rail. By taking your storage vertical, it frees up all the square footage that a bulky, freestanding wardrobe would swallow up. Suddenly, your room feels more open and less cluttered.
Unlike traditional wardrobes that leave awkward, dust-gathering gaps, a wall-mounted system gives you a clean, seamless line. It creates an aesthetic that makes the room feel bigger and more put-together. You’re essentially trading unused "wall real estate" for a powerhouse of practical, accessible storage.
The Advantage Over Traditional Storage
Let’s be honest, freestanding wardrobes can be limiting. They come in standard sizes that rarely fit a space perfectly, leaving you with wasted potential in alcoves or along walls. A wall-to-wall rail, on the other hand, is made to measure. It’s cut to your exact dimensions, so every centimetre gets put to work.
This custom fit unlocks a few major benefits:
- Unbeatable Space Utilisation: Running the full width of a wall means no dead space. It’s not uncommon to double your hanging capacity compared to a standard wardrobe.
- Serious Load Capacity: When anchored correctly into wall studs, these rails are built to handle serious weight. Think heavy winter coats, a massive denim collection, or a full rack of costumes.
- Easy Access to Everything: The open design means you can see every item at a glance. It makes getting dressed in the morning quicker and is absolutely essential for managing stock in a busy retail environment.
It’s no surprise that clever solutions like these are more popular than ever. In the UK, the demand for space-saving storage, including the wall to wall hanging rail, shot up by around 15% each year between 2018 and 2023. This jump is part of a bigger trend, with the entire UK storage and shelving market now worth about £2.4 billion, driven by the need to make smaller urban homes work smarter.
By dedicating an entire wall to storage, you’re not just organising; you’re strategically designing your space for peak efficiency and visual flow. It’s less about adding another piece of furniture and more about integrating function right into the room's architecture.
Designing Your Vertical Space
The flexibility isn't just about the length. You can also think vertically. To really squeeze the most out of your space, understanding the advantages of a double closet rod is a great next step. A wall-to-wall system is perfect for creating multiple tiers—a higher rail for shirts and jackets with a lower one for trousers or skirts. This simple trick instantly doubles your hanging room without taking up any more wall width.
For even more inspiration on making the most of your space, our guide to clothes rail storage solutions at https://www.displayguru.co.uk/blogs/news/clothes-rail-storage is packed with ideas. It's this level of personalisation that makes a wall-to-wall system such a smart choice for anyone serious about creating an organised and efficient space.
Selecting the Right Wall to Wall Hanging Rail

Choosing the perfect wall-to-wall hanging rail is about more than just getting the length right. The ideal system is a careful balance of strength, style, and a good match for your specific walls. Nail this combination, and you'll have a rail that not only looks the part but performs flawlessly for years.
The whole decision really comes down to three key things: the rail material, its load capacity, and the hardware you use to fix it to the wall. Each element is just as important as the next, whether you're designing a minimalist wardrobe at home or a heavy-duty stockroom display.
Choosing Your Core Material
The material of your hanging rail essentially sets the tone for its durability, appearance, and overall feel. Think of it as the backbone of your storage system; everything else relies on its strength and aesthetic.
Here are the most common materials you'll come across and what they bring to the table:
- Industrial Steel: Known for its raw strength, steel is the undisputed champion for heavy-duty work. It’s the perfect choice for busy stockrooms, workshops, or any scenario where sheer load-bearing muscle is the number one priority.
- Sleek Aluminium: Lighter than steel but still impressively strong, aluminium gives you a clean, modern look. Its natural resistance to rust makes it a solid option for any room, and its contemporary finish is a great fit for minimalist interiors.
- Powder-Coated Finishes: This is more than just adding a splash of colour. A powder-coated finish gives the metal an extra layer of tough protection, making it far more resistant to chips and scratches. It also opens up a world of customisation, with popular choices like matte black or crisp white to perfectly match your decor.
The choice of material is a direct trade-off between function and form. While industrial steel offers unmatched strength, a powder-coated aluminium rail might better complement the visual style of a boutique retail space or a modern bedroom.
When you're trying to weigh up the pros and cons, a quick comparison can make all the difference.
Hanging Rail Material Comparison
| Material | Key Features | Best Suited For | Average Cost per Metre |
|---|---|---|---|
| Industrial Steel | Unmatched strength, raw/utilitarian look, very high load capacity. | Stockrooms, workshops, heavy-duty commercial use, industrial-style interiors. | £20 - £40 |
| Aluminium | Lightweight yet strong, rust-resistant, modern and clean aesthetic. | Home wardrobes, retail boutiques, minimalist designs, areas with potential moisture. | £25 - £50 |
| Powder-Coated | Durable finish, scratch-resistant, wide colour choice (e.g., black, white, chrome). | Any application where aesthetics are key, from high-end retail to stylish homes. | £30 - £60+ |
Ultimately, the best material is the one that ticks all the boxes for your specific needs—combining the look you want with the strength you absolutely need.
Understanding Load Capacity and Hardware
Load capacity is simply the maximum weight your entire rail system can safely hold. It’s easy to focus on the strength of the metal bar, but the real limit is determined by the rail, the support brackets, and—most critically—the wall fixings. Think of it like a chain; the whole setup is only as strong as its weakest link.
A high-quality wall to wall hanging rail should be able to handle a serious amount of clothing, from a few light shirts to a full rail of heavy winter coats. But all that potential is wasted without the right hardware. A big part of the job is choosing the perfect hardware for your building projects, because the same principles apply here.
The type of wall you're working with is the single biggest factor in deciding which fixings you need.
- Solid Brick or Concrete Walls: This is the dream scenario. You can use heavy-duty sleeve anchors or lag bolts, which create an incredibly secure anchor point that can handle the heaviest loads with ease.
- Plasterboard or Drywall: This is what most of us have in modern UK homes, and it demands a bit more care. You must locate the wooden studs behind the plasterboard and fix your brackets directly into them. A stud finder isn't optional here; it's essential for a safe job.
- Plasterboard with No Studs: What if a stud isn't where you need a bracket? You'll have to use specialised heavy-duty plasterboard fixings. Things like toggle bolts or spring toggles are designed to open up behind the board, spreading the load across a much wider area to stop the fixing from pulling straight out.
For anyone planning a project that needs to take some serious weight, our guide on heavy duty hanging rails goes into much more detail on picking components built for the job. At the end of the day, matching your rail, brackets, and fixings to both your expected load and your wall type is the secret to a secure installation that will last a lifetime.
How to Plan and Measure for a Perfect Installation
Getting your measurements and planning right from the start is the secret to a professional-looking installation. Think of it as drawing up a blueprint before the builders arrive; it saves a world of hassle down the line. A bit of careful prep work is what separates a shaky, amateur job from a rock-solid system you can truly rely on.
This isn't just about finding the length of your wall. We need to look at the wall's condition, spot any potential obstacles, and decide on the perfect height for your rail. It’s this attention to detail that ensures you buy the right components for a secure and perfectly level finish.
Start with an Accurate Wall Measurement
First things first, let's get a precise measurement of the space. Guesswork is your enemy here. Even being a few millimetres out can throw the whole project off.
- Measure Wall to Wall: Grab a decent tape measure and find the exact distance between the two walls. It's crucial to measure at the height you actually plan to hang the rail, not along the floor. Walls are almost never perfectly parallel.
- Take Three Measurements: To be extra sure, measure the gap at the left, the centre, and the right where your rail will sit. This little trick quickly shows up any bows or bulges in the wall. Always, and I mean always, use the shortest of the three measurements for your final length. This guarantees the rail will actually fit.
- Check for Level: Put a spirit level against the wall and on the floor. Knowing if your surfaces are truly level helps you adjust the bracket positions later, so the rail looks straight even if the room isn't.
If you remember one thing, make it this: measure twice, cut once. Double-checking your numbers before you order anything is the single best way to avoid frustrating delays and costly mistakes.
Identify Obstructions and Plan Placement
With your core measurements sorted, it’s time for a bit of reconnaissance. In a perfect world, you’d have a clear, empty wall, but real life usually involves working around existing features.
Have a good look for potential snags:
- Electrical Sockets and Light Switches: Your brackets and rail need to be a safe distance from any electricals.
- Window or Door Frames: Make sure the rail won’t get in the way of opening a door or hanging curtains.
- Existing Shelving or Furniture: Check that there's enough clearance for clothes to hang freely without bumping into anything else.
Lightly mark any obstacles with a pencil. This creates a simple visual map, helping you figure out the best spots for your support brackets where they can get a solid fixing. If you want to get deeper into how brackets and rails work together, our article on choosing the right clothes rail and brackets is a great resource.
Calculating Bracket Spacing and Rail Height
Now that your wall is mapped out, the last piece of the puzzle is deciding on the rail height and how many brackets you’ll need. This takes the guesswork out of the equation and ensures your system is built to last.
Optimal Rail Height:
The right height really depends on what you're hanging. Here are some solid starting points:
| Garment Type | Recommended Height from Floor |
|---|---|
| Shirts & Blouses | 100cm (approx. 40 inches) |
| Trousers (folded over hanger) | 125cm (approx. 50 inches) |
| Long Dresses & Coats | 165cm+ (approx. 65 inches or more) |
Thinking of a double-rail system? A good setup is to place the top rail around 210cm and the bottom rail around 105cm from the floor. This leaves plenty of room for shorter items on both levels without anything dragging.
Calculating Bracket Needs:
There’s a simple rule of thumb for this that works every time. Plan for one support bracket for every 100cm to 120cm of rail.
Start by placing a bracket about 15cm in from each end wall. Then, just space the rest out evenly between them. If you’re planning on loading the rail up with heavy stock like winter coats or denim, it's smart to reduce that spacing to every 80cm. This adds serious strength and stops the rail from bowing under pressure. Job done.
Your Step-by-Step Installation Guide
Right, you’ve done the planning, and now it’s time for the satisfying part: getting that rail up on the wall. This is where all that careful measuring really comes into its own. By following a clear, methodical process, you’ll end up with a professional, secure, and perfectly level wall-to-wall hanging rail.
Think of this as your go-to checklist. It breaks the whole job down into manageable stages, from gathering your gear to the final checks that guarantee a flawless result. Whether you're a seasoned DIYer or overseeing a professional, this will give you the confidence that the job is being done right.
The key to a great installation is simple: measure, mark, and check. Get these three steps right, and you're golden.
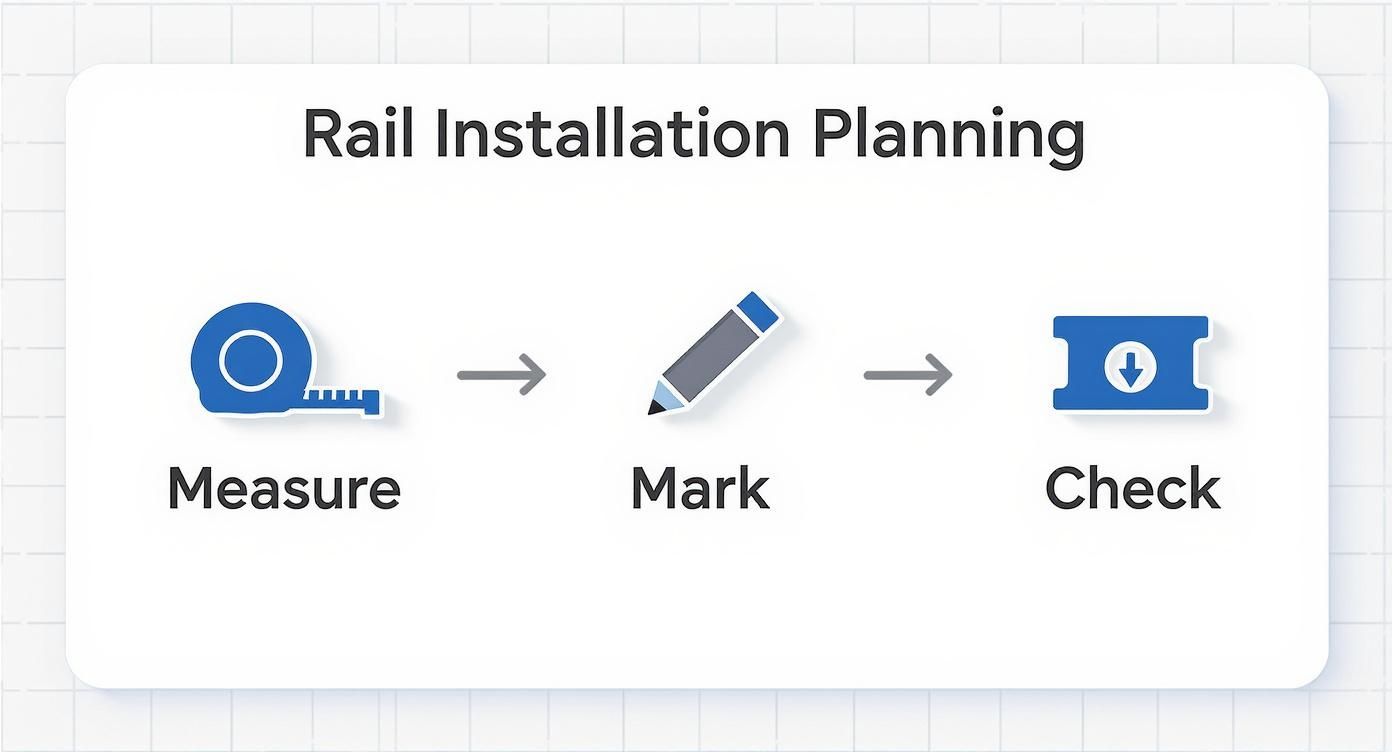
This simple flow—measure twice, mark once, and check for level at every opportunity—is the foundation of a stable and visually impressive rail system.
Phase 1: Getting Your Kit Together
Before a single hole is drilled, get everything you need organised and within easy reach. There’s nothing worse than being halfway up a ladder and realising the right drill bit is still in the van. A bit of prep here makes the whole job smoother and safer.
Below is a quick checklist of the essentials you'll need to have on hand.
Essential Installation Tools and Safety Gear
| Category | Tool/Item | Purpose |
|---|---|---|
| Measuring & Marking | Tape Measure | For accurate length and height measurements. |
| Spirit Level (min. 60cm) | To ensure the rail is perfectly horizontal. | |
| Pencil | For clearly marking drill points on the wall. | |
| Drilling & Driving | Power Drill | To create pilot holes for fixings. |
| Appropriate Drill Bits | Correct bits for your wall (masonry, wood, etc.). | |
| Screwdriver/Driver Bit | To secure brackets to the wall. | |
| Safety Gear | Safety Goggles | Non-negotiable protection from dust and debris. |
| Gloves | Protects hands during drilling and handling. | |
| Rail Components | Hanging Rail & Brackets | The core components of your system. |
| Wall Fixings (Screws/Plugs) | The correct type and size for your wall structure. |
Laying everything out on a dust sheet is a great habit. It not only protects the floor but also gives you a chance to spot if anything is missing before you start.
Phase 2: Marking and Mounting the Brackets
This is the make-or-break stage. Accuracy here is everything, as your markings will dictate how level and professional the final rail looks. Don’t rush this part.
Start by marking the positions for the end brackets. Use your tape measure and spirit level to mark the drill holes for the first bracket, making sure it’s perfectly vertical. As a rule of thumb, position it about 15cm in from the end wall to give the rail proper support.
Pro Tip: If you're fixing to plasterboard, an electronic stud finder is your best friend. Hitting the wooden studs behind the board gives you the strongest possible fixing point. Always aim for a stud where your bracket placement allows.
Once that first bracket is marked up, grab your long spirit level and tape measure. Transfer the height across the wall, marking the positions for all the other brackets according to your plan. Check, and then double-check, that all your marks are perfectly level with each other. You can't be too careful here.
Phase 3: Drilling and Securing the Rail
With your drill points clearly marked, you're ready to get the system mounted. Using the right fixings and technique for your wall type is absolutely crucial for the rail's long-term safety and stability.
- Drill Your Pilot Holes: Choose the correct drill bit for your wall plugs and screws. Drill a pilot hole at each mark, keeping the drill straight and going to the depth needed for the plug.
- Insert the Wall Plugs: If you're on a solid wall, gently tap the plugs in until they sit flush with the surface. This gives the screw something solid to bite into. For plasterboard, you’ll be using special fixings like toggle bolts.
- Attach the Brackets: Line each bracket up over the holes and drive the screws in until they are held firmly against the wall. Don't go crazy overtightening them just yet.
- Fit the Rail: Slot the wall-to-wall hanging rail into the brackets. Make any small final adjustments, then securely tighten all the bracket and rail screws.
For a deeper dive into the different mounting methods, our guide on wall mounted hanging rails has some extra tips. Once it’s all tight, give the rail a firm tug to make sure it's completely solid before you start loading it up.
Using Hanging Rails in Retail and Commercial Spaces
In a commercial setting, a wall-to-wall hanging rail is so much more than a place to hang stock—it's a seriously powerful business tool. For retailers, tailors, and designers, these systems are the backbone of both efficient operations and compelling visual merchandising, directly shaping customer experience and, ultimately, your sales figures.
Forget bulky freestanding racks that dictate your floor plan and create frustrating bottlenecks for customers. A wall-to-wall system takes back that precious real estate. It turns a simple perimeter wall into a seamless, high-capacity display that naturally draws the eye, allowing for a far more open, inviting, and easy-to-navigate shop floor. This isn't just about looking good; it's a fundamental shift in how your space works.
Maximising Your Visual Merchandising Impact
Think of visual merchandising as the silent salesperson in your store. A continuous wall-to-wall rail gives you a clean, uninterrupted canvas to tell your brand's story. It opens up all sorts of possibilities for creative and logical merchandising that guides a customer’s journey through your collection.
With all that length, you can start creating distinct zones:
- Colour Blocking: Grouping garments by colour creates a visually stunning gradient that’s both incredibly organised and pleasing to the eye.
- Collection Showcasing: Dedicate entire sections to new arrivals or specific collections, making it effortless for shoppers to see the full range at a glance.
- Style Stories: Arrange complete outfits together, showing customers exactly how to pair different items. It’s a classic technique for encouraging multiple purchases.
The clean, simple line of the rail keeps the focus exactly where it should be: on your products, not on cluttered fixtures. This minimalist backdrop makes the clothing the hero, letting the quality of the fabric, the richness of the colour, and the details of the design truly stand out.
A well-merchandised rail does more than just display clothes; it communicates your brand's identity and inspires customers. The strategic spacing of hangers, the flow from one garment to the next, and the overall organisation can turn a passive browser into an active buyer.
Streamlining Workflow and Stock Management
Beyond the shop floor, the operational benefits in stockrooms, workshops, and studios are huge. A wall-to-wall system offers an organised, high-density storage solution that makes managing inventory significantly easier.
In a busy tailor's workshop or a costume department, efficiency is everything. Having garments neatly organised and instantly accessible on a long, continuous rail speeds up the entire workflow. Staff can quickly find, retrieve, and move items without having to navigate around clunky, space-hogging racks. This is absolutely critical for improving turnaround times on alterations or managing vast inventories for theatrical productions. Our article on versatile wall clothes racks delves deeper into organising professional spaces effectively.
The impact of these systems is clear. A recent retail facilities report found that over 55% of UK boutiques have already adopted wall-to-wall systems. These rails can hold up to 20 garments per metre, slash floor space usage by up to 30%, and have even been linked to a 12% increase in turnover for the items displayed on them. By making the most of your wall space, you can free up your floor, improve stock access, and ultimately drive both sales and productivity.
Why Integrated Storage Is A Cornerstone of Modern Building
In today's world of design and construction, space has become the ultimate luxury. We're seeing architects and builders move decisively away from cumbersome, freestanding furniture. Instead, the focus is now on storage solutions woven directly into the very fabric of a building, and the wall to wall hanging rail is a perfect example of this philosophy in action.
Storage is no longer an afterthought. It's a strategic element planned right from the blueprint stage. This approach speaks directly to the modern desire for clean, minimalist interiors and living spaces that can adapt to our needs. When you embed storage into the structure, rooms instantly feel more spacious, uncluttered, and purpose-built.
A Shift Towards Built-In Functionality
This trend is about more than just aesthetics; it's a smart, practical response to the way we live now. With homes becoming more compact, especially in cities, every square metre counts. An integrated system like a wall-to-wall rail adds a huge amount of practical value without eating into that precious floor space, which is a major selling point for any property.
A well-designed home should anticipate the needs of the people living in it. Building storage directly into the architecture is one of the most fundamental ways to create a space that feels efficient, calm, and perfectly suited to modern life from the moment you move in.
The numbers back this up. Between 2020 and 2025, the use of wall-mounted rails and fittings in UK home renovations jumped by over 18%. This surge is tied directly to the boom in home improvement, where homeowners are prioritising versatile, hard-working living spaces. What's more, recent surveys reveal that almost 60% of UK construction firms now specify wall-to-wall hanging rails as standard in new builds, especially for wardrobes and utility areas. You can dig deeper into these kinds of construction market trends over at Grand View Research.
This forward-thinking approach elevates the humble hanging rail into a key player in efficient, contemporary building design. It just goes to show that often, the smartest solutions are the ones that blend in seamlessly.
Your Questions Answered
Even the most straightforward projects can throw up a few questions. When it comes to fitting a wall-to-wall hanging rail, you want to be sure you've covered all the bases. This is where we clear up some common queries, giving you that final bit of confidence before you start drilling.
Let's dive into the practical details.
Can I Fit a Hanging Rail to a Plasterboard Wall?
Absolutely, but you have to do it properly. Plasterboard on its own simply isn't strong enough to support the weight of a fully loaded rail. The secret is to anchor your brackets directly into the wooden studs that form the framework of the wall. A good stud finder is your best friend here – it’s a non-negotiable tool for locating these solid fixing points.
What if there isn't a stud exactly where you need a bracket? Your fallback is a heavy-duty plasterboard fixing. Things like toggle bolts or spring toggles are designed specifically for this job; they pop open behind the plasterboard to distribute the load over a much wider surface area. Just remember, fixing straight into a stud is always the gold standard for strength and safety, especially for heavier garments.
How Do I Keep My Hanging Rail Looking Its Best?
Maintenance is surprisingly simple. For most materials like steel or aluminium, a quick wipe with a damp cloth is all you need to get rid of dust. For anything more stubborn, a spot of mild, non-abrasive cleaner will shift it without harming the finish.
The most important maintenance job? Every so often, just check that the screws holding the brackets are still tight. Heavy use can cause vibrations, so a quick five-minute check ensures everything stays solid and secure for the long haul.
Steer clear of harsh chemical cleaners or abrasive pads, particularly on powder-coated colours, as they can easily scratch or discolour the surface. A little gentle cleaning goes a long way.
Can I Cut a Rail to a Specific Length?
Yes, most metal rails are designed to be cut for a perfect, custom fit. A hacksaw with a sharp, new metal-cutting blade is the right tool for the job. Take your time, measure twice (or even three times!), and focus on making your cut as straight as possible for a professional-looking result.
The cut edge will be sharp, so the final step is to take a metal file and gently smooth down any rough spots or burrs. This leaves you with a clean, safe finish. If you’re not keen on doing it yourself, don't worry. Many suppliers offer a cutting service, which is a great way to guarantee a flawless, factory-finished edge.
For a comprehensive selection of high-quality garment rails and professional display solutions, explore the collection at Display Guru. Find the perfect system for your space at https://www.displayguru.co.uk.