


A Practical Guide to Heavy Duty Rails
What Are Heavy Duty Rails and Why Do They Matter?
When you think of a shelf bracket at home, you’re likely picturing something designed for a few books or a photo frame. Heavy-duty rails, however, play in a completely different league. They aren't just stronger fittings; they're engineered systems, built to be a permanent, structural backbone in places where failure simply isn't an option.
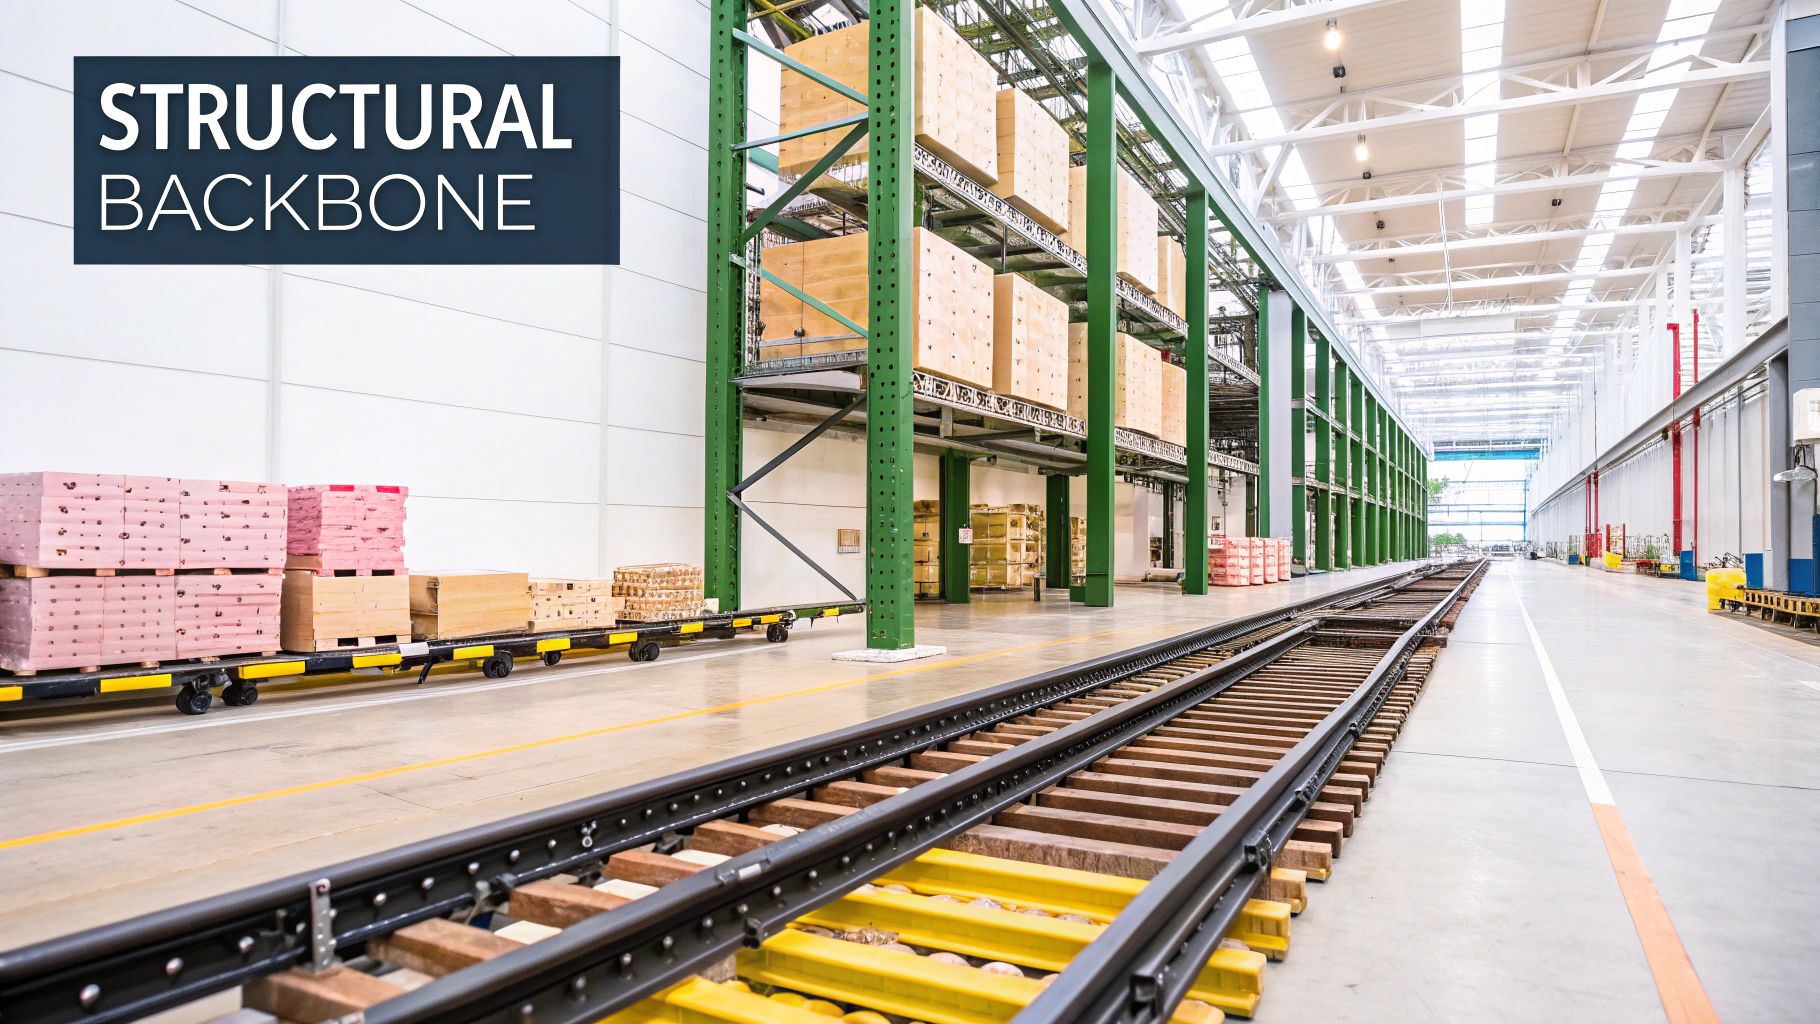
From the chaotic energy of a retail stockroom to the focused calm of a professional sewing workshop, these systems are the unsung heroes of organisation and safety. Their core job is to provide unwavering support for serious loads that would instantly overwhelm standard hardware. It’s not just about holding more kilograms; it’s about distributing that weight safely and keeping things straight and true, year after year.
A regular rail will sag, bend, or even pull away from the wall under constant, heavy use. A properly installed heavy-duty system, on the other hand, remains solid and secure.
The Core Role of Heavy Duty Rails
At their heart, heavy-duty rails solve a fundamental problem: how to store or display weighty items safely and efficiently, without eating up precious floor space. You really start to see their importance when you look at where they’re put to work.
- Retail Environments: Picture a busy clothes shop. The rails need to hold hundreds of items, from heavy winter coats to stacks of denim. A standard rail would buckle in no time, creating a mess and a real safety hazard.
- Workshops and Studios: A tailor or costume designer needs somewhere to keep large bolts of fabric or specialised equipment. Heavy-duty systems keep these valuable materials organised, accessible, and safely off the floor. You can find out more about specialised options like these in our guide to costume rails.
- Industrial Storage: In warehouses, garages, and workshops, these rails are vital for hanging tools, parts, and stock. They are the key to turning empty vertical walls into high-capacity, organised storage.
Beyond a Simple Definition
It helps to think of these systems as more than just hardware. They're an investment in how well your space works and how safe it is. The right rail system protects your products from damage, frees up your floor for other things, and creates a secure environment for staff and customers.
A well-chosen heavy-duty rail is more than just a piece of metal; it’s the structural guarantee that your display or storage can handle real-world demands without faltering. Its strength isn't just measured in weight capacity, but in reliability and peace of mind.
Ultimately, these systems give you the confidence to load up your space without a second thought. If you want to get a better sense of the individual components that make up these systems, exploring a complete Rails and Fittings collection is a great next step. Getting this foundational knowledge right is key before we get into the nuts and bolts of materials and installation.
The Materials That Make a Rail Truly "Heavy Duty"
At its heart, the strength of a heavy duty rail isn't just about one single component. It’s about a carefully engineered system. The rail itself, the brackets holding it up, and the fixings anchoring it to the wall all have to work in perfect harmony to support serious weight without giving up. Getting to grips with the materials involved is the first real step in picking a system you can rely on for years to come.
When choosing a material, you're usually balancing three things: raw strength, resistance to rust, and of course, cost. Each option has its own personality, making it a better fit for some jobs than others. Let's dig into the most common choices and see how they stack up in the real world.
Steel: The Undisputed Champion of Strength
When you think of something built to last, you’re probably picturing steel. For heavy duty rails, cold-rolled steel is often the material of choice. This isn't just any steel; the manufacturing process hardens it and boosts its strength, making it exceptionally good at resisting the urge to bend under heavy loads. Think of a retail display packed with winter coats – that’s the kind of stress we're talking about.
- Galvanised Steel: This is your workhorse option. It’s standard steel that's been given a protective zinc coating. That zinc layer acts as a sacrificial barrier, stopping rust and corrosion in its tracks before it can ever touch the steel underneath. It's a fantastic, budget-friendly choice for most indoor jobs, like in a workshop or a busy stockroom.
- Stainless Steel: If you’re dealing with moisture, high humidity, or even chemicals, stainless steel is the premium ticket. It has chromium mixed in, which creates a natural, rust-proof film right on the surface. It does cost more, but for damp environments or really demanding settings, its incredible longevity makes it a smart investment.
The secret to any heavy duty rail system is how it distributes the load. The material's innate strength stops the rail from bending, the brackets expertly transfer that downward force to the wall, and the fixings lock the whole thing down. Every single part is critical for the system to work.
This bar chart gives a great visual breakdown of the tensile strength between common materials used for heavy duty rails.
As you can see, stainless steel comes out on top for sheer tensile strength, making it the go-to for the most punishing jobs. Galvanised steel, however, is a very close and reliable second.
Aluminium: The Lightweight Contender
Aluminium is another popular choice, mostly because it's so much lighter than steel while still packing a decent punch in the strength department. It's also naturally resistant to corrosion, which is a big plus.
However, it generally can't handle the same kind of extreme loads as its steel cousins. So, for jobs where keeping weight down is a priority and the loads are more moderate, aluminium can be a brilliant solution. But when you need to support something truly substantial, like a heavy duty 6ft wide and 5ft high garment rail piled high with stock, steel is still king for its brute strength and rigidity.
How It All Works Together: From Railways to Retail
You can see the importance of these material principles on a massive scale. Just look at the UK's railway network—it's a colossal testament to heavy duty rail infrastructure. The market for railway construction is valued at an estimated £2.6 billion and has seen a compound annual growth of 5.4% over the last five years. That growth is fuelled by huge projects to modernise the trackwork, which relies on meticulously engineered steel rails to handle the immense, constantly moving loads of trains. You can read more about the growth of the UK railway construction industry on ibisworld.com.
Whether it's for a national railway or a small shop's stockroom, the principle is identical: the components must work together as a team. The rail provides the support, but it's the brackets that do the heavy lifting of transferring that weight to the wall. The quality and spacing of those brackets are just as vital as the rail itself. Pairing a premium steel rail with flimsy, undersized brackets is like putting bicycle wheels on a lorry—it completely undermines the strength of the entire system.
How Load Capacity Actually Works
Load capacity is easily the most important number you’ll see when choosing a heavy duty rail, but it's not as straightforward as it looks. The figure on the box doesn't just represent the strength of the metal; it’s about how that weight is distributed and, crucially, how the entire system is anchored to your wall. Getting your head around this is the key to a setup that's not just functional, but genuinely safe and reliable.
Think of a manufacturer's weight rating as a best-case scenario, tested under perfect lab conditions. In the real world, the actual strength of your installation boils down to a mix of factors, from the wall you're mounting it on to the screws you use. Nailing these details prevents dangerous failures and ensures your system stands the test of time.
Understanding Uniformly Distributed Load (UDL)
The most common way manufacturers talk about strength is through a Uniformly Distributed Load (UDL). It sounds technical, but the concept is simple. Picture a clothing rail in a busy shop, packed from end to end with heavy winter coats. The weight is spread out evenly across the entire length of the rail.
This even spread is the ideal situation. It ensures the stress is shared equally across all the brackets and fixing points, which is by far the most efficient way for the system to handle a heavy load. It's why nearly all quality rails are rated using the UDL principle, as it reflects how they're meant to be used in places like stockrooms or workshops.
A rail's stated capacity nearly always assumes a Uniformly Distributed Load. This means the weight is spread evenly, not dumped in one spot. Always think about how your items will be loaded to know if the rail is right for the job.
The Danger of Point Loading
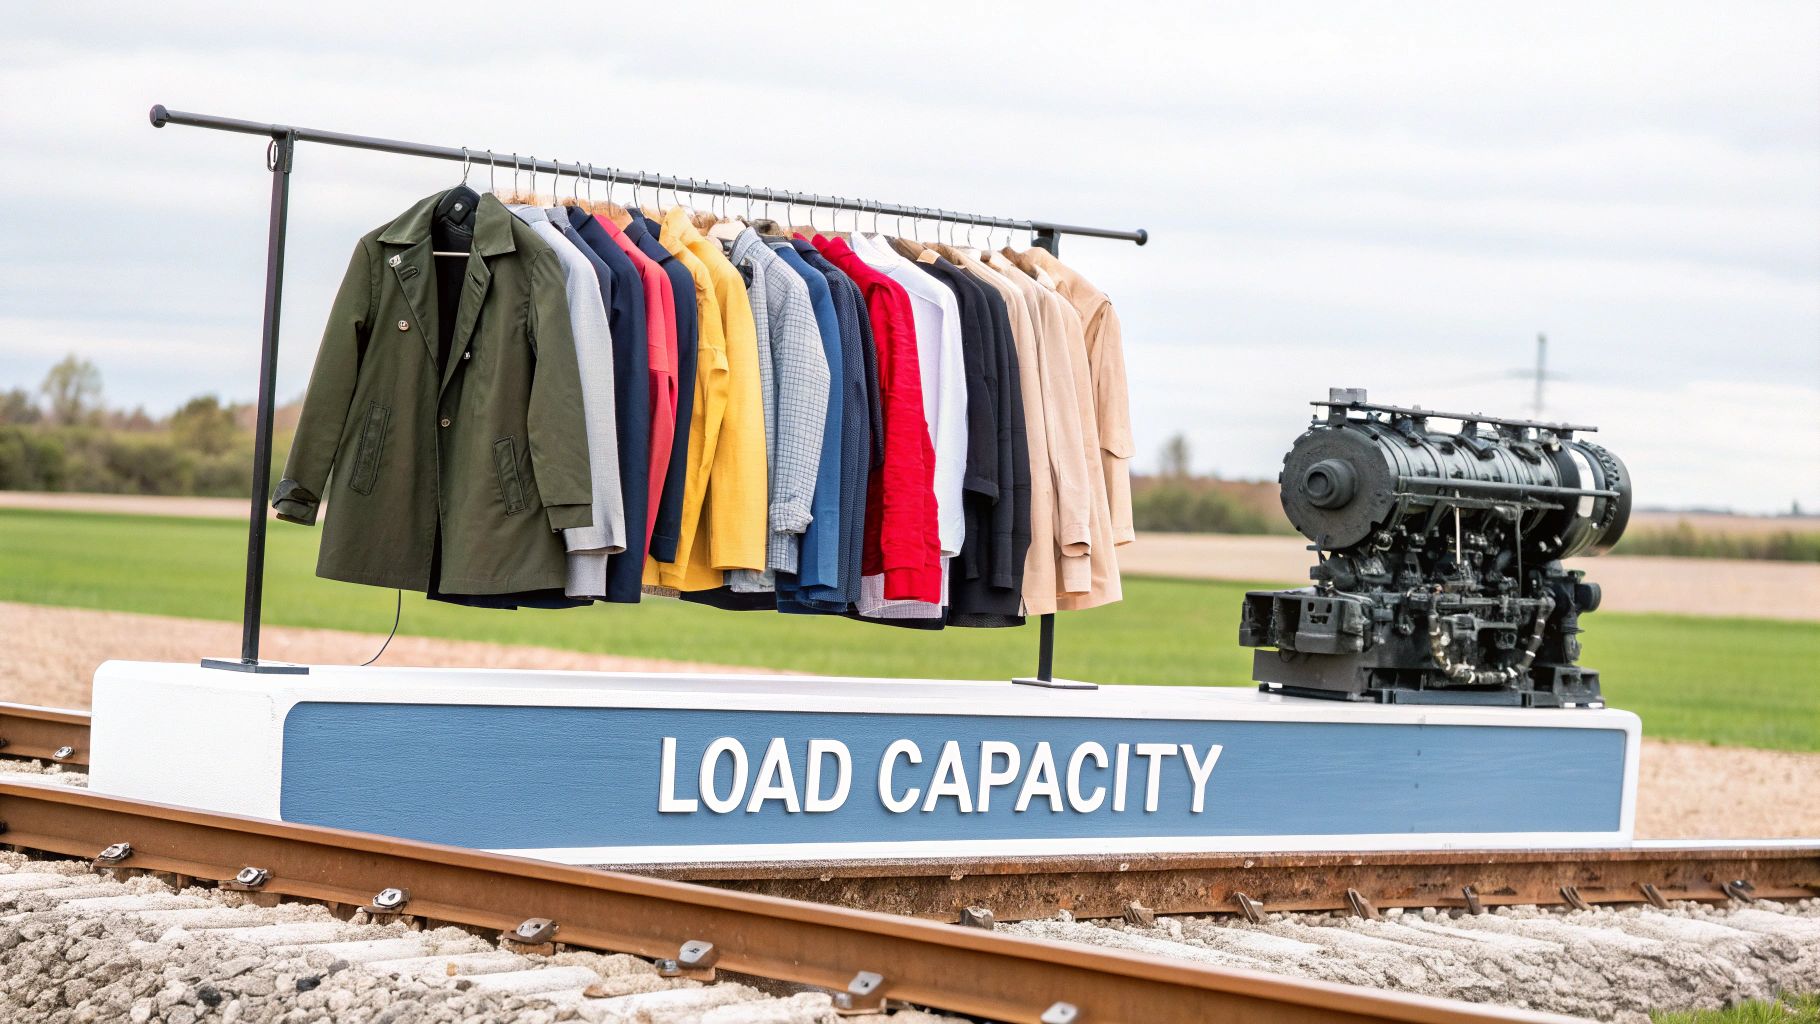
Now, let's flip that scenario on its head. Instead of a row of coats, you hang a single, incredibly heavy item—like a gearbox or a massive roll of industrial fabric—right in the middle of the rail. This is called point loading, and it’s the rail’s worst enemy.
Point loading creates an immense, focused stress on one tiny section. Even the toughest heavy duty rail isn't designed for that kind of pressure. This can cause the rail to visibly bend or, even worse, rip the central brackets straight out of the wall, as all that weight is bearing down on just one or two fixing points. It's something you should avoid at all costs.
The Hidden Factors That Affect Real-World Strength
The rail itself is just one piece of the puzzle. A few other elements can make or break the actual load capacity of your installation, and overlooking them is where most people go wrong.
A strong system is only as strong as its weakest link.
- Wall Type and Integrity: It’s common sense, really. A solid brick or concrete wall offers a far more secure anchor than plasterboard. The material you're drilling into is the foundation of the whole setup.
- Bracket Spacing: Don’t just guess where the brackets should go; follow the manufacturer's guidelines to the letter. Placing them too far apart creates long, unsupported spans of rail that are just asking to buckle under pressure. For a deeper dive, our guide on choosing the right clothing rail bracket has you covered.
- Fixing Quality: The screws and wall plugs are just as vital as the rail. Using cheap, undersized fixings is like building a house on sand—it’s just not going to hold. Always invest in the recommended heavy-duty fixings for your specific wall type.
Why British Standards Matter
If you want to be certain you're buying a product that does what it says on the tin, look for rails that meet British Standards (BS) or other recognised industry certifications. These aren't just arbitrary codes; they represent tough, independent testing that verifies a product's true strength and build quality.
A certified product gives you peace of mind that the load capacity isn’t just a marketing claim—it's been proven. It's a hallmark of quality that separates reliable, professional-grade gear from cheaper alternatives that might let you down when it counts.
Choosing the Right Heavy Duty Rail System
Picking out the right heavy duty rail isn't as simple as grabbing the strongest-looking one off the shelf. It’s a careful balancing act, weighing up exactly what you need against what the system can actually do. Get it wrong, and you could be looking at anything from a saggy, inefficient setup to a complete structural failure. That’s why spending a bit of time asking the right questions upfront is so important for a safe and successful installation.
Think of it like choosing tyres for a vehicle. You wouldn't put standard road tyres on a lorry that’s heading for a muddy building site. In the same way, the rail system that’s perfect for a chic boutique displaying silk blouses would be completely unsuitable for a workshop hanging heavy engine parts. The whole game is about matching the equipment to the job it needs to do.
This means taking an honest look at your space, the items you'll be hanging, and—crucially—the walls you'll be mounting everything to. A methodical approach from the start guarantees you’ll invest in a system that’s going to give you reliable support for years to come.
Your Essential Decision-Making Checklist
Before you even start looking at products, run through these critical questions. Your answers will essentially create a blueprint, pointing you straight to the heavy duty rail system that’s the perfect fit for your needs. Being realistic here will save you from making costly and potentially dangerous mistakes down the line.
- What’s the absolute maximum weight you need to support? Be honest, and always err on the side of caution. Tally up the total potential weight of everything you plan to hang, then add a safety buffer of at least 25%.
- Will the load be static or dynamic? A static load, like boxes in an archive, just sits there. A dynamic load is a different beast entirely—think of clothes in a busy shop being constantly shunted back and forth. This movement creates vibrations and shifting forces that put a whole lot of extra stress on the entire system.
- What kind of wall are you fixing it to? A solid brick or concrete block wall can handle an immense amount of weight. A plasterboard or stud wall, however, needs a completely different strategy, usually involving reinforcement or specific fixings that bite deep into the wooden studs behind the board.
- What are the environmental conditions like? Is the rail going into a damp stockroom, a climate-controlled shop floor, or a workshop with big temperature swings? This will tell you whether you need the superior corrosion resistance of stainless steel or if a standard galvanised finish will do the job.
Real-World Choices: Contrasting Scenarios
Let's put that checklist into practice with a couple of very different examples. This should make it crystal clear how different answers lead to very different solutions.
Scenario A: The Busy Denim Retailer
A high-street shop needs to display hundreds of pairs of heavy jeans. The total weight is pretty high and spread out, but the load is also very dynamic, with staff and customers constantly moving stock around. The rail needs to be installed on an internal plasterboard wall.
- Weight: High, but distributed (UDL).
- Load Type: Dynamic.
- Wall Type: Plasterboard stud wall.
- Solution: A tough steel rail system is definitely needed, but the installation itself is the make-or-break factor here. The brackets must be secured directly into the wooden wall studs, not just the plasterboard. Using a decent stud finder and heavy-duty wood screws isn't just a good idea—it's non-negotiable for a safe setup.
Scenario B: The Industrial Sewing Workshop
A workshop needs to store huge, heavy bolts of industrial fabric. The weight is extreme and almost entirely static, as the rolls are only moved every now and then. The installation is planned for a solid external brick wall.
- Weight: Very high, with potential for some point loading.
- Load Type: Static.
- Wall Type: Solid brick.
- Solution: This job calls for the toughest steel rail system you can find. The most critical components, however, are the fixings. You’ll need heavy-duty anchor bolts or sleeve anchors drilled deep into the brickwork to ensure the brackets can handle the massive shearing force without ever pulling away from the wall.
When designing your heavy-duty rail system, it's crucial to understand the foundational components, such as specialised shipping container shelving brackets, which are engineered for unique and demanding structural challenges. This same principle of matching the component to the specific environment applies to all installations.
At the end of the day, the smartest move is to buy a complete, compatible system from a single, reputable manufacturer. Trying to mix and match rails from one brand with brackets from another is asking for trouble—it creates an instant weak link and will almost certainly void any performance guarantees. A unified system ensures every single piece has been designed and tested to work together perfectly, giving you both the performance you paid for and the peace of mind you need.
Installing Rails for Maximum Safety and Longevity
https://www.youtube.com/embed/9nbK1FFBC7U
Even the most robust heavy duty rail system is only as strong as its installation. This is the moment where all that potential strength becomes a practical reality. A rushed or poorly executed fitting doesn't just look sloppy; it can completely undermine the system's integrity, creating a serious safety hazard that could lead to a catastrophic failure.
Getting this final stage right is crucial for protecting your investment and ensuring you get the durable, long-lasting support you paid for. It’s all about a methodical approach, from figuring out your wall type to choosing the right fixings and making sure everything is perfectly level. This attention to detail means you can confidently tackle the job yourself or know exactly what to look for when supervising a professional.
Preparing for a Flawless Installation
Before you even think about drilling, you need a solid plan. The very first thing to do is identify what kind of wall you're working with. Is it solid brick? Concrete block? Or a plasterboard stud wall? This one piece of information dictates every decision that follows, especially when it comes to your choice of fixings.
Using the wrong fixings is probably the most common—and most dangerous—mistake people make. A screw meant for wood won't grip properly in masonry, and a standard plasterboard fixing will simply crumble under the strain of a fully loaded heavy duty rail.
Once you know your wall type, you can get the right tools and hardware together.
- Stud Finder: This is non-negotiable for plasterboard walls. You absolutely must find the solid timber studs behind the board, as they are the only points strong enough to anchor your brackets.
- Spirit Level: A perfectly level rail distributes weight evenly across all its brackets. If it’s even slightly crooked, you’ll put immense stress on just one or two points, which can weaken the whole setup.
- Correct Fixings: This could mean heavy-duty anchor bolts for concrete, sleeve anchors for brick, or long, sturdy wood screws for drilling into wall studs. Whatever you do, don't skimp on the quality of your fixings.
Critical Steps for Secure Mounting
With your prep work done, you can start the installation. Precision is key here, as is following the manufacturer's instructions to the letter. Those guidelines aren't just suggestions; they're based on rigorous engineering tests to guarantee the system can hold its stated load capacity. For more specific guidance, have a look at our detailed article on wall-mounted hanging rails.
One of the most important specs to follow is the recommended bracket spacing. If you place brackets too far apart, you create long, unsupported sections of rail that can easily bend or buckle under a heavy load. The manufacturer gives you a maximum distance for a reason—going beyond it is a recipe for disaster.
Safety Warning: Never, ever try to install a heavy duty rail system directly into plasterboard. The material is far too weak to support any significant weight and will almost certainly fail, often taking a chunk of your wall with it. Always anchor directly into the solid structure behind the plasterboard.
If you want to see just how important secure infrastructure is, look at the wider industrial sector. In a recent twelve-month period, the total freight moved by rail in Great Britain reached a massive 16,536 million net tonne kilometres, which was a 5% increase from the year before. This growth, partly driven by an 8% jump in intermodal maritime freight, is only possible because of meticulously installed heavy duty rails that can handle constant, immense stress. You can find more insights on UK rail freight performance from the Office of Rail and Road.
By following these structured steps—identify the wall, pick the right fixings, get the rail level, and respect the bracket spacing—you turn a set of strong parts into a truly reliable system. This methodical approach is the best way to guarantee safety and ensure your heavy duty rails provide unwavering support for years to come.
Putting Heavy Duty Rails to Work: From Shop Floors to Workshops
It's one thing to talk about load capacities and material gauges, but it's another to see how these heavy duty rails perform out in the real world. This is where the theory meets the pavement. Far from being confined to warehouses, these systems are the unsung heroes of bustling retail spaces and busy professional workshops.
Seeing them in action really drives home how versatile they are. The way a rail is used in a high-street boutique versus a sewing studio shows just how adaptable they can be, and why choosing the right one matters so much.

Let's dive into these practical examples. It's the best way to connect the dots between technical specs and real-life performance.
Keeping Retail Environments Sharp and Efficient
On a shop floor, every detail counts. Presentation is king, and heavy duty rails form the very backbone of a tidy, professional, and well-organised space. Imagine trying to hang dozens of heavy winter coats or a full line of denim on a standard rail – it wouldn't take long for it to sag, creating a messy look that undermines the whole display. That's not just unprofessional; it's a potential safety hazard.
This is exactly where a properly specified system proves its worth. A fashion retailer, for instance, depends on its rails to perform several crucial jobs:
- Maximise Stock Display: Wall-mounted systems are a game-changer. They transform empty vertical space into prime merchandising real estate, letting you show off more products without cluttering the floor.
- Maintain a Professional Look: Nothing says "cheap" like a bowing clothes rail. Heavy duty steel rails hold their shape, ensuring every garment hangs perfectly and looks its best.
- Withstand Constant Use: Think about the stress a rail endures. Shoppers are constantly sliding hangers back and forth, and staff are always moving stock around. The fixings have to be absolutely solid to cope with that dynamic load day in, day out.
The right setup truly makes your walls work for you. To get a better idea of how different elements come together, have a look at our guide on the best retail display stands for your business.
Ensuring Safety and Order in the Workshop
Now, let's step off the shop floor and into a professional workshop or sewing studio. Here, the priority shifts from pure aesthetics to raw functionality and, most importantly, safety. In this environment, heavy duty rails aren't just for display; they are a critical part of the infrastructure for storing heavy, bulky, and often very expensive materials.
In a workshop, a rail failure is more than just an inconvenience. It can cause costly damage to materials, grind productivity to a halt, and even lead to serious injury. Strength and reliability aren't just nice to have—they're non-negotiable.
Picture a costume designer's studio or an upholstery workshop. The demands on a storage system are clear and unforgiving:
- Storing Heavy Rolls: Massive bolts of fabric, leather hides, or heavy vinyl rolls need to be kept organised and off the floor. A robust rail system is the only safe and practical way to manage them.
- Hanging Tools and Equipment: In a craft or mechanical workshop, rails can provide a strong, secure point for hanging heavy tools, machine parts, or projects that are in progress, freeing up precious bench space.
- Organising Supplies: From coils of wire to bulky patterns, a good rail system can bring order to the creative chaos, making sure everything has a home and is easy to find.
This absolute need for dependable, strong infrastructure is something we see at every scale, from a small studio right up to the national level. The core principle never changes: the system has to be strong enough for the job it's being asked to do.
Your Heavy Duty Rail Questions Answered
When you're planning a project that relies on heavy duty rails, a few common questions always seem to pop up. Getting these sorted early on can make all the difference, helping you nail down your plans and pick a system that's genuinely up to the job. It's the best way to avoid expensive mistakes and ensure your setup is safe for the long haul.
How Do I Know My Wall Can Take the Weight?
This is, without a doubt, the most important question to ask. Your entire rail system is only as strong as the wall it's attached to.
If you're dealing with plasterboard, it's non-negotiable: you must find the timber studs hidden behind the plaster and fix your brackets directly into them. For solid walls made of brick or concrete, you'll need the right kind of heavy-duty fixings—think anchor bolts or sleeve anchors—to create a truly secure foundation.
Before you buy a single component, figure out what your wall is made of. A beefy rail on a weak wall is just asking for trouble. If you're in any doubt, getting a professional fitter in is a smart move for safety and your own peace of mind.
Can I Cut a Heavy Duty Rail to Fit My Space?
Absolutely. Most steel rails can be cut down to the exact length you need. The best way to do this is with a hacksaw, making sure you use a fresh, sharp blade that’s designed for metal.
Once it's cut, you'll need to file down any sharp edges or burrs. This little step is crucial for preventing snags on clothing or even nasty cuts. Also, keep in mind that cutting a galvanised rail exposes the raw steel at the end. A quick coat of zinc-rich paint over the cut will help stop rust from setting in down the line.
What’s the Difference Between a Static and a Dynamic Load?
Getting your head around this is key to choosing the right rail. It’s simpler than it sounds.
- Static Load: This is a weight that just sits there, like boxes in a stockroom or archived files. It doesn't move.
- Dynamic Load: This is a weight that’s constantly on the move. Think of a busy clothes shop where staff and customers are sliding hangers back and forth all day.
That constant movement of a dynamic load puts a whole lot more stress on the rail and its fixings. If you know your rail will be used like this, always choose a system with a load capacity well above what you think you’ll need. This extra buffer gives it the strength to handle all that extra force from the day-to-day motion.
At Display Guru, we specialise in providing robust and reliable display solutions for professionals. Explore our range of garment rails and accessories to find the perfect fit for your retail or workshop needs. Find out more at https://www.displayguru.co.uk.