


Fitted Wardrobe Rail: Perfectly Organize Your Closet
It’s easy to think of a fitted wardrobe rail as just a simple metal bar, but in reality, it's the structural backbone of a well-organised closet. This single component does the heavy lifting, supporting your entire clothing collection and making sure every garment hangs perfectly, free from creases and damage.
The Foundation of a Flawlessly Organised Wardrobe

Picture your wardrobe as a well-built house. The outer frame and walls give it shape, but it’s the internal beams that carry the weight and make it a safe, functional space. A top-quality fitted wardrobe rail is that crucial support beam, specifically designed to handle the combined weight of your clothes without buckling under the pressure.
Getting the rail right is the first, most important step toward creating a storage system that not only looks sleek and professional but will also last for years. A weak or badly fitted rail is a recipe for disaster, leading to that frustrating dip in the middle, brackets pulling away from the wall, and potential damage to both your clothes and the wardrobe itself.
Why the Right Rail Matters
Whether you're a DIYer giving a home closet an upgrade or a professional shopfitter designing a new retail display, you can't afford to overlook this component. Picking the perfect rail means looking at a few key details that all come together to create a system you can rely on.
You’ll want to keep these things in mind:
- Material Strength: Different metals have different breaking points. Some offer incredible durability, while others are more suited for lighter loads.
- Load Capacity: The rail needs to be strong enough for everything you plan to hang on it, from a few light blouses to a dozen heavy winter coats.
- Proper Installation: Even the toughest rail in the world is useless if it isn't securely fixed. A solid anchor into the wardrobe or wall is non-negotiable.
A well-chosen fitted wardrobe rail is an investment in longevity. It protects your garments, simplifies your daily routine, and ensures the structural integrity of your entire storage solution.
For those planning a larger project, the rail is a central piece of comprehensive walk-in closet organization systems. To learn more about creating a truly cohesive and practical space, have a look at our guide on walk-in wardrobe fittings. Once you nail these fundamentals, you can build a wardrobe that genuinely works for you, day in and day out.
Exploring Different Types of Wardrobe Rails
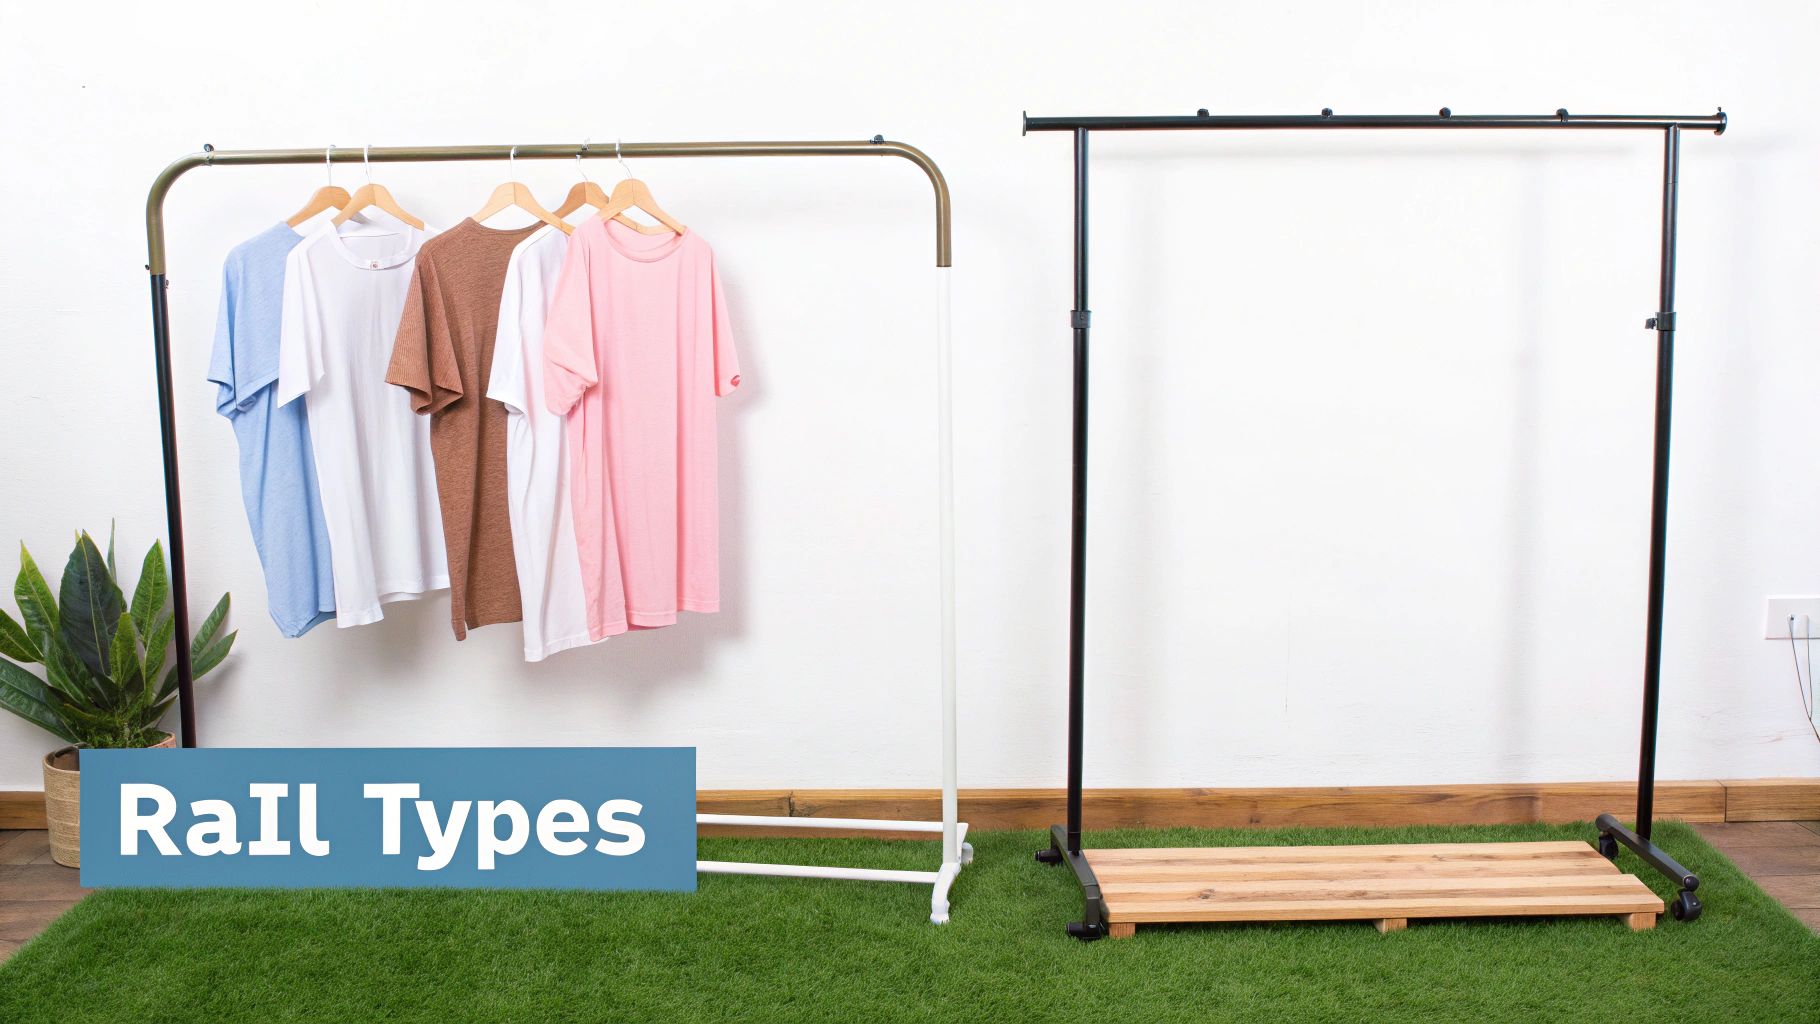
When you’re looking for a fitted wardrobe rail, it’s easy to think one metal bar is pretty much the same as another. But the reality is quite different. The world of wardrobe rails is surprisingly varied, with different designs engineered for very specific jobs. Getting to grips with these variations is the key to choosing a rail that not only fits your space but also performs perfectly for your particular clothing collection.
Think of it like choosing a vehicle. A standard round rail is your reliable family car—great for everyday domestic use and handling an average load of shirts, trousers, and dresses. It gets the job done without any fuss. But what happens when you need to carry something much, much heavier?
That’s where specialised designs come into play. By looking at the different options based on their shape, material, and unique features, you can make a smart choice that guarantees strength and a long life.
Shape: The Secret to Strength
The shape of a wardrobe rail is probably its most critical feature when it comes to load-bearing capacity. You might not think a simple change in geometry would make much of a difference, but it has a massive impact on how the rail resists bending and sagging under weight.
-
Round Rails: This is the classic choice and the shape you’ll find in most home wardrobes. They offer a simple, clean look and are more than adequate for standard clothing loads, especially over shorter distances.
-
Oval Rails: Now, this is the heavy-duty lorry of the wardrobe world. The oval profile acts like a miniature I-beam, giving it exceptional structural rigidity. This design massively increases the rail’s ability to resist bowing, making it the ideal choice for heavy garments like winter coats, leather jackets, or a jam-packed retail display.
The cleverness of the oval shape is that it distributes weight more effectively along its taller, vertical axis. This is what stops the middle from dipping. For any span over 120cm or for any commercial use, an oval rail is almost always the superior option.
A rail's profile is its engineering signature. An oval shape is purposefully designed to combat the downward force of gravity, providing a stronger backbone for your heaviest and most valuable garments.
Functional Rails: Specialised Solutions
Beyond just hanging clothes, some really innovative designs can solve specific storage problems, adding both convenience and a touch of modern luxury to your space. These rails go beyond simple static storage.
They’re designed to improve accessibility, make brilliant use of awkward spaces, and generally make your life easier.
-
Pull-Down Wardrobe Rails: Absolutely perfect for wardrobes with high ceilings. These rails have a pull-rod mechanism that lets you lower the entire rail down to a comfortable height. It means you can use every inch of vertical space without needing a step stool, bringing your clothes down to you with one smooth action.
-
Illuminated LED Rails: For that premium, high-end feel, an illuminated rail integrates LED lighting right into the bar. They are often motion-activated, casting a clear, even light over your clothes the moment you open the door. Not only does this make it easier to see what you’ve got, but it also adds a sophisticated, boutique-like feel to your closet.
-
Corner Rails: These are custom-curved or angled rails designed to make the most of tricky corner spaces in L-shaped or U-shaped wardrobes. They create a continuous, flowing hanging area, ensuring no part of your wardrobe is wasted and giving you seamless access to everything.
Choosing the right type of rail is all about matching the design to what you really need. For those of you dealing with particularly weighty collections, like in a retail shop or for theatre costumes, learning more about heavy-duty hanging rails is a crucial next step. By looking past appearance and focusing on performance, you can be sure your fitted wardrobe rail will serve you perfectly for years to come.
Selecting the Right Material and Finish
Choosing the right material and finish for your wardrobe rail is one of those details that seems small but makes a world of difference. It’s not just about aesthetics; it’s about durability, performance, and that simple, satisfying feeling of a wardrobe that just works. Get it right, and your rail will stand up to years of use while making your daily routine that little bit smoother.
Think of the finish as the rail's functional "skin." A polished chrome finish, for example, is incredibly smooth for a reason. It creates a low-friction surface that lets your hangers glide effortlessly from side to side. When you're in a rush in the morning, or managing a busy retail stockroom, that seamless movement is a real practical benefit.
On the other hand, you have more rugged finishes like powder-coated black or brushed nickel. These are designed with resilience in mind.
Durability Meets Design
Powder coating, for instance, isn't just paint. It’s a dry powder applied with an electrostatic charge and then baked on, forming a hard-wearing layer that’s much tougher than conventional paint. This process makes the rail exceptionally resistant to scratches and chips from metal hangers – perfect for an industrial-themed wardrobe or a high-traffic area where pure function is key.
Here’s a quick rundown of the most common materials and what they bring to the table:
- Steel: The dependable workhorse. Steel offers fantastic strength and is usually chrome-plated for that smooth glide and to resist corrosion.
- Aluminium: Lighter than steel but naturally rust-resistant. This makes it a smart choice for wardrobes in rooms with higher humidity, like a utility room or near a bathroom.
- Stainless Steel: The best of both worlds. It combines serious strength with top-tier corrosion resistance, making it ideal for premium installations built to last a lifetime.
Picking the right material is more important than ever. The UK fitted furniture market is booming as people look for smarter storage in modern homes. This is part of a bigger picture – the global fitted wardrobe market was valued at around $15 billion in 2023 and is set to keep growing. As our living spaces get smaller, efficient and durable storage like a well-chosen fitted wardrobe rail becomes non-negotiable. Many are even happy to pay a bit more for sustainable materials. For more on this, you can read this detailed report on the global fitted wardrobe market.
The finish on a wardrobe rail dictates its interaction with your clothes. A smooth chrome finish prioritises effortless access, while a tough powder-coated finish prioritises long-term resilience against daily wear.
Matching Finish to Function
Ultimately, your choice is a balance between your practical needs and your personal style. A sleek, polished chrome rail looks right at home in a modern, minimalist wardrobe. In contrast, a matt black or antique brass finish can add a touch of character to a more traditional or rustic design.
Before you decide, take a moment to think about your specific situation. What will you be hanging? Heavy winter coats or light summer dresses? Is the wardrobe in a damp environment? Answering these simple questions will point you towards the perfect combination of material strength and functional finish.
For a deeper look at how all the different parts come together, have a read of our guide on selecting a complete clothing rail pole and fittings. It’ll help ensure your new rail doesn't just look the part, but performs flawlessly for years to come.
How to Measure for a Perfect Fit Every Time
Getting your measurements spot-on isn't just a preliminary step; it's the most crucial part of installing a new fitted wardrobe rail. Think of it like tailoring a bespoke suit for your closet. If you’re off by just a few millimetres, the whole thing will look and feel wrong. Taking the time to be precise guarantees a secure, professional finish that's not only strong but looks the part, too.
This is all about precision, not guesswork. A few extra minutes with the tape measure now will save you the immense frustration of a rail that’s too short, too long, or sitting at an awkward height. The aim is a perfect fit that makes the most of your space and turns your wardrobe into an organised, easy-to-use haven.
Mastering the Internal Width
Your first and most important measurement is the internal width of the wardrobe, from one side panel to the other. Grab a decent tape measure and check the distance where the rail will sit, once near the top and again near the bottom. It’s a rare wardrobe that's perfectly square, so taking two readings helps you catch any variations before they become a problem.
Once you have this figure, you need to factor in your fixings.
Remember to subtract the depth of the end brackets from your total internal width measurement. This small but vital calculation ensures the rail itself is the perfect length to sit securely within its supports.
Let's say your wardrobe's internal width is 1000mm and each end bracket is 3mm deep. You'll need to subtract a total of 6mm (3mm for each side). This means the rail itself needs to be cut to 997mm for a snug, secure fit. This simple sum is often the difference between a wobbly, unsatisfying rail and a rock-solid one. For a deeper dive into the options available, take a look at our guide on wardrobe rails and fixings.
When choosing the right rail, you're really balancing three things: durability for a long life, a smooth glide for your hangers, and a style that matches your wardrobe's interior. This infographic breaks it down nicely.
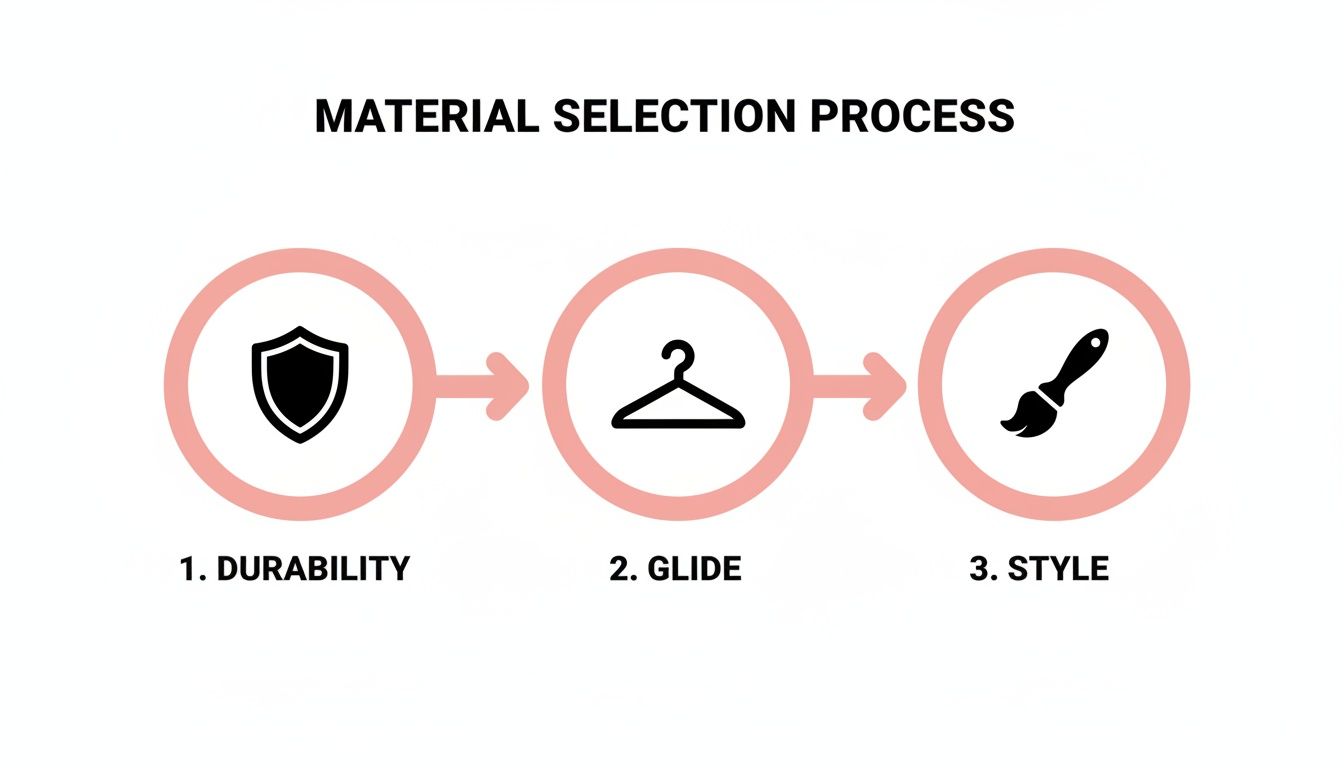
As you can see, the sweet spot is finding a rail that’s strong enough for your clothes, smooth enough for daily use, and has a finish that you’re happy to look at every day.
Selecting the Optimal Height
Where you position the rail vertically is just as critical as getting the length right. The ideal height depends entirely on what you plan to hang. Go too low, and long dresses or coats will end up in a heap on the floor. Go too high, and you can waste a huge amount of valuable storage space underneath.
To help you get it just right, here's a quick reference guide for some of the most common garment types.
Recommended Hanging Rail Heights
| Garment Type | Recommended Height from Floor (cm) | Notes |
|---|---|---|
| Shirts & Blouses | 100 - 110 cm | Allows ample room for shirts and folded trousers on hangers. |
| Trousers (Full Length) | 120 - 130 cm | Ideal for hanging trousers by the waistband to avoid creasing. |
| Long Dresses & Coats | 160 - 180 cm | Ensures your longest items hang freely without touching the floor. |
| Double Hanging (Top Rail) | 205 - 215 cm | The upper rail in a two-tier system for shirts, tops, and skirts. |
| Double Hanging (Bottom Rail) | 100 cm | The lower rail, positioned to give the top rail enough clearance. |
These are tried-and-tested heights that work for most people, but always feel free to adjust them based on your own clothes and how you want to use the space.
Common Mistakes to Avoid
Even with the best of intentions, it’s easy to make small oversights that lead to a less-than-perfect fit. Before you pick up a drill, run through this checklist of common pitfalls to make sure you haven’t missed anything.
- Forgetting Door Clearance: Make sure the rail is set back far enough from the front edge of the wardrobe. You don't want your clothes getting snagged every time you open or slide a door.
- Ignoring Wall Levelness: Use a spirit level on your markings. If the rail isn’t perfectly level, all your hangers will slowly but surely slide down to one end. It’s a classic mistake.
- Measuring Just Once: The old carpenter's adage holds true: measure twice, cut once. It takes seconds to double-check and can save you from having to buy a new rail.
- Not Accounting for Hanger Drop: This one catches a lot of people out. Remember that the hook of the hanger adds an extra 10-12cm to the total hanging length of your garment. Always factor this "hanger drop" into your height calculations.
Your Installation and Maintenance Checklist
Even the best fitted wardrobe rail is only as good as the way it’s installed. A bit of care during fitting and a little attention over time will make sure your rail stays secure, level, and ready for whatever you hang on it for years to come. This checklist breaks down the best practices for getting a professional-grade result, whether you're organising your wardrobe at home or setting up a busy retail display.
Think of the installation as the foundation of a house. If you rush it, you’ll end up with problems later—sagging rails, wobbly brackets, or even damage to the wardrobe itself. Taking an extra few minutes to get it right from the start really does pay off in the long run.
This is especially true in the competitive UK furniture market, which is set to grow from USD 29.69 billion in 2026 to a huge USD 38.21 billion by 2031. With this growth comes a demand for quality that lasts. For retailers, a sturdy rail is crucial for merchandising, particularly as average shop sizes have grown by 23% since 2023, demanding more from their fixtures. You can dive deeper into these UK furniture market trends on Mordor Intelligence.
Pre-Installation Checks
Before you even pick up a drill, a few simple checks will set you up for success. This is all about getting to know your space and having the right kit on hand.
- Know Your Wall Type: What are you fixing into? Is it solid brick or hollow plasterboard? This single detail changes everything, as it dictates which wall plugs and screws you’ll need. Choosing the right fixings is absolutely fundamental for a secure fit.
- Gather Your Tools: Make sure you have a tape measure, a pencil, a spirit level, a drill with the correct bits, and the screws and plugs for your wall type all laid out and ready to go.
- Confirm Your Measurements: Go back and double-check the internal wardrobe width and the height you marked earlier. You can’t go wrong with the old carpenter’s rule: measure twice, drill once.
The Installation Process
With your prep sorted, the actual fitting should be pretty straightforward. The name of the game here is precision—getting everything perfectly level and rock-solid.
- Mark Your Drill Points: Use your spirit level to draw a faint, perfectly horizontal line where you want the rail. Hold a bracket up to the line and mark where the screw holes need to go.
- Drill Pilot Holes: Carefully drill the holes for your wall plugs. If you're going into plasterboard, you absolutely must either hit a wooden stud behind it or use proper hollow-wall anchors.
- Secure the Brackets: Gently tap the wall plugs in so they're flush, then screw your brackets firmly into place. Don't go crazy and overtighten, but make sure they're snug and don't move.
- Fit the Rail: Slot the rail into the brackets. Most are secured with a small grub screw from underneath, so tighten that up. Give the whole thing a gentle but firm tug to make sure it’s solid. To understand the components better, check out our guide to clothes rails and brackets.
Long-Term Maintenance Tips
A little bit of ongoing care will keep your wardrobe rail performing perfectly. These simple habits prevent common headaches like bowing rails or hangers that refuse to slide.
Maintaining your wardrobe rail is like a routine car service—a few small checks can prevent major issues. It’s about protecting your investment and ensuring continued performance.
- Respect the Weight Limits: Overloading is the number one enemy of a happy wardrobe rail. Spread the weight of your clothes evenly, and if your rail is longer than 1.2 metres, seriously consider adding a centre support.
- Check for Tightness: Every six months or so, just give the bracket screws a quick check to see if they’ve worked themselves loose. It only takes a second.
- Keep the Rail Clean: A quick wipe with a soft, dry cloth removes dust and build-up. It’s a tiny job, but it keeps your hangers gliding smoothly and stops grime from transferring onto your best clothes.
Troubleshooting Common Wardrobe Rail Problems
Even the best wardrobe rail can run into trouble, especially if it wasn't installed quite right or is constantly overloaded. The good news is that most problems are easy to fix. Catching them early stops a minor annoyance from turning into a major headache.
This little guide walks you through the most common issues you'll face. We'll look at the symptom, figure out the cause, and find the right fix to get your wardrobe back in perfect working order.
The Problem: A Bowing or Sagging Rail
A dip in the middle of your rail is the classic sign of a system under stress. It immediately makes a wardrobe look messy and puts a huge amount of strain on the brackets and fixings.
- What's Happening: The rail is simply carrying too much weight, or it’s too long to support the load on its own. This is a very common issue for any rail spanning more than 1.2 metres without any help.
- The Fix: First things first, lighten the load. Take all the clothes off and see if you can reorganise, maybe moving heavier winter coats somewhere else. For a permanent solution on a longer rail, you absolutely need to fit a centre support bracket. It provides a vital third anchor point, spreading the weight evenly and getting rid of that sag for good.
The Problem: Wobbly or Loose Brackets
You might notice the end brackets don't feel solid, maybe shifting a bit as you slide hangers back and forth. This is one of those small problems you need to sort out straight away.
- What's Happening: The issue is almost always with the wall fixings. Either the screws have gradually worked loose, or the wrong type of plugs were used for your wall in the first place (like using standard plugs in plasterboard and missing a stud).
- The Fix: Empty the rail completely, then try tightening the screws that hold the brackets to the wall. If a screw just keeps spinning and never tightens up, you need a stronger fixing. Take the bracket off the wall and install a more suitable wall anchor, like a hollow wall anchor for plasterboard, before screwing the bracket firmly back in place.
Don't ignore a wobbly bracket. It’s a clear warning sign of potential failure. Securing it properly protects your wall, your clothes, and the wardrobe itself from a sudden collapse.
The Problem: Sticking or Noisy Hangers
Hangers should glide effortlessly. If they catch, stick, or make that horrible scraping sound, it takes the simple pleasure out of choosing an outfit.
- What's Happening: Nine times out of ten, this is just down to a build-up of dust and grime on the surface of the rail. Over time, this film creates just enough friction to stop hangers from moving freely.
- The Fix: This is the easiest one on the list. Take everything off the rail and give it a good wipe with a soft, dry microfibre cloth. If it’s a bit more stubborn, use a damp cloth with a tiny drop of gentle soap. Just make sure the rail is bone dry before you hang anything back on it. A quick dust every now and then will keep it from happening again.
Frequently Asked Questions About Wardrobe Rails
Even with the best plans, a few practical questions always pop up when you're fitting a wardrobe rail. I've pulled together the most common queries we get asked, giving you straight-to-the-point answers to help you sidestep any hitches and feel totally confident in your project.
Think of this as your quick-reference cheat sheet, rounding out everything we've covered so far.
What is the maximum weight a standard wardrobe rail can hold?
A rail's real strength isn't just about the rail itself. It’s a mix of its material, shape, length, and—most importantly—how well it's fixed to the wall. As a rule of thumb, a standard 1-metre steel rail, when properly mounted into a solid brick wall, can comfortably hold between 40-60kg.
But be warned, that capacity drops quickly as the rail gets longer. For anything over 1.2 metres or for really heavy items, you absolutely need a sturdier oval-shaped rail and a centre support bracket. That one extra fixing is your best insurance policy against a sagging rail.
Can I cut a wardrobe rail to a custom length?
Of course. In fact, most metal wardrobe rails are made to be cut down for that perfect, wall-to-wall fit. The right tool for this is a simple hacksaw with a fine-toothed blade. It will give you a clean, precise cut without scratching or damaging the finish.
Once you've cut it, you must file the raw edge until it’s smooth. This gets rid of any sharp metal burrs that could snag your clothes or stop the end brackets from fitting flush. Just remember the old carpenter’s saying: measure twice, cut once.
Should I choose a round or an oval wardrobe rail?
This really boils down to what you plan to hang on it. For most everyday wardrobes filled with shirts, trousers, and dresses, a classic round rail does the job perfectly well and looks great.
An oval rail, on the other hand, is a serious step up in structural strength. Its profile works a bit like a steel I-beam, giving it far better resistance to bowing under serious weight. It’s the undisputed champion for heavy winter coats, busy retail displays, or any time you need maximum load-bearing muscle.
What are the best wall fixings for a wardrobe rail?
Getting the fixings right is non-negotiable for a safe, sturdy rail. The wall itself will tell you what you need to use.
- Solid brick or block walls: Your best bet is heavy-duty screws combined with good-quality wall plugs. They'll expand into the hole and create an incredibly strong anchor.
- Plasterboard (hollow) walls: Ideally, you'll find the wooden studs behind the plasterboard with a stud finder and screw directly into them. Nothing beats a solid wood fixing.
- If you can't find a stud: You have to use specialised plasterboard fixings. Things like hollow wall anchors or spring toggles are designed to open up behind the board, spreading the load and providing a much more reliable hold than a standard plug ever could.
At Display Guru, we stock a huge range of tough, high-quality rails and fittings for any project, whether it's a home declutter or a full retail fit-out. Have a look at our collection and find exactly what you need at https://www.displayguru.co.uk.