


Choosing and Installing Your Perfect Clothing Rail Pole
A clothing rail pole is the core bar in any garment storage system, the part that actually holds the hangers. In professional settings like retail shops, design studios, or stockrooms, it's the main load-bearing element that makes organisation and display possible.
The Unsung Hero of Professional Spaces
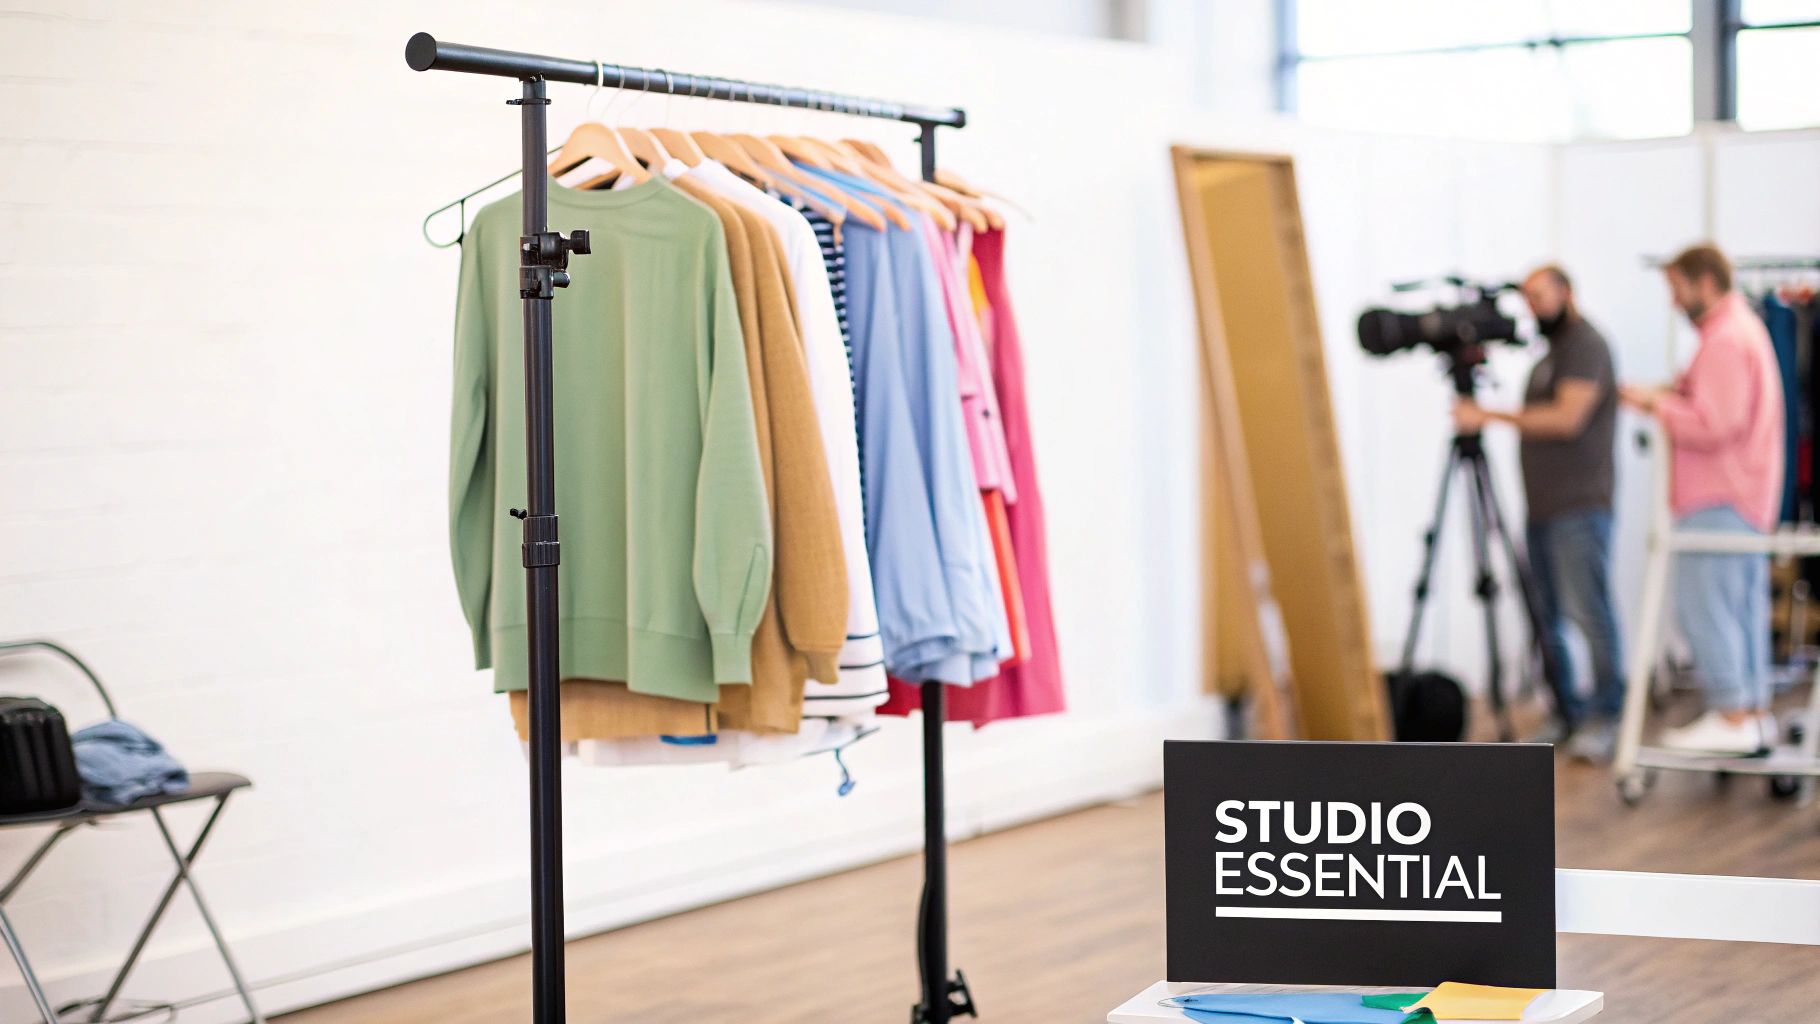
Walk into any busy fashion studio, thriving high-street store, or the backstage buzz of a theatre, and you’ll find a quiet workhorse holding it all together: the clothing rail pole. It’s so much more than a simple metal bar; it’s a vital tool for keeping things organised, showcasing garments, and making the entire workflow run smoothly.
This guide is about looking past the obvious and understanding how choosing the right rail can transform a space from chaotic to perfectly curated. We'll get into the details that professionals sweat over, from the science behind the materials and load capacities to clever installation and accessorising. Think of this as your blueprint for finding a clothing rail pole that doesn’t just do a job, but actually elevates your entire operation.
More Than Just a Hanger
In a professional environment, a clothing rail is the backbone of day-to-day operations. It's not just for passive storage—it plays an active role in the business of fashion.
- In Retail: Here, the rail is a primary tool for visual merchandising. It presents collections in a way that is both attractive and easy for customers to browse. The right setup can make a clothing line feel more premium, directly impacting how shoppers perceive your brand. You can learn more about this in these detailed visual merchandising guidelines.
- In Fashion Studios: Designers and tailors need heavy-duty rails they can trust to hold bulky fabric rolls, half-finished pieces, and entire collections without buckling. A dependable rail means valuable creations are kept safe, organised, and in perfect condition.
- In Stockrooms: Efficiency is everything behind the scenes. In a busy stockroom, a clothing rail pole isn't just a place to hang stock; it's a key part of a much larger inventory system. To get a real sense of how it fits into the bigger picture, it's worth reading an ultimate guide to warehouse inventory management.
Why Professional Grade Matters
There's a world of difference between a flimsy domestic clothes rack and a professional-grade clothing rail pole. The professional models are engineered for toughness, higher weight limits, and constant, heavy use.
They're built from industrial-strength materials specifically chosen to handle the weight of things like a dozen winter coats or heavy bridal gowns—items that would quickly overwhelm a standard household rail.
A well-chosen clothing rail pole isn't an expense; it's an investment in workflow efficiency and asset protection. It prevents damage to valuable stock, streamlines organisation, and enhances the professional appearance of your workspace.
This guide will give you the know-how to spot these professional-grade features. We'll cover everything from the thickness of the steel to the quality of the wheels, so you can make a choice that’s truly fit for purpose and built to last.
What Makes a Great Clothing Rail? A Look at the Anatomy
Before you can pick the right clothing rail, you need to know what makes one genuinely reliable. A truly robust rail isn't just a collection of metal tubes; it’s a system where every single part works together to handle the weight you throw at it. Think of it like a suspension bridge – every component is critical.
It’s easy to be swayed by looks, but the real test is structural integrity. Once you know what to look for, you can spot a rail built for the long haul, saving you the headache and cost of replacing a flimsy one down the line.
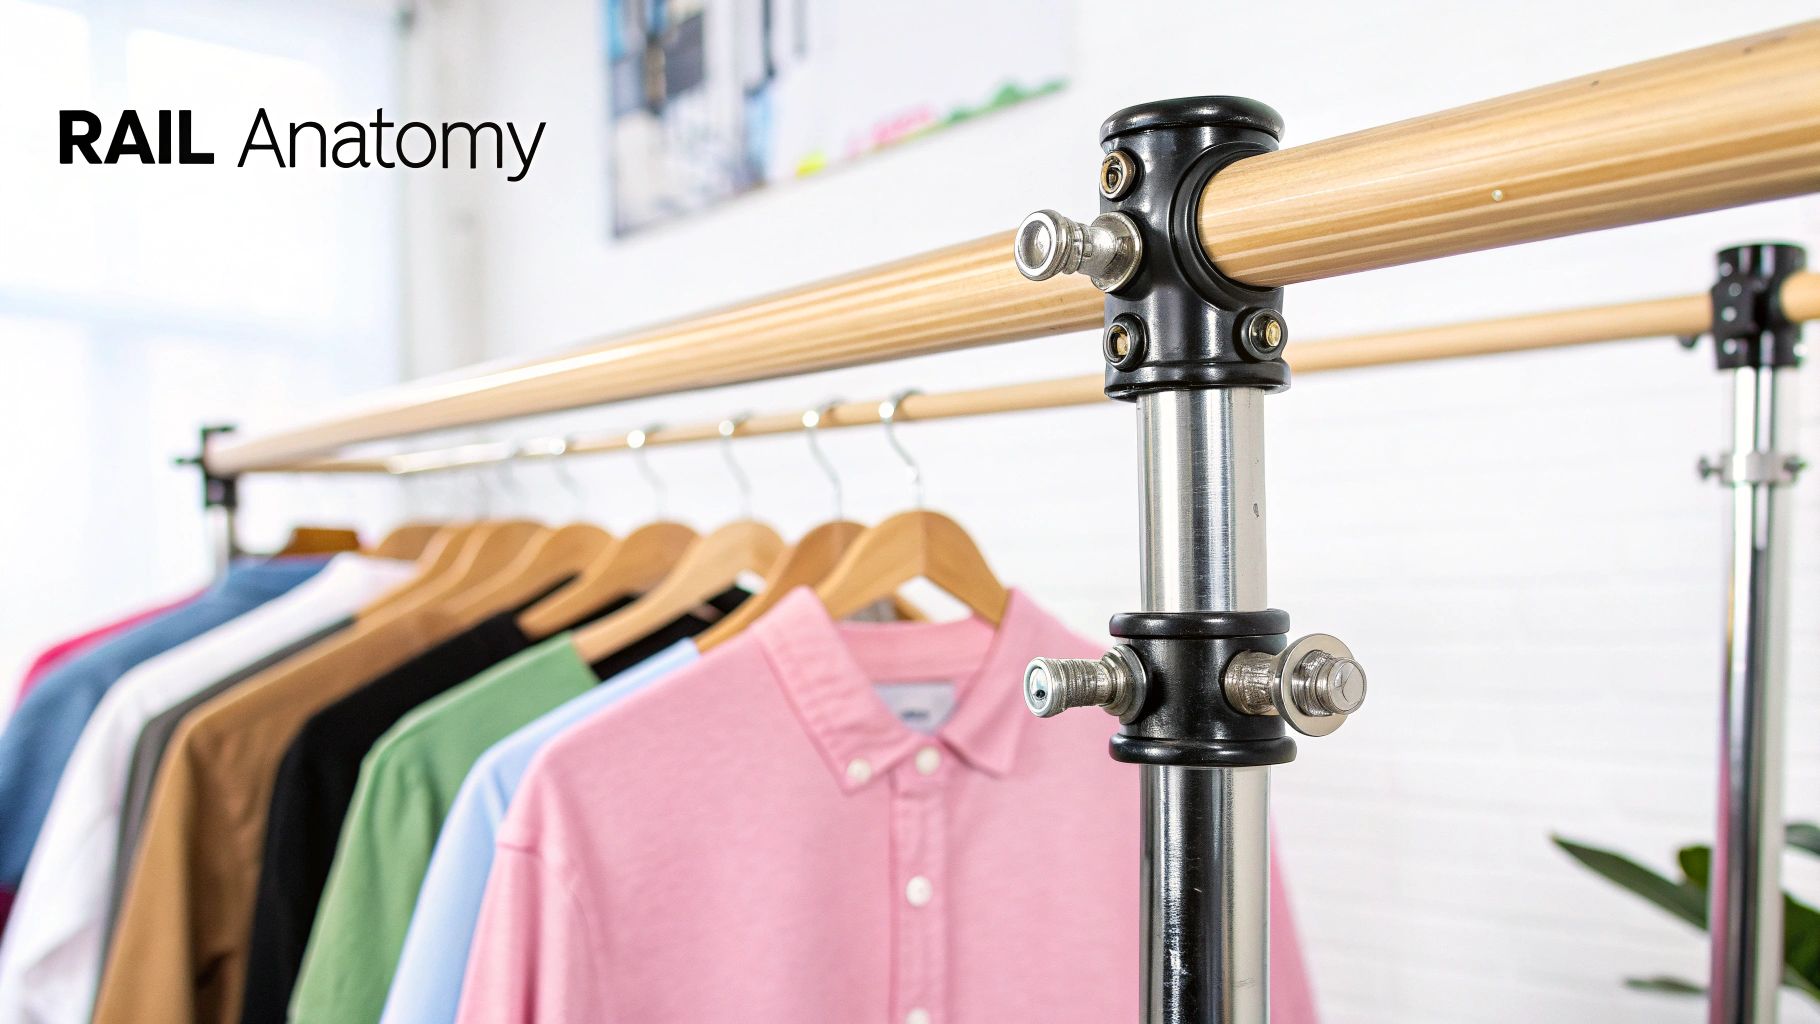
The Core Components
At its most basic, a professional clothing rail has four key elements. The overall strength of the structure is only as good as its weakest part, so understanding how they all fit together is crucial.
- The Horizontal Pole: This is the workhorse. Its diameter and the thickness of the metal (its gauge) are what determine how much weight it can carry without starting to sag.
- Vertical Supports: These are the uprights, or legs, that take all the weight from the pole and transfer it down to the base. Good ones stop the rail from wobbling or, worse, tipping over.
- The Base or Feet: This is the foundation. It could be static feet for a rail that stays put or heavy-duty castors (wheels) if you need to move it around without compromising on stability.
- Connecting Fixtures: Often the most overlooked part, but the quality of the screws, welds, and brackets is absolutely vital. These are the joints holding everything together under pressure, and weak fixtures are usually the first thing to fail. A high-quality clothing rail bracket is especially important for keeping the main bar securely in place.
Why Materials Make All the Difference
The material a clothing rail is made from dictates everything—its durability, how much it can hold, and even its appearance. From a distance, many rails look the same, but the metal used tells the real story of its strength and where it truly belongs.
The right material isn't just about looks; it's a direct indicator of the rail's performance ceiling. An industrial-grade steel rail can often support over 100 kg, while a lightweight aluminium alternative may struggle with a fraction of that load.
A well-made rail is a serious piece of equipment, especially in the competitive UK apparel market, which is projected to be worth £68.7 billion by late 2025. Retailers depend on effective displays to make an impact, and a good garment rail is key to creating collections that can lift impulse buys by up to 30% in busy areas.
This is precisely why getting the material right matters. Choices like industrial-grade steel offer brute strength for stockrooms, while classic chrome gives you a durable, professional finish for the shop floor. For a more modern feel, powder-coated options provide a stylish, chip-resistant surface in a range of colours to match your brand.
To make the choice clearer, here’s a quick comparison of the most common materials you’ll come across.
Clothing Rail Material Comparison
| Material Type | Key Benefits | Best Suited For | Aesthetic |
|---|---|---|---|
| Industrial-Grade Steel | Maximum strength and durability. Can hold very heavy loads without bending. | Stockrooms, warehouses, costume departments, and busy retail environments. | Raw, functional, and utilitarian. Often has a matte or galvanised finish. |
| Chrome-Plated Steel | Highly durable, corrosion-resistant, and easy to clean. | Retail showrooms, boutiques, and home use where a polished look is desired. | Bright, reflective, and professional. The classic retail standard. |
| Powder-Coated Metal | Chip-resistant, scratch-resistant finish available in various colours. | Branded retail spaces, pop-up shops, and home interiors. | Modern, versatile, and customisable. Can be matte, satin, or gloss. |
| Aluminium | Lightweight and resistant to rust. Easy to move and assemble. | Pop-up events, market stalls, and temporary displays with lighter garments. | Sleek and contemporary, but less robust than steel options. |
By familiarising yourself with these options, you'll be in a much better position to choose a rail that not only looks the part but performs flawlessly for years to come.
How to Choose the Right Rail Type and Size
Choosing the right clothing rail isn't a one-size-fits-all decision. It's about matching the tool to the job. Think of it like a chef picking the right knife – you wouldn't use a delicate paring knife to break down a side of beef. In the same way, the rail you choose has to be right for your space and the clothes you're hanging. Get it wrong, and you're looking at a sagging, wobbly mess that just doesn't work.
The first step is getting to know the main players. Each type of rail is designed to solve a specific problem, whether that's squeezing more stock into a tiny boutique or holding up a mountain of heavy costumes backstage.
Matching the Rail to Your Needs
Before you even look at a single product, ask yourself: what is this rail for? Is it for a customer-facing display in a shop? Is it for organising stock in a storeroom? Or is it for a pop-up event? Your answer will instantly narrow the field and point you towards the perfect fit.
Let’s break down the most common types and where they shine:
- Standard Single Rails: These are the reliable workhorses of the industry. You'll find them everywhere, from high-street boutiques to home sewing studios. They're simple, strong, and perfect for everyday use, whether you're displaying a new collection or just keeping your current projects organised.
- Double Rails: When floor space is tight, double rails are a game-changer. By adding a second hanging tier, you literally double your capacity without taking up an inch more floor. This makes them a lifesaver for small stockrooms or busy retail spaces where every square foot counts.
- Heavy-Duty Rails: Built like a tank, these are the rails you call in for the serious jobs. Think of a theatre's costume department, weighed down with velvet gowns and military coats, or a warehouse packed with winter stock. Their solid construction means they won't buckle or bend under pressure.
- Wall-Mounted Rails: For a sleek, permanent installation, nothing beats a wall-mounted rail. They keep the floor completely clear, which creates a clean, minimalist look. This makes them ideal for high-end shops or design studios where you want an open, uncluttered feel.
Getting this right is especially important in the UK’s bustling clothing retail sector, which is on track to hit a massive £50 billion in 2025. In such a competitive market, a good clothing rail pole is more than just storage; it’s a vital tool for creating attractive, organised displays that can cope with heavy footfall in cities from London to Edinburgh.
Getting the Size and Load Capacity Right
Once you've settled on a type, it's time to talk numbers: size and, crucially, load capacity. It’s so easy to underestimate the weight of clothes, and that's a mistake that can lead to a collapsed rail.
First, get out the tape measure. Check the space you have available, and make sure to leave at least 60cm of clearance around the rail. People need to be able to walk around it and browse comfortably without feeling squeezed.
For the rail's length, think about how much you plan to hang. A good rule of thumb is to allow about 2.5cm per hanger for items like shirts or blouses, but you'll need closer to 7-8cm for bulky items like winter coats.
What does 'load capacity' really mean? It’s not just an arbitrary number; it’s a guarantee of the rail's strength. When you see a 'heavy-duty' rail, it can typically hold 75kg or more. To put that in perspective, that's enough to support around 35-40 heavy winter coats or well over 100 shirts without breaking a sweat.
Don't just guess. Think about what you'll be hanging. A man's suit weighs about 1.5kg, while a heavy wool coat can easily top 2-3kg. Do a quick calculation: multiply the average weight by the number of garments you need to hang. Always choose a rail with a capacity that’s comfortably above your estimate. This isn't just about stability; it's about safety and ensuring your investment lasts for years.
A Practical Guide to Assembly and Installation
A professional clothing rail is only as good as its assembly. A wobbly setup or a poorly mounted fixture isn't just an annoyance—it's a safety hazard that can lead to damaged stock and potential accidents. This guide breaks down the essential steps for both freestanding and wall-mounted rails, making sure you get a secure, professional-level installation every single time.
Whether you're quickly setting up a display for a weekend pop-up shop or building a permanent storage system in your studio, getting the installation right from the very beginning is crucial. When done correctly, your rail will handle its maximum stated load without breaking a sweat, staying stable and reliable for years to come.
Assembling Freestanding Rails for Maximum Stability
The good news is that most freestanding clothing rails are designed for a quick, pain-free assembly, often with minimal tools. While the exact steps will differ slightly between models, the basic principles for getting a rock-solid build are always the same. Your goal is a rigid, perfectly balanced frame that won’t sway, even when fully loaded with heavy garments.
Follow these key steps for a sturdy, wobble-free rail:
- Lay Out and Check All Parts: Before you start, unpack everything and lay it out. Cross-reference all the components with the instruction manual to make sure nothing is missing.
- Loosely Connect the Frame: Begin by attaching the vertical supports to the base, then add the main clothing rail pole. At this point, just finger-tighten the screws—enough to hold the frame together but still allowing for adjustment.
- Ensure Everything Is Level: Place the rail on a flat, even surface. Nudge and adjust the frame until it's perfectly square and not leaning to one side.
- Systematically Tighten All Fixtures: Once you're happy with the alignment, go back and fully tighten all the connections. The trick is to work in a criss-cross pattern, much like you would when changing a car tyre. This distributes the tension evenly across the frame and is the secret to preventing any wobbles.
One of the most common mistakes is to fully tighten one bolt before moving on to the next. This can easily pull the frame out of alignment, creating an unstable rail. Always tighten your fixtures progressively and evenly for the best, most stable result.
This decision tree can help you visualise which type of clothing rail pole might be right for your space before you even think about installation.
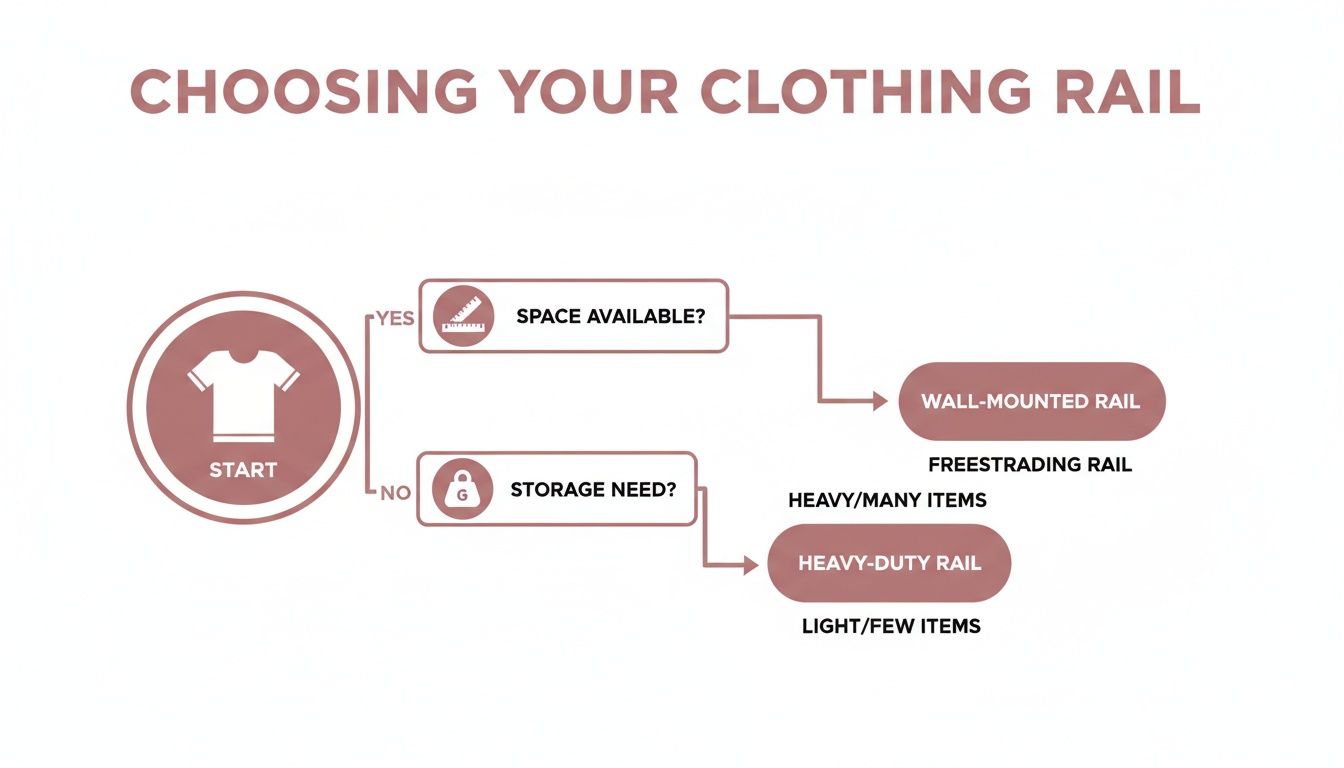
As the flowchart shows, thinking about your available space and the weight of your garments is the first step in narrowing down your options, from simple freestanding rails to more robust heavy-duty models.
Mastering Wall-Mounted Rail Installation
Mounting a rail directly to a wall is a fantastic way to create a sleek, space-saving storage solution, but it does require a bit more know-how. The entire security of the installation hinges on using the right fixings for your specific wall type. Getting this wrong isn't an option—it's a major safety risk.
Identifying Your Wall Type
- Plasterboard (Drywall): This is the most common wall type in modern UK homes. A quick tap will produce a hollow sound. For a secure fix, you absolutely must find the wooden studs behind the plasterboard, or use specialised heavy-duty plasterboard anchors.
- Solid Brick or Blockwork: Typically found in older properties and on external walls. It feels solid when you tap it, and drilling will produce a fine red or grey dust. Standard wall plugs and screws are perfect for this job.
Essential Tools and Techniques
To guarantee a level and secure installation, a few tools are non-negotiable. A stud finder is your best friend when working with plasterboard, as it helps you locate the strong wooden supports for mounting. And always, always use a spirit level to mark your drill holes—this ensures your clothing rail pole will hang perfectly horizontal, not at a slight, unprofessional angle.
For a more detailed look at the different kinds of fittings available, this guide on clothes rails and brackets is a great resource. Picking the right bracket is just as important as the installation itself. Never take a guess on wall plugs; matching the fixing to the wall is the single most important step for a safe and durable wall-mounted rail.
Making the Most of Your Rail: Accessories and Smart Care
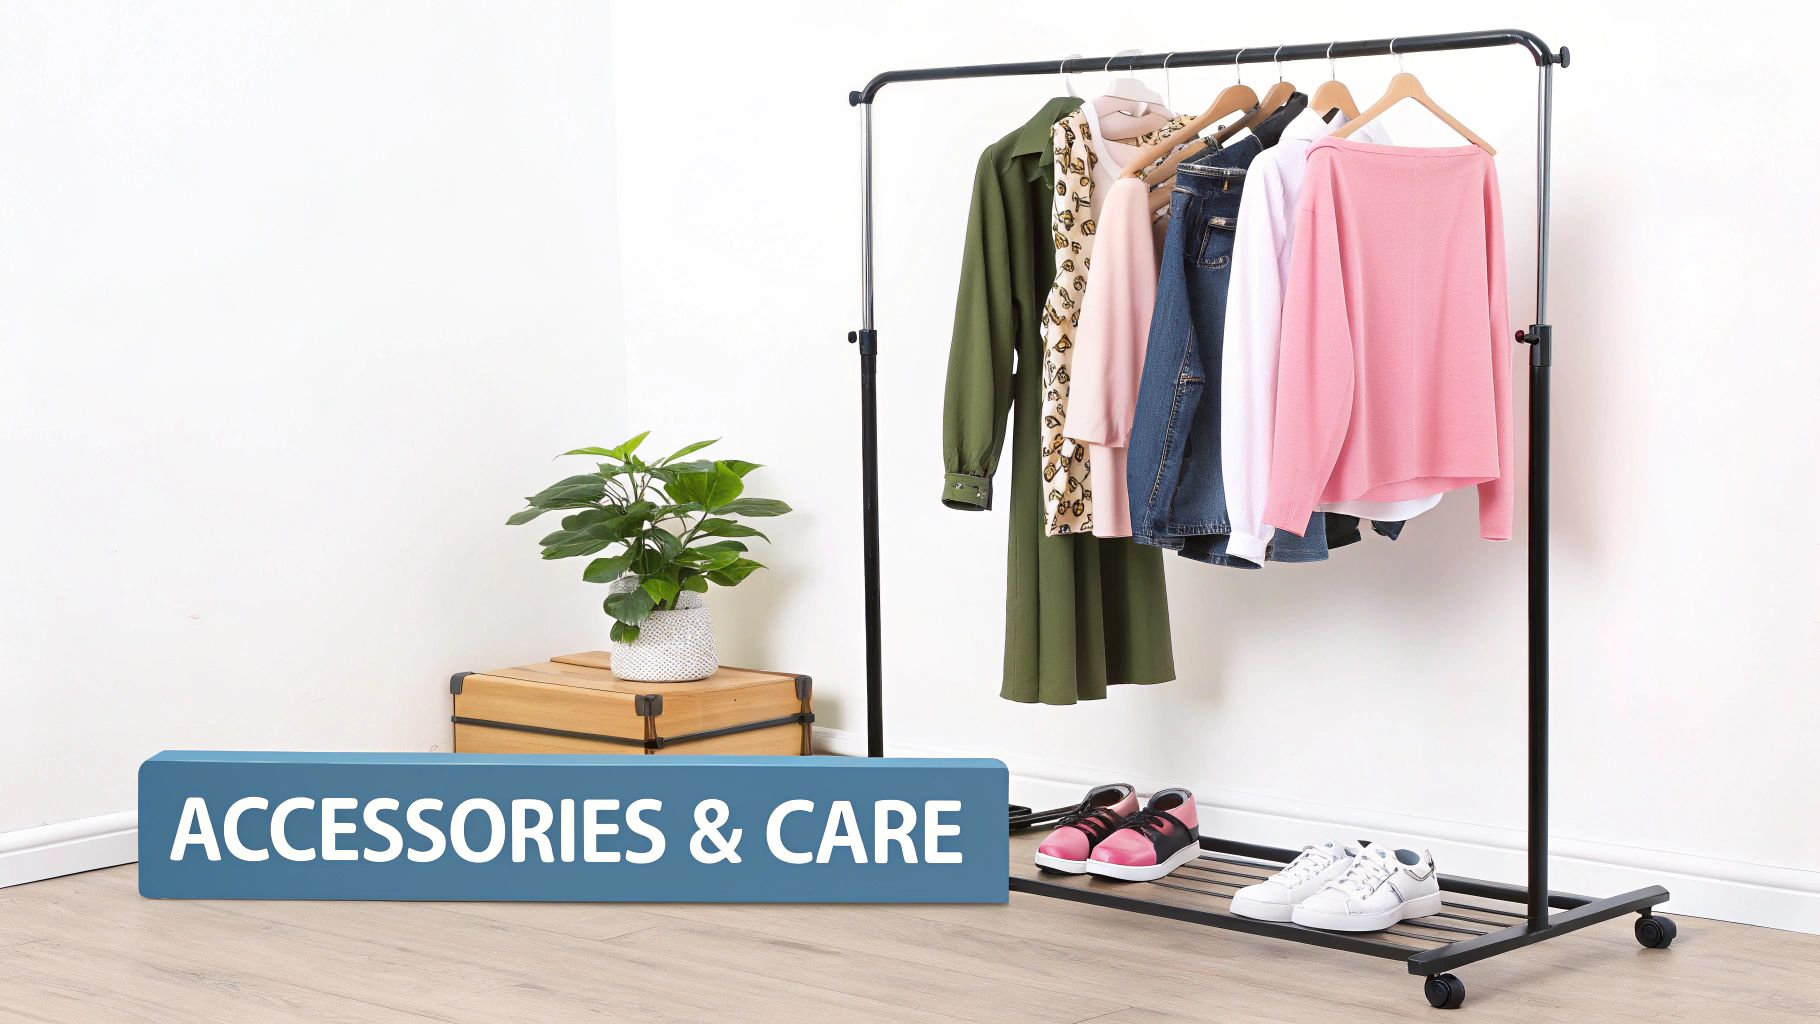
A clothing rail pole on its own is a solid workhorse, but its real power comes alive when you start adding the right accessories. Think of the basic rail as a blank canvas. With a few smart additions, you can transform it from a simple hanging bar into a seriously efficient, modular system that's perfectly suited to your retail space, workshop, or stockroom.
These clever components help you dramatically increase your storage capacity, smooth out your workflow, and bring a whole new level of order to how you manage garments. It means one piece of kit can adapt and grow with your needs, making it a much more valuable long-term asset.
Supercharge Your Rail with Key Accessories
Accessories are simply problem-solvers. Whether you’re struggling to hang different garment lengths or trying to categorise a mountain of stock, there’s an add-on designed to help. These simple but effective tools are a must for anyone wanting to get the absolute most out of their clothing rail.
Here are a few of the most popular and impactful accessories you'll find:
- Height Extenders: An absolute essential if you handle long items like maxi dresses, formal gowns, or full-length coats. These simple extensions stop your valuable garments from bunching up or dragging on the floor, keeping them in perfect condition.
- Middle Bars: This is probably the quickest win for increasing hanging space. A middle bar instantly adds a second tier, effectively doubling your rail's capacity for shirts, trousers, and skirts—all without taking up an inch more of your precious floor space.
- Rail Dividers: Anyone working in retail or a busy stockroom will tell you how vital these are. The dividers just clip onto the pole, allowing you to neatly separate your stock. You can organise by size, colour, or collection, making it faster for staff to find items and much easier for customers to browse.
These add-ons aren’t just about cramming more in; they’re about creating a smarter, more logical system. For more practical ideas, our guide to clothes rail storage is packed with useful tips. In a professional setting, that level of organisation is critical—time saved is money earned.
Protect Your Investment with Proper Maintenance
Just like any professional tool, your clothing rail needs a bit of regular care to keep it performing reliably for years. A simple maintenance routine protects your investment, helps you avoid unexpected breakages, and keeps your equipment looking sharp. If you let basic upkeep slide, you're inviting rust, wobbles, and a much shorter lifespan.
A well-maintained clothing rail pole speaks volumes about your professionalism. It shows a commitment to quality and organisation that extends from the backroom to the shop floor, ensuring safety and protecting your stock from damage.
Regular checks are quick, easy, and can save you a world of trouble down the line. By building a few simple tasks into your routine, you’ll keep your rails in top working order, always ready for the demands of a busy environment.
A Simple Maintenance Checklist
Just follow this straightforward checklist to keep every clothing rail pole in your business in prime condition.
- Clean the Finish Regularly: For a chrome rail, a quick buff with a soft, dry cloth gets rid of fingerprints and dust. If you have a powder-coated finish, a simple wipe with a damp cloth will do the trick. This stops dirt from building up and keeps things looking professional.
- Inspect All Fittings: About once a month, give all the screws and bolts a quick check to make sure they’re tight. The constant weight and movement of clothes can cause them to loosen over time. A quick tighten is all it takes to make the rail sturdy again.
- Check the Castors: If your rail is on wheels, make sure they spin freely. Pull out any tangled hair, thread, or other debris that might be stopping them from moving smoothly. A tiny drop of lubricant will sort out any squeaking and ensure the rail glides effortlessly.
Your Questions, Answered
Even after you've done your homework, a few specific questions always pop up when you're about to invest in a new clothing rail. Let's tackle some of the most common queries we hear from professionals, so you can choose and use your equipment with complete confidence.
How Do I Figure Out the Weight Capacity I Need?
Working out the right capacity is less about guesswork and more about understanding what you'll be hanging. A sagging rail is an accident waiting to happen, so it's a step you can't afford to skip.
A great way to start is by thinking in terms of garment types. Here’s a handy rule of thumb:
- Allow roughly 1 kg for every three or four lightweight items like t-shirts or blouses.
- Budget around 1 kg for a single pair of trousers or a standard dress.
- Set aside 1.5-2 kg for a single heavy item, like a big winter coat or a formal wool suit.
Once you’ve got a rough total, think about your environment. If you're running a busy stockroom or a retail floor where garments are packed in tightly, always aim higher. Choosing a heavy-duty clothing rail pole rated for 75-100 kg gives you a safety buffer. Trust me, it’s far better to have more capacity than you need than to have a rail fail at a critical moment.
Can I Put Wheels on a Static Clothing Rail?
In most professional setups, yes, but it all comes down to the rail's design. Most high-quality rails are built for this kind of flexibility, with uprights that have threaded inserts ready to take either standard feet or screw-in castors.
However, if your rail just has simple plastic caps pushed into the ends of the tubes, you won't be able to add wheels without some serious DIY. Before you buy a set of castors, double-check the product specs or give your supplier a call to make sure they're compatible and have the right thread size. The wrong wheels can throw off the rail's entire stability.
The ability to adapt is a key difference between professional and domestic rails. Pro-grade systems are often designed as modular kits that can be customised with accessories, while most domestic rails are built for one fixed purpose.
What's the Real Difference Between a Chrome and a Powder-Coated Finish?
The main differences are in the look, feel, and how they perform in different settings.
A chrome finish is that classic, mirror-like shine you see in most high-end shops. It's made by electroplating a very thin layer of chromium onto the steel. The result is an exceptionally hard surface that’s brilliant at resisting scratches from hangers being dragged back and forth all day.
A powder-coated finish—usually in black, white, or other colours—is created differently. A dry powder is applied to the steel using an electrostatic charge and then baked on. This creates a tough, modern-looking skin that’s fantastic at resisting chipping and corrosion. Chrome is the timeless choice for a busy shop floor, whereas powder-coating gives you more aesthetic freedom to match a brand's specific colour scheme.
What’s the Best Way to Mount a Rail on a Plasterboard Wall?
Mounting a rail to plasterboard demands the right fixings—get this wrong, and you risk the whole thing coming down. The most secure method, without a doubt, is to use a stud finder to locate the wooden supports behind the plasterboard and screw your brackets directly into them.
If your bracket positions just don't line up with the studs, you’ll need to use heavy-duty plasterboard anchors that are designed to spread the load. Spring toggles and self-drilling metal anchors are both excellent choices. Whatever you do, never use standard plastic wall plugs for this job. They simply aren't designed for the kind of weight a loaded clothing rail exerts and will pull straight out of the wall.
At Display Guru, we build robust, professional-grade garment rails and accessories designed for the real-world demands of retail, theatre, and design studios. Explore our full range of durable display solutions to find the perfect fit for your space.