


Your Essential Guide to Choosing the Perfect Rail for Wall Displays
Struggling with a cramped floor plan? A wall-mounted rail is more than just a bit of hardware; it’s a secret weapon for reclaiming your space and taking your displays to the next level. Think of it as a foundational piece for creating dynamic, eye-catching presentations in any retail shop or creative studio.
Why Wall-Mounted Rails Are a Display Game-Changer
Look at your walls. Right now, they're probably just holding up the ceiling. But what if you saw them as untapped potential? In any space where presentation is key—from a busy high-street boutique to a home sewing room—every square metre matters. Freestanding racks and other furniture eat up that precious floor area, often making a room feel cluttered and difficult to navigate.
Wall-mounted rails completely flip that script. By making smart use of your vertical real estate, they open up the entire room. This isn't just about saving space; it's about transforming a flat, boring wall into a genuine focal point. Suddenly, you have a dedicated stage to showcase your best pieces, tell a visual story, or simply organise your work with professional polish.
Maximising Your Vertical Space
The most obvious win when you install a wall rail is freeing up your floor. This immediately clears walkways, improves the flow of foot traffic in a shop, and creates a more spacious, welcoming atmosphere. For a designer or tailor, it means more room for cutting tables, machines, and client fittings.
Here’s what that looks like in practice:
- Better Layout Flexibility: With clear floors, you can move other fixtures and furniture around easily, adapting to new collections or seasonal promotions without a major headache.
- A Smoother Customer Journey: In a retail environment, a less cluttered floor is simply easier for people to browse, making their shopping experience far more enjoyable.
- A Clean, Minimalist Look: Wall-mounted solutions help create a tidy, organised aesthetic that puts the focus exactly where it should be: on your products.
A well-placed wall rail does for a room what good posture does for a person. It instantly elevates the space, making it appear more organised, confident, and purposeful. It’s an architectural detail that actively works for you.
Boosting Your Visual Merchandising
A wall rail is a seriously powerful tool in the art of visual merchandising. It’s far more dynamic than a static shelf, allowing for a fluid, engaging presentation that grabs attention and puts your star items in the spotlight.
You can use a rail to introduce a new colour story, feature a hero piece from your latest collection, or create an "outfit of the day" that inspires shoppers to buy the whole look. This approach turns a simple storage fixture into an active part of your sales and branding strategy.
Learning how to arrange garments effectively can make a huge difference to both customer perception and your bottom line. To really get this right, it's worth exploring professional visual merchandising guidelines, which cover everything from colour theory to fixture placement. This knowledge will help you move beyond just hanging clothes and start creating displays with real commercial impact.
Finding the Right Wall Rail for Your Specific Needs
Choosing the right wall-mounted rail can seem daunting, but it really comes down to one simple question: what job do you need it to do? Are you aiming for a clean, minimalist look, trying to maximise your stock capacity, or building a flexible display that can evolve with your collections? The secret is matching the rail's design to its function. Get that right, and you'll create a space that’s both practical and visually stunning.
Think of it like picking the right tool from a toolbox. You wouldn’t use a fine-tipped artist's brush to paint a whole room. In the same way, a delicate, slimline bar just won't cut it for a stockroom overflowing with heavy winter coats. By getting to grips with the main types of rails available, you can make an informed choice that perfectly suits your professional or creative goals.
This decision-making flowchart breaks it down, helping you pinpoint whether your main driver is optimising space or enhancing your display.
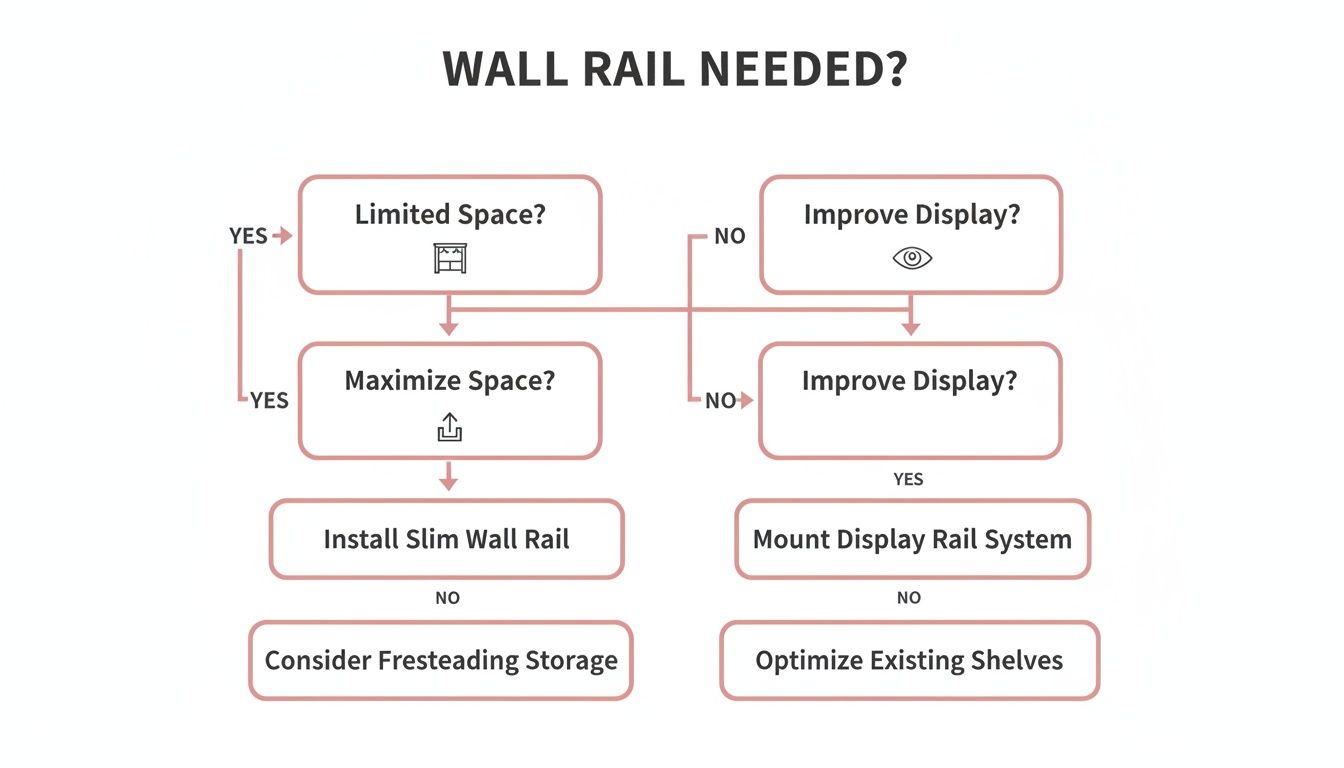
As you can see, your starting point—whether you're short on space or focused on visual merchandising—points you directly to the best rail for the job.
Exploring Core Wall Rail Designs
Let's dive into the most common designs and see how they work in the real world. We'll start with the basics and build up to more advanced systems, making sure you find the perfect match.
-
Straight Bar Rails: These are the epitome of simplicity and elegance. A single, horizontal bar creates a clean, unobtrusive line that’s perfect for minimalist boutiques, contemporary homes, or for showcasing a single "hero" product. Their real strength is in their understated design, which lets the clothes do all the talking.
-
U-Shaped and Return Rails: When capacity is your top priority, these are your go-to solutions. The ‘U’ shape gives you three hanging surfaces, while a return rail sticks out from the wall before making a 90-degree turn. They’re the workhorses of the industry, ideal for stockrooms, back-of-house areas, or busy tailoring workshops where keeping lots of garments organised is a daily challenge.
-
Multi-Arm or Waterfall Rails: Perfect for creating dynamic, layered displays. These rails have several arms that cascade downwards or jut outwards, letting you show off a whole range of items in a small footprint. A retailer might use a waterfall rail to display a full-size run of a popular shirt, making it incredibly easy for customers to see every option at a glance.
To help you decide, here’s a quick comparison of how each rail type stacks up for different professional and creative uses.
Wall Rail Type Comparison for Different Applications
| Rail Type | Primary Material | Best For | Key Feature |
|---|---|---|---|
| Straight Bar | Stainless Steel, Black Iron | Minimalist retail, home wardrobes, single-item features | Clean lines, lets products stand out |
| U-Shaped/Return | Heavy-Duty Steel | Stockrooms, workshops, high-capacity retail | Maximises hanging space in a compact area |
| Waterfall/Multi-Arm | Chrome, Coated Metal | Displaying size ranges, showcasing collections | Tiered, cascading arms for easy browsing |
| Modular/System | Aluminium, Steel, Wood | Dynamic retail, creative studios, pop-up shops | Fully customisable and adaptable |
This table shows there’s a specific solution for every need, from pure function to high-end visual merchandising.
The Power of Modular and System Rails
For ultimate creative control, nothing beats a modular system. Think of them as building blocks for your walls. Systems like gridwall or slotwall use panels with grooves or a grid, allowing you to attach different rails, hooks, and shelves in any arrangement you can imagine.
A modular rail system transforms a static wall into a dynamic canvas. It’s an adaptable solution that empowers visual merchandisers to experiment, evolve, and tell new stories without the need for a complete refit.
This kind of flexibility is priceless in retail, where displays must be updated frequently to keep things fresh and exciting. A tailor could even use a modular setup to create a bespoke workstation, with rails for current projects, shelves for patterns, and hooks for tools, all perfectly organised on a single wall.
In the UK, the demand for strong, reliable fixtures is a constant across professional sectors. In a way, it mirrors the wider construction market—for instance, the road and railway construction sector was forecast to hit £18.2 billion in 2025. This shows a broad appreciation for dependable, well-engineered solutions. That same quality is just as vital for a garment rail installation as it is for national infrastructure.
For more ideas on how to improve your space, you can explore the variety of wall clothes racks and their benefits to get further inspiration. And if you're looking for modern alternatives to traditional rods for other purposes, it's worth checking out the sleek functionality of curtain track wall mount systems, which offer a versatile way to partition spaces or hang window treatments.
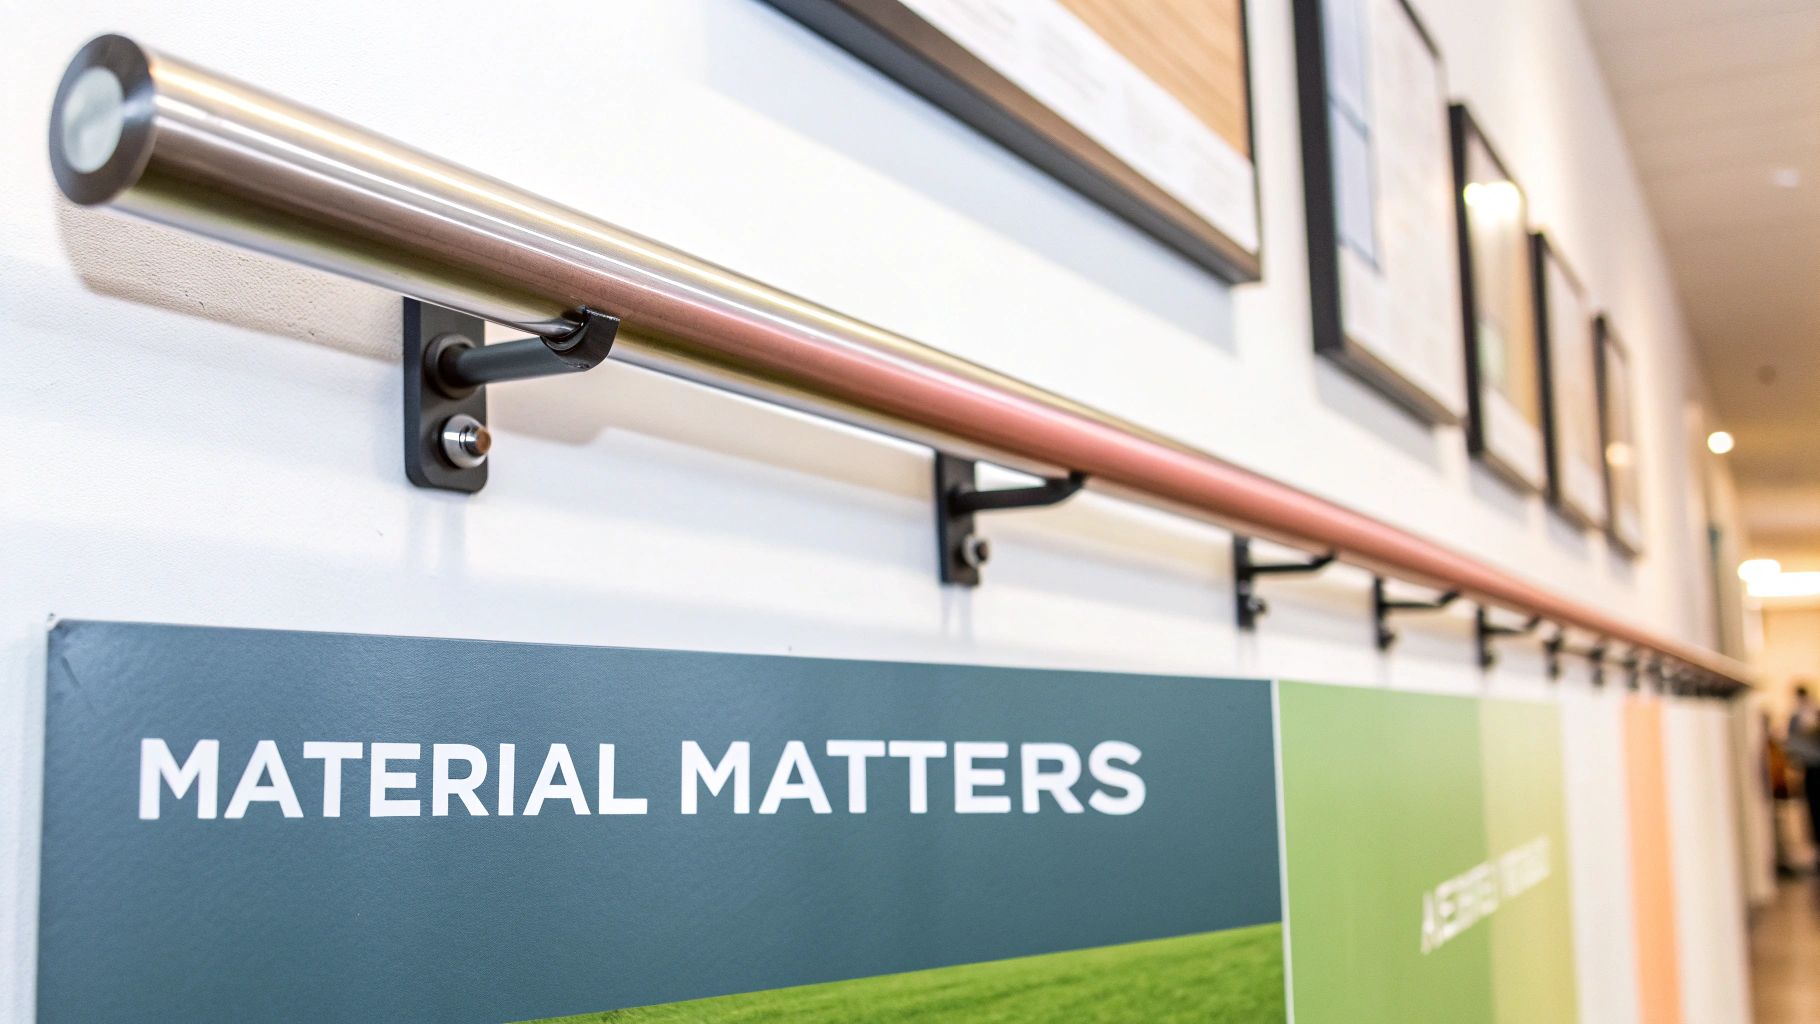
How Material and Finish Impact Performance
Choosing the material for your wall rail is a lot like selecting the right fabric for a bespoke suit. It’s a decision that dictates not only how the rail looks, but also its core strength, how long it will last, and whether it’s right for its environment. The material is the very foundation of its performance, ensuring it can stand up to the demands of a busy retail floor or a bustling studio for years.
A rail isn't just a bar on the wall; it's a working piece of your space's infrastructure. Its physical properties have a direct impact on its load capacity and longevity. A flimsy choice might look alright at first, but it will quickly start to bend or even fail under the weight of heavy stock. A robust selection, on the other hand, gives you peace of mind and lasting value.
Core Materials and Their Strengths
Every material brings a unique mix of strength, resilience, and style to the table. Getting to grips with these differences is the key to picking the perfect rail for your specific needs, whether you're prioritising pure ruggedness or a more polished aesthetic.
- Industrial Steel Pipe: This is the heavyweight champion of wall rails. Known for its raw, rugged appeal, steel pipe delivers exceptional strength. It's the ideal choice for stockrooms, industrial-themed boutiques, or for hanging seriously heavy items like winter coats and leather jackets. Its durability is simply unmatched for high-traffic, demanding environments.
- Stainless Steel: Valued for its sleek look and impressive resistance to corrosion, stainless steel is a brilliant choice for humid spaces. If your rail is going to be in a laundry room or near a clothing steamer, stainless steel will prevent rust and keep its clean look without needing a lot of upkeep.
- Polished Chrome: For that classic, high-shine finish, polished chrome is a perennial favourite. It offers good durability and a reflective surface that brightens up a space, making it a popular go-to for traditional retail settings where a clean, professional appearance is everything.
Think about it this way: just as our national infrastructure relies on durable materials to last, so does your display setup. The UK's railroad market, which hit USD 14,210.5 million in 2024, is built on the same principle of using robust, long-lasting rails designed for constant, heavy use. You can read more about the importance of durable infrastructure over at Spherical Insights.
How Finishes Shape Your Brand Story
The finish on a wall-mounted rail is the final touch that ties your display into your wider interior design and brand identity. It’s where practicality meets personality, allowing you to create a space that feels cohesive and memorable. A finish can either make a rail a subtle background player or a bold statement piece.
A rail's finish is its voice. A raw steel finish whispers industrial authenticity, while brushed brass speaks of quiet luxury. Choose a finish that communicates your brand's unique message clearly and consistently.
Let's look at a few popular options:
- Matte Black: This finish gives you a modern, sophisticated, and incredibly versatile look that works with almost any colour scheme. It's fantastic at hiding fingerprints and creates a strong graphic line against lighter walls, which really makes the garments pop.
- Brushed Brass: For a touch of warmth and understated elegance, brushed brass is an excellent choice. It avoids the high shine of polished brass, offering a softer, more contemporary feel that works beautifully in boutique settings or high-end creative studios.
- Raw Steel: By embracing an authentic, industrial aesthetic, a raw steel finish shows off the natural texture and colour of the metal itself. It’s perfect for brands that value craftsmanship and a bit of an edgy, urban feel.
For anyone planning to display particularly heavy collections, such as bridal gowns or extensive outerwear, taking a look at our guide to heavy-duty rails will give you deeper insights into making the right choice.
A Practical Guide to Safe and Secure Installation
You can pick the most beautiful rail in the world, but if it’s not installed properly, it’s not just a wasted effort—it’s a hazard. Getting your rail securely and perfectly level is where the real work begins, but don't let that put you off. With a bit of know-how, you can achieve a rock-solid, professional finish that keeps your garments safe and your walls intact.
The first thing you absolutely must do is figure out what your wall is made of. It’s the foundation of the whole project. Is it a solid brick or block wall? Or are you dealing with a more modern plasterboard wall, which is essentially a sheet of gypsum fixed to a timber frame? A simple tap test can often tell you what you need to know. A dull, solid thud usually means brick, while a hollow sound points to plasterboard.
This isn't just a trivial detail; it changes everything. Using the wrong fixing for your wall type is like trying to use a tent peg in concrete. It’s the number one reason DIY installations fail.
Matching Fixings to Your Wall Type
Choosing the right hardware isn't just a recommendation, it's non-negotiable. Get this part wrong, and you're setting yourself up for a nasty surprise when the rail gives way under the weight of your stock.
Here’s what you need to know:
- For Solid Walls (Brick, Masonry, Concrete): This is the easy one. A good-quality, heavy-duty wall plug and a solid screw are your best bet. You’ll drill a hole with a masonry bit, pop the plug in, and drive the screw home for a fixing that’s not going anywhere.
- For Plasterboard Walls: You have to be a bit more strategic here. The ideal scenario is to find the wooden studs behind the board with a stud finder and screw your brackets directly into them. If that’s not an option, you absolutely must use specialist plasterboard fixings like toggle bolts or self-drilling anchors. These are designed to expand behind the board, spreading the load and creating a secure anchor point.
Safety First: Whatever you do, never use standard plastic wall plugs in a plasterboard wall for a garment rail. They simply aren’t designed to handle the downward pulling force and are almost guaranteed to fail over time.
For a deeper dive into getting this right, this comprehensive railing on wall installation guide is packed with expert advice on materials and safe installation practices.
Essential Tools and Getting It Right First Time
With your wall type identified and the right fixings ready to go, a few essential tools will make the difference between a professional job and a botched one.
You will need:
- A Spirit Level: This is your most important tool. A wonky rail looks terrible and causes all your hangers to slide to one end, creating a dangerous imbalance of weight.
- A Stud Finder: An absolute lifesaver for plasterboard walls. It electronically locates the timber studs, showing you exactly where the strongest mounting points are.
- A Tape Measure and Pencil: Remember the old carpenter's motto: "measure twice, drill once." It’s as true here as it is anywhere else.
- A Power Drill: Make sure you have the right drill bits—masonry bits for brick and concrete, and standard wood bits for timber studs.
The process itself is pretty straightforward. First, decide on your desired height. Use your level and tape measure to mark the position for the first bracket, using a stud finder if you're on plasterboard. Drill a pilot hole, install the fixing, and loosely attach the bracket.
Now, place the rail onto that first bracket and rest your spirit level on top of the rail. Adjust the loose end until the bubble is perfectly centred, then mark the wall for the second bracket. Drill and fix it just like the first. With both brackets loosely mounted, you can make any final tiny adjustments before tightening all the screws. Taking the time to get your brackets and fixings right is a crucial part of the process, as detailed in our complete guide to clothes rails and brackets.
Finally, always have the load capacity in mind. Your setup is only as strong as its weakest link—be it the rail, the fixings, or the wall itself. It’s always better to err on the side of caution and avoid overloading the rail. That’s the key to a safe and long-lasting display.
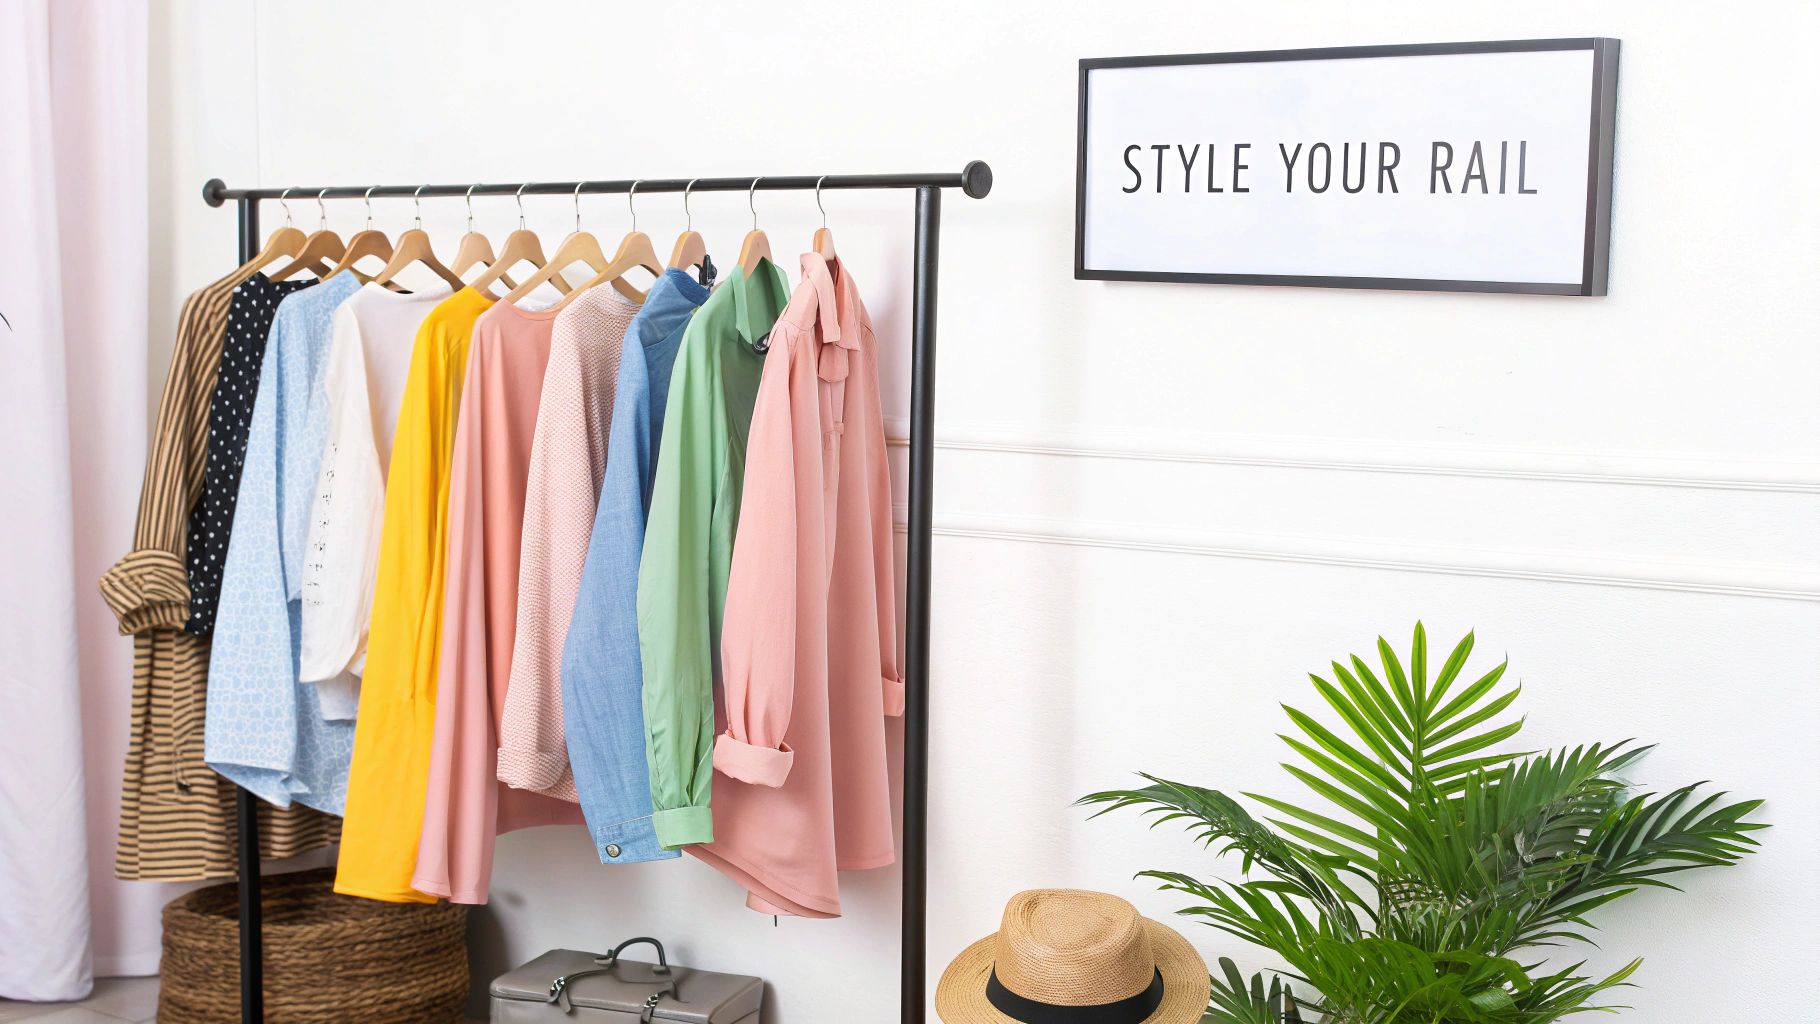
Styling Your Wall Rails for Maximum Visual Impact
So, your rail is securely on the wall. The technical part is over, but this is where the real fun begins. A wall rail is so much more than just a place to hang things; it’s a blank canvas, a stage waiting for you to tell a story. Whether you’re merchandising a boutique, organising a creative studio, or designing a minimalist open wardrobe at home, how you style that rail makes all the difference.
This is your chance to turn a functional bit of hardware into a stunning visual feature. When you stop thinking about it as simple storage and start seeing its potential, you can create displays that don't just look incredible but also pull people in and even drive sales. The secret is to borrow a few tricks from the world of design—thinking about colour, rhythm, and narrative.
Merchandising Techniques for Retail Success
In a shop, your wall rail is your silent salesperson. A thoughtfully styled display can literally stop customers in their tracks, draw their eye, and invite them to come and have a feel. It’s about creating an experience, not just showing off your stock.
Here are a few professional techniques to get you started:
- Colour Blocking: This is a classic for a reason. Grouping garments by colour creates bold, clean blocks of visual interest that are impossible to ignore, even from across the room.
- Capsule Collections: Dedicate a rail to a curated story—a "weekend away" collection, perhaps, or "office essentials." This helps customers visualise a complete look and often encourages them to buy multiple pieces at once.
- Visual Rhythm: Don't just space your hangers out evenly. Bunch a few key items together, then leave a bit of breathing room before the next piece. This creates a natural rhythm that guides the eye along the rail, just like a piece of music.
Storytelling for Designers and Creatives
If you're a fashion designer, tailor, or costume maker, your wall rail is a powerful storytelling tool. It can offer a fascinating glimpse behind the scenes, turning your workspace into an inspiring gallery of your craft.
Try using your rail to map out a collection as it develops. Hang your mood boards, fabric swatches, and sketches right next to the works-in-progress. It gives clients and collaborators a real, tangible sense of your vision and the hard work that goes into every piece. Of course, a beautifully organised rail of finished garments also works as a brilliant, ready-to-go portfolio.
The need for high-quality display solutions is a big part of the UK’s dynamic creative and retail sectors. It actually mirrors growth in other major industries; for instance, the UK railroad market hit USD 14,636.0 million in 2024 and is expected to climb to USD 21,613.5 million by 2030. This kind of economic momentum fuels demand for professional display equipment in shops and studios everywhere. You can find more market insights on this at Grand View Research.
The Chic Open Wardrobe at Home
The "open wardrobe" isn't just a trend anymore; it's a staple of modern interior design that turns clothing storage into a key decorative feature. A sleek wall rail is the perfect starting point, letting you curate your favourite pieces like your own personal collection.
Think of your open wardrobe rail not as storage, but as a rotating exhibition of your personal style. It’s a chance to celebrate the items you love by putting them on display, rather than hiding them away.
The key here is to be selective. Only hang your most beautiful or most-worn items. To add a bit of personality, mix in stylish accessories like hats and bags for extra texture. One small detail that makes a massive difference is using uniform, high-quality hangers—slim velvet or natural wood hangers instantly create a cohesive, polished look that elevates the whole room.
Whether you're selling clothes or just showing them off, the right styling is everything. For more ideas on taking your space to the next level, have a look at our guide on choosing the best display stands for clothing to go with your wall rails.
Simple Maintenance for Lasting Durability
You’ve invested in a quality wall rail to enhance your space, and a little bit of care will go a long way in protecting it. Keeping your rail looking great and working perfectly is straightforward, ensuring it remains a reliable, eye-catching feature for years to come. Think of it as simple upkeep to protect your investment.
The cornerstone of good maintenance is regular cleaning. For most finishes, all you need is a soft, damp microfibre cloth to wipe away dust and fingerprints. Whatever you do, steer clear of abrasive chemicals or harsh scouring pads—they can permanently ruin the surface of your rail for wall installation.
A Quick Cleaning Checklist
Different materials and finishes need slightly different handling to stay in top condition. Follow these simple tips to prevent damage and keep your rail looking as good as the day you installed it.
- Matte Black: Grab a cloth, dampen it with water, and add a tiny drop of pH-neutral soap. Wipe it down, then dry it immediately with a fresh, soft cloth to avoid water spots and keep that sleek, non-reflective finish.
- Polished Chrome and Stainless Steel: A dry microfibre cloth is perfect for buffing away fingerprints. For a more thorough clean, a dedicated stainless steel cleaner or a simple mix of water and white vinegar works wonders. Just be sure to buff it to a streak-free shine afterwards.
- Brushed Brass: This beautiful finish can tarnish over time if neglected. Clean it gently with a soft cloth and a mild soap solution. It’s best to avoid any polishes with harsh abrasives, as they can scratch the delicate brushed texture.
- Industrial Raw Steel: The main enemy here is rust. To protect an uncoated rail, the most important thing is to keep it dry. You can also apply a thin layer of paste wax or a clear sealant once a year to shield the metal from moisture while preserving its raw, industrial character.
Routine Checks for Long-Term Safety
Beyond just cleaning, it’s smart to do a quick physical check now and then. The daily cycle of hanging and removing items, especially in a busy shop, creates subtle vibrations that can loosen fixings over time.
Think of it like servicing a car—a quick, periodic inspection prevents small issues from becoming major problems. Why not set a calendar reminder to check your wall rail every six months? It’s a simple way to ensure it stays safe and secure.
When you do your check, give each bracket a gentle push to see if there’s any wobble or movement. If anything feels loose, use a screwdriver or Allen key to gently tighten the screws. This five-minute task is the single best thing you can do to guarantee the long-term stability of your display.
If a bracket still feels wobbly after you’ve tightened it, that might signal an issue with the wall fixing itself. It’s crucial to investigate this straight away to prevent any accidents.
Your Wall Rail Questions, Answered
Got a few lingering questions? Perfect. Let's tackle some of the most common queries we hear from professionals and home users alike. This is your go-to reference for clearing up any practical details before you start your project.
What’s the Maximum Weight a Standard Wall Mounted Garment Rail Can Actually Hold?
This is the big one, and the honest answer is: it depends. The real-world strength of your rail comes down to three things: the rail itself, what your wall is made of, and the fixings you use. A heavy-duty steel rail, for example, can often handle 50 kg or more when it's securely anchored into solid brickwork. That’s more than enough for a full stock of winter coats.
Take that exact same rail and mount it onto a plasterboard wall, though, and its safe capacity could plummet to just 15–20 kg. The rail hasn't changed, but the foundation has. Before you hang anything, always check the manufacturer’s guidelines. If you’re planning to display heavy items like bridal gowns or leather jackets, securing the rail directly into wall studs or solid masonry isn't just a good idea—it's essential.
Can I Install a Garment Rail on a Plasterboard Wall?
Absolutely, you can. You just have to be smart about it. The best-case scenario is to find the wooden studs behind the plasterboard with a stud finder and drive your screws straight into them. This gives you a rock-solid anchor point.
But what if the studs aren't where you need them? In that case, you’ll need to use specialised heavy-duty plasterboard fixings. Things like toggle bolts or self-drilling anchors are designed to spread the load by expanding behind the board. They’re a world away from standard fixings.
Crucial Tip: Never, ever try to hang a garment rail on plasterboard using standard plastic wall plugs. They simply can’t handle the downward pull and are almost guaranteed to fail, often with disastrous results for your wall and your stock.
How Do I Choose the Right Height to Mount My Wall Rail?
The perfect height for your rail for wall setup really hinges on what you’ll be hanging. Nailing this detail is key to creating a display that not only looks professional but also keeps your garments off the floor and in perfect condition.
Here are a few trusted guidelines we use all the time:
- For Long Garments: If you're displaying long coats, dresses, or jumpsuits, a mounting height of around 165-180 cm from the floor is the industry standard. This gives everything plenty of room to hang naturally.
- For Shorter Items: For rails that will hold shirts, jackets, or trousers folded over a hanger, 100-120 cm from the floor is typically ideal. It keeps the display neat and easy for customers to browse.
- For Tiered Displays: To really make the most of your vertical space, especially in a retail environment, try stacking two rails. A top rail at 200 cm with a lower one at 100 cm is a classic combination that creates a really dynamic, high-capacity display.
At Display Guru, we specialise in robust, professional-grade garment rails and display solutions built for the real-world demands of retailers, designers, and creatives. Discover the perfect fit for your space by exploring our complete collection of wall-mounted rails.