


A Crafter's Guide to Sewing Cutting Mats
If you're serious about sewing, a quality cutting mat isn't just nice to have—it's the bedrock of every precise project. Think of it as the ultimate protector for your work surfaces, giving you a stable and forgiving base for making clean, accurate cuts with a rotary cutter.
Why a Quality Cutting Mat Is Your Most Important Tool
Let's be honest: a good cutting mat is the unsung hero of the sewing room. Without one, your dining table would be a mess of scratches, and your rotary cutter blades would become dull in a heartbeat. Its main job is to provide a safe, reliable surface that can take a beating from sharp blades, day in and day out.
The real magic is its self-healing surface. It’s not actually magic, of course, but a clever bit of material science. Picture a dense forest of tiny, flexible fibres. When your rotary cutter slices across, it gently parts these fibres. Once the blade passes, they spring right back into place, closing the gap. This clever design keeps the mat's surface smooth and, just as importantly, protects the razor-sharp edge of your blade.
This self-healing feature is what makes a cutting mat indispensable for three key aspects of sewing:
- Accuracy: Those grid lines and angle markings aren't just for show. They guide your cutter, helping you achieve perfectly straight lines and consistent pattern pieces every single time.
- Safety: A good mat has a non-slip surface that grips your fabric, stopping it from shifting around and preventing any dangerous slips while you cut.
- Efficiency: When your cutter can glide smoothly across a self-healing surface, you can work much faster and with far less frustration.
As more people embrace crafting, these mats have become a workshop staple. The global market for self-healing cutting mats is valued at around USD 16.76 billion and is expected to grow even more, which shows just how vital they are for hobbies like sewing and quilting in the UK and worldwide.
Just as a great cutting mat is crucial for sewing, having the right foundation is key to any creative hobby. For a wider perspective on starting out, you might find a guide on essential art supplies for beginners helpful. At the end of the day, investing in a proper cutting mat is a direct investment in the quality and sheer enjoyment of your craft.
Finding the Perfect Size Mat for Your Space and Projects
Choosing the right size for your sewing cutting mat isn't about finding the single "best" option, but the best one for you. It really comes down to two things: the size of your workspace and the kind of projects you love to make.
A mat that’s too small for your fabric is a recipe for frustration, forcing you to constantly stop and reposition everything. On the other hand, a huge mat can completely swallow up a small craft corner, making the space feel cramped. The trick is to strike that perfect balance—one that helps your creative process, not hinders it.
Think about it: trying to cut out a long dress panel on a tiny A4 mat would be a nightmare. You’d spend more time shuffling the fabric around than actually cutting. For those with a compact sewing nook or who focus on smaller crafts like appliqué, a portable A3 or A2 mat is often a brilliant choice. They’re big enough for most pattern pieces but can be tucked away easily.
But if you’re lucky enough to have a dedicated sewing room, investing in a large A1 or even A0 mat to live on your cutting table is an absolute game-changer.
Matching Mat Size to Your Sewing Ambitions
The biggest influence on your choice will be the type of sewing you do. A quilter, for instance, needs a large, seamless surface for cutting long strips of fabric and squaring up big quilt blocks. For them, an A1 mat is practically a necessity. A dressmaker will also thank their past self for choosing a bigger mat when they can lay out an entire trouser leg or bodice piece in one go.
To help you get a better sense of what’s what, let's look at the standard sizes available here in the UK and what they're typically used for.
Sewing Cutting Mat Size Guide for UK Crafters
This table breaks down the common cutting mat sizes you'll find, along with their dimensions and the kind of sewing projects they are best suited for.
| Mat Size (UK Standard) | Approx. Dimensions (mm) | Best For |
|---|---|---|
| A4 | 297 x 210 | Tiny projects, trimming small quilt blocks, crafts on the go. |
| A3 | 420 x 297 | Small patchwork, appliqué, most bag-making pattern pieces. A good portable option. |
| A2 | 594 x 420 | The all-rounder. Great for most dressmaking patterns and larger quilt blocks. An excellent starting point. |
| A1 | 841 x 594 | Serious quilters and dressmakers. Ideal for cutting from bolts of fabric and laying out large patterns. |
| A0 | 1189 x 841 | Dedicated sewing tables. Perfect for professional use, cutting multiple pattern pieces, and very large quilts. |
As you can see, there's a size for every type of crafter, from those who make miniatures to those who tackle enormous quilts.
A great piece of advice I always give is to choose a mat that's just a bit bigger than your most common projects. That little bit of extra space around the edges gives you room to manoeuvre your ruler and rotary cutter, which helps prevent your blade from slipping off the mat and ensures you get beautifully clean and accurate cuts every time.

This image really highlights how popular these mats are within the quilting community, which reinforces why having a generously sized mat is so important for so many of us.
At the end of the day, the right cutting mat feels like a natural part of your creative space. If you're looking for more ways to create a workspace that works for you, have a look at our guide filled with practical sewing room ideas.
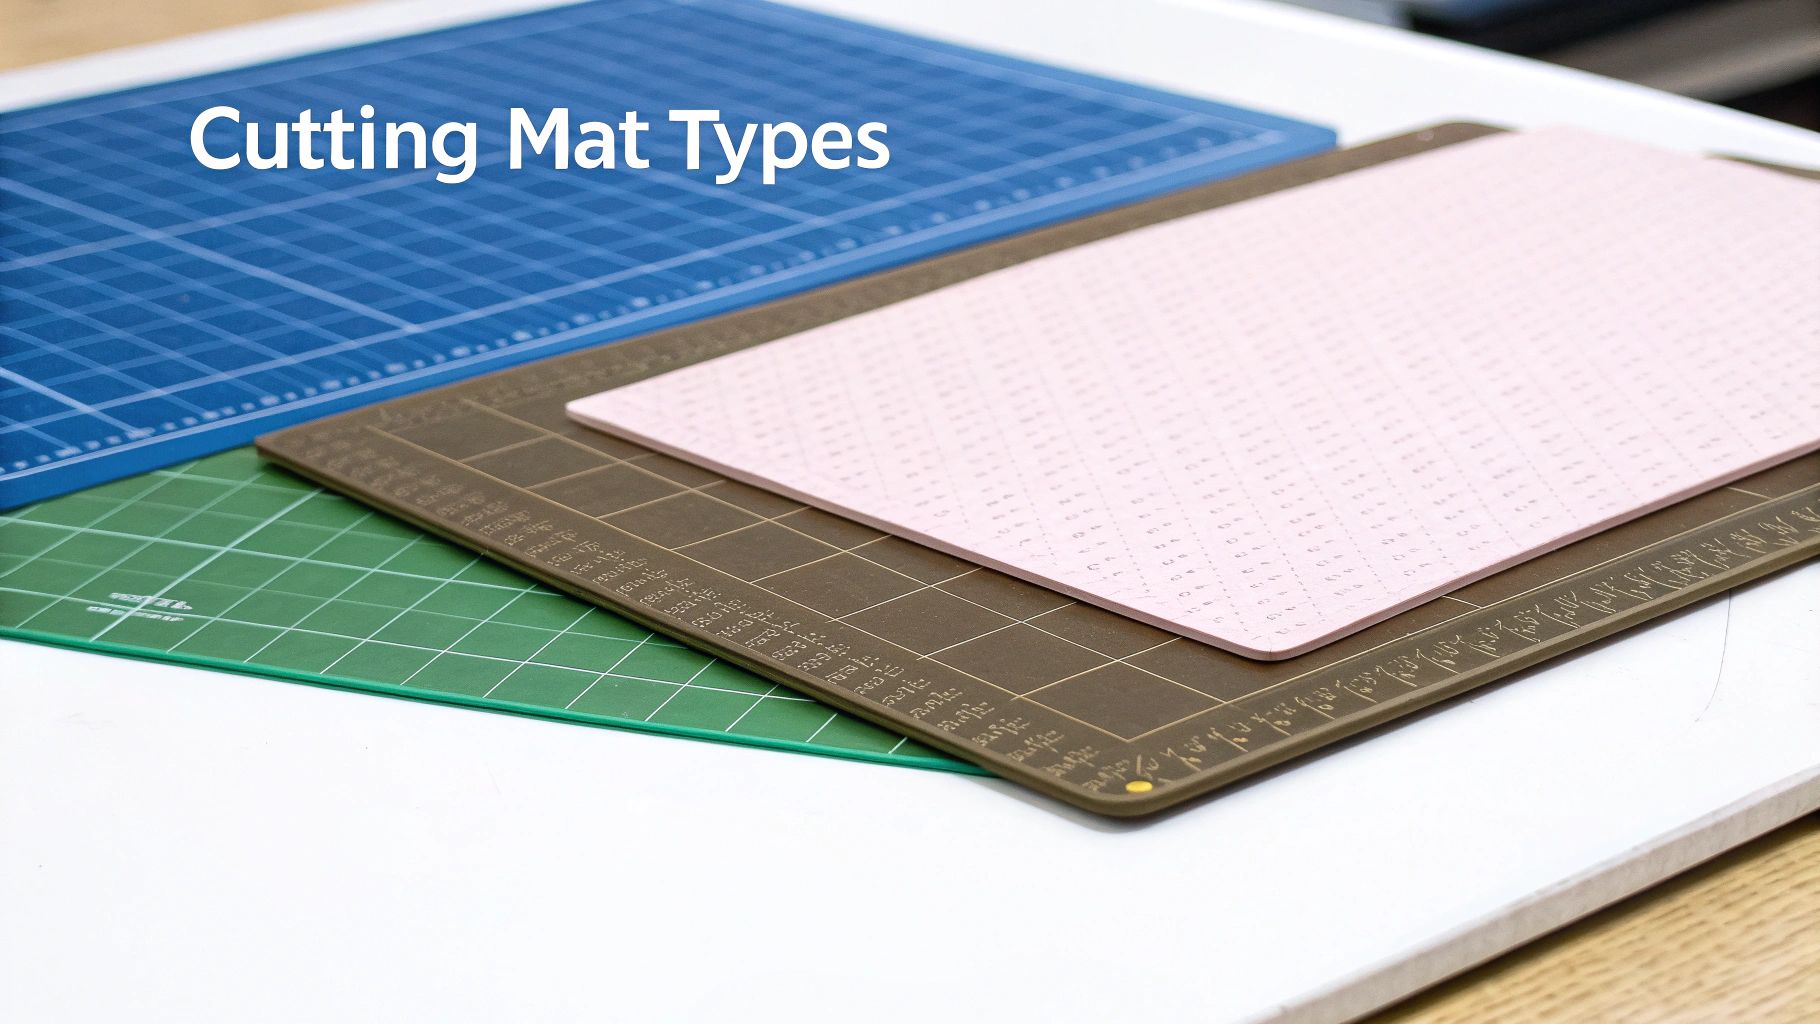
Understanding What Makes a Great Cutting Mat
At first glance, most sewing cutting mats look pretty much the same. But dive a little deeper, and you’ll find that the materials and features of a quality mat can completely change your cutting game, boosting both your accuracy and your speed. Knowing what to look for is the key to investing in a tool that will last for years.
The one feature that is absolutely non-negotiable is a self-healing surface. It’s a bit of a marvel, really. These mats are constructed from a dense composite of Polyvinyl Chloride (PVC), layered together in a specific way. The top and bottom layers are soft, designed to give way just enough for your rotary blade, while the inner core is solid and rigid, stopping the blade from slicing right through.
When you make a cut, the blade gently separates the fibres of this soft outer layer. As soon as the blade passes, the material's natural memory and resilience cause those fibres to press back together, almost magically “healing” the cut. This leaves you with a smooth, reliable surface for your next cut.
In contrast, cheaper, non-healing mats are often just a solid piece of plastic. Every single cut leaves a permanent groove that can catch your blade, throw off your accuracy, and ultimately ruin your fabric.
A self-healing surface does more than just extend the mat's life—it actively protects your rotary cutter blades. A smooth, forgiving surface creates less friction and prevents nicks, which means your blades stay sharper for longer.
The Markings That Matter
Beyond the clever material science, it’s the printed markings that turn a simple slab of PVC into a precision tool. These guides are your roadmap to perfect cuts, taking the guesswork out of measuring and squaring up your fabric. Staying organised is a huge part of any successful project, and using a sewing project planner can help you track everything from your measurements to your fabric swatches.
When you're comparing mats, keep an eye out for these essential markings:
- Grid Lines: A clear, one-inch grid is the standard for a reason. It's indispensable for squaring up fabric and making basic straight cuts. Many mats also include centimetre markings, which is a lifesaver when working with patterns that use metric.
- Angle Guides: If you're a quilter, lines at 30°, 45°, and 60° are your best friends. They make cutting triangles, diamonds, and other geometric shapes for patchwork a breeze, ensuring every piece is perfectly uniform.
- Bias Lines: These are the diagonal lines, usually at a 45° angle, that cross the main grid. They are essential for cutting fabric on the bias, which gives garments a beautiful drape and is necessary for creating your own bias binding.
Once you get to grips with these core components—the self-healing construction and the vital measurement guides—you'll be able to confidently choose the right sewing cutting mat for your craft room.
How Rotary Cutters and Mats Work Together
Think of a rotary cutter and a self-healing mat as the perfect partnership in your sewing room. Honestly, one just doesn't work effectively without the other. This dynamic duo has completely changed the game for cutting fabric, giving us speed, precision, and consistency that shears and scissors simply can't offer, especially when you're cutting through multiple layers at once.
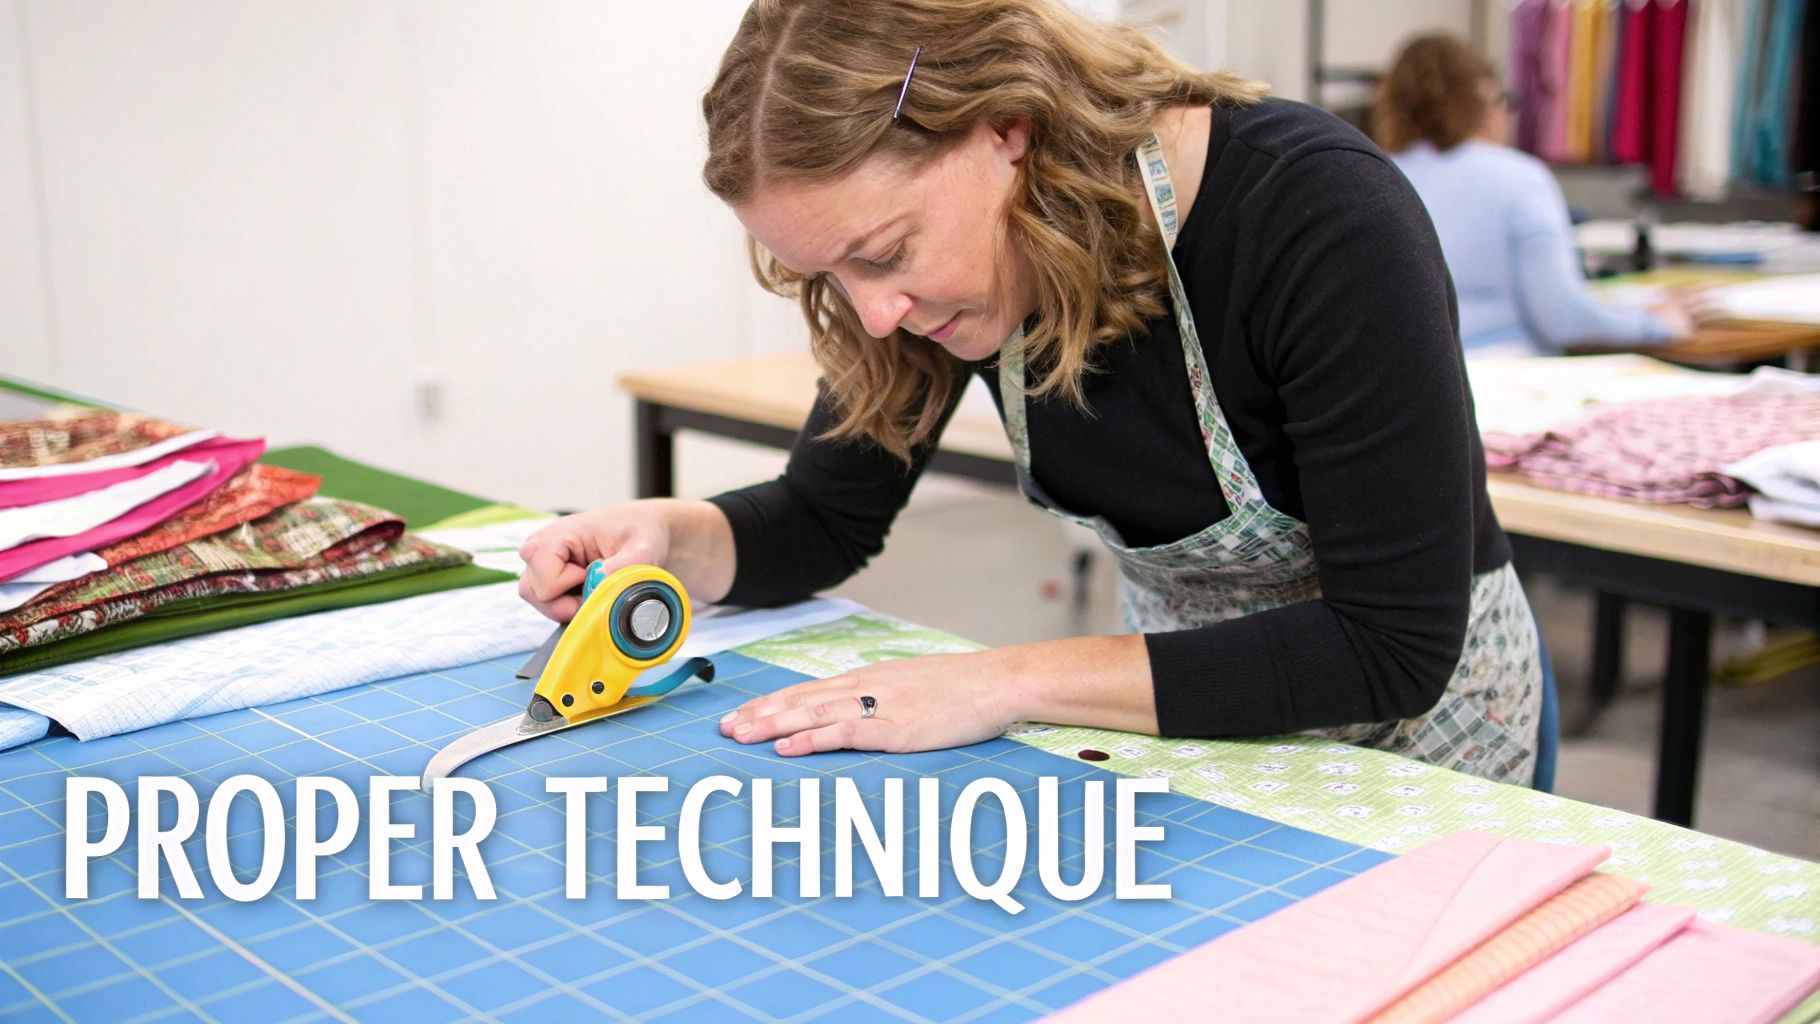
It’s a bit like trying to slice a pizza on a granite worktop. You’d instantly dull your knife and probably scratch the surface. A rotary cutter on a hard table is no different; its razor-sharp blade would be ruined in a single pass. A self-healing mat, on the other hand, has the perfect amount of 'give', letting the blade sink in just enough to slice the fabric without hitting a hard, damaging surface.
This is exactly why sewing cutting mats are an absolute must-have if you use a rotary cutter. The mat’s surface also grips your fabric to stop it from shifting about, while the cutter glides smoothly alongside a quilting ruler for perfectly straight lines. It's this complete system that allows us to achieve professional-level accuracy with incredible speed.
Why the Mat Surface is So Important
A self-healing surface isn't just a nice-to-have; it's essential for two very practical reasons. First and foremost, it protects your blades. A good rotary blade isn't cheap, and cutting on a proper mat massively extends its life by stopping it from dulling. Secondly, the mat prevents the blade from getting stuck in deep grooves, which can yank your cut off course and leave you with wobbly, jagged edges.
This synergy is something crafters across the UK have long understood, with rotary cutters and their companion mats being a staple in most sewing spaces. In fact, the global market for cutting pads is projected to expand from USD 8.5 billion to roughly USD 13 billion by 2033, and UK sewists are a big part of that. We tend to favour mats with clear, precise grid lines and angle markings that take the headache out of cutting complex patterns. You can find out more about the growth of the cutting pads market on DataHorizzon Research.
An Integrated System for Precision
It really helps to stop thinking of your mat, ruler, and cutter as separate tools. Instead, see them as a single, integrated cutting system where each part plays a crucial role.
- The Mat: This is your foundation. It’s stable, measured, and forgiving.
- The Ruler: This is your guide. It provides the unwavering straight edge you need for perfect accuracy.
- The Rotary Cutter: This is your blade. It delivers a clean, continuous cut with very little effort.
When you bring these three together, they practically eliminate the common mistakes that lead to wonky cuts. The grid lines on the mat help you align your fabric perfectly, the heavy ruler keeps your cutting line straight and true, and the blade slices through layers without shifting them. This cohesive approach is the real secret to getting perfectly cut quilt blocks and pattern pieces, every single time.
Keeping Your Cutting Mat in Top Shape for Years to Come
A good sewing cutting mat is a real workhorse in the sewing room, but it's not indestructible. Think of it as a long-term investment in your craft. With just a little bit of care, you can keep that surface smooth and ready for precise cuts for years and years.
It’s all about building good habits. You don't need a complicated routine, just a few simple practices to protect your mat from its two biggest enemies: heat and improper storage.
Get these wrong, and you could end up with a warped, bumpy surface that’s pretty much useless. But get them right, and you'll dramatically extend its working life.
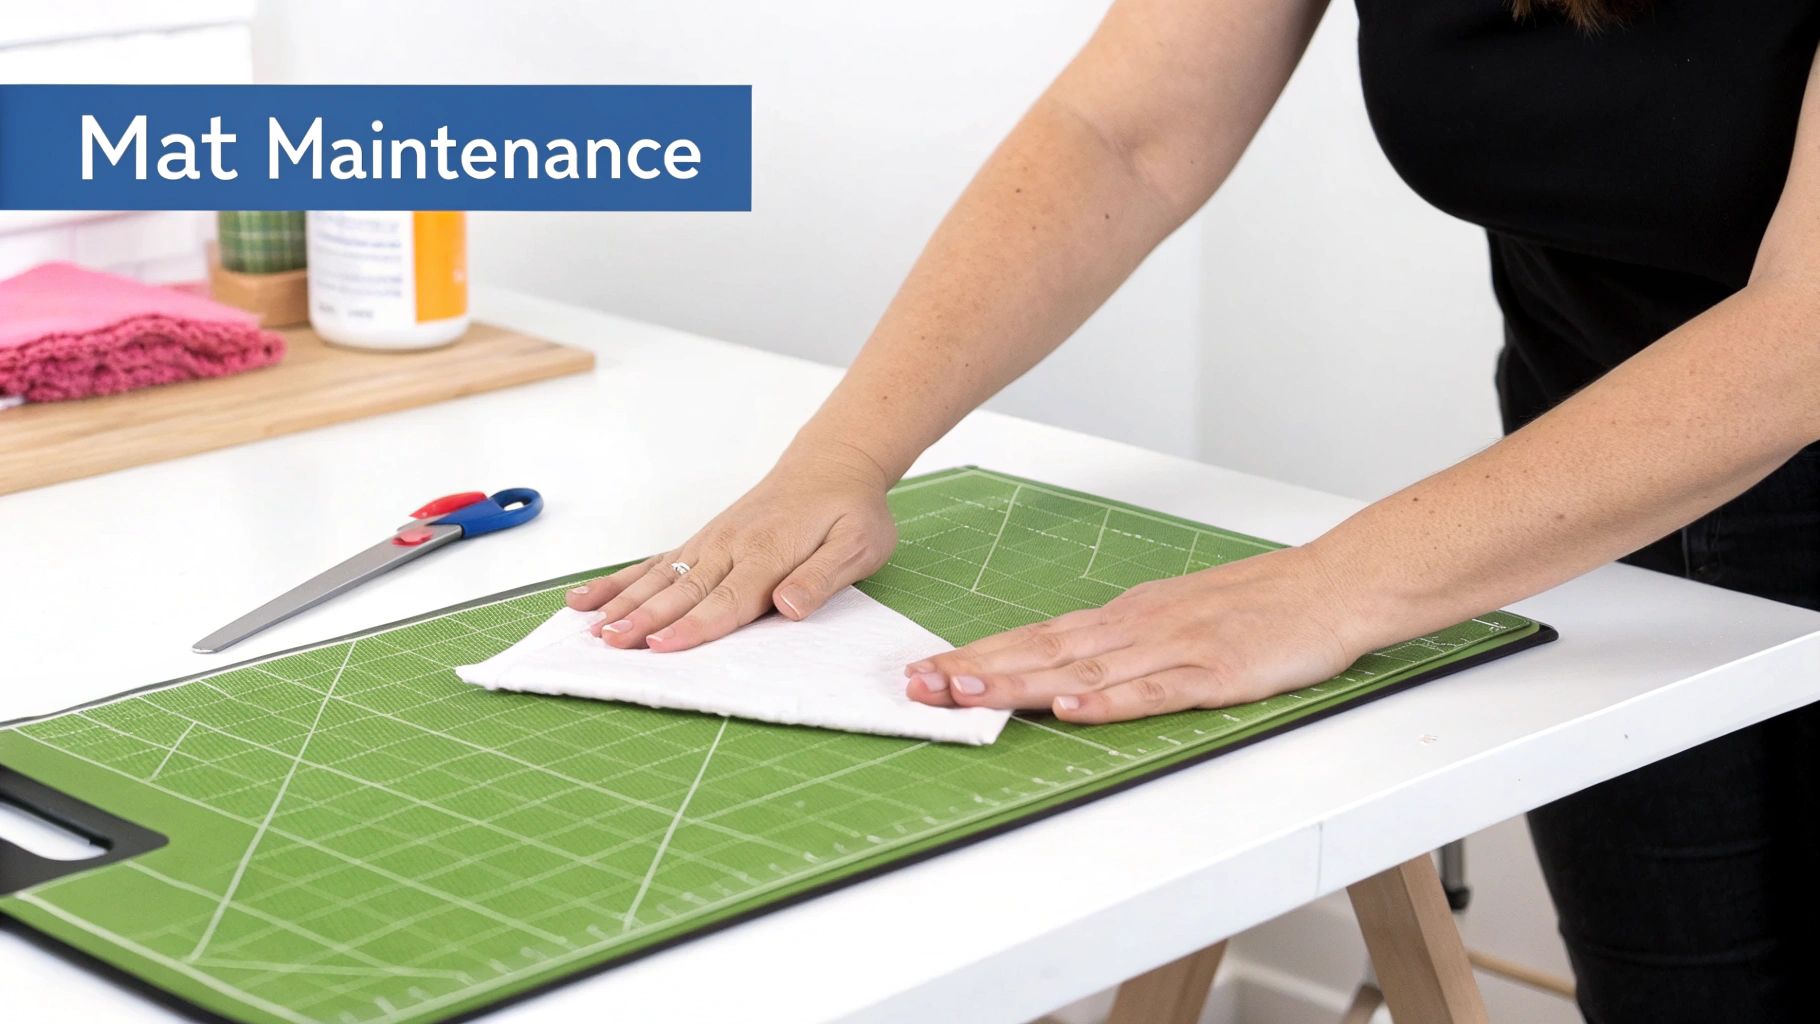
The Golden Rules of Mat Maintenance
These aren't complicated, but they make all the difference. Try to build them into your sewing routine, and your mat will thank you for it.
- Always Store It Flat: This is the absolute number one rule. Never, ever roll your mat or prop it up on its side for long. This will cause it to warp and develop curves that are impossible to get out. Your best bet is to leave it on your cutting table or slide it under a bed or cabinet where it can lie completely flat. If you're looking for clever ways to manage your space, check out these brilliant sewing room storage ideas.
- Keep It Cool: Heat is a cutting mat's worst enemy. It can cause the material to soften, bubble, and warp permanently. This means keeping it away from direct sunlight, radiators, and—crucially—never using your iron on it.
- Clean Gently: After you’ve finished cutting, you’ll notice tiny fibres and lint stuck in the grooves. Most of the time, a quick wipe with a damp, lint-free cloth is all you need. Steer clear of harsh chemical cleaners or anything abrasive, as they can wear away the surface markings and damage the self-healing layer.
There's a persistent myth out there about soaking a mat in a hot bath to 'heal' it. Please don't do this! While a wash can be helpful, hot water is a fast track to a warped mat. If you're washing it, always stick to cool or lukewarm water.
How to Give Your Mat a Gentle Deep Clean
Every so often, your mat will need more than a quick wipe-down to get rid of those stubborn fibres embedded in the cuts. Think of this as a little spa treatment.
First, lay the mat on a flat surface in a bathtub or a large sink. Add a couple of drops of mild washing-up liquid to some cool water.
Next, grab a soft brush—a mushroom brush or even a very soft-bristled nail brush is perfect—and gently scrub the surface in small circles. This motion is brilliant for lifting debris out of the little cuts without being harsh.
Rinse it thoroughly with more cool water and pat it dry with a towel. The final, and most important, step is to lay it perfectly flat to air dry, well away from any heat sources or direct sunlight. Once it’s completely dry, your sewing cutting mat will be as good as new and ready for your next project.
Common Cutting Mat Mistakes and How to Avoid Them
Even the most seasoned sewist can fall into bad habits that shorten the life of their cutting mat. Let's be honest, we've all done it. But recognising these common slip-ups is the key to protecting your investment and making sure your mat stays a reliable partner for years. A well-looked-after mat isn't just about longevity; it's about safer, more precise cuts every single time.
One of the biggest culprits is using too much force with your rotary cutter. There's a persistent myth that leaning into the blade gives you a cleaner cut, but it's just not true. All that extra pressure does is carve deep gouges into the mat—wounds that even a self-healing surface can't mend. This quickly leads to a bumpy, uneven surface that snags your fabric and dulls your blade.
Your rotary cutter should glide, not plough. Let the sharpness of the blade do the work, not the brute force of your arm. If you find yourself white-knuckling the cutter, that's your cue: it's time for a new blade.
Building Better Habits
Another classic mistake is cutting along the same grid lines over and over. It feels efficient in the moment, but you're essentially digging a trench in one spot. This concentrated wear and tear creates permanent grooves. A simple fix? Make a conscious effort to move around the mat and use different areas for your main cuts.
Here are a few other common pitfalls and how to steer clear of them:
- Using the Wrong Blades: A dull or nicked blade is your mat's worst enemy. It chews and tears at the surface instead of slicing cleanly. Stick to sharp, high-quality rotary blades made specifically for fabric.
- Improper Storage: Rolling your mat or leaning it against a wall is a sure-fire way to warp it for good. As we've touched on, it needs to live completely flat and away from direct heat or sunlight. Good sewing room organization is a game-changer here; you can find some great ideas in our guide to creating an efficient workspace.
- Forgetting to Clean: Tiny fabric fibres and threads love to wedge themselves into the cuts on your mat, stopping the self-healing process from working properly. A quick, gentle clean after each project makes a world of difference.
By simply being mindful of these habits, you can dramatically extend the lifespan of your cutting mat. It will reward you by remaining a smooth, dependable surface for all your creative projects. A little bit of care goes a very long way.
Answering Your Top Questions About Sewing Mats
Even after you've got a good grasp of what sewing cutting mats are all about, a few practical questions always seem to pop up. Let's tackle some of the most common queries I hear, so you can use your mat with total confidence and get the best out of this indispensable tool.
When you first unbox a new mat, especially a PVC one, you might notice a distinct plastic-y smell. Don't worry, this is just a harmless process called 'off-gassing', and the scent will disappear on its own in a few days. If you want to speed it along, just leave the mat to air out in a well-ventilated room.
Key Usage and Care Questions
If there's one golden rule, it's this: never, ever use an iron on your cutting mat. The intense heat will instantly warp and bubble the surface, completely ruining its self-healing ability. Always have a dedicated ironing board or pressing mat on hand for any tasks that involve heat.
People often ask about the difference between single and double-sided mats. It’s pretty straightforward: a single-sided mat has markings on one face, whereas a double-sided one has a usable cutting grid on both. This is a brilliant feature, as you often get inches on one side and centimetres on the other, effectively doubling the mat's lifespan and versatility.
Good overhead lighting is essential for accurate cutting, but we’ve all been there – trying to spot a faint pattern line on dark fabric can be a real headache. Making sure your workspace is properly lit with good task lighting can be a game-changer. For more advice, check out our guide on choosing the best lamps for sewing.
Keeping Your Mat's Surface in Top Shape
To keep your mat working perfectly, a bit of regular cleaning goes a long way. For a quick tidy-up, a simple wipe-down with a damp, lint-free cloth is all you need to get rid of any loose fibres.
When it's time for a deeper clean to clear out all those tiny bits of fabric from the cuts, just follow these simple steps:
- Lay your mat flat in a bathtub or a large sink.
- Use cool water and just a few drops of a mild, gentle soap.
- With a soft-bristled brush, gently scrub the surface in a circular motion.
- Rinse it thoroughly with cool water and pat it dry with a towel.
- Finally, lay it completely flat to air dry, well away from any heat sources or direct sunlight.
Sticking to this simple routine will do wonders for preserving your mat’s self-healing powers, ensuring it remains a trustworthy foundation for all your creative projects.
At Display Guru, we provide the high-quality tools that professionals and hobbyists rely on. Explore our range of dress forms and garment rails to complete your ideal sewing space at https://www.displayguru.co.uk.