


Your Guide to a Sewing Adjustable Mannequin
Think of an adjustable sewing mannequin as your silent partner in the sewing room. It's the indispensable tool that takes garment making from a game of guesswork to a precise, enjoyable craft. Essentially, it acts as your personal body double, letting you see exactly how fabric will hang and drape with professional accuracy.
This solves one of the biggest headaches for any sewer: trying to fit clothes on yourself.
Your Silent Partner for Perfect Garment Fitting
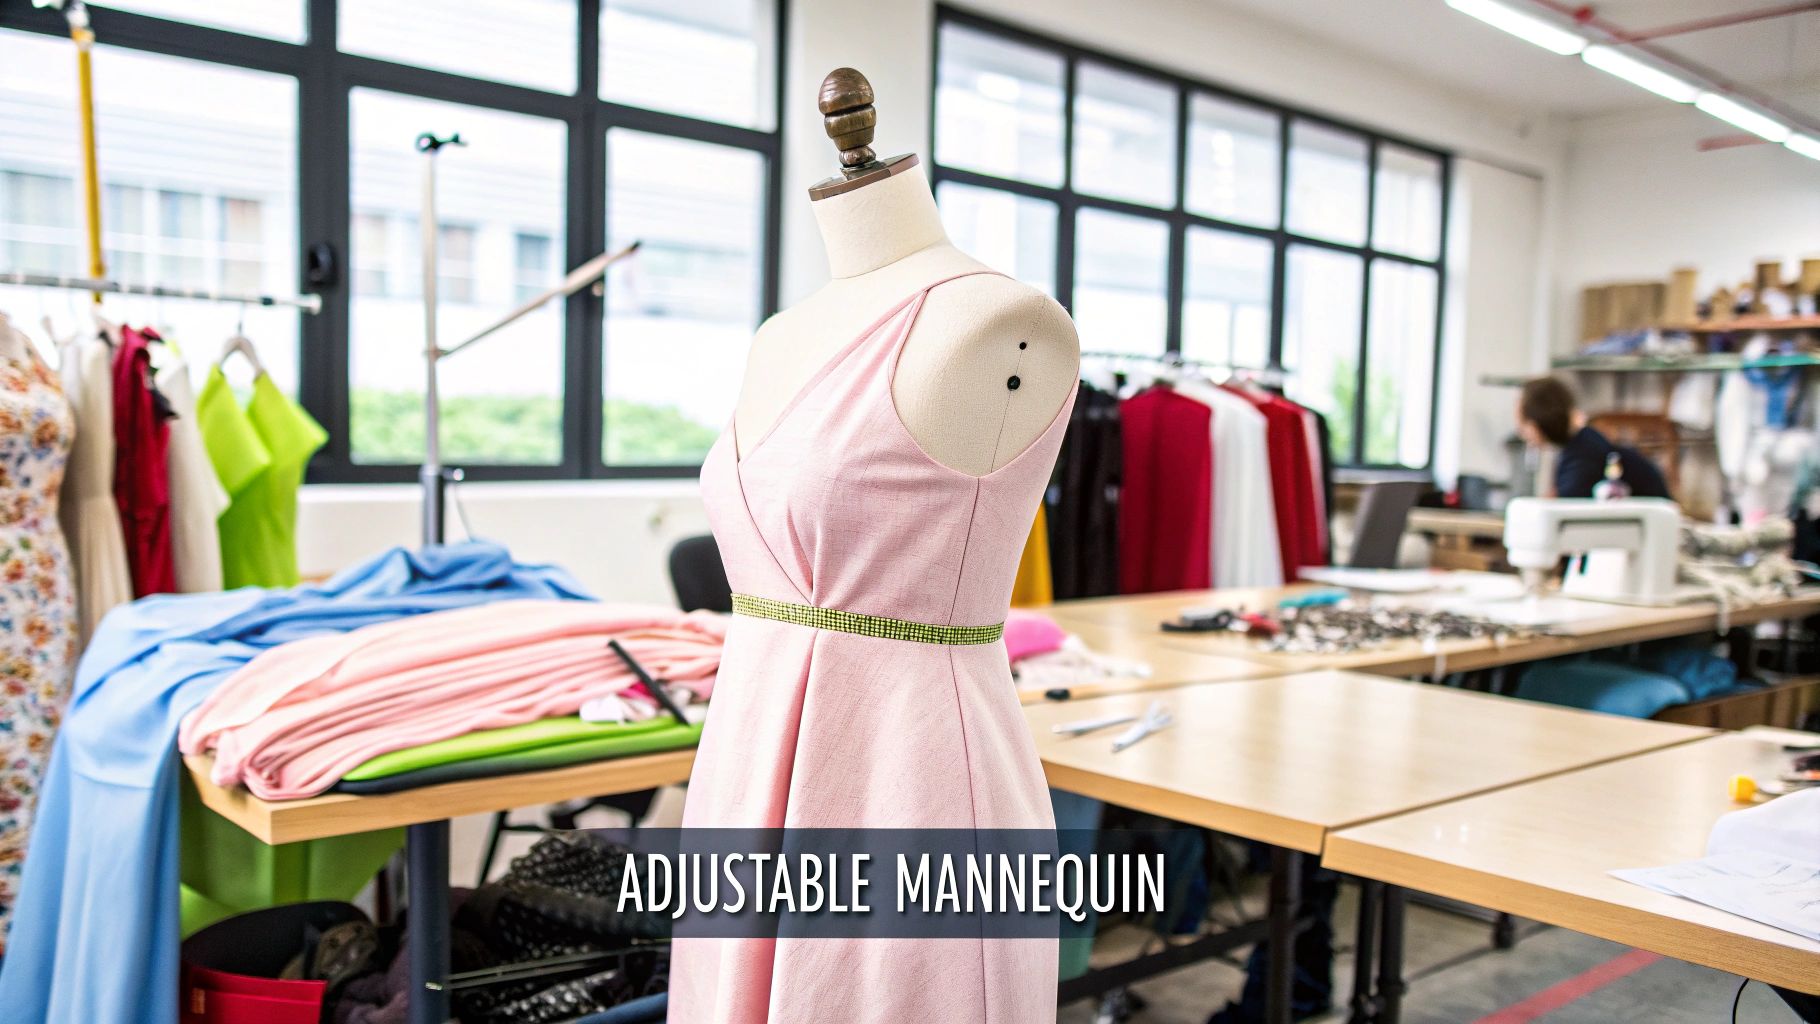
Trying to sew a truly fitted garment without a proper dress form is a bit like painting a portrait without a model. You can certainly try, but the final result often misses that spark of true-to-life form and precision. An adjustable mannequin fills that void, giving you a three-dimensional canvas that you can mould to specific measurements. It’s all about working with confidence and clarity.
This guide is designed to show you just how this essential form takes the frustrating trial and error out of sewing. We’ll explore how an adjustable mannequin becomes a natural extension of your creative process, and why it's so crucial for achieving that polished, professional finish.
Moving Beyond Guesswork
At its core, an adjustable sewing mannequin is simply a stand-in for a human body. This lets you check the fit, alter patterns, and drape new designs without ever needing a live model to stand still for hours. The benefits are immediate and practical.
- Precision Fitting: You can get a flawless fit by turning the dials to match specific bust, waist, and hip measurements.
- Accurate Draping: It’s the perfect way to experiment with how a fabric falls and folds around the body, a key skill in couture and custom design.
- Simplified Alterations: You can instantly see where you need to make changes, whether it’s a simple hem or a more complex full-bust adjustment.
- A Full 360-Degree View: Walk around the garment and assess it from every angle. This ensures your seams are straight, patterns align perfectly, and the overall silhouette is balanced.
We’ve all been there: twisting and turning in front of a mirror, trying to pin a hem or a side seam on ourselves. This contorts not only your posture but the fabric itself, leading to wonky pinning and uneven seams. A mannequin provides a static, correctly postured form, which is exactly what you need for precise work.
Your Personal Body Double
To really get the most out of your mannequin, you first need to turn it into an accurate replica of your body—or your client's. This all starts with taking a good set of measurements. For a detailed walkthrough, you can learn more by reading our guide on how to take body measurements for clothes.
Once you have those key numbers, you simply transfer them to the mannequin using its adjustment dials. This guide will set the stage, showing you how to select, adjust, and ultimately master your mannequin so you can bring your creative visions to life without a hitch.
Getting to Know Your Dress Form, Piece by Piece
To really get the most out of your sewing adjustable mannequin, you need to get familiar with all its moving parts. Think of it like a chef learning their knives – knowing what each dial and stand does is the secret to creating garments that fit like a glove.
Each component, from the little dials to the sturdy base, has a specific job in recreating a human shape. Once you understand what these features do, you'll be able to look at any model and see beyond the price tag, focusing instead on the build quality and functions that will actually help with your sewing.
The Dials: Your Key to a Custom Fit
The real magic of an adjustable mannequin lies in its system of dials and keys. This is what lets the form grow and shrink, turning it from a standard shape into your personal body double. You’ll usually find them at the bust, waist, and hips, and sometimes at the neck too.
When you turn these dials, you’re actually moving the panels of the mannequin's torso apart, increasing the circumference where you need it. The trick is to make small, gradual adjustments to all the dials at the same time. Don't max out the bust before you’ve even touched the waist; work evenly to keep the form balanced and symmetrical.
- Bust Dials: These adjust the fullest part of the chest.
- Waist Dials: For tweaking the narrowest part of the torso.
- Hip Dials: These expand the form at the widest point of the hips.
This ability to adjust at multiple points is what makes the mannequin so incredibly versatile, able to match a huge variety of body types. Getting a handle on what each dial controls is the first, most important step.
To give you a clearer picture, here’s a quick breakdown of the essential features and why they matter.
Key Features of a Sewing Adjustable Mannequin
| Feature | Primary Function | Importance in Fitting |
|---|---|---|
| Adjustment Dials | Expands or contracts the torso at key points (bust, waist, hips). | Crucial for matching the mannequin's circumference to specific body measurements. |
| Pinnable Surface | A fabric-covered exterior that allows pins to be inserted easily. | Essential for draping fabric, securing patterns, and marking alterations directly. |
| Adjustable Height Pole | Allows the entire form to be raised or lowered. | Accommodates different garment lengths, from short tops to long dresses. |
| Stable Stand | The base that supports the entire mannequin (tripod or pedestal). | Prevents wobbling or tipping, ensuring safety and precision during fitting. |
| Back-Waist Length | Adjusts the vertical distance from the neck to the waistline. | Critical for achieving a correct torso fit, which varies greatly between people. |
| Hem Marker | An attachment on the pole for marking a level hemline. | Ensures professional, perfectly even hems without guesswork. |
Understanding these components helps you see how they all work together to create a truly customised tool for your sewing room.
The Foundation: All About the Stand and Pole
A dress form is only as reliable as its foundation. The stand needs to be rock-solid to handle the pulling, pinning, and draping you'll be doing. A wobbly stand isn't just annoying; it can tip over, disrupting your work and potentially wrecking your garment.
You'll generally come across two main types of stands:
- Tripod or Four-Legged Stands: These have a wider footprint, which gives them fantastic stability, even if your floor isn't perfectly level. They're a really popular and dependable choice.
- Pedestal Stands: These have a single, heavy base, which is often circular. They can be just as stable, but it all comes down to the weight and quality of that base.
The central pole is nearly always height-adjustable, which is a must-have. It lets you work comfortably on anything from a simple blouse to a floor-length wedding gown. Many also come with a hem marker attachment on the pole—an incredibly handy little tool that helps you get a precise, even hem every single time.
If there's one thing to remember, it's that stability is non-negotiable. A flimsy base will drive you mad. Investing in a mannequin with a solid, well-built stand means you can focus on your creative work, not on stopping it from falling over.
The Surface and Other Finer Details
What the mannequin is covered in is just as important as what’s going on inside. Most good-quality adjustable forms are wrapped in a foam-backed fabric, like nylon. This pinnable surface is absolutely essential. It’s what lets you drape fabric, hold pattern pieces in place, and mark up changes right on the form.
You'll also find a few other adjustment points that help you nail the fit. An adjustable back-waist length lets you change the distance from the base of the neck to the natural waistline—a measurement that can be wildly different from person to person. A similar dial at the neck helps you get collars and necklines fitting perfectly.
If you want to dig a bit deeper into this, there’s a great overview of standard mannequin measurements that explains how these numbers relate to real bodies. By understanding this complete anatomy, you're perfectly set to make your sewing mannequin truly work for you.
How to Choose the Right Mannequin for Your Needs
Walking into the world of sewing adjustable mannequins can feel a bit overwhelming at first. With so many models, features, and sizes out there, where do you even begin? Think of it this way: your mannequin is an investment in your craft, a silent partner that should help you create perfectly fitted garments for years to come.
Getting this choice right is crucial, and it all boils down to understanding a few key criteria. This guide will walk you through everything you need to know to find the perfect match for your sewing room.
Finding Your Perfect Size Range
This is the most common stumbling block for newcomers, but it's also the most important factor to get right.
The golden rule is surprisingly simple: select a form that is slightly smaller than your own body measurements. It might sound backwards, but you can always add padding to build up a smaller mannequin to match your unique curves. What you can't do is shrink a mannequin beyond its minimum setting.
So, start by taking accurate bust, waist, and hip measurements. Once you have your numbers, compare them to the size ranges listed on the mannequins you’re considering.
The sweet spot is when your own measurements fall somewhere in the middle of the mannequin's adjustment range. This gives you the freedom to adjust both up and down and keeps the form stable, without creating large, awkward gaps between the panels.
For example, if you have a 30-inch waist, a mannequin with a 26–34 inch range is a much better bet than one that starts at 30–38 inches. With the second option, you'd be at the very bottom of its range, leaving no room to go smaller and potentially straining the adjustment mechanism.
Standard, Petite, or Full-Figure Forms
Just like people, mannequins come in different shapes and proportions. Choosing a form that reflects your general body type gives you a much better starting point for customisation.
- Standard Forms: These are the most common you'll find, designed for average heights and proportions.
- Petite Forms: If you have a shorter torso, these are a game-changer. They feature a shorter back-waist length, which is essential for getting the fit right through the body.
- Full-Figure Forms: Built for plus-size bodies, these forms have a larger measurement range and are often shaped to better reflect the contours of a fuller figure.
For a deeper dive into this, our guide on how to buy a dress form you'll actually use has even more practical tips to help you make a smart choice.
Understanding 8-Part vs 12-Part Bodies
You'll often see mannequins advertised as having an "8-part" or "12-part" body. This simply refers to the number of sections the torso is split into, which tells you how many adjustment points it has. An 8-part body usually has four sections on the front and four on the back, all controlled by dials.
A 12-part body, however, offers a greater level of precision. These models typically include extra adjustment points around the upper bust or shoulders, allowing for a much more detailed and customised shape. While an 8-part mannequin is fantastic for most everyday sewing, a 12-part body offers superior control for couture techniques or for fitting unique proportions, like narrow shoulders paired with a full bust.
This kind of specialised equipment is a direct result of a thriving industry. The UK's fashion sector, which contributes a massive £62 billion to GDP, continues to fuel demand for better production tools for professionals and hobbyists alike. With the UK textile market projected to hit nearly USD 46.25 billion by 2034, it’s clear that quality tools like a reliable adjustable mannequin will remain essential.
Final Considerations for Your Purchase
Beyond the core specs, a few other features make a world of difference in your day-to-day use.
- Stand Stability: A wobbly mannequin is a frustrating mannequin. Look for a solid tripod or a weighted pedestal base that won’t tip over while you're working.
- Pinnable Surface: Make sure the form is covered in a foam-backed fabric. This is non-negotiable, as you’ll need to pin patterns and fabric directly to the body for draping and fitting.
- Hem Marker: It might seem like a small detail, but a built-in hem guide is an incredibly useful tool. It will save you heaps of time and ensure your hemlines are perfectly level, every single time.
By keeping these key elements in mind—size range, body type, adjustment points, and overall build quality— you can confidently choose a mannequin that will become your most trusted sewing companion.
Mastering Adjustments and Strategic Padding
Unlocking the full potential of your sewing adjustable mannequin isn’t just about turning the dials. While getting your core measurements dialled in is the first step, the real magic happens in the finer details—the balanced adjustments and clever padding that turn a generic form into a true body double.
This is where we get hands-on. I’ll walk you through the process of creating that perfect replica, starting with the basics of making slow, even adjustments to build a symmetrical base. From there, we'll dive into the critical technique of padding, which is the secret to replicating the unique body contours that dials alone simply can't capture.
The Foundation of a Symmetrical Fit
Before you even think about padding, your first goal is a solid, symmetrical foundation using the mannequin's dials. It’s tempting to rush this part, but that's a common mistake that leads to a wonky form and, inevitably, poorly fitting clothes. The key is to work slowly and methodically.
Instead of cranking one measurement (like the bust) all the way out at once, expand all the dials bit by bit. Turn each dial a little, check your measurements, and then repeat the process. This simple technique stops big gaps from forming between the panels and keeps the mannequin’s shape proportional and stable.
This flow chart breaks down the core steps for getting those initial measurements set just right.
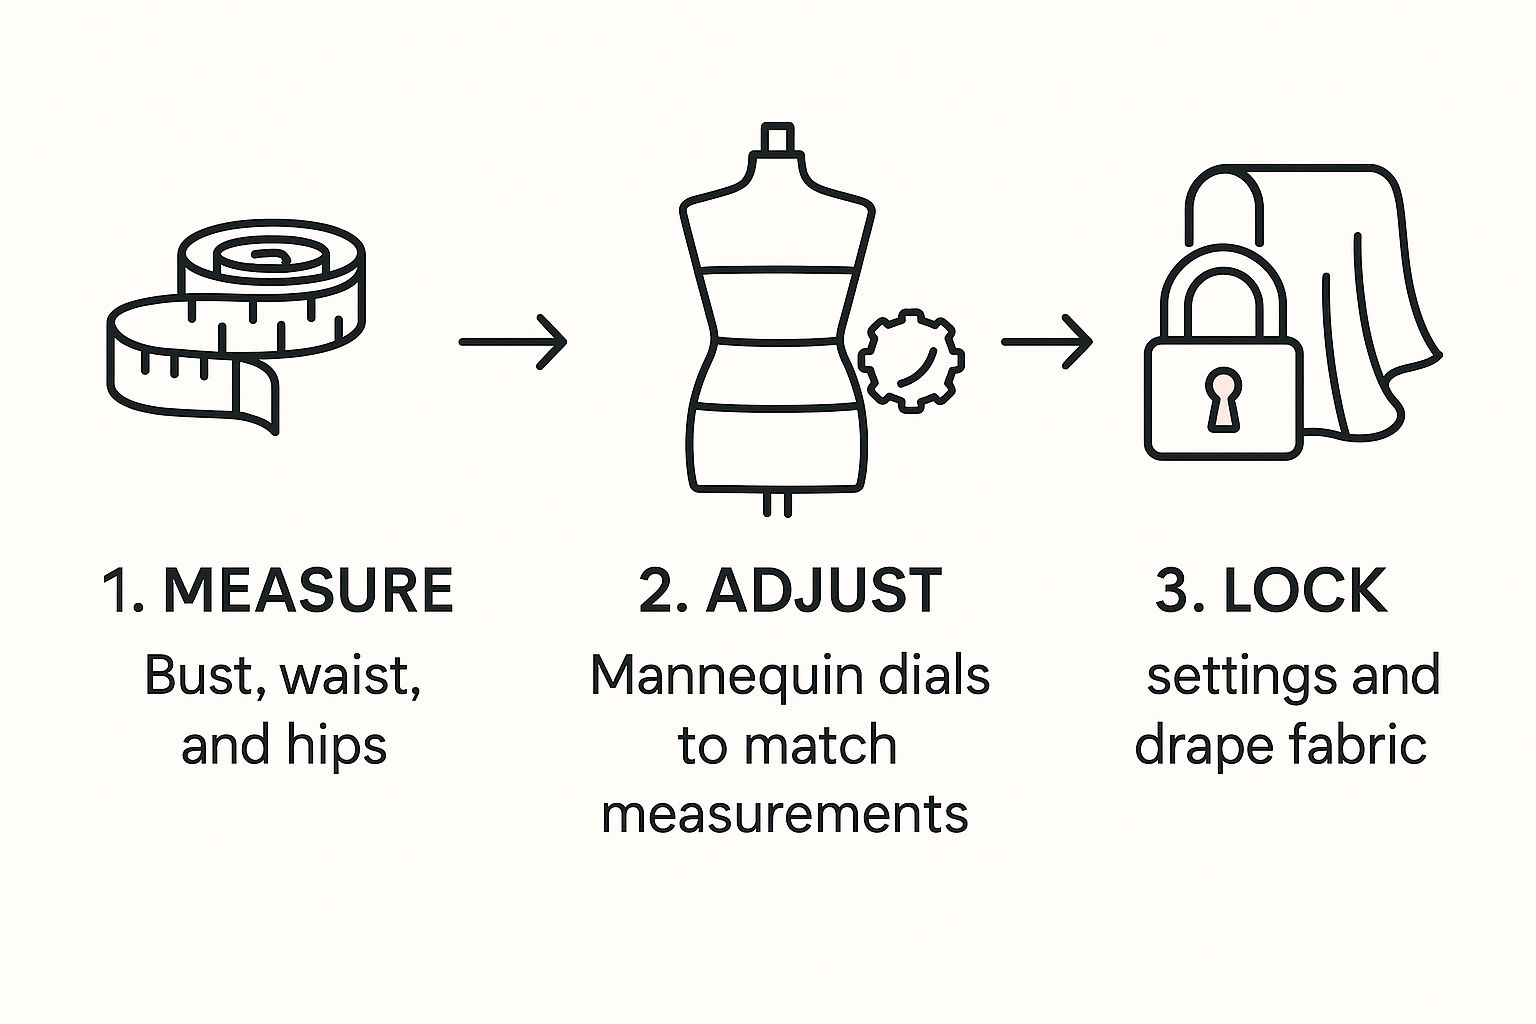
Think of this visual as your roadmap. It reinforces that crucial measure-then-adjust workflow, ensuring you have a reliable base before you start customising.
Bridging the Gaps with Strategic Padding
Let’s be honest, no human body is perfectly symmetrical or shaped like a standard dress form. We all have unique curves, slopes, and asymmetries—maybe a rounded upper back, a full abdomen, or one hip that sits a fraction higher than the other. This is where padding becomes essential for a truly flawless fit.
Padding is the bridge between the mannequin's mechanical adjustments and the organic shape of a real body. It’s what accounts for posture, muscle distribution, and individual contours, turning a good fit into a perfect one.
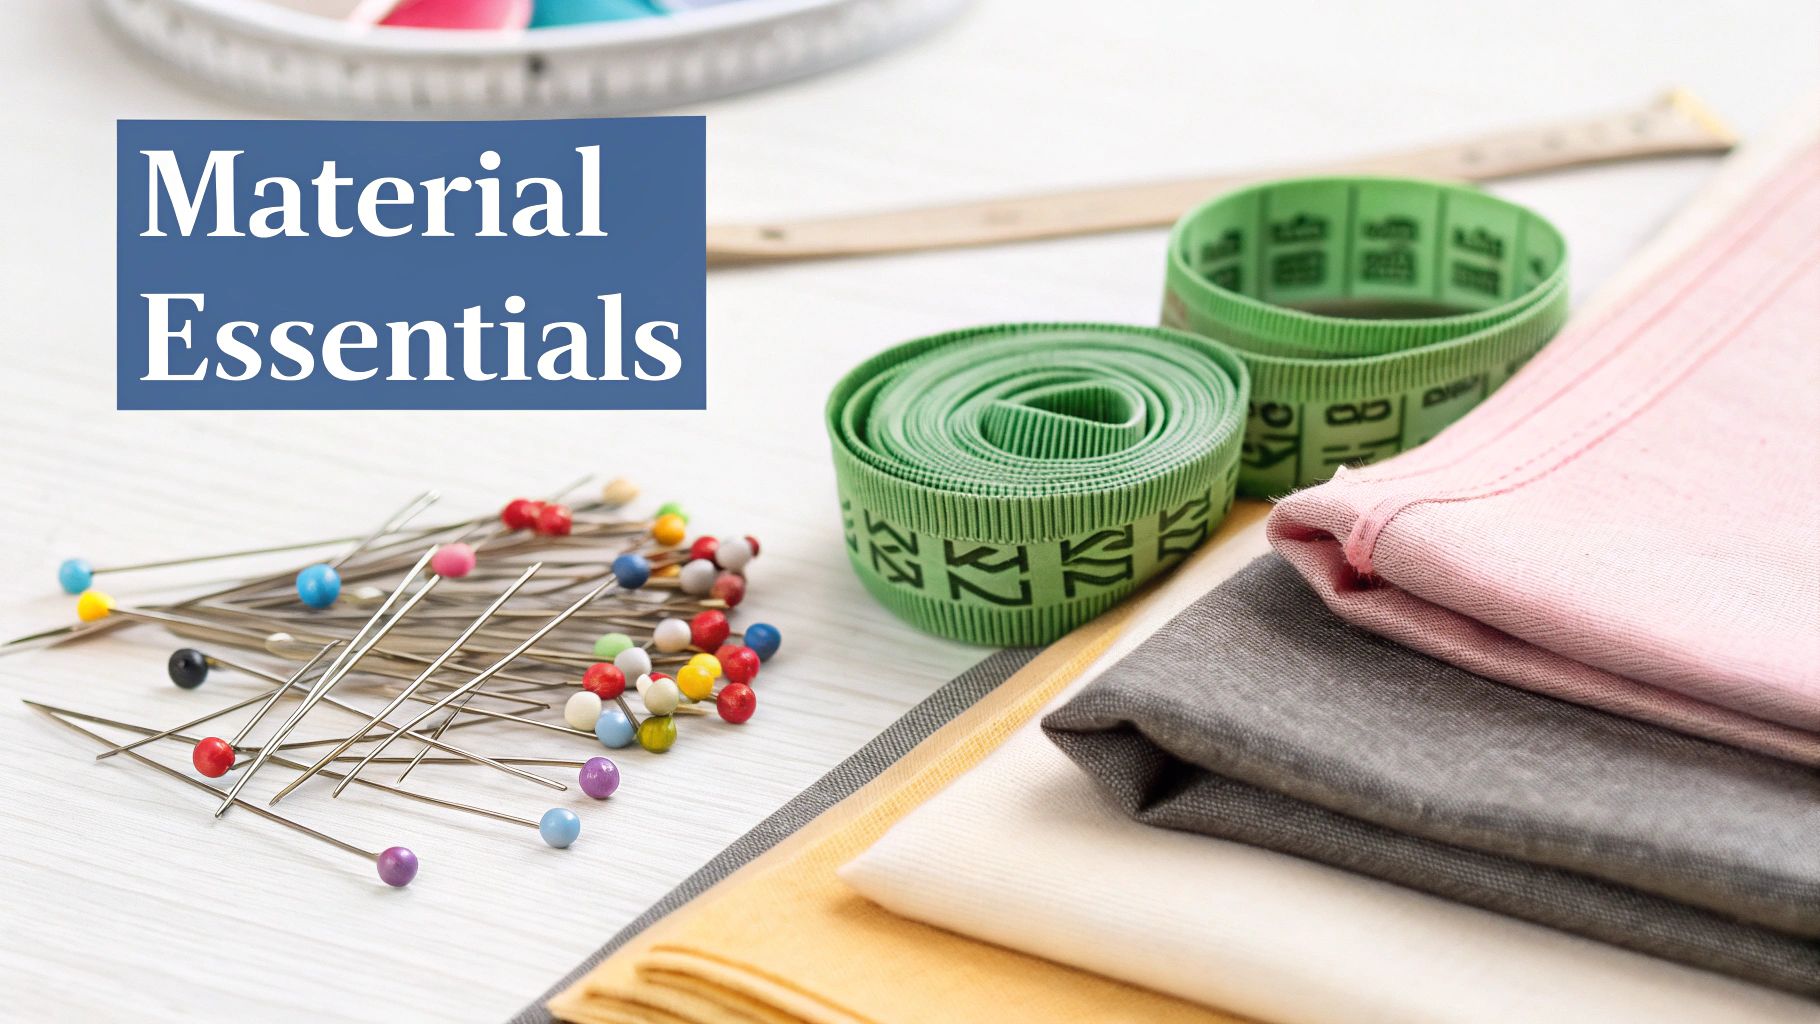
To get started, you'll need a snug-fitting cover for your mannequin. You can buy one designed for the job or just make your own from a bit of stretchy knit fabric. The cover does two things: it holds all your padding securely in place and gives you a smooth, pinnable surface to work on. If you're new to the basics, our beginner's guide to sewing for dummies is a great place to get your bearings.
Choosing Your Padding Materials
You don't need to spend a fortune on fancy materials to get a professional result. Many of the best options might already be in your sewing room or can be found at a local haberdashery.
- Polyester Wadding or Batting: This is a fantastic all-rounder. It’s affordable, easy to shape, and you can layer it up to build volume gradually.
- Felt Sheets: Perfect for creating firmer, more defined shapes. You can cut felt to replicate specific areas like shoulder blades or a fuller tummy.
- Shoulder Pads: Don't just use them for shoulders! Layering a few shoulder pads is a great trick for building up the bust, hips, or buttocks.
- Professional Padding Kits: These kits often come with pre-shaped foam pads for common areas, which can be a brilliant time-saver.
Start by figuring out where your body differs most from the mannequin. Use pins to attach small layers of your chosen material, building up the volume slowly. Keep checking with a tape measure until the mannequin's measurements match your own, creating a truly bespoke form.
This level of precision is what the professionals do. In the UK, hundreds of textile manufacturers operate with turnovers well over £5 million, and they rely on perfectly padded forms for accurate garment prototyping. Precision fitting tools are fundamental to many of the 1.3 million jobs in the wider UK fashion and textile industry. By mastering padding, you're not just improving your sewing; you're adopting a technique used at the highest levels of the craft.
Advanced Draping and Pattern Alteration Techniques
 Once you've padded your sewing adjustable mannequin to create a perfect body double, you can step beyond basic fitting and into the far more creative world of bespoke dressmaking. This is where your skills really come to life, and the mannequin transforms from a simple fitting aid into a three-dimensional sketchbook for your designs.
We’re going to explore two advanced techniques that are the heart and soul of custom garment creation: draping fabric directly onto the form, and tackling complex pattern alterations with total confidence. These skills allow you to build unique designs from scratch and refine commercial patterns in a way that flat paper adjustments just can't replicate. This is where you enter the realm of couture sewing.
The Art of Draping Directly on the Form
Draping is the beautifully intuitive process of sculpting fabric directly on a dress form to develop a pattern. Instead of starting with flat paper, you let the mannequin guide your hands. You mould the fabric, shaping it into darts, pleats, and seams to create the silhouette you envision. It's a wonderfully visual way to design, letting you see your ideas materialise in real time.
To get started, you’ll want some inexpensive muslin or calico for your test fabric. Secure a piece to the form with pins, making sure to follow the grainline, then begin smoothing and moulding it around the body.
- Establish Key Lines: Use twill tape to mark out the centre front, centre back, bust, waist, and hip lines on your mannequin. Think of these as your roadmap.
- Work with the Grain: Always keep the fabric's grain straight and true on the form. This is crucial for preventing twisting in your final garment.
- Pin Strategically: Pin along the seam lines you marked with the twill tape, smoothing out any wrinkles or bagging as you go.
- Create Darts and Seams: Wherever the fabric won't lie flat, simply pinch the excess material and pin it to create darts or new style lines.
Once you’re happy with the draped design, you can mark the seam lines and darts right onto the muslin. You then unpin it, true up your lines with a ruler, add your seam allowances, and you’ve just created a completely custom pattern piece. It's a truly organic way to work.
Visualising Complex Pattern Alterations
While draping lets you create a pattern from nothing, your mannequin is just as valuable for altering existing ones. For many of us, learning how to read sewing patterns is the first big step, but a dress form helps you see the necessary changes in 3D. It turns abstract instructions into something you can touch and see.
An adjustable mannequin gives you a clear, immediate understanding of how a pattern change will affect the overall balance and hang of a garment. It's the difference between guessing on a flat table and knowing on a 3D form.
Suddenly, complex adjustments like a Full Bust Adjustment (FBA) or a swayback correction seem far less intimidating. You can pin the paper pattern pieces directly onto the mannequin to see exactly where they pull or strain. This instant visual feedback tells you precisely where more (or less) room is needed, leading to a much more intuitive and accurate fit.
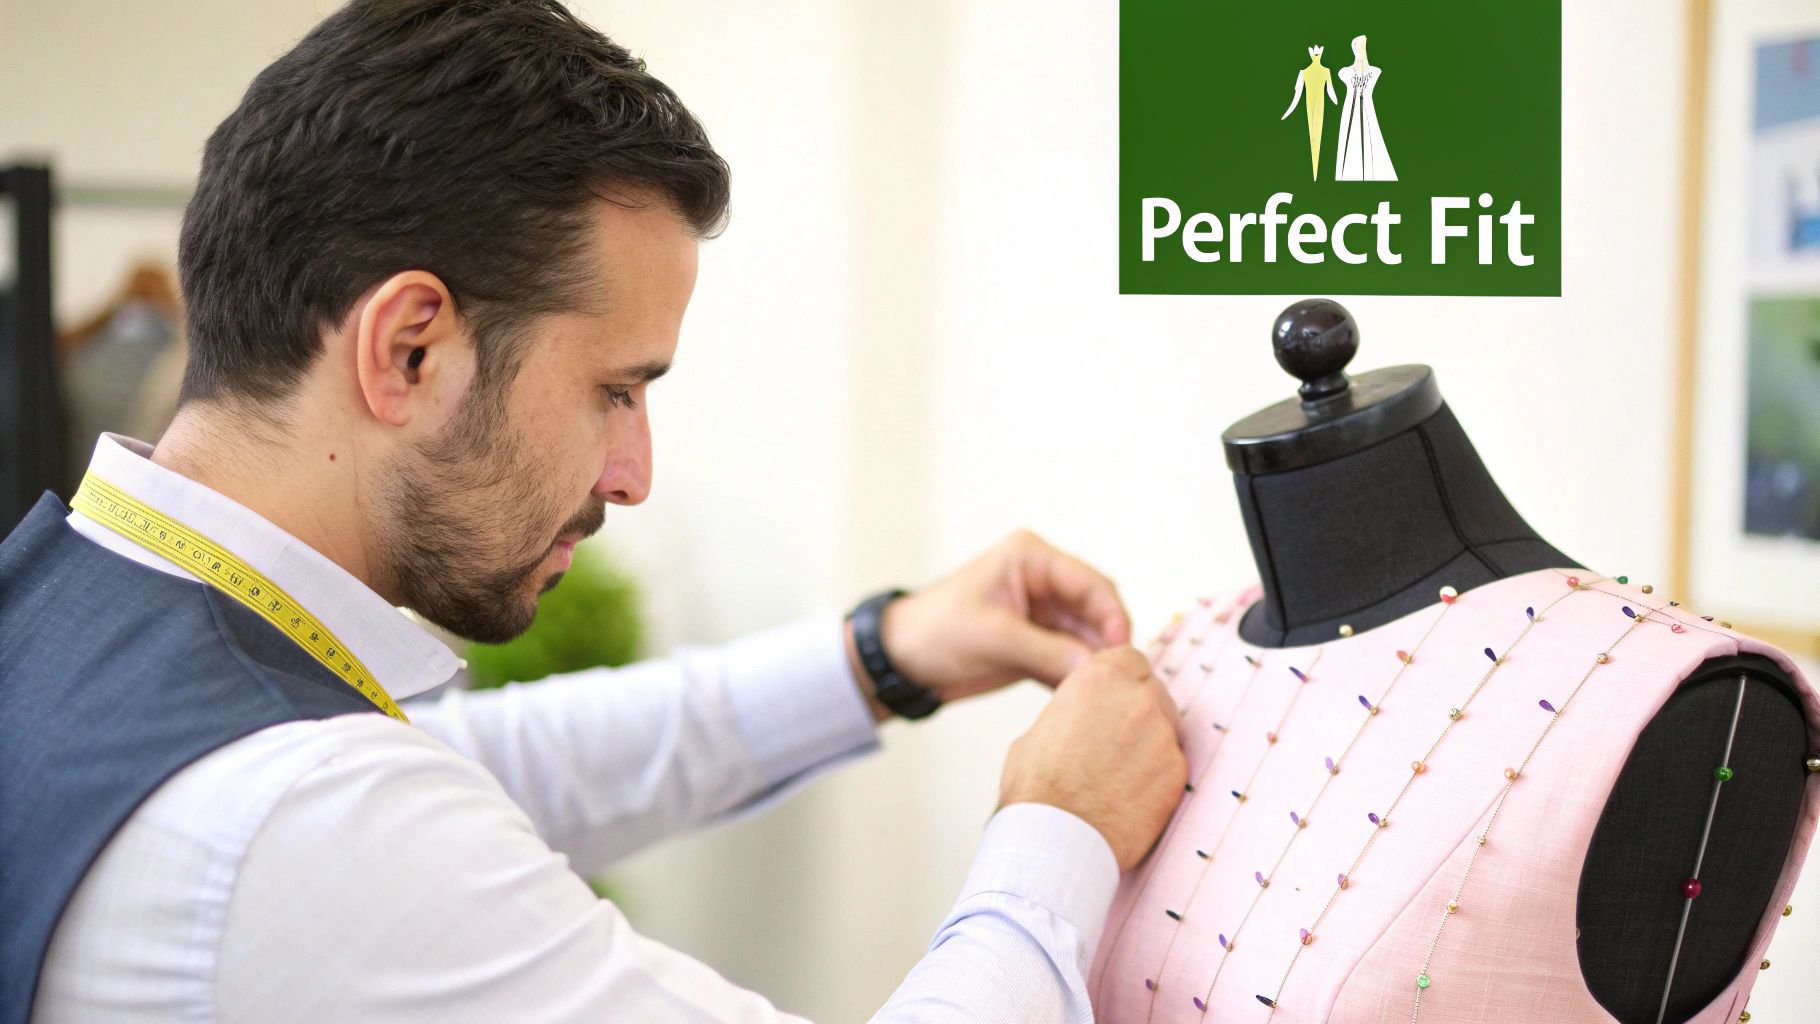
Checking Balance and Perfecting the Hang
The final acid test for any garment is how it hangs. A sewing adjustable mannequin is your secret weapon for checking the balance and making sure your creation looks impeccable from every angle. After you’ve constructed a garment, pop it on your form for one last quality check.
Keep an eye out for these key signs of a well-made garment:
- Straight Seams: The side seams should hang perfectly perpendicular to the floor, not swing forwards or backwards.
- Level Hemline: The hem should be perfectly parallel to the floor all the way around. No dipping or rising.
- Balanced Silhouette: The garment should sit evenly on the form without pulling, twisting, or straining in any direction.
This final check is what separates good sewing from truly great dressmaking. It’s a level of refinement that a body-double form makes achievable for the home sewer.
Common Questions About Adjustable Mannequins
Even when you’ve got a good grasp of the features, diving into the world of adjustable sewing mannequins can still leave you with a few nagging questions. From picking the right size to getting the padding just right, it’s completely normal to want a bit more clarity. This section answers the most common queries we hear from sewers, giving you practical advice to help you get the most out of your dress form.
Think of this as a troubleshooting guide to help you overcome those first few hurdles. By tackling these common points of confusion head-on, you'll be well on your way to making your mannequin an indispensable tool for achieving a perfect fit.
What Is the Best Size Mannequin to Buy?
This is probably the most important decision you'll make, and the best advice often feels a little backwards. You should always choose a mannequin that is slightly smaller than your own body measurements, not an exact match or bigger. Why? Because you can always add padding to build up a smaller form, but you can’t make a mannequin shrink past its smallest setting.
Before you even think about buying, take a careful set of your own bust, waist, and hip measurements. Use these to check against the adjustment range of any mannequin you’re considering. You've hit the jackpot when your own measurements sit comfortably within the form’s range, but not right at the very top or bottom. This gives you plenty of wiggle room for adjustments and keeps the mannequin stable and well-proportioned.
Can I Pin Fabric Directly Into the Mannequin?
Absolutely! On most decent models, this is a core feature. When you're shopping around, look for mannequins described as 'pinnable'. This tells you it has a layer of foam or a similar soft material just underneath the fabric cover. This is what lets you stick pins directly into the form to hold patterns, fabric, and twill tape in place—a must-have for any serious draping or fitting work.
A quick tip: try to insert your pins at an angle instead of straight in. This gives you a much better grip and means you're less likely to hit the hard plastic shell underneath. Be warned that some budget-friendly models might only have a very thin layer of fabric over a plastic body. These aren't truly pinnable and will really hold you back when it comes to draping and making fine-tuned adjustments.
A truly pinnable surface is a game-changer. It lets you sculpt and shape fabric with confidence, knowing every pin will hold firm. This gives you the freedom to play around with pleats, darts, and gathers without everything slipping and sliding out of place.
How Do I Pad My Mannequin to Match My Body Shape?
Padding is the magic that turns a standard adjustable mannequin into your personal ‘body double’. It’s how you recreate your own unique shape—things like a slightly rounded back, a lower tummy, or hips that aren't perfectly symmetrical—that the adjustment dials just can't handle on their own. The process itself isn't complicated, but it does call for a bit of patience.
First, pull a snug-fitting cover over your mannequin; a simple stretchy jersey one is ideal. Then, start building up the areas you need to using materials like polyester wadding, layers of felt, or specially made foam pads.
- Build It Up Slowly: It's much better to add padding in thin layers than to stick on one big chunk.
- Pin as You Go: Use pins to keep the padding secure under the cover while you work.
- Keep Measuring: Constantly check the padded areas with a tape measure, comparing them to your own measurements.
Just keep adding and shaping the padding until you’ve got a faithful replica of your own figure. Taking the time to get this right is what will ultimately make your homemade clothes fit you, and only you, perfectly.
Is an Expensive Adjustable Mannequin Worth It?
Whether a pricier mannequin is a smart buy really comes down to your sewing ambitions and how often you'll be using it. More expensive models usually come with real, tangible benefits that can make a huge difference to your sewing, especially if you're a serious hobbyist or a professional.
These benefits often include:
- More Adjustment Points: A 12-part body gives you far more control over fine-tuning the shape than a standard 8-part one.
- Better Stability: They tend to have heavier, sturdier stands that won't wobble or tip over while you're working.
- Hard-Wearing Materials: Higher-quality parts mean the mannequin will stand up to years of use, adjustments, and countless pins.
For someone just starting out, a good mid-range mannequin is usually more than enough to get to grips with fitting and alterations. But if you see dressmaking as a long-term passion, investing in a top-tier model will pay you back in accuracy and ease of use for many years to come.
At Display Guru, we stock a wide range of high-quality, pinnable mannequins for every skill level, from home sewing enthusiasts to professional designers. Find the perfect partner for your sewing room and start creating garments that fit flawlessly.
Explore our collection at https://www.displayguru.co.uk.