


How to Take Body Measurements for Clothes | Easy Guide
Getting Set Up for Measurement Success
 Before you even think about wrapping a tape measure around yourself, let’s get your setup sorted for the most accurate results. It's these small details at the beginning that make the difference between a garment that fits like a dream and one that’s just a bit... off. Knowing how to take body measurements for clothes properly starts with having the right tools and a consistent approach, both of which can really influence the final numbers.
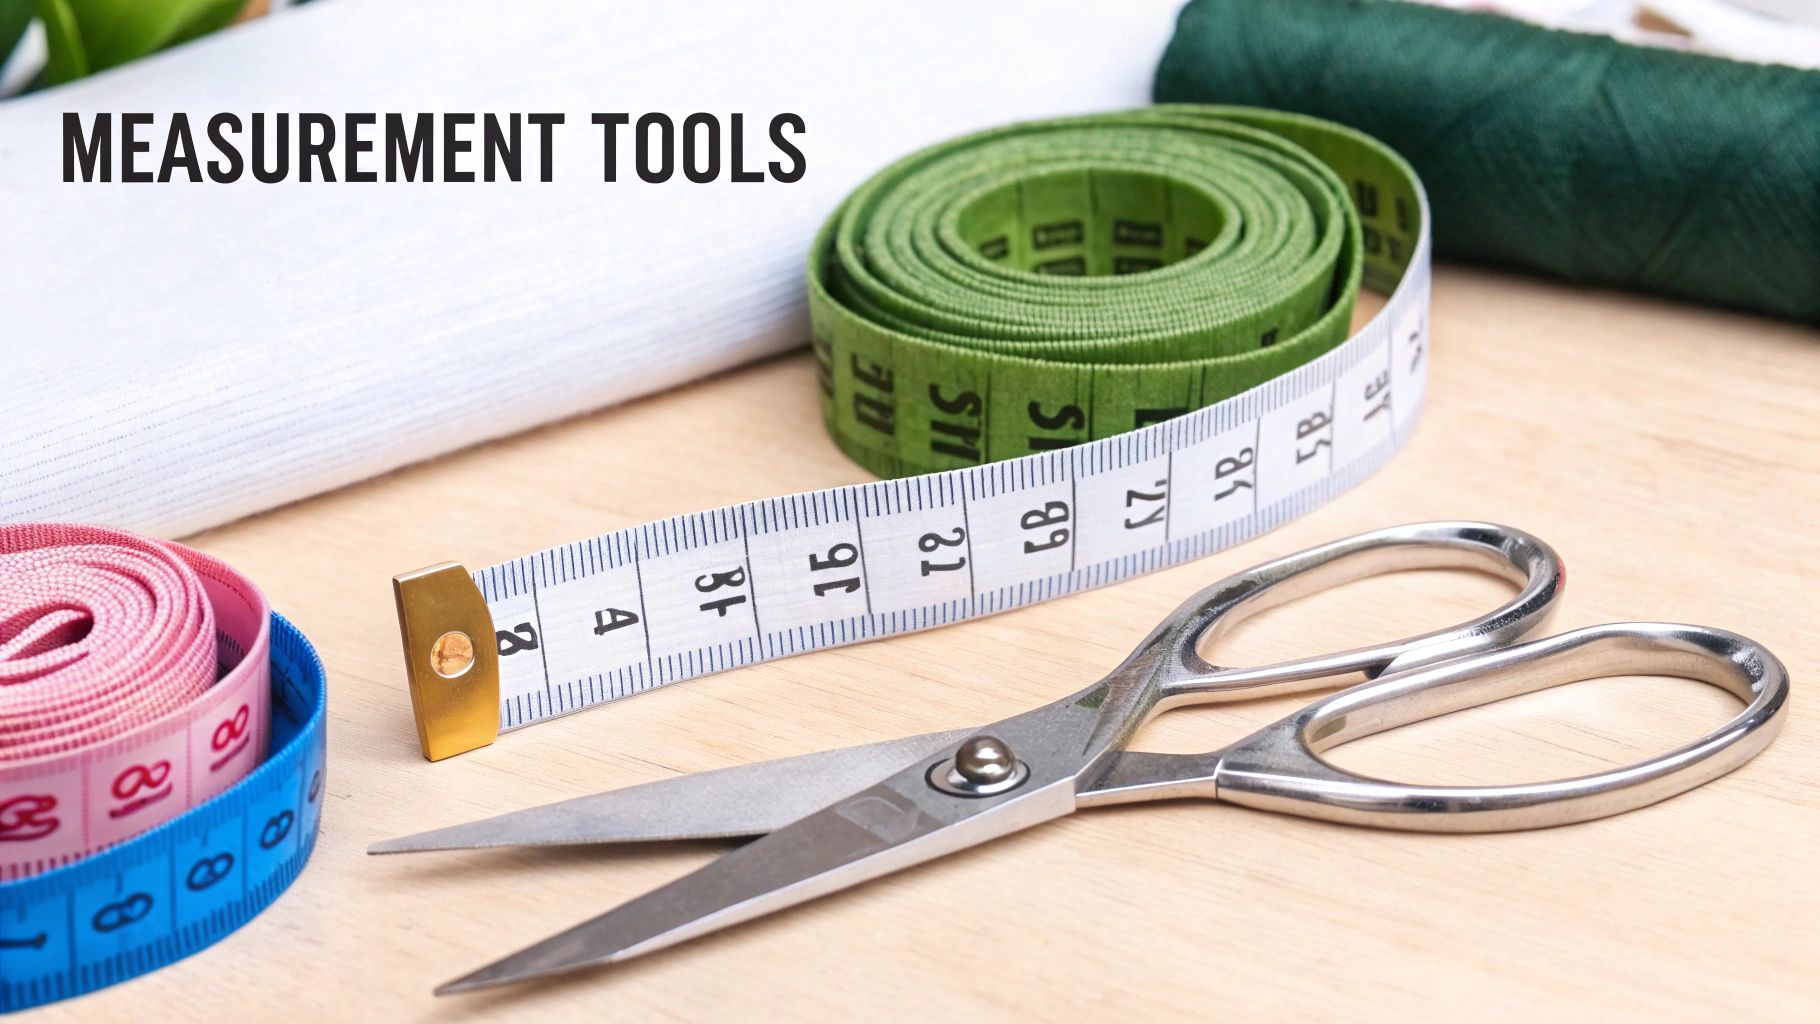
Choose Your Tools Wisely
Your choice of measuring tape is more important than you might think. That soft plastic tape from an old sewing kit might have stretched out over the years, which will throw off your readings. It's much better to use a flexible fibreglass tape measure, as it won’t warp or stretch over time. This simple switch could be the very thing that prevents a finished piece from being a size too small.
What you wear (or don't wear) during measuring also plays a huge part. Trying to measure over bulky clothes like a jumper or jeans will add extra centimetres that aren't really there. For the best results, take your measurements while wearing only your undergarments or very thin, form-fitting clothes like leggings and a camisole. This way, you can be sure you're measuring your body, not your outfit.
Create a Consistent Environment
Our bodies can change slightly throughout the day. To get the most reliable measurements, it’s a good idea to measure yourself at roughly the same time each day. Many professional tailors prefer mid-morning, as you're less likely to be bloated from meals or affected by the day's physical activities.
Standing in front of a full-length mirror is also a brilliant tip. It lets you keep an eye on your posture and check that the tape measure is staying perfectly level around your body, which is especially important for the bust and hip measurements. A sagging tape is a common mistake that can easily skew the true figure. While having a friend to help is great, especially for hard-to-reach spots, you can get perfectly accurate results on your own with a mirror and a bit of care.
Decoding Which Measurements Actually Matter
The secret to a perfect fit isn't about collecting a long list of numbers. It’s about knowing which measurements are crucial for the specific garment you're making or buying. You don't need twenty different figures for a simple pair of trousers. Instead, focus on the essentials that dictate the fit for that particular item. For a dress to hang beautifully, for example, you need accurate bust, waist, and hip measurements. For trousers, it’s all about the waist, hips, and inseam.
The Core Five Measurements
For most everyday clothing, you can achieve a great fit by focusing on just five key areas:
- Bust/Chest: This is non-negotiable for tops, dresses, and jackets. It’s what prevents a garment from pulling uncomfortably or gaping across your chest.
- Waist: We're talking about your natural waist here—the narrowest part of your torso. This measurement is essential for high-waisted trousers, skirts, and fitted dresses.
- Hips: Measured at the fullest part of your seat, this is a must-have for trousers, skirts, and any form-fitting dress. It ensures you have enough room to move, sit, and walk without restriction.
- Inseam: The key to getting your trouser length just right. A correct inseam means no more dragging hems or trousers that finish awkwardly above the ankle.
- Shoulders: Often forgotten but absolutely vital for structured pieces like blazers and jackets. Getting this right ensures the shoulder seams sit perfectly where they should.
To get a perfect fit, especially for close-fitting tops or lingerie, it's also important to understand the relationship between overbust and underbust measurements.

As the infographic shows, the difference between these two points is what determines cup size. This detail is fundamental for achieving proper support and comfort in bras, but it also helps in tailoring the upper body of dresses and tops for a more precise fit.
Matching Measurements to Garments
Knowing which numbers to prioritise can save a lot of time and frustration. A well-fitting blazer, for instance, relies heavily on shoulder and bust measurements, while the hip measurement might be less critical. For A-line skirts, the waist is everything, but the hip measurement is far more forgiving.
To make this easier, here’s a quick guide showing which measurements are most important for different types of clothing.
| Clothing Type | Primary Measurements | Secondary Measurements | Why It Matters |
|---|---|---|---|
| Fitted Dress | Bust, Waist, Hips | Shoulder Width, Back Length | These three define the overall silhouette and prevent pulling or bagginess. Secondary measurements refine the fit across the shoulders and torso. |
| Trousers/Jeans | Waist, Hips, Inseam | Thigh, Rise | The primary trio ensures the trousers fit around the body and are the correct length. Thigh and rise measurements help dial in the fit for specific styles (e.g., slim-fit vs. relaxed). |
| Blazer/Jacket | Shoulder Width, Bust, Sleeve Length | Waist, Bicep | Shoulders and bust are critical for structure and ensuring the jacket closes properly. Sleeve length prevents the cuffs from being too long or short. |
| A-Line Skirt | Waist | Hips | The waist is the anchor point for this style. Since the skirt flares out, the hip measurement is much more flexible and often not needed. |
| Button-Up Shirt | Bust, Waist, Sleeve Length | Shoulder Width, Bicep | This combination prevents gaping buttons at the chest and ensures the sleeves are comfortable and the right length. |
By focusing only on the measurements that are truly essential for each item, you can streamline your process and get a better fit with less effort.
Even with perfect measurements, it's worth remembering that modern UK clothing sizes can be inconsistent. Sizing standards have a long history, but each brand interprets them differently. In fact, these inconsistencies mean that up to 30% of UK shoppers buy the wrong size, contributing to high return rates for online retailers. Having your core numbers on hand gives you the power to cut through the confusion and choose the right size with confidence.
Mastering Your Upper Body Numbers
 Let's get into the measurements that truly define the fit of tops, dresses, and jackets. Getting your upper body numbers right is essential, and it goes beyond just a single bust measurement. A small mistake here can make a beautifully designed garment look awkward and ill-fitting. The goal is to learn how to take body measurements for clothes with the precision of a professional fitter. A key trick I've learned is to always keep the measuring tape perfectly parallel to the floor, especially around your torso. A full-length mirror is your best friend for checking your form.
Bust, Underbust, and Shoulders
For the bust measurement, you’ll want to wrap the tape around the fullest part of your chest, making sure it passes over your shoulder blades at the back. The tape should be snug, but not so tight that it’s digging in – you should be able to breathe comfortably. This is the core number most size charts rely on for tops.
However, don't overlook the underbust measurement. It's just as important, especially if you're working on fitted bodices or need accurate bra sizing. Measure directly underneath your bust, right where a bra band would normally sit. Comparing this figure to your full bust measurement is how you determine cup size, and it ensures a garment gives the right support and shape.
Next, let's talk about the shoulders. An incorrect shoulder measurement is a dead giveaway of a poor fit, making a jacket look either too tight or comically oversized. The easiest way to get this right is to grab a shirt that fits you perfectly and measure from one shoulder seam to the other across the back. If you're measuring on yourself, stand relaxed and feel for the bony point at the top of each shoulder—measure the distance between these two points.
Neck, Arms, and Bicep
The smaller details, like your neck and arms, are what make or break the fit of button-up shirts and long-sleeved tops. Don’t skip them!
- Neck Circumference: Gently wrap the tape around the base of your neck, exactly where a shirt collar would rest. For a comfortable fit, you should be able to slide a finger between the tape and your skin.
- Arm Length: This one can be a bit tricky to do on your own. It's best to have a slight bend in your arm. Place one end of the tape at the bony point of your shoulder, run it down to your elbow, and then continue to your wrist bone.
- Bicep Circumference: Measure around the fullest part of your upper arm. Sleeves that are too tight in the bicep are a common frustration, so getting this number is crucial for comfortable movement.
For anyone serious about sewing or pattern making, translating these numbers onto fabric is the next stage. If you want to make this process much simpler, you might find our guide on using an adjustable mannequin for sewing really helpful. It can act as your body double for fittings
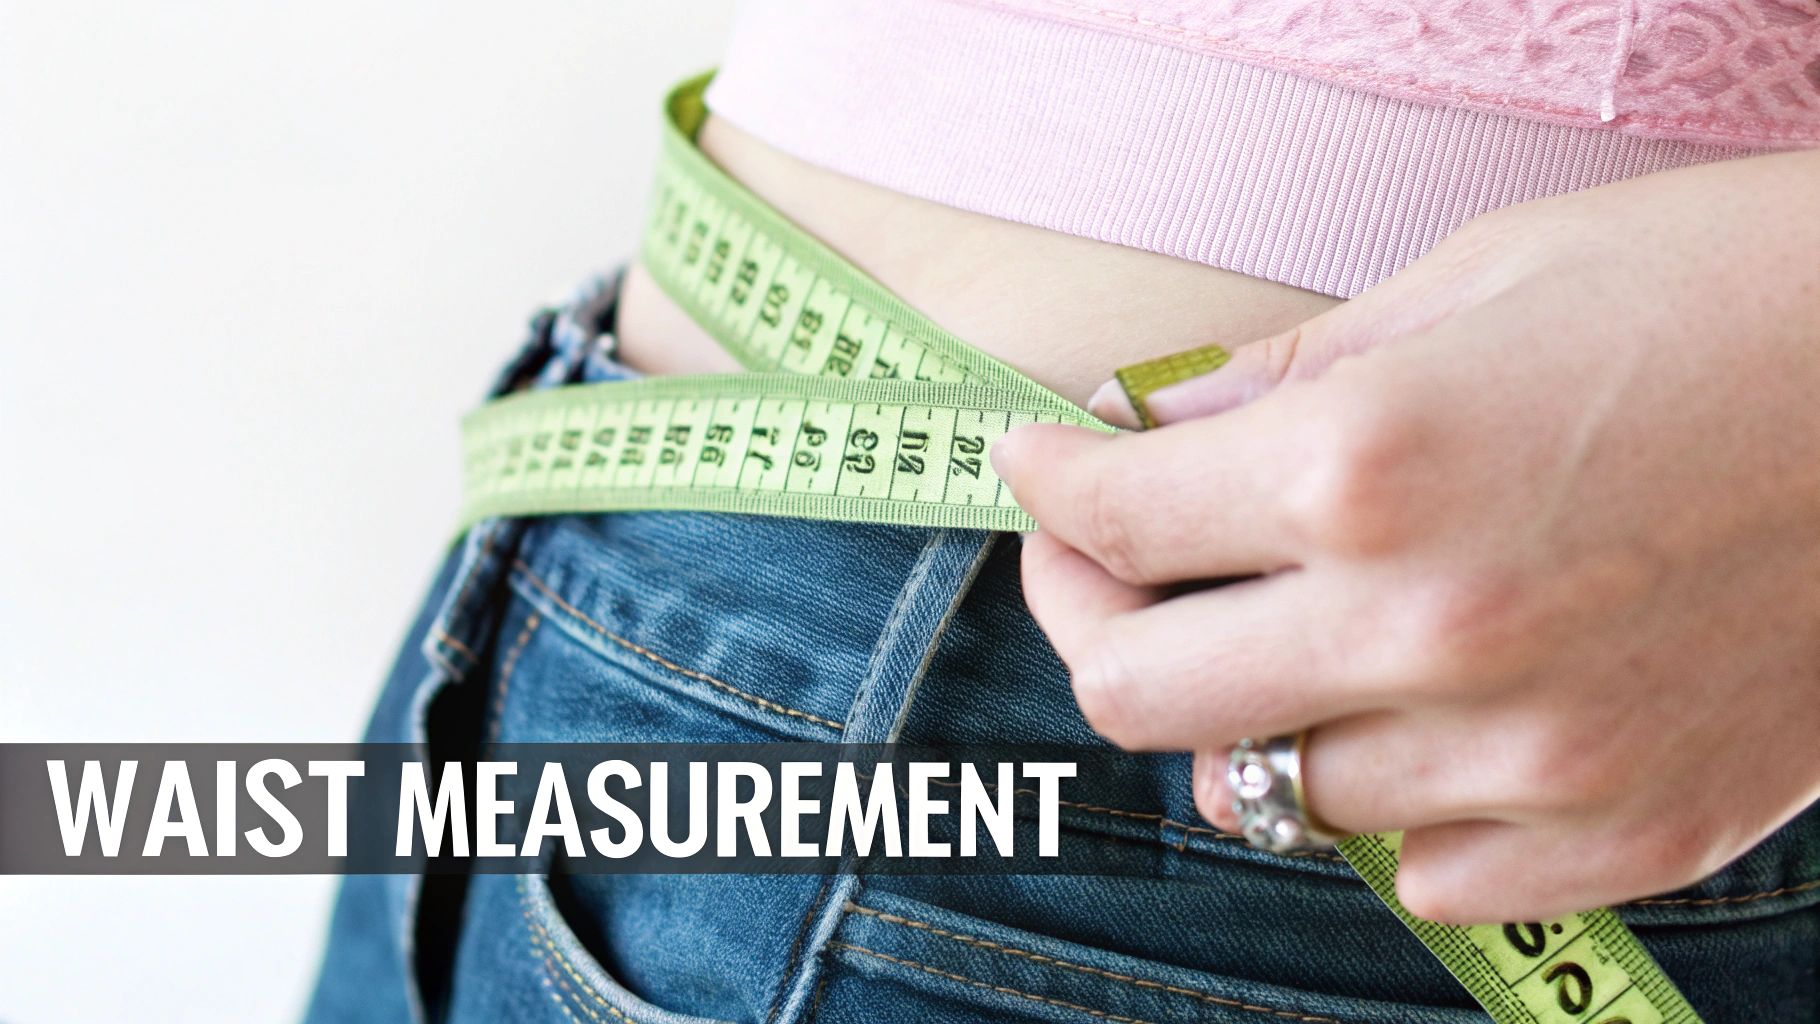
Nailing Your Waist and Hip Measurements
 Let’s be honest, almost everyone gets their waist measurement wrong at first. It’s a common mix-up to measure where your favourite jeans sit, but that's not your natural waist. Finding your true waist is fundamental to how to take body measurements for clothes accurately, as this single number influences the fit of everything from high-waisted trousers to A-line dresses.
A simple trick I always use is to bend to one side; the crease that forms is your natural waistline, which is usually just above your belly button. When you wrap the tape measure around this point, make sure you keep it parallel to the floor for an accurate reading.
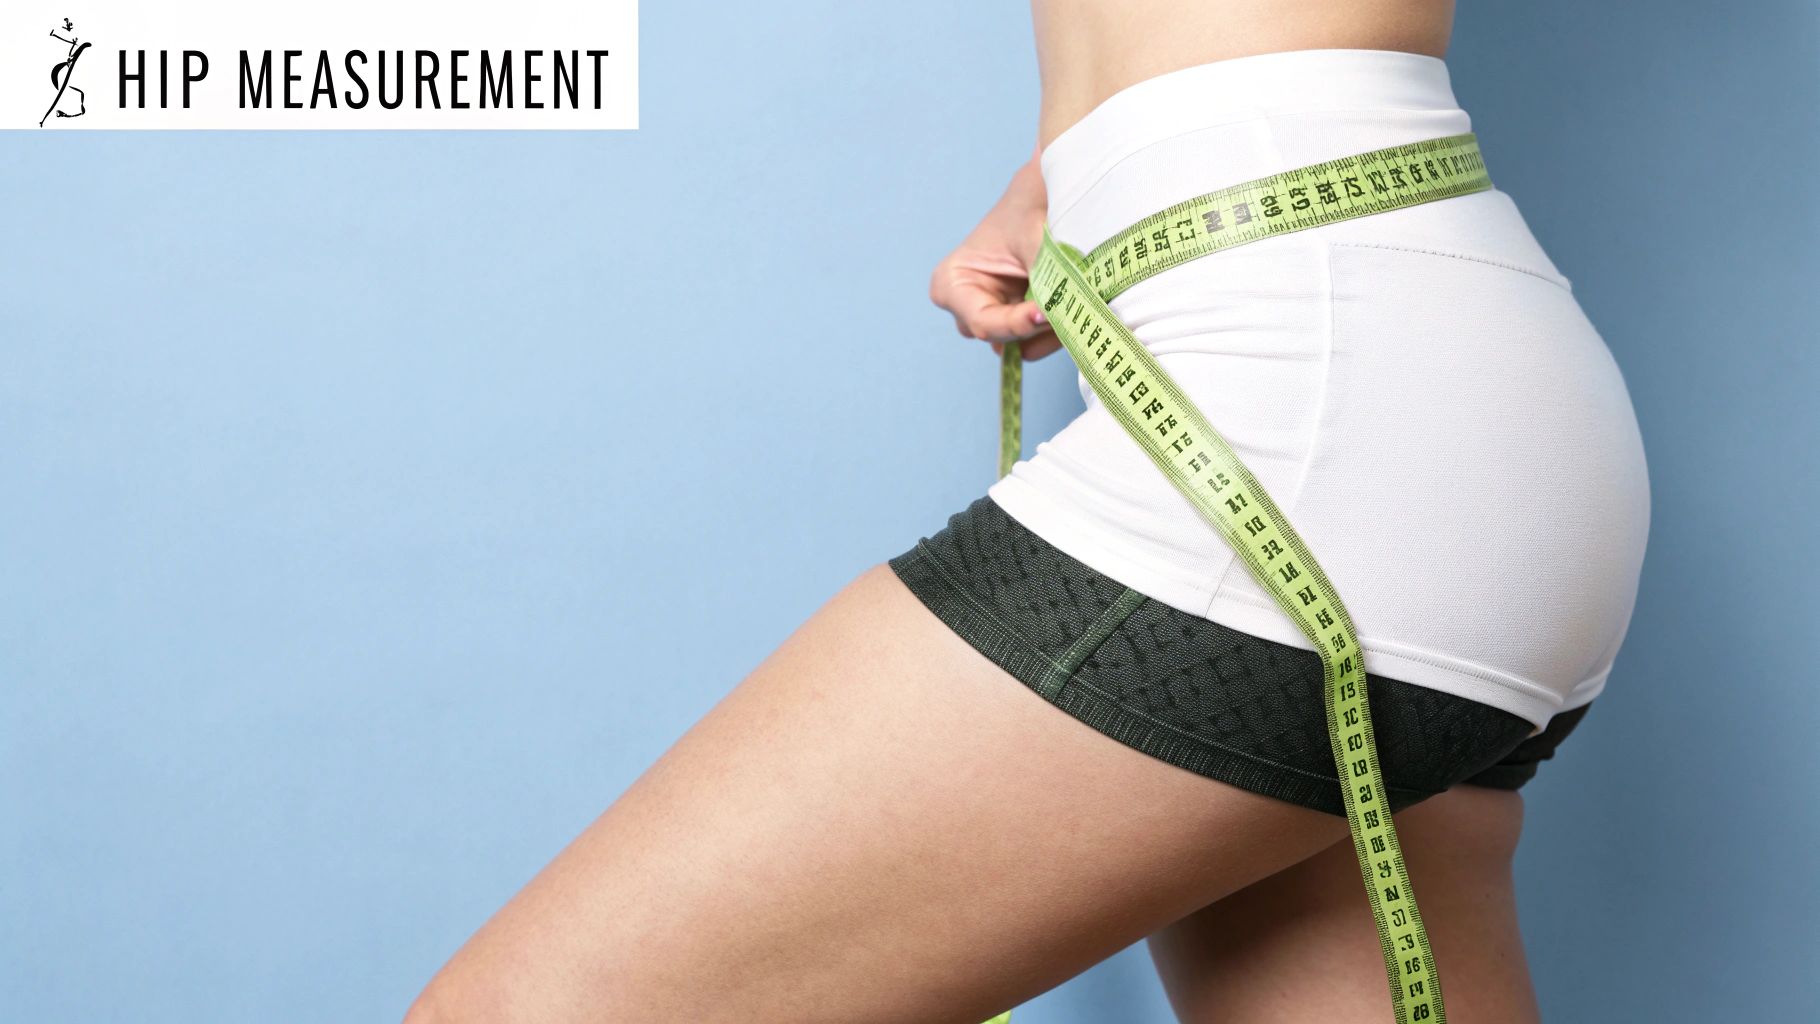
Finding Your Hip and Seat
Once you've located your waist, the hips are next. Stand with your feet together and wrap the tape around the fullest part of your hips and bottom. Using a mirror is a massive help here to ensure the tape isn’t sagging at the back, which is a very easy mistake to make when measuring solo. This hip measurement is crucial for preventing trousers from feeling too tight when you sit down.
For an even more precise fit, especially for tailored trousers or fitted skirts, you should also consider the seat measurement. This is taken around the widest part of your hips and buttocks, similar to the standard hip measurement, but with a focus on ensuring maximum comfort for sitting. Many tailors I've worked with find this number just as important as the hip measurement itself.
Accurately taking these measurements is a skill that has been refined over time. In fact, standardising body measurements in the UK began in the 19th century as demand for ready-to-wear clothing grew, which reduced the reliance on purely bespoke tailoring. You can discover more insights about the history of clothing sizes on Wikipedia.
These core lower-body numbers, when combined with your upper-body figures, provide a complete picture for pattern makers and retailers. A tailor’s dummy is an excellent tool for visualising how these measurements translate into a three-dimensional shape, which is especially useful for men's tailoring. If you're looking to improve your fitting process, check out our guide on how a male tailor dummy can transform your fitting game.
Getting Lower Body and Length Measurements Right
Getting a perfect fit on trousers often hinges on the lower body and length measurements, but these can be surprisingly difficult to get right. The inseam measurement, for example, is a common point of confusion. It’s not simply about measuring from your crotch to your ankle; it’s about measuring to the precise point you want your trousers to finish.
Think about it this way: the inseam for a pair of cropped summer trousers will be several inches shorter than for a pair of formal trousers designed to have a slight break over your shoes. To get this measurement yourself, hold the start of the tape measure snugly at your inner crotch and let it drop straight down your leg to your ideal hemline. It helps to stand in front of a mirror or have a friend assist to ensure the tape is straight.
Tackling Circumference and Outseam
Beyond just the length, circumference measurements are what determine comfort and silhouette. The thigh circumference is crucial; it’s the difference between jeans feeling restrictive or fitting like a dream. To find it, simply measure around the fullest part of your upper leg. You can use this same approach for your knee and calf, which is especially useful when considering slim-cut trouser styles.
Another often-ignored but incredibly valuable measurement is the outseam. This is taken from your natural waist, down the outside of your leg, to your desired hem length. So why does this matter? It's the secret to understanding trouser rise. If two pairs of trousers have the same inseam but different outseams, you immediately know one sits higher on the waist. This small piece of information can solve those long-standing fit mysteries, explaining why some styles feel amazing while others just seem a bit… off.
For anyone who works with sewing patterns, getting these measurements spot-on is non-negotiable. Using a scaled-down model can be a fantastic way to visualise how a garment will fit and drape before you even think about cutting into your good fabric. If you're looking to sharpen your pattern-making skills, you might find our guide on half-scale mannequin mastery particularly useful.
Finally, don’t overlook the torso and back length, measured from the nape of your neck down to your natural waistline. These are vital for all-in-one garments like jumpsuits and dresses, and for making sure tops don't ride up awkwardly. Truly mastering how to take body measurements for clothes in these specific areas gives you the confidence to shop for or create garments that fit flawlessly from top to bottom.
Avoiding the Measurement Mistakes Everyone Makes
Even with the best intentions, it's easy to make small mistakes that can throw off your fit. Getting accurate numbers for your clothes isn't just about wrapping a tape measure around yourself; it's about avoiding the common slip-ups that can lead to a wardrobe disaster. Let's move beyond the obvious "pulling the tape too tight" and look at the sneakier problems that can affect your final measurements.
Posture and Breathing Matter
One of the most overlooked aspects of measuring is your posture. If you're slouching or hunching over, your back length and waist measurements simply won't be accurate. Before you start, stand up straight, relax your shoulders, and keep your feet planted firmly together. It creates a natural, neutral stance that reflects how you'll actually wear the clothes.
Equally important is how you breathe. Many people instinctively hold their breath or suck in their stomach when the tape measure comes out, especially around the waist. This is a recipe for clothes that are uncomfortably tight. For a true-to-life measurement, breathe normally and let your abdomen relax. You want the garment to fit you on a normal day, not just when you're holding everything in.
What You Wear (and Why It’s Important)
Measuring over bulky jumpers or jeans is a classic mistake that adds phantom centimetres to your results. For the most precise figures, you should always measure in your undergarments or very thin, form-fitting clothes like leggings and a camisole. This ensures the tape is measuring you, not your outfit.
Getting this right is more important than you might think. It's estimated that 15-20% of UK consumers return online clothing purchases because of a poor fit, a problem that often starts with these small measurement inaccuracies. While the UK fashion industry is pushing for better size standardisation, it all begins with precise at-home measuring. If you're curious about this topic, you can learn more about clothing sizing principles and history on bu.style.
Sometimes, despite your best efforts, the numbers just don't seem to line up. Don't be afraid to measure a second or even third time to be sure. It's also completely normal to find you're a different size in different areas – for instance, you might have a medium bust but large hips. This is where you have to prioritise the most critical measurement for the garment you're making or buying. Tools like inclusive mannequins can be a massive help here, allowing you to visualise how a garment will drape on different proportions. For more on this, check out our article on plus-size mannequins for stylish displays.
To help you sidestep these common issues, we've put together a table outlining the most frequent measurement mistakes and how to fix them.
| Common Mistake | Why It Happens | How to Fix It | Impact on Fit |
|---|---|---|---|
| Measuring over clothes | It's tempting to do a quick measure without changing. | Always measure in undergarments or thin, close-fitting clothing. | Garments will be too large, as you've added the bulk of your clothes to your measurements. |
| Sucking in your stomach | An instinctive reaction to being measured at the waist. | Breathe out normally and relax your abdomen before measuring. | Waistbands will be uncomfortably tight and restrictive. |
| Slouching or poor posture | We often don't stand in a neutral position naturally. | Stand tall, with your shoulders back and feet together. | Can lead to inaccurate torso and back length measurements, affecting the overall drape. |
| Letting the tape droop | The tape measure can easily slip, especially when measuring hips or chest. | Ensure the tape measure is parallel to the floor all the way around. Use a mirror or ask for help. | Creates an artificially large measurement, resulting in a baggy or ill-fitting garment. |
This table should help you catch those little errors that make a big difference. By being mindful of your posture, what you're wearing, and the position of the tape, you'll be well on your way to getting numbers you can trust for a perfect fit.
Making Your Measurements Work in Real Life
You've carefully taken down all your numbers, so what now? This is the moment where knowing how to take body measurements for clothes really starts to make a difference, turning the often confusing world of online shopping into a far more straightforward affair.
Don’t be discouraged if your measurements don't align perfectly with a single size on a brand's chart—this is completely normal. In fact, it’s quite common to find you have, for instance, a size 12 bust and a size 14 hip. This is where a little bit of strategy comes in.
When Your Measurements Span Multiple Sizes
The trick is to figure out which measurement is the most important for the specific item you're buying. For a non-stretch dress, you should always go with the size that accommodates your largest measurement, whether that’s your bust, waist, or hips. It's much easier to have a garment taken in than to try and let it out. For a pair of trousers, the hip measurement is usually the decider, ensuring you have enough room to sit and move about.
If you often find yourself between sizes, have a close look at the product description. The fabric content can give you huge clues. A top made from a stretchy jersey with elastane will be much more forgiving than one made from rigid cotton poplin, and you can often size down. Customer reviews are also your best friend here; shoppers are usually very honest about whether an item runs large, small, or fits just right.
Working with a Tailor or Seamstress
Having your measurements ready makes visiting a tailor a breeze. When you go for a fitting, be specific about what you want. Instead of just saying "make it smaller," point out exactly where it feels too loose. Your core measurements—bust, waist, and hips—will be their starting point for most jobs. For something more structured, like a blazer, providing your shoulder width and sleeve length will be a massive help.
Professionals often rely on adjustable dress forms to get the fit just right. If you do a lot of sewing or alterations yourself, you can learn more about how to use a mannequin with a stand to achieve that perfect drape and fit at home.
Remember to keep your measurements written down somewhere safe and consider re-measuring every six months or so. Our bodies change, and having up-to-date numbers ensures you're always shopping smart, building a wardrobe filled with pieces that feel custom-made for you.
At Display Guru, we appreciate the importance of a perfect fit. From adjustable tailor's dummies to professional garment rails, we supply the quality tools you need to make your designs a reality. Shop our collection today and see what a difference the right equipment can make.