


A Crafter's Guide to Scissors in Sewing
If you're serious about sewing, there's one tool you absolutely can't skimp on: a fantastic pair of scissors. They're the first and most fundamental tool you'll use, responsible for setting up every project for success with clean, precise cuts. A good pair of fabric scissors is a real investment, and they'll give you an edge that your everyday kitchen or paper scissors just can't compete with.
The Unsung Hero of Every Sewing Kit
Before we get into all the different kinds of sewing scissors you can find today, it's worth taking a moment to appreciate their history. These tools didn't just appear overnight; they evolved from simple cutting implements into the precision instruments we rely on. The story of our modern sewing scissors really gets going in 18th-century England, a time of huge manufacturing breakthroughs.
This era was a game-changer, especially for the city of Sheffield, which became the world's hub for steel production. It was here that new forging methods made it possible to create incredibly sharp, durable blades—exactly what tailors and dressmakers needed.
The Sheffield Revolution
The leap from basic iron shears to modern steel scissors was more than just an upgrade; it was a revolution in quality. In 1761, a Sheffield maker named Robert Hinchliffe created the first pair of scissors from hardened and polished cast steel. This new process produced a tool that stayed sharp for far longer, making it perfect for the non-stop, precise cutting that textile work demands. If you're curious, you can explore the complete history of scissors to see how they've developed over time.
This innovation sealed Sheffield's reputation as the global leader in scissor manufacturing. The core principles that Hinchliffe and his contemporaries established—using high-quality steel and focusing on a razor-sharp edge—are still what separates the best sewing scissors from the rest.
When you hold a quality pair of fabric shears, you are holding a piece of history. The weight, balance, and clean cutting action are the direct results of centuries of refinement, a legacy that began with the need for better tools in the textile trade.
Why This History Matters for You
Understanding where these tools came from helps explain why a dedicated pair of sewing scissors is so crucial. Unlike the all-purpose scissors in your junk drawer, fabric shears are designed with one specific job in mind: to slice through textiles cleanly, without snagging or fraying.
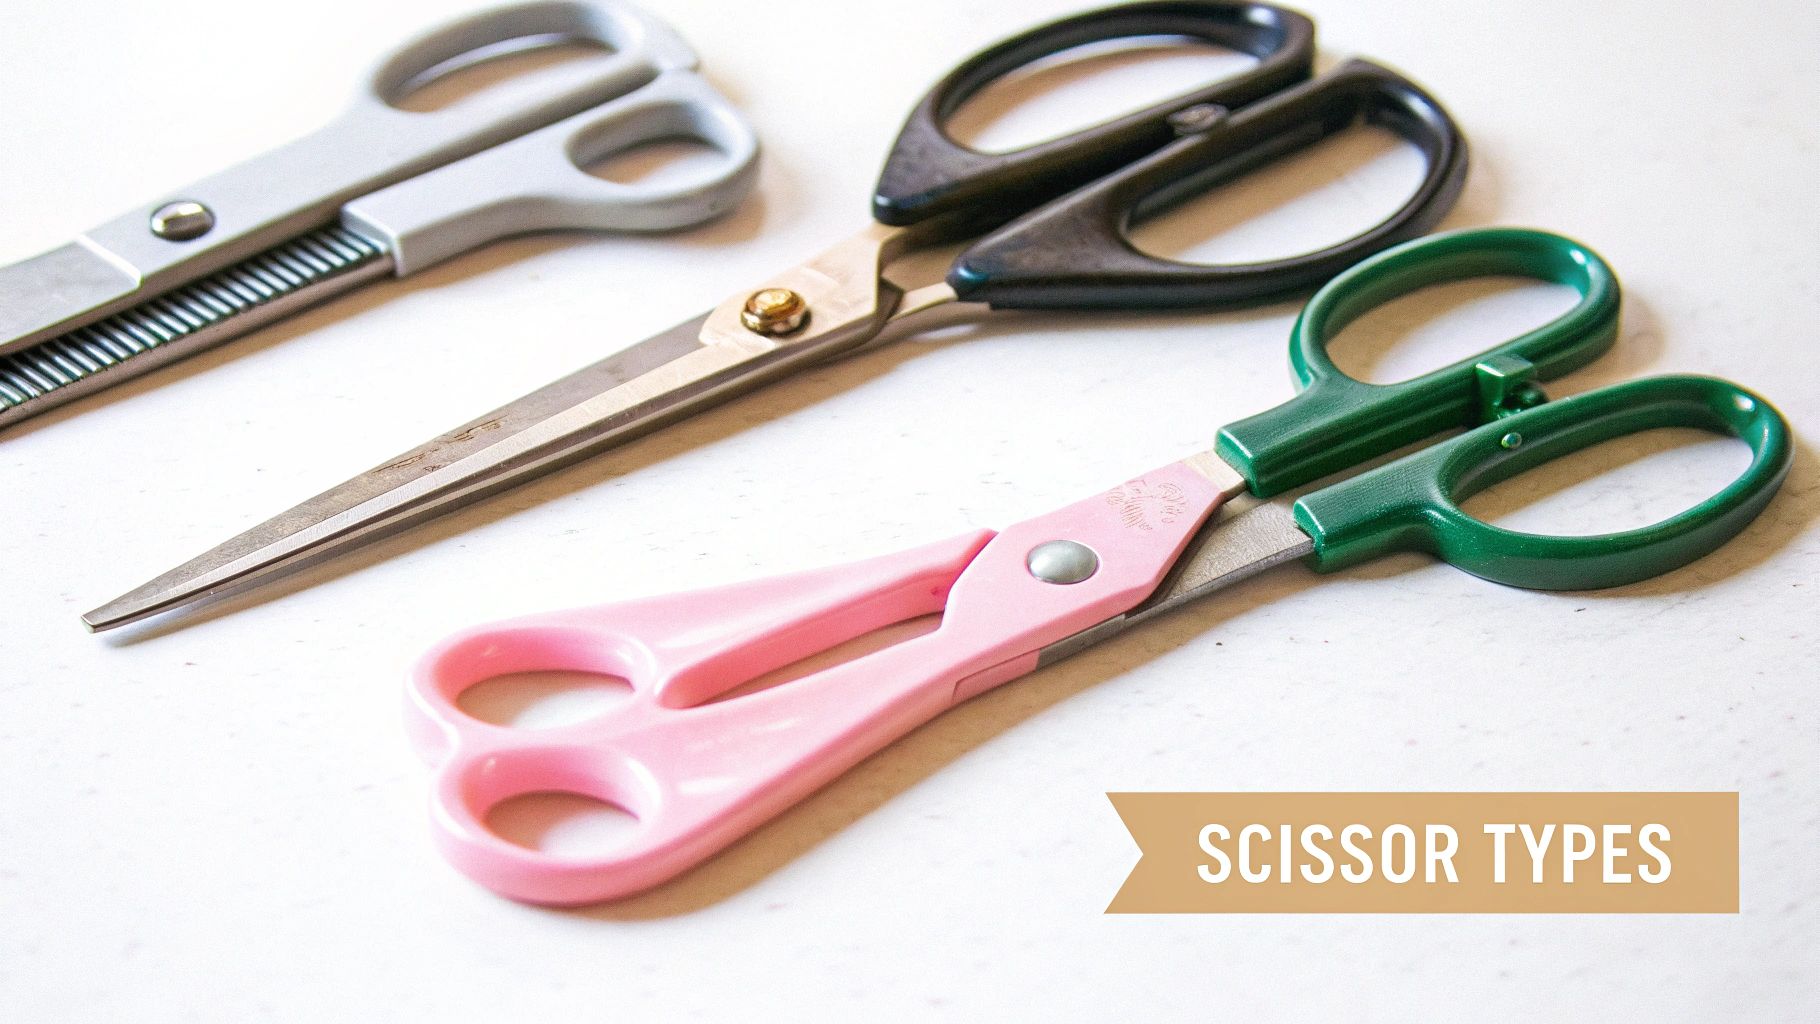
This image gives you a sense of the sheer diversity in scissor design throughout history. You can see how they were adapted for different jobs, from delicate embroidery to heavy-duty tailoring. The basic design—two blades on a pivot—hasn't changed, but the materials and ergonomics have seen constant improvement.
Knowing this history helps you appreciate the craftsmanship behind a great pair of scissors. They aren't just a throwaway purchase; they're an investment in the quality of your work. Every time you pick them up, you're connecting to a long line of makers who relied on these sharp, dependable tools. As we look at the different types available, just remember that each one is a specialised descendant of those original Sheffield innovations.
Building Your Essential Scissor Toolkit
Ever tried to cut fabric with a pair of scissors from the kitchen drawer? If you have, you’ll know the chewed-up, jagged line it produces. Using the right tool for the job is more than just a preference in sewing; it's the difference between a professional finish and a project-ending disaster.
Think of your sewing scissors like a chef's knife set. You wouldn't use a delicate paring knife to chop through bone, and you shouldn't use your best fabric shears to cut paper. Each tool is designed for a specific purpose, and respecting that is the first step towards better sewing.
At the heart of any sewing kit is a dedicated pair of fabric shears. These are your prized possession. The golden rule, sworn by every sewer, is that they only touch fabric. Cutting paper, tape, or anything else will dull their finely-honed blades in an instant, leading to snagged threads and inaccurate cuts.
The Four Essential Pairs Every Sewer Needs
To really set yourself up for success, you need more than just one good pair of shears. A small, curated collection will make your workflow smoother and your results far more polished. You don't need a drawer full of tools, just the right ones.
Here are the four workhorses you’ll reach for again and again:
- Fabric Shears (or Dressmaker’s Shears): These are the stars of the show. Typically 8 to 10 inches long, their long blades are perfect for gliding through fabric in one clean, continuous motion. Look for a pair with a bent-handle design; this allows the bottom blade to rest flat on your cutting table, which stops the fabric from lifting and ensures your pattern pieces are cut with precision.
- Embroidery Scissors: Tiny but mighty. At just 3 to 4 inches long, these scissors have incredibly fine, sharp tips made for detailed work. They’re essential for snipping threads flush with the fabric, trimming appliqué, and neatly finishing buttonholes without accidentally cutting your garment.
- Pinking Shears: You'll recognise these by their distinctive sawtooth blades. Pinking shears aren't for cutting out your main pattern pieces. Instead, their job is to finish raw fabric edges and seam allowances. The zigzag pattern they create stops woven fabrics from fraying, giving the inside of your garments a clean, durable finish.
- Thread Snips: These spring-loaded clippers are designed for one thing: speed. Keep them right next to your sewing machine for quick, one-handed snips to cut threads at the end of a seam. They save you from constantly reaching for your larger shears and are a true time-saver.
A great way to approach this is to match your scissors to the material you're working with.
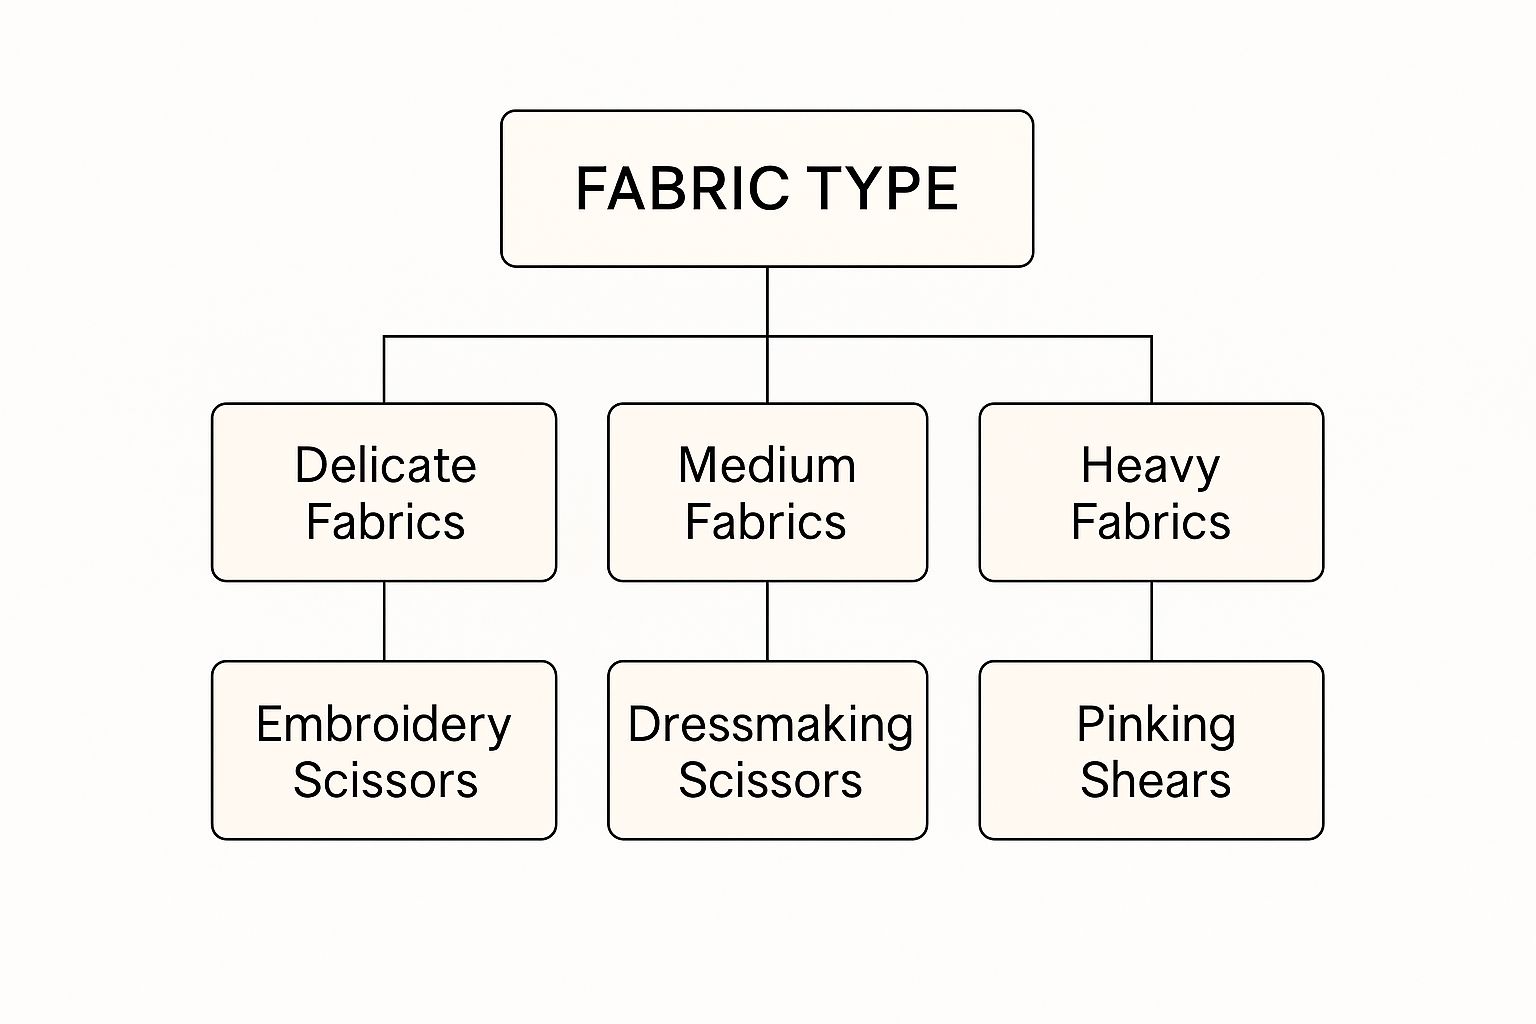
As the illustration shows, heavier fabrics need the power of shears, while delicate trimming requires a much finer tool.
Essential Sewing Scissors and Their Primary Uses
To make it even clearer, here's a quick-reference table that breaks down what each of these core tools does best.
| Scissor Type | Primary Use | Key Features |
|---|---|---|
| Fabric Shears | Cutting large pieces of fabric and patterns. | Long blades (8-10 inches), sharp edge, bent-handle design for flat cutting. |
| Embroidery Scissors | Detailed thread trimming, appliqué, and buttonholes. | Small (3-4 inches), ultra-fine tips, highly precise for close-quarters work. |
| Pinking Shears | Finishing raw edges to prevent fraying. | Sawtooth blades that create a zigzag cut. |
| Thread Snips | Quickly cutting threads at the sewing machine. | Small, spring-loaded, designed for fast one-handed use. |
Having these four pairs on hand means you’re prepared for almost any cutting task a project might throw at you.
Why You Can’t Just Use One Pair
It might feel a bit excessive at first, but keeping separate scissors is non-negotiable for quality work. Imagine trying to snip a single stray thread with a huge pair of dressmaker's shears – it’s clumsy and you risk gouging your fabric. On the flip side, trying to cut denim with tiny embroidery scissors would be a frustrating, hand-cramping exercise in futility.
The rule is simple: the right tool for the right job. Honouring the purpose of each pair of scissors not only improves your work but also dramatically extends the life of your tools, protecting your investment.
Keeping your fabric shears pristine is the most important part of this. Give them a dedicated home where they won't be mistaken for craft scissors. If you're looking for clever ways to keep your tools in order, exploring some sewing room ideas can provide fantastic inspiration for creating a workspace where your best tools are protected and always within reach.
With these four types of scissors as your foundation, you'll be well-equipped to tackle the vast majority of sewing projects with confidence and precision.
How to Choose the Perfect Fabric Shears
Choosing your first good pair of fabric shears is a real milestone in your sewing journey. This isn't just another tool; it's an investment that pays dividends on every single project you create. A truly great pair feels less like a pair of scissors and more like a natural extension of your hand, delivering those satisfyingly clean, crisp cuts that lay the groundwork for a professional finish.
To find your perfect match, you need to look past the price tag. It's the little details that make all the difference—the blade material, the overall length, the weight in your hand, and the ergonomics. These factors determine not just how well the shears perform, but how they feel after an hour of cutting out a complex pattern.
When you know what to look for, you can confidently pick a pair that’s right for your hands, your projects, and your unique way of working.
Analysing Blade Material and Design
The soul of any pair of shears is in its blades. The steel they’re crafted from dictates their sharpness, how long they'll hold that edge, and their overall lifespan.
You'll generally find two main types of steel used:
- High-Carbon Steel: This is the gold standard for serious sewists. The higher carbon content means the blades can be honed to an incredibly fine, sharp edge that lasts. They are exceptionally strong but do need a bit of looking after—always wipe them down and keep them dry to prevent any chance of rust.
- Stainless Steel: A fantastic and far more common choice, stainless steel is brilliant for its rust resistance and general durability. While you might need to sharpen them a bit more often than high-carbon steel, they are wonderfully low-maintenance and a dependable workhorse for almost any sewing task.
Beyond the metal itself, look at how the blade is sharpened. Many professional-grade shears boast a "knife edge," where the blades are ground at a very steep angle. This design is what allows them to slice through fabric with almost zero effort, preventing those frustrating snags and giving you one smooth, clean cut from the pivot right to the very tip.
Finding the Right Fit and Feel
What good are sharp blades if the shears are a nightmare to hold? Ergonomics aren't a luxury; they're essential for accuracy and preventing hand fatigue.
The single most important feature here is the bent-handle design. This clever offset lets the bottom blade lie completely flat on your cutting table. This is crucial because it means you can cut your fabric without lifting it, preventing the material from shifting and ensuring your pattern pieces are perfectly accurate. Of course, a good surface is just as vital. For more on this, have a look at our guide on choosing a pattern cutting table that suits your space and your tools.
The perfect shears should feel balanced in your hand—not too heavy, not too light. The handle loops should fit your fingers comfortably without pinching, allowing for a relaxed but firm grip.
Choosing the Ideal Length and Weight
Shears come in a variety of lengths, most commonly between 8 to 12 inches. The right size for you really comes down to your hand size and the kind of sewing you do most.
- 8-9 Inch Shears: These are the versatile all-rounders. They're perfect for most dressmaking, offering a great balance of control for navigating curves while still being long enough for straight runs.
- 10-12 Inch Shears: If you're tackling big projects like curtains, upholstery, or large quilts, longer shears are a godsend. Their extended blades let you make long, flowing cuts quickly and smoothly, though they can feel a bit unwieldy for smaller, more detailed work.
Weight is the final piece of the puzzle. Heavier shears often feel more robust and can help you power through tough, thick fabrics like denim or wool. Lighter shears, on the other hand, can be a real wrist-saver during those marathon cutting sessions. If you can, try to hold a few different pairs before buying. You’ll know when you’ve found a weight that feels both comfortable and controllable.
By thinking through these elements—the material, the feel, the length, and the weight—you’ll be able to choose a pair of fabric shears that will be a trusted companion for years to come.
Beyond the Basics: Mastering Specialty Scissors for Pro Finishes
While a great pair of fabric shears is the undisputed workhorse of any sewing room, it’s the specialty scissors that truly separate good sewing from great sewing. These aren't just novelties; they are purpose-built tools designed to solve specific challenges with elegance and precision.
Think of them as the specialist surgeons of the sewing world. They turn tricky, nerve-wracking tasks into straightforward steps, elevating the final quality of your work from homemade to professional. Once you understand what they do, you’ll wonder how you ever managed without them.
The Precision of Duckbill Appliqué Scissors
Ever held your breath while trying to trim that tiny bit of excess fabric from an appliqué, praying you don’t snip through the garment underneath? Duckbill scissors are the ingenious answer to this common sewing nightmare.
They have a unique design with one wide, flat blade that looks like a duck's bill. This paddle-like shape is the magic; it slides between your fabric layers, lifting the part you want to cut while keeping the base fabric safely pushed away. This lets you trim incredibly close to your stitch line without any fear of making a catastrophic mistake.
They are an absolute must-have for:
- Detailed Appliqué: Trimming neatly around intricate shapes after you've stitched them down.
- Reverse Appliqué: Cutting away the top layer to reveal the fabric beneath.
- Grading Seam Allowances: Trimming seam layers to different widths to reduce bulk for a flat, crisp finish.
The control they provide is simply unmatched.
Duckbill scissors transform one of the most stressful cutting jobs into a simple, confident action. They act as a physical guard, removing the element of chance and giving you complete control over your close-quarters trimming.
Creating Perfect Slits with Buttonhole Scissors
Cutting a buttonhole is a real moment of truth. One tiny slip and you can ruin a garment you’ve spent hours on. Buttonhole scissors are specifically designed to take all the risk out of this crucial step.
These are small but mighty scissors with short, stout blades for maximum control. Their best feature, though, is an adjustable screw that lets you set the exact cutting length. You just set the screw to match your buttonhole size, position the blades at the starting point, and snip. The screw acts as a physical stop, preventing the blades from cutting a single millimetre further than you intended.
This brilliant feature guarantees every single buttonhole on your shirt or jacket is identical, which is key to a truly high-end, professional finish.
The Speed and Power of a Rotary Cutter
For quilters, or frankly anyone who needs to cut long, straight lines or multiple layers of fabric at once, the rotary cutter is a revelation. It’s less like a pair of scissors and more like a pizza cutter for fabric, with a razor-sharp circular blade that glides through material.
When used with a self-healing mat and a clear ruler, a rotary cutter delivers speed and accuracy that shears just can't compete with. You can slice through 4, 6, or even 8 layers of cotton in a single, clean pass, ensuring every piece is perfectly identical. This is a massive time-saver for patchwork, quilting, and any project with repeating shapes.
Of course, the key is having the right setup. A large, stable workbench is vital, and you can learn more about the benefits of dedicated cutting tables for sewing to see how a proper workspace can revolutionise your workflow. Adding these three specialist tools to your kit will give you the confidence to tackle more ambitious projects and achieve a level of finish that really stands out.
The Art of Scissor Care and Maintenance
A quality pair of sewing scissors is more than just a tool—it's an investment in your craft. Look after them properly, and they’ll serve you well for years, delivering those clean, crisp cuts that make all the difference. Neglect them, though, and that premium tool can quickly become a source of frustration.
Protecting this investment starts with the one golden rule every sewer learns, often the hard way: fabric scissors are for fabric only. It's so tempting to grab them for a quick snip of paper or sticky tape, but doing so is the fastest way to destroy their finely honed edge.
You might wonder how something as soft as paper could harm hardened steel. Paper contains abrasive fillers like clay and calcium carbonate, which act like microscopic sandpaper on the blades. These tiny particles create micro-nicks along the cutting edge, causing them to snag and chew fabric. It’s why a pair of shears that can slice through denim can be defeated by a single sheet of A4.
Establishing a Simple Care Routine
Keeping your scissors in top condition doesn't require a lot of fuss. A few simple habits built into your sewing routine will keep them gliding through fabric as beautifully as the day you first used them. This tiny bit of effort pays off big time, preserving their sharpness and extending their lifespan.
A basic routine really just comes down to three things: cleaning, oiling, and storing.
- Wipe Down After Every Use: Keep a soft, dry cloth handy—a scrap of microfibre or flannel is perfect. After you’ve finished cutting, give the blades a quick wipe to clear away lint and dust before it works its way into the pivot screw.
- Oil the Pivot Point Occasionally: Just like your sewing machine, your scissors have moving parts that need a little lubrication. A single drop of sewing machine oil on the pivot screw every few months will keep the action smooth and effortless. Open and close the blades a few times to work it in, then wipe off any excess so you don't stain your next project.
- Store Them Safely: Never just toss your shears into a drawer full of other tools. Banging against other metal objects can knock the blades out of alignment or chip the tips. Store them in the case they came in, a dedicated sheath, or even a wall-mounted rack. An organised space doesn't just protect your tools, it streamlines your entire process. For some great ideas, have a look at our guide on sewing room organisation.
Recognising When Your Scissors Need Sharpening
Even with the best care in the world, all scissors will eventually need to be sharpened. The key is to recognise the signs before dull blades start to ruin your work.
A dull blade doesn't just cut poorly; it actively damages your fabric. Instead of slicing cleanly through the fibres, it folds and chews them, resulting in frayed edges and inaccurate pattern pieces.
Keep an eye out for these tell-tale signs:
- The scissors start to fold or bend the fabric instead of cutting it.
- You notice snagging, particularly on delicate fabrics like silk or chiffon.
- You find yourself having to apply much more pressure to make a cut.
- The shears won’t cut cleanly all the way to the very tip.
If you spot any of these problems, it’s time for a tune-up. While you can find home sharpening kits, for a really good pair of shears, I’d always recommend professional sharpening. They have the right equipment to restore the precise blade angle needed for perfect performance.
Tackling Common Fabric Cutting Problems
We've all been there. You're in the zone, gliding through fabric, and suddenly your shears start snagging, chewing the material, or feeling stiff in your hand. It's a frustrating hiccup that can throw off your entire project. But don't worry, most of these issues are easily diagnosed and often simple to fix right at your cutting table.
Think of your fabric shears as a precision instrument. Just like a musician tunes their guitar before a performance, a sewer needs to tune their scissors to keep them working perfectly. Getting to the root of the problem is the first step back to achieving those satisfyingly clean cuts.
Why Your Fabric is Snagging or Chewing
One of the most common complaints I hear is about scissors that suddenly start creating a frayed, chewed-looking edge instead of a crisp line. In almost every case, this is a classic sign of dull blades. Even the finest steel will lose its edge over time, causing it to push and pull the fibres apart rather than slicing them cleanly.
Another culprit could be a tiny, invisible nick in the blade. This often happens if you accidentally snip over a pin or (and we're all guilty of this at some point) use your fabric shears for something other than fabric. To check, run your fingernail very carefully along the blade's edge. You’ll probably feel the tiny imperfection that’s causing all the trouble.
A sharp pair of scissors slices through fabric fibres effortlessly. A dull pair crushes and tears them, leading to frayed edges and inaccurate pattern pieces. This seemingly small issue can compromise the structural integrity of your seams before you even start sewing.
If the blades are just dull, it’s time for a professional sharpening. If you’ve found a small nick, a sharpening expert might be able to grind it out, but it’s a good reminder to be more vigilant about pins!
That Stiff or Loose Feeling
What if your shears feel stiff and are a real effort to open and close? The problem is almost certainly the pivot screw. Over time, tiny fibres and lint can work their way into the joint, creating friction and making the cutting action feel sluggish. A single drop of sewing machine oil on the screw, followed by working the blades back and forth a few times, usually does the trick.
On the other hand, if the blades feel loose and wobbly, the pivot screw has likely worked its way loose. This is a real problem, as it can cause the fabric to fold between the blades instead of being cut. A gentle turn of the screw with a screwdriver is all you need—just a tiny adjustment is usually enough to restore the tension. Just be careful not to overtighten, or you'll be right back where you started.
Of course, using the right surface prevents a lot of problems from the get-go. A good quality mat protects both your table and your scissor tips from damage. You can find a wide range of professional sewing cutting mats that provide the perfect foundation for accurate, safe cutting.
When The Blades Don't Cut Right to the Tip
It's maddening when your shears cut beautifully along their length but just won't snip cleanly at the very tip. This usually means the tips are either dull or have become slightly misaligned, which is especially frustrating when you're trying to clip sharp corners or get into tight spaces.
This is one of those issues that almost always needs professional help. A sharpening expert can not only hone the tips back to a perfect point but also check and correct the blade alignment, ensuring they meet with precision all the way from the pivot to the point. Regular maintenance is the key to keeping your essential sewing scissors in top form.
Your Sewing Scissor Questions Answered
When you're deep in a project, questions about your tools are bound to pop up. It happens to everyone, from seasoned professionals to those just starting their sewing journey. Getting to grips with the dos and don'ts of your scissors is one of the best ways to improve your craft, so let's tackle some of the most common queries.
Can I Really Not Use My Fabric Shears on Paper?
This is the golden rule of sewing, and for good reason: absolutely not. It might seem overly dramatic, but cutting paper with your fabric shears is the fastest way to ruin them.
Paper is full of tiny, abrasive mineral fillers that act like a very fine sandpaper on the blade’s delicate edge. Even one cut can create microscopic nicks that will cause the shears to snag, chew, or push the fabric instead of slicing cleanly through it. Keep a dedicated pair of craft scissors for your paper patterns; your fabric shears will thank you for it.
Think of your fabric shears like a chef's prized knife. You'd never use it to open a tin can, would you? The same level of respect and discipline applies here to keep that precision edge perfectly sharp.
What Is the Difference Between Shears and Scissors?
While most of us use the words interchangeably, there's a subtle but important distinction in the sewing world.
Generally, shears are longer than six inches and feature handles with two different-sized loops. There’s a smaller one for your thumb and a larger one that fits two or more fingers, giving you better leverage and control for those long, smooth cuts through fabric. Scissors, on the other hand, are usually shorter and have symmetrical, same-sized handle loops.
How Often Should I Get My Scissors Sharpened?
There’s no magic number here; it all comes down to how much you use them. A professional dressmaker who cuts fabric all day might need their shears sharpened every few months, while a hobbyist sewing on weekends could easily go a year or more.
The best way to know is to let the shears tell you. If they start snagging threads, struggling to cut cleanly all the way to the tip, or you find yourself having to apply more pressure, it’s time to see a professional. Good habits, like keeping them clean and regularly oiled, will make a huge difference in how long they stay sharp.
At Display Guru, we know that quality tools are the cornerstone of incredible craftsmanship. Discover our range of professional-grade tailor's dummies and sewing room essentials to build your perfect creative space at https://www.displayguru.co.uk.