


Master Plastic Sheeting Painting for Flawless Finishes
When it comes to painting, most people think about brushes, rollers, and the perfect colour. But for professionals, the real MVP of any paint job is something far less glamorous: plastic sheeting. It's not just about covering the floor; it's a critical technique for protecting your valuable assets and ensuring a flawless finish.
Why Plastic Sheeting Is Your Most Valuable Painting Tool

Let's stop thinking of plastic sheeting as just a flimsy drop cloth. For visual merchandisers and designers, knowing how to use it properly is what separates an amateur mess from a truly professional result. It’s the tool that saves your most valuable assets, makes your workflow smoother, and ultimately, elevates the quality of your work.
Imagine you’re refreshing a high-end retail space. Your biggest worry isn’t just getting the new paint colour right. It's making sure the expensive fixtures, custom displays, and surrounding stock are completely shielded from damage. A single drop of paint on a luxury handbag could wipe out your entire project budget. In this world, the strategic use of plastic sheeting isn't just a good idea—it's essential.
It's More Than Just a Barrier
Any seasoned pro will tell you that the secret to a great paint job lies in the prep work. In fact, most of the time spent on a project is in the preparation, not the actual painting. And at the heart of that prep is plastic sheeting.
It does so much more than just catch a few drips:
- Asset Protection: It gives you total coverage for everything from delicate mannequins to large, expensive display cases, protecting them from both paint and dust.
- Workflow Efficiency: A properly masked-off area lets you work faster and with more confidence, whether you’re using a brush, a roller, or a sprayer.
- Debris Containment: If you're tackling a messy job like sanding a display or removing old textures, it keeps all the mess in one place. Cleanup becomes a breeze.
- Professionalism: A clean, well-prepped workspace shows you take your work seriously and reflects the high standards central to effective visual merchandising.
A project’s success is often determined before a can of paint is even opened. Proper masking with quality plastic sheeting ensures that the only surface getting painted is the one you intended, preventing costly mistakes and rework.
This guide will walk you through why this simple tool is indispensable for everything from large-scale retail displays to the detailed work of painting custom mannequins. Mastering these basics will help you set the stage for a perfect project, every single time. For more on creating stunning retail environments, take a look at our essential visual merchandising guidelines.
Selecting the Right Sheeting for Your Project
We’ve all seen it happen. Grabbing the first roll of plastic sheeting off the shelf seems like a quick win, but it often leads to frustrating paint bleed, unexpected rips, and a far bigger clean-up job than you planned for. The reality is, not all plastic sheeting is created equal, and choosing wisely is the first step towards a professional finish on your mannequins and displays.
Think of this as your practical guide to navigating the options. The single most important factor to get right is the thickness, which is measured in mils. One mil is simply one-thousandth of an inch, so a higher mil number means thicker, tougher plastic. It's the same logic you'd use for paper – you wouldn't build a sturdy box out of flimsy printer paper, and you shouldn't protect a high-traffic floor with ultra-thin film.
Understanding Thickness and Density
Imagine you’re in the middle of a shop refit. You need to protect the floor from footfall, dropped tools, and the occasional ladder scuff. This is where a heavy-duty sheet of at least 4 mils becomes non-negotiable. Its robust, tear-resistant nature means it can take a beating without puncturing, giving you a reliable barrier against mess.
On the other hand, if you're draping over delicate props or lightweight fixtures, a thinner, high-density film is a much better bet. A sheet around 0.7 to 1 mil is light enough to conform to unusual shapes without weighing them down. This is perfect for covering garment rails or temporarily shielding shelving units from overspray.
The rule of thumb I always follow is simple: the more abuse the plastic needs to endure, the thicker it has to be. For draping over vertical surfaces or objects, lighter is almost always better. For floors and walkways, go heavy.
Material Types and Special Features
Beyond thickness, the type of plastic itself plays a part. Most painter's drop cloths are made from either low-density polyethylene (LDPE) or high-density polyethylene (HDPE). LDPE tends to be more flexible and is often used for those thicker, more durable sheets. HDPE, in contrast, is stiffer and can be made into very thin yet surprisingly strong films.
You may also come across special features that can be a real lifesaver on certain jobs:
- Anti-static properties: When you’re painting anything made of polystyrene or plastic, static electricity is your enemy. It's a magnet for dust and airborne particles that will embed themselves straight into your wet paint. Anti-static sheeting helps neutralise this charge, leading to a much cleaner, smoother finish.
- Cling film: Some painter’s plastic is designed with a light static cling that helps it "grab" onto vertical surfaces like walls or large displays. This makes it far easier to secure with tape and creates a much tighter seal against overspray.
Getting the material choice right is a key part of your project planning. To get a better feel for the options available, you might want to explore various plastic films and see what their specific characteristics are.
Plastic Sheeting Thickness Guide for Painting Applications
To make things even clearer, I've put together this quick reference table. It breaks down the most common thicknesses and where they work best, so you can choose with confidence.
| Thickness (Mils) | Best For | Why It Works |
|---|---|---|
| 0.7 - 1.5 mil | Draping furniture, covering delicate props, masking vertical displays. | Lightweight and easy to manage. It conforms well to irregular shapes without causing damage. |
| 2 - 3 mil | General-purpose floor covering in low-traffic areas, light sanding. | A good middle ground, offering more puncture resistance than thin films. |
| 4 - 6 mil | Protecting floors in high-traffic zones, heavy-duty projects. | Highly durable and tear-resistant, ideal for withstanding tools, ladders, and foot traffic. |
This table should give you a great starting point for almost any painting scenario you'll encounter in a retail or display environment.
Finally, a quick word on what happens after the job is done. Proper storage of leftover materials is key to an efficient workspace. If you're looking to keep your supplies organised for the next project, it's worth learning more about plastic stacking storage boxes for a tidy and professional setup.
Mastering Your Prep and Application Technique
Any seasoned professional will tell you the secret to a flawless paint job isn't in the final coat, but in the prep work. This is where we get our hands dirty, moving from planning to practice to guarantee a perfect seal and those razor-sharp lines that scream quality. Forget about winging it; getting your plastic sheeting right is a skill that pays for itself.
A methodical approach is everything. Whether you're carefully sectioning off a retail space or wrapping an intricate mannequin, precision is what stands between you and a costly mess. With the UK's professional paints and coatings market tipped to hit USD 11.29 billion by 2030, getting these foundational steps spot-on has never been more important.
Cutting and Measuring Your Sheeting
First things first, you need to cut your sheeting without creating snags or tears that could let paint through. My rule of thumb is to always unroll more than you think you need. It’s a lot easier to trim off a bit of excess than it is to try and patch a gap later on.
For clean, straight cuts, a sharp utility knife is non-negotiable. Don't try to hack through a wadded-up roll; instead, lay the plastic out flat on a clean surface. A large, self-healing cutting mat is a fantastic bit of kit for this – it protects your blade and the floor underneath. The principles are similar to those used in textiles, which you can read about in our guide on choosing the right https://www.displayguru.co.uk/blogs/news/cutting-pad-for-sewing.
Before you even make that first cut, it’s worth thinking through your choice of material.

Starting your prep by matching the sheeting's thickness to the job's demands—from light dust cover to heavy-duty floor protection—is the first real step towards a perfect result.
Securing the Perfect Seal
With your plastic cut to size, the next goal is to create a completely sealed barrier. This is where the right painter’s tape comes in, and your choice should be dictated entirely by the surface you're working with.
- Low-Tack Tape: Perfect for delicate surfaces. Think freshly painted (but fully cured) walls, wallpaper, or finished retail displays where you can't risk peeling off the surface.
- Medium-Adhesion Tape: This is your everyday workhorse. It’s ideal for most jobs, including cured paintwork, wood trim, and metal frames, offering a solid bond that stands up to sprayers.
- High-Adhesion Tape: Save this for the tough stuff. Use it on rough, uneven surfaces like brick or concrete where other tapes just won't get a proper grip.
When you're covering large areas, make sure you overlap any seams by at least six inches. This creates a double barrier and is one of the simplest, most effective ways to stop sneaky paint drips from finding a way through.
Pro Tip: The most common point of failure is a poorly sealed tape edge. Once your tape is down, run a plastic smoother or even an old credit card firmly along the edge. This forces out tiny air pockets and creates that perfect, crisp line that prevents paint bleed.
Of course, using plastic sheeting is just one part of the puzzle. Learning how to prep walls for painting properly is fundamental to achieving a truly professional finish. It’s all about creating the perfect canvas. When you combine meticulous sheeting with expert surface prep, you’re not just painting – you’re showcasing true craftsmanship.
Advanced Techniques for Mannequins and Bespoke Displays
Painting a flat wall is one thing, but bringing a mannequin or a custom retail display to life requires a completely different level of skill. This is where you move beyond simply masking off an area and start using plastic sheeting to sculpt protection around complex, three-dimensional forms.
These aren't jobs where you can just sling a dust sheet over the top and hope for the best. We're talking about creating a second skin for your object, meticulously safeguarding every curve and contour. It’s the difference between a prop that looks like it's had a quick paint job and one that looks like it’s fresh from the manufacturer.
Creating a Form-Fitting Mask
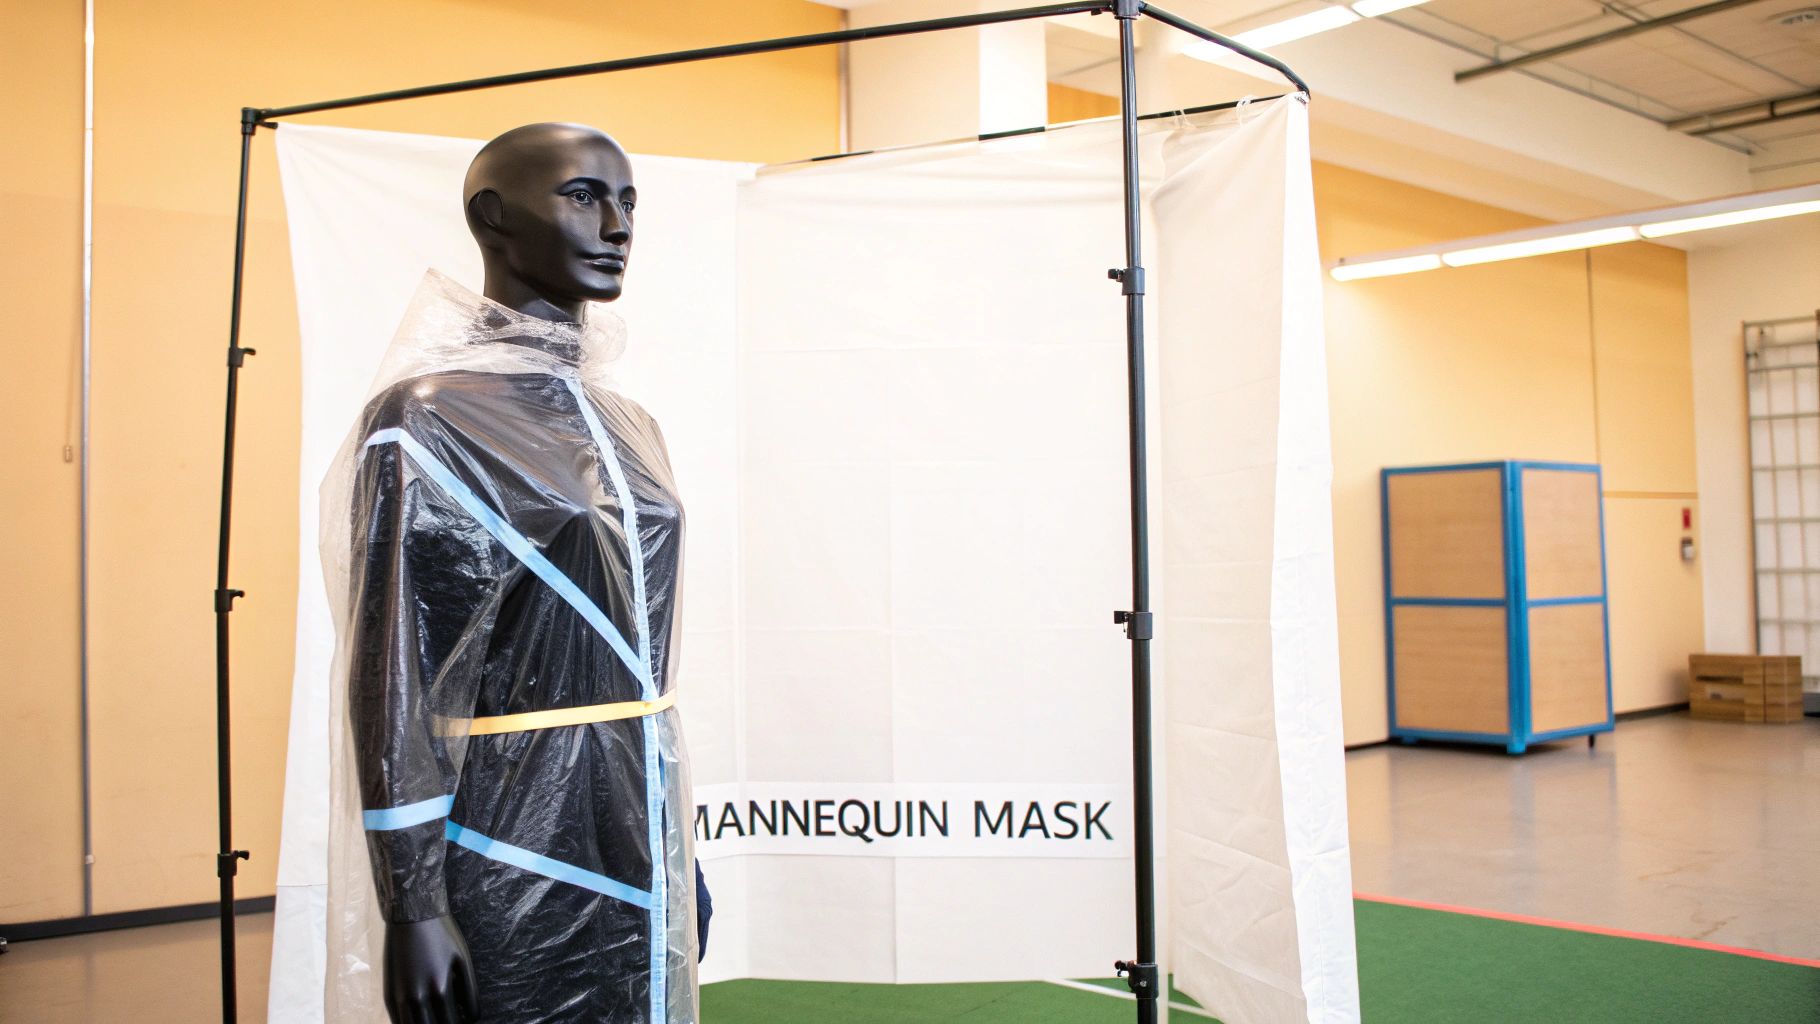
When you’re faced with a complex shape like a mannequin, trying to use one big sheet just won't work. It’s cumbersome and creates bulky folds where paint can pool and bleed. The trick is to work in smaller, more manageable sections.
Start by draping a lightweight sheet over the main torso. Then, with a sharp craft knife, carefully trim away the excess material, but be sure to leave a generous overlap around the edges. From there, use separate pieces to wrap the arms, legs, neck, and any part of the stand.
Use a quality low-tack painter's tape to secure each piece, making sure you overlap the sections of sheeting to create a complete, airtight seal. Anyone who's handled these forms knows how important precision is. In fact, many of the same principles apply as when you're preparing a display; our guide on how to dress a mannequin touches on similar themes of careful handling.
Expert Insight: Static cling is your worst enemy when painting plastic or polystyrene mannequins. It’s an invisible magnet for dust and airborne fibres that will ruin a wet paint finish. Before you even think about painting, wipe the entire wrapped surface with an anti-static cloth to neutralise the charge. It’s a small step that makes a huge difference.
Building a Temporary Spray Booth
If you're using spray paints, overspray is a given. It gets everywhere, coating surfaces in a fine mist of colour that's a nightmare to clean up, not to mention a health risk. A surprisingly simple and effective solution is to build your own temporary spray booth out of plastic sheeting.
This doesn’t have to be an elaborate construction. A basic frame made from some spare timber battens or even PVC pipes will do the job perfectly.
- Build the Frame: First, knock together a simple cube or three-sided frame. Make it large enough to hold your display piece with enough room for you to move around it comfortably.
- Hang the Walls: Next, drape a medium-thickness plastic sheet over the frame to create the walls and ceiling. You can secure it with strong tape or spring clips. Make sure the sheeting reaches all the way to the floor.
- Protect the Floor: Lay a separate, heavier-duty sheet down for the floor. Let it run up the 'walls' by about 30 cm or so to fully contain any drips and overspray.
- Ventilate Properly: This is non-negotiable. Good airflow is critical for your safety. Set up your booth near an open door or window and use a box fan—placed outside the booth—to pull the fumes away from your workspace. Never, ever spray in a fully enclosed, unventilated area.
This DIY booth contains the mess, gives you a cleaner finish by keeping dust out, and makes the whole process far safer. It’s an indispensable technique for getting professional results on any bespoke display piece, turning simple plastic sheeting into a tool for real precision and control.
Your Guide to a Clean and Safe Removal
Nothing ruins the satisfaction of a perfect paint job faster than a messy cleanup. This final step is crucial; it’s all about removing your used plastic sheeting painting materials without dragging dust and drips all over your pristine new space. It’s not difficult, but it does require a bit of patience and a methodical approach.
First things first: let the paint dry completely before you touch a thing. I can't stress this enough. Rushing this stage is a surefire way to smudge wet paint or accidentally transfer it onto clean surfaces. Once you're confident everything is fully cured, you can get started. It's also a good idea to keep your protective gear on—gloves and a dust mask will protect you from fine, airborne particles as the dried paint flakes off.
The Inward Fold Technique
The secret to a clean removal is what I call the inward fold. You start at the outermost edges of the plastic sheeting and begin carefully folding it in on itself.
The whole point is to trap all the dust, paint flakes, and any other debris in the centre, effectively creating a self-contained rubbish bag. Imagine you're folding a giant, messy letter. As you work your way in, the "dirty" side of the plastic is always facing inward. This simple technique stops loose particles from escaping and contaminating your freshly painted walls or the floor. Once it’s a manageable size, roll it up tightly and pop a piece of tape around it to keep it secure for the bin.
A disciplined cleanup is the final signature of a professional job. Taking the time to fold and contain used materials methodically prevents last-minute accidents that can undo hours of meticulous work.
Disposal and a Note on Reuse
With the UK painting and decorating market valued at around £4.0 billion in 2024, the industry generates a huge amount of waste. That makes responsible disposal more important than ever. If your plastic sheeting is caked in paint, it needs to be disposed of according to your local council’s guidelines for household waste.
But you don't always have to throw it away. Thicker, heavy-duty plastic with just a bit of light overspray can often be wiped down, left to dry, and stored away for another day. It's a fantastic way to cut down on waste and save a bit of money on supplies. Keeping your reusable sheets folded neatly in a dedicated spot is a great habit to get into. For more tips on keeping your workspace tidy, check out our guide on using a crafts storage drawer.
Troubleshooting Your Plastic Sheeting Prep
Even the best-laid plans can hit a snag. When you're mid-project, you need practical answers, fast. Let's tackle some of the common curveballs that pop up when you're working with plastic sheeting.
Can I Reuse Plastic Sheeting After a Job?
You certainly can, particularly if you've gone for a sturdier grade of 4 mils or more. The trick is patience. You must let the paint dry completely before even thinking about folding it up. Once it's fully cured, carefully fold the sheet inwards on itself. This traps all the dried paint flakes and dust, preventing a mess later.
If a sheet only has a light misting of overspray, you can often just wipe it clean and pack it away for the next job. Heavily painted sheets are great for chucking on the floor for future projects, but I'd never drape them over furniture or delicate displays. You're just asking for old paint flakes to transfer and ruin your hard work.
What's the Best Tape to Use?
This is a classic "it depends" situation, and what it depends on is the surface. If you're masking over anything delicate—like wallpaper or a wall that was painted recently (but is fully cured!)—you absolutely must use a low-tack painter's tape. It gives you a decent seal without the risk of yanking off the finish when it’s time to peel it away.
For most other standard jobs, like taping over cured walls, wood trim, or metal, a good quality, medium-adhesion tape will be your best friend.
Here's a pro tip I swear by: always test your tape on a small, hidden spot first. Stick a little piece on, leave it for a bit, then pull it off. You'll know straight away if it’s going to leave sticky residue or cause any damage.
How Do I Stop Paint from Bleeding Under the Tape?
Getting those razor-sharp, clean lines is all about a perfect seal. Once you've laid down your tape, grab a flexible putty knife or even a credit card and run it firmly along the edge you'll be painting against. This simple step squeezes out any microscopic air pockets and presses the adhesive securely against the surface.
For an almost foolproof method, especially if you're painting a dark colour next to a light one, try this old painter’s trick. Paint a thin coat of your original base colour along the tape's edge. This acts as a sealant. If any paint bleeds under, it's the colour that's already there, so it'll be completely invisible once you apply your new coat.
Is There a Difference Between Clear and Opaque Sheeting?
In terms of stopping paint, no—they both do the job. The real difference is all about light and what you can see. I almost always reach for clear or translucent sheeting if I'm covering windows or doorways. It lets natural light pour into the workspace, which is a massive help for spotting any drips or imperfections as you go.
Opaque or black sheeting has its place, though, especially for outdoor jobs. It does a great job of blocking direct sun, which stops the heat from baking wet paint spatters onto the very surface you're trying to protect.
At Display Guru, we know that a professional finish starts with quality equipment. Take a look at our selection of mannequins and displays that are perfect for your next creative project. You can find exactly what you need at https://www.displayguru.co.uk.