




Large Fabric Cutting Mats: A Complete Buyer's Guide
You've spread a dress pattern across the table, but the cutting mat covers only part of it. Each time you move the fabric to reach the next section, the grain shifts, the pattern piece creeps out of alignment and the cut becomes harder to trust. A larger mat can help, but only if it fits your room, your reach and the way you work.
Choosing among large fabric cutting mats is about more than finding the biggest surface you can buy. The right mat should support accurate cutting, sit securely on your table and remain practical to store and use. It should also suit the person cutting: a surface that reduces repositioning may still be awkward if it forces repeated stretching.
Why Your Cutting Mat Size Matters More Than You Think
A too-small mat turns a straightforward cut into a series of adjustments. You lay out a skirt panel, cut the section that fits, then move the fabric to continue. Even careful handling can pull the cloth off grain or shift a pattern edge, making consistent seam allowances harder to maintain.
The same problem crops up when cutting long pieces for trousers, sleeves or borders. Each repositioning creates another chance for the ruler, fabric and pattern to stop lining up. A larger uninterrupted cutting area makes it easier to keep the layout stable from the first mark to the last cut.
Practical rule: Choose a mat that accommodates the largest pattern section you routinely cut, not just the projects you make most often.
Treat the mat as part of the workstation
A cutting mat is more than a shield for the table. In a controlled cutting workstation, it sits level, stays in place and gives the fabric and cutter a reliable working area. If you're comparing rotary cutting with scissor work, this guide to scissors used in sewing can help you think about which tool best suits the task.
For UK users, workspace needs vary widely, from a home sewing corner to a shared studio, teaching room or professional bench. The country's textile-making history helps explain the continuing value of dependable fabric-handling tools. Research linked to the UK textiles manufacturing workforce records substantial historical textile employment, including the growth of textile work in Lancashire. Today's mat doesn't need to be factory-sized to be useful. It needs to give you a stable area for laying out cloth, aligning patterns and cutting cleanly.
The useful question isn't "How large is the mat?" It's "How much of my real cutting job can I complete without shifting the fabric, and can I work on it comfortably?"
Understanding Cutting Mat Types and Self-Healing Surfaces
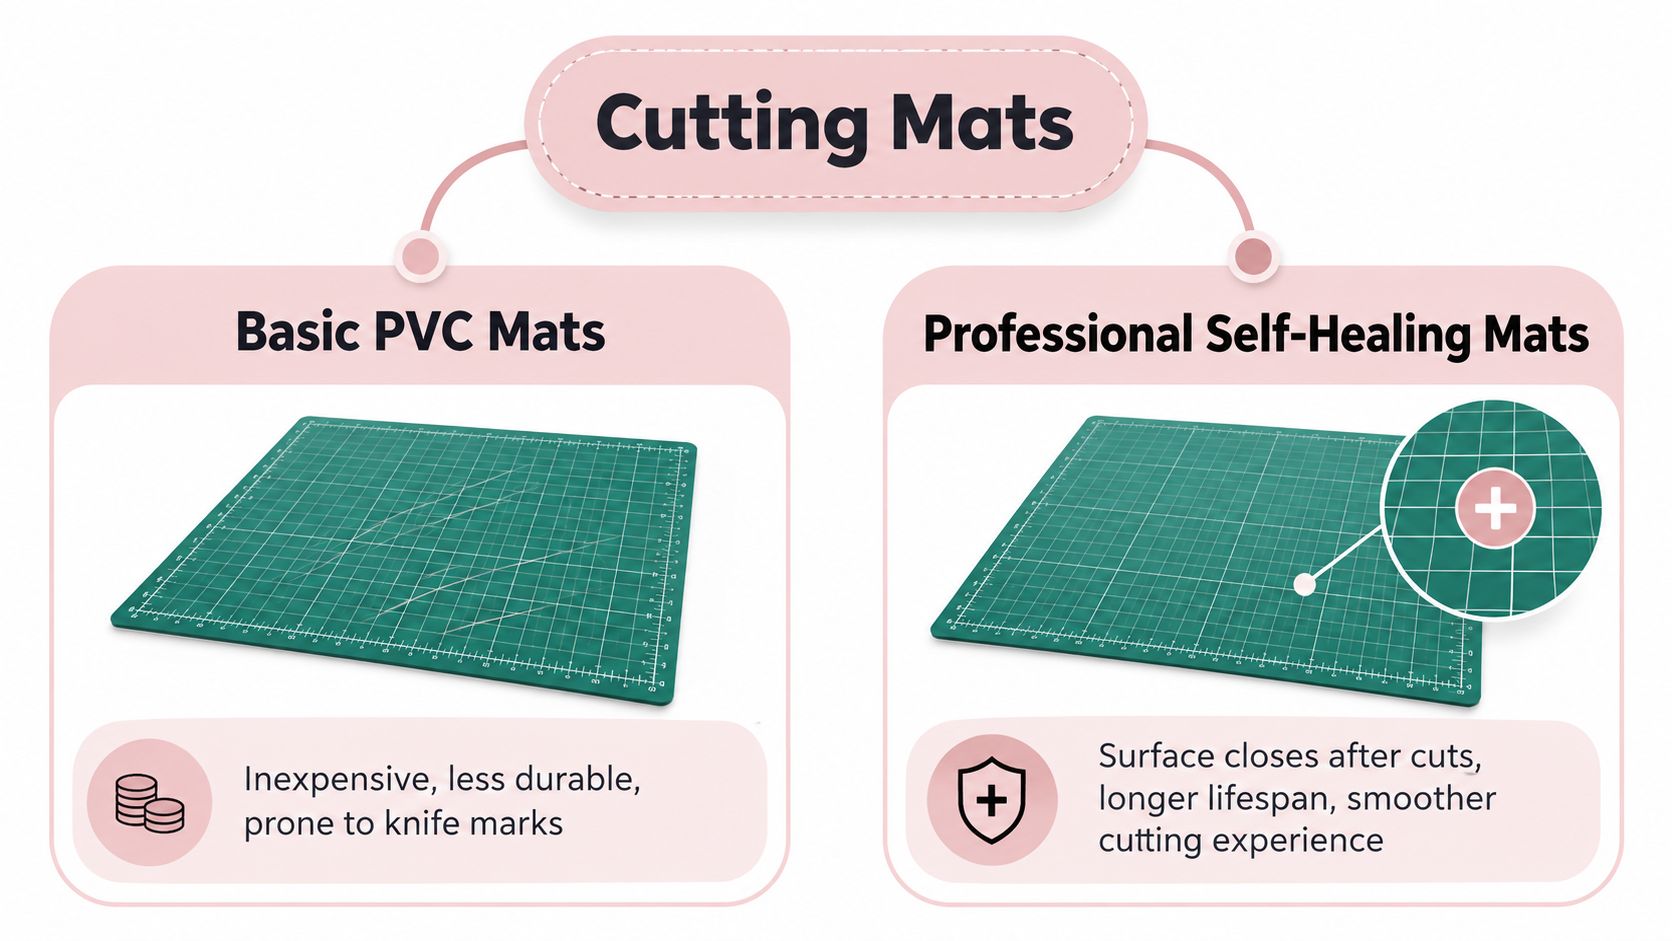
A basic PVC mat and a professional self-healing mat may look similar on a shop page, but they're designed to handle cutting differently. A basic surface can protect a table during light craft work, yet repeated rotary-cutter passes may leave grooves. Once a blade catches in an old mark, it can veer from the intended line and make a clean cut harder to achieve.
A self-healing mat uses a layered or composite surface designed to close back over shallow blade cuts. It's a bit like a cutting board that recovers from knife marks: the surface springs together after the blade passes, helping it stay smoother for continued use. “Self-healing” doesn't mean the mat is immune to wear or that a deep cut disappears completely. Blade condition, pressure and care still matter.
Choose markings for the work you do
Grid markings provide a fixed reference for squaring fabric and positioning pattern pieces. A clear, legible grid is useful for straight cuts and checking whether an edge follows the selvedge. Angle guides can help with bias cuts and angled pattern pieces, but extra markings are only useful if you can read them easily and they don't clutter the view.
For garment work, prioritise a grid that's visible against the fabrics you usually cut and aligned with the mat's edges. Checks, stripes and directional prints demand particular care: even a slight angle can become more apparent across a long piece. A mat won't replace a ruler or careful pattern placement, but its markings can provide a steady reference.
Look past the label
A self-healing claim tells you what the surface is intended to do, not how it will perform under every cutting routine. Check that the mat lies flat, the grid is sharply printed and the surface feels consistent rather than soft or ridged. If you mainly use scissors, a basic protective mat may be adequate. If rotary cutting is part of regular garment preparation, a surface that tolerates repeated blade passes is a more practical choice.
Key Factors to Consider When Choosing a Large Mat
Size is only one part of the decision. A mat also needs to stay flat, remain readable in your lighting and give you dependable control over fabric and blade. When a pattern includes plaid, stripes or directional print, those details can affect whether the finished pieces line up as intended.
Compare the practical specifications
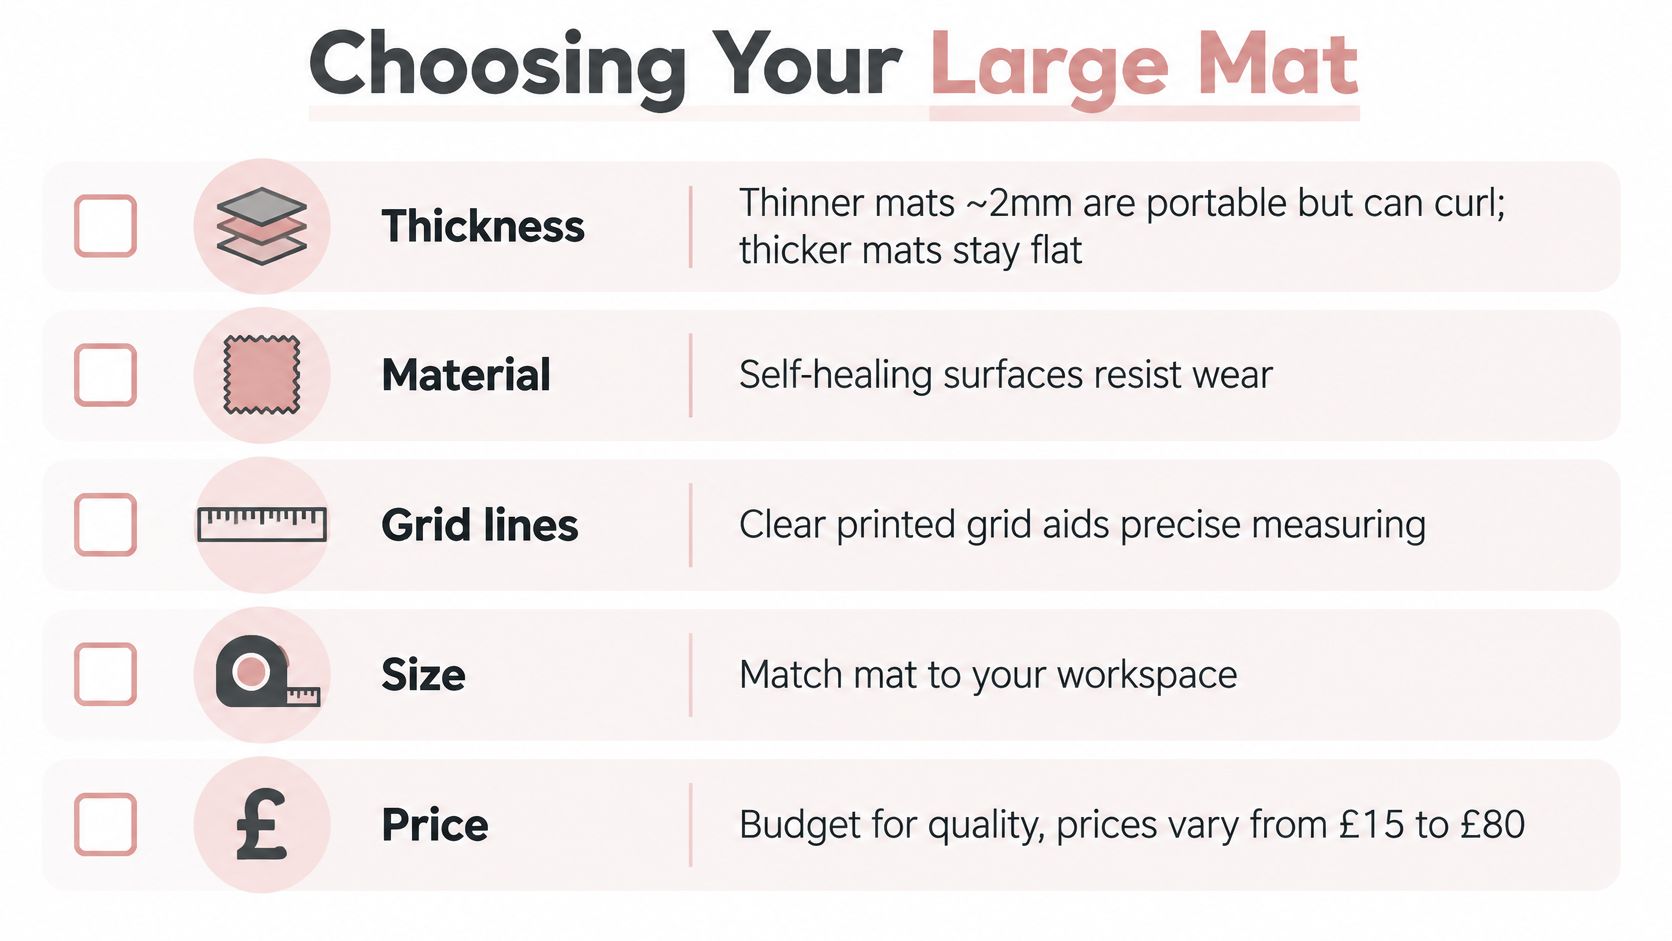
- Thickness and stability: A thin mat may be easier to move, but it can curl or feel less secure if the table isn't perfectly flat. A more substantial mat may sit better during cutting, though it can be heavier to lift and store.
- Material: For frequent rotary-cutter use, look for a self-healing surface designed to recover from ordinary blade passes. Avoid assuming that any plastic mat will behave the same way.
- Grid quality: Check that lines are crisp, readable under your studio lighting and aligned with the mat's edges. A distorted or hard-to-see grid undermines its value as a reference.
- Working area: Match the mat to the largest pieces you cut regularly, while leaving room for your hands, ruler and pattern weights.
- Handling and cost: Consider how easily you can carry and store the mat, as well as the price. A cheaper mat that is awkward to use may not be the most economical choice for your routine.
For guidance on handling and using a rotary cutter with a mat, see this rotary cutter and cutting mat guide.
Match the mat to the fabric
The surface should allow the fabric to lie flat without unwanted drag or slipping. For stretch fabrics, avoid tugging the cloth into position; let it relax, keep handling gentle and cut without pulling against the intended shape. UK occupational standards for sewn-product cutting cover preparing the work area, laying out materials and accounting for stretch, print placement and fabric utilisation in the sewn-product cutting standard.
Before buying, consider how the mat works with your ruler and blade. The surface should give the cutter a smooth path, while your ruler provides a straight, stable edge. The mat's grid is a guide, not a substitute for checking your measurements against the pattern.
Measuring Your Workspace and Choosing the Right Size
Measure the area you can use, rather than relying on the table's advertised dimensions. A mat may fit on paper yet leave too little room for a rotary cutter, ruler or comfortable hand position. It can also make a compact sewing space harder to move around if it blocks access to storage or sits awkwardly against a wall.
Measure the usable area
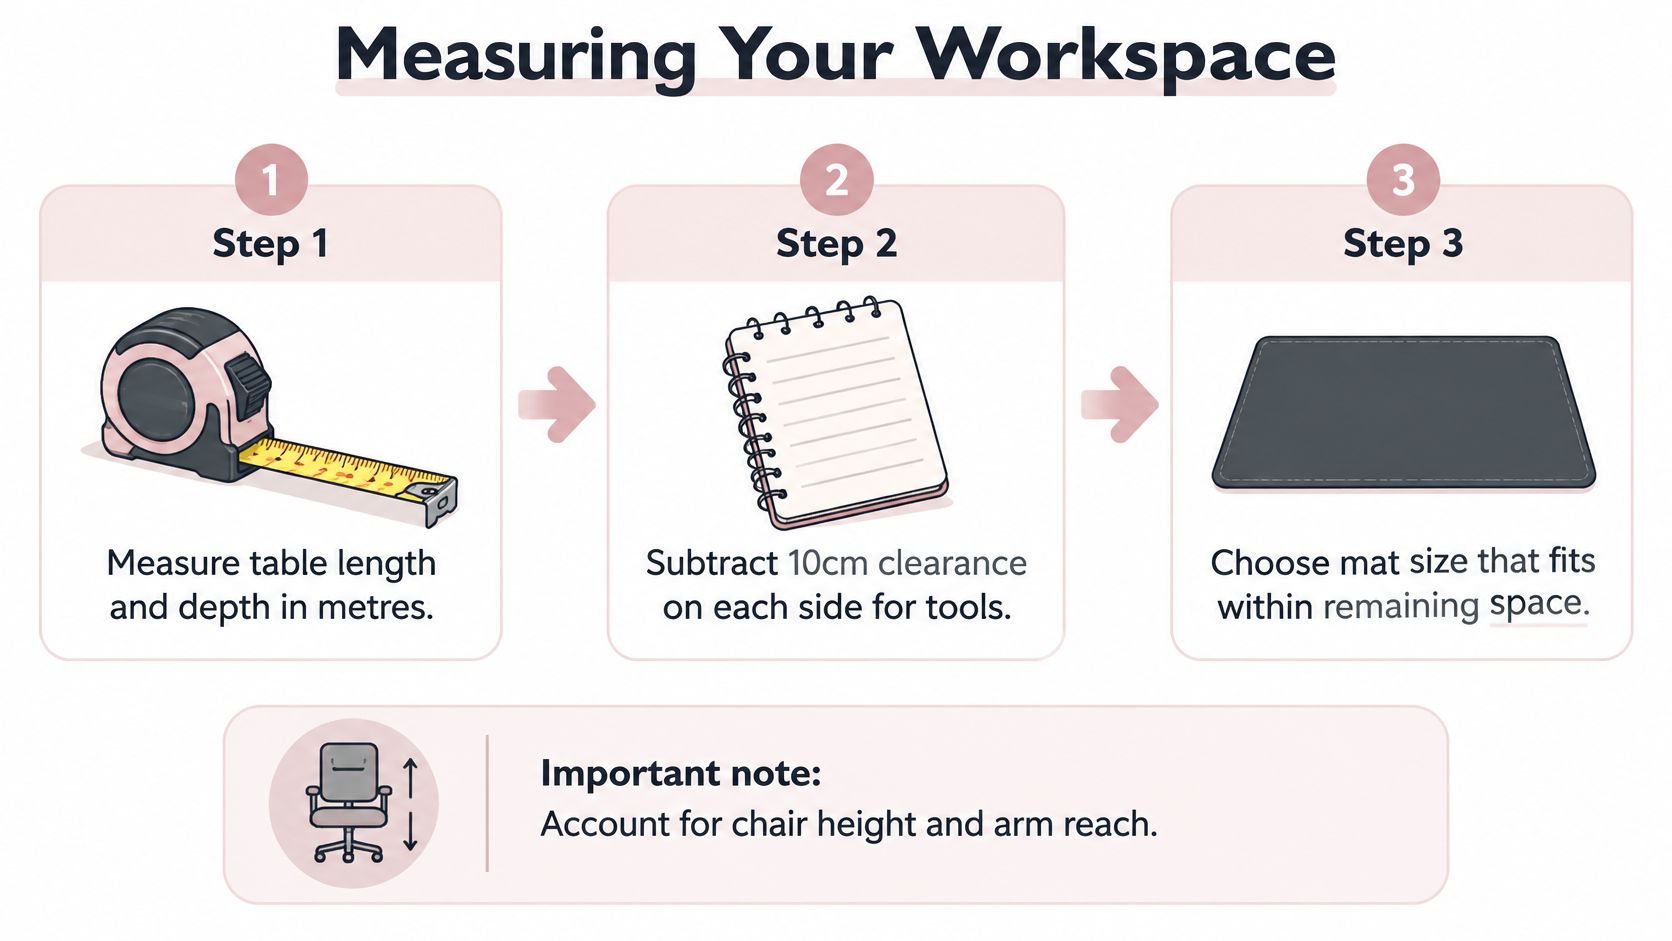
Start by measuring the table's length and depth. Then account for the space your hands and tools need around the working zone, plus any wall or furniture that limits access. The infographic's clearance is a helpful prompt, but treat it as a layout aid rather than a universal requirement: your reach, table height and cutting style determine what feels workable.
Next, put your usual tools on the table. Place a ruler, pattern weights and a piece of fabric where you'd normally use them. The remaining clear area is a better guide to useful mat size than the empty tabletop.
For a compact room, a mat that can be moved and stored without strain may be more practical than a larger surface that stays in the way. On a communal craft table, leave enough usable area for other makers and avoid creating raised joins where fabric or a blade could catch. A professional bench can accommodate a broader cutting area, provided it's stable and reachable.
Decide between one mat and two
One large mat gives you a continuous grid and avoids a join beneath a long pattern piece. Two smaller mats can be easier to carry and store, but the seam between them can interrupt a ruler's path or create a snag point. If you use adjoining mats, align their edges and grids carefully, and don't assume the join will behave like a single surface during precision cuts.
Reach matters as much as coverage. A surface that makes you lean and stretch across the table can be less comfortable than a smaller mat positioned within easy reach.
Before ordering, check how the mat will be lifted, where it will be stored and whether it can be kept flat. These details matter particularly in shared or multipurpose rooms. For ideas on fitting work surfaces into a compact area, see this guide to making the most of small spaces.
Maintenance and Troubleshooting for Long-Term Use
A cutting mat wears gradually, so don't judge its condition by one visible scratch. Superficial marks may leave the surface perfectly usable. The more important question is whether the mat still provides a flat, even path for your blade and a dependable reference for your fabric.
Keep it clean and flat
Wipe away lint and fibres so debris doesn't interfere with the cutter or collect along old marks. Use gentle cleaning rather than abrasive pads or harsh products that could damage the surface or markings. Keep the mat away from excessive heat, which can warp it and make accurate cutting difficult.
Store it flat whenever possible. Leaning a large mat against a wall can encourage it to bend, while wedging it into a tight space may leave a permanent curl. If you need to move it regularly, plan its storage before you buy; an awkward mat is more likely to be left somewhere unsuitable.
Rotating the mat from time to time can spread cutting wear across more of the surface. It won't restore a worn area, but it may prevent your most-used cutting zone from taking every blade pass.
Diagnose common problems
A curled edge may indicate poor storage or heat exposure. Lay the mat flat and inspect it before cutting; don't rely on weights or your hand to hold down a surface that keeps lifting. If it slips, check the table and mat underside for lint or residue, then reposition it on a clean, stable surface.
Replace the mat when deep grooves repeatedly catch the cutter, the surface has become uneven, or the grid is too faded to guide your work. If a cut follows old tracks instead of the ruler edge, test another area of the mat and inspect the blade as well. A blunt blade can cause poor results too, so don't blame the surface without checking both.
No self-healing mat lasts indefinitely. How quickly it wears depends on how often you cut, how much pressure you use and how you store it. Replace it when it no longer supports accurate, controlled work, rather than waiting for it to look completely worn out.
Setting Up Your Cutting Station for Accuracy and Safety
A well-chosen mat works best on a stable, uncluttered surface. Set it down with its long edge aligned to the table, then position it so the area you use most is within comfortable reach. When you lay out fabric, keep the grain and pattern aligned to the mat's reference lines instead of pulling cloth into position.
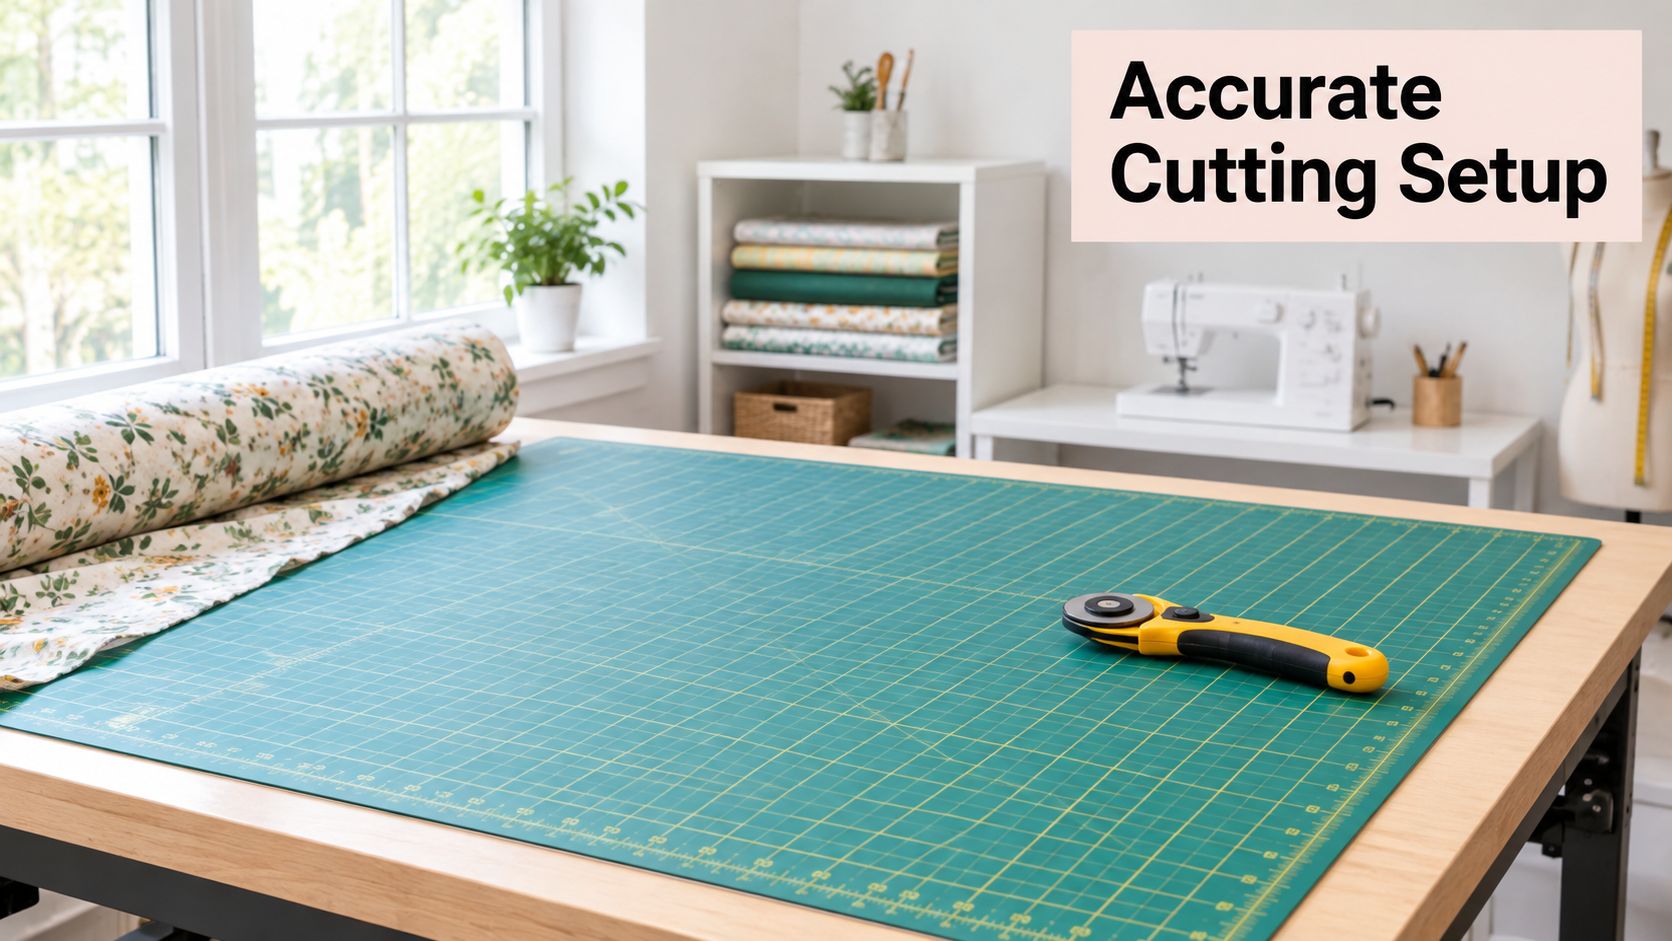
Leave enough clear table space to guide the cutter and support the fabric. Sweep away scraps and fibres before starting; loose debris can get in the way of safe knife handling. Check that the mat lies flat without raised edges, gaps or unstable overlaps that could catch a rotary cutter or distort the fabric.
UK workplace guidance calls for clearly marked danger zones and restricted access where cutting machinery is used. It also highlights the need for sufficient free space and work surfaces set at a comfortable height. For a powered cutting setup, the HSE guidance on textile cutting machinery is clear that hazards can include both cutting devices and adjacent work areas. A mat doesn't replace guarding, access controls or safe operating procedures.
Before each cutting session: Check that the mat is stable, the working zone is clear and your hands can guide the cutter without reaching across the fabric.
A home sewist may need a portable arrangement that can be cleared and stored after each project. A teaching room needs a layout that leaves room for shared use and safe movement. A professional dressmaking bench should keep the main cutting zone organised, with scraps removed as work progresses.
For planning a bench around sewing and cutting tasks, refer to this guide to sewing tables. The principles are the same whether the setup is a compact home station or a dedicated workroom: stable support, comfortable reach and a clear path for the tool.
Here's a visual example of a sewing workstation in use:
Making the Right Choice for Your Sewing Needs
The largest mat isn't automatically the best mat. A broad surface can make it easier to handle long pattern pieces, but it may be difficult to carry, store or reach across. If it becomes a nuisance to set up, you may end up cutting on an unprotected surface instead.
Choose according to your regular work, not an imagined future project. A home sewist who makes garments occasionally may prefer a manageable mat that fits the table and can be stored flat. Someone cutting frequently for clients or costume work may value a larger continuous surface, provided the table and user can support it comfortably.
Use the mat as a working tool
Beginners should prioritise a clear grid, a stable surface and a layout that makes the fabric easy to understand. Grainlines and seam allowances can feel abstract until you place a pattern on cloth, so keep the pattern instructions, ruler and cutting area visible rather than crowding them onto the mat. This guide to reading sewing patterns can help connect the printed markings to the fabric layout.
Accessibility matters, too. Check whether the grid has enough contrast for your vision and lighting, whether glare makes it hard to read, and whether the mat allows you to cut comfortably with your preferred hand. A very large surface can increase reach and repetitive stretching; a smaller mat placed closer may support better control. If you're sharing the workstation, make sure each user can work safely without having to reach over another person's cutting area.
Professional makers should focus on repeatability: a flat mat, legible markings, enough uninterrupted space for routine pattern pieces and storage that protects the surface. For occasional work, portability may matter more than maximum coverage. In either case, measure the room, test your reach and consider where the mat will live when it's not in use.
A good purchase makes accurate cutting easier without making the rest of the workspace harder to use. Choose the largest mat you can handle comfortably, store properly and use safely.
Display Guru supplies sewing and display equipment, including tailor dummies, garment rails and accessories for studios, fittings and retail spaces. If you're setting up a sewing workspace alongside your cutting area, explore the range at Display Guru and choose tools suited to the way you work.