




Rotary Cutter with Mat: A Complete UK Buying Guide
You've cleared the dining table, pressed the fabric and laid out the pattern pieces. The plan is to spend Saturday cutting, not wrestling with shifting layers, blunt shears and edges that wander away from the grain. A rotary cutter with mat can make that job controlled and efficient, but only when the cutter, mat, ruler and working habits function as one system.
The common disappointment is easy to recognise. The blade jumps away from the ruler, the fabric creeps, or the mat develops a curve after being left beside a radiator. The tool hasn't failed in isolation. The setup was never treated as a calibrated cutting surface. This guide covers the practical choices that matter in UK sewing rooms, from A3, A2 and A1 mats to blade diameter, safe handling, replacement and storage.
Why a Rotary Cutter and Mat Change the Way You Cut
A classroom table covered with folded cotton, pattern pieces and rulers shows the value of a rotary cutter quickly. The blade travels along the ruler rather than lifting fabric as shears close, so repeated cuts can stay consistent. That improvement depends on the mat, ruler and cutter working as a single calibrated tool.
Rotary cutting became a practical turning point for patchwork and quilting after Yoshio Okada, founder of OLFA, invented the rotary cutter in 1979, as described by Cotton Patch's UK guide to rotary cutters. A circular blade rolls across fabric supported by a self-healing mat. The action is straightforward, but accurate results require controlled pressure, a stable ruler and a flat surface.
A dressmaker notices the difference when cutting long strips, waistbands or repeated rectangular pieces. Shears may lift slippery cloth or several folded layers as the blades close. A rotary blade remains in contact with the mat and follows the ruler edge, producing a clean, repeatable line when the fabric is aligned and held securely.
Practical rule: The mat protects the table and gives the blade a predictable path.
Standard mat formats include A2, about 45 x 60 cm or 18 x 24 in, A1, about 90 x 60 cm or 36 x 24 in, and A3, with metric and imperial markings for British sewing rooms that use both systems. A home dressmaker may manage routine garment pieces on A2, while classroom cutting and larger pattern work often need A1. A3 suits small patchwork blocks, appliqué and portable work, although it limits the length of each pass.
What the system does well
A rotary cutter and mat perform especially well for:
- Repeated straight cuts: Strips, squares, facings and bands can be measured against a ruler without repeatedly repositioning shears.
- Layered fabric: Quilting cotton and similar materials can be cut in aligned layers when the ruler stays stable and the blade remains sharp.
- Small controlled curves: A smaller blade follows appliqué shapes and shallow curves more readily than a large cutter.
- Workshop repetition: Students, costume teams and sewing groups can follow the same grid, ruler and cutting direction instead of relying on inconsistent shearing habits.
Scissors still handle deep notches, complex internal corners and loose pattern paper more comfortably. A rotary cutter becomes awkward when the work is unsecured. Press harder because the blade drags, and the cut may wander while the fabric shifts. Leave the blade open on a shared table, and a useful time-saver becomes a preventable hazard.
The working discipline is simple: keep the mat flat, align with its grid, hold the ruler firmly and let the blade roll without forcing it. Those conditions produce accurate pieces in home studios, classrooms, pattern-cutting rooms and small costume workshops. Ignore one, and the result may be damaged fabric, distorted shapes or an avoidable injury.
Anatomy of a Rotary Cutter and a Self-Healing Mat
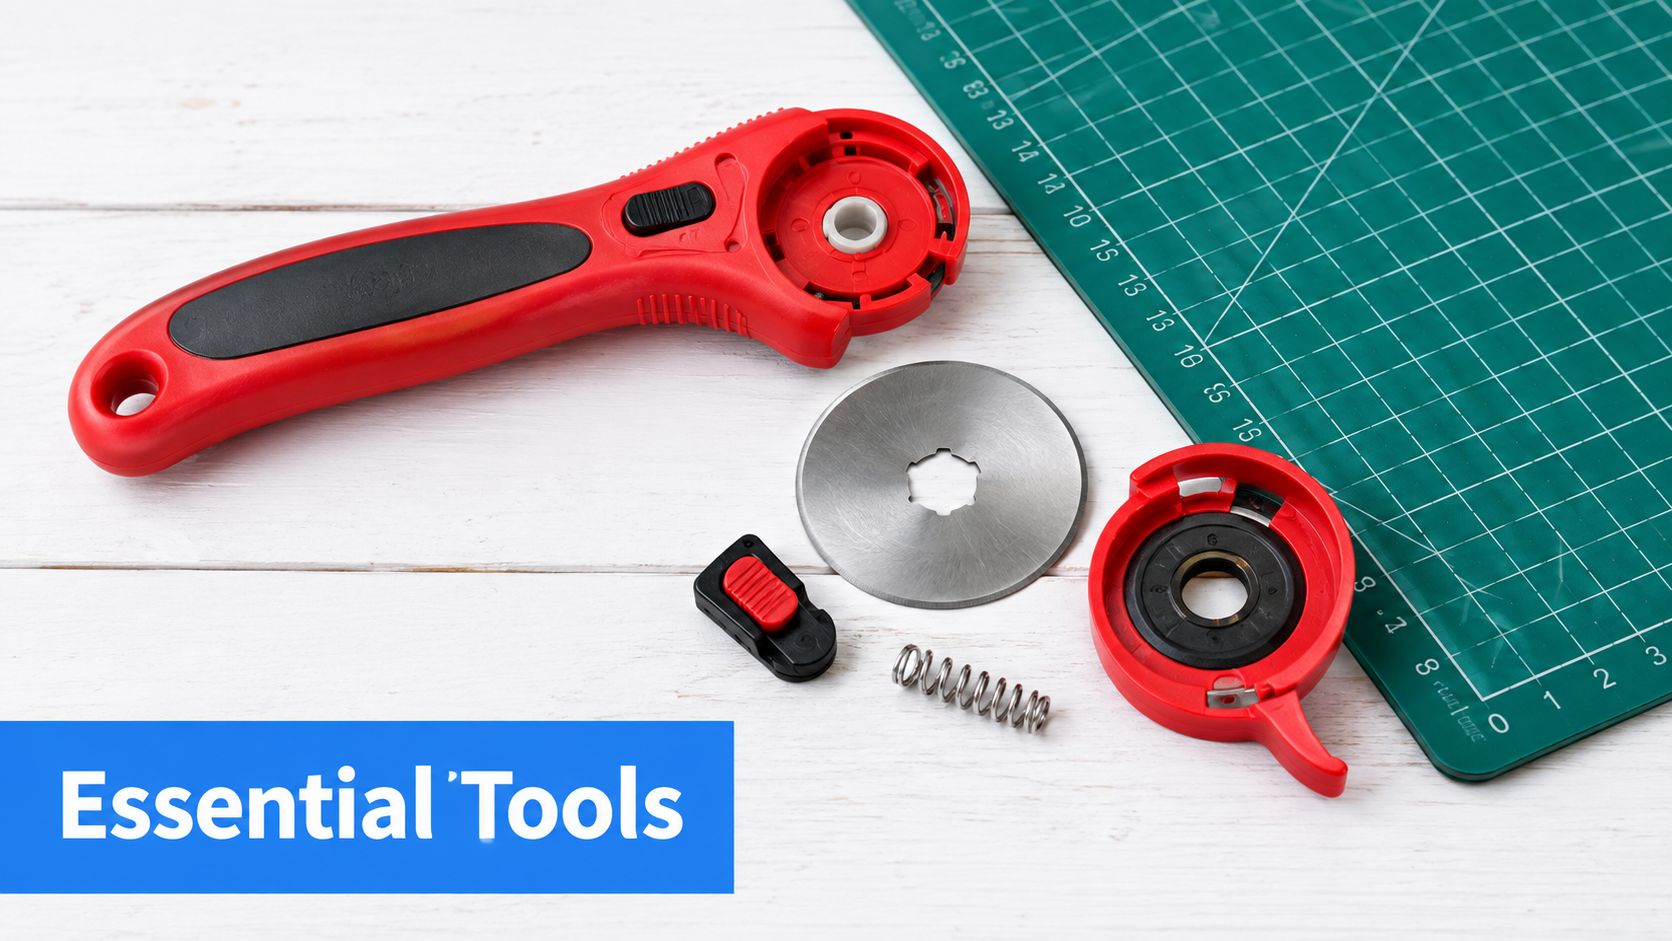
A rotary cutter and mat work as one calibrated tool. The cutter depends on a flat, dependable surface, while the mat's grid is useful only when the blade, ruler and fabric stay aligned. Learn what each part does before matching the set to home dressmaking, classroom cutting, pattern work or costume projects.
A rotary cutter usually includes a handle, circular blade, blade housing, safety lock and a spring or guard mechanism that returns the blade to a closed position. Some designs use a sliding guard. Others expose the blade only while you squeeze the handle.
The cutter parts that affect control
The handle affects how evenly you can apply pressure. An ergonomic shape may reduce fatigue during a long cutting session, but it cannot compensate for a loose grip or poor hand position. The blade housing keeps the wheel aligned with the handle and contains the central bolt or screw that secures the blade to its pin.
Use the safety lock or guard whenever the cutter is put down, including pauses to move a ruler or answer the door. The blade should be covered when not in use and kept away from children. This UK rotary blade cutter guide from Display Guru explains terminology used when comparing guard and cutter designs.
Blade diameter changes the tool's balance and cutting behaviour:
- 28 mm: Suits tight curves, appliqué and small notches, where a larger wheel can feel cumbersome.
- 45 mm: The practical all-rounder for dressmaking pieces, quilting strips and routine straight cuts.
- 60 mm: Handles long passes and thicker or multiple layers, but can feel awkward on small pieces.
Why the mat heals
A self-healing mat has layered construction. Its cutting surface closes around the blade incision instead of leaving an open groove. The printed face commonly combines a metric scale, an imperial grid and angle guides such as 30°, 45° and 60°. These markings help square fabric, check measurements and cut bias strips without changing the basic layout.
Thickness changes the feel under the blade. Mats are commonly sold in 3 mm, 4.5 mm and 5 mm grades. A thicker surface generally gives more support against repeated downward pressure. UK suppliers commonly describe mats around 3 mm thick, with metric markings on one side and imperial markings on the other.
The surface still needs disciplined use. A dull blade, excessive force or repeated cutting along one narrow channel can leave grooves that stop closing properly. Rotate the mat when practical, keep the blade moving in a controlled pass and avoid treating the printed grid as a substitute for an acrylic ruler. The ruler provides the cut line and keeps fingers away from the wheel.
Choosing the Right Mat Size and Cutter Diameter
Size should follow the work you do, not the largest mat that fits a product photograph. An A3 mat is convenient on a kitchen table, while an A1 mat needs a dedicated cutting area. A2 sits between those extremes and is often the sensible starting point for a mixed sewing practice.
A British specialist retailer describes A2 as its most popular rotary cutting mat size, equivalent to roughly 45 x 60 cm or 18 x 24 in, while another UK source calls a 36 x 24 in mat its most popular size and pairs it with a 24 in ruler. These figures show how UK rotary cutting has settled around familiar quilting and dressmaking dimensions, rather than a single universal surface. Cotton Patch's medium mat range is a useful reference for those established formats.
Match the surface to the project
| Mat size | Best cutter diameter | Typical UK project |
|---|---|---|
| A3 | 28 mm | Patchwork blocks, doll clothes, appliqué and small repairs |
| A2 | 45 mm | Dressmaking pieces, quilt blocks, strips and classroom cutting |
| A1 | 45 mm or 60 mm | Adult garment pieces, large quilts and pattern cutting |
A3 works when the project is compact and the table is shared with other activities. It's easy to put away and gives precise control for small pieces, but it won't support a large pattern section without repeated repositioning. That repositioning is where accuracy starts to suffer.
A2 is the workhorse for many home dressmakers. It provides a useful working area for rectangular garment pieces, quilt blocks and folded fabric, without demanding the full footprint of a professional cutting table. In a classroom, several A2 mats can also be arranged across tables more flexibly than one very large surface. Display Guru's sewing cutting mat guide discusses how a self-healing mat supports accurate fabric cutting while protecting the table.
A1 earns its space when full adult garment pieces, coat sections or large quilt components need to lie flat. It reduces the need to slide the fabric during a long cut, but it's heavy, harder to store and more exposed to accidental heat damage. Measure your storage area before buying one.
The cutter follows the same logic. A 28 mm wheel turns neatly through curves, a 45 mm wheel covers most daily work and a 60 mm wheel makes long, deep passes easier. Don't choose a 60 mm cutter just because it appears more capable. On a small mat, its size can reduce your control.
Safe Cutting Technique From Setup to Final Pass
A cutter can be sharp and still cut badly if the setup is unstable. Set the mat on a flat, stable table with enough clearance around it that the surface cannot flex or the fabric cannot catch on an edge. A guide to setting up a sewing cutting table explains how the work surface supports accurate cutting. A mat that bows under pressure changes the blade angle and makes the wheel more likely to jump.
Press the fabric before laying it on the mat. Align the straight grain or a folded edge with a printed grid line, then smooth the cloth from the centre towards the edges. With several layers, check that each layer reaches the intended edge. Folded fabric can look square while the lower layer has shifted.
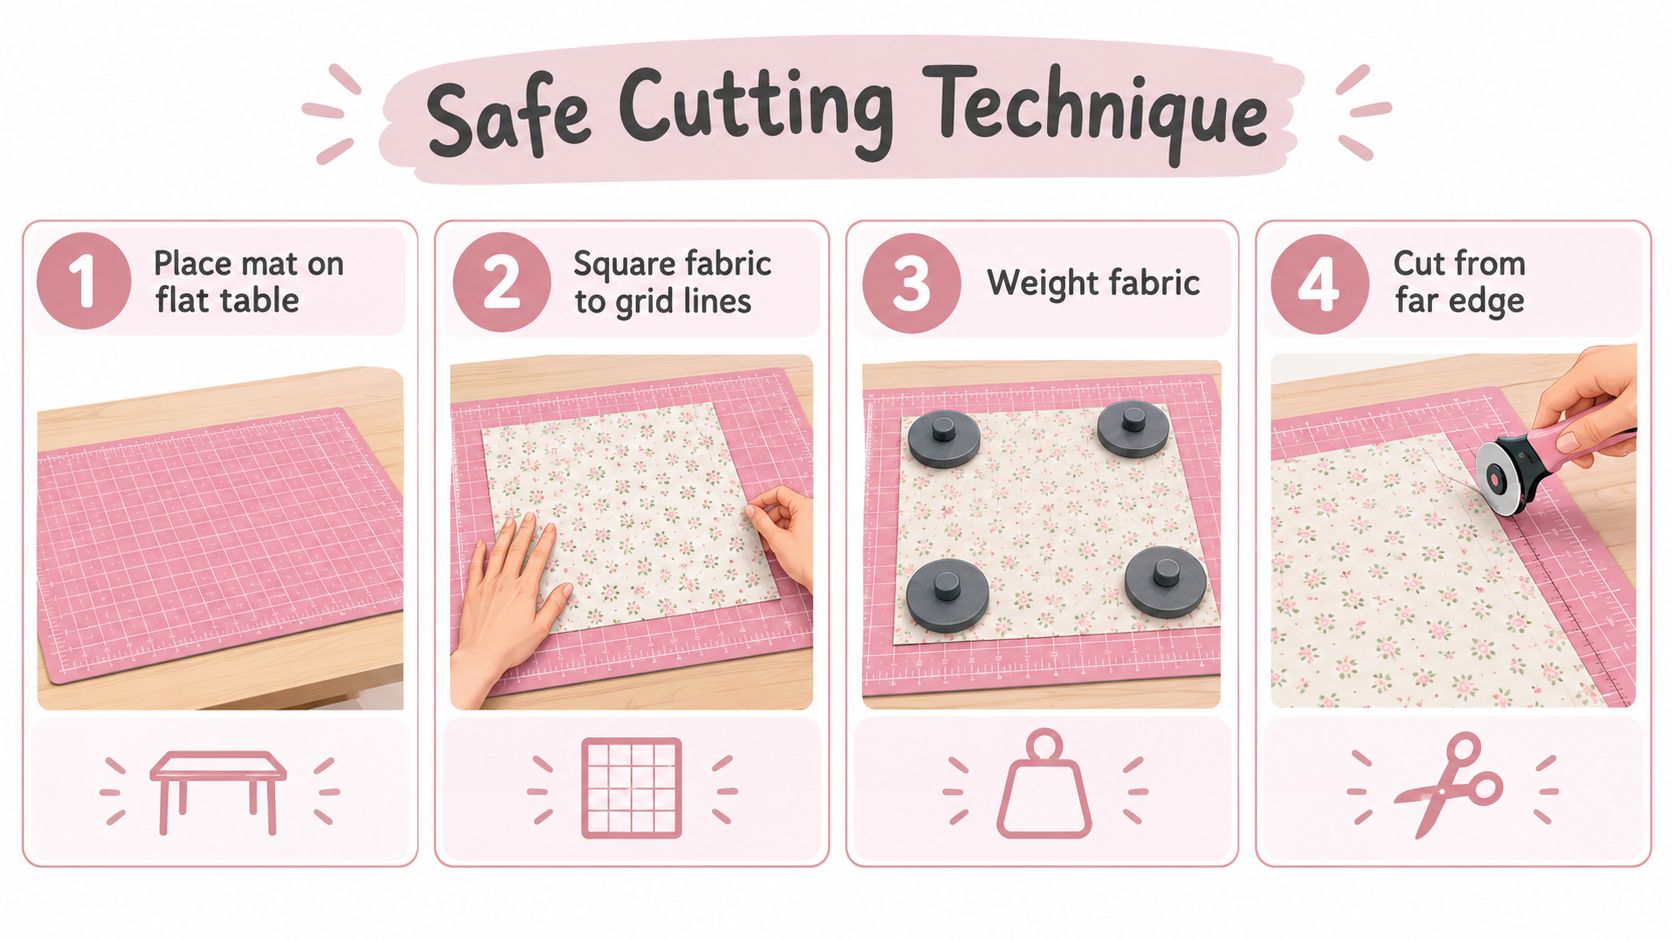
Build a stable cutting position
Keep the part of the fabric you are not cutting weighted or lightly held. Pattern weights, fabric weights or a firmly placed ruler can prevent movement, but keep them clear of the route your hand must take. Set an acrylic ruler over the fabric, with its bottom edge on the intended line. Leave at least 5 cm of ruler covering the fabric on each side of the intended cut. That contact helps the ruler resist movement without requiring excessive pressure.
A UK design safety guide recommends holding the cutter at about a 45° angle against a steel ruler and moving it away from the body. Use the grid for vertical and horizontal checks, rather than relying on the ruler alone. The guidance from the National Design Academy also highlights the risk of blade jump on uneven surfaces.
Hold the ruler with your non-cutting hand, keeping every finger behind its edge. Spread your hand across the ruler instead of pressing at one small point. On a long cut, your forearm can provide extra stability if it does not enter the blade path. Keep fingertips away from the edge throughout.
Make one controlled pass
Hold the cutter between thumb and forefinger, with the index finger resting on top if that grip suits the handle. Keep the blade perpendicular to the mat while maintaining the working angle against the ruler. Press down firmly and roll the wheel forward. A sawing action encourages the fabric to shift and can leave an uneven edge.
Start at the far end, or at the end that suits your handed position, and move away from your body in one smooth pass. Keep the blade against the ruler edge. If the fabric pulls, snags or stays connected in short sections, stop and inspect the cut. More pressure will not correct a worn or damaged blade.
A clean cut comes from stable fabric and a moving wheel, not from forcing the handle through the cloth.
Use this sequence for home dressmaking, classroom work and small workshop cutting:
- Square the fabric: Align the grain or fold with the mat grid and smooth away tension.
- Secure the work: Weight the unused area without blocking the cutting route.
- Set the ruler: Align its edge with the cut line and maintain the required fabric coverage.
- Cut away from yourself: Keep the wheel against the ruler and your free hand behind its edge.
- Finish safely: Retract the blade or close its guard, lift the ruler instead of sliding it, and clear offcuts from the mat.
Process discipline matters especially in classrooms and small workshops, where several people may share one cutting table. UK workplace guidance for fabric-cutting environments focuses on guarding, controlled access around cutting tables and suitable protective measures. A home studio does not need an industrial arrangement, but the same principle applies. Keep the cutting zone clear, control who can reach it and never leave an open blade in a mixed-use room.
The embedded demonstration below lets you compare hand position and cutting direction with the written sequence.
Blade Care, Replacement and Safe Disposal
A rotary blade is dull before it looks blunt. The warning signs are practical: the wheel drags, the fabric snags, the edge turns ragged or you find yourself pressing harder and repeating the same pass. That extra pressure reduces control and can damage the mat as well as the cloth.
Blade life depends on the material, the number of layers and how much of the edge you repeatedly use. Patchwork cotton, linen and upholstery-weight fabric don't place the same demand on a wheel, so replace the blade when its cutting behaviour changes rather than following an arbitrary calendar.
Choose diameter by the cut
| Blade size | Best for | Typical lifespan |
|---|---|---|
| 28 mm | Tight curves, appliqué and small notches | Replace when it drags or fails to complete a clean curve |
| 45 mm | Everyday dressmaking and quilting | Replace when straight cuts become ragged or require repeated passes |
| 60 mm | Long cuts, multiple layers, craft foam and heavy interfacings | Replace when pressure increases or the wheel stops rolling cleanly |
A 45 mm blade is usually the sensible everyday choice because it balances reach and control. The 28 mm blade is more precise around curves but covers less fabric with each rotation. The 60 mm blade handles bulk well, yet its larger wheel needs room and a steady hand.
A UK rotary fabric cutter guide from Display Guru offers another way to compare wheel-based cutting tools and their intended uses. The important point is to match the blade to the task, not to force one size through every material.
Replace the blade methodically
Retract the blade fully before opening the housing. Use the supplied key or a coin to loosen the central bolt, keeping the cutter on a clear surface where the old blade can't roll into fabric or onto the floor.
Remove the worn wheel and place the replacement on the pin in the same orientation. Retighten the bolt firmly without over-tightening it, then check that the blade rotates freely and the guard moves correctly. Wipe the new blade with a dry cloth before use, keeping fingers away from the edge.
Used blades need a disposal plan, especially in a home business or classroom where another person may empty the bin. Put them into a rigid container with a secure lid, mark the container clearly and never leave a loose blade in a domestic waste bin where a refuse worker could be cut.
Looking After Your Cutting Mat for Years of Use
A self-healing mat closes around ordinary blade cuts, but it can't correct heat damage, deep scoring or permanent distortion. The surface relies on layered material and a resilient core, so how you clean and store it directly affects whether it remains flat and predictable.
After each session, remove thread, lint and small fabric fragments. Wipe the surface with a damp cloth and let it dry completely before putting it away. Don't use the mat as a general craft board for glue, paint or hot tools unless the manufacturer specifically permits it.
Protect the surface from heat
Direct sunlight, radiators and hot irons are the main storage hazards in a crowded sewing room. Heat can warp the core, and a mat that has permanently curved won't reliably return to flat. Keep the mat away from windows that receive strong sun and never place a hot iron on it, even briefly.
Store the mat flat whenever possible. If you must roll it, follow the manufacturer's direction and avoid folding it. Don't lean a large mat upright against a wall for long periods, because its own weight can encourage a bow.
Storage habit: Give the mat a permanent home before you give it a permanent curve.
Rotate the cutting area so the same narrow channel doesn't receive every pass. Use the full surface for large work and reserve separate zones for trimming, pattern scoring or other tasks only if they won't introduce damage. A dedicated sewing cutting pad can help define the work area, and Display Guru's cutting pad guide explains why the mat belongs beneath the rotary cutter rather than directly on a table.
Know when recovery has ended
Replace the mat when cuts stay visibly open, deep grooves remain after cleaning or the surface has developed a clear curve. A warped mat changes the relationship between the ruler, fabric and blade, so future pieces may be inaccurate even when your measurements are correct.
One UK sewing tutorial specifically advises storing mats flat, away from heat and sunlight, and replacing them when worn or buckled. The Sewing Directory's rotary cutter guidance also notes that a damaged or warped mat can affect blade life. Don't try to rescue a permanently distorted mat with heat or pressure. That approach risks making the surface less stable.
Quick Reference Checklist and Common Questions
Keep this beside the cutting table rather than relying on memory when you're tired or working in a shared room.
- Before cutting: Press and square the fabric, check that the mat lies flat, and align the ruler with the grid.
- During the pass: Keep the cutter perpendicular to the mat, use even pressure, and keep your wrist and free hand clear of the blade path.
- After cutting: Retract the blade or close its guard, lift the ruler rather than sliding it, wipe the mat and store both tools safely.
- For size selection: Choose A3 for compact work, A2 for general home dressmaking and A1 when full-length pieces need to lie flat.
- For blade selection: Use 28 mm for tight curves, 45 mm for routine cutting and 60 mm for long or heavier passes.
Common questions from UK sewists
How often should I replace the mat? Replace it when grooves stop closing, deep channels remain visible or the mat no longer lies flat. A calendar schedule is less useful than inspecting the surface and checking how accurately the blade travels.
Can I cut fusible interfacing on it? Yes, if the adhesive side is protected and the material won't leave residue that interferes with the ruler or blade. Check the interfacing instructions, keep the mat clean and avoid cutting through adhesive onto an area you use for fine fabric work.
Which cutter suits bias strips and quilting curves? A 45 mm cutter handles most strips efficiently. Choose 28 mm when the curve is tight or the piece is small enough that a larger wheel feels difficult to steer.
Can a rotary cutter go in hand luggage? Don't assume it can. The blade is a sharp cutting implement, so check the current airline and airport rules before travelling. Pack it securely in checked baggage when permitted, with the blade fully retracted or removed and protected.
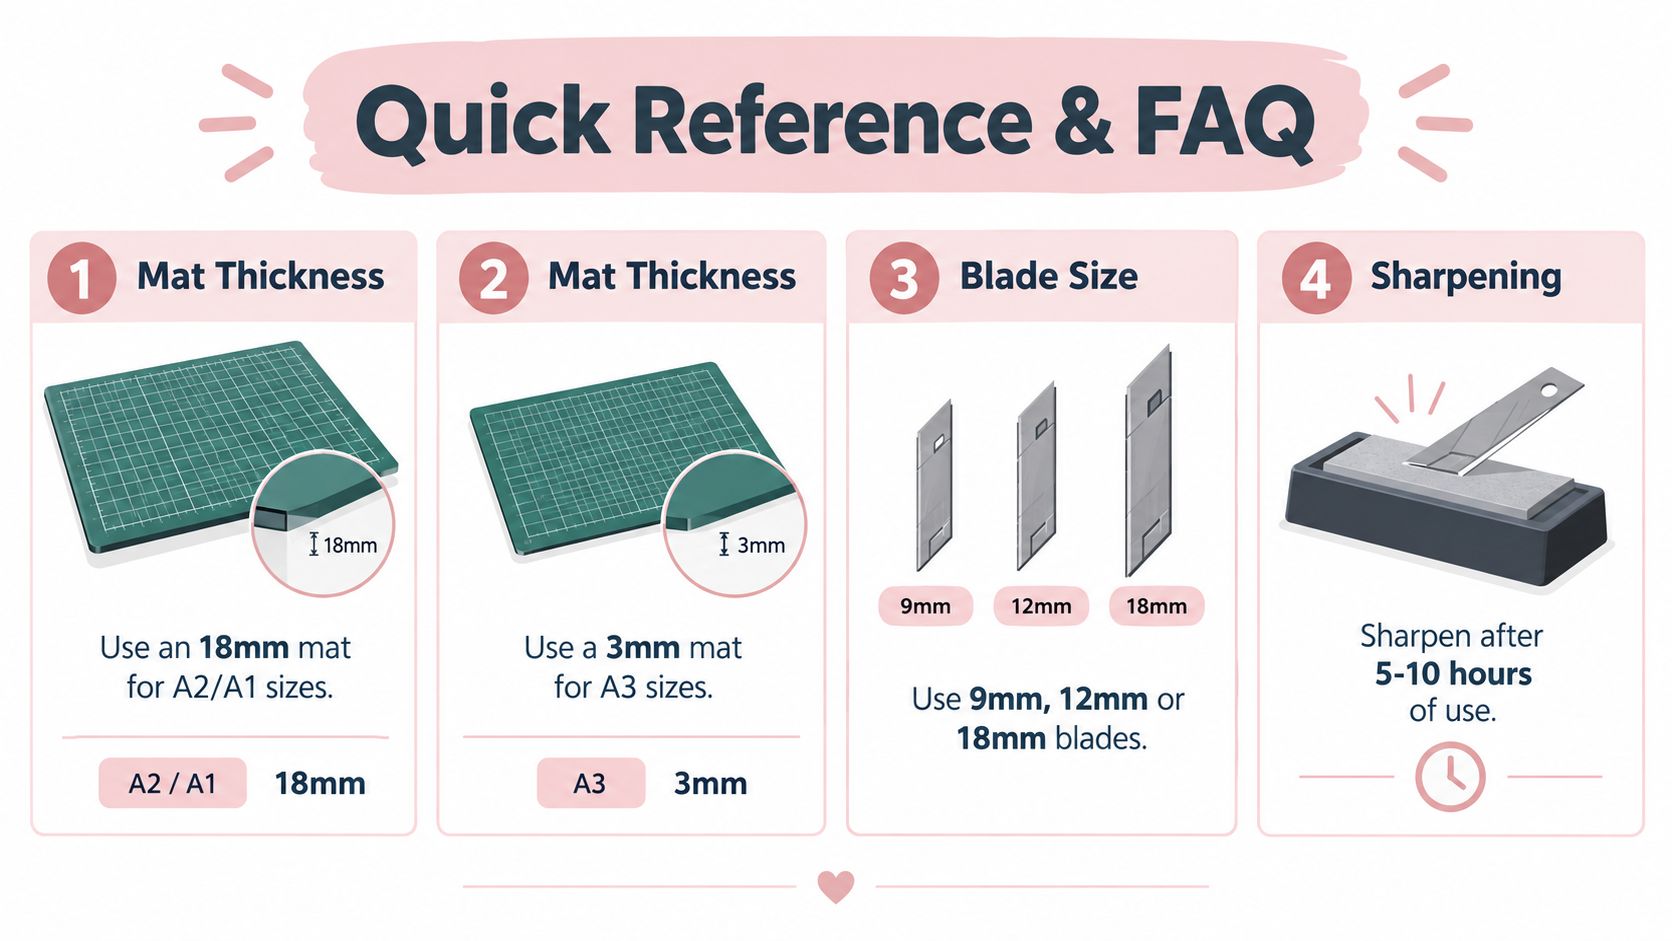
What about mat thickness? Don't choose thickness from an isolated product description. Check the manufacturer's specifications, confirm the surface is intended for rotary cutting and prioritise a mat that lies flat, supports the blade and fits your working area.
Display Guru supplies sewing-room equipment including tailor dummies, body forms, garment rails and display tools, alongside guides that place a self-healing mat in the cutting zone. Visit Display Guru to organise the fitting, pattern-cutting and presentation areas around your rotary cutter workflow.