


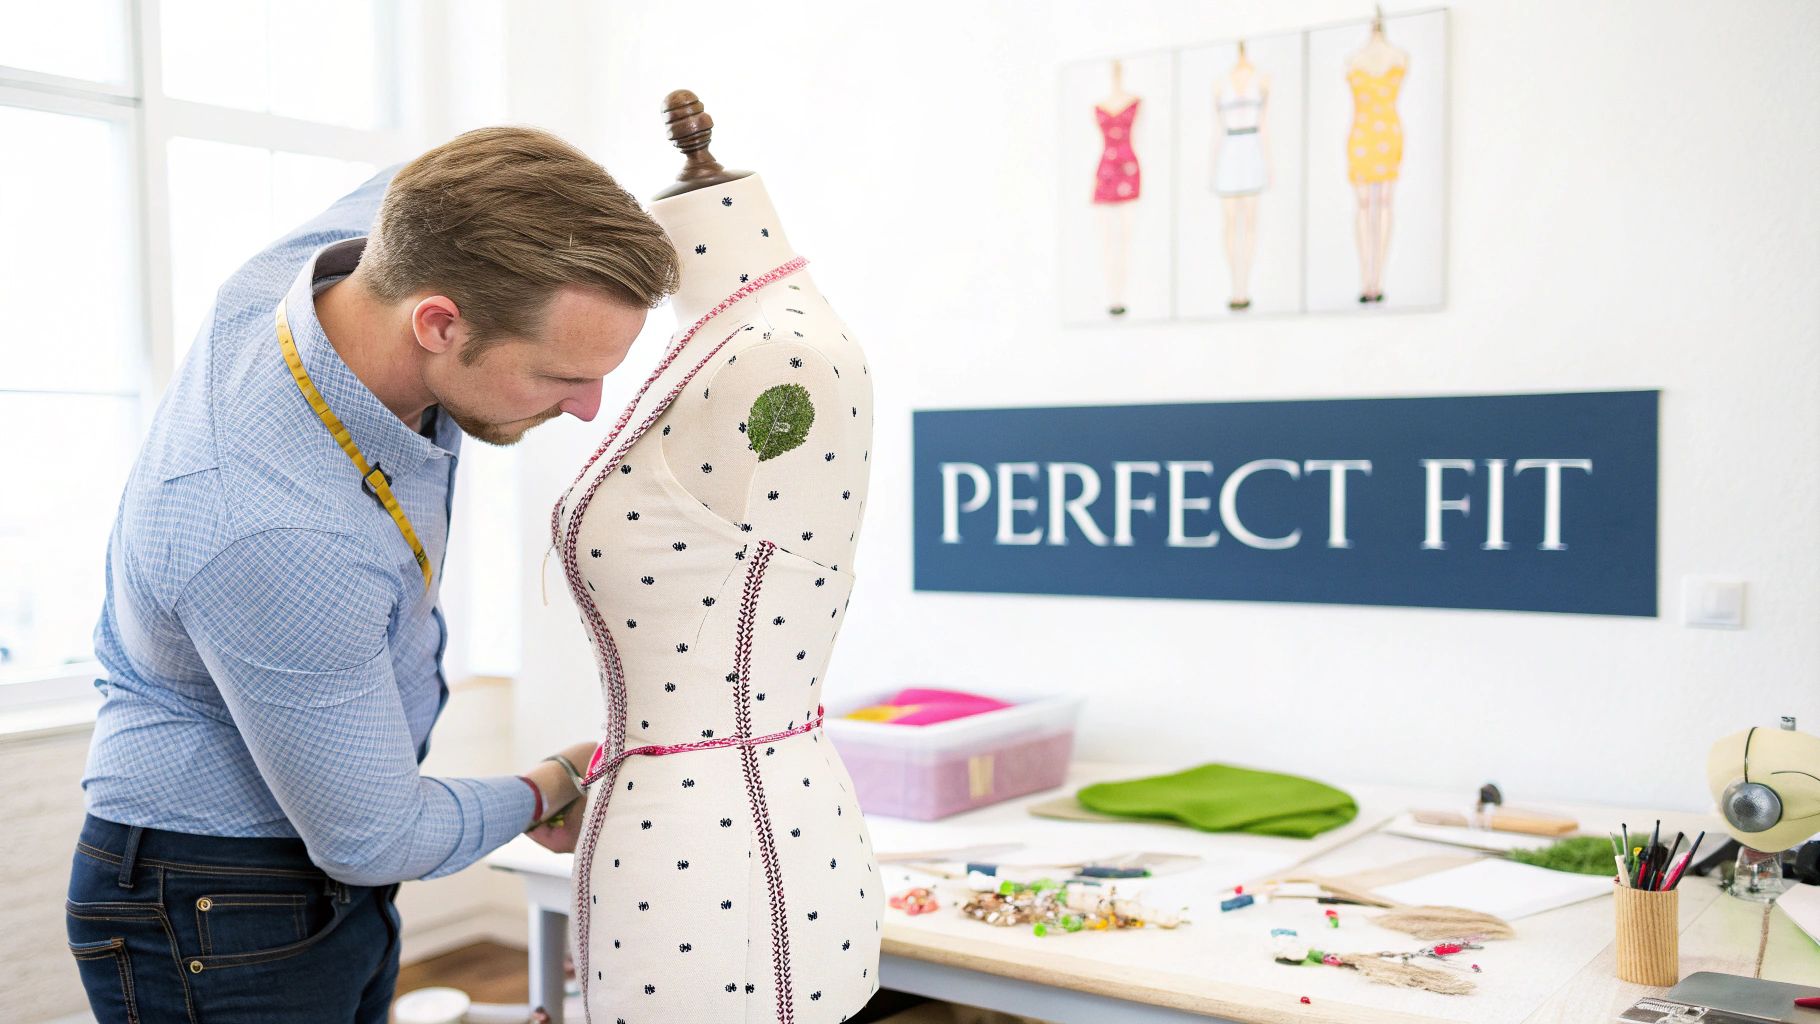
The Perfect Fit Your Guide to an Adjustable Mannequin Dress Form
An adjustable mannequin dress form is the vital link between a flat, two-dimensional pattern and a beautifully fitted, three-dimensional garment. In essence, it's your personal body double, allowing you to create a truly bespoke fit for any shape and size.
The Secret to Achieving a Perfect Fit
Have you ever poured hours into sewing a piece, only for it to pull awkwardly, bunch up in the wrong places, or just hang lifelessly? It’s a common frustration, and it gets to the heart of the biggest challenge in garment making: turning flat fabric into something that truly complements the body's natural curves.
An adjustable mannequin dress form is far more than just a static dummy. It becomes an active, dynamic partner in your creative process.
By serving as a reliable stand-in for a real person, it takes the guesswork out of fitting. You can drape fabric, pin seams, and tweak every detail with confidence, all without needing a live model on hand for hours. This single tool empowers everyone, from professional tailors in Mayfair to dedicated hobbyists across the country, helping them bring a new level of polish to their work.
Your Dynamic Partner in Design
Think of an adjustable form as the ultimate problem-solver for getting the fit just right. Its main job is to mimic a specific set of body measurements, giving you a customised silhouette to work on. This is absolutely critical, as very few people actually conform to standard sizing charts. An adjustable form lets you dial in those unique variations for a perfect match.
The advantages go well beyond simple convenience; they directly improve the quality and efficiency of your projects.
- Precision and Accuracy: You can check the drape, balance, and line of a garment in real-time, making sure every seam and dart sits exactly where it should.
- Time and Fabric Savings: Spot and fix fitting issues long before you touch your final, expensive fabric. That means less waste and no more frustrating rework.
- Creative Freedom: It provides a 3D canvas for draping new designs from scratch, letting you experiment with ideas as they come to you.
This move towards personalised fitting tools reflects a broader industry shift. A recent survey found that 68% of independent UK tailors now rely on adjustable mannequins. This is a significant jump, and it lines up with the growing demand for sustainable fashion, where custom-fit garments and alterations help reduce textile waste.
From Measurements to Masterpiece
The journey to a flawless garment always starts with one thing: accurate measurements. An adjustable form is only as good as the data you put into it. For a step-by-step tutorial, have a look at our comprehensive guide on how to take body measurements for clothes.
With your measurements in hand, you can begin methodically turning the dials to match the bust, waist, hips, and torso length. In minutes, the form transforms from a generic shape into a precise replica of your client or yourself.
This guide will walk you through everything you need to know about choosing, setting up, and getting the most out of your adjustable mannequin. Think of it as your trusted companion for turning creative visions into beautifully fitted realities.
Understanding the Anatomy of Your Dress Form
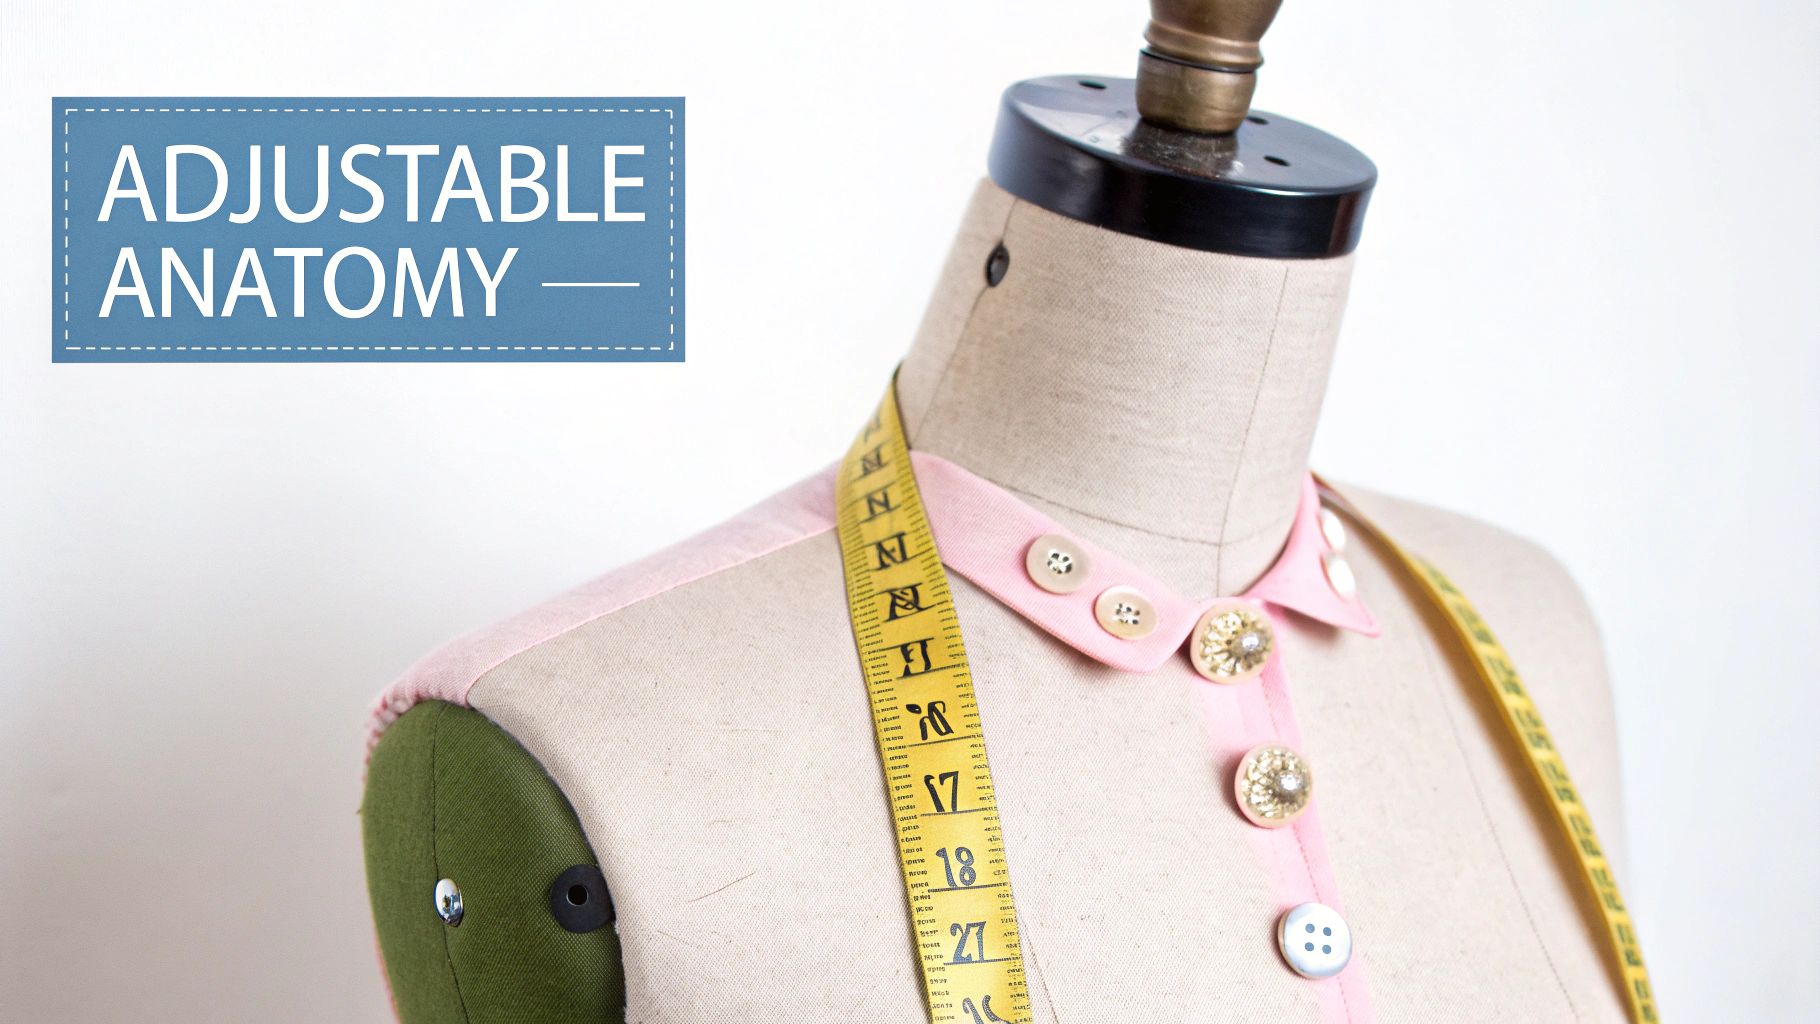
To really get the most out of your adjustable mannequin dress form, it helps to know what makes it tick. Don't think of it as just a static model; it’s a sophisticated tool with interconnected parts, each playing a crucial role in helping you bring a garment to life. The real genius is in how these pieces work in concert.
The core of the mannequin is the torso, which is usually a hard plastic shell. But for any serious sewing or design work, it's the outside that counts. A good form will have a foam-backed fabric cover, often made of nylon or canvas. This pin-friendly surface is non-negotiable—it allows you to pin fabric directly onto the form for draping and fitting, all without causing any damage.
Behind this simple exterior is where the clever engineering really begins.
The Control Panel for a Custom Fit
The single most important feature of any adjustable form is its network of dials or key adjusters. Most models come equipped with between 12 and 16 separate dials, thoughtfully placed to fine-tune the bust, waist, and hip measurements. You’ll often find adjustments for the neck and the back-waist length, too.
Think of these dials as a control panel for the body's key dimensions. As you turn a dial, you’re engaging an internal screw mechanism that precisely expands or contracts that part of the torso.
It’s a bit like a car jack. A few easy turns on a small handle can lift a heavy vehicle. In the same way, a slight twist of a dial can expand the bust or cinch the waist, letting you mirror real-body measurements with incredible accuracy.
This ingenious system is what makes a single dress form so versatile, capable of adapting to a huge range of shapes and sizes. It's what makes it an indispensable ally for both seasoned designers and home-sewing enthusiasts.
Core Components and Their Functions
Beyond the dials, a few other key parts make a dress form truly practical. Knowing what they do will help you choose the right model and use it to its full potential.
- Collapsible Shoulders: This is a brilliant feature you’ll find on many modern forms. It allows the shoulder section to be squeezed inwards, making it much easier to slide on and off close-fitting garments, like a fitted blouse, without stretching or damaging the fabric.
- Stand and Base: The stand is all about stability. Most come with either a three-legged tripod base or a heavier, round one. An adjustable height pole is also essential, as it lets you set the form at a comfortable working height that saves your back.
- Hem Marker: Many forms include a pin hem marker that clamps onto the central pole. This simple attachment is a lifesaver for achieving perfectly level hemlines, giving you a consistent guide as you rotate the garment.
From Post-War Necessity to Modern Essential
The adjustable forms we rely on today have a fascinating history rooted in pure practicality. They first became popular in the UK during the post-WWII period, when a mandate from the UK Board of Trade called for better clothing-sizing data. This led to the creation of the first adjustable forms, specifically designed to match the average British woman’s 34–36 inch bust—a measurement that represented a staggering 72% of the population back then.
This little piece of history highlights the tool's original purpose: to bridge the gap between flat, standardised patterns and the curves of a real body. From those early days, the concept has evolved to include male, female, and child forms, each crafted with specific proportions. To learn more about how these different forms are sized, take a look at our guide on mannequin measurements.
How to Choose the Right Dress Form for Your Craft
Picking out the right adjustable mannequin dress form isn't about finding a single 'best' model. It's about finding the right partner for your creative work. The needs of a bespoke tailor are worlds away from those of a fashion student or someone sewing for fun at home, and understanding that difference is the key to investing in a tool that will genuinely help, not hinder.
Think of it like a chef choosing a knife. Any sharp blade can cut, but a professional needs a perfectly balanced, specialised tool for intricate tasks, while a home cook might be better off with a versatile all-rounder. It's the exact same principle with dress forms—your specific craft should guide your choice.
A professional designer who spends their days draping fabric, for instance, will need a form with a high-quality, fully pinnable surface and collapsible shoulders to get tight garments on and off without a struggle. A tailor, on the other hand, needs a form with a whole host of precise adjustment dials to mimic the unique shapes of their clients.
Matching the Mannequin to the Maker
Let's break down what different creators should be looking for. Figuring out what you'll actually be doing with the form is the most important first step you can take.
- For the Professional Designer: Draping and pattern making are your bread and butter. You should prioritise a form with a rock-solid, stable base and a professional-grade foam body that can take a real beating from constant pinning. Features like collapsible shoulders and realistic body contours aren't just nice to have; they're essential.
- For the Bespoke Tailor: Precision is everything. You need a form with at least 12 to 16 adjustment dials to capture the subtle measurements of individual clients. The ability to meticulously tweak the bust, waist, hips, and back-waist length is non-negotiable if you want to achieve that perfect, bespoke fit.
- For the Home Sewing Enthusiast: You're looking for versatility and good value. A solid adjustable form that covers a decent range of sizes will see you through all sorts of projects. Look for a model that’s straightforward to adjust and, ideally, comes with a hem marker—it's an invaluable little tool for getting skirts and dresses perfectly level.
The focus on precision isn't just talk. A recent British Retail Consortium analysis found that tailors using high-quality adjustable forms managed to slash their fitting errors by an impressive 37%. What's more, a separate survey revealed that 82% of UK dressmakers said mannequins with 15 or more adjustment points were crucial for their ability to work with diverse body shapes—a massive advantage in today's market.
Creating Your Body Double: Taking the Right Measurements
Once you’ve identified the features you need, the next critical step is matching the form's size range to your measurements—whether they're your own or a client's.
- Measure with Care: Grab a flexible measuring tape and record the fullest part of the bust, the natural waistline, and the widest part of the hips. Don't forget the back-waist length, measured from the base of the neck down to the natural waist.
- Check Against the Form's Range: Every adjustable dress form is sold with a specific size range, like UK Size 10-16. Your measurements need to fall comfortably within that advertised range.
- Go Slightly Smaller: This is a pro tip that makes all the difference. Always choose a dress form where the minimum settings are a touch smaller than your actual measurements. Why? Because no human body is perfectly smooth or symmetrical like a mannequin.
You can always add padding to build up specific areas like the stomach, thighs, or a rounded back, but you can never make a dress form smaller than its minimum setting. Starting smaller gives you the ultimate flexibility to create a true body double.
This simple rule of thumb means you can use batting or a dedicated padding kit to sculpt the form, perfectly recreating the unique curves and contours that adjustment dials alone can't capture.
Before you make a final decision, it's worth comparing how different needs line up with specific features.
Comparing Dress Form Features by User Needs
This table breaks down the essential features of an adjustable dress form based on what different users really need, from hobbyists to professional designers.
| User Profile | Most Important Feature | Recommended Form Type | Budget Consideration |
|---|---|---|---|
| Home Sewing Hobbyist | Versatility and ease of use (e.g., simple dials, hem guide) | A good-quality dial-adjustable form (8-12 dials) | Entry-level to mid-range; focus on value for money. |
| Fashion Student | Pinnable surface and stability for draping practice | A form with a foam-backed fabric cover on a sturdy base | Mid-range; an investment that needs to last through studies. |
| Bespoke Tailor | High number of precise adjustment points (12+) | A professional form with extensive dial customisation | Mid-range to high-end; precision is a primary cost driver. |
| Professional Designer | Fully pinnable body, collapsible shoulders, realistic shape | Professional-grade foam or fibreglass form | High-end; this is a core piece of studio equipment. |
Ultimately, the goal is to find a form that feels like an extension of your own hands.
For a deeper dive, you might find our expert guide on how to buy a dress form helpful, as it covers everything from sizing to specific features. By following these steps, you can confidently choose an adjustable mannequin that will become one of the most valuable tools in your sewing room.
Getting to Grips with Your Mannequin: Setup and Adjustments
There’s a real thrill in unboxing your new adjustable mannequin dress form. It’s that moment where a box of parts starts to become your most trusted fitting partner. But before you can get to the creative stuff, a solid setup is absolutely essential for transforming it into a precise body double.
First things first, let's build a stable foundation. A wobbly mannequin is a tailor's nightmare. If yours has a tripod base, make sure each leg is fully splayed and locked down tight. For models with a pedestal base, give every fixing a final twist to eliminate any rocking that could disrupt your pinning.
With the base sorted, set the height. A good rule of thumb is to adjust the central pole so the mannequin’s waistline sits at about the same height as your own. This simple ergonomic step saves you from hunching over for hours, which your back and shoulders will thank you for. If you’re looking for a more detailed walkthrough, our guide to assembling your dress form stand can help.
A Step-by-Step Guide to Adjusting the Dials
Now for the main event: dialling in the measurements. The temptation is to spin all the dials at once, but that’s a fast track to a distorted, lumpy shape. You need a more methodical approach. Think of it like tuning a guitar – you adjust one string at a time to get the perfect harmony.
The secret is to work incrementally and evenly. Instead of cranking one dial all the way, adjust all the dials for a single area (like the bust or hips) a little bit at a time. Work your way around the form, alternating between the front, back, and sides. This gradual expansion preserves the natural curves of the torso.
For the best results, I always recommend following this order:
- Neck: Start at the top. Set the neck circumference first.
- Bust: Move to the bust dials, expanding them evenly while checking with a tape measure until you hit the right number.
- Waist: Next, adjust the waist, again expanding slowly and checking as you go.
- Hips: Finally, dial out the hips, making sure the shape remains balanced all around.
- Back-Waist Length: If your model has this feature, adjust it last. Getting the torso length right is absolutely critical for a perfect fit.
This process—measure, compare, then pad—is what truly turns a generic form into a bespoke fitting tool.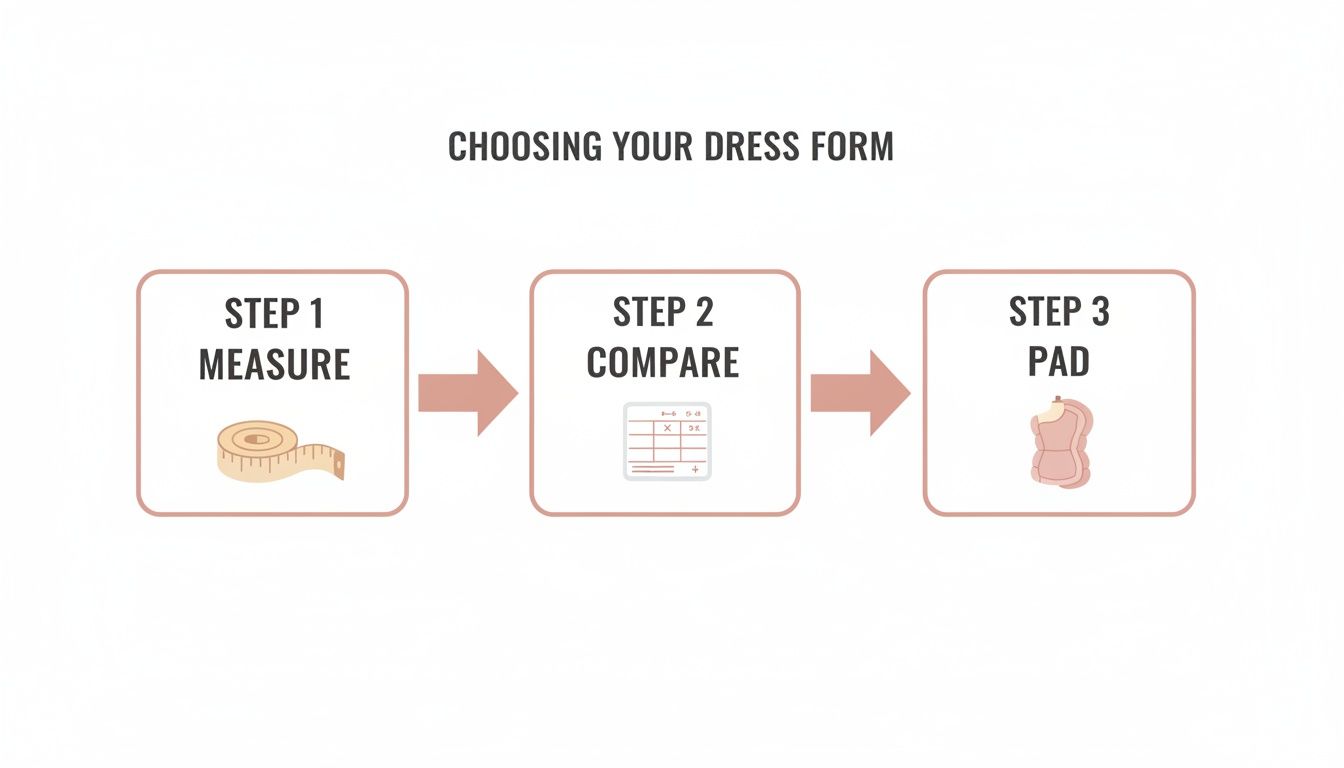
As you can see, the dials get you into the right ballpark, but it's the padding that really brings the customisation to life.
Sculpting a Realistic Shape with Padding
While the dials do a great job of setting the main circumferences, they can’t replicate the subtle, unique curves of an actual human body. This is where padding comes in, and honestly, it’s the most important step of all.
The dials create the skeleton, but padding adds the flesh. It’s the difference between a generic mannequin shape and a true body double that accounts for a rounded tummy, a sway back, or asymmetrical hips.
You can use polyester batting or a dedicated foam padding kit. Start by pulling a snug-fitting top or a purpose-made cover over the form. Then, begin tucking layers of padding underneath it, sculpting and pinning as you go to build up the areas where the form’s shape differs from the body you’re fitting.
Concentrate on creating smooth, natural-looking contours. You'll want to add padding to:
- Flesh out the bust, stomach, or buttocks.
- Define the curve of the spine or the slope of the shoulders.
- Account for any asymmetries, like one hip or shoulder sitting higher than the other.
This final, hands-on stage is what elevates your adjustable mannequin from a simple measuring tool into a truly bespoke fitting assistant, ready to help you nail the fit on every garment you make.
Advanced Techniques for Fitting and Draping

Once your adjustable mannequin dress form is dialled into the right measurements, it stops being just a stand and becomes your silent partner in creation. Now the real work begins: meticulously fitting existing garments and draping entirely new designs straight from your imagination. It's in these two key skills that your dress form really starts to pay for itself.
Fitting is all about refinement. It’s where you take a nearly finished piece and troubleshoot those frustrating little issues that separate a good garment from a truly great one. Your dress form acts as a perfectly still, endlessly patient model, letting you see and fix problems that are almost impossible to diagnose on a living, breathing person.
Draping, on the other hand, is creation in its purest form. Rather than starting with a flat paper pattern, you work directly with fabric on the form, sculpting it into a three-dimensional design. It’s a wonderfully fluid and intuitive process that lets you see how fabric wants to fall and behave, bringing your ideas to life right before your eyes.
Mastering the Art of Fitting
Think of fitting on a dress form as a diagnostic process. It gives you the power to spot exactly where a garment is pulling, gaping, or twisting so you can pin the necessary corrections with total accuracy.
It's a bit like a mechanic listening to an engine; they can hear a tiny, subtle noise that tells them exactly what’s wrong. In the same way, your dress form helps you spot the visual clues of a poor fit, like drag lines pointing to a tight spot or a neckline that just refuses to lie flat.
Here are a few common fitting problems you can solve on your form:
- Gaping Necklines: Pin a small, subtle dart or tuck along the neckline to absorb the excess fabric, creating a much snugger and more flattering fit.
- Twisted Seams: Unpin and re-pin the seam so that it follows the fabric's grainline properly and hangs perfectly straight on the form.
- Bust Wrinkles: Adjust the side seams or add darts to give the right amount of shaping and space, getting rid of any horizontal pulling or wrinkling.
Your dress form provides an objective, 360-degree view of the garment. It never gets tired or shifts its posture, giving you the consistency needed to analyse balance, proportion, and drape from every possible angle.
An Introduction to Creative Draping
Draping is where your artistic vision really takes shape. It’s the hands-on process of manipulating fabric directly onto the form, securing it with pins to build the foundational structure of your garment. This is how you discover where darts, pleats, and seams should go organically.
It's always best to start with a length of inexpensive muslin or calico, which acts as a fantastic practice canvas. Secure the centre of your fabric to the form’s centre front and then begin smoothing it over the bust, waist, and hips.
- Establish Key Lines: Use style tape or pins to mark the centre front, centre back, bust, waist, and hip lines on your form. These will be your essential reference points.
- Mould the Fabric: Gently smooth the muslin over the body's curves. Wherever the fabric naturally bunches up or creates excess, you can pin it into darts or pleats.
- Define Seams: Once the main sections are shaped, you can mark where you want your seams to fall and then trim away the excess fabric.
This hands-on method lets you experiment with design elements in a way that flat pattern-making simply can't match. If you're new to this, you might find it helpful to explore this great introduction on sewing for dummy. And once your garment is perfected, you might even consider adding some extra flair by looking into the fundamentals of embroidery.
Essential Accessories for Your Workflow
To get the most out of your fitting and draping sessions, a few key accessories will make a world of difference.
- Pin Cushion: A wrist-mounted pin cushion is a game-changer, keeping your pins within easy reach and seriously speeding up your workflow.
- Hem Marker: This simple attachment clips onto the stand and gives you a perfectly level guide for marking hems, ensuring professional results every time.
- Style Tape: This thin, coloured tape is brilliant for marking design lines directly on the form, giving you a clear visual guide for your draping.
By getting comfortable with these techniques and arming yourself with the right tools, you'll unlock the full potential of your adjustable mannequin dress form, turning it into the true centrepiece of your creative process.
Looking After Your Adjustable Dress Form
Think of your adjustable mannequin dress form as a serious investment in your work. It's more than just a tool; it's a partner in your creative process. Looking after it properly doesn't just protect that investment—it ensures your form stays accurate and reliable for years of projects to come.
A little bit of regular upkeep goes a long way. Dust and loose threads will inevitably settle on the fabric cover, so a quick pass with a vacuum's brush attachment every so often is a great idea. If you notice any small marks, it’s best to spot-clean them gently to avoid any moisture getting through to the foam core.
Keeping Your Form in Top Condition
To keep your dress form working perfectly, you need to care for both the outside and the inside. A few simple habits will keep it in prime condition.
- Cleaning the Cover: For any marks, use a mild fabric cleaner or a simple mix of gentle soap and water on a damp cloth. Always test on a hidden spot first, and never soak the fabric.
- Smart Storage: When you're not using it, keep your mannequin out of direct sunlight. The sun's rays can fade the cover and make the material brittle over time. A simple dust cover or even just an old sheet will do the trick.
- Dial Care: The adjustment dials are the heart of your form. To keep them turning smoothly, it’s a good practice to give them a gentle twist every now and then, even if you don't need to change the size. This stops them from getting stiff or seizing up.
Treat your adjustable form like a musical instrument. You need to keep it clean, store it correctly, and 'tune' it occasionally. That way, it will always be ready to help you create something beautiful.
Getting More from Your Mannequin
Your dress form is brilliant for fitting and draping, but its job doesn't have to end there. With a little imagination, it can become one of the most versatile pieces of kit in your studio.
For starters, use it as a model to photograph your finished clothes. Whether for your portfolio or an online shop, its perfect posture gives you consistent, professional-looking photos every time. It’s a lot more reliable than a human model!
An adjustable dress form also makes a fantastic display piece for your favourite creations, turning a practical tool into part of your studio's decor. By weaving it into every stage of your process, from the first pin to the final photo, you really get the most out of it.
Got Questions About Dress Forms?
When you’re diving into the world of adjustable dress forms, a few questions always seem to pop up. Getting those sorted is the last step before you can confidently pick out your new studio partner. Let’s tackle some of the most common queries I hear from designers and home sewists alike.
Whether it’s about navigating those tricky in-between sizes or figuring out how to handle specific garments, you've come to the right place. Let's clear up any lingering doubts.
What If My Measurements Are Between Two Sizes?
This is easily the question I get asked most often. The answer is simple: always choose the smaller size. I know it sounds a bit backwards, but trust me, it gives you so much more creative freedom.
You can always add padding to build up a form to match your exact measurements, but you can’t shrink a form down past its minimum setting. Starting smaller lets you sculpt specific areas like the bust or hips with a bit of batting, creating a far more accurate body double than you could ever get with just the dials.
Can I Make Trousers on an Adjustable Mannequin?
Yes, absolutely—for the top half, at least. A standard adjustable form is just the torso, which is perfect for nailing the fit around the waist, hips, and seat. Frankly, that’s where most of the tricky fitting challenges are with trousers anyway.
What a standard form won't help you with is the inseam or the shape of the leg itself. If you're a dedicated trouser maker, you might want to invest in a bifurcated (legged) form. For most of us, though, getting the top block right on a standard adjustable mannequin dress form and then finishing the legs on a real person works just fine.
An adjustable torso form gets you 90% of the way there with trousers. It resolves the critical curves around the waist and hips, making the final leg adjustments much more straightforward.
How Do I Replicate an Asymmetrical Body?
This is where the real artistry comes in. Very few of us are perfectly symmetrical, so learning to replicate those little differences is the secret to a truly custom fit. This is where padding is your best friend.
- Start with the Larger Side: First, set the mannequin’s dials to match the measurements of the body's larger side.
- Build Up the Smaller Side: Now, grab a padding kit or some cotton batting and start building up the smaller side of the dress form until it mirrors the person's unique shape.
- Focus on the Details: Pay really close attention to subtle differences. Is one shoulder slightly lower? Is one hip more curved? The key is taking meticulous measurements of both the left and right sides of the body before you even touch the form.
Following this process transforms your dress form from a generic shape into a true replica of a real body. It’s the difference between a good fit and a flawless one.
Ready to achieve a perfect fit on every garment? Explore the extensive range of professional and hobbyist dress forms at Display Guru. Find the ideal partner for your craft and enjoy free UK delivery on all orders. Discover your perfect adjustable mannequin dress form at https://www.displayguru.co.uk.