


The Ultimate Guide to Wall Hanging Rails for Your Space
When you think of wall hanging rails, you might just see functional bits of hardware. But they're so much more than that. In any professional space, they're a secret weapon for unlocking the true potential of your walls. Think of it as turning a blank surface into a dynamic canvas, one that can elevate your visual merchandising and sharpen your workflow from the moment they're installed.
Beyond Storage: How Wall Hanging Rails Transform Your Space
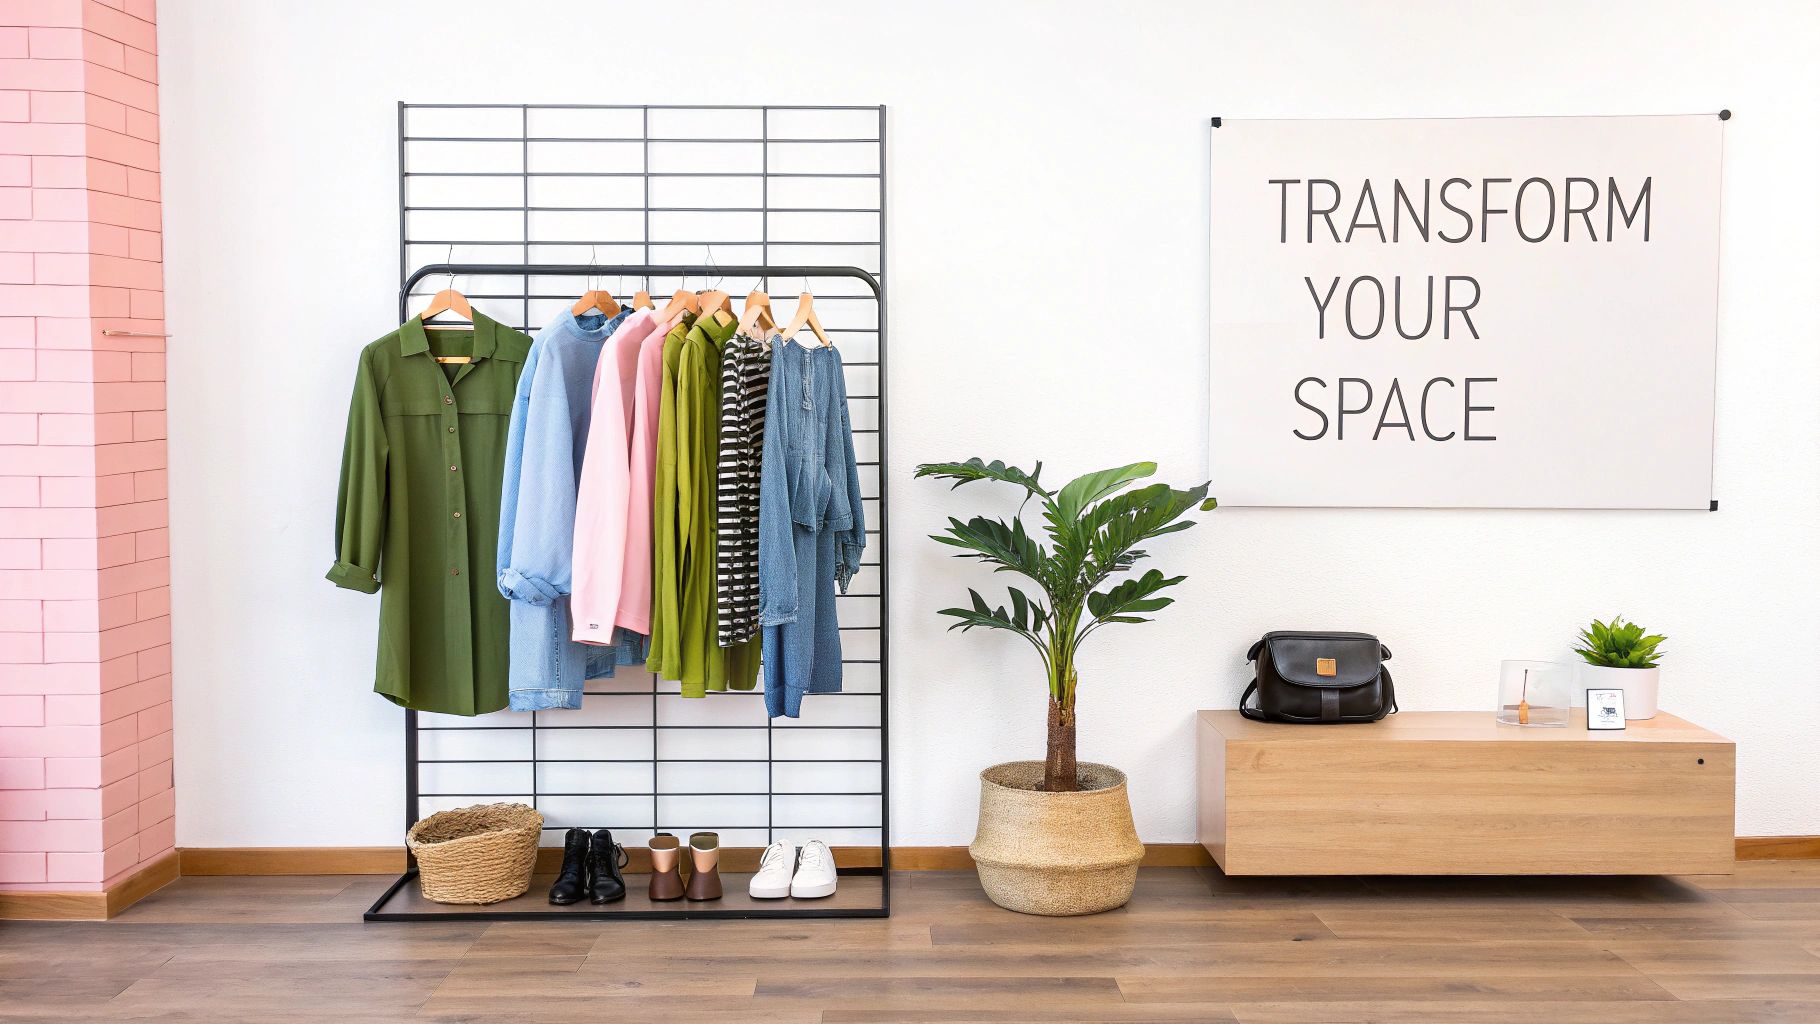
Look around your space. How much of your wall is just… wall? In a compact retail boutique, a bustling tailor's studio, or even a home workshop, every square foot of floor space is gold. Freestanding racks are notorious for eating up that valuable real estate, leaving you with a space that feels cluttered and awkward to move through. This is where wall hanging rails come in as an elegant, highly efficient alternative.
By shifting your garments, fabrics, or materials up onto the walls, you instantly free up the floor. Suddenly, you have more room for customers to browse, for work tables, or for other essential bits of kit. It’s a simple change, but it completely alters how your space feels and functions, making it seem larger, more organised, and far more professional.
Unlocking Vertical Merchandising Potential
The real magic of wall hanging rails is how they let you build compelling vertical displays. Instead of everything sitting at one level, you can start layering garments, creating visual stories, and drawing the customer's eye upwards. This isn't just about looking good; it's a cornerstone of effective retail strategy.
The advantages are clear:
- Improved Product Visibility: When you hang items at different heights, more of your collection is visible at a single glance. No more hidden gems getting lost on a crowded floor rack.
- Enhanced Aesthetic Appeal: A well-curated wall display looks deliberate and sophisticated. It instantly lifts your brand's image and boosts the perceived value of your products.
- Dynamic and Flexible Layouts: Wall rails make it incredibly easy to switch up your displays. You can highlight new arrivals, feature seasonal collections, or push promotional items with very little fuss.
This isn’t just a hunch; it’s a strategy backed by results. Retailers have seen as much as 25% better inventory turnover after switching to wall-mounted rails, especially when dealing with bespoke garments that need careful presentation. The demand for stylish, contemporary designs is growing, and it's easy to see why.
For a deeper dive into creating displays that truly capture attention, have a read of our guide on essential visual merchandising guidelines.
Choosing the Right Rail for Your Specific Needs
Picking the right wall hanging rail isn't just about how it looks; it’s about matching the tool to the job. You wouldn't use a delicate art hanger to hold a dozen heavy winter coats, and a busy tailor’s workshop needs something far more resilient than a simple decorative bar. Let's break down how to choose the right system for your specific needs, so you can make a decision you'll be happy with for years to come.
First, what's your primary goal? Are you aiming for a sleek, minimalist display to show off a few standout pieces in a boutique? Or do you need a practical, high-capacity workhorse to manage a constant flow of garments in a stockroom or retail floor? Answering that one question will instantly point you in the right direction.
Boutique and Minimalist Displays
When the display itself is a core part of your brand's aesthetic, like in a high-end boutique or a design studio, simple bar rails are your best friend. Their job is to look elegant and almost disappear, letting the clothes do all the talking.
- Single Bar Rails: These offer a clean, linear look that feels modern and uncluttered. They're perfect for displaying a small, curated collection where you want plenty of space between each item, creating a real sense of focus and luxury.
- Picture Rail Systems: While originally designed for hanging artwork without putting nails in the wall, these are fantastic for creative displays. By using hooks and wires suspended from a high-mounted rail, you can create unique, layered arrangements with garments, accessories, or even small props.
These options put form before function, turning a simple hanging rail into a key piece of your interior design. For a similarly discreet and modern finish, some people even adapt sleek curtain track wall mount systems for lightweight apparel displays.
Versatile and Heavy-Duty Systems
If your top priorities are strength and the ability to adapt, then it’s time to look at modular and industrial-grade solutions. These systems are built to withstand the daily grind of busy retail environments, bustling workshops, and ever-growing collections.
For a growing business or a space with evolving needs, a modular system is an investment in adaptability. It allows you to expand and reconfigure your layout without starting from scratch, saving both time and money in the long run.
Modular systems are the chameleons of the wall hanging rails world. They're built from separate uprights, brackets, and rails that you can combine in almost endless ways. This means you can create multi-level displays, mix in shelving, and completely change the layout as your stock or projects demand.
For sheer, brute strength—think theatre costume departments or stockrooms piled high with heavy garments—nothing beats industrial pipe rails. Their rugged construction is designed to handle serious weight, ensuring everything from bulky coats to elaborate costumes is stored safely and securely. If you need more guidance on finding the right fit, our article on choosing the best wall racks for clothes offers some extra helpful tips.
Comparing Wall Hanging Rail Systems
To make the choice even clearer, here's a quick comparison to help you select the ideal rail system based on its intended use, material, and typical load capacity.
| Rail Type | Best For | Material | Typical Load Capacity |
|---|---|---|---|
| Single Bar Rail | Boutiques, minimalist home displays, showcasing key items | Steel, brass, wood | Low to Medium |
| Picture Rail System | Creative merchandising, lightweight garments, artful displays | Aluminium, wood, steel | Low |
| Modular System | Retail stores, workshops, growing businesses, mixed-use spaces | Steel, aluminium | Medium to High |
| Industrial Pipe Rail | Stockrooms, costume departments, heavy-duty retail, garages | Galvanised steel, iron | Very High |
This table should give you a solid starting point. By thinking carefully about what you'll be hanging and how you want your space to feel, you'll be able to find a rail system that not only works perfectly but also enhances your environment.
Understanding Materials, Load Capacity, and Sizing
Choosing the right wall-hanging rail isn’t just about how it looks; it's about understanding the basic physics of your display. The material, diameter, and length you pick will determine exactly how much weight your rail can safely hold. Getting this right is crucial—it prevents the rail from bowing, protects your garments, and ensures you have a secure, long-lasting setup you can rely on.
Think of it like choosing a bookshelf. You wouldn’t put a full set of heavy encyclopaedias on a flimsy decorative shelf, would you? It's the same principle here. A sleek stainless steel rail that looks fantastic holding a few delicate blouses in a boutique just isn't cut out for a dozen heavy woollen coats in a stockroom. Every material has its own strengths, both in terms of durability and style.
Matching Material to Your Needs
The material your wall-hanging rails are made from is what gives them their strength and visual character. In any professional setting, durability is the name of the game.
- Stainless Steel: This gives you a clean, modern look that’s also brilliant at resisting corrosion. It’s a great choice for anywhere that might get a bit humid or simply for when you need a rail that will last and last.
- Powder-Coated Metal: This offers a tough, scratch-resistant finish, usually in colours like black or white. It’s perfect for blending the rail into your existing décor or for making a bold visual statement.
- Industrial Pipe: When you need sheer strength, this is what you turn to. It has a rugged, urban feel and is the top choice for really heavy-duty work—think costume departments, workshops, or busy retail stockrooms.
This preference for strong, reliable materials is seen across the industry. The global market for hanging rails (which originally started with banner displays) hit USD 1.38 billion in 2024, and its use for clothing has absolutely taken off here in the UK. Steel is often the material of choice because it's so strong and recyclable, which is why the durable black and white rails supplied by Display Guru for professional and theatre productions are so popular. You can read more about this growing market on dataintelo.com.
Calculating Load Capacity and Sizing
Working out the total weight of the clothes you plan to hang is easier than it sounds, and it’s a vital step in picking the right size rail. If you overload a rail, it will start to sag, and in a worst-case scenario, it could pull away from the wall entirely.
As a simple rule of thumb, plan for about 2-3 inches of rail space per hanger for everyday items like shirts and trousers. For bulkier things like winter coats or suits, give them a bit more breathing room—more like 4-5 inches per hanger—to avoid that cramped, unprofessional look.
To get started, just weigh a few of your typical garments. For instance:
- Light Items: A handful of 10 silk blouses might only weigh around 2 kg.
- Medium Items: A rail holding 10 pairs of denim jeans could easily be 7-9 kg.
- Heavy Items: Just 5 heavy winter coats can weigh 10-15 kg, sometimes even more.
Once you have a rough idea of the total weight, you can confidently choose a rail with the right diameter and length. Remember, longer rails will need more support brackets to spread the load evenly and stop them from dipping in the middle.
If you’re dealing with seriously heavy stock, our complete guide to heavy-duty hanging rails offers more specialised advice. The golden rule is to always pick a rail with a load capacity that’s comfortably above your estimated maximum weight. That's how you guarantee both safety and durability for years to come.
A Step-by-Step Guide to a Safe and Secure Installation
Getting your installation right is what separates a professional-looking display from a wobbly disaster. Think of it as the foundation of your entire setup. This guide breaks down the process into simple, manageable stages, so you can mount your wall hanging rails with confidence. We’ll cover everything from finding the perfect spot on the wall to giving it that final all-important stability check.
Honestly, with a bit of prep, this is a job you can easily tackle yourself. The aim is to create a rock-solid mounting that you know will hold your stock securely.
Preparing for Installation
Before you even think about picking up a drill, a little bit of groundwork makes all the difference. The single most important job is figuring out what your wall is made of, as this will determine the fixings you need.
- Locate Wall Studs: If you have plasterboard walls, you absolutely want to fix your rail into the wooden studs behind the plasterboard. This is the strongest anchor point you'll get. Use a stud finder to pinpoint their location and mark them lightly with a pencil.
- Assess Your Wall Type: Working with solid walls like brick or concrete? You’ll need a different set of tools, specifically masonry plugs and screws. A quick knock on the wall usually gives it away – plasterboard sounds hollow, while brick feels completely solid.
- Gather Your Tools: Make sure you have a decent drill, the right drill bits for your wall, a spirit level (crucial!), a tape measure, and a pencil.
A perfectly level rail isn't just a 'nice to have' – it's essential for a professional finish. Always use a spirit level to mark your drill points and check the alignment one last time before you drill. An uneven rail doesn't just look off; it can also cause the weight to be distributed unevenly, which is a big no-no.
This flowchart maps out the key decisions you need to make before you even start the installation. It’s all about matching the right rail to your specific needs.
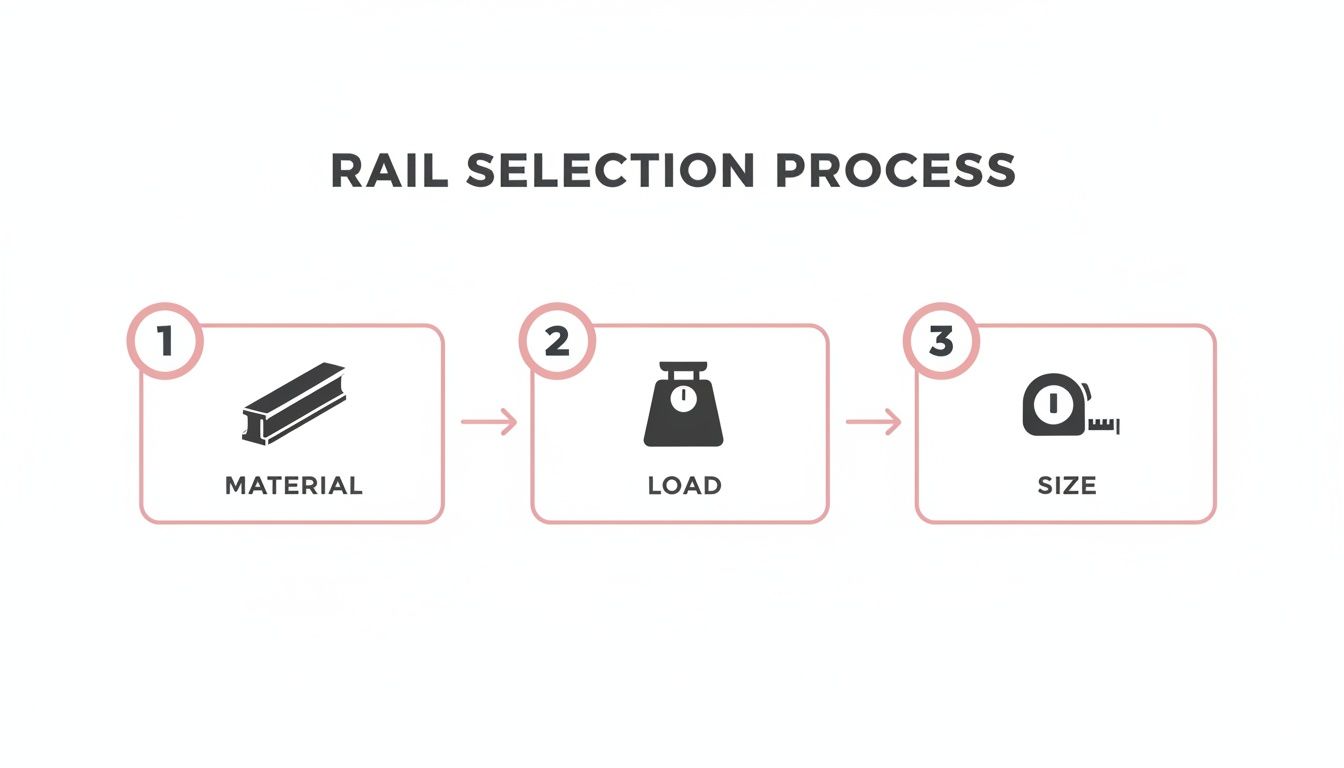
As you can see, thinking about the material, the weight it needs to hold, and the size you need are the first steps to a successful setup.
Mounting the Rail Securely
Right, preparation done. Now for the main event. Take your time here; there’s no prize for rushing.
Start by holding the rail up against the wall at the height you want. Place your spirit level on top and adjust until it’s perfectly horizontal. Then, mark where you need to drill through the holes in the brackets. If you've got a long rail, trust me, getting a second person to help hold it steady will make life much easier.
Next, drill your pilot holes on the marks you made. For plasterboard, you'll drill straight into the centre of the studs you found earlier. For brick or concrete walls, drill the holes and then gently tap in the correct wall plugs until they’re sitting flush with the wall. Choosing the right hardware can be a minefield, so our overview of clothes rail and brackets is a great resource if you need more detail.
Finally, line up the rail's brackets with your prepared holes and drive the screws in firmly. You want them tight, but don't go overboard and strip the screw head. Once all the brackets are secure, give the rail a good, firm tug to make sure it’s not going anywhere. This same meticulous approach applies to many DIY projects, like applying wall stickers flawlessly for a perfect finish. That final check is your peace of mind that the installation is safe and ready to be loaded up.
Creative and Professional Use Cases

Far more than just a place to hang things, wall hanging rails are a secret weapon for professionals. They’re problem-solvers, turning blank walls into highly functional, dynamic spaces that can completely transform a workflow or a customer's first impression. Whether you’re in a tailor's studio or a high-street boutique, these rails often become the unsung heroes of an organised, visually engaging environment.
The power of a well-thought-out display can't be overstated. With the UK home decor market projected to hit USD 30.30 billion by 2029, presentation is everything. In fact, a recent survey found that 72% of UK retailers using wall-mounted systems saw customer engagement jump by 15-20%. It’s clear they do more than just hold stock; they shape the customer experience. You can dig deeper into these trends over on verifiedmarketresearch.com.
For the Tailor and Seamstress
In a busy sewing room, chaos is the enemy. A simple wall rail can bring instant order by becoming a dedicated ‘work-in-progress’ station, keeping multiple client jobs from blending into one messy pile.
- Segment Your Projects: Use one long rail to separate different client orders. This keeps patterns, cut fabric, and half-finished garments neatly organised and easy to grab.
- Visualise Your Workflow: Hang projects in deadline order. A quick glance tells you exactly what needs your attention next, making prioritising a breeze.
- Keep Tools Handy: Pop a few S-hooks on the rail for pattern hooks, fabric swatches, or frequently used tools. Everything stays off your worktable but is always within arm's reach.
This kind of system is brilliant for protecting delicate fabrics from getting creased or lost, ensuring the quality of your work is maintained from the first cut to the final stitch.
For the Retail Merchandiser
For anyone in retail, wall hanging rails are the key to creating displays that tell a story and guide the customer's eye. They let you build visual narratives that floor racks simply can’t achieve.
A dynamic wall display does more than just hold stock; it tells a story about your brand. By using varied heights and spacing, you can create a visual hierarchy that draws attention to new arrivals or high-margin items, actively guiding the customer's journey through your collection.
Try creating a feature wall by mounting rails at staggered heights. This classic technique lets you showcase a complete look—a jacket, shirt, and trousers, for instance—as a single, compelling outfit. For more ideas on creating standout displays, have a look at our guide to effective retail display stands.
For the Costume Designer
Backstage at a theatre or on a film set, keeping track of a mountain of costumes is a huge logistical puzzle. Wall hanging rails provide a brilliantly clear and efficient way to organise an entire production's wardrobe.
You can set aside specific rails for each character, act, or scene, making sure every single piece is accounted for and ready for those lightning-fast quick changes. In the high-pressure backstage world, this level of organisation is absolutely vital. It cuts down on stress and drastically reduces the chances of a costume mix-up during a live performance.
Your Frequently Asked Questions Answered
Got a few questions before you get started? You're not alone. We've put together answers to the most common queries we hear from customers, helping you choose and install your new rail with complete confidence.
How Do I Know What Weight My Wall Can Handle?
This is a great question, and the answer really comes down to what your wall is made of. A solid brick or concrete block wall is your best-case scenario – with the right masonry fixings, it can hold a serious amount of weight.
If you're dealing with plasterboard, your goal is to find the hidden wooden studs behind the board and screw the rail directly into those. That's where you'll get your real strength. While you can get heavy-duty plasterboard anchors, they’ll never be as robust as a rail fixed securely to the internal frame of the wall. When in doubt, it's always worth getting a professional opinion.
Key Takeaway: Always aim to fix into something solid, whether that's brickwork or a wooden stud. The sturdiest rail in the world is only as strong as the wall it's attached to.
Can I Put a Wall Hanging Rail Up Myself?
Absolutely. For most of our standard rails, installation is a perfectly manageable DIY job. It’s often a one-person task, though an extra pair of hands never hurts.
The secret to a good finish is having the right kit. You'll need a decent drill, a spirit level to avoid a wonky rail, and a stud finder if you're working with plasterboard. Take your time, follow the instructions, and you'll get a professional result. If you're tackling an extra-long or modular system, we definitely recommend roping in a friend to help hold things steady while you mark up and drill. It makes the whole process safer and more accurate.
What’s the Best Height to Mount a Garment Rail?
The perfect height depends entirely on what you plan to hang. Think about your longest items first.
For things like full-length coats or dresses, a good starting point is around 165cm (65 inches) from the floor to the rail itself. This gives everything enough room to hang freely without dragging on the ground.
If you’re mostly hanging shorter garments like shirts or trousers folded over a hanger, you can go lower – somewhere between 100-120cm (40-47 inches) usually does the trick. Want to get really efficient? Consider installing two wall hanging rails in a tiered system, one above the other, to double your hanging space.
How Do I Look After My Wall Hanging Rails?
Keeping your rails in top condition is easy. For our powder-coated and stainless steel finishes, a simple wipe-down with a soft, damp cloth is all you need to get rid of dust and smudges. Just be sure to avoid any harsh, abrasive cleaners that could damage the finish.
For busy retail spaces or stockrooms, it’s a good habit to give the fixings a quick check every so often to make sure everything is still nice and tight. A little bit of routine care goes a long way in keeping your display looking sharp and secure for years to come.
Ready to find the perfect display solution? Explore the full collection of professional-grade garment rails at Display Guru. Our products are built for style and engineered to last. Discover the right fit for your space at https://www.displayguru.co.uk.