


Top Sewing Room Organization Ideas for 2025
A well-organised sewing room is more than just a tidy space; it is the foundation of creativity, efficiency, and enjoyment in your craft. Whether you are a home-based hobbyist, a fashion student, or a professional tailor, the constant influx of fabric, thread, and tools can quickly turn a creative haven into a chaotic workspace. This article presents a comprehensive collection of practical and stylish sewing room organisation ideas designed to bring order and inspiration to your studio. We will explore solutions that transform how you store and access your materials, from leveraging vertical space with pegboards to mobilising your projects with rolling carts.
A pivotal element in many professional studios is the use of high-quality display and storage tools. For instance, incorporating tailor's dummies and garment rails from specialists not only aids in the creation process but also serves as an organisational anchor for works-in-progress, keeping them pristine and off cluttered surfaces. These ideas go beyond generic advice, offering actionable steps to help you build a sewing room that is both beautiful and brilliantly functional, allowing you to move seamlessly from concept to creation.
1. Pegboard Organisation System
A pegboard organisation system is a quintessential solution for any sewing space, transforming unused vertical wall space into a highly efficient and customisable storage hub. This method involves a perforated board mounted on the wall, which accommodates a variety of hooks, shelves, and containers. This modularity is its greatest strength, offering a tailored approach to sewing room organisation ideas that can evolve with your projects and tool collection.
By keeping essential tools like scissors, rotary cutters, and thread spools visible and within arm's reach, a pegboard streamlines your workflow and reduces time spent searching for items. The visual clarity it provides not only enhances productivity but also adds a professional, workshop-inspired aesthetic to your studio. Systems like the IKEA SKÅDIS are popular in home craft rooms, while more industrial-grade versions are staples in professional tailoring shops, demonstrating their versatility across different scales.

Why Use a Pegboard System?
This approach is ideal for sewists who value flexibility and accessibility. It's particularly beneficial in smaller rooms where floor space is limited, effectively moving clutter from work surfaces onto the walls. Because it is so easy to reconfigure, it supports a dynamic creative process where tool requirements can change from one project to the next.
Key Insight: A pegboard system is more than just storage; it's an active part of your workflow. By organising tools by project or process (e.g., a cutting station section, a marking tools section), you create an intuitive layout that minimises movement and maximises efficiency.
Actionable Implementation Tips
To get the most out of your pegboard, strategic planning is essential. Consider these professional tips for an effective setup:
- Group and Conquer: Arrange similar items together. Dedicate specific zones for cutting tools, marking implements, rulers, and threads to create a logical, easy-to-navigate layout.
- Use Clear Containers: For small notions like buttons, bobbins, and machine needles, use clear, lidded pots or transparent bins attached to the board. This keeps them dust-free and easily identifiable.
- Incorporate Lighting: Install a small LED strip light above or below your pegboard to illuminate your tools. Good lighting prevents eye strain and makes it easier to grab the correct item quickly.
- Label Everything: Use a label maker or simple tags to designate areas for specific tools. This enforces discipline and makes tidying up at the end of the day a simple, thoughtless task.
For further inspiration on integrating this system, you can discover more detailed sewing room organisation strategies and see how a pegboard system can revolutionise your workspace.
2. Thread Storage Tower/Rack System
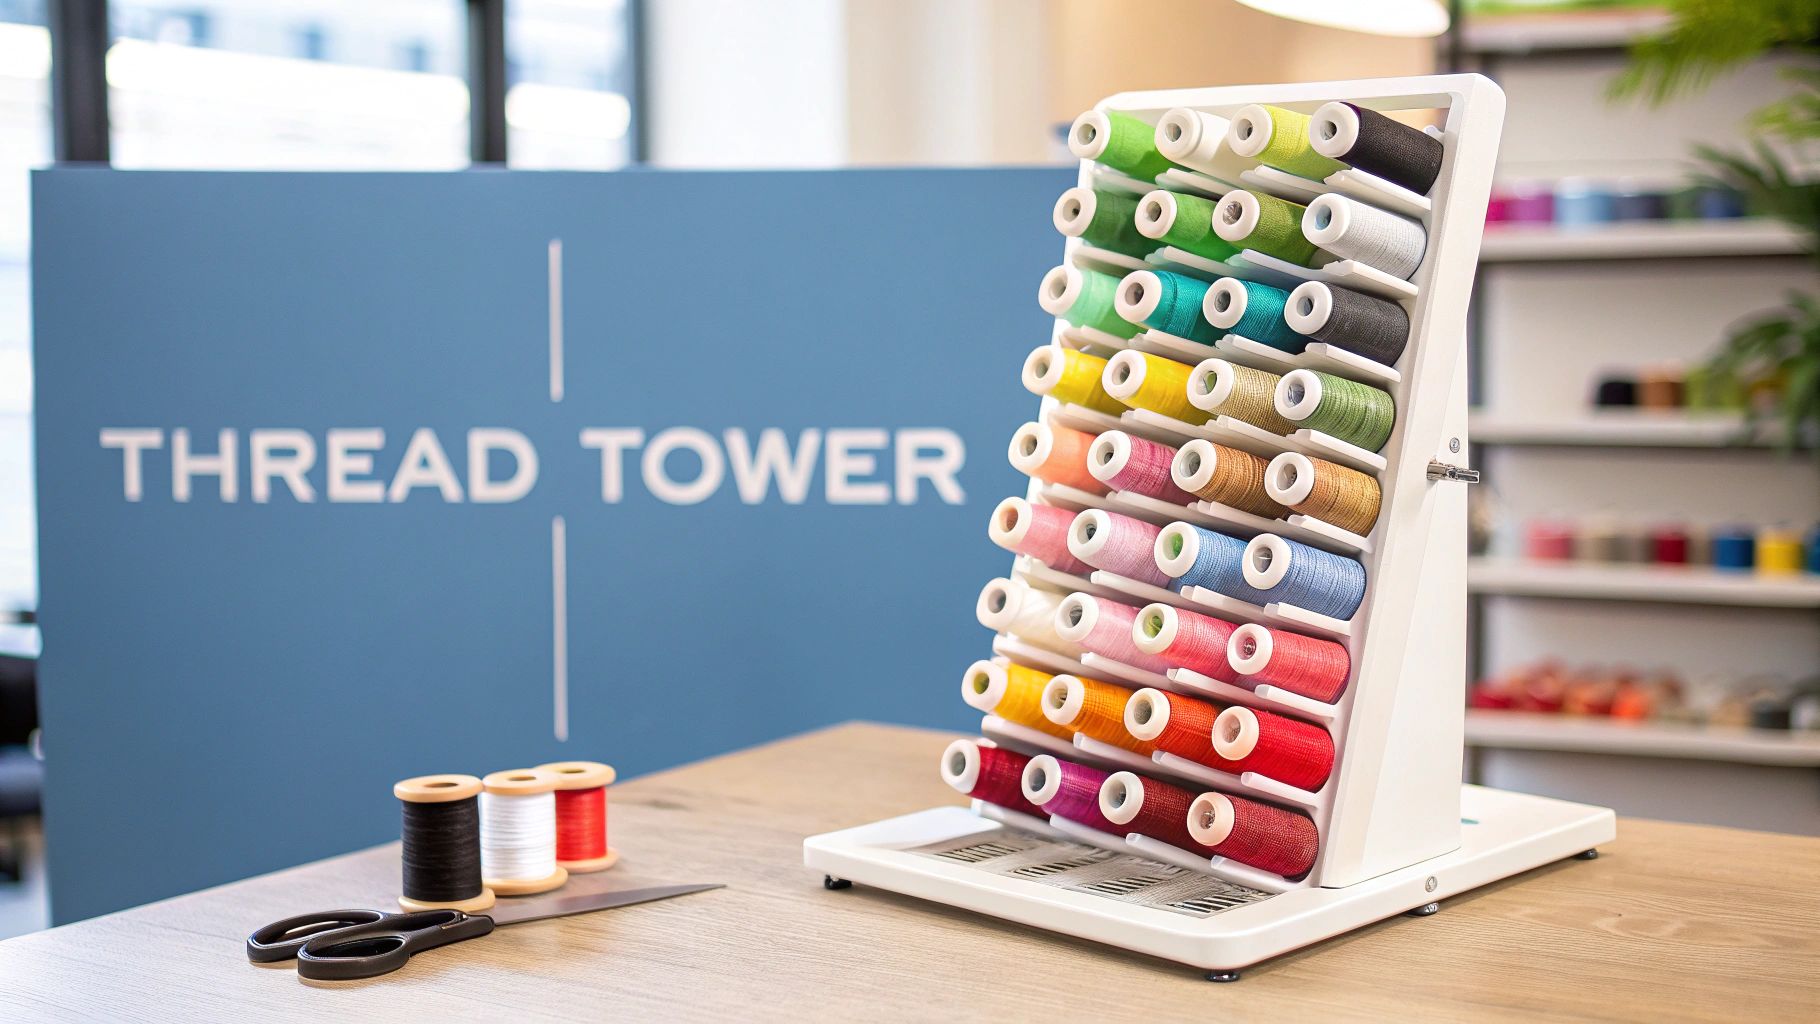
A thread storage tower or rack system is a specialised solution designed to bring order and accessibility to one of the most colourful, yet potentially chaotic, elements of a sewing room. These units, which range from wall-mounted racks to freestanding rotating towers, allow sewists to display their entire thread collection at a glance. This immediate visibility is a cornerstone of efficient sewing room organisation ideas, preventing duplicate purchases and making colour matching a swift, accurate process.
These systems are engineered to hold individual spools securely, protecting the thread from tangling, dust, and light degradation. Renowned quilters often use large-capacity towers like those popularised by Nancy's Notions, while professional embroidery shops rely on commercial-grade stands from brands like Madeira to manage hundreds of shades. This approach transforms a functional necessity into a vibrant, inspiring visual feature.
Why Use a Thread Storage System?
This method is indispensable for any sewist who works with a wide palette of thread colours, from quilters and embroiderers to garment makers. It eliminates the frustration of rummaging through a box or drawer, which can lead to tangled, messy spools. A dedicated rack organises threads by type and colour, streamlining your workflow and preserving the quality of your materials.
Key Insight: A well-organised thread rack functions as a real-life colour card. Arranging spools in a gradient or by colour family not only looks professional but also trains your eye for subtle shade differences, improving your colour selection skills for every project.
Actionable Implementation Tips
To maximise the benefits of a thread rack, consider how you arrange your collection. Implement these professional strategies for a truly effective setup:
- Organise by Colour Families: Group your spools by colour, arranging them in a logical spectrum (e.g., a rainbow or gradient). This makes finding the perfect shade intuitive and fast.
- Keep Favourites Accessible: Place your most frequently used colours, such as black, white, and neutral tones, at eye level or in the most easily accessible part of the rack.
- Use Thread Nets: For slippery threads like rayon or metallics that tend to unwind, use thread nets or "huggies" to keep the tails secure and prevent tangles on the rack.
- Consider Thread Weight: If you work with various thread weights (e.g., for quilting, topstitching, and general sewing), dedicate specific rows or sections of your rack to each type to avoid mix-ups.
For those with smaller, more specialised collections, you can explore more about how a sewing organiser box can complement a larger storage system.
3. Fabric Storage Cubes and Bins
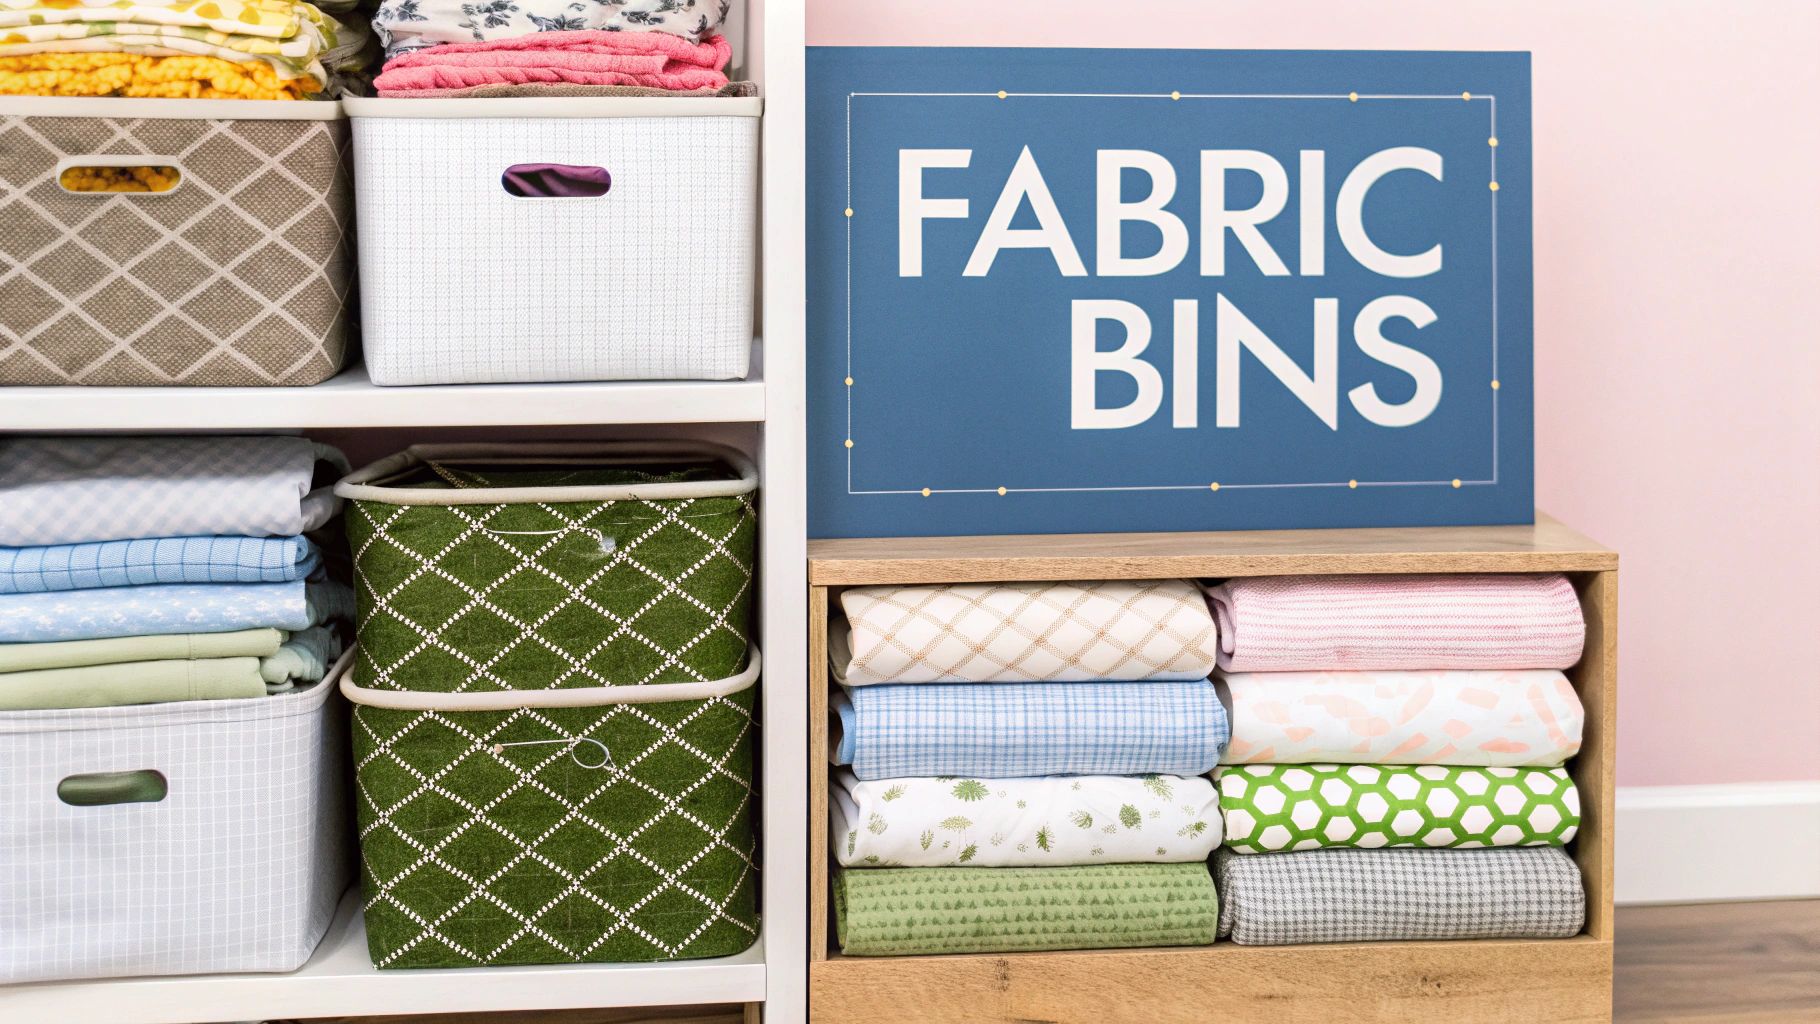
A well-organised fabric stash is the foundation of an efficient sewing room, and using storage cubes and bins provides a systematic solution. This approach involves uniform containers to categorise fabric, transforming a chaotic pile into an accessible and visually pleasing library of textiles. By standardising storage, you not only make items easy to find but also protect delicate materials from dust, light damage, and pests.
This method is highly scalable, working just as effectively for a small collection of remnants as it does for a professional studio's extensive inventory. The uniformity of bins and cubes creates a clean, cohesive look, turning clutter into a deliberate design element. It’s a core principle seen in professional organising methods, like those popularised by Marie Kondo, where containing items is key to maintaining order.
Why Use Fabric Storage Cubes and Bins?
This system is ideal for sewists with a growing fabric collection who need a clear inventory management solution. It's particularly useful for protecting investments in high-quality silks, wools, or delicate prints. Clear bins offer at-a-glance identification, while opaque or fabric-covered cubes can be labelled for a neater aesthetic, hiding visual clutter while keeping contents organised.
Key Insight: Storing fabric uniformly is not just about tidiness; it’s about preservation and project planning. When you can see your entire collection categorised by colour, type, or project, you are more likely to use what you have, reducing waste and inspiring new creative combinations.
Actionable Implementation Tips
To effectively implement a cube or bin system, a methodical approach is crucial. Follow these professional tips for a perfectly organised fabric collection:
- Categorise Before Storing: Decide on a system that works for you. Common methods include sorting by colour, fabric type (cotton, linen, knit), project, or even designer. Stick to one method for consistency.
- Fold Uniformly: Fold all fabric pieces to the same dimensions so they fit neatly within your containers. Use comic book boards or specially designed fabric rulers to achieve crisp, uniform folds that maximise space.
- Label Precisely: Use clear, detailed labels on every bin. Include information like fabric type, yardage, and pre-washing status. This saves you from having to unfold everything to find what you need.
- Create an Inventory: For larger collections, consider a digital or physical swatch library. Attach a small cutting to an index card with its location noted, or use an app to track your inventory, making "shopping your stash" simple.
- Protect Your Textiles: Add cedar blocks or lavender sachets to your bins to naturally deter pests, especially when storing natural fibres like wool or silk for long periods.
By adopting these strategies, you can transform your fabric storage from a source of stress into a functional and inspiring part of your creative space. You can find more comprehensive sewing room ideas on displayguru.co.uk to further enhance your studio's functionality.
4. Rolling Cart Storage System
A rolling cart storage system introduces dynamic, mobile organisation to your sewing room, offering a flexible solution that moves with your workflow. This system typically consists of a multi-tiered cart on castors, equipped with shelves, drawers, or bins. Its core advantage is portability, allowing you to bring an entire set of tools, notions, and fabrics directly to your cutting table or sewing machine, then tuck it away when not in use.
This approach embodies one of the most practical sewing room organisation ideas, as it keeps essential supplies for a current project consolidated and within immediate reach. This significantly reduces the need to get up and search for items, saving time and maintaining creative momentum. Carts like the IKEA RÅSKOG have become a staple in home craft rooms, while more robust, industrial-style carts are often repurposed in professional studios for their durability and larger capacity.
Why Use a Rolling Cart System?
This method is perfect for sewists who work on multiple projects simultaneously or have a multi-functional space. It allows you to dedicate a cart to each project, keeping all relevant materials separate and organised. It is also an excellent solution for smaller studios where permanent storage is scarce, as the cart can be moved out of the way to create more floor space.
Key Insight: A rolling cart functions as a portable project station. By dedicating a cart to a specific task, such as pattern cutting or garment assembly, you create a self-contained kit that can be deployed anywhere in your studio, streamlining complex workflows and making project management far more efficient.
Actionable Implementation Tips
To maximise the utility of a rolling cart, a considered approach to organisation is key. Follow these professional tips for an effective setup:
- Prioritise Stability: Always place your heaviest items, such as fabric bolts or large cutting mats, on the bottom shelf. This lowers the cart's centre of gravity and prevents it from tipping over during movement.
- Contain and Subdivide: Use trays, clear containers, and drawer dividers within the cart's tiers. This stops smaller items like bobbins, thread, and marking tools from shifting and mixing together as you move the cart.
- Dedicate Carts to Projects: If space allows, assign one cart per major project. This keeps all necessary fabrics, patterns, and notions together, simplifying your process and making it easy to switch between tasks without losing your place.
- Maintain Mobility: Regularly check and clean the castors to remove threads, dust, and debris. Smooth-rolling wheels are crucial for effortless movement and prevent damage to your flooring.
To effectively manage the contents of your project-specific cart, you can find a helpful guide and template with a sewing project planner to keep everything in order.
5. Magnetic Strip and Container System
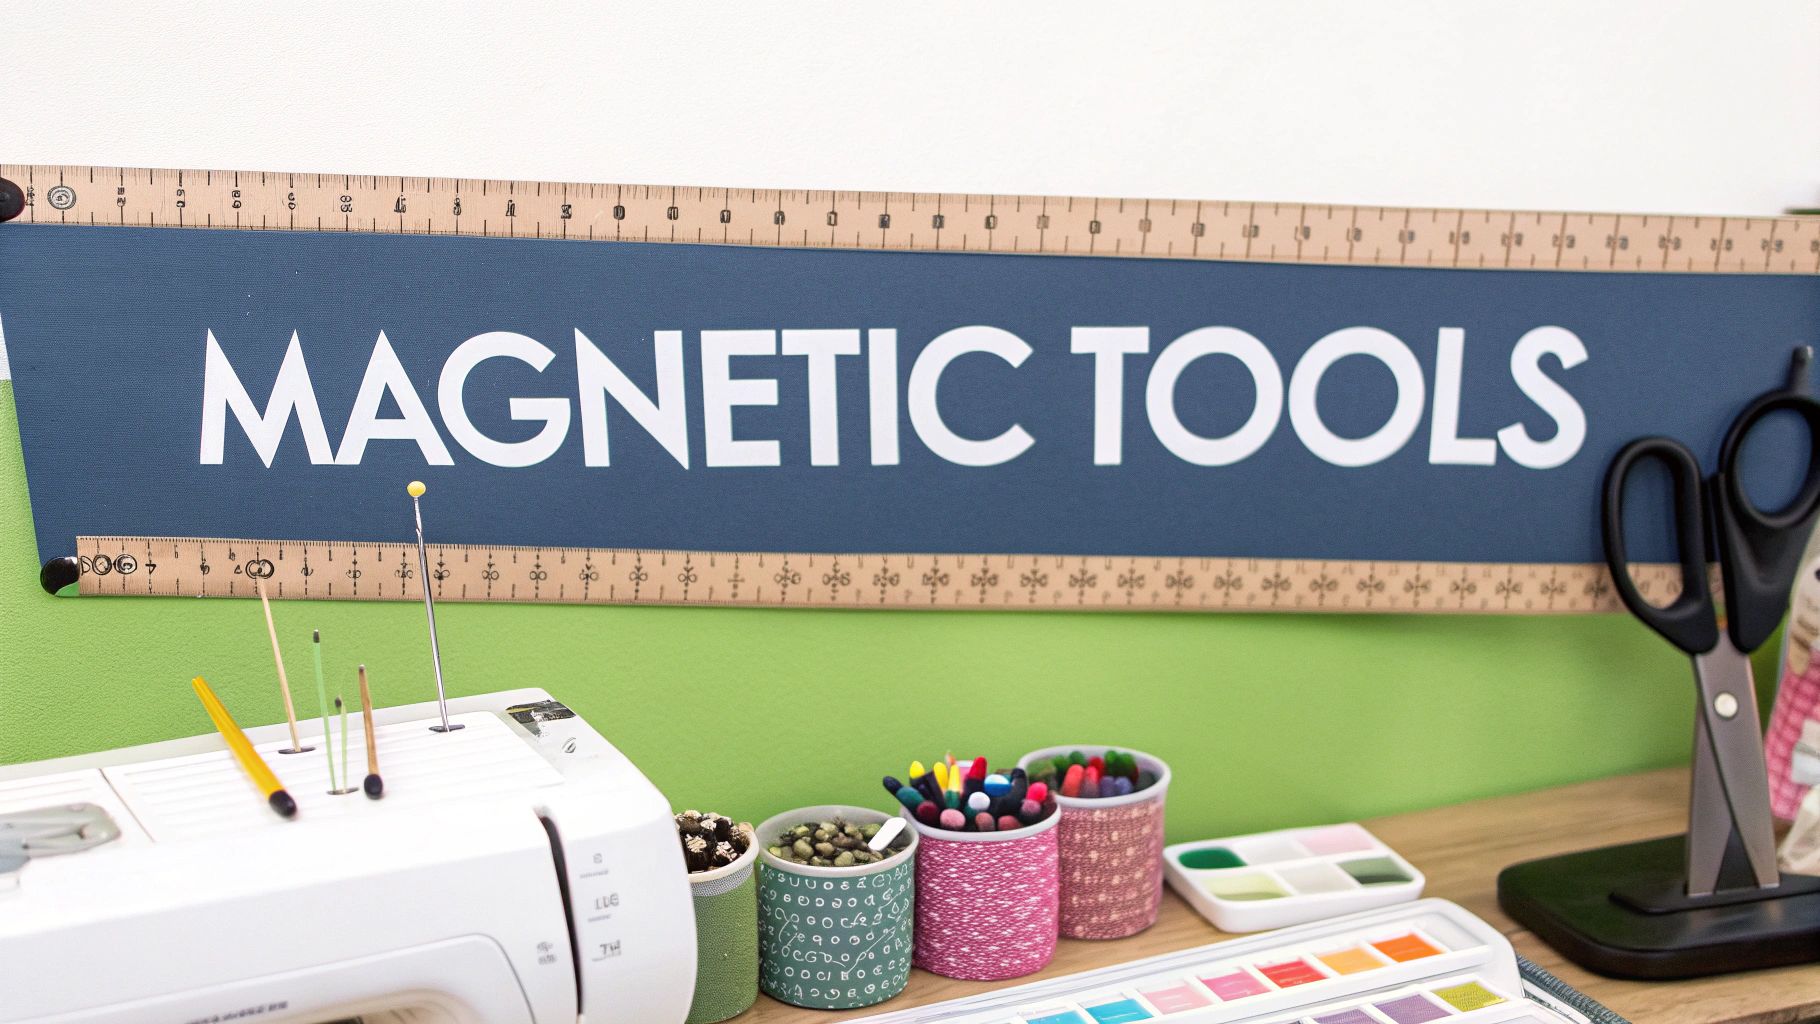
A magnetic strip and container system offers a sleek and highly practical solution for managing metal sewing tools and notions. This method involves mounting strong magnetic bars on a wall or the side of a cabinet to hold items like scissors, snips, and seam rippers, while magnetic bowls or pots corral smaller items like pins and needles. This approach is a fantastic example of borrowing clever sewing room organisation ideas from other domains, such as professional kitchens, to create an orderly and accessible workspace.
The primary advantage is the immediate grab-and-go access it provides for frequently used metal implements. By securing sharp tools safely out of the way, it declutters your cutting mat and worktable, reducing the risk of accidents or misplacing essential gear. Esteemed brands like Grabbit have popularised magnetic pin cushions, while professional alteration shops often use long, wall-mounted strips to keep their most critical tools within easy reach, demonstrating the system's effectiveness in high-pace environments.
Why Use a Magnetic System?
This approach is perfect for any sewist who works with numerous small metal tools and wants to prevent them from getting lost in drawers or fabric piles. It is particularly effective for those with limited table space, as it utilises vertical surfaces near the sewing machine or cutting area. The system excels at keeping tiny, sharp items like machine needles and pins contained, preventing them from becoming a hazard.
Key Insight: A magnetic system is an active safety feature as much as an organisational tool. By providing a designated, secure "home" for sharp objects, it builds a muscle memory of returning tools immediately after use, dramatically enhancing workshop safety and cleanliness.
Actionable Implementation Tips
To effectively integrate a magnetic system into your sewing room, a little planning goes a long way. Consider these professional tips for a seamless setup:
- Test Magnet Strength: Before permanently mounting a strip, test it with your heaviest tools, like fabric shears, to ensure the magnet is powerful enough to hold them securely without sliding.
- Strategic Placement: Mount strips at a comfortable reaching height, either above your worktable or to the side of your sewing machine. This ensures tools are accessible without forcing you to stand up or overreach.
- Use Magnetic Bowls: Place a magnetic pin bowl next to your sewing machine to catch pins as you remove them from fabric. This simple habit prevents stray pins from ending up on the floor.
- Keep Electronics Separate: Be mindful of placing magnetic strips near computerised sewing machines or other sensitive electronic devices, as strong magnets can potentially interfere with their operation.
6. Drawer Divider and Organizer System
A drawer divider and organiser system is a cornerstone of effective sewing room organisation ideas, transforming chaotic drawers into meticulously arranged compartments. This method involves using adjustable dividers, individual containers, and custom-fit inserts to assign a specific home to every notion, from buttons and bobbins to zips and trims. The primary benefit is its ability to contain small, easily lost items, preventing them from mixing and becoming a jumbled mess.
By compartmentalising drawer space, you maximise its capacity and ensure that every tool is instantly visible and accessible. This eliminates wasted time spent rummaging for a specific colour of thread or the right size of machine needle. High-end sewing cabinets often come with built-in inserts, while professional organisers champion modular systems from companies like The Container Store, proving this solution is adaptable for both dedicated hobbyists and professional tailoring environments.
Why Use a Drawer Organiser System?
This approach is indispensable for any sewist dealing with a large collection of small notions and tools. It’s particularly effective in workspaces where maintaining a clean, uncluttered surface is paramount. By keeping items neatly tucked away but perfectly organised, drawers become powerful storage assets rather than dumping grounds, supporting a more streamlined and focused creative process.
Key Insight: An effective drawer system is designed around your specific inventory. Instead of buying a generic organiser, audit your notions first and select a system that provides the right size and number of compartments for your collection, ensuring no space is wasted.
Actionable Implementation Tips
To create a truly functional drawer system, a thoughtful approach is key. Consider these professional tips for an efficient setup:
- Group Similar Items: Dedicate specific drawers or sections to related categories. For example, one compartment for zips, another for elastic, and a third for measuring tapes and gauges.
- Use Shallow Containers: For items like buttons or snaps, use shallow trays or clear-lidded containers within the drawer. This prevents you from having to dig through deep piles to find what you need.
- Label Everything: Use a label maker to clearly mark each compartment. This reinforces the system, makes finding items effortless, and simplifies tidying up after a project.
- Leave Room to Grow: Avoid filling every single compartment to its maximum capacity. Leaving some empty space allows your storage system to adapt as your collection of notions and tools expands.
For a deeper dive into organising your supplies, you can explore more sewing room storage ideas and find the perfect solution for your space.
7. Rotating Carousel Storage
A rotating carousel storage system introduces dynamic, 360-degree access to your most-used sewing supplies, making it one of the most efficient sewing room organisation ideas for a compact workspace. These circular systems, often based on a Lazy Susan mechanism, allow you to bring items to you with a simple spin, eliminating the need to reach, stretch, or dig through drawers. Their design is perfect for holding small notions, thread spools, buttons, and other frequently needed tools in a condensed footprint.
This storage solution is incredibly versatile, ranging from multi-tiered carousels designed specifically for craft supplies to repurposed kitchen spice racks or professional thread stands used in embroidery shops. By placing a carousel on your cutting table or next to your sewing machine, you keep essential items organised and immediately accessible, significantly speeding up your workflow and reducing time spent searching. The principle is simple but powerful: minimise movement to maximise productivity.
Why Use a Rotating Carousel?
This method is ideal for sewists who work with numerous small components and want to maintain a clear primary workspace. It's especially effective in studios where the sewing machine and cutting mat are in close proximity, allowing you to access a wide array of tools from a single seated position. It centralises your core supplies into one easy-to-reach hub.
Key Insight: A rotating carousel acts as a central command station for your notions. By organising it strategically, you can create a 'grab-and-go' system that supports the natural flow of a project, from pins and clips at the start to buttons and snaps at the end.
Actionable Implementation Tips
To maximise the effectiveness of a rotating carousel, thoughtful organisation is key. Follow these professional tips for an optimal setup:
- Balance the Load: Distribute the weight of items evenly around the carousel to ensure it rotates smoothly and doesn't tip. Place heavier items like large pin cushions or full containers closer to the centre.
- Contain and Subdivide: Use small, clear containers, jars, or magnetic pots on each tier to group similar items like bobbins, machine needles, and seam rippers. This prevents them from mixing or falling off during rotation.
- Prioritise by Frequency: Place your most frequently used supplies, such as your favourite thread colours or essential marking tools, on the most accessible tier, typically at eye level from your sewing position.
- Regular Maintenance: Periodically wipe down the carousel and clean the rotating mechanism to remove dust and stray threads, ensuring it continues to operate smoothly. A quick spray of silicone lubricant can fix a sticky base.
7-Method Sewing Room Storage Comparison
| Storage System | Implementation Complexity 🔄 | Resource Requirements ⚡ | Expected Outcomes 📊 | Ideal Use Cases 💡 | Key Advantages ⭐ |
|---|---|---|---|---|---|
| Pegboard Organization System | Moderate - requires wall mounting | Low - hooks, shelves, pegboard | Visible, accessible, customizable tool storage | Craft rooms, tailoring shops, DIY spaces | Maximizes vertical space; customizable; cost-effective |
| Thread Storage Tower/Rack | Moderate - choice of mounting or freestanding | Moderate - specialized racks/towers | Organized thread by color, protects thread | Quilting, embroidery, large thread collections | Saves search time; protects thread; compact footprint |
| Fabric Storage Cubes and Bins | Low - simple stacking and labeling | Moderate - investing in uniform bins | Clean, categorized fabric storage | Fabric stash management, quilting, sewing projects | Protects fabric; stackable; neat visual appearance |
| Rolling Cart Storage System | Low - no installation, just assembly | Moderate - cart with multi-level storage | Mobile, flexible storage for current projects | Multi-task sewing spaces, project mobility | Highly mobile; versatile; no permanent setup needed |
| Magnetic Strip and Container | Low - mount or place magnets | Low - magnetic strips and containers | Secure, accessible metal tool storage | Small metal tools, scissors, pins, needles | Space-saving; quick access; keeps sharp tools safe |
| Drawer Divider & Organizer | Moderate - setup and customization | Moderate - dividers, inserts, containers | Max drawer space use; organized small items | Drawers with mixed small sewing notions | Maximizes space; customizable; keeps items separate |
| Rotating Carousel Storage | Moderate - assembly and positioning | Moderate to High - quality rotating mechanism | Easy 360° access; compact storage of frequently used items | Workspaces with limited space; high-access needs | Space-efficient; easy access; functional design |
Stitching It All Together: Your Action Plan for an Organised Studio
Transforming your sewing room from a space of creative chaos into an organised, professional-standard studio is a journey, not a destination. Throughout this guide, we've explored a range of powerful sewing room organisation ideas, each designed to tackle a specific challenge and enhance your workflow. The goal is not merely to tidy up; it is to build an environment that actively supports and inspires your creativity.
From the visual efficiency of a well-ordered pegboard system to the satisfying uniformity of a thread storage rack, each solution offers a path to greater productivity. We've seen how versatile rolling carts can create mobile workstations and how simple magnetic strips can keep essential metal tools within immediate reach. These are more than just tips; they are strategic systems for managing your most valuable assets: your tools, your materials, and your time.
Key Takeaways for Your Creative Space
The core principle connecting all these ideas is zoning. By assigning a specific home for every category of item - threads, fabrics, cutting tools, works-in-progress - you eliminate the mental clutter that stems from a disorganised space. This frees up your cognitive energy to focus on what truly matters: design, construction, and flawless execution. Remember that the best system is the one you will consistently use. A solution that looks beautiful but doesn't fit your personal workflow is ultimately ineffective.
Your Actionable Next Steps
To begin your transformation, resist the urge to tackle everything at once. Instead, adopt a methodical approach:
- Assess and Prioritise: Identify your single biggest organisational bottleneck. Is it finding the right colour thread? Is your cutting table constantly cluttered? Start there.
- Select Your System: Choose one or two ideas from this article that directly address your main challenge. If fabric management is the issue, start with storage cubes. If small notions are lost in drawers, implement a divider system.
- Implement and Refine: Dedicate a weekend to implementing your chosen system. Live with it for a week, notice what works and what doesn't, and don't be afraid to tweak it for a better fit.
A truly optimised sewing studio represents an investment in your craft. By implementing these sewing room organisation ideas, you are not just cleaning a room; you are refining your creative process, reducing friction, and building a professional foundation for all your future projects. The result is a seamless transition from idea to finished piece, empowering you to produce your best work with greater ease and enjoyment.
Ready to elevate your studio with professional-grade display and organisation solutions? Explore the curated collection at Display Guru, where you'll find everything from adjustable tailor's dummies to sturdy garment rails perfect for managing your projects. Visit Display Guru to discover the tools that will bring professional order and style to your creative workspace.