


Sewing Mannequins Adjustable: Get Flawless Fits for Every Project
An adjustable sewing mannequin is your secret weapon for creating clothes that fit perfectly. Think of it as a stand-in for a real person, letting you bridge that tricky gap between a flat paper pattern and a three-dimensional body. It gives you the chance to see exactly how fabric will drape and fall before you've sewn the final seam, taking the guesswork out of your projects and elevating them from homemade to genuinely bespoke.
Your Partner in Achieving the Perfect Fit
It’s best to see an adjustable mannequin as a silent, patient partner in your creative process. It’s far more than just a static display piece; it's a dynamic tool that you can mould and shape to match a specific set of measurements. This customisation is precisely what makes it such an invaluable asset for anyone serious about making clothes.
Whether you're sewing a dress for yourself at home or a professional tailor crafting made-to-measure suits, a good form provides a true-to-life foundation. The ability to dial in key measurements—like the bust, waist, and hips—means you’re working on a body double of your client, or yourself. The result? A flawless fit, every time.
Why an Adjustable Form Matters
Trying to make a well-fitting garment without a body form is like trying to paint a portrait without a model. You might get the general idea, but capturing all the subtle curves and details is nearly impossible. An adjustable mannequin solves this problem by giving you:
- A Realistic 3D Canvas: It allows you to see how your design truly interacts with the body’s natural contours.
- Precision and Accuracy: You can pin, tuck, and adjust your pattern pieces directly on the form, making sure seams align perfectly.
- Improved Efficiency: Draping and fitting become so much faster and more accurate, saving you precious time and fabric.
It’s no surprise that the demand for these tools is on the rise. In the UK alone, the mannequin market generated USD 278.2 million in revenue in 2023, with forecasts projecting it will climb to USD 649.7 million by 2030. This growth underscores just how much professionals rely on adjustable models for accurate fittings. You can read more about the UK market's growth projections over at Grandview Research.
A great mannequin doesn't just hold fabric; it holds the potential of your design. It gives you the confidence to experiment with draping, test complicated seams, and execute alterations with professional precision.
Ultimately, working with an adjustable form empowers you to build garments on a foundation you can trust. If you're just getting started, our guide on the different types of dress forms for sewing is a fantastic place to begin. Consider it your first step towards turning your creative vision into a perfectly fitted reality.
Getting to Know Your Adjustable Mannequin
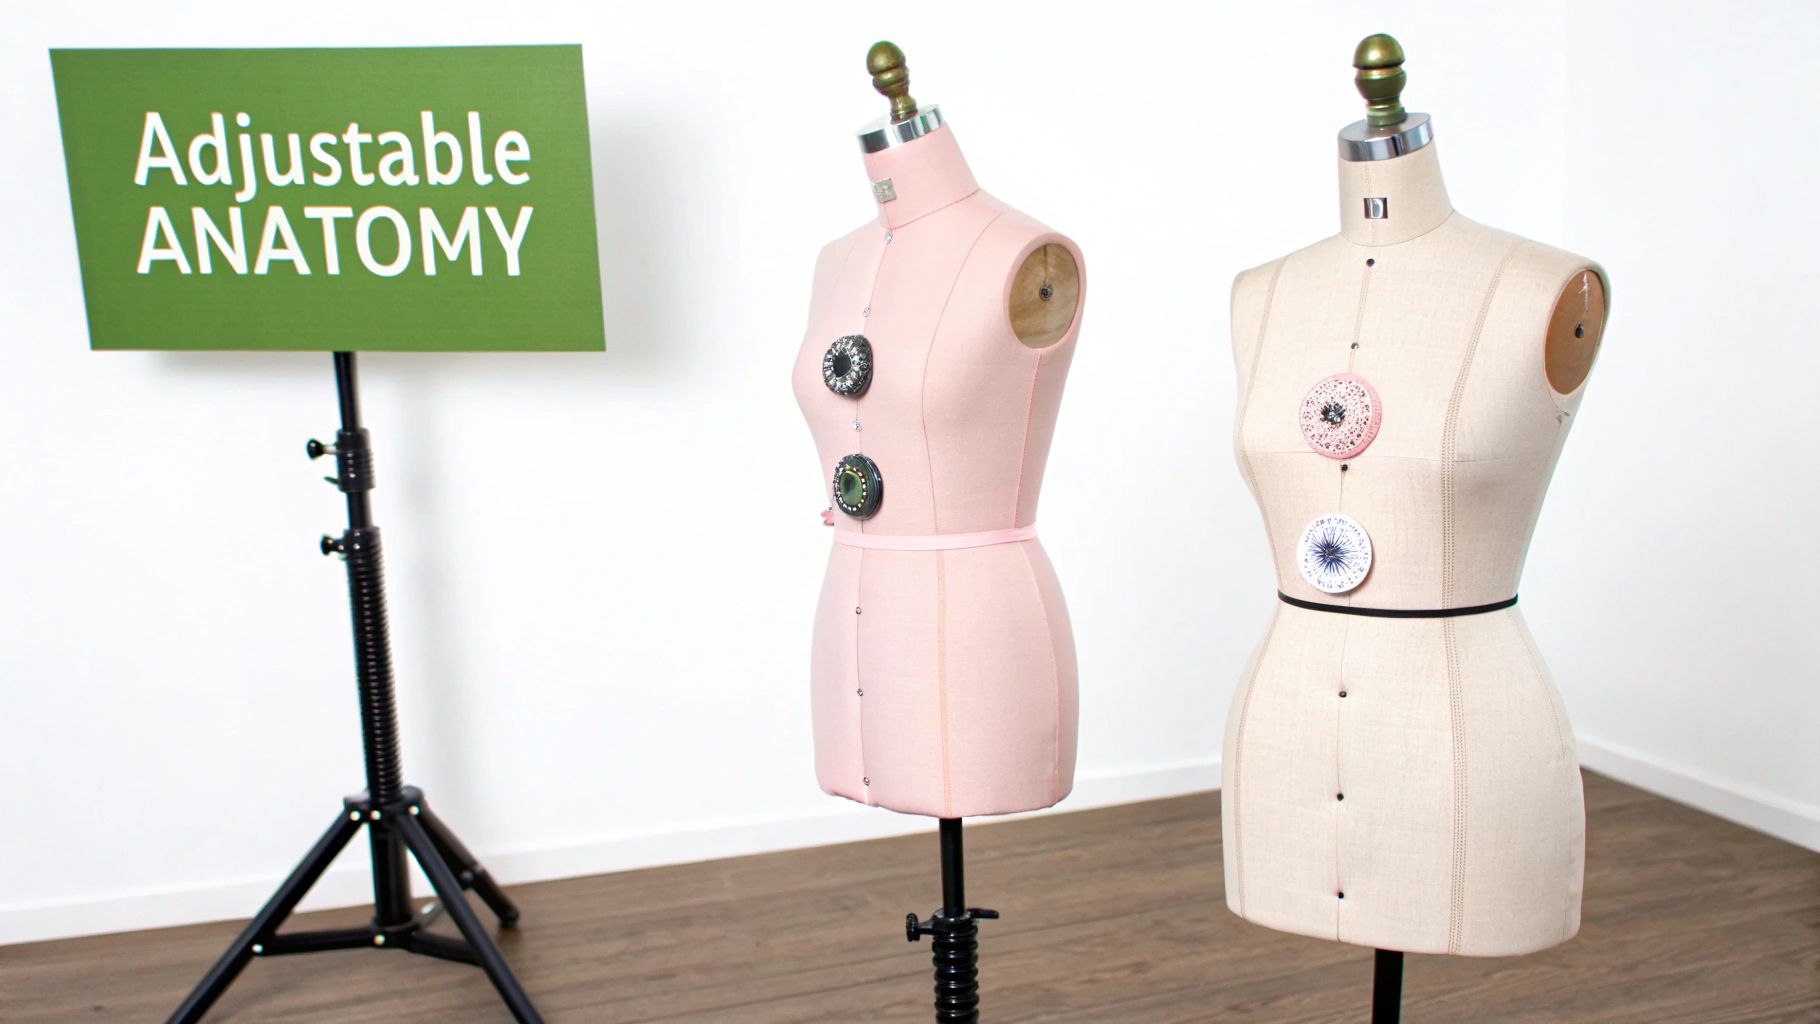
To really get the most out of an adjustable mannequin, it helps to understand what’s going on 'under the bonnet'. These aren't just static dummies; they're clever pieces of engineering built for precision. Every dial and component works together to turn a standard shape into a personalised body double for your projects.
At the very heart of the form are the adjustment mechanisms. You'll usually find a series of dials or keys—often 12 or more—placed strategically at the bust, waist, and hips. Giving these a twist expands or contracts internal panels, letting you meticulously fine-tune the circumference at each key point.
Think of it like being a sculptor, carefully adding or removing clay. Each turn of a dial is a small, controlled adjustment that brings the form that little bit closer to the exact silhouette you need. This is what makes it a genuine fitting tool, not just a display piece.
The Core Components You Need to Know
Once you can spot the main parts of an adjustable dress form, you'll find it much easier to read product descriptions and pick the right one. Beyond the overall shape, there are three key elements that really define how it works and what it’s like to use day-to-day.
These features have a direct impact on the mannequin’s ease of use, how long it will last, and the kinds of projects it’s best suited for.
- The Adjustment System: As we've touched on, dials are the most common way to make changes. Better quality models use smooth, geared mechanisms that allow for really gradual adjustments. This is important because it stops any sudden jumps that could strain the internal parts and ensures everything expands evenly.
- Torso and Surface Material: The mannequin's body is typically a hard plastic shell covered with a thin layer of foam and fabric. This outer layer is absolutely crucial; it needs to be pin-friendly. This means you can push pins right into the form to hold your fabric or patterns without a struggle.
- The Stand and Pole: A sturdy stand is essential for stability. A tripod base gives fantastic balance, which is great for heavier garments like coats. On the other hand, a round or pedestal base is more compact if you're tight on space. Some models even have an offset pole, which is a game-changer for fitting trousers because it lets both legs hang naturally.
Why a Pinnable Surface Is Non-Negotiable
One feature, above all others, separates a proper dress form from a simple display mannequin: its surface. A hard, unyielding plastic body is incredibly frustrating to work with. You're forced to try and pin along the narrow gaps between the adjustable panels, which is rarely where you actually need to place them.
A pinnable surface transforms the entire torso into a working canvas. It gives you the creative freedom to drape, mark, and secure fabric anywhere, at any angle, which is essential for accurate pattern making and complex alterations.
This is especially vital for techniques like draping, where you create the design directly on the form. Without the freedom to pin wherever you need to, getting those fluid lines and a perfect hang is next to impossible. If you want to dive deeper into getting the dimensions just right, our guide on mannequin measurements offers some extra tips.
To help you compare your options, the table below breaks down these core features and what they mean for your work.
Adjustable Mannequin Feature Comparison
| Feature | What It Does | Best For |
|---|---|---|
| Adjustment Dials | Expands or retracts internal plates to alter bust, waist, and hip measurements. | Achieving precise fits for individual body shapes and creating garments for different sizes. |
| Pinnable Surface | Allows pins to be inserted directly into the foam-backed body for securing fabric and patterns. | Draping, pattern adjustments, and detailed alteration work requiring precise pin placement. |
| Adjustable Height | Lets you raise or lower the torso on its stand to match the shoulder-to-floor height of the intended wearer. | Hemming dresses and coats accurately and ensuring the garment hangs correctly during the fitting process. |
Ultimately, every part of an adjustable mannequin has a purpose. From the smooth turn of its dials to the texture of its fabric cover, each detail is there to help you achieve one simple goal: creating clothes that fit beautifully.
Choosing the Right Mannequin for Your Sewing Projects
Picking the right adjustable sewing mannequin isn’t about splashing out on the model with the most bells and whistles. It's about finding the perfect partner for your creative projects. The truth is, not all dress forms are created equal, and your choice should really be guided by what you plan to make.
Think about it this way: the needs of a professional tailor who uses their form day in, day out are worlds away from a home sewist making the occasional summer dress. Understanding these differences is the key to finding a mannequin that becomes a trusted assistant, not a source of frustration.
For the Professional Tailor and Dressmaker
When you’re a professional, your mannequin is a workhorse. It needs to be tough, steady, and packed with features that make your job easier. You need a form that can handle constant pinning, the weight of heavy fabrics, and frequent tweaks without falling apart.
One of the most crucial elements is a sturdy, heavy base. A solid tripod or a weighted pedestal stand is non-negotiable. It stops the form from wobbling or, even worse, tipping over when you’re draping a heavy woollen coat or a fully-lined wedding gown. An unstable form isn’t just annoying; it can completely throw off your draping and fitting.
Professionals should also keep an eye out for a few specialist features:
- An Offset Pole: This is an absolute must for tailoring trousers. A standard central pole gets in the way of one leg, making it impossible to check the inseam or how the fabric hangs. An offset pole shifts the stand to the side, letting both trouser legs hang naturally.
- Collapsible Shoulders: These are a lifesaver when you're crafting fitted jackets or dresses with tight bodices. They allow you to gently slide a finished garment off the form without stretching or damaging the delicate neckline and shoulder seams.
- Heavy-Duty Build: Look for mannequins with robust internal mechanisms and a high-quality, dense surface you can pin into for years without it crumbling.
For the Fashion Student or Versatile Creator
If you're a fashion student, versatility is the name of the game. One week you might be draping elegant evening wear, and the next you're constructing a tailored blazer. Your ideal mannequin needs to be a flexible all-rounder that can adapt to a huge range of projects and techniques without costing a fortune.
The top priority here is an extensive adjustment range. A student needs a form that can be dialled right down to a small size for one assignment and expanded significantly for the next. This flexibility is essential for learning to design for different body types, which is a massive part of any fashion course.
For an aspiring designer, a mannequin is like a 3D sketchbook. The ability to quickly change its shape to match a new idea is what lets creativity flow without being held back by your tools.
A good, fully pinnable surface is also vital for getting to grips with draping. While a professional might invest in a top-of-the-line form, a student’s model needs to be a dependable workhorse that provides a solid foundation for building skills. If you're weighing your options, learning how to properly use an adjustable dress mannequin can make a real difference to your work.
For the Home Sewist and Hobbyist
As a home sewist, you're most likely making clothes for yourself or for friends and family. The main goal? Getting that perfect, custom fit. Your ideal mannequin doesn't need all the industrial-strength features of a professional model, but it absolutely must be able to mirror your own unique body shape.
The most important thing to check is the measurement range. Before you even think about buying, take your bust, waist, and hip measurements properly. The right mannequin for you will have a range that comfortably covers your numbers, ideally sitting somewhere in the middle of its adjustment capacity. Pushing the dials to their absolute maximum or minimum can put a strain on them.
Beyond the core measurements, also think about:
- Ease of Use: You want dials that are smooth, easy to turn, and clearly marked.
- Pinnable Surface: Even for simple projects, being able to pin directly into the form makes marking darts and hemlines so much easier.
- Adjustable Height: This is crucial for getting your hem lengths spot-on.
By figuring out which of these profiles sounds most like you, you can start to filter out the noise and focus on the features that will actually help you. This approach makes sure you choose the right adjustable sewing mannequin to bring your creative visions to life.
Mastering Measurements to Create Your Body Double
An adjustable sewing mannequin straight out of the box is just a generic shape. Its real magic happens when you dial in your precise measurements, transforming it from a simple form into a true body double. This is where your careful work with a measuring tape meets the mannequin's mechanics, creating a custom replica that's the secret to a perfect fit.
Getting this stage right is arguably the most critical step. We're not just aiming for "close enough"; the goal is to create an exact match of the torso's unique landscape. A few millimetres here or there can be the difference between a seam that lies beautifully flat and one that puckers or pulls. Precision is everything.
Taking Your Foundational Measurements
Before you even think about turning a dial on your new mannequin, you need a solid set of your own body measurements. It's a straightforward process, but it demands a bit of care. Grab a soft measuring tape and make sure you're wearing close-fitting clothes (or just your undergarments) to get the truest numbers without any extra bulk.
Here are the four essential measurements you'll need to transfer over to your form:
- Bust: Wrap the tape around the fullest part of your chest. Keep it level with the floor, making sure it's snug but not constricting your breathing.
- Waist: To find your natural waist, simply bend to one side. The crease that forms is the spot you want to measure – it's usually the narrowest part of your torso.
- Hips: Measure around the widest point of your hips and bottom. Just like with the bust, keeping the tape parallel to the floor is key.
- Back-Waist Length: This one is crucial and often overlooked. It’s a vertical measurement from that prominent bone at the base of your neck straight down to your natural waistline. Most quality adjustable forms will have a way to alter this torso length.
If you need a more detailed walkthrough, our comprehensive guide on how to take body measurements for clothes has some great tips and visuals to make sure you nail it.
This flowchart breaks down the key things to look for in a mannequin, depending on what you'll be using it for most.

As you can see, the features a professional tailor needs are quite different from those a home sewing enthusiast might prioritise.
Transferring Measurements to Your Mannequin
Right, you’ve got your numbers. Now it's time to bring your mannequin to life. The two most important words for this part of the process are patience and evenness. If you rush it, you risk putting too much strain on the internal gears and mechanisms.
First, turn all the dials back to their smallest settings to give yourself a clean slate. Then, start making your adjustments slowly and systematically. The trick is to avoid expanding one area to its final size all at once. Instead, work across all the dials in small, gradual increments.
Pro Tip: Work in a rotation. Add a little bit to the bust, then a little to the waist, then a little to the hips, and repeat. This method helps the mannequin expand evenly, maintaining a natural shape and preventing any one set of panels from gapping too wide.
Keep going with this gradual process until the form’s measurements match your own. Use your soft tape measure to check the mannequin's circumference at the bust, waist, and hips as you adjust.
Fine-Tuning with Padding for a Perfect Match
Let’s be honest: no human body is perfectly symmetrical or shaped quite like a standard mannequin, not even an adjustable one. Our bodies have unique curves, slopes, and postures. This is where a bit of clever padding becomes your best friend, helping you fine-tune the form for a truly custom fit.
Common areas that often need a bit of extra attention include:
- Bust Shape: If the mannequin's bust is a different shape from yours, you can perfect it with padding. An old, well-fitting bra slipped onto the form and stuffed with wadding or batting works wonders to achieve the right volume and silhouette.
- Sway Back or Rounded Shoulders: Many of us have a distinct curve in our lower back or a slight forward slope to our shoulders. You can replicate this by pinning layers of quilt batting or even proper shoulder pads to these areas until the mannequin’s posture mimics the real body.
- Fuller Hips or Tummy: In the same way, you can add layers of padding to the abdomen, hips, or bottom to create a more realistic silhouette that matches your own.
Once all your padding is pinned securely in place, pulling a fitted, stretchy mannequin cover over the top will smooth everything out. This gives you a lovely, uniform surface to work on and holds all your customisations exactly where you want them. By taking the time to master your measurements and get creative with padding, you’ll transform your adjustable mannequin from a useful tool into an essential partner in your sewing room.
Unlocking Advanced Techniques with Your Mannequin
Once you've dialled in the measurements and perfectly replicated a body shape, your adjustable mannequin is ready for its real job. It's time to move beyond being just a fitting aid and let it become a true partner in your creative work. Getting past the basic adjustments opens up a world of advanced techniques that can seriously elevate your craft, helping you design and refine garments with an artistry that flat patterns alone just can't match.
This is where the real fun begins. You can start exploring techniques that you might have only seen in high-end couture studios. Think of your mannequin as a 3D canvas, a place to play with fabric in ways that spark genuine creativity and lead to truly one-of-a-kind pieces. It's the key to tackling those ambitious projects you've been dreaming of with confidence.
The Art of Draping Fabric
Draping is the beautiful practice of designing a garment by pinning and shaping fabric directly onto a dress form. It’s essentially sculpting with cloth. Instead of starting with a rigid paper pattern, you let the fabric’s weight, texture, and character guide your design. This creates fluid lines and unique silhouettes that are incredibly difficult to even imagine on a flat cutting table. It’s a wonderfully intuitive process that puts you in direct conversation with your material.
Many of the world's most iconic designs were born this way. With your adjustable mannequin set to the right dimensions, you can start your own draping journey.
- Experiment with the Bias: See firsthand how fabric stretches, clings, and flows when cut on the bias. It’s the secret to creating those elegant, body-skimming dresses.
- Create Structured Details: Build up pleats, tucks, and gathers in real-time. You can see exactly how they will fall and hang before you’ve sewn a single stitch.
- Design Asymmetrically: Draping makes it so much easier to craft complex, asymmetrical designs that would be a complete headache to draft as a flat pattern.
Conquering Complex Alterations
When it comes to intricate alterations, your mannequin is an indispensable ally. It turns daunting tasks into manageable projects. By giving you a stable, 360-degree view of the garment, it allows you to spot and solve fitting issues with far more accuracy than trying to pin something on your own body.
Take the challenge of a tailored jacket. Perfecting the hang of the shoulders, ensuring the collar sits just right, and getting rid of any pulling across the back requires a precise eye. On a dress form, you can pin out excess fabric, mark new seam lines, and check the garment's overall balance without asking someone to stand perfectly still for hours. The same goes for formalwear; ensuring the smooth cascade of a wedding dress train or the perfect fit of a structured bodice becomes a systematic process, not just guesswork.
Your mannequin gives you the power to see the problem from every angle. It turns a frustrating fitting session into a controlled, problem-solving exercise, saving time and ensuring a professional finish.
For those just building their skills, it's always good to start with the fundamentals. You can find some helpful advice in our article on sewing for beginners, which covers essential concepts that are great building blocks for these more advanced techniques.
A Tool for Creatives and Brands
The usefulness of an adjustable mannequin extends far beyond personal tailoring. For costume designers, it's an essential tool for building intricate, multi-layered outfits. They can construct historical corsetry, craft elaborate fantasy armour, or drape otherworldly fabrics, making sure every component fits together perfectly before the actor even steps in for their first fitting.
What's more, small fashion brands and independent makers can use their mannequins to create professional-looking product photography. A well-fitted garment displayed on a form presents a much more appealing and accurate image to potential customers than one laid flat or hung on a hanger. It showcases the garment's shape, drape, and intended fit, adding a layer of professionalism to online shops and creative portfolios.
Looking After Your Mannequin
You've invested in a fantastic tool for your craft, and a bit of care will make sure your adjustable mannequin serves you well for many years. Keeping the dials working smoothly and the surface in good nick is all it takes to maintain its accuracy and stability for every project you throw at it.
Think of it like any other quality tool in your sewing room—a little regular maintenance goes a long way. It’s the key to preventing small issues from becoming big problems and keeping your form in top working order.
Regular Cleaning and Dusting
It’s inevitable that your mannequin will pick up dust and stray fabric fibres. A quick, regular clean is the best way to keep its surface fresh, especially if it’s a pinnable model. I find a soft brush or a lint roller works wonders for gently lifting debris off the fabric cover without causing any wear.
If you spot any small smudges, just use a cloth dampened with a little mild soap and water. Try not to get the fabric too wet, as moisture can seep through to the materials underneath. Always let it air dry completely before you start draping or pinning again.
Treat your mannequin's fabric cover a bit like you would upholstery. Gentle, frequent upkeep is always better than a harsh, deep clean every now and then. It's the best way to preserve the texture and integrity of the pinnable surface.
Safe Storage and Handling
Where you keep your mannequin when it's not in use can make a real difference. If you can, pop a light, breathable dust cover or even an old sheet over it. This stops dust from building up and, just as importantly, protects it from direct sunlight, which can cause the fabric to fade over time.
Try to store it in a room with a stable temperature. Extreme heat, cold, or humidity can be rough on the internal mechanisms, so it's best to avoid damp cellars or hot attics if you can.
When you need to move it, always grab it by the central pole or the main body of the torso. Picking it up by the adjustment dials or the neck cap is a no-go—those parts aren't built to take the weight and could easily get damaged.
Mechanical Do's and Don'ts
The adjustment dials are what make your sewing mannequins adjustable, so they need a bit of respect.
- DO turn the dials slowly and smoothly when you’re changing the measurements.
- DON'T ever force a dial that feels stiff or stuck.
- DO make sure you stay within the mannequin's specified measurement range.
- DON'T crank the dials too tight, as you could strip the gears inside.
Follow these simple tips, and you’ll protect your investment, ensuring your mannequin remains a precise and reliable friend for all your sewing adventures.
Frequently Asked Questions
Even the most seasoned sewist runs into questions when using an adjustable mannequin. Getting the right answers can be the difference between a project you love and a fitting session filled with frustration. Let’s tackle some of the most common queries that come up.
What Should I Do If My Measurements Fall Between Settings?
This is a classic head-scratcher, but the solution is straightforward. It’s tempting to round up, but don't! Always adjust the dials to the setting just below your actual measurement.
Think of the mannequin as your base. By setting it slightly smaller, you give yourself room to add padding—like quilt batting or foam—to build up specific areas like the bust, waist, or hips. This little bit of extra work gives you a far more accurate representation of your own unique shape than simply going up a size ever could.
Can I Use an Adjustable Mannequin to Fit Trousers?
You absolutely can, but only if you have the right type of mannequin. The secret lies in a feature called an offset pole.
Instead of a single pole running straight up the middle, this design places the stand to one side.
Why does this matter so much? An offset pole is the only way to let both trouser legs hang naturally. It’s essential for checking the drape of the fabric, getting the inseam length just right, and, crucially, perfecting the fit around the crotch. A central pole just gets in the way, making a proper fitting impossible.
Is a Pin-Friendly Body Really Necessary?
If you're serious about dressmaking, draping, or alterations, then yes—it’s non-negotiable. A fully pinnable body, usually made with a foam-backed surface, lets you stick pins in anywhere, at any angle.
This is what allows you to secure pattern pieces with precision, creatively drape new designs, and accurately mark your adjustments. On the other hand, a hard plastic form only lets you pin into the thin gaps between its panels. This is incredibly restrictive and turns a versatile sewing partner into little more than a display dummy. A pinnable surface truly unlocks what your mannequin can do.
At Display Guru, we stock a wide range of high-quality, adjustable sewing mannequins to bring every creative project to life. Find the perfect partner for your sewing room and start achieving those flawless fits. Explore our collection at https://www.displayguru.co.uk.