


The Ultimate Sewing Box Organizer Guide
Let's be honest, a sewing box is more than just a place to chuck your bits and bobs. It’s the command centre for your entire craft. Getting it right means every needle, thread, and notion is right where you need it, the moment you need it. Thinking of it this way is the first step to making your sewing time more focused and, frankly, far more enjoyable.
Why a Good Sewing Box is Your Secret Weapon
Before you even think about threading a needle, the success of your project hangs on how well you've prepared. Chefs call it ‘mise en place’—the art of having every ingredient and tool laid out before you start cooking. The very same principle is a game-changer in sewing. A properly organised sewing box is your creative mise en place, banishing chaos and letting you get on with the good stuff.
We’ve all been there: that maddening hunt for the exact shade of blue thread or the right-sized needle, right when you're in the zone. Those little pauses don't just waste time; they completely shatter your creative flow. A decent sewing box organizer stops all that by giving every single item a logical, easy-to-find home.
The Bedrock of an Efficient Workflow
Having a dedicated system isn't just about being tidy—it's about fundamentally changing how you work. When everything has its own spot, you stop reacting to clutter and start proactively creating. This structured approach brings some brilliant, practical benefits:
- It protects your gear: Good storage stops threads from turning into a tangled bird's nest, prevents needles from going rusty, and keeps delicate bits and pieces from getting snagged or broken.
- It saves you time (and sanity): Forget digging through a jumbled mess. An organised layout means you can grab what you need in seconds, keeping your mind on the actual project.
- It frees up your creativity: When your brain isn't distracted by a messy workspace, you have more mental energy to pour into design, mastering a new technique, or just enjoying the process.
A well-thought-out sewing box doesn't just hold your tools; it holds your focus. It’s the unsung hero that supports every single stitch, whether you're quickly sewing on a button or crafting a couture-level masterpiece.
Ultimately, this simple tool is the foundation you build great work on. It keeps your supplies in perfect nick and your creative process smooth and efficient. By setting up this organised base, you're setting yourself up to tackle any project with confidence, knowing your personal command centre is ready for anything.
Finding the Right Type of Sewing Box Organiser
Choosing a sewing box organiser is a bit like picking a dance partner. The right one moves with you, anticipates your next step, and makes the whole creative process feel effortless. There's a whole world of organisers out there, but each style has a distinct personality designed for a specific kind of creator. Your perfect match really comes down to your personal workflow, how much space you have, and your creative ambitions.
Don't worry, navigating the options is simpler than it sounds once you understand the core purpose behind each design. From the nostalgic charm of a traditional box to the mobile efficiency of a professional cart, there’s a solution out there for everyone. By matching the features to your habits, you’ll find a system that doesn’t just store your tools but genuinely improves your craft.
This flowchart pretty much sums up the daily dilemma for every sewer: the frustrating hunt for tools versus getting straight into a project.
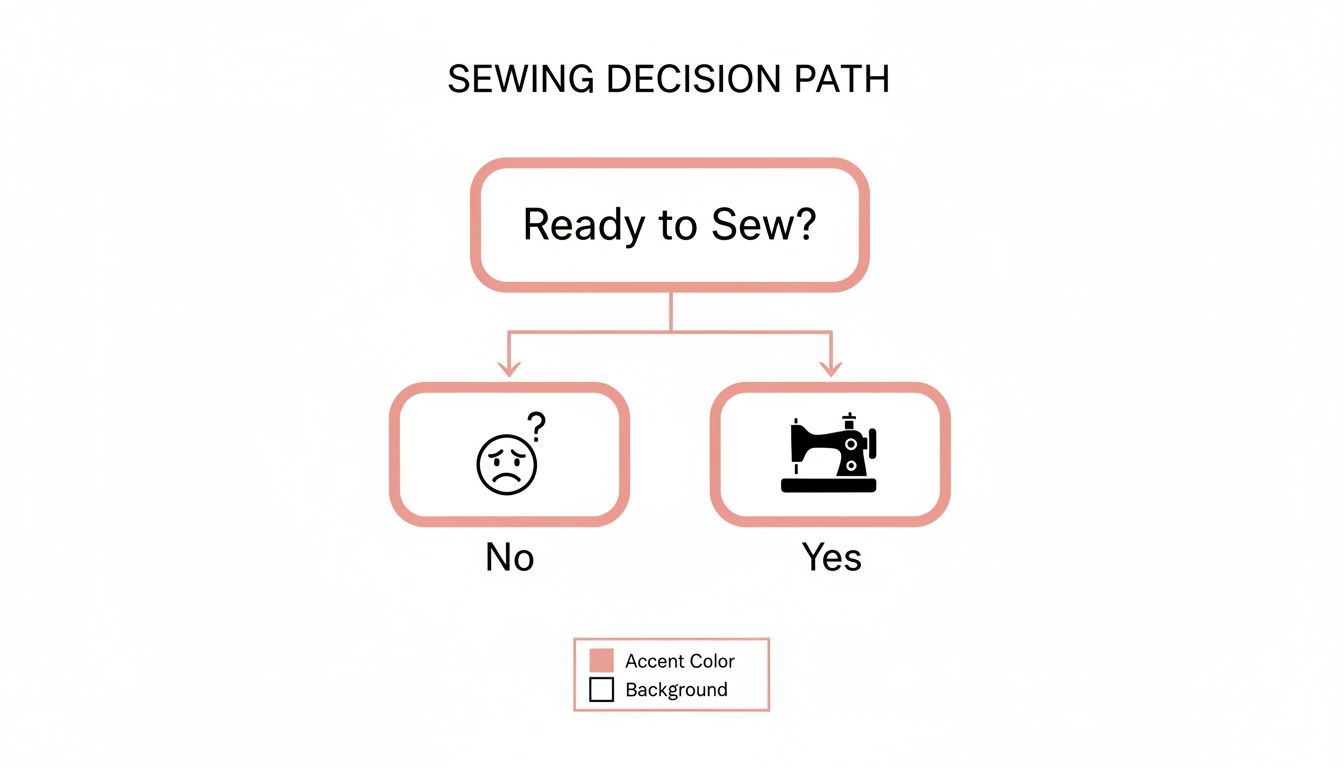
It highlights a simple truth: being organised is what turns that initial spark of an idea into a finished piece without all the fuss.
Traditional Cantilever Boxes
When you picture a classic wooden sewing box, you're probably thinking of a cantilever design. These timeless organisers have tiered trays that swing outwards as you lift the lid, revealing multiple compartments all at once. It’s a brilliant design that gives you an excellent overview of all your supplies, making it easy to spot that specific button or needle you’re searching for.
They’re perfect for the home hobbyist with a steadily growing collection, as the structured layout keeps everything beautifully neat. The downside? The fixed compartments can be a bit restrictive for oddly shaped tools, and their traditional wooden construction often makes them heavier and less portable than other options.
Modern Stackable and Modular Units
For the sewer whose collection seems to be constantly expanding, modular units are a game-changer. Think of them as the building blocks of the sewing world—individual, stackable plastic containers or drawers. You can start with just a few and simply add more as your stash of fabrics, threads, and notions inevitably grows.
This scalability makes them ideal for professionals and serious crafters who need a system they can customise. You can dedicate entire drawers to specific projects or types of tools. Their main drawback is that getting to items at the bottom of a stack can be a hassle unless you go for a drawer-based system. To see some great examples, check out our guide on the 7 best sewing organizer box options available.
Portable Fabric Totes and Bags
Picture a fashion student rushing to a class or a quilter heading off to a weekend workshop. The portable fabric tote is their best friend. These organisers are lightweight, flexible, and usually packed with pockets and zipped compartments, making them perfect for a life on the go.
They really excel at carrying project-specific supplies, letting you pack exactly what you need without having to lug your entire collection around. While they offer fantastic portability, their soft structure provides less protection for delicate items compared to a rigid box, and things can get a bit jumbled if you don't pack them carefully.
The UK's passion for organisation is reflected in market trends. The home storage sector is huge, with the UK once holding 12.98% of the entire European market share. The storage box category, which covers every type of sewing box organiser, is the largest segment, valued at an impressive USD 2.58 billion.
Professional Rolling Carts
In a busy studio or a bustling alterations shop, efficiency is king. This is where the professional rolling cart truly shines. It's essentially a mobile workstation, complete with multiple drawers and a flat top surface that moves seamlessly between your sewing machine, cutting table, and dress form.
A tailor can keep all their fitting tools—pins, chalk, measuring tapes—right beside them as they work. While they’re unmatched for mobility and capacity in a professional environment, their size makes them pretty impractical for small home spaces or for hobbyists who simply don't need that level of storage.
Comparing Sewing Organiser Types
Use this quick comparison to find the best sewing box organiser for your specific needs, workspace, and sewing habits.
| Organizer Type | Ideal User | Core Benefits | Common Materials |
|---|---|---|---|
| Cantilever Box | Home hobbyists with a medium collection. | Excellent visibility, classic aesthetic, structured layout. | Wood, plastic, wicker. |
| Modular/Stackable | Crafters with a growing stash, professionals. | Highly customisable, scalable, space-efficient. | Plastic, acrylic. |
| Portable Tote/Bag | Students, workshop attendees, on-the-go sewers. | Lightweight, flexible, easy to transport. | Fabric, canvas, vinyl. |
| Rolling Cart | Professionals, studio owners, serious crafters. | High capacity, mobile, serves as a workstation. | Metal, plastic, wood. |
Each type offers something different, so think about what frustrates you most with your current setup and choose the solution that solves that problem best.
Essential Features of a Great Sewing Organiser
What really separates a basic tub from a high-performance sewing box organiser that makes your craft better? It all comes down to the thoughtful features designed with a sewer’s real needs in mind. These details turn a simple box into a genuine partner in your creative work, saving you frustration and protecting your valuable supplies.
The best organisers are built around function, not just storage. They don't just hold your tools; they make them easier to find, use, and put away. When you're weighing up your options, keep an eye out for specific design elements that solve common sewing headaches, like tangled threads or lost pins.
By understanding what each feature does, you can pick a system that doesn’t just tidy your space but actually helps you work more smoothly and efficiently.
Smart Compartmentalisation and Layout
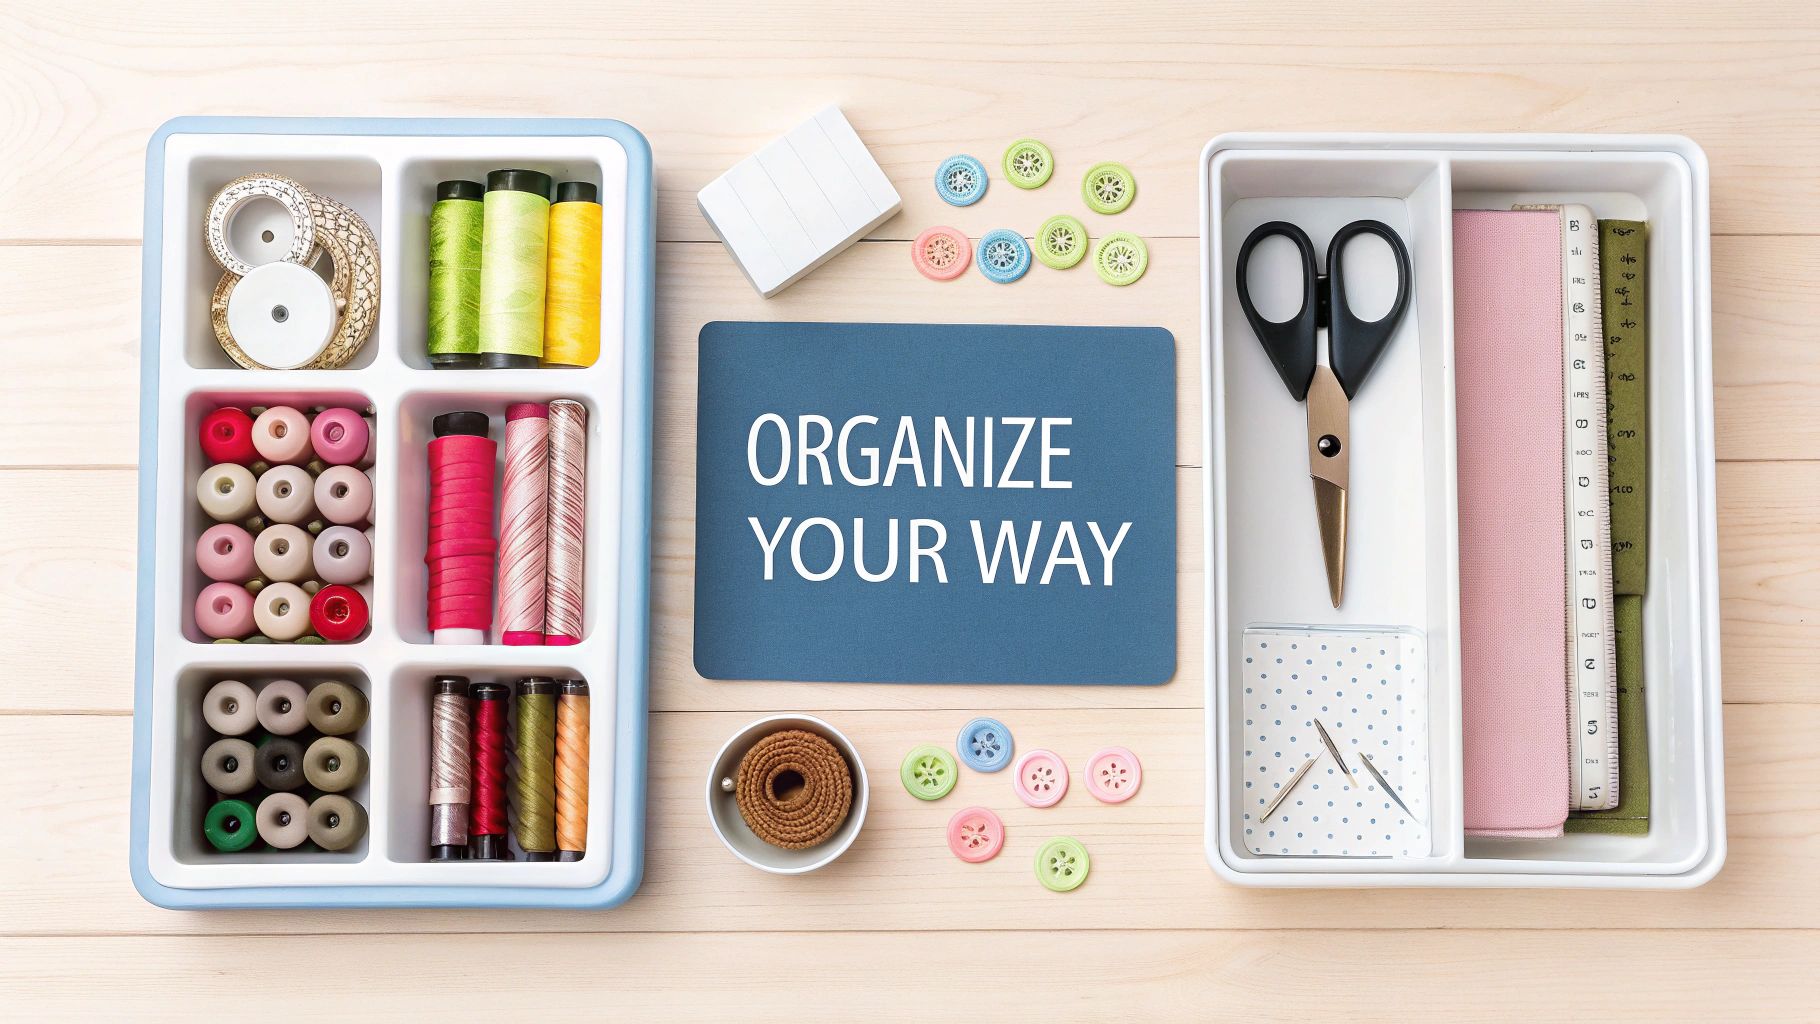
The internal layout is, without a doubt, the most crucial part of any sewing box. A single large compartment is a recipe for a jumbled mess, forcing you to constantly dig around for what you need. A great organiser offers a smarter, more intuitive system of divisions.
Look for models with adjustable or removable dividers. This gives you incredible flexibility, letting you create custom-sized sections for everything from bulky fabric scissors to tiny buttons. As your collection of notions and tools grows and changes, your storage can adapt right along with it.
A truly effective sewing organiser isn't static; it's a dynamic system that can be reconfigured to suit your current project. This adaptability is key to maintaining long-term order and efficiency in your workspace.
Tiered or cantilever trays are a classic feature for a very good reason. They fold out to present all your supplies at once, giving you a complete visual inventory the moment you open the lid. This completely solves the "out of sight, out of mind" problem where essential tools get buried and forgotten at the bottom.
Task-Specific Storage Solutions
The most innovative sewing organisers include clever little features designed to solve very specific problems. These additions show that the designer genuinely gets the day-to-day challenges of sewing.
Here are a few indispensable features to look for:
- Dedicated Thread Spindles: Rows of small pegs that hold individual spools are a total game-changer. They stop spools from unravelling into a chaotic bird's nest, keeping every colour neat and ready to go.
- Built-in Pincushions: An integrated pincushion, often in the lid or a top tray, keeps your pins and needles safely stashed and instantly accessible. It’s a simple touch that eliminates the risk of stray sharps and saves you from hunting for a separate cushion.
- Magnetic Trays: A small magnetic tray or dish is a brilliant solution for keeping loose pins, needles, and other little metal notions from disappearing. It’s perfect for preventing those tiny-but-critical items from getting lost mid-project.
- Transparent Lids or Drawers: Being able to see what you've got is vital. Organisers with clear components let you identify the contents at a glance without having to open everything. This saves precious seconds and keeps your workflow flowing.
Durability and Material Quality
A sewing box is an investment that should last for years, so the material really matters. The ideal material strikes a balance between durability, weight, and aesthetics. When thinking about what you need, it can be helpful to borrow ideas from other hobbies that involve lots of small parts, like jewelry organization and storage.
Classic hardwood boxes, for instance, have a timeless appeal and are exceptionally durable—often becoming cherished heirlooms. The trade-off is that they can be quite heavy, so they might not be the best choice if you take your sewing on the go.
Modern plastics, on the other hand, are lightweight, easy to wipe clean, and often transparent. They may not last for generations like wood, but their practicality and portability make them a popular choice for many. For those trying to balance looks with function, exploring different sewing accessory box tips for organizing your supplies can offer more ideas.
Fabric totes offer ultimate portability but provide less protection against being squashed. Ultimately, the best choice comes down to where and how you sew. A sturdy, well-made organiser, no matter the material, will protect your tools and stand up to years of use.
Mastering Your Sewing Box Organisation Strategy
An organised sewing box isn’t just about being tidy—it's about creating an intuitive extension of your creative mind. Owning a good sewing box organizer is the first step, but the real magic happens when you build a system that truly works for you. The aim is to go beyond simple storage and create a layout so instinctive that finding what you need feels like second nature.
Think of your sewing box like a chef's kitchen. Everything has its place, grouped logically so you can grab what you need without breaking your flow. The best method depends entirely on how you think and work.
Let's dive into some practical strategies to transform your box from a simple container into a powerhouse of creative efficiency.
Find Your Organisational Philosophy
There’s no single "right" way to set up your sewing supplies. The most effective system is the one that just clicks with your brain, making your sewing process smoother and more enjoyable. Here are three popular approaches you can adopt or mix and match.
1. Organisation By Tool Type
This is probably the most common and straightforward method. It’s all about grouping similar items together, which gives you a clear and logical inventory at a glance.
- Cutting Tools: Keep all your scissors—fabric shears, pinking shears, embroidery snips—and rotary cutters in one place.
- Measuring Tools: Tape measures, rulers, and seam gauges all live together in another section.
- Marking Tools: This compartment holds your tailor's chalk, fabric pens, and tracing wheels.
- Fastenings: A dedicated space for all those buttons, zips, hooks, and eyes.
This method is brilliant for quickly grabbing a specific tool and for seeing exactly what you're running low on.
2. Organisation By Project
If you're someone who often juggles multiple projects at once, this strategy can be a real game-changer. It’s all about creating little "kits" for each piece you're working on.
For example, imagine you’re making a blouse and also hemming a pair of trousers. You’d set up two separate trays or containers within your main box. The "blouse tray" would have the specific thread, buttons, and interfacing for that garment. The "trouser tray" would hold the right colour thread and hemming tape. Everything you need is ready to go, slashing your setup time.
3. Organisation By Material
This approach is perfect if you work with a wide variety of fabrics and textures. The idea is to sort your supplies based on what they're made of or which materials they’re used with.
- Cotton Supplies: Group all your cotton threads, twill tapes, and bias bindings together.
- Silk and Delicate Supplies: Store fine silk pins, delicate needles, and silk threads separately.
- Upholstery Supplies: Heavy-duty needles, waxed threads, and upholstery tacks belong in their own rugged section.
This system helps prevent damage—like a rusty upholstery needle staining fine silk—and makes it a breeze to find complementary materials. For a deeper dive, learning how to organize craft supplies in general can offer some fantastic, transferable techniques.
Pro Tips For A Flawless Layout
Once you’ve settled on a core strategy, you can fine-tune it with these expert tips to squeeze the most out of your space. These little habits make a huge difference in keeping things orderly long-term.
Your sewing box should serve your workflow, not the other way around. The best organisational system is one that reduces friction, allowing your creativity to flow uninterrupted.
- Sub-Divide Your Compartments: Don't let small items get lost. Use tiny, clear containers or even ice cube trays within larger drawers to corral little things like buttons, beads, and press studs. This stops them from becoming a jumbled mess.
- Tame Your Threads: Wind any loose threads onto bobbins or small bits of cardboard. Not only does this save a surprising amount of space, but it also puts an end to those frustrating tangles.
- Create a Mini "Go-To" Kit: Dedicate one small, easy-to-reach section for your absolute essentials. This should have a seam ripper, a few common thread colours, a needle, and small scissors for quick fixes.
As the sewing industry grows, so does the demand for great organisational tools. The global market for household sewing machines, valued at USD 4,841.62 million, is expected to climb to over USD 8,752.75 million in a decade. With the apparel sector making up 65.3% of that use, the need for effective storage like the perfect sewing box organizer has never been stronger.
By taking the time to set up a thoughtful system, you're creating an environment where you can focus on what you love—creating. For more inspiration, check out our comprehensive guide full of other sewing room storage ideas.
Integrating Your Organizer Into a Professional Workspace
In a professional setting, a sewing box isn't just for tidiness—it's a core piece of equipment that directly impacts your workflow and how clients see you. A well-placed storage system can turn a standard workspace into a streamlined studio or a slick retail environment where every moment counts.
The aim is to achieve what's known as ergonomic placement, creating a seamless flow between your main work areas. Picture a 'work triangle' connecting your sewing machine, cutting table, and storage. Your sewing box should sit right in this zone, ideally just an arm's reach away, to cut down on wasted steps and keep you focused on your craft.
Creating a Cohesive Studio Environment
In any busy design studio or tailor's workshop, efficiency is everything. Your sewing box organizer shouldn't just sit in the room; it needs to work in harmony with your main pieces of kit. A truly smart setup means your tools are exactly where you need them, right when you need them.
Think about how you work with a dress form. A small, portable caddy holding your pins, chalk, and tape measures can be placed right beside the mannequin. No more dashing back to your main table for a handful of pins. This keeps the fitting process fluid and professional, which is crucial when you have a client standing right there.
It's a similar story in retail. A dedicated organizer is a surprisingly powerful tool for merchandising. A small box tucked near the garment rails, filled with tag guns, spare hangers, and safety pins for quick styling fixes, helps keep the shop floor looking polished and ready for customers.
A professional sewing workspace is a finely tuned machine. Every component, including your sewing box organizer, should be strategically placed to reduce friction and amplify your skill, creating an environment that is as efficient as it is impressive.
Matching the Organizer to the Professional Setup
Different professional spaces have entirely different demands, so a one-size-fits-all approach to storage just won't work. The real trick is choosing an organizer that complements the specific job at hand, especially when speed and precision are part of your business.
Here are a few examples of smart pairings for different setups:
- Large Design Studio: A rolling cart organizer is the undisputed champion here. Its mobility is a game-changer, letting you move a whole arsenal of tools from an industrial sewing machine over to a vast pattern-making table without breaking your stride.
- Retail Alterations Counter: Space is usually tight, so a compact, stackable organizer with clear drawers is perfect. It keeps the counter clear while giving you an instant view of all the threads, needles, and buttons needed for those on-the-spot repairs.
- Bespoke Tailoring Atelier: In a space where image matters, a traditional wooden cantilever box on a dedicated side table is ideal. It offers classic, sophisticated organisation that reflects the quality and craftsmanship you provide to your clients.
The demand for high-quality tools is definitely on the rise. In just one year, the UK sewing machine market—a great indicator for related accessories—brought in USD 116.7 million and is expected to climb to USD 148.5 million. This shows a growing number of professionals and dedicated hobbyists are investing in better systems to support their work. You can read more about the UK sewing machine market trends on Grand View Research.
By thinking carefully about how your organizer fits with your other equipment and the layout of your space, you create a workspace that doesn't just make you more productive—it also shows everyone you mean business. For more inspiration on optimising your workspace, check out our guide to the perfect sewing room setup.
Looking After Your Sewing Organiser and Supplies
A well-kept sewing box is more than just storage; it’s your creative command centre, ready for action whenever inspiration strikes. Putting a little time into maintenance means your tools will serve you well for years, protecting your investment and making sure you're never caught out by a rusty needle or brittle thread halfway through a project.
It’s all about building a simple, consistent routine. Think of it less as a chore and more as part of the craft itself. This small effort ensures every sewing session is a smooth, enjoyable one.
Keeping Your Organiser in Top Condition
First things first, let's talk about the box itself. How you clean it really comes down to what it’s made of. Each material needs a slightly different touch to keep it looking and working its best.
-
Wooden Boxes: These beautiful pieces need a bit of love. Give the outside a polish with a soft cloth and a good wood cleaner to stop it from drying out. A quick dust of the inside compartments keeps them free of lint. For more on these timeless classics, have a look at our guide on the benefits of a wooden sewing box.
-
Plastic Units: These are the simplest to look after. Just wipe them down with a damp cloth and a bit of mild soap to get rid of any dust or marks. The key is to make sure every nook and cranny is completely dry before you put your supplies back in.
-
Fabric Totes: For fabric bags, spot-clean any stains as they happen with a gentle fabric cleaner. It’s also a good idea to empty the pockets and give the whole bag a good shake outside every now and then to get rid of the inevitable collection of loose threads and tiny fabric scraps.
Essential Supply Maintenance
Looking after the box is one thing, but your tools and materials need attention too. Storing them correctly and giving them a quick check-up now and again is crucial for keeping them in prime condition.
Take your needles, for example. Always store them in a pincushion or a magnetic case. This simple step keeps them away from moisture and stops rust in its tracks.
Your threads are also more delicate than you might think. Keep spools out of direct sunlight, as it can bleach the colour and make the fibres brittle over time. Tucking them away in a closed sewing box organiser also protects them from dust, which can cause real problems for your sewing machine.
Regular maintenance isn't just a chore; it's a fundamental part of the craft. Sharp scissors, clean needles, and pristine thread are the foundation of quality stitching and professional results.
And finally, don't forget your cutting tools. Keeping your fabric shears and rotary cutter blades sharp is non-negotiable. A sharp blade gives you those clean, precise cuts that are the hallmark of a professional finish and prevents the frustration of snagged fabric.
Your Questions Answered: Sewing Organisers FAQ
Even the most seasoned sewists have questions when it comes to getting organised. Choosing the right system can feel like a big decision, and you want something that truly works for you and your craft.
Think of this section as a chat with an experienced friend. I've gathered the most common queries I hear and answered them with straightforward, practical advice to help you get the most out of your organiser.
What’s the Best Sewing Box for a Beginner?
If you're just starting out, my top recommendation is a medium-sized cantilever or a modular box with clear compartments. Why? Because when you're learning, being able to see all your new tools at a glance is a massive help.
For a beginner, the goal is simple: find your tools easily and don't feel overwhelmed. Good visibility and room to grow are far more important than fancy features.
A cantilever box is brilliant because it opens up layer by layer, showing you everything at once. A simple modular system is also great because you can start small and just add more trays or boxes as your collection of notions and threads inevitably expands. Both give you flexibility without forcing you to buy a whole new setup down the line.
How Do I Stop My Thread from Tangling Inside the Box?
Ah, the dreaded thread tangle! It’s a classic, frustrating sewing problem, but thankfully, it's one you can easily solve. The absolute best way is to get an organiser with built-in spindles or a proper thread rack. These hold each spool snugly, preventing them from unravelling and causing chaos.
If your box doesn't have those features, don't worry. You've still got options:
- Bobbin clips are your best friend: These handy little gadgets clip right onto the spool and hold the loose thread end down.
- Try a DIY fix: Even wrapping the loose end around a small slit in a piece of card can work wonders in a pinch.
- Give them their own space: If you have small compartments, dedicating one to each spool is another great way to keep them from getting tangled up.
Should I Get a Wooden or a Plastic Sewing Box?
Choosing between wood and plastic really boils down to your personal taste and how you sew. There’s no right or wrong answer here; it’s all about what you need from your organiser.
Wooden boxes look beautiful and can last a lifetime—they’re a classic for a reason. But, they can be quite heavy. Plastic organisers, on the other hand, are lightweight, a breeze to clean, and often see-through, which is incredibly practical. They might not become a family heirloom, but they get the job done.
Here’s the simple breakdown: if you need something you can easily carry to a class and want to see your supplies instantly, go for plastic. If you're looking for a beautiful, durable piece for your home sewing space and don't plan on moving it much, a wooden box is a fantastic investment.