


Your Guide to the Perfect Sewing Room Setup
A successful sewing room isn't just about what's in it, but where everything is placed. Before you even think about buying a new desk or storage unit, taking a moment to plan your layout is the single most important thing you can do. A good layout is the bedrock of an efficient workflow, creating a natural path between your core activities: cutting, sewing, and pressing.
Getting this right from the start saves an incredible amount of time and frustration, no matter if you're quilting, dressmaking, or just doing a quick repair.
Designing a Functional Sewing Room Layout
Creating a space that truly works for you is less about having expensive, custom furniture and more about smart, intentional planning. The real goal is to design a layout that anticipates your next move, making the whole creative process feel smoother and more enjoyable. It should feel intuitive, whether you've got an entire room to play with or just a cosy corner.
The best way to think about it is like a mini production line. Your fabric comes in at one end, goes through its different stages, and leaves as a beautiful finished piece. Your room’s layout should mirror that journey. When you group tasks and tools into logical zones, you'll be amazed at how much time you save just by not having to walk back and forth hunting for things.
Mapping Your Core Activity Zones
I've always found that the most efficient sewing spaces borrow a concept from kitchen design: the "work triangle." The three points of this triangle are the main areas where you'll be spending nearly all your time.
-
The Cutting Zone: This area absolutely needs a large, flat surface. I'd strongly recommend one at a comfortable standing height to save your back. Make sure you leave plenty of room around the table itself, so you can easily walk around and manage large pieces of fabric. Excellent lighting here isn't just a nice-to-have; it's essential for accurate cutting.
-
The Sewing Zone: This is the heart of your creative space, home to your sewing machine (or machines!). The table needs to be sturdy and at a height where you can sit with your feet flat on the floor and your arms at a relaxed 90-degree angle. The key here is to keep your most-used tools—scissors, thread, bobbins, seam ripper—within easy reach.
-
The Pressing Zone: Don't tuck your ironing board and iron away in a cupboard. Having it set up and ready to go is a game-changer. I like to position it near my sewing station, which makes it easy to press seams as I sew without breaking my rhythm. If you're tight on space, a wall-mounted iron and board holder can be a brilliant solution.
This visual shows how these three zones work together to create a really effective and logical flow in your sewing room.
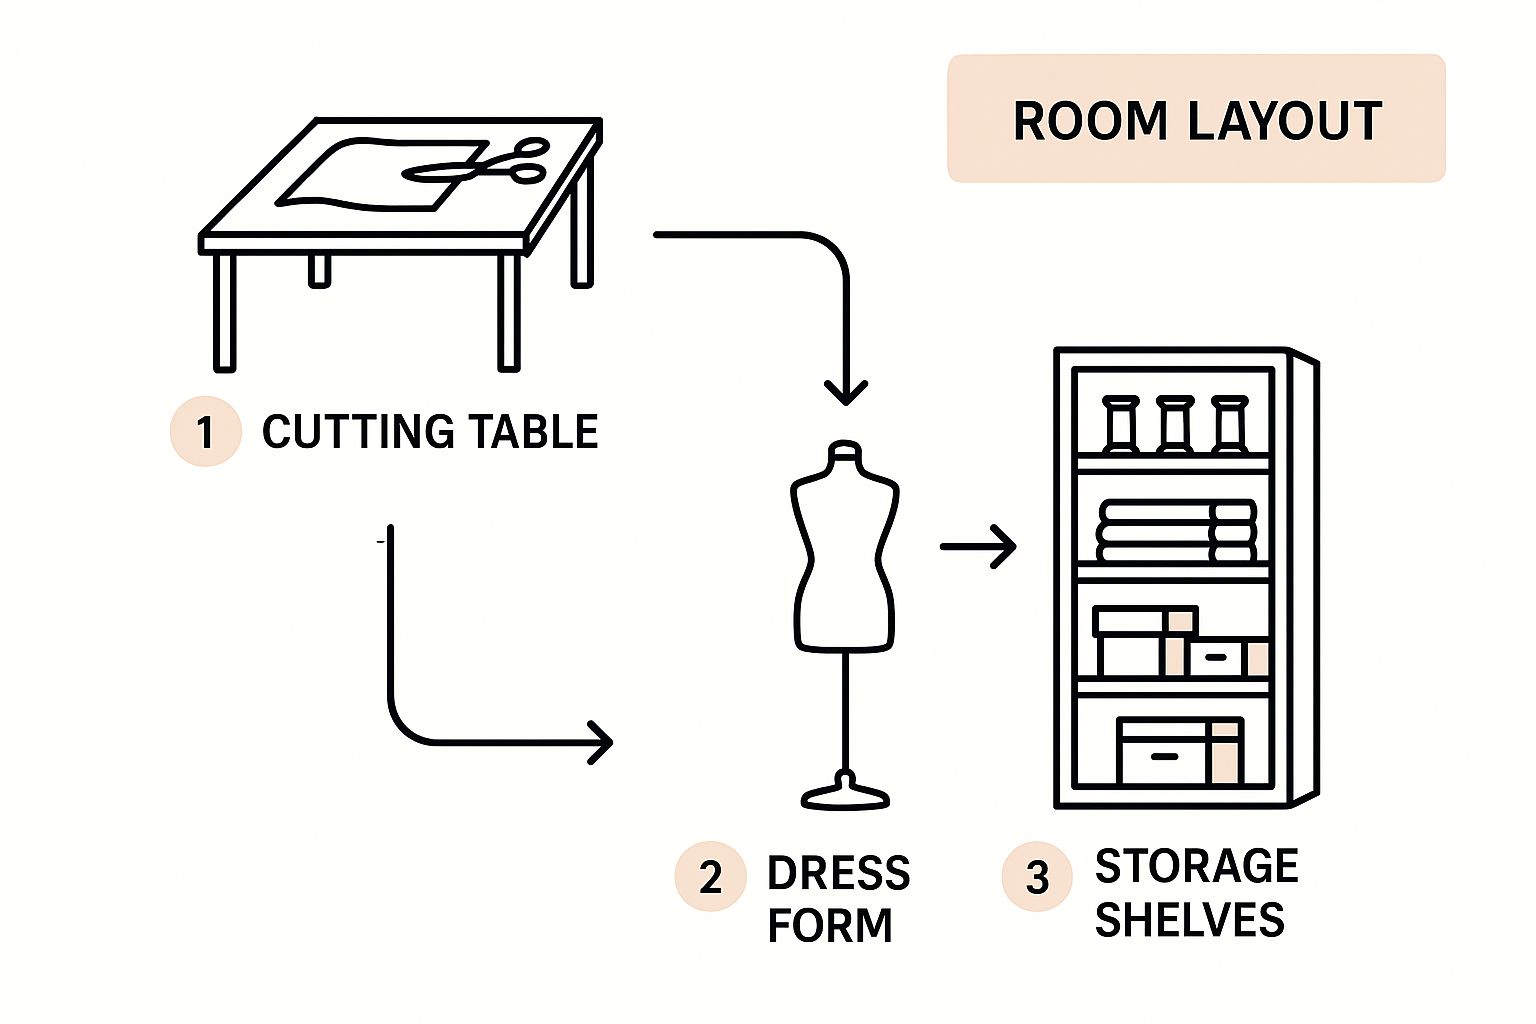
As you can see, arranging your stations to match the natural order of a project is what makes all the difference. It cuts down on wasted steps and really lets you get into a productive groove.
To give you a clearer picture, here's a quick breakdown of the essential zones and what they're for.
Essential Sewing Room Zones and Their Purpose
| Zone | Primary Function | Key Equipment and Considerations |
|---|---|---|
| Cutting Zone | Preparing and cutting fabric accurately. | Large, stable cutting table (standing height is ideal), self-healing mat, good task lighting, rotary cutters, and rulers. |
| Sewing Zone | The main construction area for stitching projects. | Sturdy sewing desk, ergonomic chair, sewing machine(s), task lighting, and immediate access to thread, bobbins, and small tools. |
| Pressing Zone | Pressing seams and finishing garments. | Iron, ironing board (or pressing mat), and a pressing cloth. Proximity to the sewing zone is crucial for efficiency. |
Planning these zones is the foundation, but a truly functional space also accounts for storage and movement.
Creating a Practical Floor Plan
Once you've got your zones figured out, it's time to grab a pencil and paper (or your favourite design app) and sketch a quick floor plan. Measure your room and any furniture you already have and want to keep. It's always best to start by placing the biggest items first, like your cutting table and sewing desk.
Think about how you'll move between each station. Can you swivel your chair from your machine to your thread rack? Is the path clear from the cutting table to the ironing board?
An effective layout isn't static; it's a dynamic system that adapts to your creative process. The ideal sewing room setup makes your tools and materials feel like an extension of your own hands, always right where you need them.
This planning phase is also the perfect moment to consider storage. Where will your fabric stash live? How will you keep patterns and notions organised? By integrating your storage solutions right into your initial floor plan, you make sure every centimetre of your space is working hard for you. For a little more inspiration, have a look at our collection of creative and practical sewing room ideas.
Choosing Your Core Workstations and Surfaces
Once you've mapped out your floor plan, it’s time to focus on the real heart of your creative space: your workstations. The sewing table and cutting surface aren't just pieces of furniture; they are the very foundation of your craft. Getting these choices right will have a massive impact on your efficiency and, just as importantly, your physical comfort during those long, wonderful hours lost in a project.
The first thing to consider for your sewing desk is rock-solid stability. There is nothing more frustrating than a wobbly table. The constant vibration can lead to skipped stitches and wonky seams, especially if you like to sew at speed. Look for something with a solid frame and enough heft to absorb the movement of your machine.
You also need enough surface area. The fabric needs space to rest comfortably to the left and behind the needle, otherwise, it will pull and drag. This simple factor makes a huge difference to your stitch quality and saves you from constantly fighting the material.
Selecting Your Sewing Station
You'll find plenty of dedicated sewing tables on the market, many with clever features like a recessed lift. This lets your machine sit flush with the tabletop, creating a perfectly smooth, ergonomic surface that stops fabric from snagging. For many experienced sewists, it’s a non-negotiable feature.
That said, you don’t have to splash out on a specialised desk. A sturdy office desk or even a solid dining table can work brilliantly. The absolute key is getting the height right for you. You want to be able to sit with your feet flat on the floor, your back supported, and your arms at a relaxed 90-degree angle to the machine.
Getting this posture right is crucial for preventing aches in your neck, shoulders, and back. If your chosen table is a bit too high, an adjustable chair with a footrest is a great way to compensate and find that sweet spot.
Your sewing station should feel like a command centre, not a compromise. Stability and ergonomic comfort are the two pillars that support hours of productive and pain-free creating. Prioritise them above all else.
With today's advanced home sewing equipment, a stable base is more important than ever. The UK sewing machine market has grown substantially, reaching revenues of approximately £116.7 million. This boom is fuelled by a real interest in high-spec models, with computerised machines being the fastest-growing segment. As we all invest in more powerful tools to boost our productivity, our sewing room setups need to keep pace and provide the right support.
The Critical Cutting Surface
While your sewing desk is for precision stitching, your cutting table is all about space and support. Anyone who has cut large fabric pieces on the floor knows it’s a fast track to an aching back and inaccurate cuts. A dedicated, standing-height table is honestly one of the best upgrades you can make to your sewing practice.
The ideal height allows you to stand up straight, without hunching over—usually around waist or hip level. This position gives you far better control over a rotary cutter or shears and a much clearer view of your pattern pieces.
So, what makes a good cutting surface?
- Height-Adjustable Desks: These are fantastic because you can set the perfect standing height for you, and then lower it for other tasks.
- Kitchen Islands or Workbenches: These are often built at a comfortable counter height and can be repurposed with great success.
- DIY Solutions: A popular and budget-friendly trick is to place a sturdy tabletop across two matching bookshelves (like the IKEA KALLAX), which gives you valuable built-in storage too.
Whatever you choose, make sure the surface is large enough to lay out your fabric without a struggle. A small surface forces you to constantly shift large pieces around, which is a recipe for error. For a deep dive into the pros and cons, have a look at our guide on choosing the best sewing and cutting table for your space. This is where having a clear sewing room plan really pays off, ensuring every piece of furniture has a clear and comfortable purpose.
Mastering Sewing Room Storage and Organisation
Now that you’ve mapped out your layout and set up your workstations, it’s time to tackle the heart of any creative space: storage. Let’s be honest, a well-organised sewing room is about more than just being tidy. It’s about creating a space that fuels your creativity instead of draining it. When you can lay your hands on exactly what you need without a frantic search, your mind is clear to focus on the joy of making.
The aim here is to build an intuitive system where everything, from the bulkiest fabric bolt to the tiniest button, has a designated, logical home. This isn't about creating some sterile, minimalist showroom. It's about building a practical, functional environment that genuinely supports your creative process. Think of it as your personal supply library—everything visible, accessible, and ready to go.
Taming the Fabric Stash
For most of us, our fabric stash is a double-edged sword. It’s a source of endless inspiration, but it can also be a massive organisational headache. We've all been there: beautiful fabrics buried in opaque boxes or stuffed into cupboards, completely forgotten. The old adage "out of sight, out of mind" is a real creativity killer here. If you can't see what you own, you won't use it, and you’ll probably end up buying duplicates.
The secret to conquering the stash is simple: visibility. Your system needs to let you see your collection at a glance.
-
Fold and File: This is one of my favourite methods. Fold your fabric cuts into uniform shapes and ‘file’ them vertically in drawers or clear containers. It turns your stash into a card catalogue of textiles, letting you flick through and find the perfect piece without pulling everything out.
-
Wrap on Boards: To get that lovely fabric shop feel, try wrapping your lengths around acid-free comic book boards or purpose-made fabric organisers. When you stand them up on open shelves, it not only keeps the fabric neat and wrinkle-free but also creates a beautiful and inspiring display.
-
Roll and Stack: For larger cuts of fabric, or for delicate materials like velvet or silk that mark easily, rolling is the way to go. Storing them in cubby-style shelving (the IKEA KALLAX is a classic for a reason) prevents harsh creases and lets you see the ends of each roll for easy picking.
Whichever approach you take, the key is to stick with it. Committing to one primary system makes it far easier to maintain order and, crucially, to put away any new additions properly.
A well-organised fabric stash is an active inventory, not a hidden hoard. When you can easily see and access your materials, you empower yourself to create with the beautiful things you already own.
One final thought on fabric: don't forget about light exposure. If you're using open shelving, be mindful of direct sunlight, which will fade your precious textiles over time. If your room is particularly bright, using cupboards or simply keeping the blinds down when you’re not sewing is a smart protective measure.
Organising Notions and Tools
While fabric takes up the most physical space, it's often the little things that create the biggest mess. All those essential notions—threads, zips, buttons, elastics—can quickly descend into a chaotic jumble if they don't have a proper home.
For these smaller items, clear, compartmentalised storage is your best friend. I find that shallow drawer units, often sold for scrapbooking supplies or even workshop hardware, are perfect. You can assign each drawer to a specific item: one for zips, another for bias binding, and so on. Popping in some drawer dividers creates even more granular order.
A pegboard is another game-changer for a sewing room. It’s a brilliant way to use vertical wall space and keep your most-used tools like scissors, rotary cutters, and rulers in sight and within easy reach of your machine. It gets them off your work surface and saves you from rummaging through drawers mid-stitch.
And when it comes to thread, you can't beat a wall-mounted thread rack. It does more than just stop your spools from becoming a tangled bird's nest; it turns them into a functional, colourful piece of wall art. Seeing all your shades at once makes matching thread to fabric an absolute breeze.
For a deeper dive into taming the clutter, have a look at our detailed guide on sewing room storage ideas. It’s full of even more practical solutions for every kind of supply, helping you turn your sewing room into the efficient, inspiring hub you deserve.
Making Your Sewing Room Work for You
Moving beyond simple storage solutions is what turns a hobby corner into a truly functional studio. This is the moment you introduce equipment that genuinely elevates your entire workflow, making the journey from fabric to finished garment smoother and far more organised. You're essentially building a system that can handle anything you throw at it, whether it's a single bespoke commission or a small production run.This shift mirrors what’s happening across the UK’s garment industry. A remarkable 128% increase in sales volume and a 123% rise in purchase orders for garment SMEs means the demand for efficient production spaces has skyrocketed. Having a properly equipped sewing room isn't a luxury anymore; it’s a necessity if you want to keep up. You can read more about this industry boom and what it means for makers at Just-Style.com.
The Mannequin: Your Silent Partner in Fit
Many people see a dress form or mannequin as a display piece, something to show off a finished creation. But in a working sewing room, its true value is as an indispensable tool. A professional, adjustable mannequin from a supplier like Display Guru isn't just for show—it's your silent partner in getting the work done right.
Think of it as your 24/7 fitting model. A high-quality, pin-friendly polystyrene form is a game-changer, allowing you to:
- Drape fabric to experiment with new patterns and ideas directly in 3D.
- Check the fit and balance of a garment at every stage, catching issues long before a final fitting.
- Pin and tweak tricky elements like collars, set-in sleeves, and darts with absolute precision.
- Level a hem perfectly—a task that's notoriously difficult to get right when working on yourself.
Choosing the right mannequin is key. Consider the size range you work with most often. While an adjustable model offers flexibility, having a form that closely matches your house block or primary client's measurements is the ideal. Make sure you place it in an area with good, all-around light and enough room to walk around it comfortably. It needs to be within easy reach of both your sewing machine and your ironing board.
Elevate Your Workflow with Garment Rails
What happens to a garment when it’s nearly finished? Tossing a half-made dress over a chair is a sure-fire way to invite wrinkles and undo your hard work. This is where a simple but profoundly effective tool comes into its own: a dedicated garment rail.
A sturdy garment rail brings a level of professionalism and organisation to your sewing room that’s hard to replicate otherwise. It’s not just for storing your own clothes; it’s an active part of your project management system.
A garment rail isn’t just storage; it’s a staging area for creativity. It separates what’s done from what’s next, bringing clarity and order to your entire process.
Integrating one into your space immediately tidies up your process. You can hang finished pieces to keep them pristine and ready for delivery. It's also the perfect spot to assemble all the cut pieces for a project on hangers, ensuring nothing gets lost or creased on a cluttered cutting table.
Putting It All Together: A Project-Based System
By combining these professional-grade tools, you can create a highly effective system for managing projects from start to finish. Picture this workflow:
- Prep: First, you gather all the fabric and notions for a new project and place them in a dedicated bin or on a shelf attached to your garment rail. Everything is in one place.
- Cut & Organise: As you cut the pattern pieces, you immediately hang them on hangers on the rail. No more mystery pieces buried under scraps.
- Fit & Assemble: You move to the mannequin for draping and fitting, pinning directly onto the form to check your work as you go.
- Finish & Protect: Once complete, the garment is pressed and hung straight back on the rail, safe, immaculate, and ready for its new home.
This systematic approach, supported by the right tools, is what defines a truly optimised sewing room. It minimises the chaos, protects your work, and frees up your mental energy to focus on what you actually love to do: create.
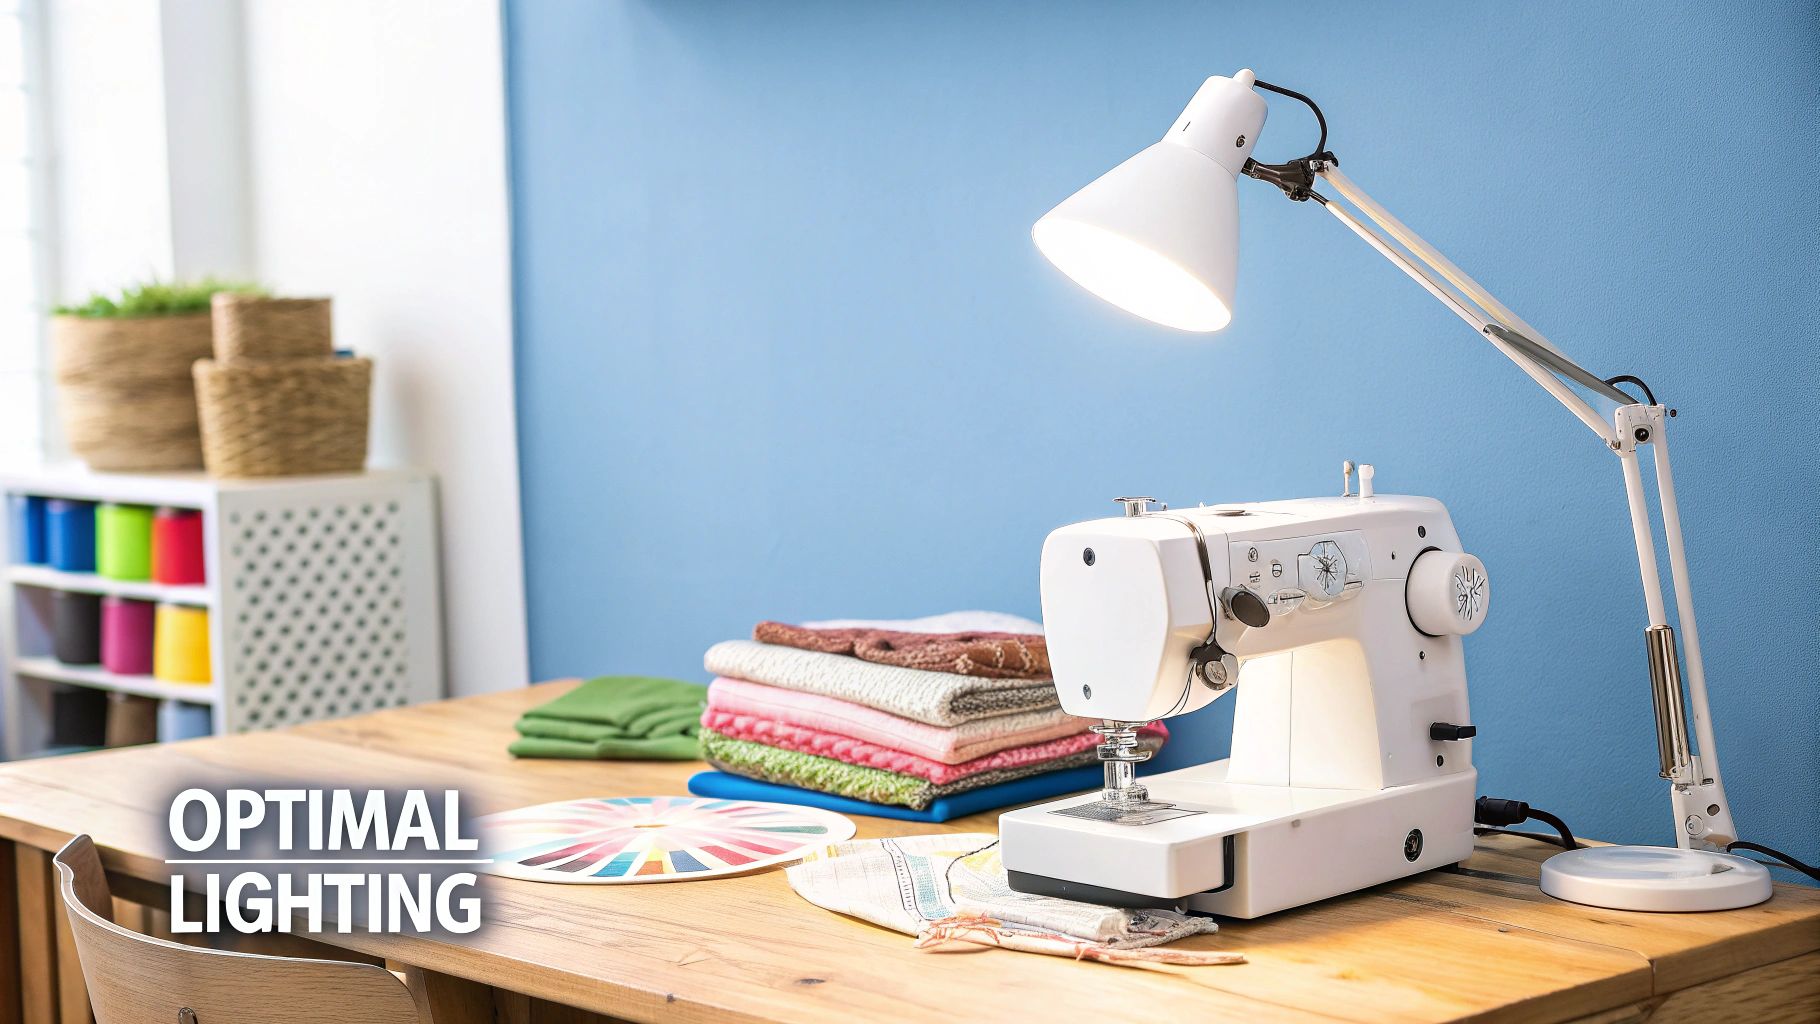
Getting Your Lighting and Ergonomics Spot On
You can have the most beautiful sewing room, with all the best gear, but if the lighting is poor and the setup is uncomfortable, you just won't want to spend time in there. This is where getting your lighting and ergonomics right comes in. They’re the unsung heroes of any creative space, the things that let you sew for hours without eye strain or an aching back.
Honestly, taking the time to sort this out is one of the best investments you can make in your hobby. Think of it as fine-tuning your environment so your body isn’t fighting your creativity. A few thoughtful tweaks to your lighting and posture can make a world of difference to how long you can comfortably sit and sew.
Build Up Your Lighting in Layers
Just relying on the main ceiling light is a classic mistake. It casts shadows right where you don’t want them and really tires your eyes out. A much better approach for a sewing room is what’s known as layered lighting. It’s all about combining three different types of light to create a space that’s bright, clear, and works for whatever you’re doing.
First, you have your ambient light. This is the general light that fills the room, usually from a main ceiling fixture or a big window. Natural light is lovely, of course, but it changes all day and isn't reliable for matching colours, so you'll always need to back it up.
Next up, and this is the really crucial one, is task lighting. This is bright, focused light pointed exactly where you need it most: on your sewing machine needle, your cutting mat, and your ironing board. I find that adjustable desk lamps or even some LED strip lighting tucked under a shelf above my machine work wonders.
Finally, you can add some accent lighting. This is more for atmosphere, highlighting your fabric stash on the shelves or a few of your finished pieces on display. It just adds a bit of warmth and personality to the room.
Why Colour-Accurate Bulbs are a Must-Have
When you're buying bulbs, you need to check the Colour Rendering Index (CRI). It’s a simple scale from 0 to 100 that tells you how accurately a light source shows the true colours of things. For sewing, where matching a thread to a fabric is everything, a high CRI is absolutely non-negotiable.
My rule of thumb? Always aim for bulbs with a CRI of 90 or higher. This is your guarantee that the navy blue thread you picked out under your lamp will still look navy blue in the daylight. It saves so much frustration!
Keep an eye out for bulbs that are labelled "daylight" or have a colour temperature somewhere between 5000K and 6500K. This type of cool, bright light is the closest thing to natural daylight, which helps reduce eye strain and lets you see every little detail clearly. For a deeper dive, we have a whole article on choosing the best lamps for sewing.
Setting Up an Ergonomic Workspace
Ergonomics sounds complicated, but it’s really just about setting up your workspace to fit you, rather than forcing your body to fit the workspace. The whole point is to keep a natural, relaxed posture to avoid aches and pains.
Your chair is the absolute foundation of an ergonomic sewing room. You really want a proper, adjustable office chair where you can tweak the height, the backrest, and the armrests. The goal is to have your feet flat on the floor with your knees at a comfortable 90-degree angle.
Next, think about your table heights. They make a huge difference.
- Sewing Table: The surface needs to be at a height where your arms are bent at a 90-degree angle when you’re sewing. No reaching up or hunching down.
- Cutting Table: Ideally, this should be at counter or waist height. It lets you stand up straight while you cut, which takes a massive amount of strain off your lower back.
It's no surprise that as the UK textile market grows—it's projected to hit £46.25 billion—more people are creating professional-level sewing spaces at home. There's a real shift towards building studios that are not just functional but also support our well-being. You can read more about this growing market over at Expert Market Research. By putting these ergonomic tips into practice, you're making sure your sewing room can keep up as your passion grows, without the physical toll.
Common Sewing Room Setup Questions
Even the most carefully laid plans run into snags. As you start setting up or reorganising your sewing space, you're bound to have questions. It’s completely normal, and sorting out these common hurdles now will help you create a room that genuinely works for you.
Let's dive into some of the questions I hear most often from fellow sewists, whether they're dealing with a tiny box room or a fabric stash that’s taken on a life of its own.
What Is the Best Way to Set Up a Sewing Room in a Small Space?
When you’re short on space, you have to think smart. Your best friends are vertical space and multi-functional furniture. Forget about sprawling layouts and start looking up. Wall space is your most underrated asset, so use tall shelving units or pegboards to get tools and supplies off your floor.
Every piece of furniture needs to earn its keep. Can that sturdy kitchen table double as a cutting mat surface? Would a sewing cabinet that folds away when you're finished be a better fit than a permanent desk? I’m also a huge fan of rolling carts. You can load one up with everything for your current project—thread, scissors, fabric—and just wheel it into a corner when you need to reclaim the room.
How Can I Organise a Large Fabric Stash Effectively?
A mountain of fabric can feel more intimidating than inspiring. The only way to conquer it is with a system that lets you see exactly what you’ve got. It’s a bit of work upfront, but start by sorting everything. Most people go by fabric type (cottons, knits, silks) or by colour.
The goal is to be able to 'shop' your stash. If you can't see it, you won't use it. You'll end up forgetting beautiful fabrics you already own and buying more of what you don't need.
For great visibility, try folding your fabric to a uniform size and filing it vertically in deep drawers or clear plastic bins. This way, you can flick through your collection like you’re at a record shop. Another method I love is wrapping fabric around comic book boards and standing them on shelves, creating a mini fabric library. For a deeper dive, our guide on sewing room organisation ideas is packed with more detailed strategies for any size of stash.
How Much Does It Cost to Set Up a Basic Sewing Room?
This is a "how long is a piece of string?" question, as the cost can swing wildly. If you're resourceful and use furniture you already have, a basic but functional setup could be done for under £100.
However, if you're starting from a blank slate and buying new, dedicated pieces, the budget obviously grows. A realistic breakdown might look something like this:
- A dedicated sewing table: £150–£500
- An ergonomic chair (don't skip this!): £100–£300
- Good storage solutions: £100–£400
So, a brand-new setup could easily range from £350 to over £1,200. Your biggest expenses will almost always be the furniture and, of course, a new sewing machine if that's on your list. My advice is always to start with what you can afford and upgrade key items—like your chair or your main storage—as your skills and budget grow.
At Display Guru, we provide the professional-grade tools to help you create a studio that’s as serious about sewing as you are. From adjustable mannequins for the perfect fit to sturdy garment rails for impeccable project organisation, we have the solutions to support your creative journey. Explore our collection and elevate your sewing space today.