


Sew On Trim Like a Pro A Complete Guide
Adding trim is how you take a simple sewing project and turn it into something truly special. It's the secret sauce, really. But the magic isn't just in the stitching; it's in the prep work you do long before you get to the machine. Getting this groundwork right is what makes a decorative edge look polished and stand the test of time.
Foundations for a Flawless Finish
Before you even think about threading a needle, let's talk about planning. Adding a trim isn't just a final flourish. It's a structural part of the piece, and if you rush it, you can mess with the drape, fit, and the whole look of your project. I’ve seen it happen too many times—a bit of haste at this stage leads to puckering, warping, or a finish that just looks, well, homemade.
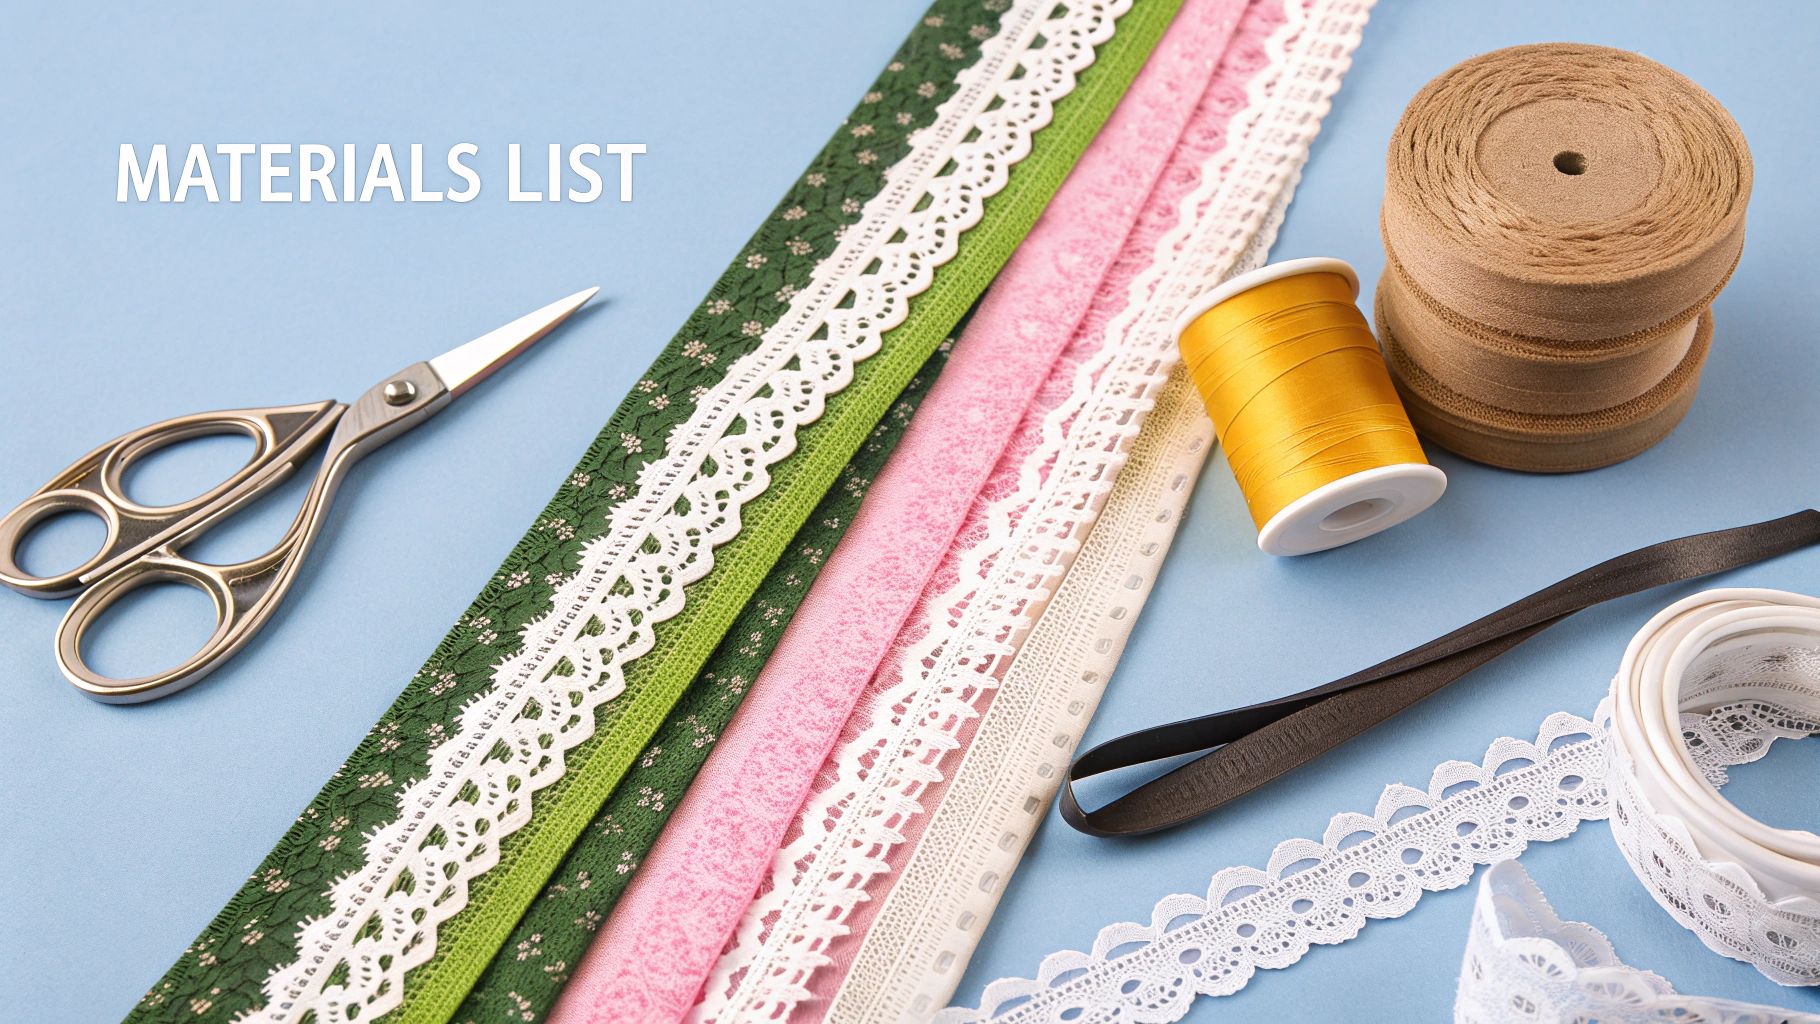
The first and most important step is to really understand your materials. This goes deeper than just seeing if a trim looks nice against your fabric. You need to think about how they're going to live together once the garment is being worn and washed.
Here’s what I always check before I start:
- Material Compatibility: Make sure the weight and fibre of your trim and fabric are friends. A heavy, chunky braid will pull a delicate silk completely out of shape, while a flimsy little ribbon will just vanish on a sturdy denim.
- Pre-washing is a must: Always, always pre-wash and dry your fabric and your trim. Do it exactly how you plan to care for the finished piece. This stops one from shrinking more than the other later on, which is the number one cause of those dreaded puckered seams.
- Colourfastness: If you’re using a dark or brightly coloured trim, it's worth doing a quick test. Just take a small snippet and see if the dye runs on a scrap of your fabric when wet. Better safe than sorry!
It's no surprise that these beautiful details are so popular. The UK's textile industry, which produces so many of these lovely trims, was valued at around £1.8 billion in 2024, and that number keeps growing. It just shows how much we all still appreciate high-quality, thoughtful embellishments.
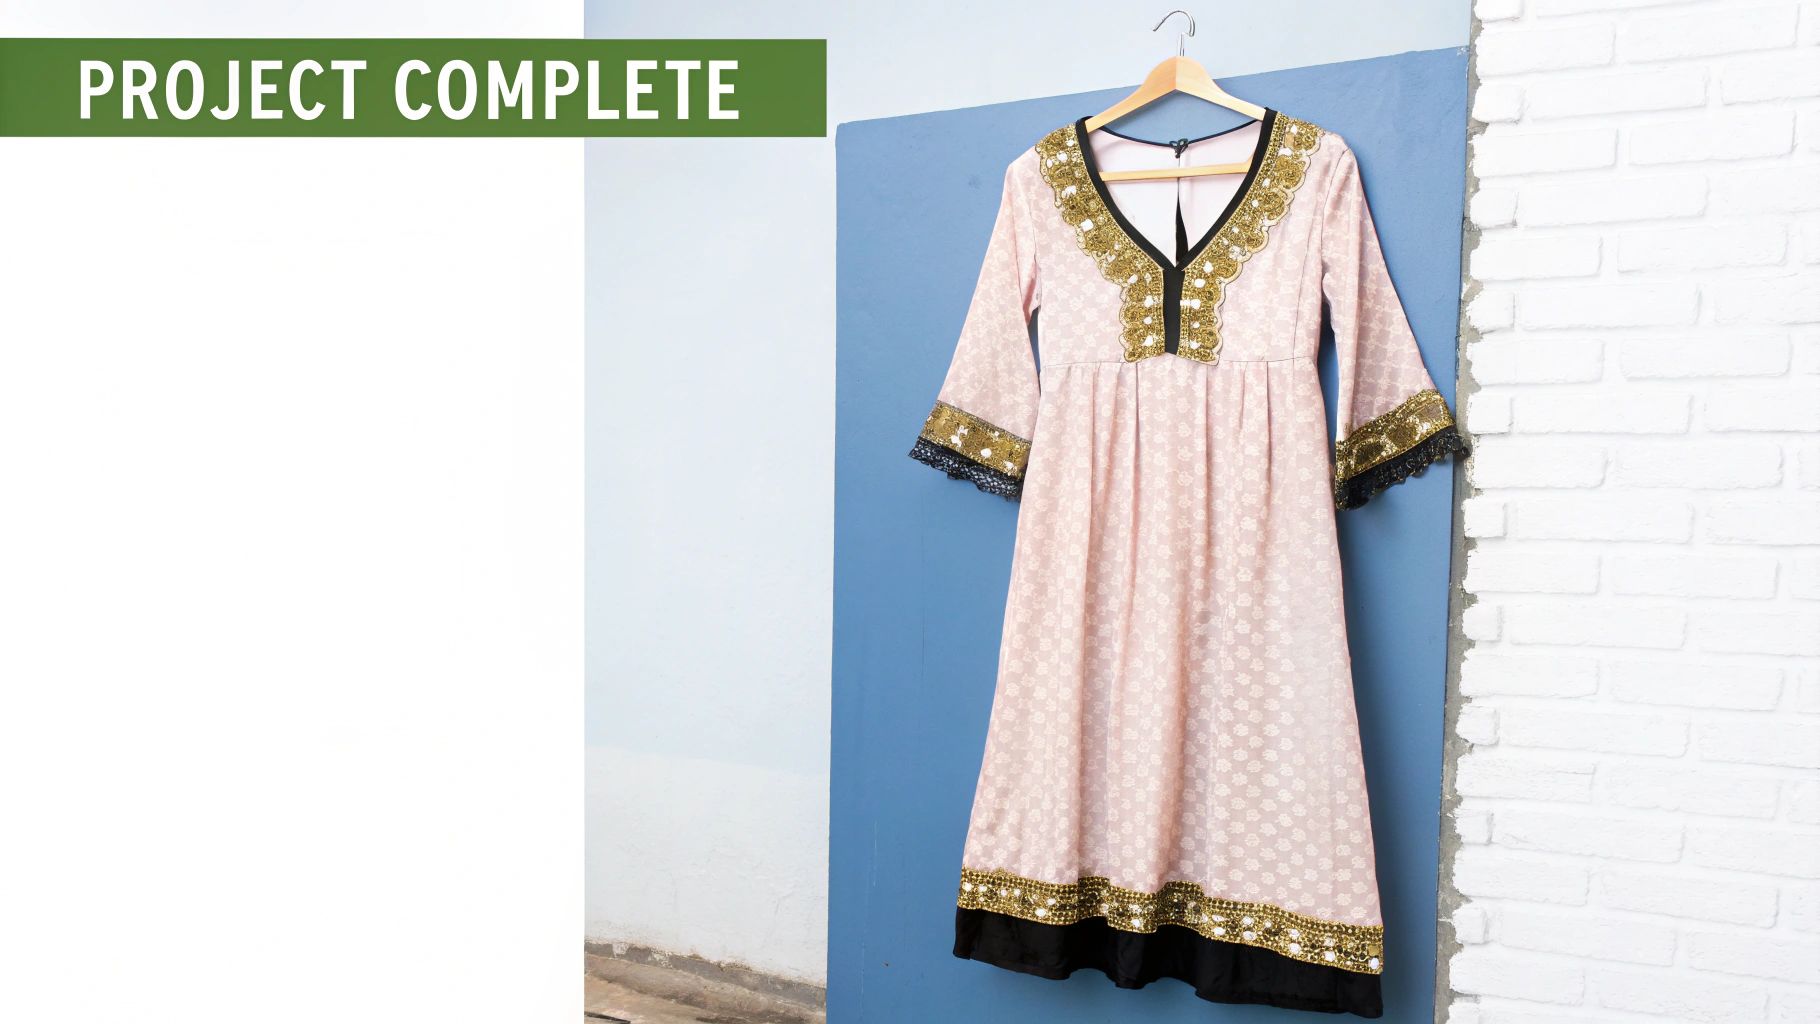
A well-chosen and perfectly applied trim should look like it was always part of the design, not just stuck on at the end. That seamless integration is the true sign of craftsmanship.
Keeping all these little details straight from one project to the next can be a challenge. I find using a dedicated organiser is a total game-changer. Something like this sewing project planner can help you keep notes on fabric types, trim choices, and what you did to prepare them, so you get a great result every single time.
Matching Trims and Fabrics for a Flawless Finish
The real magic in a beautiful sewing project often happens before you even thread your needle. Pairing the right sew on trim with your fabric is a skill that balances visual appeal with practicality, ensuring your final piece looks fantastic and lasts for years.
Imagine sewing a heavy, beaded trim onto a lightweight jersey t-shirt. It sounds like a creative idea, but in reality, the weight of the beads would drag the delicate fabric down, causing it to sag, pucker, and lose its shape. The two materials are just not a good match.
Think About Weight and Drape
The golden rule here is to match the weight of your trim to the weight of your fabric. A heavy wool coat, for instance, can easily handle a substantial velvet ribbon or a thick, decorative cord. In contrast, a floaty chiffon blouse would be completely overwhelmed by anything heavier than a delicate lace or a feather-light satin ribbon.
This principle extends to how the materials behave.
- For curved seams, like a neckline or an armhole, you'll want something flexible that can bend without bunching. Rickrack and single-fold bias tape are perfect for this.
- For straight, crisp edges, such as the hem on a cushion cover, a sturdier trim like grosgrain ribbon provides structure and a clean, sharp line that softer options can't achieve.
Sometimes, your fabric might need a bit of help to support the trim you've chosen. This is where understanding what interfacing is in sewing can make all the difference, adding that extra stability right where you need it.
Matching Trim Types to Fabric Properties
To make things a bit easier, here’s a quick reference table to guide your choices. It’s a great starting point for pairing common fabric types with suitable trims.
| Fabric Type | Recommended Trim | Key Consideration |
|---|---|---|
| Lightweight Cottons (Lawn, Voile) | Delicate lace, rickrack, narrow ribbon | Avoid anything heavy that will pull or distort the fabric. |
| Denim & Canvas | Thick cord, twill tape, jacquard ribbon | The trim needs to be robust enough to match the fabric's durability. |
| Jersey & Knits | Stretch lace, bias tape, flexible trims | Ensure the trim can stretch with the fabric to avoid popped stitches. |
| Silk & Chiffon | Seed beads, feather-light ribbon, pin-tucks | The trim should complement the fabric's drape, not weigh it down. |
| Wool & Tweed | Velvet ribbon, faux leather, heavy braids | Choose substantial trims that won't get lost in the fabric's texture. |
This isn't an exhaustive list, of course, but it highlights the core principle: the trim and fabric must work together, not against each other.
Don't Skip the Prep Work
Shrinkage is the number one enemy of a well-finished project. Always pre-wash both your fabric and your trim according to their care labels. This simple step prevents one from shrinking after you’ve sewn them together, which is a classic cause of puckering and distortion.
Another crucial test is for colourfastness, especially with brightly coloured trims. A red ribbon that bleeds can instantly ruin a crisp white shirt in the first wash. To check, just dampen a small piece of the trim and press it firmly onto a scrap of your fabric to see if any dye transfers.
The most successful embellished garments are those where fabric and trim work in harmony. The goal is to create a cohesive piece where the sew on trim feels like an integral part of the design, not an afterthought.
The demand for high-quality embellishments has never been higher. The global trims market was valued at USD 12.5 billion in 2024, with Europe being a significant part of that market. You can read more about the growth drivers of the trims market on Verified Market Reports to see just how much this corner of the fashion world is expanding.
Getting Set for a Flawless Finish
Anyone with a bit of sewing experience knows that the real magic happens before you even sit down at the machine. Getting your fabric and trim ready is the difference between a project that looks polished and one that just looks… homemade.
Start by giving everything a good press. Don't just iron the main fabric; your trim needs attention too. Just be careful with the heat settings – a delicate polyester ribbon or a sequined trim can’t handle the same heat as a sturdy cotton. I always use a pressing cloth and a lower temperature for synthetics to be safe. You're aiming for a perfectly flat canvas to work on.
Marking and Pinning Your Trim
This is where precision really counts. Grab a fabric marker or a chalk pencil and carefully draw a guide line right onto your fabric. This simple step ensures your trim goes on straight or follows a curve exactly as you envisioned. If you're working near an edge, it's also worth brushing up on what is seam allowance, as it plays a big part in the final dimensions of your piece.
With your placement line marked, the next job is to secure the trim so it doesn't budge while you're sewing. You’ve got a few choices here:
- Pins: The old-school, reliable method. I like to place them perpendicular to the trim's edge; it makes them much easier to pull out as you sew. Just watch out for pins causing little pulls or distortions on very slinky or delicate fabrics.
- Fabric Clips: A fantastic alternative, especially for thick materials like denim or delicate ones like velvet where pins would leave permanent marks. They grip everything firmly without causing any damage.
- Basting: For the most secure hold, nothing beats basting. You can do this by hand with a simple, long running stitch or even use a temporary fabric adhesive spray. I always baste when I'm dealing with tricky curves or attaching a very long piece of trim.
If you take away one thing, let it be this: don't skip securing your trim. It’s the single best thing you can do to stop the fabric from shifting and guarantee your stitching ends up flat, even, and right where you want it.
Choosing Your Stitching Method and Settings
Once your materials are ready, it's time to decide how you'll actually attach the trim. This choice is just as important as picking the trim itself, as it dictates the final look and durability of your work. The big question is: machine or hand sewing? Honestly, there’s no single right answer. It all depends on your fabric, the trim you're using, and the effect you're after.
The UK sewing machine market is booming, expected to hit around £95 million in 2024, with electric models making up 46.19% of that. This tells us that plenty of people rely on their machines for precision and a strong finish.
Machine Sewing for Precision and Speed
For the vast majority of projects, a sewing machine is going to be your best friend. It’s fast, consistent, and gives you a really durable result.
The humble straight stitch is usually all you need. The real secret is to fine-tune the stitch length to match your materials. If I'm working with a heavy trim on something tough like canvas, I'll lengthen the stitch to about 3.0 mm. For delicate fabrics, a shorter stitch (2.0-2.5 mm) offers more control and melts into the background.
Don't underestimate the power of a specialty presser foot, either. A standard foot can get the job done, but the right tool makes it so much easier:
- Edge-Stitching Foot: This is my absolute go-to for things like ribbons and braids. It has a little guide that hugs the edge of the trim, making it almost impossible to sew a wonky line.
- Walking Foot: An absolute lifesaver for anything bulky, slippery, or layered. It has its own set of feed dogs that grip the top fabric, moving it in perfect sync with the bottom layer to stop any annoying shifting or puckering.
If you're wrestling with tricky fabrics, I highly recommend getting comfortable with a walking foot. For some brilliant advice, check out these expert tips on How to Use a Walking Foot: Expert Tips for Perfect Stitches.
Hand Sewing for an Invisible Finish
Of course, sometimes a machine just isn't the right choice. For delicate heirloom pieces, couture garments, or trims laden with beads and sequins that would snap a machine needle in a heartbeat, hand sewing is the only way to go. It gives you a level of control that a machine simply can't match.
The following graphic breaks down the essential prep work that applies whether you choose to sew by hand or machine.
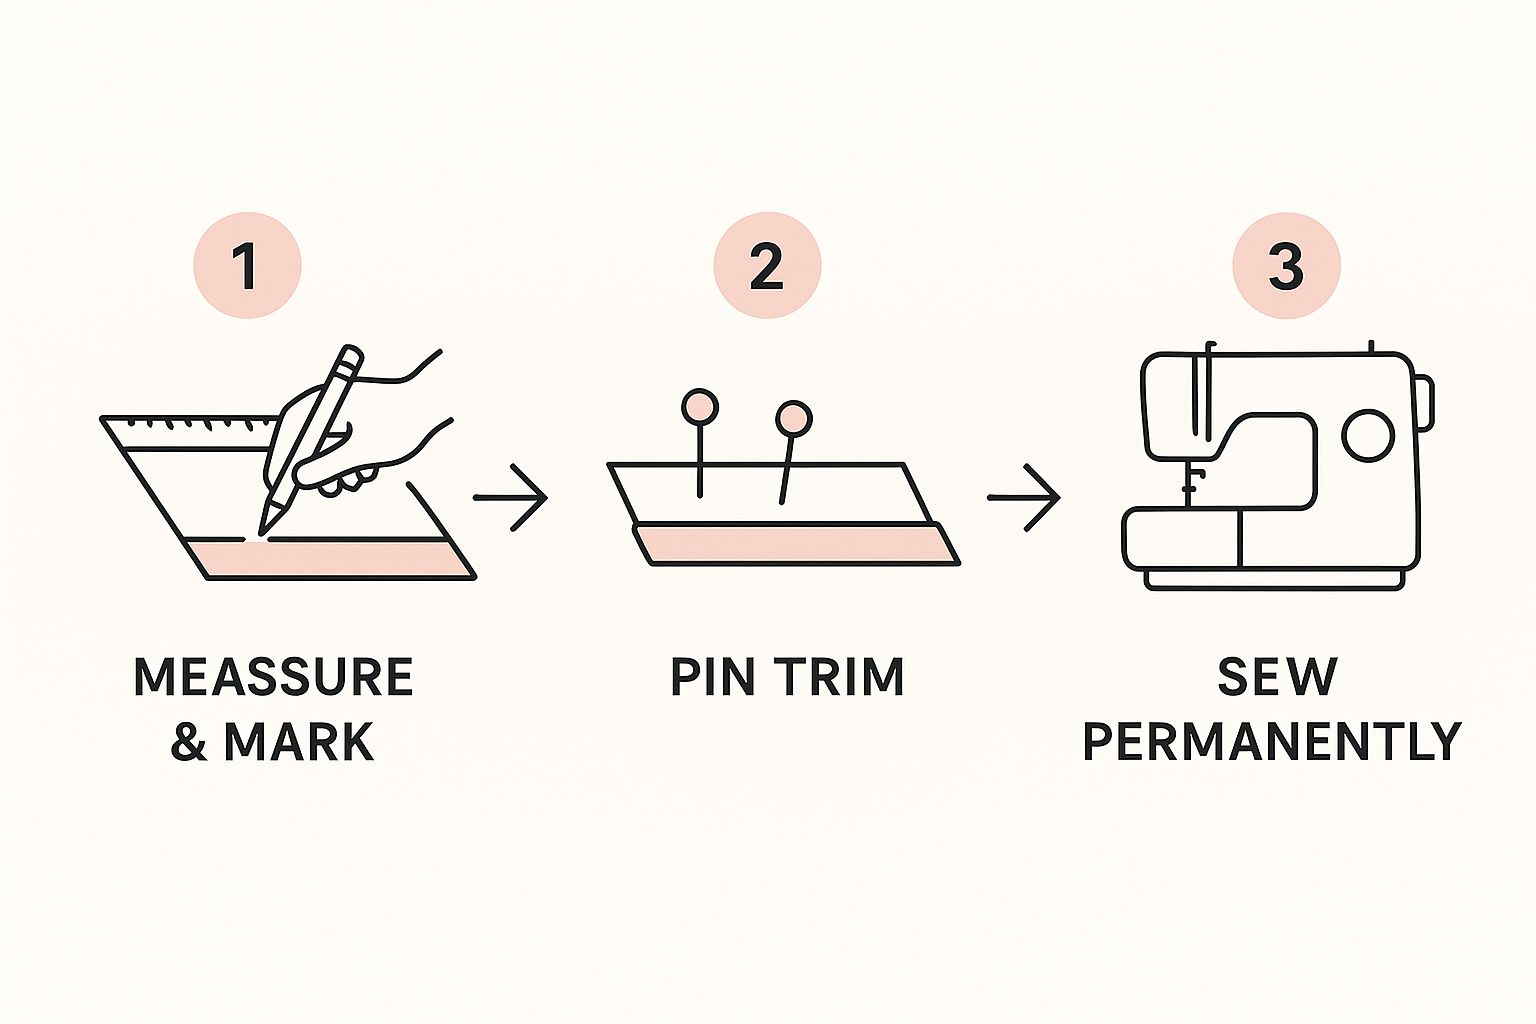
As you can see, precise measuring, marking, and pinning are the non-negotiable foundations for a clean, professional finish.
When it comes to hand-stitching sew on trim, two stitches are my trusted favourites:
- The Slip Stitch: This is the undisputed champion of invisible stitches. You run the needle through the folded edge of the trim, then catch just a tiny thread or two from the main fabric. From the outside, the stitches are virtually undetectable.
- The Whipstitch: Perfect for securing a raw edge that's prone to fraying, like a cut piece of ribbon. The stitch neatly wraps around the edge, encasing it for a tidy and secure finish.
Ultimately, whether you're at your machine or sewing by hand, the aim is the same: a secure trim that looks fantastic. Taking a few extra moments to choose the right stitch is what elevates a project from simply 'handmade' to 'beautifully crafted'. For a deeper dive, take a look at our guide on various sewing techniques.
How to Handle Corners and Curves
Getting around the twists and turns of your project is what really separates a good finish from a great one. Corners and curves can seem a bit daunting at first, but with the right technique, you can get a sharp, clean look on any sew on trim application.
For those sharp, right-angled corners on things like cushions or placemats, the mitred corner is your best friend. This classic technique involves folding the trim at a perfect 45-degree angle. Simply sew along the first side, stop just before the corner, then fold the trim up and back on itself to create that crisp diagonal line. Pressing the fold firmly is the secret to getting it to lie perfectly flat.
Taming Tricky Curves
Curves, like you'd find on necklines or armholes, throw a different kind of challenge your way. The main goal is to stop the fabric from puckering and make sure the trim follows the line of the curve smoothly.
- Clip Convex Curves: For outward curves, you'll want to make a few small snips into the seam allowance of your trim. This gives it room to spread out and lay flat.
- Notch Concave Curves: For inward curves, cut tiny V-shaped notches out of the seam allowance. This gets rid of the extra bulk, allowing the trim to compress neatly without bunching up.
Working with something like one of our adjustable dress forms for sewing can be a massive help here. It lets you pin everything in place and see exactly how the trim will sit on a garment's curves before you even touch the sewing machine.
A common mistake is pulling the trim too tightly around a curve. You actually want to do the opposite – gently ease it into place, letting the fabric and trim sit naturally together without any tension.
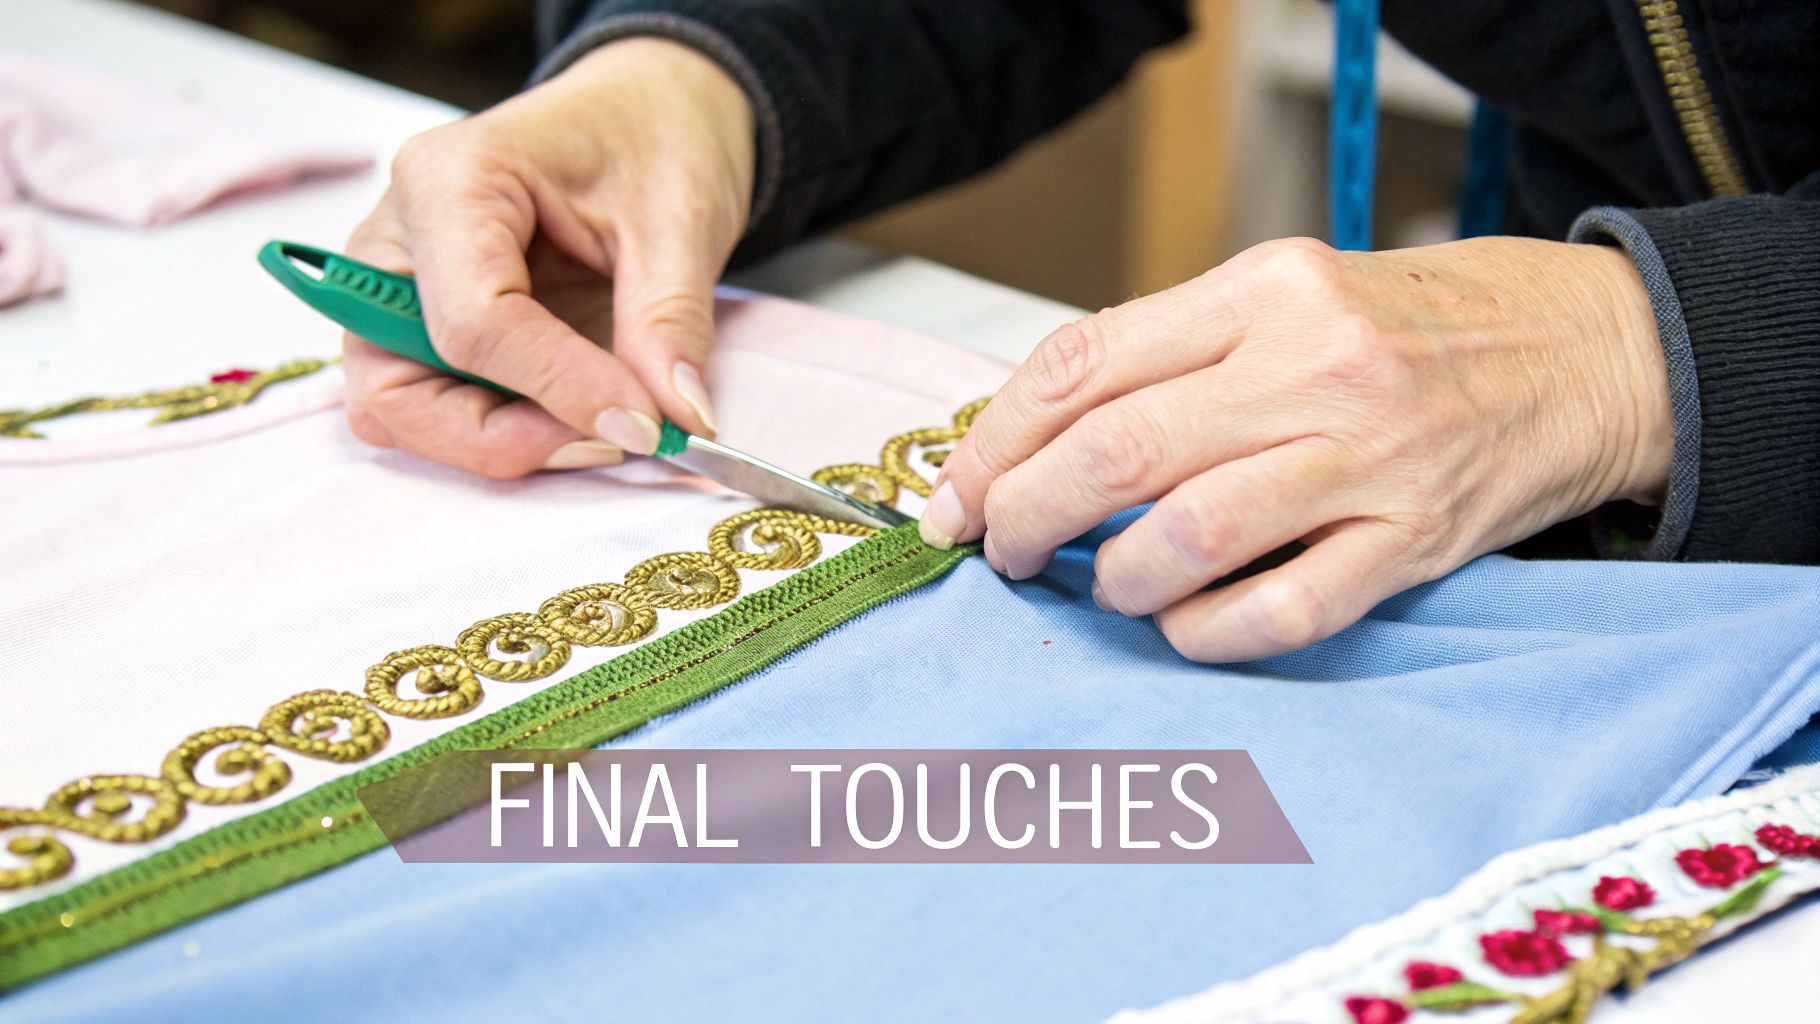
When it's time to join the ends of your trim, just overlap them slightly. Fold the raw edge of the top piece under and secure it with a few hidden hand stitches. This little trick makes the join practically invisible.
Finishing and Caring for Your Trimmed Projects
That final stitch isn't quite the end of the road. How you finish and care for your project is what separates a good result from a truly professional one, ensuring your hard work lasts for years.
The first thing to deal with are those pesky thread tails. It's tempting to just snip them close, but that's a recipe for unravelling down the line. A much better approach is to take a hand needle and weave each tail back through the stitches on the wrong side for a few centimetres. It's an invisible fix that really locks everything in place. For high-wear items, I like to add a tiny dab of fray-stopping liquid to the final knot for extra peace of mind.
Pressing and Aftercare
Pressing is non-negotiable for a crisp finish, but you have to be careful not to ruin the trim itself. If you're working with anything dimensional, like a lovely velvet ribbon or a playful pom-pom fringe, never press it directly from the top. You'll crush it flat.
The trick is to lay a thick, fluffy towel on your ironing board. Place the garment wrong-side up on the towel and press from the back. The towel's pile gives the trim a soft cushion to sink into, so it stays perfectly shaped.
Finally, a little thought about long-term care goes a long way.
- Washing: Always turn the garment inside out before washing. Popping it into a mesh laundry bag offers even more protection, minimising friction that could snag or damage your beautiful trim work. A gentle cycle is a must.
- Drying: If you can, air-dry. It’s always the kindest option. If you need to use a tumble dryer, stick to the lowest heat setting.
Think of finishing and aftercare as the final, crucial steps of the creative process. Spending just a few extra minutes here is what guarantees your beautifully trimmed creations stay that way.
Common Questions About Sewing On Trim
Even the most carefully planned project can throw a curveball when you start to sew on trim. Let's walk through some of the questions I hear most often from fellow sewers, so you can navigate those tricky spots and get a flawless finish.
One of the biggest culprits is fabric puckering. You'll see this when your fabric and trim are moving through the machine at different speeds. My go-to solution is a walking foot; it’s designed to grip and feed both layers together evenly. Remember to guide the fabric gently and let the machine do the work – pulling or stretching is a recipe for ripples.
Attaching Delicate or Stretchy Trims
Working with speciality trims is where a bit of technique really pays off. Two of the most common challenges are delicate lace and stretchy knits, but both are simple to handle with the right setup.
- Delicate Lace: To prevent fine trims from getting mangled by the machine's feed dogs, I always place a layer of tear-away stabiliser or even a piece of tissue paper underneath. It provides the necessary support. A fine needle, like a 70/10 Microtex, is also essential to avoid snagging.
- Stretchy Knits: The golden rule here is to use a stitch that can stretch with the fabric. A narrow zigzag stitch is perfect because it has that built-in flex. This simple choice ensures your threads won’t pop the first time the garment is worn.
The secret to troubleshooting is realising that most problems have simple mechanical solutions. Whether it's swapping a presser foot, tweaking your stitch, or adding a stabiliser, the right technique makes all the difference.
For all your professional sewing and display needs, explore the high-quality range of dress forms, rails, and accessories at Display Guru. Find the perfect tools to bring your creative visions to life at https://www.displayguru.co.uk.