


A Pro Guide to Wall Clothes Racks
In any professional setting that handles clothing—be it a retail boutique, a design studio, or a tailor's workshop—wall-mounted clothes racks are more than just fixtures. They are workhorses, transforming dead wall space into highly efficient storage and display areas. Think of them like a library's shelving system, but for garments; they bring instant order and visibility where there was once only a blank wall.
Why Wall Clothes Racks Are Essential for Professionals

Space is always at a premium. In a busy tailor's shop or a high-street boutique, every square metre counts. The problem with traditional, free-standing rails is that they gobble up precious floor space, making your environment feel cluttered and restricting how people move through it.
Wall clothes racks provide a simple, elegant fix. By taking storage vertical, you immediately reclaim your floor for what matters most—whether that’s more room for customers to browse, a better layout for your workstations, or space for other essential furniture.
This isn't just about saving space; it's a strategic move that directly impacts your workflow, your brand's aesthetic, and even your bottom line. Getting garments off the floor and onto a well-organised wall system creates a cleaner, more professional look and feel. It’s an instant upgrade to how your space functions and how your customers or clients perceive it.
The Strategic Value in Different Fields
The payoff for installing a good wall-mounted system is felt across the board, but the specific advantages vary depending on your profession.
-
For Retailers: These racks become silent salespeople. You can create stunning, eye-catching displays that naturally guide a customer's journey through your shop and put your star collections front and centre. A cleverly arranged set of wall rails can make even a tiny boutique feel expansive and thoughtfully curated. You can find more ideas for effective product presentation in our guide to retail display stands.
-
For Tailors and Designers: A wall rack is a vital part of the workflow. You can hang and organise garments at every stage of production—from patterns to finished pieces—keeping everything accessible and safe from accidental damage. It’s all about shaving off minutes and keeping the creative process flowing smoothly.
-
For Costume Studios: Here, the focus is on robust, high-density storage. Wall systems are perfect for holding heavy, intricate, and often delicate costumes, ensuring they are properly preserved and ready for the next performance.
The core advantage is transforming a passive architectural element—a wall—into an active, functional asset. It fundamentally changes how you interact with your inventory and your physical space, maximising every square metre.
To help clarify how these racks fit into different professional settings, here’s a quick summary.
Wall Rack Application at a Glance
| Professional Field | Primary Use Case | Key Benefit |
|---|---|---|
| Retail Boutiques | Highlighting key collections and creating visual merchandising displays. | Enhances customer experience and maximises floor space. |
| Tailoring & Design Studios | Organising projects at different stages of completion. | Improves workflow efficiency and protects delicate garments. |
| Costume & Theatre | High-density storage for heavy or bulky costumes. | Ensures preservation and quick access for performances. |
| Home Hobbyists | Creating organised sewing rooms or walk-in wardrobes. | Frees up floor space and keeps materials tidy. |
This table shows just how versatile these systems are, offering practical solutions for a wide range of needs.
Meeting Modern Space Demands
As commercial rents rise and new-builds get smaller, smart storage is no longer a luxury—it’s a necessity. This trend is clearly visible in the market’s growth. The global wall-mounted rack market is now valued at around $500 million, with Europe making up a big slice of that, driven largely by increasing urbanisation.
Here in the UK, where average home and shop sizes are often more compact, the demand for versatile wall racks has shot up. People are looking for clever ways to make the most of their vertical real estate.
Ultimately, choosing the right wall-mounted system is an investment in both your efficiency and your presentation. This guide will walk you through the crucial details—from materials and load capacities to mounting techniques—to help you find the perfect solution for your professional needs.
Choosing the Right Materials and Rack Types
The material and design you choose for a wall-mounted clothes rack will make or break its performance and how it looks in your space. Think of it like a chef choosing the right knife for a specific job; the rack you pick has to be right for its purpose, whether that's heavy-duty storage in a stockroom or a minimalist display in your boutique. Get this right from the start, and you'll have an investment that works hard and looks great.
The first question to ask is simple: what do I need this rack to do? Is it for holding hefty winter coats, showcasing a delicate new collection, or keeping garments organised in a busy studio? The answer is your starting point, guiding you to the right material and build and helping you avoid common pitfalls like sagging rails or a style that just doesn't fit.
Breaking Down the Core Materials
A rack's material dictates its strength, how long it'll last, and its overall character. Each one has its own personality and practical strengths, so understanding the differences is crucial before you buy.
Let's start with a simple comparison to see how the most common materials stack up.
Material Properties and Best-Use Cases
| Material | Typical Load Capacity | Aesthetic Style | Best For |
|---|---|---|---|
| Industrial Black Iron Pipe | Very High | Rugged, urban, industrial | Stockrooms, costume departments, edgy retail boutiques |
| Stainless Steel | High | Sleek, modern, minimalist | High-end retail, contemporary studios, humid environments |
| Aluminium | Medium | Clean, practical, lightweight | Modular displays, temporary setups, pop-up shops |
| Wood | Low to Medium | Warm, rustic, organic | Boutiques with a natural aesthetic, children's clothing stores |
As you can see, the choice really comes down to balancing strength with style.
-
Industrial Black Iron Pipe: This is your go-to for a rugged, urban feel. It’s incredibly strong and makes a real style statement, perfect for an industrial-chic boutique or a theatre costume department that needs to support some serious weight.
-
Stainless Steel: For a clean, modern aesthetic, you can't beat stainless steel. It’s sleek, highly resistant to corrosion, and a breeze to keep clean. This makes it a great fit for contemporary spaces or workshops where steam from a press might be a factor.
-
Aluminium: Don't underestimate aluminium. It's much lighter than steel but still surprisingly strong and naturally rust-proof. Its light weight makes installation easier, so it’s a brilliant option for flexible displays you might need to reconfigure.
-
Wood: If you're after a warmer, more natural vibe, wood is the obvious choice. While it generally won't handle the extreme loads of its metal counterparts, it's perfect for creating a softer, rustic feel in a boutique or adding a bespoke touch to a design studio.
The right material does more than just hold clothes; it communicates your brand's identity. An industrial pipe rack suggests durability and urban chic, while a polished steel bar conveys modern minimalism.
Matching Rack Type to Your Professional Needs
Beyond what it's made of, the actual design of the rack is just as important. Wall-mounted systems come in a few key styles, each built for a different job.
The straight bar rack is the workhorse of the bunch—a simple, linear rail offering maximum hanging space. For something with more visual punch, tiered or multi-level racks are great for displaying garments of different lengths. If you want to highlight specific items, waterfall or face-out racks present the clothes front-on, catching the customer's eye. You can see a fantastic range of options in our complete guide to the wall-mounted clothes rail.
The demand for these practical storage solutions is on the rise. In the UK, a greater awareness of energy costs and the environment has made air-drying clothes more popular than ever. In fact, the European cloth drying rack market, where the UK is a major player, accounted for over 32% of global revenue, showing a clear need for space-saving systems like wall racks. You can read more about this trend at cognitivemarketresearch.com.
To bring it all together, let’s look at a few real-world examples:
- The Chic Retailer: A high-end boutique with a minimalist aesthetic would be perfectly served by a sleek, brushed stainless steel straight bar. It keeps the focus squarely on the clothes.
- The Busy Tailor: A tailor’s workshop is all about function. A heavy-duty black iron rack, bolted securely into the wall studs, can handle dozens of heavy wool coats and wedding dresses without a hint of strain.
- The Theatre Costume Department: Here, it’s all about storage density. Long runs of industrial pipe racks mounted in parallel create an efficient ‘library’ of costumes, making the most of the vertical space while easily holding the weight of elaborate pieces.
By carefully considering both material and type, you can be sure your wall racks will be a reliable, hard-working, and stylish part of your business for years to come.
Understanding Load Capacity and Wall Mounting
Choosing the perfect wall-mounted clothes rack is only half the story. The real challenge—and the key to safety and performance—is making sure it’s anchored securely to your wall. This isn't something to take lightly. A proper mount is the absolute foundation of a successful installation.
It’s tempting to just look at the manufacturer’s stated weight limit, but that number can be deceiving. The true load capacity is always a partnership between the rack itself and the wall it’s fixed to.
Think of it this way: the world's strongest bridge is useless if its support pillars are sinking into sand. In the same way, an industrial-grade steel rack is only as strong as the wall—and the fixings—holding it up. That's why figuring out what your walls are made of is the first, most crucial step before you even think about drilling a hole.
Decoding Your Walls and Finding Support
First things first, you need to identify your wall type. This single piece of information will dictate your entire installation method. In the UK, most interior walls are either plasterboard (often called drywall) or solid masonry, like brick or blockwork.
An easy way to tell is the knock test. Give the wall a firm rap with your knuckles. A hollow, drum-like sound usually means you've got plasterboard, while a dull, solid thud points to masonry. If you're dealing with plasterboard, you have one more critical task: locating the internal wooden supports, known as studs.
Mounting a heavy-duty rack directly onto a plasterboard sheet, without anchoring it to a stud, is a recipe for disaster. The studs are the hidden skeleton of your wall, providing the structural integrity needed to bear any serious weight.
A digital stud finder is the best tool for this job. These handy devices detect changes in density behind the plasterboard, letting you pinpoint the centre of the studs. This is the prime real estate for your mounting brackets. To get a better sense of what's going on behind the plaster, a good framing inspection checklist can give you valuable insight into how wall frames are built.
This decision tree helps you visualise the key choices when selecting a rack, making sure you match the material to your needs for durability, style, and function.
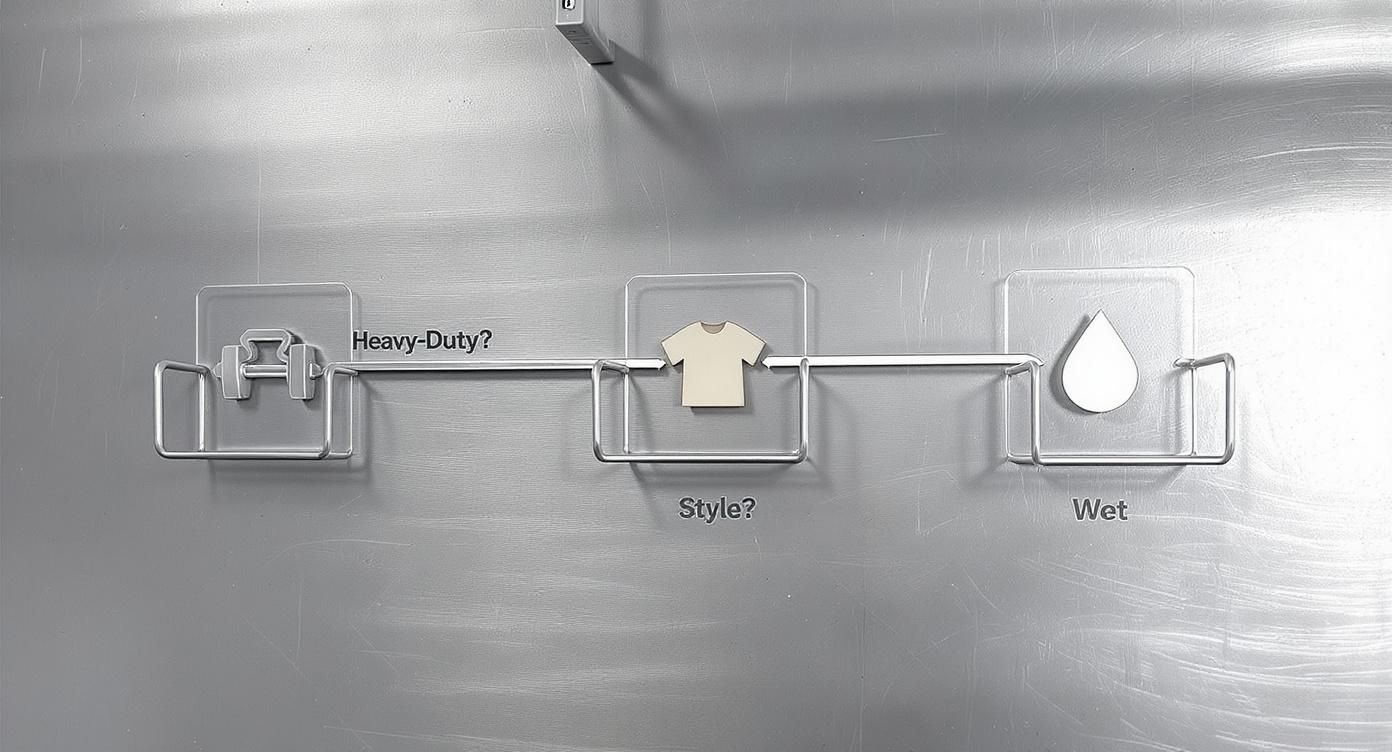
As the graphic shows, for anything heavy-duty, metal is the clear winner, while your specific style and environment will help you make the final choice.
Choosing the Correct Fixings
Once you know your wall type, you need the right hardware to make the connection. Using the wrong fixing is probably the most common mistake people make, and it completely undermines the security of the rack.
- For Plasterboard into Studs: You'll want heavy-gauge wood screws. Make sure they're long enough to go through the plasterboard and sink at least 25-40mm into the wooden stud itself.
- For Plasterboard (Light Loads Only): If you're hanging a very light rack for just a few items, special plasterboard fixings like toggle bolts or hollow wall anchors can work in a pinch. But—and this is important—they should never be trusted with heavy loads.
- For Solid Masonry Walls: This calls for masonry wall plugs and the corresponding screws. You'll drill a hole, pop in the plug, and then drive the screw in. This creates a powerful, expanding grip inside the brick or blockwork.
Calculating Your True Load Needs
The manufacturer's capacity rating is a good starting point, but you have to think about what you’ll actually be hanging. The weight of clothing adds up a lot faster than you might think.
- A simple shirt weighs around 200-300g.
- A pair of jeans is closer to 700g-1kg.
- A heavy winter coat can easily top 2-4kg.
Let’s run the numbers. A single one-metre rail packed with 20 heavy winter coats could be holding up over 60kg. That's a serious amount of weight that absolutely demands a rock-solid installation into studs or masonry.
If you’re planning a high-density setup, our guide on heavy-duty hanging rails has more detailed advice. By taking the time to understand your walls and use the correct fixings, you’re not just putting up a rail—you’re installing a safe, dependable, and professional asset.
Strategic Placement and Merchandising
Where you place a rack is just as important as the clothes you hang on it. Once you’ve handled the technical side of things, it’s time to think strategically. Whether you’re setting up a bustling shop floor or a busy design studio, clever placement turns a simple wall rack from a storage unit into a powerful tool that guides people, tells a story, and makes your life easier.
In a retail setting, the game is all about guiding the customer's eye and their feet. Racks aren't just for hanging stock; they're signposts. Position a rack with your new collection in a brightly lit spot, visible from the entrance. This immediately signals quality and draws shoppers further into your space, creating a natural path for them to follow and discover more.
For workshops, tailors, or costume studios, the focus shifts from the customer journey to your own workflow. Here, racks should support a logical process. Think about a tailor's setup: one rack for new jobs, another for garments currently being worked on, and a third for finished pieces awaiting collection. This simple organisation cuts down on wasted movement and keeps every project separate and safe.
Creating an Effective Layout
Great placement comes down to understanding your space and how people move within it. You're aiming for that sweet spot between showing off your products and keeping the environment comfortable and uncluttered. Even small tweaks to height and spacing can make a massive difference.
Keep these key points in mind:
- Accessibility: Mount your racks so the average person can easily reach the clothes without stretching or stooping. A height of 150-165 cm from the floor to the rail is a great starting point for shirts and jackets.
- Clearance: Leave enough room between racks for people to move freely. A gap of at least 90 cm is crucial, especially for customers with pushchairs or for wheelchair users.
- Visual Breathing Room: Don't cram your racks full. Leaving a bit of space between hangers makes each item look more valuable and avoids that jumbled, bargain-bin feel.
These aren't just fussy details about aesthetics; they have a real impact on the customer experience. You can dive deeper into these ideas in our detailed post on visual merchandising guidelines.
Using Racks to Tell a Visual Story
Your layout should tell a story. Grouping garments by colour, style, or as a complete collection across different racks creates distinct visual chapters. A single rack displaying a full outfit—trousers, a shirt, and a jacket—is so much more powerful than seeing each piece on its own.
Think of your wall space as a canvas and your racks as the framework for your art. Every arrangement should be deliberate, designed to create a mood, suggest an occasion, or showcase quality craftsmanship. This narrative approach turns passive browsing into a genuinely engaging experience.
The demand for smart spatial solutions like this is growing. The UK coat rack market—a close cousin to the wall-mounted clothes rack sector—is expanding as urban living demands more from smaller spaces. This trend is just as strong in commercial settings where attractive, efficient displays are essential.
The principles are surprisingly universal. Understanding how to securely fix something to a wall and spread the load is just as critical here as it is for heavy-duty applications like commercial kitchen shelving solutions. Once you master placement, your wall racks stop being just hardware. They become a core part of your brand and your success.
A Guide to Safe and Secure Installation
You can choose the perfect wall-mounted clothes rack, but it's only as good as its installation. A secure, professional fitting isn't just about looks—it's about safety. It's what ensures your rack can handle a full load without risking damage to your walls, your stock, or even your customers.
The good news is that getting it right isn't complicated. By breaking the job down into a few simple steps, what might seem like a daunting task becomes a straightforward and successful project.
The first step, as always, is preparation. Before you even think about picking up a drill, get all your tools together. Having everything you need within arm's reach makes the whole process smoother and helps you get a clean, precise result.
Essential Tools and Preparation
A solid installation comes down to accuracy and having the right kit. You don't need a professional workshop, but a few items are absolutely non-negotiable if you want a secure and level finish.
- Tape Measure: For getting your height and spacing spot on.
- Spirit Level: Essential. Don't even think about skipping this if you want a perfectly horizontal rail.
- Pencil: For marking your drill points clearly on the wall.
- Power Drill with Appropriate Bits: You’ll need masonry bits for brick or concrete, and wood bits for drilling into studs.
- Stud Finder: A must-have for locating the wooden supports behind plasterboard.
- Screwdriver or Driver Bit: For tightening up the fixings by hand to get a snug, secure fit.
Once your tools are laid out, it's time to measure and mark up. Decide on the best height for your rack, then use your spirit level to draw a faint, perfectly level guideline on the wall. Hold the rack or its brackets against this line and carefully mark the exact spots for your drill holes.
A common mistake is to "eyeball" the level, which almost always results in a slightly skewed rack. Taking that extra minute to use a spirit level is the single best thing you can do to guarantee a professional-looking outcome.
Step-by-Step Installation Blueprint
With your marks in place, you’re ready to drill. For a really clean result, drill a smaller pilot hole first. This acts as a guide for the larger drill bit, stopping it from wandering off-centre and reducing the risk of cracking the plaster.
Next, you'll insert your wall fixings. If you’re mounting onto solid brick, gently tap the wall plugs in until they're flush with the surface. For plasterboard walls, it's crucial to drive your fixings directly into the centre of the wooden studs you found earlier. For more on this, our guide to clothes rails and brackets has some great tips on choosing the right hardware for the job.
Now you can fix the brackets to the wall. Secure them firmly, but be careful not to overtighten and strip the screws. With the brackets up, attach the rail and do one last check with your spirit level to make sure everything is perfectly aligned.
Critical Safety Checks and Final Testing
Before you start loading up the rack, a couple of safety checks are paramount. The biggest potential hazard is hitting hidden electrical wiring or plumbing inside the wall. Always scan the area with a pipe and cable detector before you drill. Catching a live wire or a water pipe is a dangerous and expensive mistake to make.
It's also important to wear the right Personal Protective Equipment (PPE). At a minimum, safety goggles are essential to protect your eyes from dust and debris, especially when drilling into masonry.
Once the rack is fully assembled, give it a gentle stress test. Apply firm, downward pressure along the length of the rail and check for any movement or instability. A properly installed rack should feel completely solid, with no wobble or give whatsoever. This final check is your peace of mind that the rack is safe, secure, and ready for business.
Keeping Your Racks in Top Nick for Years to Come

You’ve invested in quality wall racks to organise your space and display your stock, but that's just the first step. To get the most out of them, a little proactive care goes a long way. Think of your racks like any other professional tool in your kit – regular maintenance keeps them safe, functional, and looking sharp for the long haul.
It’s easy to overlook, but small issues can snowball. A tiny chip in the paint on an iron rack can quickly become a patch of rust, and a slightly loose screw can put a surprising amount of strain on your wall. A simple, consistent check-up is your best bet against this kind of wear and tear.
A Simple Maintenance Routine That Works
You don't need a complicated schedule. Consistency is what really matters. A quick once-over each month is usually enough to spot problems before they get serious, especially in a busy shop or a damp stockroom.
Your routine really just boils down to two things: checking the rack itself and making sure it's still firmly attached to the wall.
- Quick Visual Check: Once a month, just run your eyes over the rack. Are there any signs of bending? Any deep scratches in the finish? Any tell-tale signs of rust starting on the metal?
- The Wobble Test: While you're at it, give the rack a firm (but not aggressive) push and pull. It should feel rock-solid. If you feel any give or see any movement at all, a fixing is probably working its way loose.
Honestly, this whole process takes about five minutes, but it gives you real peace of mind that your gear is secure and looking professional.
Cleaning and Care for Different Materials
Just as you wouldn't wash a silk blouse and a pair of denim jeans the same way, different rack materials need different care. Using the wrong stuff can actually cause damage, so it pays to know what you're working with.
Think of it like caring for different types of fabric. You wouldn't use the same method to clean delicate silk as you would for rugged denim. Each rack material has its own needs for optimal longevity and appearance.
Here’s a quick rundown on how to look after the most common materials:
- Stainless Steel: The enemy here is streaks. Your best friends are a microfibre cloth and a pH-neutral cleaner. To get that perfect, gleaming finish, always wipe in the direction of the metal's grain.
- Powder-Coated Iron or Steel: The finish is tough, but it can chip. A bit of mild soap and water is all you need for cleaning. If you spot a chip, get some matching enamel paint on it straight away to seal out moisture and stop rust from creeping in underneath.
- Wooden Bits and Bobs: A regular dusting with a soft cloth is a must. Every so often, treat the wood to a suitable oil or wax to stop it from drying out and cracking. It'll feed the timber and really bring out the beauty of the grain.
Slot these simple tasks into your normal cleaning schedule, and your wall racks will stay a reliable, good-looking asset for your business or studio for years.
Frequently Asked Questions
When you're fitting out a professional space, whether it's a bustling retail shop or a busy design studio, you need fixtures you can count on. It's only natural to have a few questions about getting it right, especially when safety and performance are top priorities.
We've pulled together the most common queries we get from retailers, tailors, and fitters just like you. The goal here is to give you clear, straightforward answers to help you choose and install your wall racks with complete confidence.
What Is the Maximum Weight a Wall Clothes Rack Can Hold?
This is a great question, but there's no single answer. The true capacity depends on a partnership between three things: the rack itself, the wall it's attached to, and the fixings you use. A lightweight bar mounted into plasterboard with standard plugs might only hold 10-15 kg before it starts to struggle.
On the other hand, a heavy-duty, industrial-grade rack bolted securely into solid brick or a wooden stud can easily handle upwards of 75 kg. Think of it like a chain – it's only ever as strong as its weakest link. Always start with the manufacturer's stated capacity, but remember that number assumes a perfect installation into a solid wall. Your job is to make sure your wall is up to the task.
Can I Install a Heavy Duty Rack on a Plasterboard Wall?
You absolutely can, but there's a non-negotiable rule: you must fix it directly to the wooden studs behind the plasterboard. The plasterboard itself is just a decorative surface; it has almost no structural strength. Trying to hang a heavy rack using only plasterboard fixings is a recipe for disaster.
If the studs aren't quite where you need them for your layout, there’s a classic trick of the trade. First, mount a solid wooden batten horizontally across the wall, making sure to screw it firmly into two or more studs. Then, you can mount your clothes rack anywhere along the batten. This simple step spreads the load and gives you a rock-solid foundation exactly where you want it.
Never rely on plasterboard alone to support a significant load. The secret to a secure installation on this type of wall lies in locating and utilising the hidden wooden framework, turning a seemingly weak surface into a robust anchor point.
How Do I Prevent Metal Racks from Rusting?
The best way to fight rust is to choose the right material from the get-go. If the rack is going into a potentially damp or humid area – think stockrooms, back-of-house, or laundry facilities – your best bets are naturally corrosion-resistant metals like stainless steel or aluminium.
If you're working with standard steel or iron racks, check that they have a tough, high-quality finish, like a thick powder coating. This layer is its shield against moisture. The key is to keep an eye on it. If you spot any deep scratches or chips in the coating, touch them up with a suitable paint straight away. This stops moisture from creeping in and getting to the raw metal underneath. Good air circulation in the room will also help keep humidity down.
What Is the Ideal Mounting Height for a Retail Display?
The perfect height really comes down to what you're selling and how you want your customers to feel. You're looking for that sweet spot between great visibility and easy accessibility, encouraging shoppers to reach out and touch the garments.
Here are a few industry-standard heights that work well in most retail settings:
- Tops and Jackets: Hanging the rail 150-165 cm from the floor is a good, comfortable height for browsing.
- Longer Garments: For dresses, long coats, or trousers, you'll want to go higher to prevent them from pooling on the floor. Aim for 175-185 cm.
- Tiered Displays: If you want to get more from your wall space, you can create a double-decker display. A high rail at around 180 cm paired with a lower one at about 90 cm works brilliantly for separates like shirts and skirts.
At Display Guru, we provide the robust, professional-grade wall clothes racks and fixtures you need to create functional and beautiful spaces. Explore our complete collection today to find the perfect solution for your boutique, studio, or workshop at https://www.displayguru.co.uk.