

Loose Fitting Clothes: How to Style, Measure and Test Fit
Buying a bigger size isn't a reliable way to get comfortable, well-balanced loose fitting clothes. It can give you a wider neckline, lower armholes and longer sleeves without putting useful room where you need it. Treat extra volume as a pattern-cutting decision: measure where it sits, check how the fabric hangs, and test what happens when the wearer moves.
What Loose Fit Really Means in Measurements
Loose fit isn't automatically good fit. Extra fabric can soften the silhouette, but it can also shift the garment backwards, bury the hands or leave the neckline standing away from the body.
There's good reason to design beyond a narrowly fitted block. The SizeUK project reported that more than 60% of UK shoppers had difficulty finding clothes that fit, and that the average female waist measurement had increased by 16.5 centimetres since the 1950s. Those findings support accommodating different proportions, not merely enlarging every pattern piece equally.
Ease is the difference between a finished garment measurement and the corresponding body measurement. Measure the body without adding an allowance, using a consistent method such as this guide to taking body measurements for clothes.
Fit categories and typical ease ranges
These are working relationships from drafting practice, not universal numerical bands. Set the actual allowance against the maker's own block, fabric and intended silhouette.
| Fit category | Bust or chest ease (approx.) | Shoulder placement | Typical garments |
|---|---|---|---|
| Close-fitting | Minimal positive ease in woven garments; stretch designs may use negative ease | At the natural shoulder point | Tailored jackets, stretch bodycon dresses |
| Relaxed | Enough additional circumference to skim the body and accommodate a light layer | At the shoulder or slightly dropped | Shirts, straight dresses, knitwear |
| Loose | Generous clearance through the body, checked separately at bust and hip | Deliberately dropped or shaped to the design | Tunics, wide shirts, blouses |
| Oversized | Exaggerated volume established through a tested sample | Pronounced drop where the design requires it | Coats, hoodies, boyfriend jackets |
A body-size label describes the intended wearer, not the finished garment. Ask for finished measurements on patterns and product listings, particularly when comparing different silhouettes.
For production, record those measurements alongside seam positions and tolerances. Genpire's explanation of what's inside a tech pack is useful context for turning a visual intention into instructions another maker can reproduce.
Start with the garment: Measure the finished chest width, shoulder drop and body length before deciding whether it's intentionally loose or simply too large.
How Ease and Drape Make Clothes Feel Relaxed
Ease is like headroom in a doorway. The space above your head lets you pass through without ducking, but extra height won't help if the doorway is too narrow. Clothing needs clearance in the right places, rather than an indiscriminate increase in size.
A walking outfit makes the relationship between room and movement easier to judge.
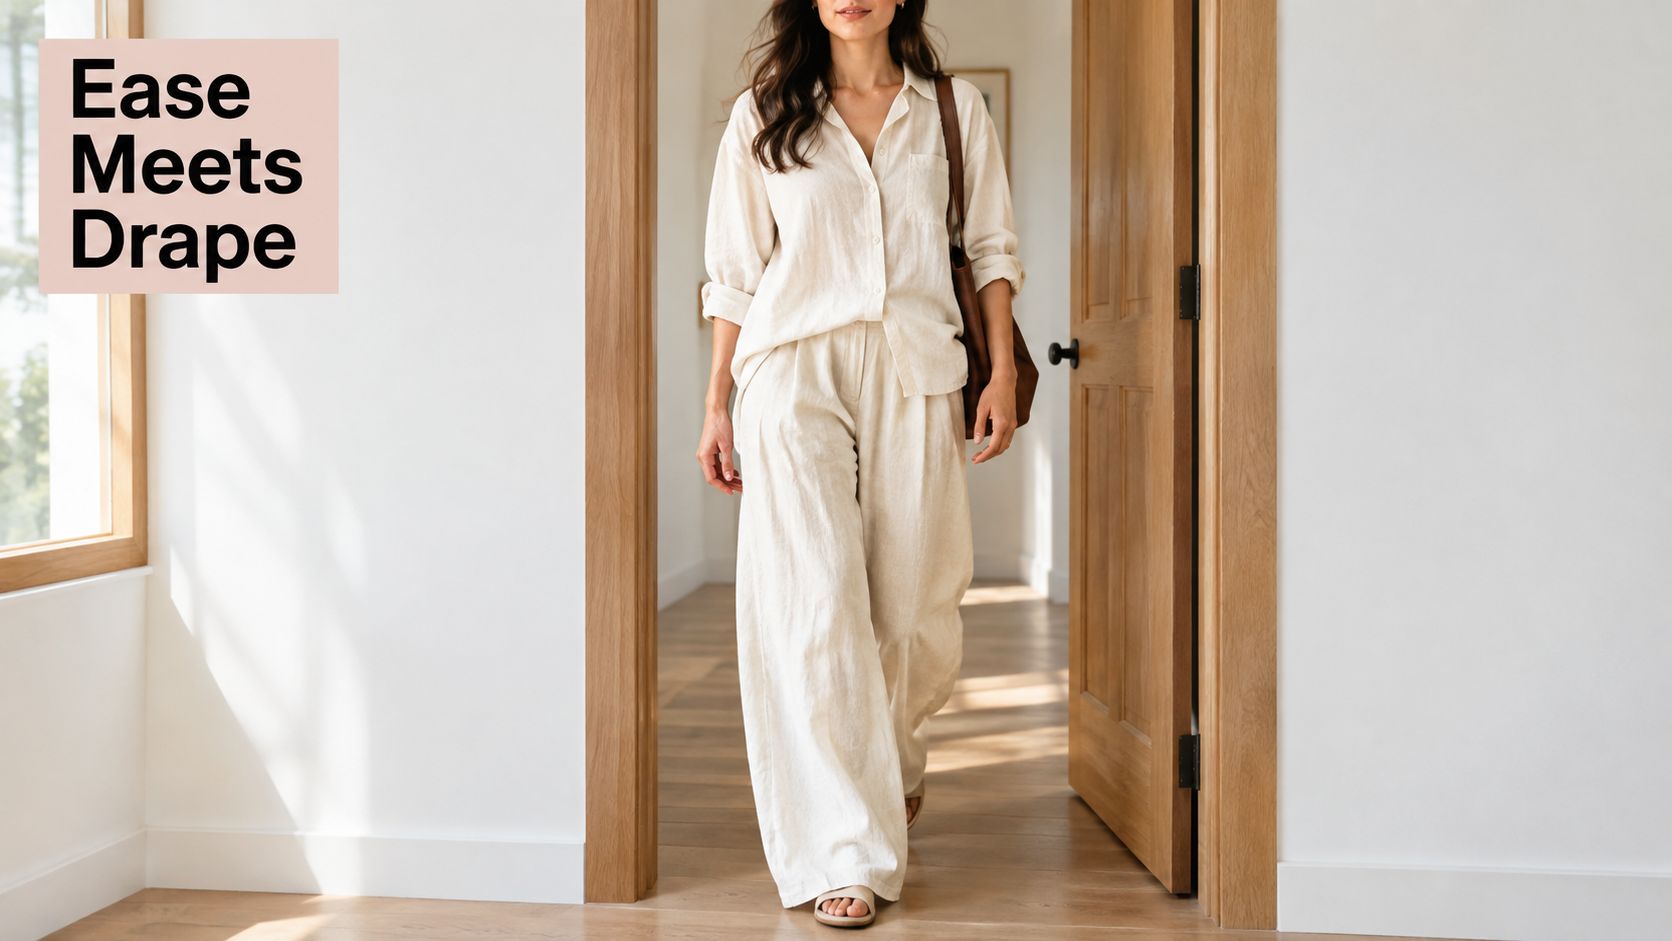
Drape is more like a curtain. Its folds depend on the cloth's weight, stiffness and suspension points, not just how much fabric you hang. A crisp shirting can stand away from the torso, while a supple cloth with the same dimensions can fall close to it.
Allocate room where the body needs it
Bust ease lets the front clear the chest without pulling the fastening. Hip and seat ease accommodate sitting, while thigh and knee allowances affect stepping and bending. A generous trouser leg won't compensate for a seat that's too short or a waistband that slips.
A University of Edinburgh trouser-fit study found dynamic air gaps of approximately 0.2–2.4 cm in loose-fit trousers, compared with 0.3–1.1 cm in tight-fit trousers and 0.3–1.7 cm in good-fit trousers. The changing gaps and garment sliding during movement explain why a still silhouette can conceal functional problems. The air gap isn't a drafting allowance that you can transfer to a pattern.
Check trousers while the wearer walks, bends and sits. Watch whether the waistband migrates, the front rises or the fabric catches behind the knee. For tops, check whether reaching forwards draws the whole garment across the back.
Read the folds before changing the pattern
Use a toile with behaviour reasonably close to the intended cloth. Heavy calico won't predict the fall of a fluid blouse, and a soft toile won't reveal how a stiff coating projects from the body. These fabric draping techniques help establish the relationship between grain, support and fall.
When communicating the design, draw folds from their actual support points rather than scattering decorative lines. The Online College of Art & Design's fashion portfolio sketching tips from OCAD provide a useful starting point for representing clothing clearly.
Judge the hang through fabric weight, ease at each body point and anchoring. Shoulders, waistbands and gathered hems each hold fabric differently.
Where Loose Fit Helps and Where It Fails
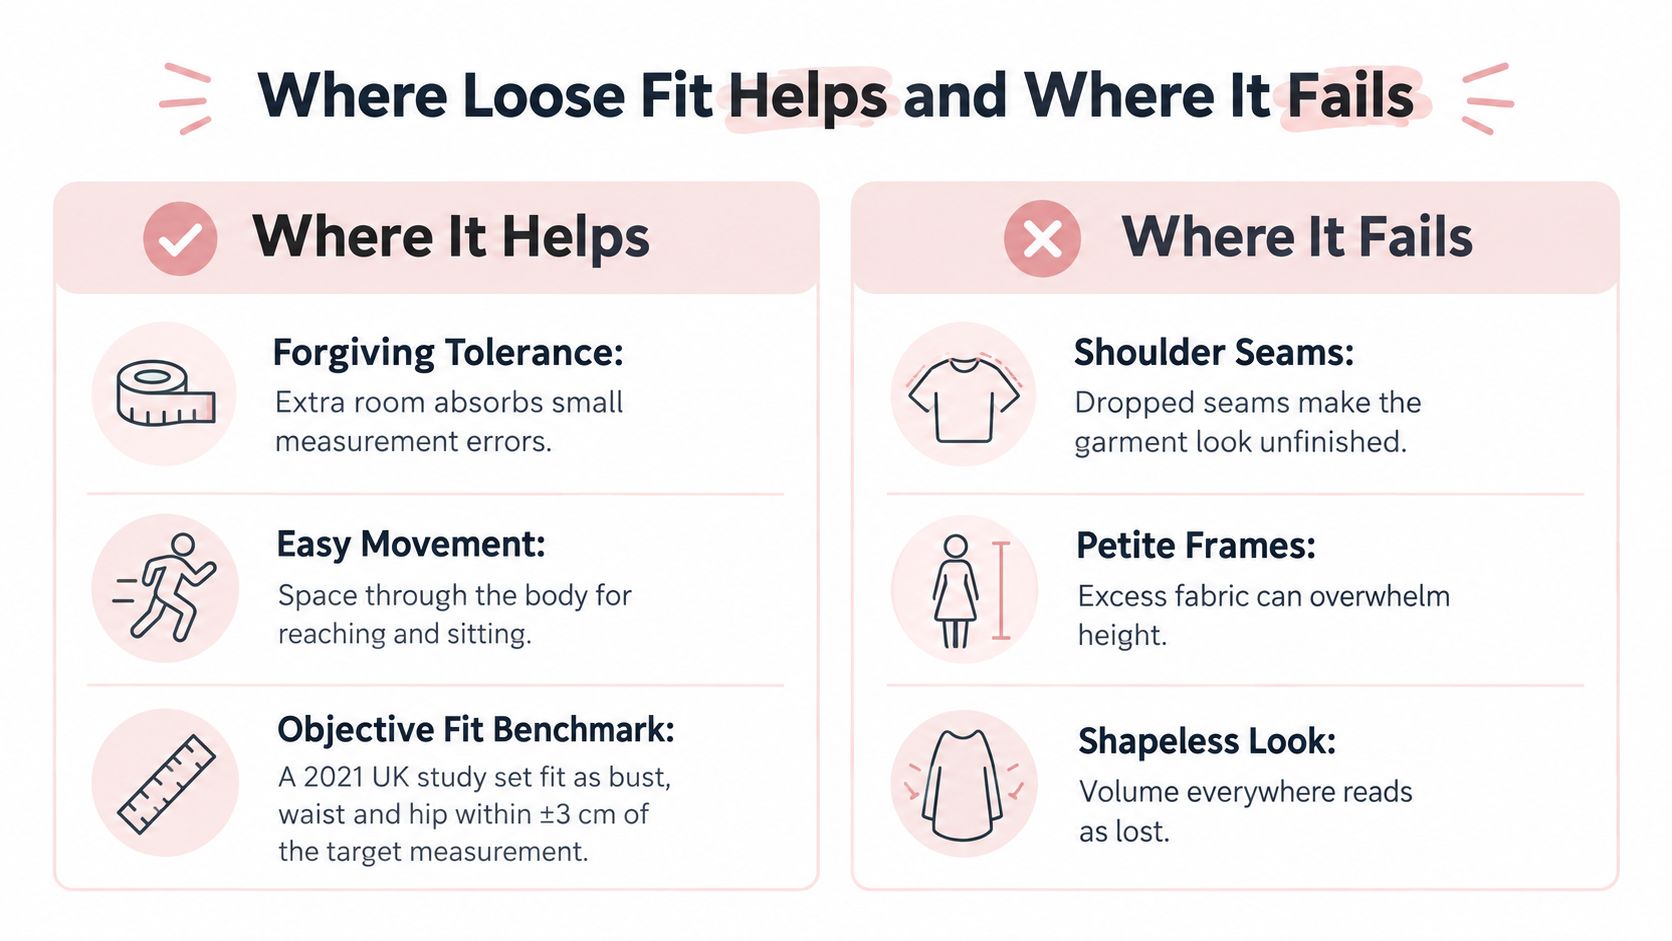
Loose fit widens the tolerance for small body-measurement differences. That's useful when dressing customers with different bust-to-waist or waist-to-hip relationships, particularly in garments that don't require close shaping.
A UK clothing-fit study published in 2021 defined objective fit as the wearer's bust, waist and hip measurements falling within plus or minus 3 centimetres of the retailer's corresponding size-chart measurements. Extra garment ease can reduce the practical consequences of a mismatch, but it doesn't change whether a wearer meets that study's size-chart definition.
The comparison below highlights the distinction between useful space and uncontrolled volume.
Useful clearance has limits
A relaxed shirt can accommodate a base layer without pressing its seams into the skin. An outer jacket needs clearance over the actual clothes worn beneath it, especially through the upper sleeve and back. For long working days, that's more useful than checking comfort over underwear alone.
However, a dropped shoulder isn't a fault by nature. It becomes a problem when its position looks accidental or prevents the sleeve from working correctly. Neither shorter stature nor a particular body shape rules out loose clothing, but length and fabric bulk need deliberate control.
A wide body also doesn't guarantee accessible dressing. Check neck openings, sleeve entry, garment weight and fastenings with the intended wearer. Side openings or low-force closures may help, while trailing hems and loose material near mobility aids may hinder.
Check fabric as well as cut
Added volume isn't the same as breathability. University of Manchester research found that lower-permeability clothing increased several thermal and humidity measures during exercise in windy conditions. For warm-weather workwear, specify fabric air permeability and assess moisture handling rather than relying on the silhouette.
Use these decision checks:
- Choose controlled looseness for layering, adjustable dressing and garments intended to skim changing body contours.
- Retain closer shaping where precise tailoring or secure positioning is essential.
- Avoid uncontrolled surplus around moving machinery, feet, wheels or equipment.
- Reject weight without purpose when heavy fabric creates tiring bulk rather than useful structure.
Styling Loose Clothes Without Looking Lost
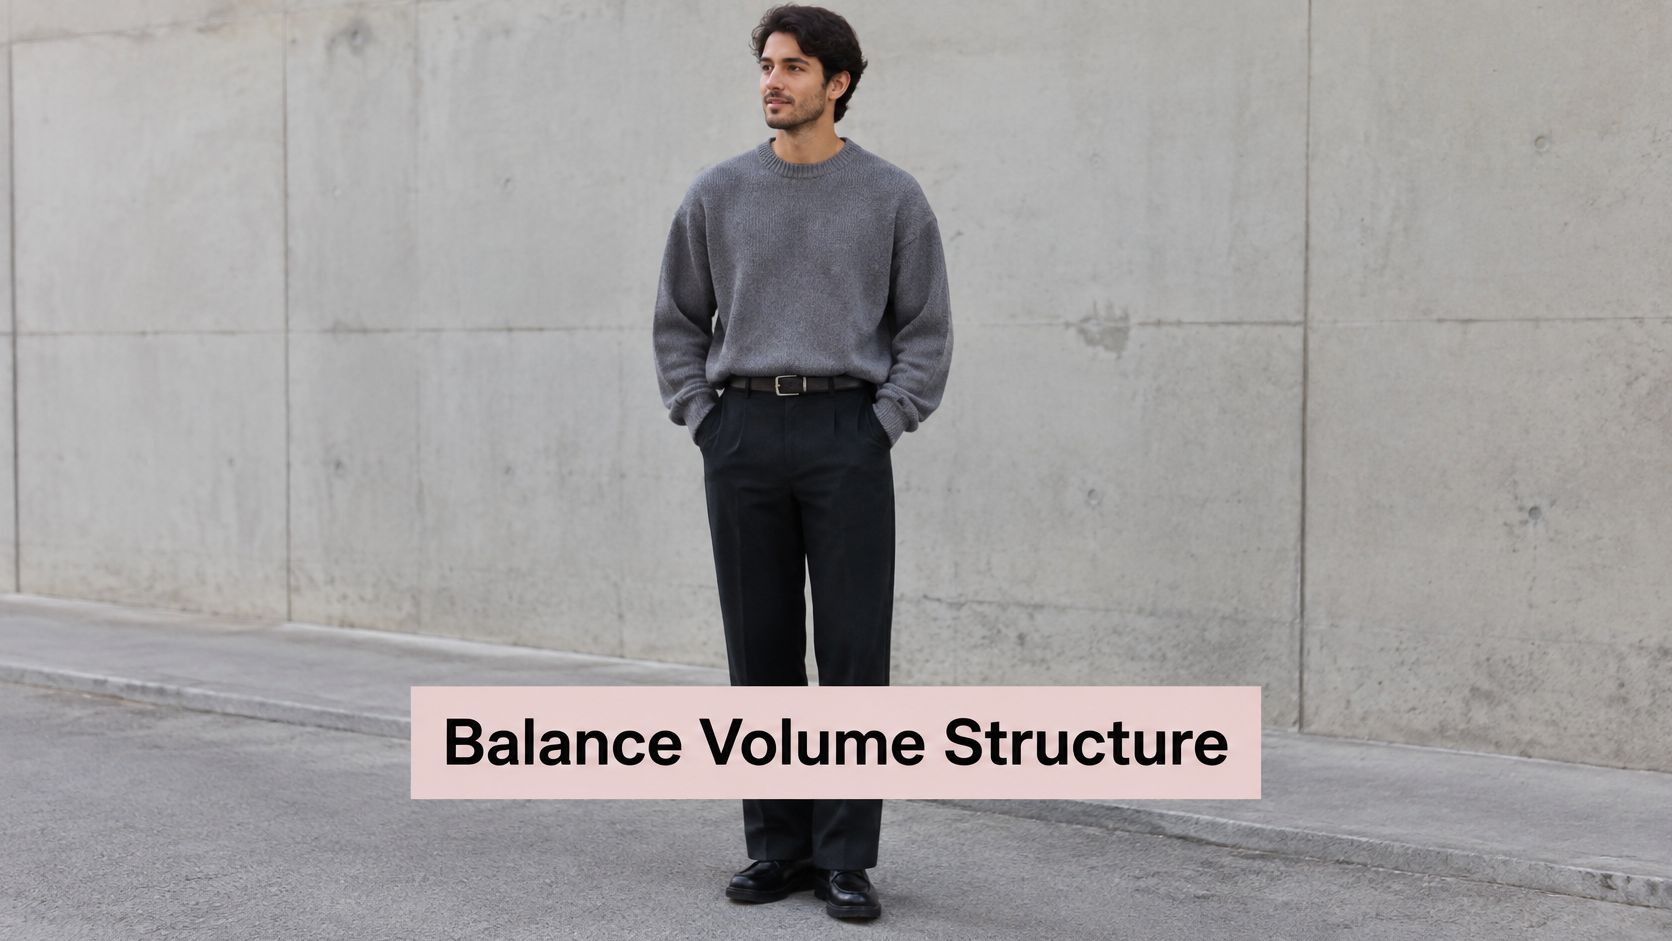
Balance a zone of volume with a zone of structure. Structure doesn't have to mean tight clothing. A defined waistband, neat cuff or deliberate trouser hem can give the eye a clear reference point.
This outfit shows how a restrained lower half can support a fuller knit.
Relaxed silhouettes also have clear commercial interest. John Lewis reported that searches for barrel-leg jeans rose 60% year over year in autumn/winter 2024, with the figure coming from its survey of 1,996 customers conducted in November 2024. Interest in volume doesn't remove the need to merchandise it with convincing proportions.
Loose-fit pairings and how they balance
| Pairing | How volume balances | Watch for |
|---|---|---|
| Oversized knit + slim straight trousers | Volume on top, clean line below | Fabric bunching at the ankle |
| Wide-leg trousers + fitted bodysuit or tucked top | Fitted upper anchors the wide leg | Tuck pulling at the hip |
| Relaxed shirt + belt at natural waist | Belt marks the waist and defines shape | Belt set too low, which shortens the line |
| Loose tunic + leggings | Narrow lower half offsets the tunic | Hem cutting the leg at its widest point |
Start by choosing the feature you want to emphasise. If it's the waist, arrange the blouse over the belt so the fabric blouses evenly rather than collapsing into a thick roll. If it's the trouser shape, keep the upper garment short enough or sufficiently controlled to reveal the waistband.
A tucked top needs room to remain tucked when the wearer sits. Pulling the fabric taut across the hips produces diagonal strain and often makes the front hem creep upwards. Release some cloth above the waistband before deciding that the trousers need altering.
Use the styling demonstration as a prompt to assess proportion on a moving wearer.
Make length deliberate
Pin proposed hems before cutting. Judge trousers with the intended footwear, and assess tunics from the side as well as the front. A hem that looks balanced head-on may project awkwardly over the seat.
For menswear, this guide to body types for men can help frame proportion decisions, but use actual shoulder, torso and leg relationships rather than treating a category as a prescription. Someone can need a broad upper garment and a shorter body length simultaneously.
Volume throughout an outfit can work when fabric, colour and lengths are controlled. It's less forgiving than combining a fuller garment with a cleaner counterpart.
The eye should reach the intended feature first, not a puddled cuff, strained tuck or accidental fold.
Measuring and Altering Loose Garments Correctly
Finished measurements are more dependable than an assumed brand size. In the Popsy Fit Fix report, only 1% of surveyed shoppers said their clothing size stayed consistent across brands, while 73% returned at least one online clothing item in the previous year because it didn't fit as expected.
Finished-garment measurement checkpoints
Measure with closures fastened, fabric smoothed and stretch materials unstretched. Keep seam allowances out of pattern measurements.
| Measurement | How to take it | Loose-fit check |
|---|---|---|
| Chest width | Lay flat, measure across the armpits and double | Compare the circumference with body bust and the approved block allowance |
| Shoulder drop | Measure from the natural shoulder point to the seam while worn | Seam reaches the intended position without twisting the sleeve |
| Armhole depth | Measure vertically from the marked shoulder reference to underarm level | Clearance supports reaching without excessive bodice lift |
| Body length | Measure from high shoulder point to hem | Front and back lengths suit the wearer and intended silhouette |
| Sleeve length | Measure from shoulder seam to cuff, with arms relaxed | Cuff reaches the intended wrist position without unwanted bunching |
| Hem width | Measure flat across the hem and double | Opening permits the intended stride or clears the hips |
For shirts, California Cowboy's guide to measuring chest and sleeve length is a useful reference for consistent measuring habits. Record your own landmarks, especially on dropped-shoulder designs, because a shorter sleeve piece can still produce a longer total shoulder-to-cuff reach.
Make alteration decisions in order
Size down when the garment is excessive throughout, not merely wide at the waist. Check that the smaller option retains adequate bust, upper-arm and hip clearance before choosing it.
Keep the usual size when the support points work. If the neckline, shoulder and upper sleeve sit correctly, don't sacrifice them to remove surplus lower down. Pin out the unwanted width locally instead.
Take in side seams where body width is the problem, blending smoothly into unchanged areas. Check pocket positions and the hem circumference before stitching. A substantial reduction may require redistributing shaping rather than taking everything from the sides.
Don't lower an armhole automatically to improve mobility. Lowering can help when the underarm genuinely cuts in, but an already deep armhole often makes the whole bodice lift with the arm. Check sleeve width, sleeve angle and underarm position together; raising the underarm or introducing a gusset may be the better correction.
Redraft an unintended shoulder drop with the sleeve head, rather than trimming the shoulder in isolation. Shorten an overlong hem only after correcting front-to-back balance. For cuff adjustments, use a method appropriate to the sleeve construction, such as those in this guide to shortening sleeves.
When grading between sizes, preserve the intended ease at each body level. Mark the revised stitching lines, notches, grainline and finished measurements on the pattern, then date the revision and identify the sample fabric. That record makes the next version repeatable.
How to Test Drape on a Mannequin or Body Form
A body form is a reference body, not a container to fill with fabric. Match its bust, waist, hip and relevant lengths to the wearer, padding where necessary, then establish visible centre-front, centre-back and waist references. Don't size the form to the finished garment circumference, because that removes the space you're trying to assess.
The visual sequence is a useful workshop reminder, but a full fitting also needs side-seam, back and movement checks.
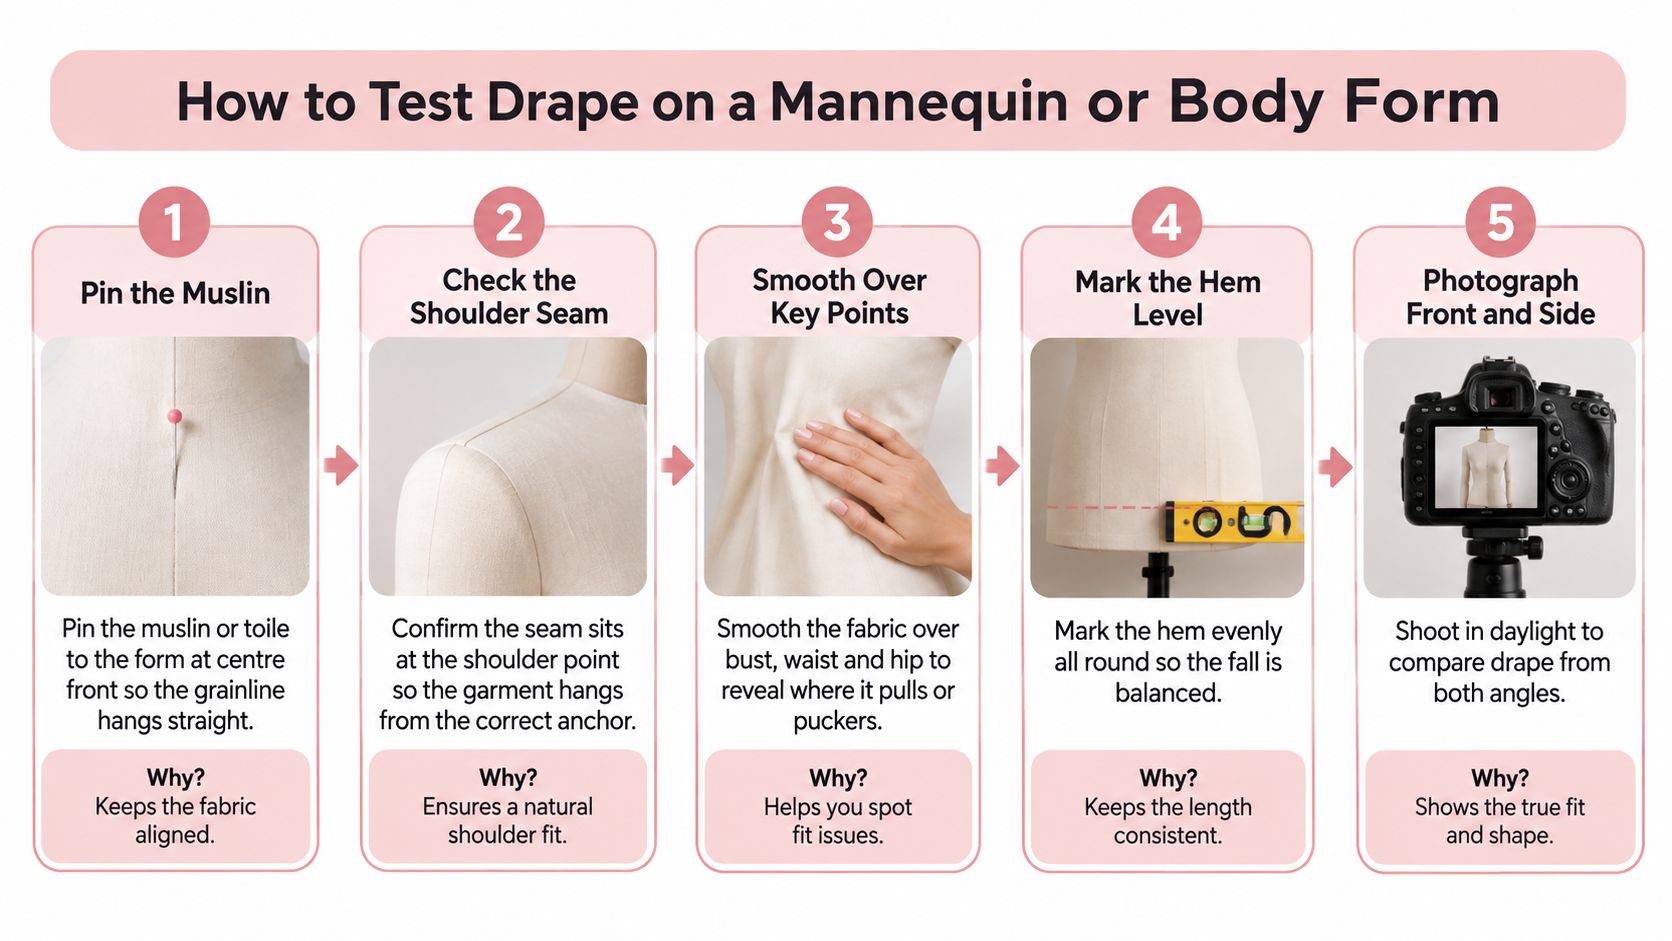
Establish the anchors before adjusting the fall
- Position the toile at centre front. Align its marked centre front with the form and secure it lightly without stretching. Check the grainline rather than assuming the cut edge is straight, because an off-grain toile can imitate a balance fault.
- Check the shoulder seam against the natural shoulder point or intended drop, then mark the position. Let the neckline settle without pulling it into place; forcing the neck flat can conceal a shoulder-slope or balance problem.
- Pin the side seams to the target allowance. Distribute room according to the design instead of forcing equal clearance everywhere. Keep horizontal balance lines level and avoid compressing padding or dragging the fabric backwards to make the front look cleaner.
- Let the toile settle, then mark the hem with a hem marker. Compare the front, side and back lengths from their established reference points, and correct the cause of an uneven fall before removing cloth from the longest area.
- Assess the armhole and sleeve together. On a jointed form, raise the arm gently; otherwise support the sleeve at the intended working angle without pretending this reproduces body movement. Watch where the bodice lifts and whether the sleeve twists, but reserve the mobility decision for a wearer.
- Walk around to the back and inspect it without smoothing away the evidence. Centre back should hang vertically unless the design specifies otherwise, and folds dragging towards the armhole, seat or neckline need investigation rather than pressing.
- Photograph front, side and back at a consistent height. Keep the camera level and the form in the same position, then compare seam placement and balance lines with the recorded measurement targets. Photographs are especially helpful for spotting a forward-pitched side seam or an unnoticed uneven shoulder.
Finish the fitting on a person
Use removable thread tracing or chalk to distinguish fitting marks from construction lines. This guide to sewing with a dummy offers practical context for using a form without relying on it for every fitting decision.
A static form shows suspension and balance, not comfort. Have the wearer walk, sit, reach forwards and return to rest, wearing the intended underlayers and footwear. Ask where they feel restriction, then check whether the garment settles without being tugged back into position.
A sound result has an even intended hem, a clean or deliberately dropped shoulder line and no pulling across the bust. Don't press the toile into submission before you've understood why it wrinkles.
Confirm the Fit Before You Cut or Buy
Use a final pass with the measurement sheet beside you. For an online purchase, request missing dimensions rather than guessing from a photograph; for a pattern, measure the stitching lines before cutting the main cloth.
- Confirm the chest allowance. Compare finished circumference with the wearer's measurement and the chosen block specification.
- Inspect shoulder and sleeve behaviour. Check the intended drop, then ask the wearer to reach overhead and forwards without holding the hem down.
- Approve length and openings. Test the body length with the intended outfit and check that the lower opening permits normal movement.
- Review the toile on a body-matched form. Mark bust tension, back drag and displaced seams before making corrections.
- Approve the actual fabric. Handle a useful sample for weight and stiffness, and assess permeability where warm-weather performance matters.
- Make the decision in motion. Accept the garment because its dimensions and behaviour work, not because the size label seems familiar.
Our polystyrene tailor dummies allow clothing and fabric to be pinned in place while you assess these corrections. Use pins to record the proposed change, then transfer it accurately to the pattern rather than relying on a temporary fold.
For professional production, the next step is specific: pin the first toile on a form matched to the wearer, complete a walking and sitting fitting, and release the pattern only after approving the corrected sample. For a home project, follow the same sequence before cutting fabric you can't replace.
Display Guru offers pin-friendly tailor dummies and body forms for fitting, alterations and garment presentation. Visit Display Guru to choose a form for your sewing space, then use your wearer's measurements to check the loose silhouette before committing to the final cut.