



Hooks for Sewing: Types, Sizes and How to Sew Them
You've finished the zip, pressed the waistband and tried the garment on. Standing still, everything meets neatly. Sit down, though, and the top edge opens, the hook twists or a small crease runs straight towards the fastening.
That's rarely solved by choosing the smallest hook you can hide. Good hooks for sewing work as part of a supported closure: the metal shape, stitching, fabric layers and direction of pull all need to agree.
Hook and Eye Types and Sizes at a Glance
Hook-and-eye fasteners have been documented in England since at least the 14th century, and Historic Jamestowne's account of clothing hooks and eyes records the wording “hook and eies” in a 1697 account associated with John Aubrey. The same account describes their use on men's breeches and doublets, not just women's clothing.
The basic arrangement remains useful because the hook can sit beneath an overlap while the receiving eye stays largely concealed. What changes between types is how they engage, how much room they need and how they transfer the pull into the garment.
Hook and eye types, UK sizes and load
| Type | Typical UK size | Best use | Load |
|---|---|---|---|
| Round eye and hook | Match the supplier's measured hook length to the available facing | Top of a zip, bodice tops, discreet closures | Light to medium |
| Spring hook and eye | Small dressmaking sizes, selected against the supplier's dimensions | General dressmaking and lingerie | Light to medium |
| Hook and bar | Select a waistband pattern that fits within the supported overlap | Trouser and skirt waistbands | High |
| Thread bar | Make to the hook's working reach | Fine fabrics where metal would show or dig in | Light to medium |
| Bodice hook | Choose a corsetry or bodice pattern to suit the supported closure | Corsetry and fitted eveningwear | Medium to high |
| Fur hook | Choose a coat-weight pattern that clears the fabric's thickness | Coats and heavier closures | High |
These load descriptions are selection guidance, not certified strength ratings. A coat hook stitched into an unsupported shell can fail before a smaller dress hook attached to a properly constructed facing.
A thread bar is a sewn receiving loop rather than a separate metal component. It gives you control over the length and finish, but its usefulness rests on secure anchoring and resistance to stretching.
Practical rule: Check the working space behind the garment edge, not just the space visible from the outside.
Inspect the hook's attachment loops, finish and engagement before buying a full batch. A cheap hook that catches the lining or arrives with rough edges isn't economical if it needs replacing after installation.
Dimensions differ between makers and batches, so check the supplier listing rather than assuming a familiar size label guarantees a familiar fit. Decide the load and acceptable visibility first, then choose the size.
Choosing the Right Hook for Each Garment
Choose by load path, not appearance. A round eye suits a discreet meeting point; a bar offers a broader bearing surface where a waistband pulls horizontally. The garment's construction should carry the strain without forcing the hook to twist sideways.
Hook choice by garment and stress point
| Garment | Closure position | Hook to use | Why |
|---|---|---|---|
| Lingerie | Back band and suitable strap closures | Small spring hook and eye | Neat for lightly loaded details; tensioned bands need appropriate support |
| Fitted dress or top | Top of a side zip or bodice | Round eye and hook | Discreet and low profile |
| Skirt | Waistband | Hook and bar | Broad bearing surface under daily strain |
| Trousers | Waistband | Hook and bar | Suits the horizontal pull during sitting and bending |
| Bridalwear | Back bodice and corset-style closure | Bodice hook for fitted tension; thread bar for lightly loaded finishing | Separates structural fastening from discreet finishing |
| Coat | Front closure beneath heavy fabric | Fur hook | Accommodates a heavier closure and fabric bulk |
| Costume | Waist, bodice or opening exposed to movement | Hook and bar or bodice hook | Supports repeated wear and deliberate, secure engagement |
For general dressmaking, More Sewing's hook-and-eye guidance specifies spring hooks in sizes 1–3, with common UK listings describing size 1 as approximately 12.5 mm and size 2 as 15 mm. Move towards a larger suitable fastener as strain increases, but confirm what the supplier measures before ordering.
Separate finishing from structural support
A hook above a dress zip should bring the top edges together without being used to haul a badly fitting bodice closed. If the zip ripples or its upper end spreads, check the zip installation and garment fit before changing hardware; this guide to sewing invisible zips is useful when that junction needs attention.
For corsetry and fitted eveningwear, use bodice hooks attached to the structural layers. A thread bar may suit a delicate finishing point, but it isn't a substitute for a tension-bearing fastening beneath a tightly fitted back.
Avoid these mismatches:
- Round eye on a strained waistband: Use a bar when the hook needs a broader receiving surface.
- Tiny fastener under heavy pull: Don't make the hardware inconspicuous at the expense of secure engagement.
- Strong hook on an unsupported shell: Carry the attachment into the facing or interlining rather than relying on decorative fabric.
Before buying, ask how much pull the closure takes, how visible it can be and how heavy the fabric is. Those answers narrow the choice more reliably than the garment name alone.
How to Sew a Hook and Eye Step by Step
Gather a fine hand-sewing needle, suitable sewing thread, tailor's chalk or a removable marker, tacking thread and small scissors. Work with the facing accessible so you can secure the fastening without leaving unwanted stitches on the garment's right side.
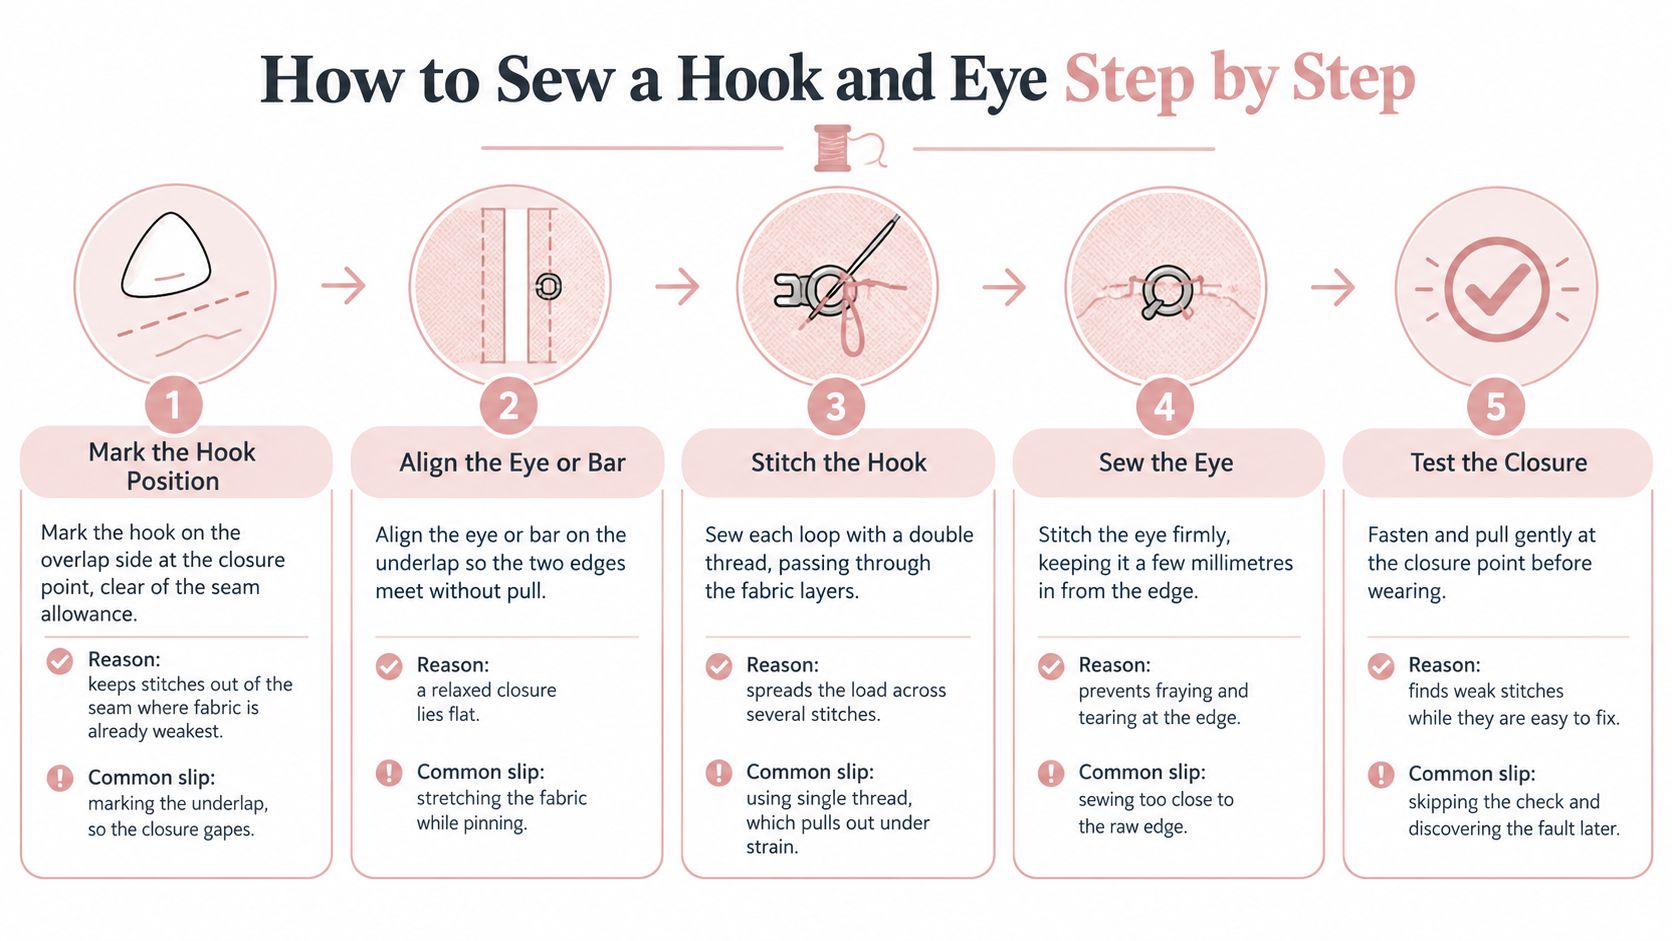
Use the illustrated sequence to orient the parts before marking the garment.
Position, tack and sew
- Mark the hook on the overlap. Place it on the inside at the intended closure point, with its attachment loops on sound, supported fabric clear of the raw seam allowance. Keep the hook's nose concealed, but leave enough reach for it to engage without dragging the edge inwards.
- Align the eye or bar on the underlap while the garment is worn or supported on a dress form. Let the edges settle naturally before marking, because stretching them together produces a closure that looks tidy on the table but pulls when released.
- Tack both components before permanent sewing. Use small temporary stitches that hold the metal flat without gathering the cloth. Skipping this stage lets the hook rotate while you work, particularly on slippery linings.
- Fasten the garment and try the movements it must accommodate: sit, bend and raise the arms as appropriate. If the edges gape, the hook lifts or the wearer feels concentrated pressure, reposition the components rather than sewing over the problem.
- Secure every attachment loop with closely spaced stitches. Use doubled suitable sewing thread, taking each stitch into the facing and structural support while keeping the outside clean where the construction permits. A lone strand of fine thread is a poor shortcut at a loaded closure, but excessively thick thread can also damage delicate cloth.
- For a thread bar, anchor the thread securely at each end, build the bridge to suit the hook's reach, then cover it tightly with buttonhole stitches. Finish with a secure bar tack at the anchorage; a loose bridge can lengthen and allow the edges to separate.
- Fasten and test again after finishing. Permanent stitches can shift a component slightly, especially if they're pulled too tightly. Remove the tacking only when the finished closure engages freely and stays flat.
Keep the stitches firm, not strangled
Pull each stitch snug against the metal, not hard enough to dent the fabric. If a loop starts sinking into the facing, stop and inspect the support rather than adding more tension.
For stitch formation and finishing methods, use these sewing techniques alongside a scrap made from the garment's actual layers. Practising on plain cotton won't reveal how a slippery lining or loosely woven shell behaves.
The video gives another view of handling the hook and receiving eye during attachment.
A correctly sewn closure leaves the edges lying flat, without visible stress lines or exposed hardware on the right side. It should engage deliberately, not require the wearer to wrestle the fabric into position.
Common Hook Failures and How to Fix Them
A smaller hook isn't automatically kinder to delicate fabric. If its attachment concentrates force into a weak patch of cloth, a slightly larger hook on a well-supported facing can be the more durable choice.
Hook failure symptoms, causes and fixes
| Symptom | Likely cause | Fix |
|---|---|---|
| Hook pulls free under strain | Undersized hook or sparse stitching through its loops | Inspect the support, move up a size if needed and sew each loop closely |
| Waistband gapes when sitting | Incorrect placement or insufficient overlap | Reposition the receiving bar using the garment's worn position |
| Puckering around the hook | Unsupported lightweight fabric or stitches pulled too tight | Stabilise the area and resew without gathering it |
| Fabric tears at the attachment | Stitching carried only by the outer shell | Repair the damaged area and attach through sound facing or interlining |
| Hook shows on the right side | Prominent eye, exposed hook nose or incorrect setback | Correct the setback; use a thread bar or lower-profile eye where suitable |
| Hook slips off the eye | Misalignment or insufficient engagement | Re-tack on the worn garment; replace a shallow or distorted hook |
Check the relationship between the fastening and the finished garment edge before committing to new stitching.
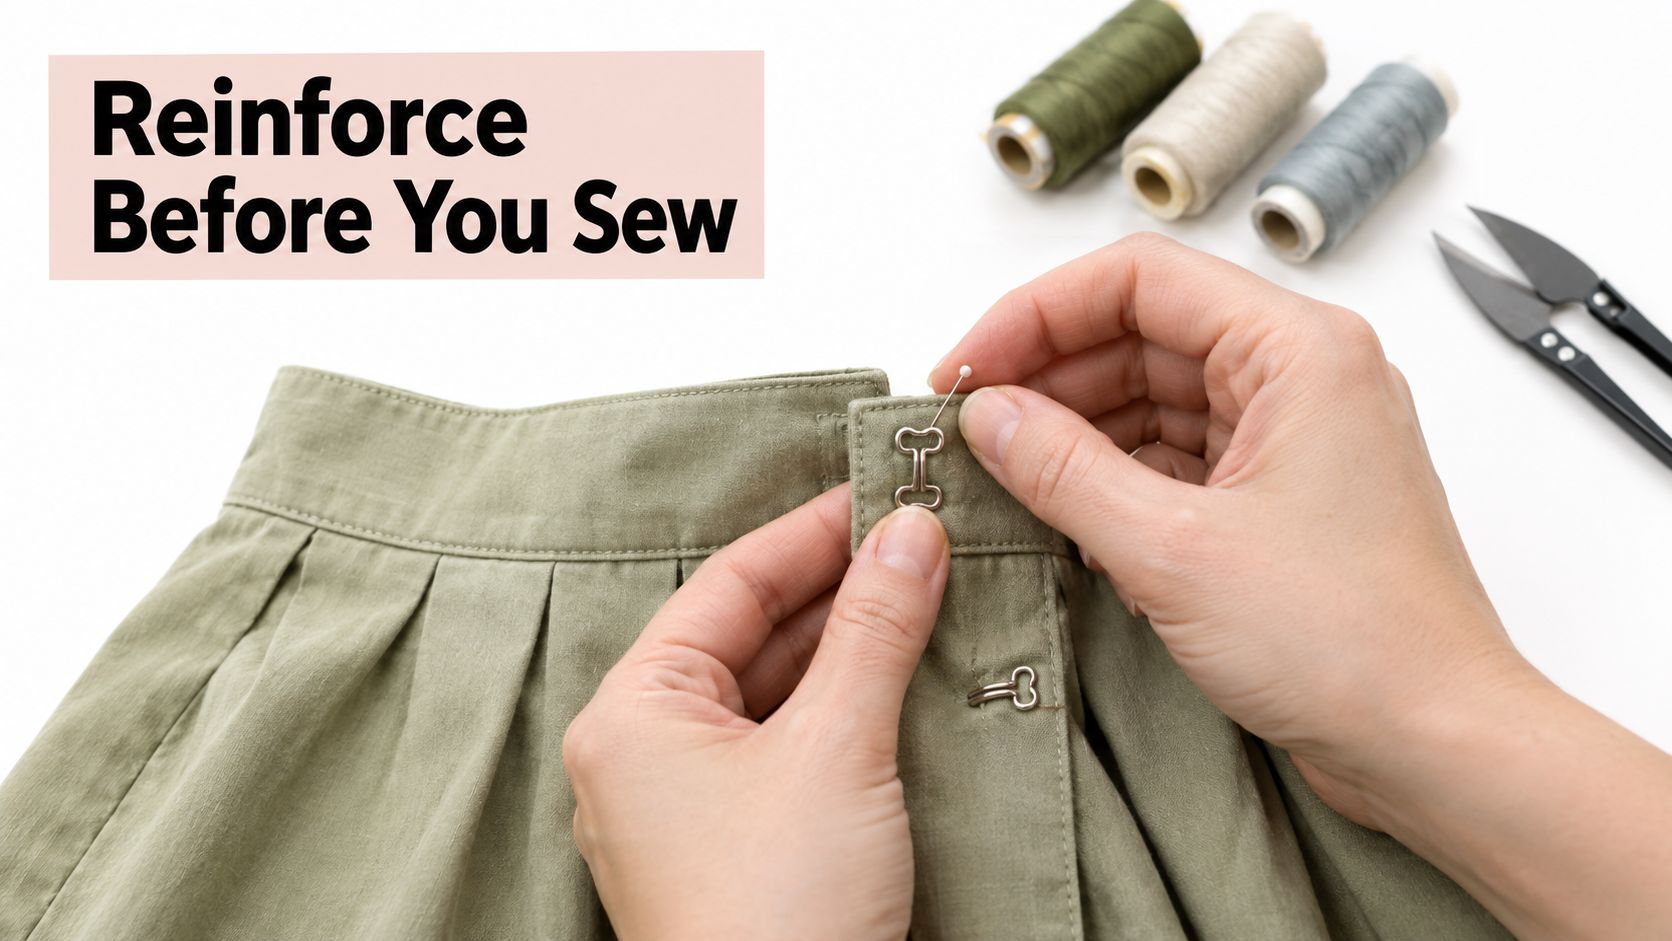
Fix the construction beneath the symptom
There's no universal overlap allowance. Provide enough supported cloth to contain the attachment loops and conceal the hook while the edges meet without strain; don't borrow wearing ease to create that overlap.
Choose a thread bar when a metal eye would print through fine cloth or press against the wearer, provided the position isn't carrying substantial fitted tension. For lightweight fabric, test a compatible fusible interlining patch on a scrap, checking adhesion, handle and show-through before applying it inside the facing. Use sew-in support if heat or adhesive would mark the cloth; this explanation of interfacing in sewing helps distinguish the options.
Diagnose what failed before adding more stitches. Torn cloth needs sound reinforcement, not a denser knot in the damaged area.
The European attached-fastener testing specification provides a useful professional comparison framework: at least five replicate specimens, conditioning at 20 ± 2 °C and 65 ± 4% relative humidity, and extension at 100 ± 10 mm/min. It concerns attached metal press fasteners in children's clothing, not certification of ordinary sewn hooks; borrow its controlled comparison and failure reporting, not a claim of compliance.
How to Test a Hook Before You Trust It
Build a repeatable comparison
Make a matching set of samples for each proposed hook, fabric and interlining combination. Keep the thread, stitch spacing, seam allowance and reinforcement consistent, and mark matching attachment positions with a ruler or sewing tape measure. Remake any sample whose construction differs, because it won't provide a fair comparison.
Let the samples rest together in stable room conditions rather than comparing freshly steamed fabric with dry scraps. Fasten each closure and apply force in the direction the garment will pull, supporting the cloth without clamping directly onto the hardware. Stop and reset if the fixture distorts the closure before loading starts.
A constant-rate tensile tester gives controlled loading and a maximum-force reading. Without one, a securely supported fixed weight can provide a repeatable comparative check, but an unmeasured hand tug can't produce a defensible force result; keep suspended weights low and clear of feet. Pass only against a service load you've deliberately chosen, not against whatever pull feels convincing.
Record the failure, not just the result
Use a short log for each sample:
- Hook pulls free: Record whether its stitches dragged through the cloth.
- Fabric tears: Note the tear's starting point and direction.
- Stitches fail: Inspect for broken thread, abrasion or an insecure finish.
- Metal deforms: Note bending, opening or loss of engagement.
Reject a construction if any sample shows premature pull-out or fabric breakdown under the intended load. An intact hook doesn't constitute a pass when the surrounding garment has failed.
Don't apply this gripping arrangement indiscriminately to eyelets or rivets, because the grips can damage the component itself. Keep comparative workshop testing separate from any formal product-safety assessment.
Confirm Your Hook Choice on a Tailor's Dummy
- Identify the garment's stress point and choose the matching closure type.
- Sew a sample using the intended fabric layers and attachment method.
- Run the pull check and inspect the failure signs.
- Position the proposed closure on a tailor's dummy.
- Complete the final attachment only after the edges sit correctly.
A dummy makes it easier to inspect a curved bodice, waistband or overlapping front without holding the garment up by hand. Check the closure from the side as well as the front: a hook can look aligned head-on while its receiving eye tips away from the body.
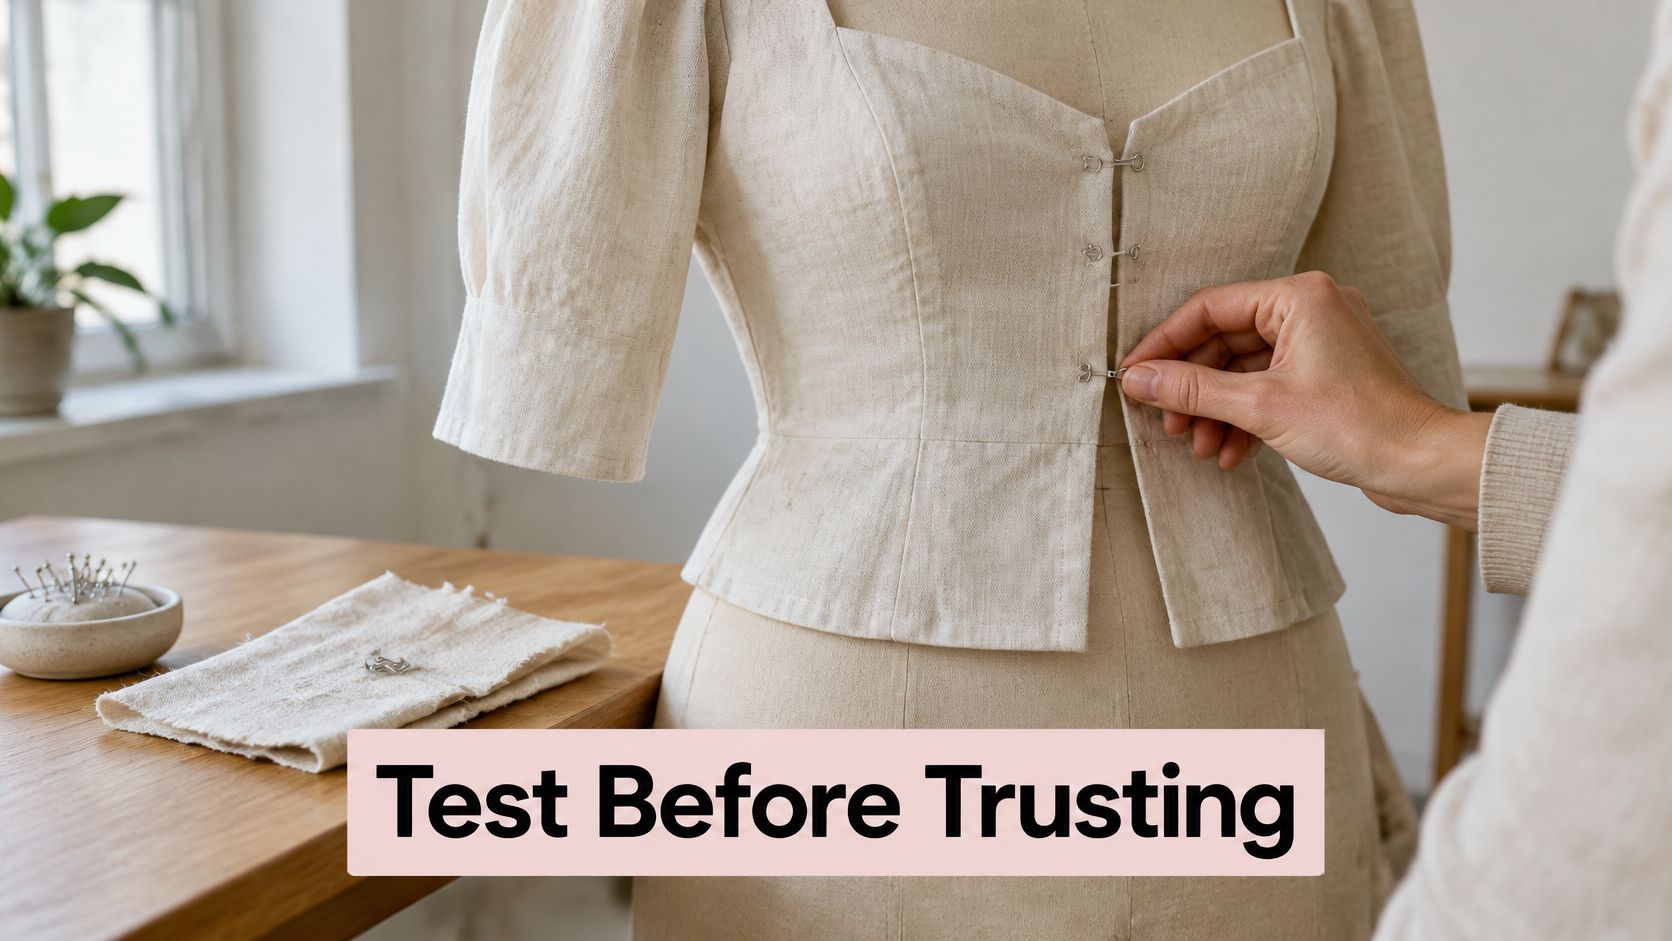
Use the form to examine the whole opening, not just the metal components.
Check shape without disguising poor fit
Pin the garment at its intended seam and waist positions, then let the opening settle before adjusting the fastening. Don't pin a strained edge flat merely to make the hook reach; that hides the alteration the garment needs.
Our polystyrene tailor dummies allow secure pinning of clothing and fabric for fittings and alterations, with female forms offered in sizes 6/8, 8/10, 10/12, 12/14, 16/18 and 18/20, with tripod or round-base stands. Choose by the garment's actual fitting requirements rather than the label alone, and use this tailor's dummy fitting guide to plan the setup.
A form checks shape and alignment. The wearer still needs to confirm comfort and movement.
Choose the hook, sew the sample, run the pull test and fit the opening before making the permanent attachment. Start with the garment's most heavily loaded closure, not its easiest decorative fastening.
Display Guru offers pin-friendly polystyrene tailor dummies for garment fittings and alterations. Visit Display Guru to choose a form for checking hook alignment, overlap and the finished shape before you sew the closure permanently.