




How to Knit in Lace for Garments and Panels
You've knitted the lace panel, counted the repeats, and held it up beside the garment. On the needles, it looks more like a collection of uncertain holes than the airy fabric you pictured. The stocking stitch is familiar, but the lace seems uneven, slightly lopsided, and nowhere near ready for a sleeve, yoke, shawl or costume panel.
That gap between lace mechanics and finished lace is where most disappointment begins. Yarn overs, paired decreases and slipped stitches create the structure, but washing, pinning and fitting reveal the design. The work isn't finished when the last stitch leaves the needle.
Why Knitting in Lace Trips People Up
At the worktable, the first problem is often not the stitch count. It's the expectation that lace should already look elegant before finishing. Unblocked knitting is compressed by the yarn's natural tension, so eyelets can appear closed and motifs can seem to lean. A panel may be technically correct and still look disappointing until it has been washed and opened out.
Three faults account for much of the trouble. Loose edge tension can flare the sides while the centre remains controlled. A missed yarn over or decrease can make a repeat pull into a wedge. Judging the fabric before blocking encourages unnecessary ripping, because the geometry hasn't had a chance to show itself.
Read the fabric before undoing it
Lay the piece flat and inspect the repeated structure. Look for paired decreases, eyelets that should sit opposite one another, and a consistent number of stitches across the row. If the stitch count is stable but the fabric looks cramped, finishing may solve the visual problem.
UK guidance from the Knitting & Crochet Guild on correcting lace mistakes recommends placing a marker at each repeat and adding a smooth cotton lifeline after a correct repeat. That gives you a controlled stopping point rather than forcing you to unpick every stitch.
Practical rule: Don't judge lace by its appearance on the needle. Check the count first, then wash and block a meaningful section.
The useful progression is straightforward. First, make a balanced swatch that lets you see the motif. Next, block a panel to its intended proportions. Finally, transfer that knowledge to the garment, where edge stability, seam placement and body shape matter as much as the holes themselves.
Choosing Yarn, Needles and Patterns for Lace
For a first lace project, choose materials that make mistakes visible. A smooth DK-weight wool or wool and silk blend in a solid or semi-solid colour is a dependable starting point. The yarn has enough substance to handle comfortably, while its surface allows each yarn over and decrease to remain distinct.
The Knitting & Crochet Guild's beginner guidance for lace knitting specifically recommends beginning with something heavier than lace weight, such as DK, because fine yarn is harder to see and control. That advice matters even more when the finished piece will be blocked on a board or fitted over a form.
A 3.75 mm straight or circular needle is a practical starting choice for DK, although your swatch decides the final size. A slightly larger needle than you'd normally use can open the eyelets, but going too large may produce fragile loops and an unstable edge. Smooth metal or polished wood helps stitches move cleanly without catching the yarn.
| Element | Recommended Default | Why It Works |
|---|---|---|
| Yarn | Smooth DK wool or wool-silk blend | Clear stitch definition and manageable handling |
| Colour | Solid or semi-solid | Keeps the lace motif visible |
| Needles | 3.75 mm straight or circular | Opens the pattern without making it too loose |
| Pattern | Charted, four-row repeat with rest rows | Makes the repeat easier to recognise |
| First sample | 10 cm square in one motif | Gives a useful tension reference before committing |
A chart usually suits repeat-based lace because symbols show how eyelets and decreases relate spatially. Written instructions can be better for a shaped sleeve, neckline or armhole, where row-by-row changes are easier to follow in words. Whichever format you choose, select a pattern with a quiet row or rest row while you build confidence.
For more preparation around fabric work and equipment, keep your wider sewing supplies organised before casting on. Then knit a 10 cm square in one complete motif, wash it as you plan to wash the garment, and use the blocked sample as your tension reference.
Reading and Working a Lace Repeat
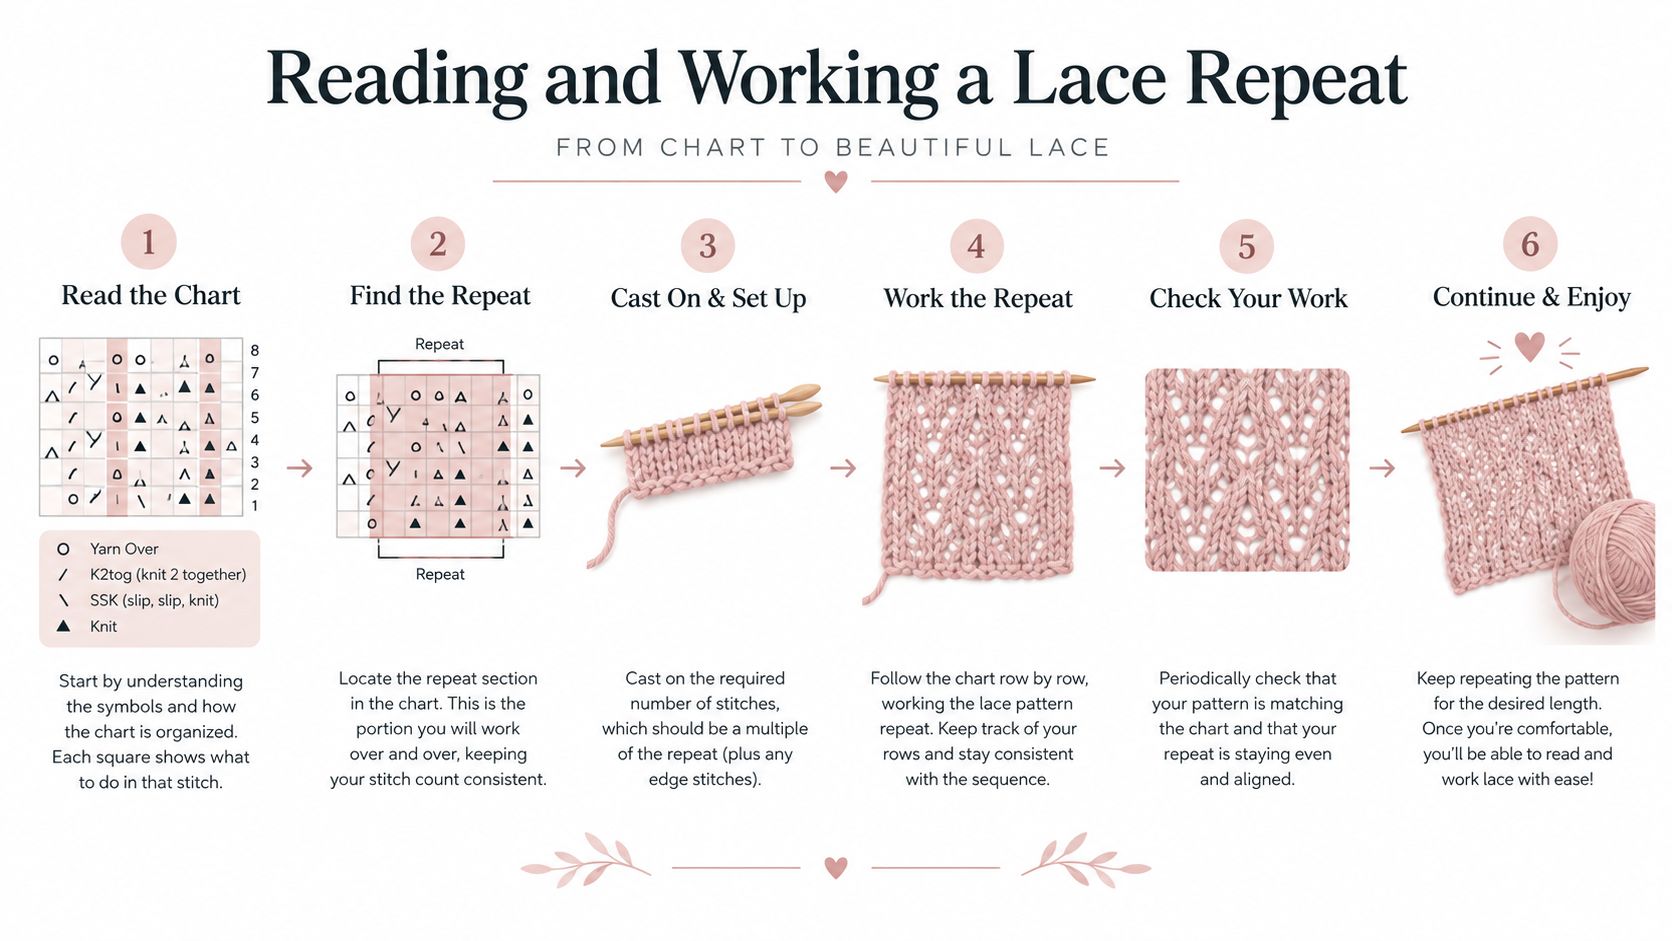
Treat a yarn over and its paired decrease as one balanced action. The yarn over adds a deliberate loop and creates the eyelet. The decrease removes a stitch, so the row returns to its planned stitch count. If you see them as unrelated tricks, it's easy to create a hole without preserving the shape of the fabric.
Work a small leaf motif
Use an 18-stitch swatch and divide it into three six-stitch repeats. Work rows one to four twice. On each pattern row, follow the chart from the correct direction, place every yarn over deliberately, and complete the decrease that balances it. On the return rows, work the stitches as instructed rather than improvising because the eyelets look uneven.
A chart symbol represents a stitch action, not a decorative suggestion. A blank square may mean a knit stitch, a circle may indicate a yarn over, and a slanted symbol may show the direction of a decrease. Always read the key supplied with your pattern because symbols vary.
Place a marker at each six-stitch repeat. After completing a correct repeat, thread a thin, smooth cotton lifeline through the live stitches. The guide to reading sewing patterns uses a different craft context, but the same discipline applies here, follow the visual key and verify each instruction before acting on it.
Catch errors while they are small
Count the stitches at the end of every pattern row. If the count has changed, inspect the last repeat before continuing. A missing yarn over often leaves an extra decrease unsupported, while a forgotten decrease leaves the next repeat with too many stitches.
Read the chart row by row, not motif by motif. Confident lace knitters don't scan for a leaf and then guess its continuation. They track each symbol, move the marker, and confirm the repeat before starting the next one.
Tension, Lifelines and Common Lace Mistakes
Lace tension has two separate effects. It controls the size of the eyelets, and it controls whether the repeat lies flat. With 4ply yarn on 5 mm needles, a starting baseline can be 18 stitches over 10 cm in stocking stitch, but that figure is a swatching reference, not a universal lace rule. Your lace fabric may require a different needle once you've assessed the blocked result.
Loose yarn overs can create oversized holes and stretched edges. Tight yarn overs can close the eyelets and make the motif look dense. The Knitting & Crochet Guild's troubleshooting advice for lace stresses even tension and blocking, because the final shape often becomes clear only after the fabric has been stabilised.
Use lifelines as controlled risk
Insert a lifeline after a correct repeat, and use the repeat boundary as your regular checkpoint. Thread contrasting smooth yarn through the live stitches with a tapestry needle, keeping it clear of the working yarn. If the next section fails, remove the needles, unravel to the lifeline and place the stitches back on the needle.
| Problem | Likely Cause | Immediate Check |
|---|---|---|
| Eyelets look closed | Yarn overs worked too tightly | Compare the loop size with earlier repeats |
| Holes are oversized | Yarn overs worked too loosely | Relax the working yarn before the next repeat |
| Motif forms a wedge | Missed or misplaced decrease | Count stitches against the chart |
| Edge flares | Row-end tension drifts | Work the first and last stitches consistently |
| Pattern shifts | A row was repeated or skipped | Check the row marker before continuing |
Lost decreases often appear after a size change, where the knitter concentrates on shaping and overlooks the lace balance. Twisted stitches can also distort a motif if the loop is pulled tight or mounted incorrectly. If two rows have accidentally been worked together, stop immediately, identify the last confirmed row and use the lifeline rather than guessing.
Keep a short checklist beside the work:
- Count: Confirm the stitch total at the end of each pattern row.
- Balance: Match every yarn over with its required decrease.
- Markers: Check each repeat separately.
- Lifeline: Add one after a clean repeat.
- Block: Wash and pin before judging the fabric.
For seam preparation, the same attention to stable edges applies when learning what stay stitching does. Lace has more movement than woven fabric, so a controlled edge is especially valuable when the panel will become part of a garment.
Blocking, Overlay and Finishing Decisions
Blocking and overlay solve different problems. Wet blocking reveals the lace, while an overlay gives it support and opacity. Choose according to the end use, not according to which method feels easiest at the swatching stage.
For wet blocking, wash the panel gently, press out water without wringing, and place it on blocking mats. Use rust-proof pins to set the schematic measurements, then pin the edges at 2 cm intervals so curves and points open evenly. Leave the work flat until completely dry, allowing 24 to 48 hours depending on the fibre, fabric thickness and room conditions.
This route suits a Shetland-style shawl, scarf or detachable panel because it preserves drape and stitch definition. It won't provide structural support, and a very delicate fabric may relax after wear or laundering.
Overlay finishing starts with accurate alignment. The UK method described in this guide to applying knitted lace places the lace behind stocking-stitch fabric, with the purl side facing the knitter, then knits each base stitch together with its matching eyelet. The process is row by row, not adhesive, so the eyelets must remain aligned and the final eyelet must not be cut during trimming.
| Factor | Wet Blocking | Overlay on Backing |
|---|---|---|
| Drape | Preserves the natural fall | Adds body and control |
| Opacity | Leaves the openwork visible | Can provide a covered foundation |
| Best use | Shawls and detachable panels | Bodice yokes, sleeve insets and costume |
| Main risk | Shape may relax later | Misaligned eyelets or bulky attachment |
| Equipment | Mats, rust-proof pins and a spray bottle | Backing fabric, pins and careful mounting |
For acrylic blends, use mist and gentle shaping rather than assuming steam will behave like wool. Heat can flatten texture or permanently alter the fabric. If the piece will be handled frequently, test the finishing method on the swatch before committing to the garment.
Decorative borders can also be planned alongside lace trims for sewing, but don't use a trim to disguise an unstable edge. Stabilise the knitted fabric first, then add the finishing detail.
Shetland-Style Lace and Heritage Techniques
Not every openwork fabric is Shetland lace. True Shetland lace is a specific heritage practice, traditionally hand-knitted on wires using a knitting belt, and Heritage Crafts describes it as extremely delicate and intricate in its overview of Shetland lace knitting. It developed as a demanding form of fine work associated with wedding shawls, where clarity, delicacy and edging symmetry carry real importance.
That distinction changes your finishing plan. Traditional work may use very fine yarn, wires and an edging knitted onto the shawl rather than a simple sewn border. The fabric needs careful opening and support, and a small mistake in tension can become obvious when the full design is stretched.
Everyday lace-look knitting is more forgiving. DK or 4ply creates a denser fabric that can suit a jumper panel, cuff, yoke or costume insert without specialist heritage equipment. It blocks more readily, holds its proportions more comfortably and gives beginners a clearer view of each stitch.
Heritage technique isn't just a visual style. It dictates the yarn, the scale of the motif, the amount of blocking and the way the edge should be built.
If you want to study Shetland charts without starting with the finest yarn, adapt the motif in a heavier yarn and accept a different scale and drape. The chart may remain useful, but the result shouldn't be described as an authentic cobweb-weight shawl. Be precise about what you're making. A modern lace garment can be inspired by Shetland work without claiming the same construction or heritage method.
Fitting and Presenting Finished Lace Work
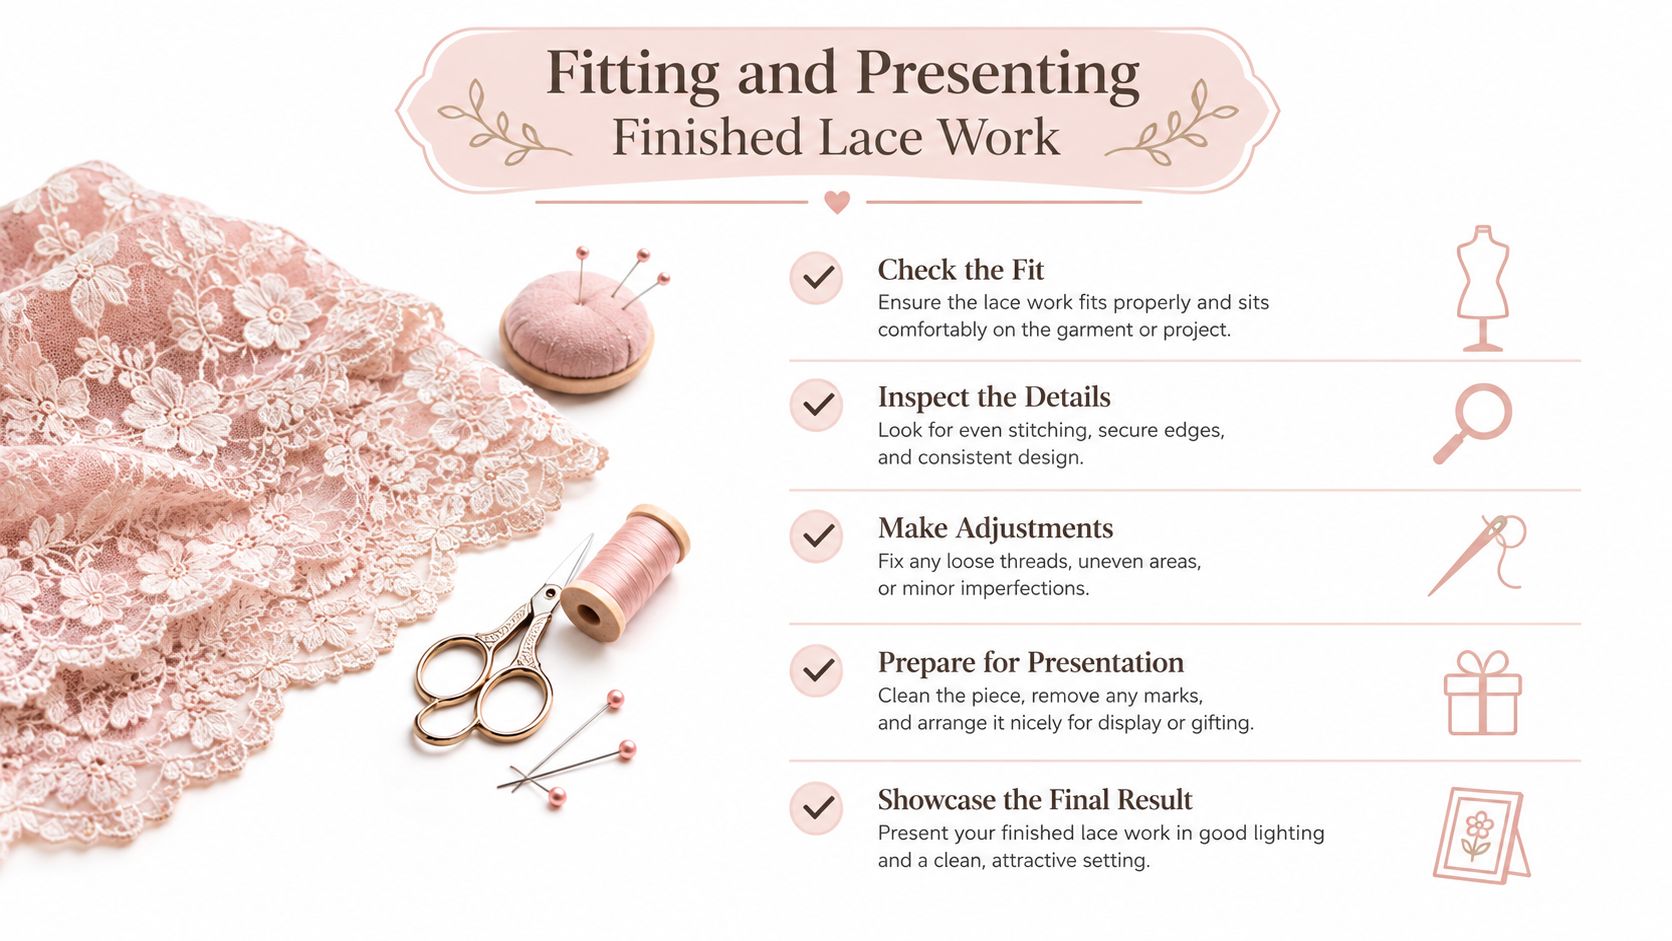
The blocking mat establishes the measurements. A padded dress form shows whether those measurements behave properly on a body. Move the finished piece onto the form only after it is dry, then pin along the side seam, balance line and armhole to check the hang, motif alignment and shoulder slope.
For a garment panel, place the right side out and avoid pulling individual eyelets into position by force. If a shoulder line needs settling, use light steam only where the fibre permits it, keeping the iron or steamer away from raised texture. Fine lace can look perfect on a flat board and still sit awkwardly across a curve.
Flat pieces need their own inspection. Put a yoke, cuff or inset panel right side up on a gridded mat, square the selvedges and measure from stable landmarks rather than from a single loose edge. If one motif sits a centimetre off the intended line, re-block that area selectively before trimming or stitching.
Keep costume work reversible until it is proven
For theatre and costume projects, pin the lace to a calico toile first. Mark stitch counts and balance points on the form, assess the fabric under the intended lighting, then mount it onto the final garment. This keeps the lace airborne and lets you correct placement without committing the finished piece too early.
A dress form fitting workflow is most useful when you treat it as a measurement tool, not merely a display surface. Photograph the pinned piece before stitching so you have a record of the approved placement.
Use this final checklist:
- Hang length: Check the panel from the intended body line.
- Motif symmetry: Compare the centre and side repeats.
- Edge security: Confirm that the edging won't distort during attachment.
- Surface control: Look for flattened texture or stretched eyelets.
- Client record: Photograph the pinned arrangement before sewing.
Finish by reviewing the garment on the form from front, side and back. Lace succeeds when the holes, fabric weight and body shape work together, not when the stitch chart alone is correct.
Display Guru supplies pin-friendly mannequins, tailor dummies, body forms, garment rails and display equipment for fitting, blocking preparation and presenting finished knitwear. Choose the form or studio solution that matches your garment and visit Display Guru to organise the final stage of your lace project with greater control.