


Hanging Rails Wardrobe: A Guide to a hanging rails wardrobe setup
Choosing the right hanging rail system is the bedrock of any organised wardrobe. Get it right, and you have a functional, durable setup for years. Get it wrong, and you're in for a world of frustration with sagging rails and cramped space. It really boils down to matching the material's strength and finish to what you plan to hang on it.
Selecting The Right Hanging Rails For Your Needs
When you're a professional, whether a retail merchandiser or a costume designer, you need to cut through the noise and pick the right hardware for the job. This is about more than just a metal bar; it’s about aligning the rail's capabilities with its daily demands.
For example, a busy theatre's costume department, crammed with heavy, ornate garments, absolutely needs industrial-grade steel rails that can take a serious beating. On the other hand, a high-end boutique might focus more on the aesthetic, opting for a sleek, polished chrome finish to complement the store's design.
The material and its finish are two sides of the same coin. A smooth, powder-coated finish ensures hangers glide effortlessly and won't snag delicate fabrics like silk or chiffon. In contrast, an untreated metal rail could rust or tarnish, potentially ruining valuable stock.
Hanging Rail Material and Finish Comparison
To simplify your choice, here’s a quick-reference table breaking down the most common materials we see in professional setups. Think of it as a cheat sheet for matching the rail to its purpose.
| Material Type | Typical Load Capacity | Best For | Display Guru Recommendation |
|---|---|---|---|
| Chrome-Plated Steel | High (50-70 kg per metre) | Retail displays, modern wardrobes, heavy-duty home use. | Our top pick for combining a sleek, professional look with exceptional strength. It’s a true workhorse. |
| Powder-Coated Steel | High (50-70 kg per metre) | Back-of-house storage, stockrooms, situations needing a specific colour. | Offers the same durability as chrome but with a smooth, protective finish that's gentle on fabrics. |
| Stainless Steel | Very High (70+ kg per metre) | Industrial settings, damp environments, commercial kitchens. | The ultimate choice for longevity and resistance to corrosion, though often at a higher price point. |
| Aluminium | Low to Medium (15-30 kg per metre) | Lightweight applications, temporary displays, children's wardrobes. | A lighter, more affordable option, but we advise against it for heavy professional use as it can bow. |
Ultimately, steel-based rails—whether chrome-plated for a polished look or powder-coated for smooth functionality—offer the reliability that professional environments demand. They provide the best balance of strength, appearance, and value.
Assessing Your Load Requirements
First things first: you have to get a realistic idea of the total weight your hanging rail will need to support. It’s easy to underestimate this. Think carefully about the clothing you’ll be storing.
- Light-Duty: This is fine for everyday items like shirts, blouses, and lightweight dresses. A standard residential rail might just about cope.
- Medium-Duty: If you're storing a mix of garments, including a few jackets, jeans, and skirts, you'll need something a bit more robust.
- Heavy-Duty: This is non-negotiable for stockrooms, design studios, or any wardrobe holding a large number of winter coats, leather jackets, or formalwear.
I've seen it time and time again—people underestimate the cumulative weight of their clothes. Just one metre of densely packed shirts can easily top 20kg. For any professional application, you should always default to a heavy-duty solution. It’s just not worth the risk of a rail bowing or completely failing. We cover this in much more detail in our guide on choosing your heavy-duty wardrobe rail.
Maximising Your Hanging Space
Smart organisation is also about making the most of the space you have. One of the most effective tricks in the book is installing a double closet rod system. This simple change instantly doubles your capacity by creating separate zones for shorter items like shirts and trousers, all without needing a bigger wardrobe.
The push for smarter storage solutions is clear. With urban living spaces shrinking, the UK wardrobe organisation market is on the up, projected to grow by 7.5% CAGR between 2025 and 2035. For professionals, this trend is even more pronounced. Hanging rails have become strategic display tools, with a recent survey showing 42% of UK visual merchandisers now use modular systems to improve product visibility and drive sales.
Key Takeaway: Choosing a hanging rail isn't just a practical task; it's a strategic one. Base your decision on three core factors: the weight of your garments, the delicacy of the fabrics, and the overall aesthetic you want to achieve. A well-chosen rail protects your clothes, streamlines your space, and perfects your presentation.
Measuring Your Space for a Flawless Installation
When it comes to fitting wardrobe rails, guesswork just won't cut it. A few millimetres can be the difference between a perfectly sleek, functional wardrobe and one that’s a constant source of frustration. The old saying ‘measure twice, cut once’ is a golden rule here, ensuring every bit of your space is put to good use.
First things first, grab a reliable tape measure and check the internal width of your wardrobe or alcove. Don't just measure once. Take a reading at the top, another in the middle, and one more at the bottom. It's rare for walls to be perfectly parallel, so to be safe, always use the smallest of these three measurements. This simple step prevents the headache of cutting a rail that’s just too long to fit.
Next, let's talk depth. For a standard adult hanger to sit comfortably without your clothes getting crushed, you need an internal depth of at least 60cm. Anything shallower and you'll find sleeves snagging on the door or garments getting creased against the back panel.
Accounting for Key Clearances
Getting the basic width and depth right is a great start, but there are a few other critical clearances that people often forget. Miss these, and you could spoil an otherwise perfect job.
- Bracket and Fixture Depth: Remember that the support brackets themselves take up space. They aren't paper-thin. You need to factor in their projection from the wall when working out your final usable hanging depth.
- Hanger Clearance: To get hangers on and off the rail without a fight, you need a bit of room above it. I always recommend leaving at least 5-7cm of clearance between the top of the rail and any shelf or ceiling above.
- Garment Drop Length: Think carefully about what you’ll be hanging. A long coat or dress needs a drop of around 165-180cm from the rail. For shirts, blouses, and jackets, you're looking at about 100-105cm.
A classic mistake is measuring the wall-to-wall width and ordering a rail of that exact length. You must subtract the thickness of the support brackets. For instance, if your alcove is 120cm wide and each bracket is 0.5cm thick, your rail needs to be cut to 119cm for that snug, professional fit.
To really nail the layout, understanding optimal walk-in closet dimensions can be a massive help, even if you're just working with a small alcove. It gives you a feel for how to plan a space that’s both functional and feels uncluttered. For more hands-on advice, our guide on wardrobe rail fitting walks you through the entire process.
Picture setting up a rail in a small bedroom. You could easily double your hanging space with a two-tier system. By placing one rail at 105cm for shirts and a second one above it at 210cm for trousers folded over hangers, you effectively double your storage capacity without taking up any more floor space. It’s these kinds of clever solutions that all start with precise, thoughtful measurement.
Your Practical Wardrobe Rail Installation Guide
You’ve taken your measurements and picked the perfect hanging rail – now for the hands-on part. A solid installation is what makes all the difference, turning a good wardrobe into a great one that can stand up to years of use. Don't be daunted; with the right tools and a bit of care, getting it right is simpler than you think.
First things first, let’s get your toolkit sorted. You won't need a full workshop, but having these essentials on hand will make the job a whole lot easier and safer.
- A reliable stud finder: If you're working with plasterboard walls, this is an absolute must-have. It’s the only way to find the solid wood studs that provide the strongest possible anchor points.
- A spirit level: Crucial for getting a perfectly horizontal rail. No one wants a wonky rail where all the hangers slide down to one end.
- An electric drill and the right drill bits: The bit you need is dictated by your wall material. You’ll need a wood bit for MDF wardrobe panels, a masonry bit for brick, and a standard bit for plasterboard.
- The correct wall fixings: For solid walls, standard screws and plugs will do the job. But for plasterboard, you need something more robust, like spring toggles or heavy-duty self-drilling anchors, to spread the load effectively.
Marking and Drilling with Precision
With your tools laid out, it's time to mark up where your brackets will go. Grab your spirit level and a pencil, and draw a faint, perfectly level line where you want the top of your brackets to sit.
Next, hold a bracket in position at one end of your line and carefully mark the screw holes. Do the same for the other end, and if you have a long rail, mark for any central support brackets as well.
Before you even think about drilling, take a moment to double-check everything. This is your last chance to make any easy adjustments. A common mistake when drilling into plasterboard is pushing too hard and damaging the surface – let the drill do the work.
This simple sequence—measure, level, and mark—is the bedrock of a professional-looking installation.
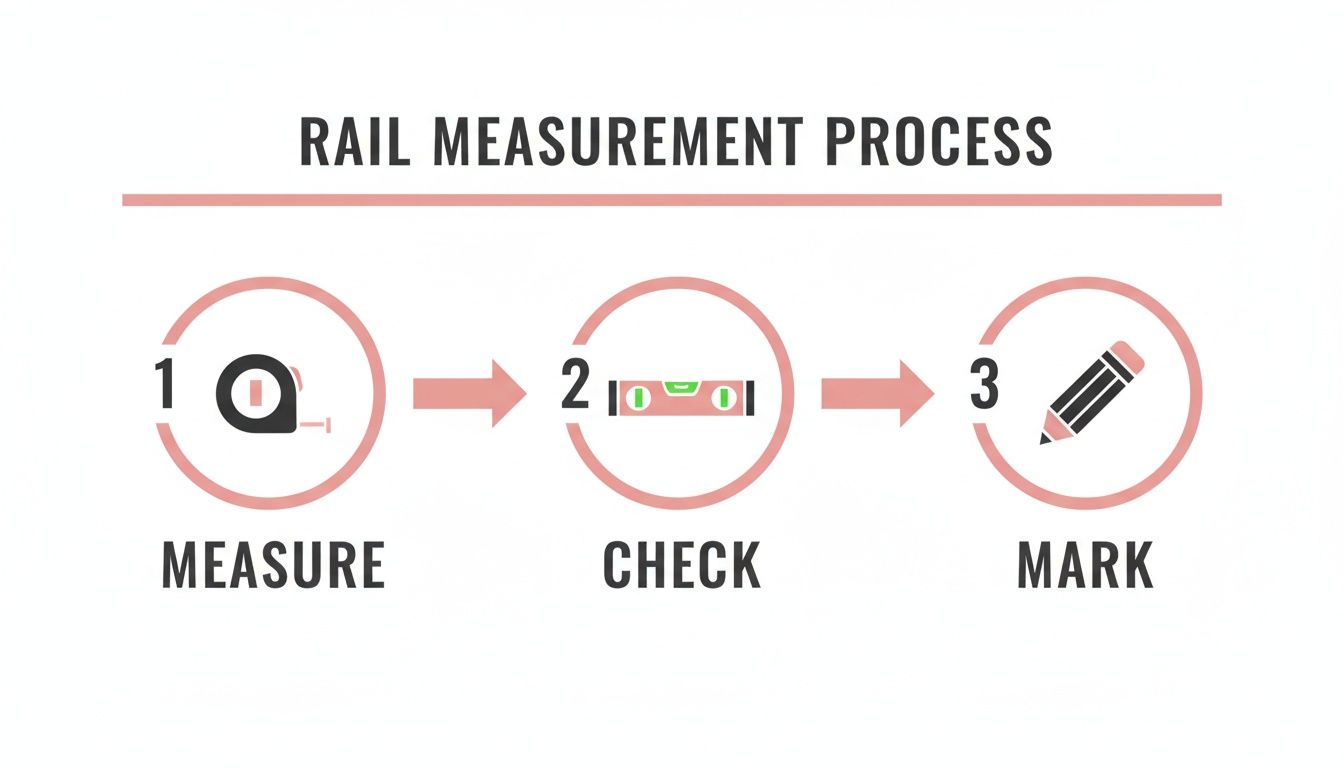
Getting this part right prevents the most common installation headaches and sets you up for a flawless finish every time.
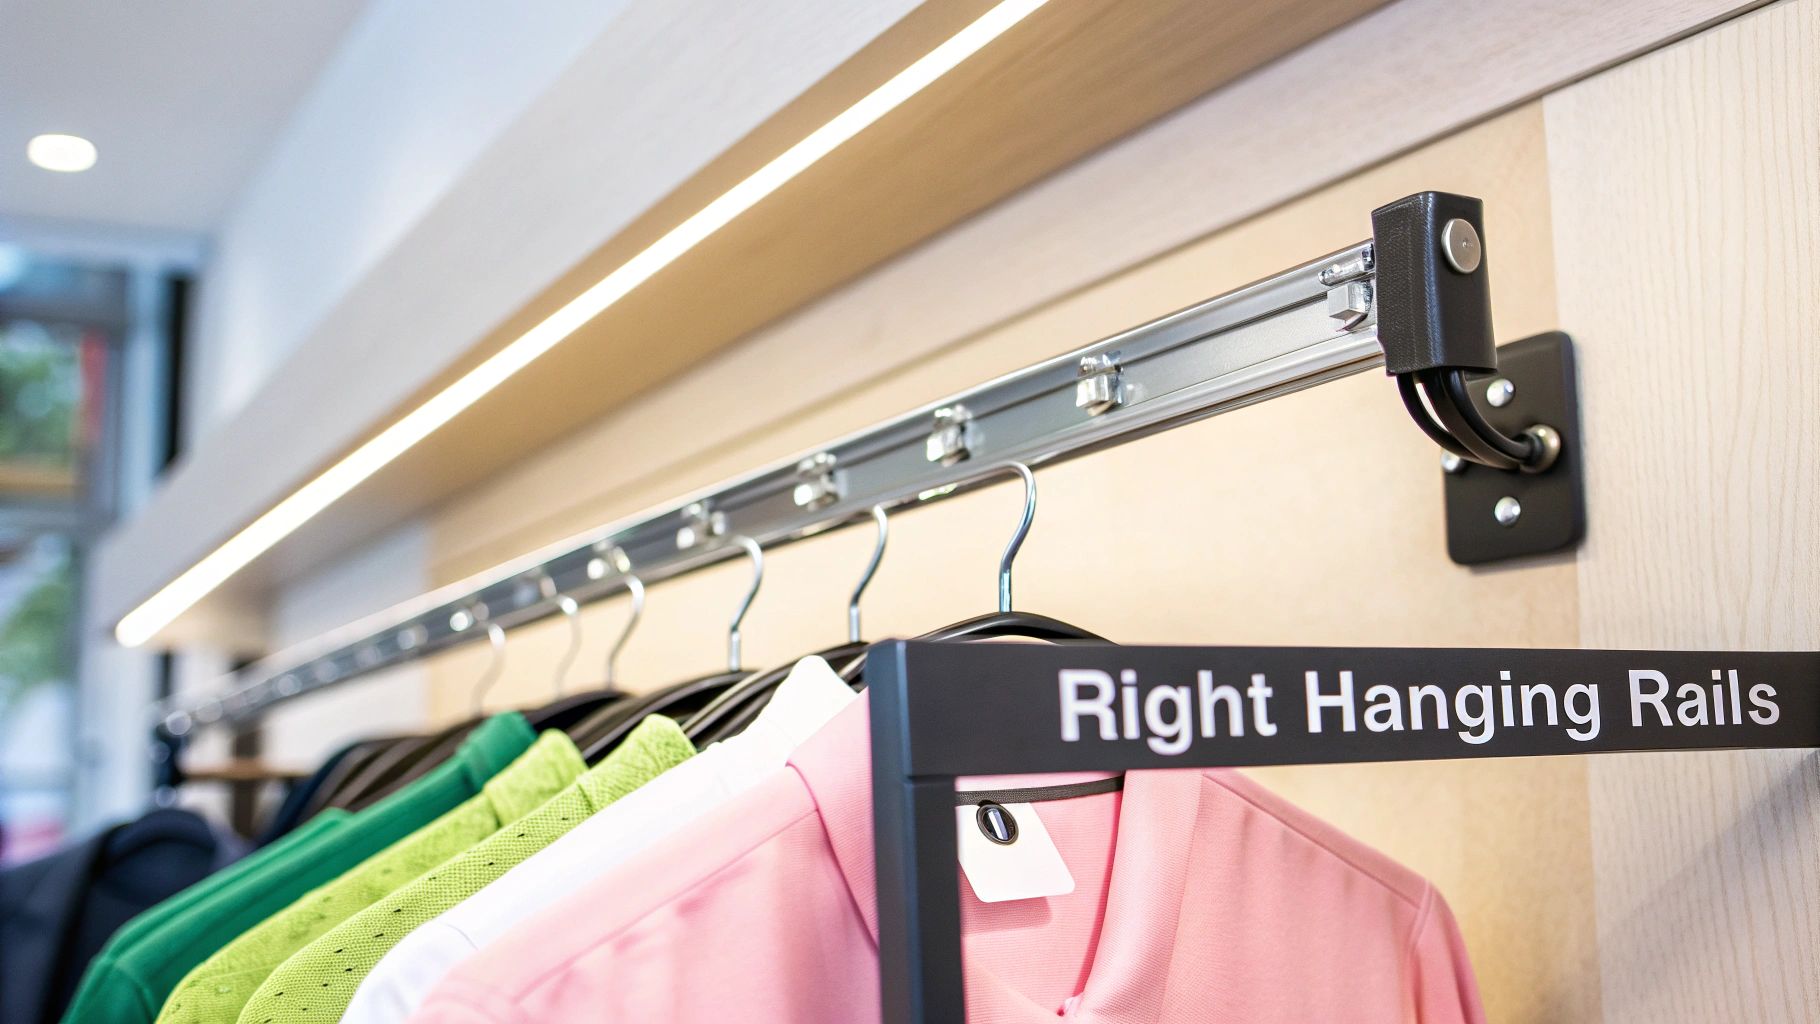
Mounting Your Hardware Securely
Once your holes are drilled and the wall plugs are tapped in, you can screw the brackets to the wall. A good tip is to leave the screws slightly loose at first. Pop the hanging rail into the brackets, and then give the screws a final tighten. This pulls everything together for a really snug fit.
The context of your project matters immensely. For instance, putting up a heavy-duty rail in a bustling retail stockroom is a different game to installing a lightweight system in a temporary pop-up shop. In the stockroom, you’d be looking for wall studs or even fixing a wooden batten to the wall first to guarantee maximum strength. For the pop-up, which might use a freestanding unit, the focus shifts to attaching brackets securely to the unit’s own MDF panels.
A bit of hard-won advice for plasterboard walls: always choose stronger fixings than you think you need. People consistently underestimate the combined weight of clothes, and a rail pulling away from the wall is more than just an inconvenience—it's a hazard. Spending a little extra on robust toggle bolts buys you complete peace of mind.
Understanding which fixing to use where can make or break a project. If you're planning on tackling this yourself, you can find more in-depth advice in our guide to wall-mounted hanging rails. Taking these extra steps is what ensures your wardrobe rails will provide a reliable, long-lasting storage solution.
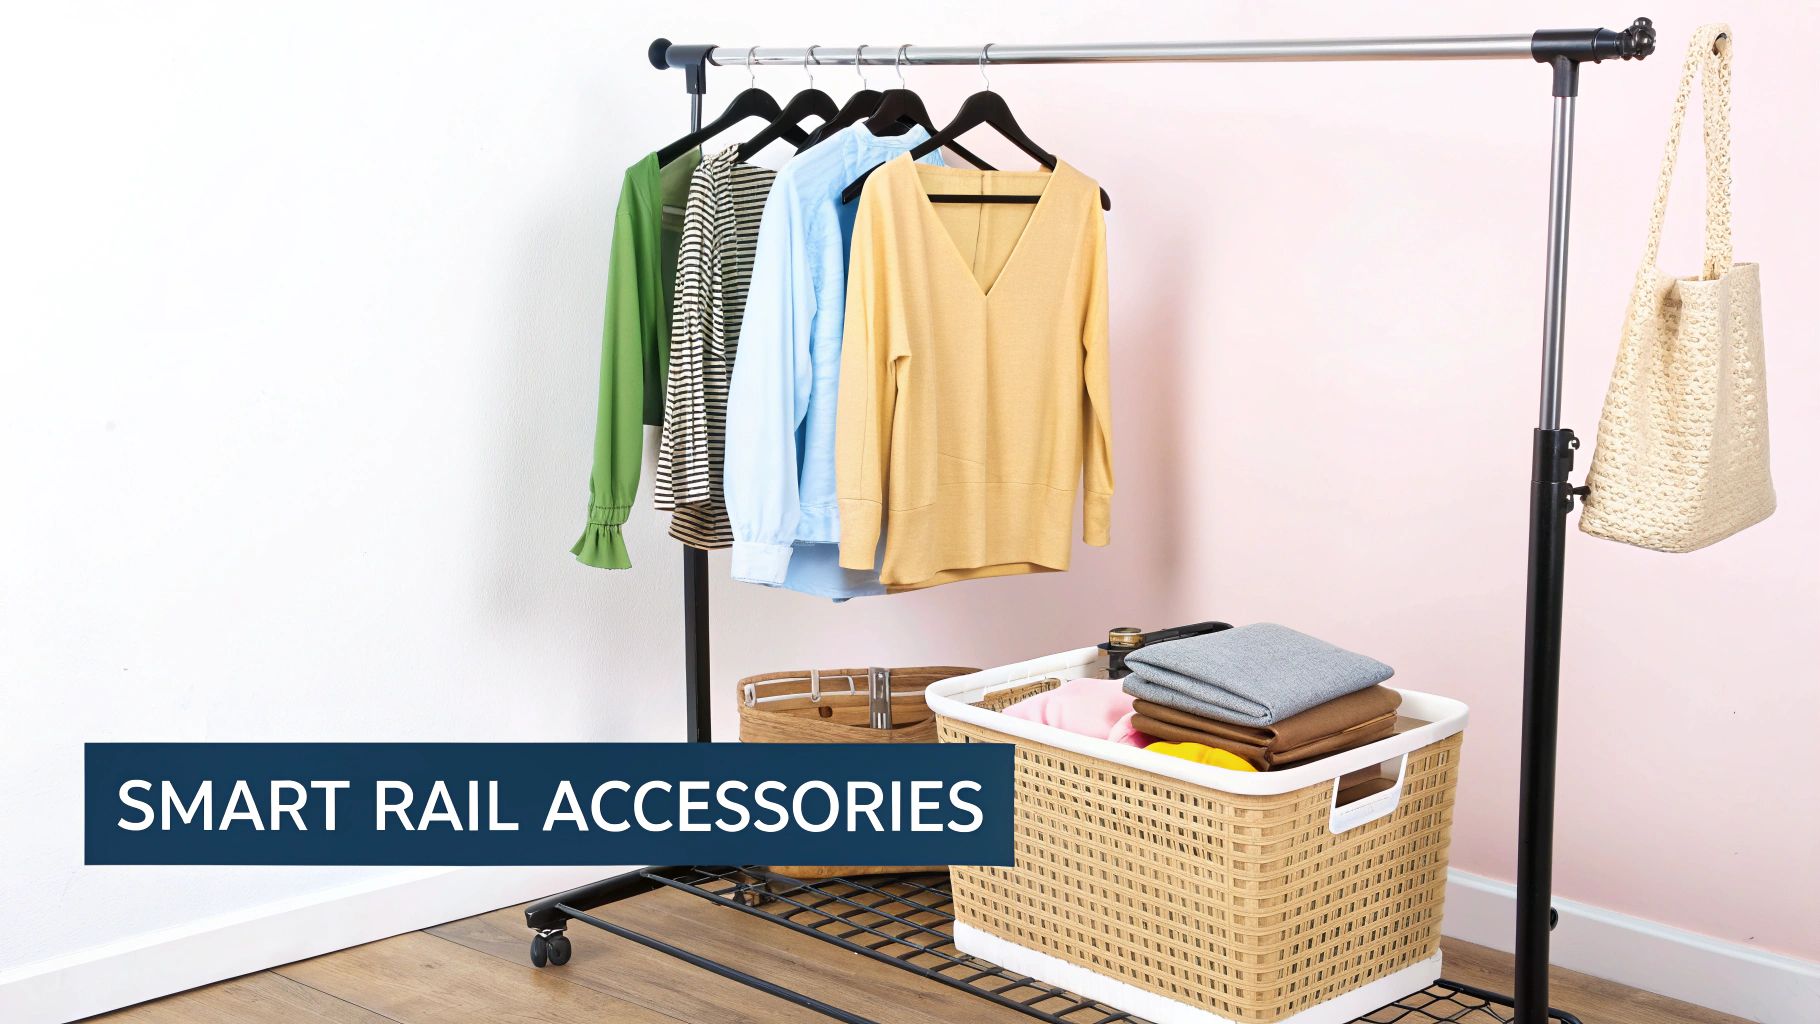
Enhancing Your Rails With Smart Accessories
A high-quality rail is the foundation, but it’s the accessories that turn a simple storage bar into a genuinely efficient organisational system. When you start thinking beyond the rail itself, you can create a setup that solves real-world challenges, whether you're managing a busy stockroom or curating a client's wardrobe. The right add-ons are what make a good rail truly great.
Think about it from a professional’s perspective. A dressmaker could find rail dividers invaluable for keeping different client projects separate and easy to find. A retailer, on the other hand, might use extension arms to make a new collection pop, pulling specific garments forward to catch the shopper's eye. It’s all about tailoring the setup to the task at hand.
Creative Strategies for Maximum Impact
It really comes down to using the right tool for the job. You’d be surprised how much of an impact a few simple additions can have on your day-to-day workflow or stock management.
- S-Hooks for Versatility: These are brilliant for hanging items like handbags, scarves, or belts right alongside your garments. Everything stays visible and within easy reach.
- Clip-On Baskets for Small Items: Perfect for holding smaller, non-hanging stock, tools, or supplies. They help keep the space around your hanging rails wardrobe clear and uncluttered.
- Merchandising Bins for Cohesion: Placing matching dump bins at the base of your garment rail creates a really professional, unified display for folded items or sale stock.
These small touches help you build a complete merchandising story. Of course, the accessories are only as good as their foundation. To get the installation right, our article on clothing rail brackets offers a much deeper dive into the mechanics of proper support.
In the UK's fast-paced retail sector, efficiency is everything. Reports have shown that 70% of high-street fashion outlets in major cities now use mobile garment rails for their seasonal displays. This simple change has helped them cut down setup time by an impressive 40% compared to fiddling with fixed wardrobes.
This shift underscores just how vital adaptable systems are in today's market. Display Guru's range is designed with this agility in mind, offering not just the rails but a whole ecosystem of accessories to help you move from an online catalogue to an impactful physical presentation without missing a beat.
Here’s a quick look at how specific accessories can support different professional needs.
Essential Accessories for Your Garment Rail
| Accessory | Primary Use | Ideal for (Profession) | Display Guru Advantage |
|---|---|---|---|
| Rail Dividers | Separating stock by size, colour, or collection. | Retailer, Dry Cleaner | Our dividers are durable and easy to read, speeding up stock checks and customer service. |
| Extension Arms | Highlighting specific items or new arrivals. | Boutique Owner, Exhibitor | Sturdy construction ensures even heavy garments are displayed securely without sagging. |
| Wheeled Bases | Creating mobile, flexible display units. | Market Trader, Pop-Up Shop | Heavy-duty castors with locking brakes provide both mobility and stability on any surface. |
| S-Hooks | Hanging accessories like bags, belts, and scarves. | Fashion Stylist, Dressmaker | A polished finish matches our rails perfectly, creating a cohesive, professional look. |
| Clip-On Baskets | Storing small tools, supplies, or non-hanging stock. | Seamstress, Workshop | Strong clips ensure baskets stay firmly in place, even when the rail is moved frequently. |
By thinking strategically about these add-ons, you elevate your hanging rail from a basic piece of hardware to a powerful business tool. It's an approach that ensures every inch of your space is working hard to keep you organised and your products looking their best.
Solving Common Installation and Usage Issues
Even the most carefully planned wardrobe project can hit a snag. A hanging rail that starts to sag under pressure or brackets that feel a bit wobbly are common frustrations, but don't worry—they're almost always fixable with a bit of know-how.
Getting to the bottom of why these things happen is the key to a permanent solution. Nine times out of ten, the problem comes down to one of two things: the rail is overloaded, or the fixings just aren't right for the wall.
What to Do When a Rail Starts to Sag
A bowing rail is the classic sign of a system under too much strain. The most obvious culprit is weight. It’s easy to underestimate just how heavy clothes can be; a single metre of tightly packed winter coats can easily top 30kg. That's a lot of weight for a standard rail to handle.
But it’s not always about the load. Sometimes, even a tough rail will sag if it isn't properly supported. If your brackets are spaced too far apart—generally more than 80-100cm—the rail will naturally dip in the middle. Adding a central support bracket is the quickest and most effective fix for this.
Pro Tip: When adding a middle bracket, resist the temptation to just guess the centre. Take a moment to measure the exact midpoint between the two end brackets. Placing it precisely there ensures the load is shared evenly and stops the sag from coming back.
Tackling Loose Brackets Pulling from the Wall
If you see a bracket pulling away from the wall, that’s a real red flag. Take the clothes off immediately. This is a sign that the wall fixings are failing and the whole thing could come crashing down. This happens a lot with plasterboard walls when the wrong type of plugs have been used.
Plasterboard itself doesn't have much structural strength for holding heavy, pulling loads. Standard wall plugs just can't get a secure enough grip to support a full wardrobe's worth of weight.
To sort this out properly, you've got a few solid options:
- Find the Studs: Your best bet is always to screw directly into the wooden studs behind the plasterboard. Use a stud finder to locate them, and you'll have an anchor point that’s as solid as it gets.
- Use Heavy-Duty Fixings: If you can't line up with a stud, specific plasterboard fixings like toggle bolts are a great alternative. They have little wings that pop open behind the board, spreading the weight over a much larger area.
- Fix a Batten to the Wall: For the ultimate bomb-proof installation, screw a solid piece of wood (a batten) horizontally across the wall, making sure the batten itself is screwed firmly into the wall studs. You can then attach your hanging rails wardrobe brackets anywhere you like along the batten, giving you a rock-solid foundation.
By figuring out the root cause and using the right technique, you can turn a wobbly, unreliable rail into a storage solution you can really count on. If you're dealing with exceptionally heavy loads, it's worth reading up on a proper heavy-duty hanging rail setup.
Your Top Questions Answered
Even the most seasoned professional can hit a snag, and when it comes to wardrobe fit-outs, a few common questions always seem to surface. Let’s tackle some of the queries we hear most often, drawing from years of real-world experience.
What’s a Safe Load for a Standard Hanging Rail?
This is the big one, and the honest answer is: it depends. The rail itself is rarely the weak point; the installation is what makes or breaks it. A well-fitted, 1-metre chrome steel rail anchored securely into solid wall studs can comfortably hold between 40-60kg.
But if you’re fitting out a stockroom with heavy winter coats or a theatre wardrobe, you need to think differently. The rail’s material and diameter matter, but the real key is the mounting. Never skimp on fixings. Use heavy-duty options suited to your wall type and make sure your support brackets are spaced no more than 80cm apart. Any wider, and you’re just inviting the rail to sag over time.
Should I Go for a Fixed or an Extendable Rail?
The choice between a fixed and an extendable rail really boils down to strength versus convenience.
Fixed-length rails are the professional’s choice for a reason. They offer unmatched rigidity and a clean, seamless look. If you have accurate measurements and are building a permanent, heavy-duty wardrobe, a fixed rail is always the superior option.
Extendable rails, on the other hand, are great for tricky spaces. Think older homes with wonky alcoves or projects where measurements aren't perfectly standard. They give you that bit of wiggle room during installation, but you do sacrifice some load-bearing capacity, especially when they’re stretched to their limit.
For any serious commercial display or a hard-working studio wardrobe, we always recommend a solid, fixed-length hanging rails wardrobe system. It’s a fit-and-forget solution that guarantees performance for years to come.
Can I Really Mount a Hanging Rail on Plasterboard?
Absolutely, but you have to do it right. Just using standard wall plugs and screws is a recipe for disaster; they’ll pull straight out of the wall as soon as you hang a few jackets on the rail.
Your best bet is always to locate the timber studs behind the plasterboard with a stud finder and drive your bracket screws directly into that solid wood. If the studs aren't conveniently located, your next best option is heavy-duty plasterboard fixings like spring toggles or Fischer-style anchors.
For a truly bombproof installation, especially with heavy loads, here’s a pro tip: fix a solid wood batten horizontally across the wall first, securing it into the studs. Then, you can mount your rail brackets anywhere along the batten. This spreads the weight across the wall structure, creating an incredibly strong foundation.
What's the Best Height to Install a Hanging Rail?
The perfect height is all about the clothes you’ll be hanging. You need enough vertical space to prevent garments from crumpling on the floor or a shelf below.
Here are the standard measurements we work to:
- Long Hang: For maxi dresses, trench coats, or full-length trousers, aim for 165-180cm from the floor to the top of the rail.
- Short Hang: For shirts, blouses, jackets, and trousers folded over a hanger, 100-105cm is ideal.
- Double Hang: To really maximise your space, a two-rail system is fantastic. Place the top rail at around 210cm and the bottom rail at 105cm. This gives you two full tiers of short-hanging space.
Of course, always think about who will be using the wardrobe. There’s no point having a perfectly placed rail if it’s out of reach. For bespoke projects, we often adjust these heights to suit the client perfectly.
Ready to build a wardrobe system that works as hard as you do? Explore the full range of durable garment rails, brackets, and accessories at Display Guru. Find your perfect hanging rail solution at Display Guru today.