


Mastering Wardrobe Rail Fitting for Professional Results
Getting a wardrobe rail fitting right is about more than just screwing a bar to a wall. It’s about choosing hardware that will stand the test of time and do its job without fail. The right rail prevents sagging, keeps valuable garments in top condition, and ensures your setup can handle the daily grind of a professional environment, whether that's a busy tailor’s studio or a high-traffic retail floor.
Choosing the Right Rail for Durability and Performance
Before you even think about picking up a drill, your most important decision is selecting the right hardware. This isn't the time for standard home-use options; we need to look at professional-grade wardrobe rails built for resilience. The choice you make here will directly impact how well your setup works and how long it lasts.
Materials and Finishes Matter
The material of your rail is the backbone of its strength. While there are plenty of basic options out there, professional jobs demand something a lot more robust.
- Chrome-Plated Steel: This is the industry standard, and for good reason. It gives you excellent strength, a smooth surface for hangers to glide across, and great resistance to corrosion and scratches. It’s the go-to for any environment with constant, heavy use.
- Powder-Coated Finishes: These come in a range of colours and add a tough, protective layer over the base metal. This finish is really good at resisting chipping and fading, making it a smart choice for retail displays where looks are just as important as function.
Thinking about the lifespan of your fittings is crucial. Making a smart investment now prevents future headaches and costs, a principle that applies across the board when considering durability in home fixture replacements.
Profile and Diameter Dictate Strength
The shape and thickness of the rail aren't just for show; they are key engineering factors that determine how much weight it can actually hold.
One of the most common mistakes I see is underestimating the combined weight of clothing. A single metre of heavy winter coats can easily top 40-50kg, putting incredible stress on a standard rail and its fixings.
An oval profile, for example, offers much better resistance to bending than a round rail of a similar size, making it a superior choice for heavier loads. It follows that a rail with a larger diameter and a thicker wall will always outperform a flimsy, thinner one.
For a deeper dive into the heavy-duty end of the market, our complete guide to heavy-duty hanging rails is a great resource to help you match a rail to your exact needs.
Comparing Wardrobe Rail Types for Professional Applications
To help you decide at a glance, here’s a quick reference guide that breaks down the common rail types we see in professional settings. This should make it easier to pinpoint the best option for your specific project.
| Rail Type (Profile & Material) | Typical Load Capacity (per metre) | Best Suited For | Considerations |
|---|---|---|---|
| Standard Round Steel | 25-35kg | General-purpose built-in wardrobes, light retail | Can sag under heavy, concentrated loads over long spans. |
| Oval Steel (Chrome/Coated) | 40-60kg | Heavy garments (coats, suits), busy retail, tailor studios | Requires corresponding oval brackets for a secure fit. |
| Heavy-Duty Round (Thick Wall) | 50-70kg | Commercial stockrooms, back-of-house, theatrical costume departments | May be overkill for domestic use; check fixing strength. |
| Square/Rectangular Tube | Varies (often custom) | Boutique displays, industrial-style freestanding units | Aesthetics-driven; load capacity depends heavily on material and wall thickness. |
Ultimately, your choice should balance the expected load with the environment it's going into. For most professional jobs, stepping up to an oval or heavy-duty round rail is a worthwhile investment in reliability.
Getting Your Tools and Fixings in Order
Any seasoned installer knows a successful wardrobe rail fitting is about more than just a sturdy rail. The real secret lies in having the right tools for the job and, crucially, selecting the correct fixings. A professional installation is only ever as strong as its weakest link, which is almost always a poorly chosen wall plug or screw. Get your kit sorted beforehand, and you're set up for a smooth, solid job.
Your core toolkit is non-negotiable. A good quality spirit level is a must for getting that rail perfectly horizontal, and a reliable tape measure ensures every dimension is spot on. If you're working with stud walls, an electronic stud finder is your best friend—it takes all the guesswork out of locating those vital timber supports behind the plasterboard.
Selecting the Right Drill Bits
You absolutely must match your drill bit to the wall material. Using the wrong bit won't just make your life harder; it can damage the wall and lead to a fixing that's bound to fail.
- For Masonry (Brick & Blockwork): You’ll need a tungsten carbide-tipped masonry bit. These are built to power through tough materials without overheating or going blunt halfway through the job.
- For Plasterboard & Studwork: A standard HSS (high-speed steel) drill bit is what you need for drilling into timber studs. If you're just going through plasterboard for a specific fixing, a spade bit often gives you a neater hole.
A pro tip I learned the hard way: always match the drill bit size to the wall plug, not the screw. If the hole is too big, the plug will just spin uselessly and won't expand properly, making the entire fitting unsafe.
Choosing Fixings for Maximum Strength
This is where the professionals really earn their stripes. The fixings you'd use for a retail stockroom holding 50 heavy winter coats are worlds apart from what you'd use for a small domestic wardrobe. Your choice is dictated entirely by what the wall is made of.
For solid brick or dense blockwork, you can’t go wrong with high-quality expanding wall plugs and some long, heavy-gauge screws for a rock-solid grip. But when you're faced with plasterboard, standard plugs are completely inadequate for a heavy-duty rail. You have two choices: either find the timber studs and fix directly into them, or use specialised plasterboard fixings like spring toggles or heavy-duty self-drilling anchors. These are cleverly designed to spread the load over a much wider surface area of the board.
Getting your head around how different supports work is crucial. We dive deeper into this in our complete guide to clothes rail brackets, which explains how to pair brackets and fixings for ultimate stability.
Getting Your Measurements and Markings Spot On
Any pro will tell you that the secret to a rock-solid wardrobe rail isn't in the drilling; it's in the prep work. This is where you separate a professional job from a wonky, unreliable one. It’s the classic ‘measure twice, cut once’ philosophy, and getting it right now saves a world of headaches later.
Before a drill even comes out of its case, your workflow should be simple and methodical: check the wall, mark your positions with precision, and only then move on to the actual fitting.
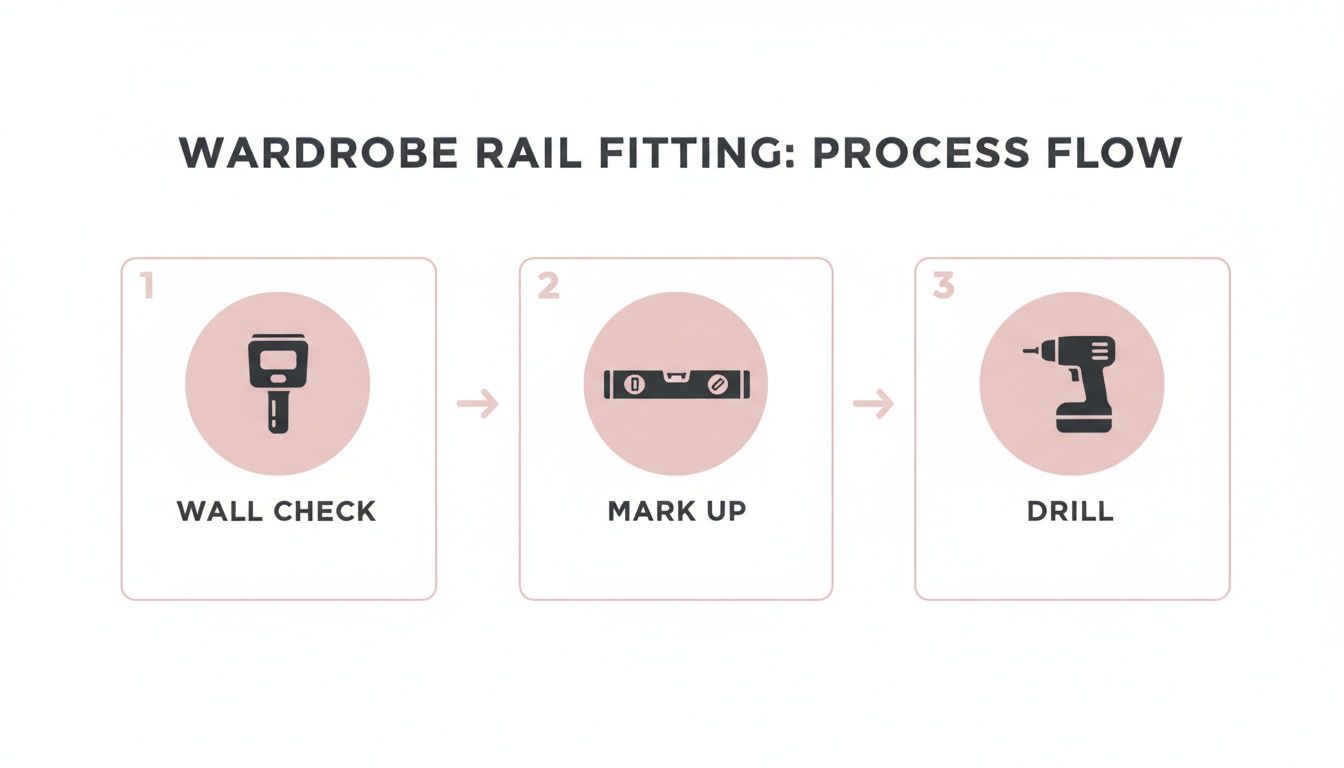
This three-step process is the foundation. Rushing this stage is the number one cause of installations that fail down the line.
Nailing the Ideal Rail Height
First things first, you need to decide how high to mount the rail. This isn't just a random number; it's dictated entirely by what you plan to hang. Get this wrong, and the space becomes frustratingly impractical.
- For long coats and dresses: If you're dealing with full-length garments like maxi dresses, overcoats, or even bridal wear, you'll want the top of the rail positioned at least 165-180cm from the floor. This gives everything enough room to hang freely without crumpling at the bottom.
- For shirts, trousers, and suits: A height of around 120-130cm is the sweet spot. It's perfect for hanging trousers folded over a hanger without them dragging on the floor or a shelf below.
- For double-hanging systems: To really make the most of vertical space—a common trick in retail and compact wardrobes—a two-rail system is fantastic. A tried-and-tested setup is placing the top rail at 210cm and the bottom one at 105cm. This effectively doubles your hanging capacity.
Getting this storage right is more critical than ever. With projected UK apparel spending hitting £1,003 per person in 2025 and the average person buying over 61 items a year, our wardrobes are working harder than ever. Well-planned hanging space is no longer a luxury, it's a necessity.
Marking Up for a Perfectly Level Rail
Once you've settled on a height, achieving a perfectly level rail is non-negotiable. Grab a quality spirit level and a sharp pencil. Mark the drill holes for your first bracket.
Now, extend a perfectly level line from that first mark across to where the second bracket will go. A word of warning: never, ever measure down from the ceiling to get your second point. Ceilings are rarely as level as you think.
Here's a pro tip for dealing with walls that aren't perfectly flat: mount one bracket first. Place the rail into it and rest the other end on your spirit level. Adjust it until the bubble is dead centre, and then mark the holes for the second bracket. This guarantees a level rail every single time, no matter what the wall is doing.
Calculating Your Support Bracket Spacing
For any rail of significant length, preventing that dreaded sag is all about proper support spacing. Time and time again, I see installations fail because a long rail was overloaded with too few brackets. It’s the most common point of failure, especially in a busy retail environment.
As a rule of thumb, place a support bracket every 80-100cm. If you know the rail is destined to hold heavy stock like leather jackets, winter coats, or even theatrical costumes, tighten that spacing to 60-75cm for maximum stability.
And for any wardrobe rail fitting over 150cm long, a central support bracket isn't just a good idea—it's absolutely essential. We dive deeper into how different wall types affect your support strategy in our practical guide to your hanging rail and wall.
Putting It All into Practice: Rail Installation in Common Scenarios
Every job is different. The way you’d fit a simple rail in a bedroom wardrobe is worlds apart from how you’d tackle a high-traffic stockroom. Let's move from the theory to the workshop floor and break down the specific techniques for three situations you'll face time and again.
Getting these right means your installations aren't just functional—they're robust, safe, and perfectly matched to their environment. We'll look at the details of fitting rails into built-in units, spanning long walls, and creating freestanding retail displays.
Fitting a Rail in an Alcove or Built-In Wardrobe
This is a bread-and-butter job for any fitter. Whether it's a bespoke wardrobe build or simply making use of an existing alcove, the aim is always a clean, strong rail supported by end sockets fixed to the side walls.
Your first job is to understand what those walls are made of, as this dictates everything. If you're lucky enough to be fixing into solid timber or a well-made wardrobe carcass, the job is straightforward. A pilot hole and a decent wood screw for each fixing point will give you a rock-solid connection that will last for years.
Things get trickier with plasterboard. Never, ever fix a rail socket directly to plasterboard alone; it’s a guaranteed failure waiting to happen. You absolutely must locate the vertical timber studs behind the board. Use a stud finder to map out the framework, ensuring your screws get a solid bite into the timber for a hold you can depend on.
Installing a Wall-to-Wall Stockroom Rail
In a commercial stockroom, it's all about strength and capacity. The main challenge here is usually the long span, which means a central support bracket isn't just a good idea—it's essential to stop the rail from bowing under a heavy load.
Start by fitting your end sockets securely, using the same principles for solid or stud walls. Then, find the exact centre of your span and mark the spot for the middle support bracket. It is critical that this bracket is also anchored firmly into a stud or solid blockwork.
For any rail longer than 2.5 metres, I'd strongly recommend using two intermediate support brackets instead of one. This divides the total length into three more manageable sections, spreading the load far more effectively and giving you the structural integrity a busy commercial setting demands.
Don't underestimate the forces at play. In a typical medium-sized UK fashion store holding 4,000–6,000 items, 40-50% of that stock could be hanging on rails. Your installation is literally supporting thousands of garments, which really drives home why getting it right is so important.
Creating a Freestanding Retail Display
Visual merchandisers and shopfitters often need to create flexible displays using floor-to-ceiling uprights. These modular systems are fantastic for creating dynamic spaces, but their stability relies on a completely different approach.
The uprights themselves need to be anchored securely at both the top and bottom. For the floor fixing, make sure you have the right hardware for the surface—proper concrete anchors for a solid floor, or heavy-duty wood screws if you're going into a timber subfloor.
The ceiling anchor is equally vital. The best-case scenario is always locating the ceiling joists and fixing directly into them for maximum strength. If the joists aren't in the right place, you’ll need to use high-capacity toggle bolts specifically designed for hollow ceilings. This dual-point fixing is what stops any wobble or sway, resulting in a safe and sturdy display that looks professional.
For more on selecting the right parts for these kinds of custom jobs, our detailed post on clothes rails and brackets is a great resource.
Final Checks and Load Testing for Safety

Just because the rail is on the wall doesn't mean the job is done. For a truly professional finish and genuine peace of mind, you need to be certain it can handle the strain. The last thing you want is a call-back about a collapsed wardrobe.
Start with a simple visual check. Stand back and eyeball the rail – is it perfectly level? Are the brackets or sockets sitting flush against the mounting surface with no visible gaps? Now get hands-on and give every single fixing a final turn with your screwdriver. You're looking for a snug fit, not a Herculean effort. Overtightening can strip the threads or damage the surrounding material, which completely undermines the strength of the installation.
Performing a Gradual Load Test
The real proof is in how the rail performs under pressure. Don't just throw a full wardrobe's worth of clothes on it straight away. The key is to test it incrementally, which gives you a chance to catch any issues before they become a disaster.
Here’s how I approach it:
- Start light: Begin by hanging a few empty hangers, then add some lighter items like shirts. Make sure you spread them out evenly.
- Watch and listen: Keep a close eye on the rail for any sagging. Listen carefully for any groans or creaks from the fixings as they settle under the new weight. These are often the first signs of trouble.
- Increase the load: Bit by bit, add heavier garments. A few jumpers, then some jackets, and finally a couple of heavy winter coats. Pause after adding each new batch to check that the brackets haven't shifted.
This careful, methodical approach builds confidence in the fitting and shows a level of professionalism your clients will appreciate.
A rock-solid installation should show zero movement at the fixing points. The only thing you should see is a slight, expected flex in the centre of the rail itself when fully loaded. If you see the brackets pulling away from the wall, even a little, that’s a major red flag.
When you're dealing with high-capacity rails for retail stockrooms or clients with extensive collections, understanding the structure you're mounting to is non-negotiable. Knowing the basics of identifying load-bearing walls can be the difference between a successful project and a costly failure.
Once the rail is loaded with a realistic amount of weight, give it one final test. Apply a firm but gentle downward push to the centre to simulate the real-world stress of daily use. If it feels solid and secure, you can walk away knowing you've done the job right.
If you’re regularly installing rails that need to take serious weight, take a look at our practical guide to heavy-duty rails to make sure you're choosing the right components from the start.
Your Wardrobe Rail Fitting Questions Answered
Even the most carefully planned installation can throw up a few questions. Over the years, we've pretty much heard them all, so we’ve put together the answers to the queries that crop up time and time again.
Think of this as your on-the-job guide to getting the details right. From spacing brackets correctly to tackling tricky plasterboard walls, these are the little bits of know-how that turn a good installation into a great one.
How Far Apart Should My Support Brackets Be?
This is probably the most important question of all. Get this wrong, and you’re setting yourself up for a sagging rail down the line. It might seem tempting to stretch the distance to save a few quid on hardware, but believe me, it's a false economy.
For a standard heavy-duty rail, a good rule of thumb is to place a support bracket every 80-100cm. That's more than enough for a typical mix of clothes. However, if you know it's going to be holding some serious weight—we're talking winter coats, wedding dresses, or a rail full of stock—you'll want to close that gap to 60-75cm. This provides bomb-proof support and completely removes any chance of the rail bowing.
Whatever you do, never go beyond a 120cm span between supports on a rail for commercial or heavy domestic use. And if the rail is over 150cm long in total, a centre support isn't optional, it's essential.
What’s the Best Way to Fix a Rail to Plasterboard?
Ah, the classic plasterboard problem. Fixing a heavy rail directly to plasterboard needs a bit of strategy because the board itself has almost no strength. Standard plastic wall plugs are a definite no-go; they’ll just pull straight out once you load the rail up.
The absolute best method is to find the timber studs behind the plasterboard using an electronic stud finder. Fixing your brackets directly into these solid wooden uprights gives you the strongest possible anchor point.
If the studs aren't where you need them to be, you'll need some specialised heavy-duty plasterboard fixings. Your best bets are:
- Spring Toggles: These clever fixings have wings that spring open behind the board, spreading the load over a much wider area.
- Butterfly Anchors: They work in a similar way to toggles, expanding behind the plasterboard to create a really secure grip.
- Self-Drilling Anchors: These are beefy, threaded anchors designed specifically for taking heavy loads in hollow walls.
Can I Cut a Wardrobe Rail to a Custom Length?
Of course. Nearly all metal wardrobe rails are made to be cut down for a perfect, bespoke fit. The right tool for the job is a simple hacksaw with a fine-toothed blade.
Here’s a pro tip for getting a clean, neat cut: wrap some masking tape around the rail where you plan to cut. It stops the saw from slipping and protects the chrome or powder-coated finish from chipping. Once you've made the cut, take a moment to smooth any sharp burrs off the end with a metal file. This little step makes installation a breeze and stops the rail from scratching the inside of your end brackets.
For a perfect fit, measure the inside gap between your mounted brackets, then subtract 2-3mm. This gives you just enough play to slot the rail into place without a struggle.
What Is the Ideal Height to Install a Garment Rail?
The perfect height really depends on what you plan to hang on it. There are a few tried-and-tested standards that help you make the most of the space and stop clothes from dragging on the floor.
- Full-Length Items: For long coats, maxi dresses, or formal gowns, you'll want the top of the rail at least 165-180cm from the floor.
- Standard Garments: For things like suits, shirts, and trousers folded over a hanger, a height of around 120-130cm works perfectly.
- Double Hanging Systems: A two-rail system is a brilliant way to maximise your vertical space. A popular and very practical setup is to put the top rail at 210cm and the bottom rail at 105cm.
For all your professional display and storage needs, from robust garment rails to versatile tailor’s dummies, explore the full range at Display Guru. Find the quality components you need for your next project at https://www.displayguru.co.uk.