


A Guide to Using a Tailors Adjustable Dummy
A tailor's adjustable dummy is your secret weapon for achieving a truly professional fit. Think of it as a customisable body double, allowing you to create garments that fit like they were made to measure. The real genius lies in a series of simple dials that expand or contract the bust, waist, and hip sections to perfectly replicate specific body measurements. This incredible adaptability makes it a must-have for professional tailors, designers, and dedicated home sewers.
Your Silent Partner in Sewing and Design
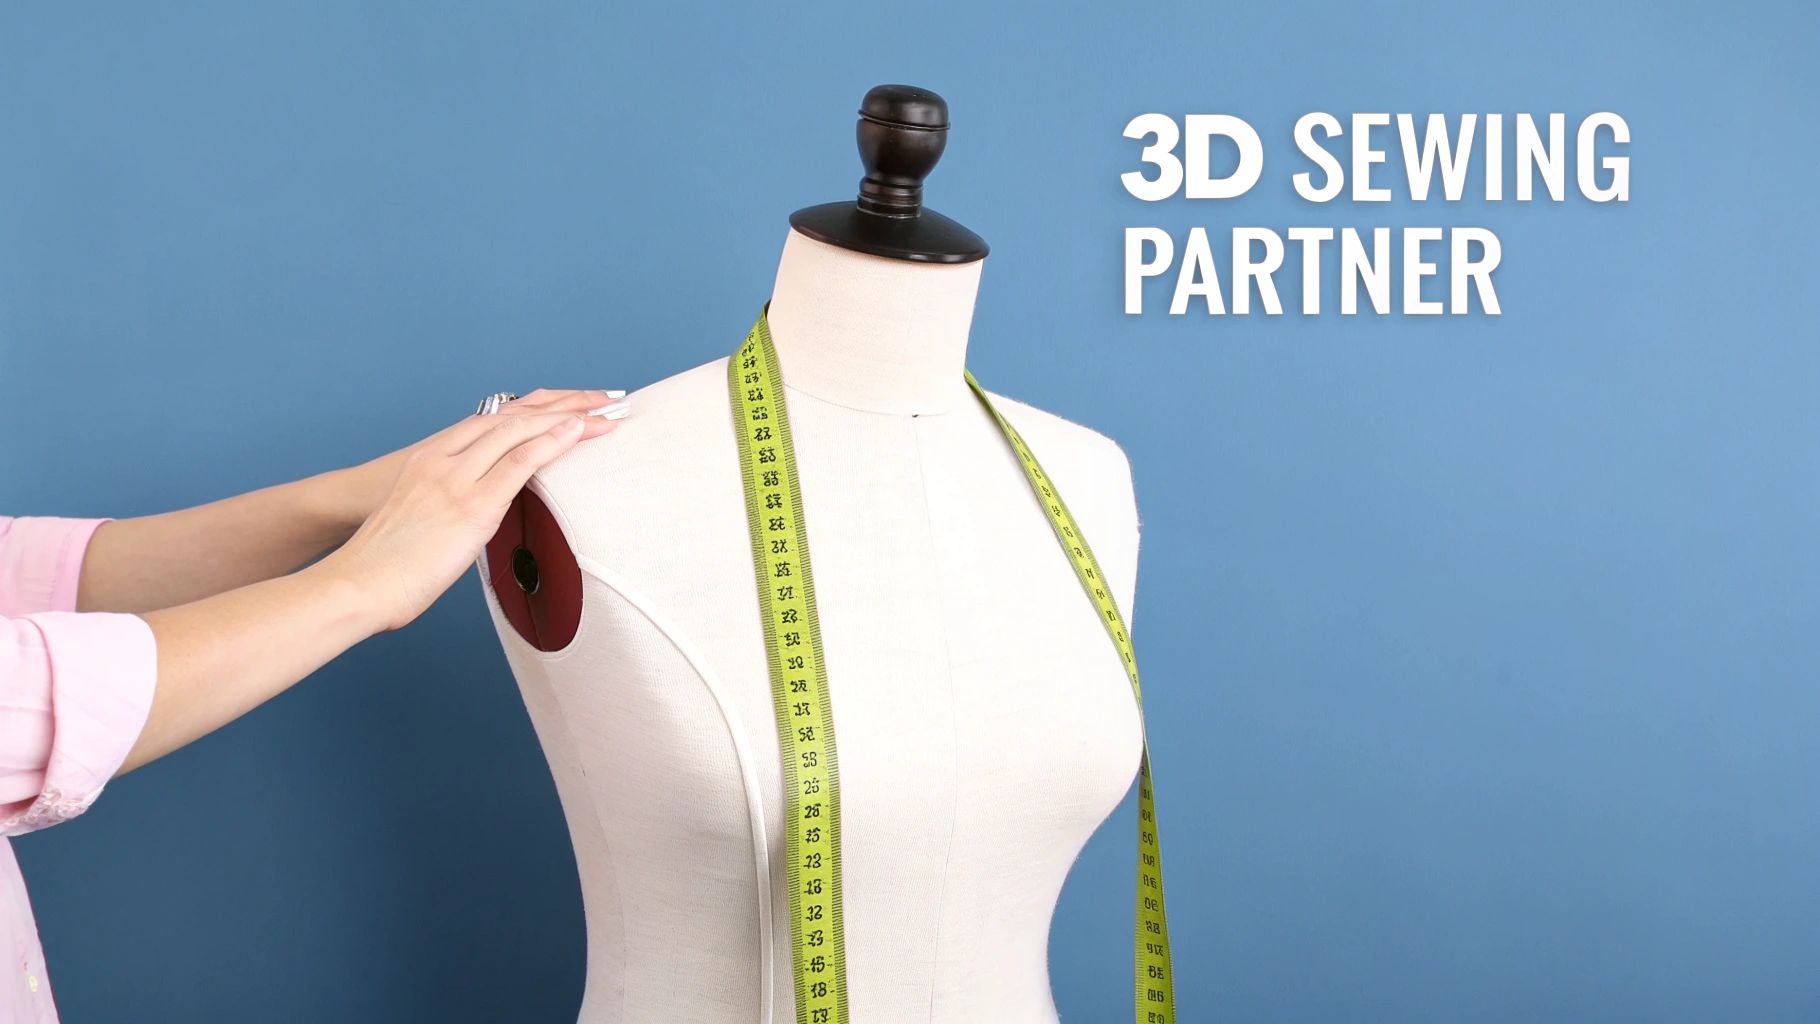
It’s best to see a tailors adjustable dummy as more than just a piece of equipment; it's your silent, three-dimensional partner in the creative process. It patiently stands in for you or your client, providing a perfectly still canvas where you can drape, pin, and refine your designs. This is where a simple mannequin evolves into a dynamic replica of the human form.
To really get your head around its value, think about it this way: a traditional, fixed-size mannequin is like a standard paper pattern. It’s useful for one specific size, but it’s completely rigid. An adjustable dummy, on the other hand, is like a customisable digital pattern you can alter with a few quick turns. This single feature completely changes your workflow, cutting out the guesswork and guaranteeing a much better fit right from the start.
The Core Concept of Adjustability
The real magic of an adjustable dummy happens inside. A clever system of interconnected parts, controlled by dials or keys on the outside, lets different sections of the torso expand and retract on their own. This mechanism is specifically designed to focus on the most critical areas for garment fitting.
Typically, you can adjust these key areas:
- Bust Circumference: This is crucial for getting a smooth fit across the chest, avoiding any pulling or gaping.
- Waist Measurement: Essential for shaping garments properly and making sure they’re comfortable to wear.
- Hip Dimensions: Lets you fit garments accurately over the body's widest point below the waist.
- Back-Waist Length: A vital vertical measurement that ensures the garment's waistline sits in exactly the right place.
- Neck Circumference: Incredibly helpful for perfecting collars and necklines.
By tweaking these points, you can recreate a huge range of body shapes and sizes with impressive accuracy. You can learn more about how different types of adjustable dressmaking dummies compare and find out which features will work best for you.
The ability to create a precise body double is what separates amateur results from professional craftsmanship. An adjustable dummy bridges that gap, letting you see how fabric drapes and behaves on a specific shape before you even think about sewing a final stitch.
Why This Tool Is an Essential Investment
For anyone serious about making clothes, getting to grips with an adjustable dummy is a game-changer. It saves countless hours you'd otherwise spend on live fittings, which are often a nightmare to schedule and can feel rushed. It gives you the confidence to try out complex draping techniques, knowing that the foundation you're building on is completely accurate.
Ultimately, this tool encourages both precision and creativity. It offers the freedom to experiment with design lines and see how different fabrics behave, all while being confident that the final garment will fit the intended person like a glove. This foundation of accuracy is precisely why the adjustable dummy remains a cornerstone in workshops, design studios, and sewing rooms everywhere.
What Makes a Quality Adjustable Dummy?
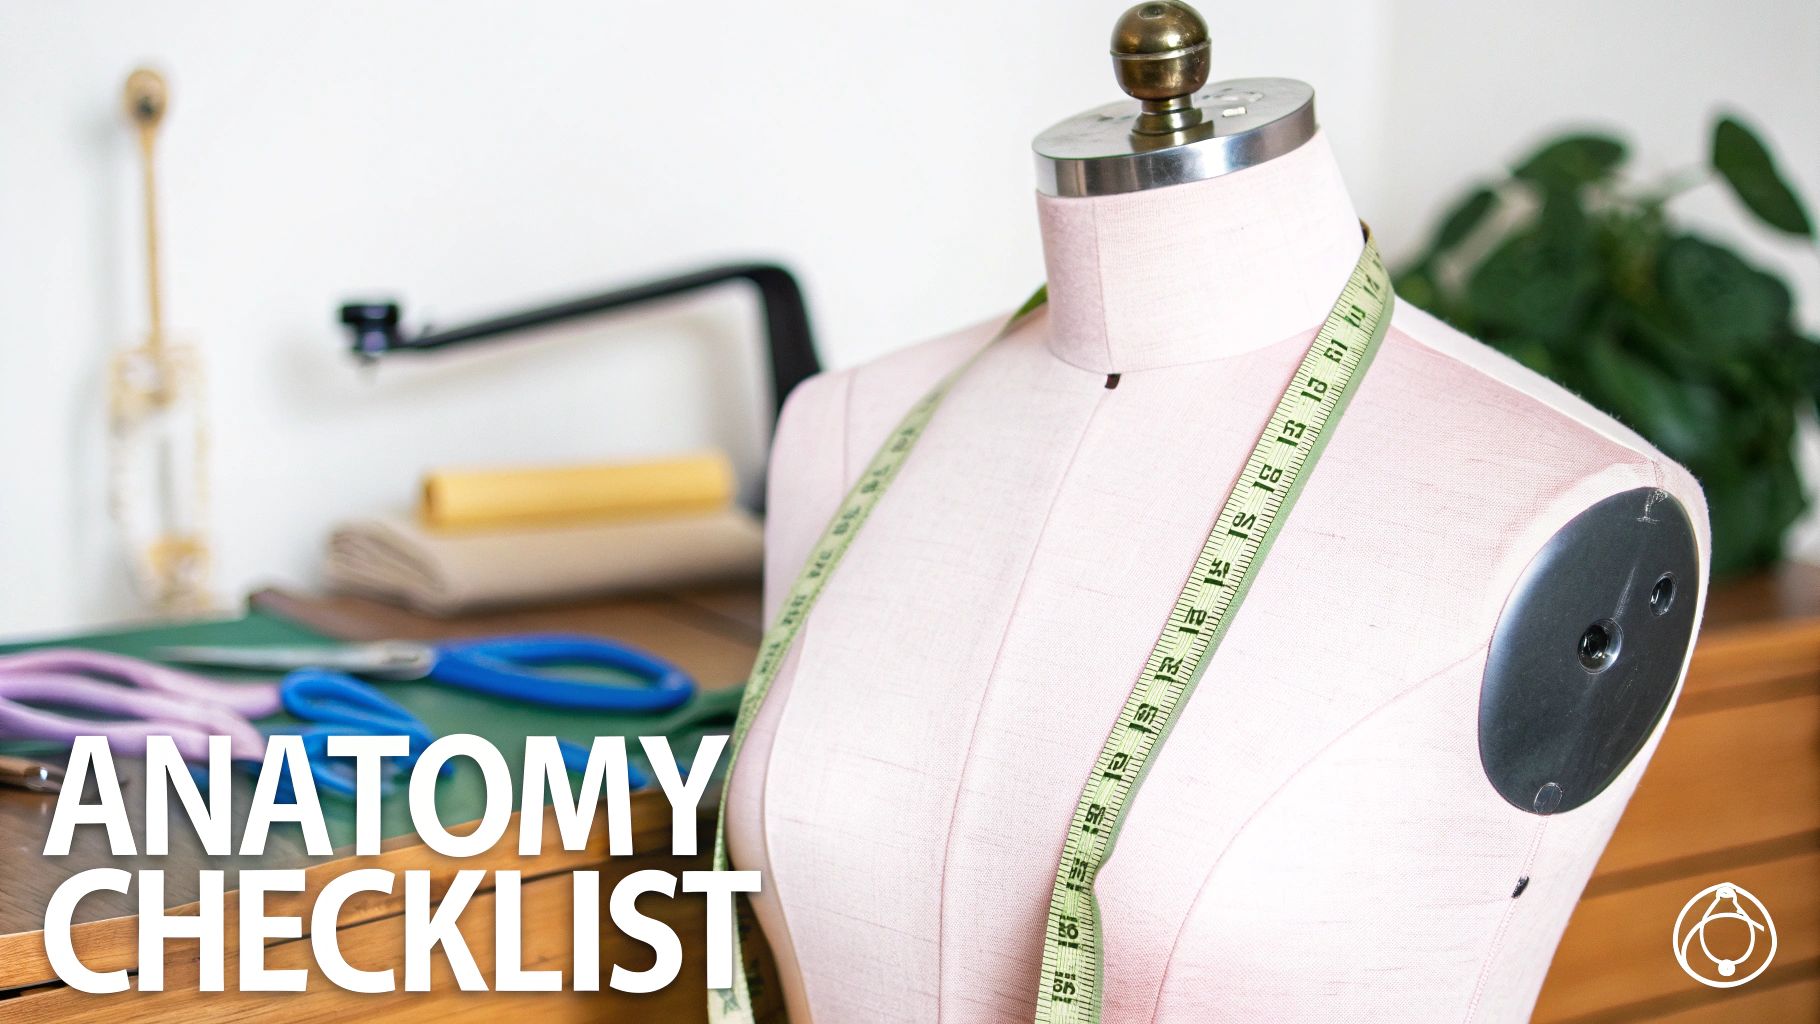
When you’re sizing up a tailors adjustable dummy, you’re not just looking at a torso on a stand. You’re evaluating a crucial piece of engineering. Understanding its anatomy is the only way to distinguish a reliable, long-term partner from a wobbly, frustrating hindrance. The best models are built with precision and durability at their core, from the surface you’ll be pinning into, right down to the base that keeps it all steady.
Think of the body form itself as the heart of the operation. The material it's made from will directly shape your entire workflow. A top-tier dummy will always have a body made of pin-friendly polystyrene. This material is dense enough to grip pins tightly, stopping them from wiggling loose or falling out mid-drape. This single feature is what gives you the confidence to drape fabric, mark adjustments, and secure pattern pieces without a second thought.
The Body: Your Foundation for Fit
A quality polystyrene form is almost always wrapped in a durable fabric, typically a foam-backed nylon or felt. This outer layer is more important than it looks. It provides a subtle grip that stops your fabrics from sliding about, and it also protects the polystyrene underneath from years of pinning. A cheap, flimsy covering, on the other hand, will quickly pockmark and lose its texture, making your job harder.
The ability to pin deeply and securely anywhere on the form is non-negotiable for professional results. It’s the difference between draping with confidence and constantly fighting with your materials.
The Mechanics: How Adjustments Actually Work
The real magic of an adjustable dummy is, of course, its ability to change shape. This is all handled by a series of dials or keys that expand and contract different sections of the torso. The number of adjustment points is what dictates how accurately you can mimic a real human body.
You'll generally come across two main setups:
- 8-Part Dummies: These models have four key adjustable areas (bust, waist, hips, and neck), each split into two halves. This configuration makes adjusting the main circumferences straightforward and is a fantastic workhorse for most general dressmaking.
- 12-Part Dummies: For those needing a higher degree of precision, a 12-part model is the way to go. On top of the standard circumference dials, they feature extra adjustment points for more nuanced shaping, giving you far greater control over the curves of the bust and hips.
Each dial corresponds to a specific measurement. As you turn it, internal gears push the sections apart or draw them back together. A brilliant, and often overlooked, feature to look for is the back-waist length adjustment. This lets you alter the vertical distance from the base of the neck to the natural waistline—a critical measurement for getting the fit of a bodice or dress absolutely perfect. To see how these dummy measurements translate to garment making, you can get more information on mannequin measurements.
To help you decide, here’s a quick breakdown of the most important features.
Adjustable Dummy Feature Comparison
This table offers a quick reference to compare essential features and their benefits, helping you select the right adjustable dummy for your projects.
| Feature | What It Does | Best For |
|---|---|---|
| 8-Part Adjustment | Provides 4 key adjustment zones (bust, waist, hips, neck), split into two parts each. | General dressmaking, hobbyists, and those working with standard patterns that need basic fitting. |
| 12-Part Adjustment | Offers more granular control with 8 adjustment zones, allowing for finer shaping of curves. | Professional tailors, designers, and anyone fitting for non-standard or highly tailored body shapes. |
| Back Length Adjuster | Allows you to change the vertical distance from the neck to the waistline. | Achieving a perfect fit in bodices, jackets, and fitted dresses where torso length is critical. |
| Tripod Stand | A three-legged base (often wood or metal) that offers excellent, stable support on various floor types. | Home studios and workshops where the dummy will largely stay in one place. |
| Caster Wheel Base | A base with wheels (ideally lockable) for easy movement around a room. | Busy retail environments, classrooms, or large studios where mobility is a major advantage. |
Choosing the right features really comes down to how you plan to use your dummy, but a stable base and a good number of adjustment points are always a solid investment.
The Stand: Stability Is Everything
The most perfectly adjusted dummy is completely useless if it’s constantly threatening to topple over. The stand is the unsung hero of the entire setup, providing the rock-solid stability you need to work without cursing.
You’ll find two main types of stands on the market:
- Tripod Bases: Usually made from wood or metal, these offer fantastic stability on almost any surface, including carpet. The three-legged design distributes weight beautifully, making it a hugely popular choice for home sewists and professional ateliers alike.
- Caster-Wheel Bases: These are a lifesaver in dynamic spaces where you’re constantly moving things around. A solid base with lockable wheels means you can glide the dummy across the room and then lock it firmly in place when you’re ready to get to work.
Ultimately, a high-quality tailors adjustable dummy should be seen as a complete system. The pin-friendly body, the precise dials, and the stable stand must all work together in harmony. Get that combination right, and you'll have a reliable foundation for your creativity for many years to come.
How to Choose the Right Dummy for Your Projects
Choosing the perfect tailors adjustable dummy isn’t about finding the "best" one on the market—it's about finding the right one for you. Think of it as hiring an assistant; the best candidate depends entirely on the job you need them to do. The robust, heavy-duty form a professional tailor needs for a wool overcoat would be complete overkill for a hobbyist whipping up summer dresses.
The whole process starts with you. By taking a moment to think about your own workflow and creative goals, you can match a dummy’s features—from its stability to its sizing range—to what you actually need. That’s how you get a tool that feels like a natural extension of your hands, rather than a constant source of frustration.
Let's walk through how to pick the right partner for your sewing table.
Matching the Dummy to Your Craft
First things first, who are you as a creator? A home sewing enthusiast has a completely different set of needs than a visual merchandiser, and the right dummy will reflect that reality.
Here are a few common profiles to help you figure out where you fit:
- For the Professional Tailor or Designer: Precision is everything. You'll need a dummy with at least 12 adjustment points, and a back-waist length adjuster is non-negotiable for achieving that perfect fit. Look for a heavy, solid base, like a wooden tripod, that won’t budge when you’re working with weighty fabrics like tweed or denim.
- For the Home Sewing Enthusiast: Versatility is your best friend. You’re likely jumping between projects, from simple tops to more complex trousers. An 8-part adjustable dummy offers a great balance of features and affordability, giving you plenty of flexibility without breaking the bank.
- For the Retailer or Visual Merchandiser: It’s all about presentation and stability. Your dummy needs to make garments look incredible while holding up to the hustle and bustle of a shop floor. A model with an elegant finish and a sturdy base with lockable wheels for easy repositioning is the way to go.
- For the Fashion Student: You need a reliable workhorse that won't cost a fortune. An 8-part model with a pinnable surface and clear measurement guides will see you through countless assignments, from draping to pattern-making.
The aim is to find a tool that genuinely supports your work. A tailor requires absolute accuracy for bespoke garments, while a hobbyist gets more value from a dummy that can adapt to many different types of projects.
It's no surprise that the demand for these tools is on the rise. In the UK, mannequin production has grown to around 1.6 thousand tons, which is a 7.5% increase from the previous year. This boom reflects just how essential precise fitting tools have become for both professionals and hobbyists, especially as the UK apparel market continues to grow. You can dive deeper into these trends at IndexBox.io.
The Golden Rule of Sizing
Once you know what type of user you are, it’s time to talk sizing. This is where a lot of people make a costly mistake, so lean in.
Here it is: your personal measurements should fall somewhere in the middle of the dummy's adjustment range.
Why does this matter so much? If you buy a dummy where your measurements push it to its maximum size, all the internal parts will be stretched to their limit. This creates awkward gaps between the panels, making the form unstable and a nightmare to pin into.
On the other hand, if your measurements are at the smallest end of the range, you have no wiggle room to size down for smaller projects or clients.
How to Measure for a Perfect Match
To get this right, you’ll need to take a few accurate measurements. Grab a flexible tape measure and, if you can, ask a friend to help—it makes getting precise numbers much easier.
- Bust: Measure around the fullest part of your chest. Make sure the tape is kept level all the way around your back.
- Waist: Find your natural waistline—it's usually the narrowest part of your torso—and measure around it.
- Hips: Measure around the widest point of your hips and bottom.
- Back-Waist Length: This one is crucial. Measure from the prominent bone at the base of your neck straight down to your natural waistline.
With these four measurements written down, you can now confidently compare them to the size charts for any dummy you’re considering. Look for a model where your numbers sit comfortably in the middle of its range. Taking this one simple step will ensure your new dummy becomes a trusted and versatile partner for years to come.
For a closer look at some of the best models available, check out our guide on the top 12 adjustable dressmakers dummies.
Setting Up Your Dummy for a Perfect Fit
There’s a real sense of excitement when you unbox a new tailors adjustable dummy, but that can quickly turn to a bit of confusion. How do you get this thing to actually look like a real person? Don’t worry. With a tape measure and a methodical approach, you can transform that generic form into an accurate body double, setting you up for perfectly fitting garments from the get-go.
Think of it like tuning an instrument. You don't just crank one string and hope for the best; you make small, deliberate adjustments in a specific order to get everything just right. Skipping steps is a common pitfall that often results in a wonky, uneven shape.
The process actually starts before you even touch a dial. This quick visual breaks down the essential first phase: measuring, comparing, and selecting the right dummy for your needs.
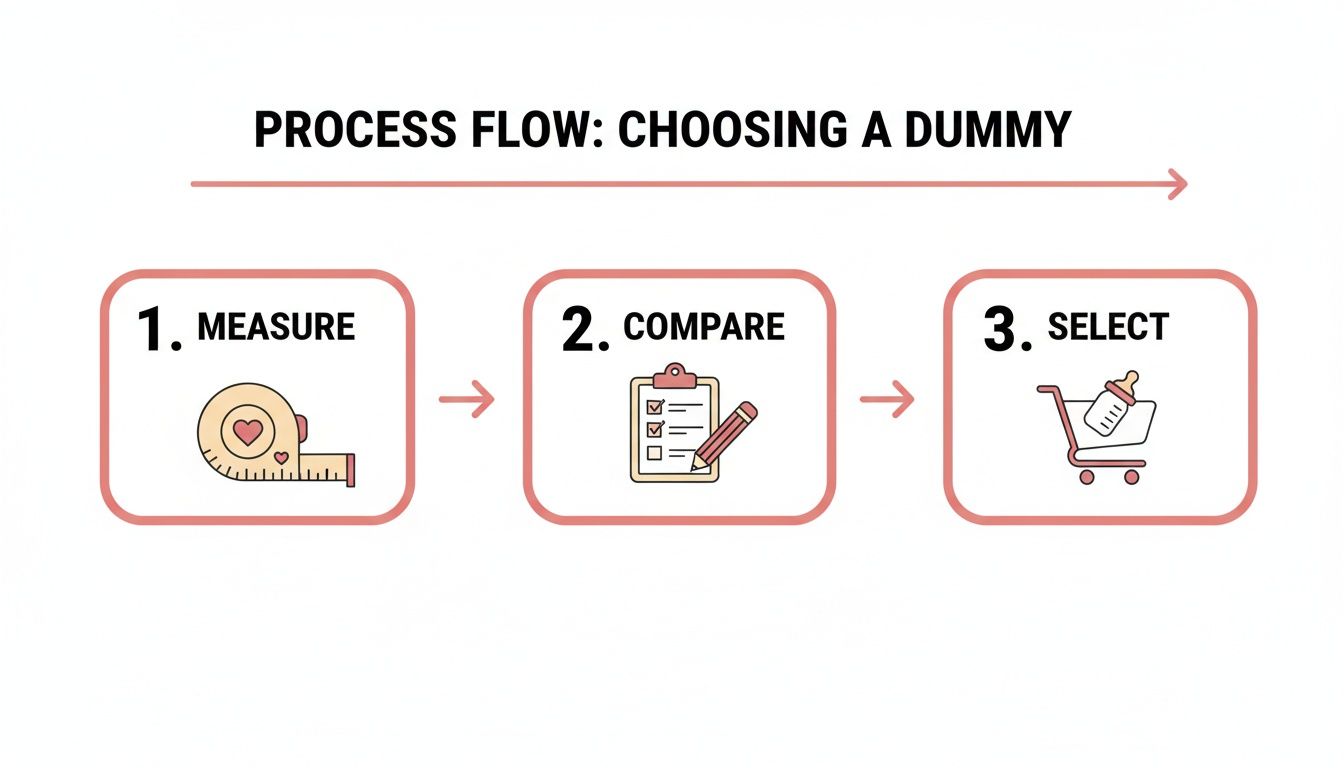
Getting this part right is crucial. It ensures the dummy you bring home actually has the range to match the dimensions you need to replicate.
The Correct Adjustment Sequence
To get the most accurate results, you need to adjust your dummy in a specific order. This method builds the core structure first before you flesh out the circumferences, which is the secret to avoiding a distorted or inaccurate form.
-
Assemble the Stand First: Before you even think about the torso, get the stand set up. Make sure it’s stable, at a comfortable working height, and if it has castors, that they're locked. Trying to make precise adjustments on a wobbly base is a recipe for frustration.
-
Set the Back-Waist Length: This is your non-negotiable first step. Adjust the torso length to match the measurement from the base of the neck down to the natural waistline. If you get this vertical dimension right, the waist on your garments will always fall exactly where it should.
-
Adjust the Circumferences: Now it’s time to work on the main body measurements. Grab your tape measure and adjust the dials in this order, checking each measurement as you go:
- Bust: Turn the bust dials slowly and evenly until the measurement is correct.
- Waist: Next, dial in the correct waist circumference.
- Hips: Finally, expand the hip section to the right size.
Pro Tip: Never turn a single dial all the way to its final setting in one go. Instead, make small, incremental turns on all the corresponding dials at the same time. For instance, give each of the four bust dials a little turn, measure, and then repeat. This ensures the dummy expands evenly and prevents putting too much stress on the internal parts.
Adding Padding for a Custom Shape
A standard adjustable dummy gives you an excellent starting point, but real bodies have unique curves, slopes, and postures that dials can’t quite capture. This is where padding comes in, taking your dummy from a generic form to a true body double.
You can achieve a much more personalised fit by adding padding to specific areas. Simple materials like foam, cotton wadding, or even pre-made padding kits work wonders. This technique is especially useful for replicating:
- Fuller Busts or Stomachs: Layer up wadding to build out these areas for a more realistic curve.
- Rounded Shoulders or a Sway Back: A little strategic padding on the upper or lower back can perfectly mimic posture.
- Wider Thighs or Hips: If the fullest part of the hips is lower down, padding can help smooth this transition from the waist.
Start by pinning your padding material directly onto the dummy. Build up the layers slowly, stepping back often to check the shape and re-measure. Once you’re happy with the form, pull a snug dummy cover over the top. This smoothes everything out and gives you a single, pinnable surface to work on.
If you’re still exploring your options, our guide to the best adjustable dressmaking dummies can offer more insight. By mastering both the dial adjustments and these padding techniques, you’ll have a truly bespoke fitting tool for any project you can dream up.
Care and Maintenance for Your Adjustable Dummy
Your tailors adjustable dummy is more than just a piece of equipment; it's a long-term partner in your creative work. And like any trusted partner, it needs a bit of care to keep it performing at its best for years to come. Looking after your dummy is really about protecting your investment and ensuring it remains a reliable tool you can count on.
A few simple habits can make all the difference, keeping the adjustment mechanisms running smoothly and the surface in top condition. On top of that, a couple of smart accessories can seriously upgrade your workflow, turning your dummy from a useful form into an indispensable assistant for draping, fitting, and pattern making.
Essential Accessories for a Better Workflow
While your dummy is ready to go straight out of the box, a few additions can make your life a whole lot easier and your work more precise. These are simple items, but they have a huge impact on your day-to-day projects.
- Form Covers: A snug cover, usually made from a stretch jersey or cotton, gives you a much smoother, more even surface to work on. It cleverly hides the gaps between the adjustable panels, creating the perfect canvas for draping delicate fabrics and stopping them from snagging on the dials.
- Marking Tapes: These thin, brightly coloured adhesive tapes are brilliant for mapping out key style lines directly on the form. You can use them to mark princess seams, define a waistline, or plot out armholes, giving you a clear visual guide that won’t budge while you work.
These simple tools help bridge the gap between a generic form and a customised, project-specific assistant. They let you prep your dummy for the task at hand, which saves time and massively improves the accuracy of your finished garment.
Protecting and customising your dummy’s surface is the first step towards consistent, professional results. A smooth, well-marked form removes guesswork and allows you to focus entirely on the design and fit of your garment.
Practical Care and Cleaning Tips
Keeping your dummy in good physical shape is pretty straightforward. A little gentle cleaning and careful handling will ensure every turn of the dial feels as smooth as it did on day one.
Dust and loose fabric fibres are just a fact of life in any sewing room. To clean the surface, a quick once-over with a lint roller or the brush attachment of your vacuum cleaner usually does the trick. This will lift away any debris without being harsh on the fabric covering.
If you happen to get a small stain or mark on it, resist the temptation to reach for strong chemical cleaners. Instead, just dampen a clean cloth with water and a tiny drop of mild soap. Gently dab the spot—never scrub—and let it air dry completely before you use it again.
Troubleshooting Common Issues
After a while, you might find that an adjustment dial feels a bit stiff or is harder to turn. This is often just down to dust or tiny fibres working their way into the internal mechanism. Whatever you do, don't try to force it, as you could damage the gears inside.
First, try gently turning the dial back and forth in small movements to see if you can dislodge whatever is stuck. If it's still stiff, a tiny amount of silicone-based lubricant (sprayed onto a cloth first, never directly onto the dummy) can work wonders. Just be sure to check the manufacturer's instructions beforehand, as some models don't mix well with lubricants.
For more in-depth advice on what to look for when purchasing or maintaining a model, you might be interested in our guide to adjustable dressmaking forms.
Best Practices for Storage
When you’re not using your dummy, storing it properly is key to protecting it from damage. If you can, keep it covered with a purpose-made dummy cover or even just a simple dust sheet. This not only keeps the dust off but, more importantly, shields it from direct sunlight.
Sunlight can be surprisingly damaging over time, causing the fabric to fade and become brittle. The best place for your dummy is a cool, dry spot in your studio or sewing room, well away from any windows. By following these simple maintenance tips, you'll make sure your adjustable dummy remains a reliable and accurate friend for countless creative projects.
Got a Question? Let's Get it Answered
Even after getting to grips with what an adjustable dummy is and how to set it up, a few practical questions almost always come up. This is where we tackle those common queries head-on, giving you clear, straightforward answers so you can get the absolute most out of your sewing partner. Think of this as the final piece of the puzzle, here to fill in any gaps and give you total confidence.
We'll sort out those tricky sizing dilemmas, look at the practicalities of fitting different clothes, and get into the finer points of customisation and care. Every answer here is designed to be immediately useful, clearing up common mistakes and offering real-world advice.
I'm Between Two Sizes – Which Dummy Should I Buy?
This is easily the most common question I hear, and the answer might surprise you: always choose the smaller size. It can feel a bit backwards, but trust me, this approach gives you so much more flexibility and a far more accurate final shape.
You can always add padding to a dummy to build it up, but you can never make it smaller than its lowest setting. Say your bust measurement is right at the top end for a size Small, but at the very bottom of a size Medium. Go for the Small. This keeps your measurements comfortably within its adjustment range and avoids putting any stress on the internal parts.
More importantly, it lets you pad the dummy out to perfectly match a real body shape. You can add layers to create a fuller bust, copy the curve of rounded shoulders, or build up a tummy – a level of customisation that's simply impossible if you start with a dummy that's already too big for you. It’s the secret to getting a truly accurate and versatile fit.
Can I Actually Use an Adjustable Dummy to Fit Trousers?
You certainly can. While most standard adjustable dummies are just a torso form without legs, they are still brilliant for fitting trousers. The trick is to focus on the area they handle best: the fit from the waist down to the hip.
You can use the dummy to:
- Get the waistband sitting perfectly.
- Check for a smooth, clean drape across the hips and seat.
- Nail the position and depth of the crotch rise.
These are often the trickiest parts of fitting trousers. While you won't be able to check the full leg length or how they fit around the calf, a standard torso form is more than enough to perfect the crucial top block of any pair of trousers. For more specialised work, you can find bifurcated (split-leg) models, but they're really only necessary for professional trouser-makers.
How Do I Get the Dummy to Match My Posture?
Now we’re getting into the advanced stuff. Matching your posture is what takes your dummy from a simple measurement tool to a true body double. This is absolutely essential for anyone with common postural quirks like rounded shoulders or a sway back, as these have a massive impact on how a garment hangs.
Once you’ve set all the main circumference and length measurements, the real customisation can begin. Using layers of foam padding, cotton wadding, or even old shoulder pads, you can start building up areas to mimic specific shapes.
Replicating posture is what separates a good fit from a perfect one. It accounts for the unique way a person stands, ensuring the garment is balanced and hangs correctly on the actual body, not just on a generic form.
For example:
- Rounded Shoulders: Add padding across the upper back and shoulder blades.
- Sway Back: Build up a small cushion of padding at the small of the back.
- Prominent Stomach: Layer wadding across the front of the abdomen.
Pin the padding in place as you go, and then pull a snug-fitting dummy cover over the whole thing. This final step is key – it compresses all the padding into a smooth, unified, and pinnable surface. Just like that, you’ve turned a standard dummy into a personalised fitting assistant.
How Tough Are the Adjustment Dials?
A good quality adjustable dummy is designed to be used, and its internal mechanisms are built to last. The dials and gears are made to handle the push and pull of constant adjustment, but their lifespan really comes down to how you treat them.
The key to keeping them working perfectly is to be gentle and methodical. Always turn the dials smoothly and never, ever force them if you feel resistance. The most common cause of damage is adjusting unevenly. It’s much better to change the measurements bit by bit across all the dials at once, rather than cranking one dial all the way out while the others are still wound in.
This balanced approach stops you from putting too much strain on any single part of the internal frame. With a little bit of care and by following the manufacturer’s instructions, the dials on your tailors adjustable dummy should give you years of reliable, precise service.
At Display Guru, we specialise in providing high-quality dummies and display tools that support creatives at every level. Whether you're a professional tailor, a design student, or a dedicated hobbyist, our range of adjustable and pin-friendly forms is designed for precision and durability. Explore our collection to find the perfect partner for your sewing studio. Discover your ideal dummy at Display Guru.