


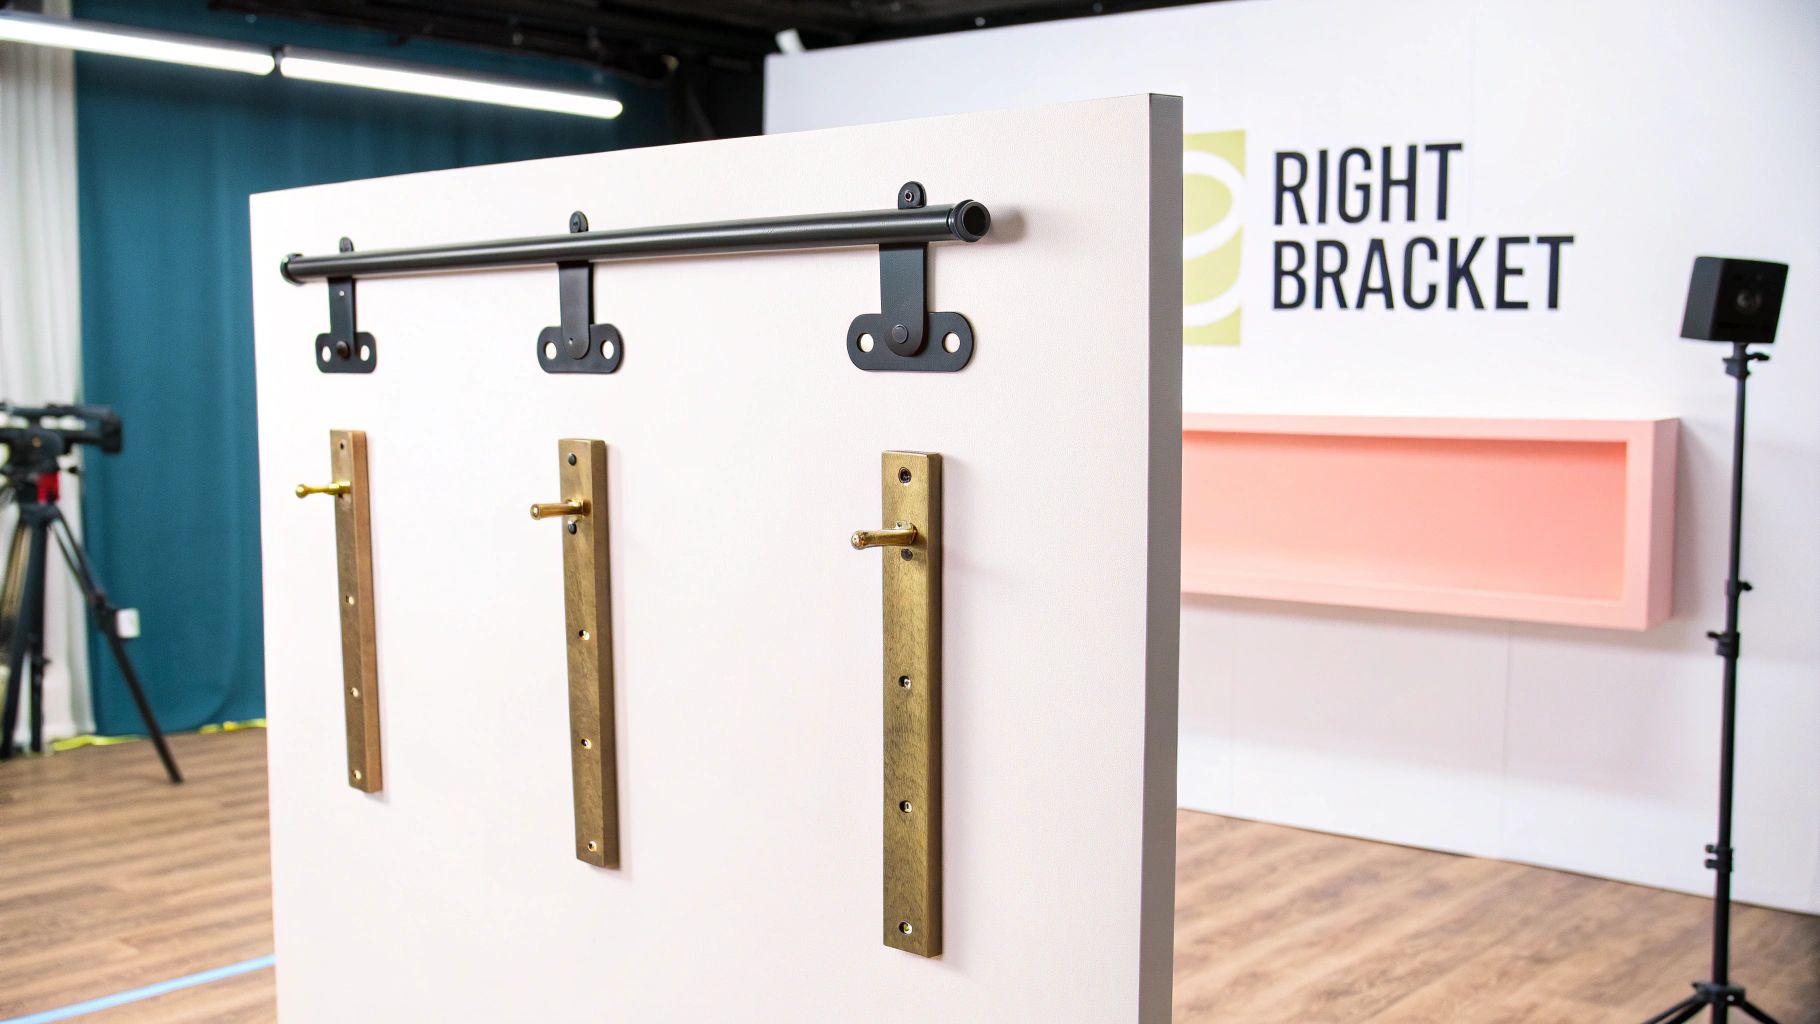
Your Guide to Installing a Hanging Rail Bracket
A hanging rail bracket is the unsung hero of any wardrobe system. It's the crucial link that secures your clothes rail to the wall, and getting the choice right is paramount for both style and safety. The best bracket for you comes down to three key things: the material it's made from, the weight you expect it to hold, and, most importantly, the type of wall you're fixing it to. Nail this combination, and you'll have a secure, long-lasting setup.
Selecting the Perfect Bracket for Your Project
Finding the right hanging rail bracket isn't just about picking one that looks good off the shelf. It’s a practical decision that hinges on your specific needs. Think about the material, your wall's structure, and what you’ll be hanging. A flimsy bracket might hold a few summer tops, but it’s a recipe for disaster if you plan to load it up with heavy winter coats.
Understanding Material Strengths
The material a bracket is made from is its most important feature, directly affecting its strength, durability, and overall look.
- Brushed Stainless Steel: This is a fantastic choice for a modern, clean aesthetic. It’s also brilliant at resisting corrosion, making it perfect for potentially damp spaces like laundry rooms or bathrooms. You can count on its durability to handle a serious amount of weight.
- Classic Brass: If you're after a timeless, warm feel for a traditional home or a boutique-style setup, brass is hard to beat. It’s plenty strong, but be aware that it can tarnish over time, so it might need a polish now and then to keep its shine.
- Rugged Black Iron: For that industrial, heavy-duty vibe, look no further. This is the ideal option for walk-in wardrobes, retail stockrooms, or any project where sheer strength is the number one priority. Its raw, powerful finish can really add character to a room.
When it comes to choosing the right material for your hanging rail brackets, it helps to see the options side-by-side. Each has its own strengths and is suited to different loads and styles.
Hanging Rail Bracket Material Comparison
| Material | Typical Load Capacity | Best For | Aesthetic Style |
|---|---|---|---|
| Stainless Steel | High | Modern interiors, humid environments | Sleek, contemporary, minimalist |
| Brass | Medium to High | Traditional décor, boutique displays | Classic, warm, vintage |
| Black Iron | Very High | Industrial spaces, heavy-duty storage | Rustic, industrial, robust |
| Chrome-Plated Steel | Medium | Retail environments, versatile applications | Bright, reflective, clean |
This table gives you a quick snapshot, but always check the manufacturer’s specifications for the exact weight limits before you buy.
The growing demand for quality hardware isn't just a feeling. The global market for handrail brackets, a close cousin to ours, saw a compound annual growth rate of about 6% between 2019 and 2024. This growth is largely driven by construction and renovation, with metal brackets leading the charge because people value reliability above all else.
Matching the Bracket to the Wall
Honestly, the most beautiful, strongest bracket in the world is completely useless if your wall can't support it. I can't stress this enough: your wall type is the single most critical factor for a secure installation.
If you have a solid brick or block wall, you're in luck. This is the ideal foundation. With some heavy-duty fixings, you can create an incredibly strong anchor point that will easily support a rail packed with clothes.
Plasterboard walls, on the other hand, require a bit more thought. Never just screw a bracket directly into plasterboard—it will almost certainly pull out and fail. For a safe and secure fit, you must locate the wooden studs behind the plasterboard and fix your brackets directly into them. For a more detailed look at this, check out our guide on choosing the best clothing rail bracket for different wall types.
Key Takeaway: Never, ever underestimate your wall type. A bracket is only as strong as the point it's fixed to. For plasterboard, find those studs. For solid walls, use the right heavy-duty plugs and screws. This one check will save you from sagging rails and damaged walls down the line.
Getting Your Tools and Wall Ready
A solid installation is all about the prep work. Honestly, the time you spend before you even pick up a drill is what makes the difference between a rock-solid rail and a wobbly disaster waiting to happen. Skipping this stage is a classic mistake, and it often ends with brackets pulling loose.
Before you start, get your kit together. Having everything within arm's reach makes the job smoother, safer, and a lot less frustrating.
- A Good Spirit Level: This is non-negotiable. There's nothing worse than a wonky rail; it just looks wrong, and all your hangers will slide to one end.
- A Decent Drill: A combi drill is your best bet here. It gives you the option of standard drilling for softer walls and a hammer action for getting into tough materials like brick.
- Stud Finder: If you're dealing with plasterboard, this little gadget is a lifesaver. It finds the wooden studs hidden behind the wall, which are the only places you should be fixing anything heavy.
- Tape Measure & Pencil: Simple, but essential for getting your marks spot on. You’ve heard it before, but it’s true: measure twice, drill once.
- Cable and Pipe Detector: Don't skip this. It's an inexpensive tool that prevents you from drilling straight into a live wire or a water pipe—a mistake you only make once.
Once you've got your tools, it's time to turn your attention to the wall itself. You need a clean, stable surface to create a strong anchor.
Prepping the Wall Surface
First, clear the space you'll be working in and give the wall a quick wipe. Getting rid of any dust or grime means your pencil marks will be crisp and you won’t get debris in the way when you’re drilling.
The real key here is figuring out what your wall is made of, as your approach will change depending on the material. In older properties with solid brick, you're looking for a solid fixing, well away from any crumbly mortar joints. For internal walls made of breeze blocks, you can get a great hold, but you absolutely have to use the right kind of wall plug.
A Quick Word of Advice: When you're mounting on plasterboard, never, ever rely on the plasterboard itself to take the weight. Your stud finder is your best mate here. Fixing directly into a wooden stud can boost the load-bearing capacity by up to 75% compared to just using standard plasterboard fixings.
If you’re fitting your rail to a wooden wall or alcove, making sure the wood is properly prepared and finished is a good idea. Using a quality Long Life Woodstain Gel can protect the timber and make it look great.
Getting your storage sorted is crucial, especially if you're setting up a dedicated workspace. We've got some great ideas for getting organised in our article on creating efficient setups for sewing and crafting. A bit of time spent on proper preparation now will pay off with a professional-looking and long-lasting result.
A Practical Guide to Mounting Your Bracket
Alright, you've got your tools and your wall is prepped—now for the main event. This is where a bit of precision goes a long way, ensuring your rail is perfectly level, incredibly secure, and ready to take the weight of your entire wardrobe. It’s all about turning those careful measurements into a professional-looking installation.
Getting Your Markings Spot-On
A perfectly level rail is non-negotiable, and it all starts with accurate markings. Grab your spirit level and tape measure to decide on the final height for your rail. Mark that spot on the wall. From that line, measure down to where the top screw of your first bracket will go. Make a clear, sharp pencil mark.
Next, hold the bracket up to the wall, lining up its top hole with your mark. Use the spirit level again, this time vertically, to make sure the bracket itself is dead straight before you mark the other screw holes.
When you're ready to position the second bracket, use your level to draw a faint horizontal line across from your first set of marks. This guarantees they line up perfectly. A classic mistake is to measure up from the floor for each bracket, but floors are rarely level. Always work from your initial marking.
This visual guide breaks down those crucial first steps for prepping any wall.
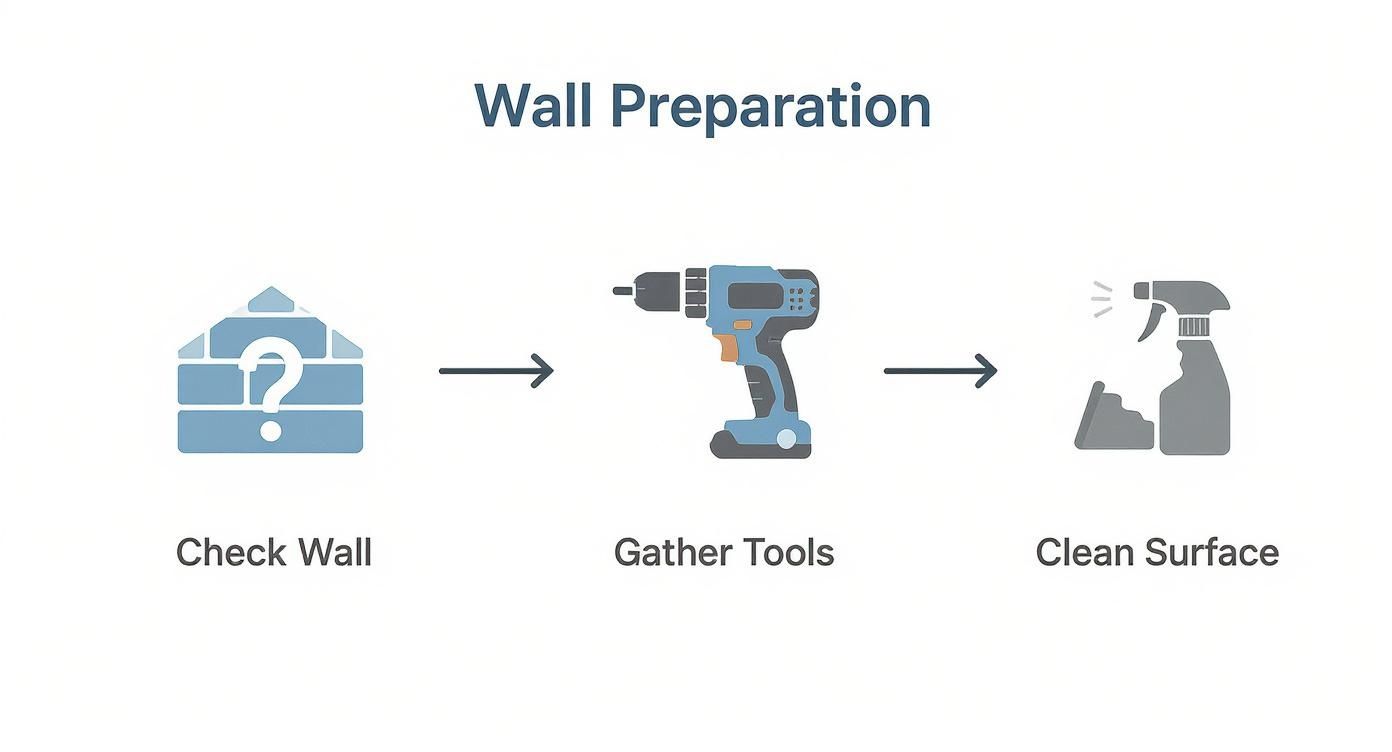
As you can see, figuring out your wall type, getting the right gear, and making sure the surface is clean are the foundations for a solid job.
Drilling and Fixing with Confidence
Drilling can feel a bit daunting, but I've got a couple of pro tips to make it a breeze. To stop your drill bit from slipping or "wandering" on a smooth, painted surface, just stick a small piece of masking tape over your mark. It gives the bit something to grip and keeps your hole exactly where you want it.
Make sure you choose a drill bit that’s the same size as your wall plug. If you’re going into solid brick or blockwork, flick on the hammer action on your drill—it makes the job so much easier. Drill to the required depth, give the hole a quick clear-out to remove dust, and then gently tap the wall plug in until it's sitting flush with the wall.
Pro Tip: The fit is everything. A wall plug should need a light tap from a hammer to go in. If you can push it in easily with just your thumb, the hole is too big and your fixing won't be secure. It's always better to start with a slightly smaller drill bit and widen the hole if you have to.
Choosing the right fixing can honestly make or break the entire project. For a deeper dive into what works best with different walls, check out our guide on achieving a sturdy https://www.displayguru.co.uk/blogs/news/hanging-rail-wall installation.
Securing the Bracket and Attaching the Rail
With your wall plugs neatly in place, it's time to get the brackets on the wall. Position each one over the plugs and drive the screws in until they're good and tight. Just be careful not to overtighten, as you could damage the plug or the wall itself. The bracket should feel completely solid, with no wobble at all.
Finally, you can place the rail into the brackets. Most designs have a small grub screw on the underside of each bracket which you'll need to tighten. This is what locks the rail in place and stops it from spinning or sliding around. If you’re installing other kinds of wall-mounted storage, this ultimate guide to hanging bicycle racks offers some great, transferable advice for getting a secure fit.
Give the whole rail a firm tug to make sure it's stable. If it feels solid, you're good to go. You've just installed a hanging rail that's not only level and neat but, most importantly, safe and built to last.
Common Mistakes and Pro Installation Tips
Even a simple job can go wrong if you're not careful. When you're putting up a hanging rail, a few common slip-ups can result in a wobbly setup, a damaged wall, or the whole thing coming crashing down. Let's walk through some of the frequent errors I see, so you can get a secure, level, and professional-looking finish from the get-go.
One of the biggest culprits? Screws that are just too short. It's a classic mistake. Your screws need to go through the bracket, through the plasterboard, and then get a solid grip into whatever is behind it – whether that's a timber stud or a brick wall. A screw that's only just caught the edge of a wall plug is asking for trouble and simply won't hold under any real weight.
Another classic is underestimating the total load. It's easy to think just about the clothes, but you have to account for the weight of the rail itself and all the hangers. That cumulative force adds up quickly. My advice is to always play it safe and choose brackets and fixings rated for more weight than you think you'll need. If you're planning something really robust, our guide to choosing heavy duty rails is worth a read.
Conquering Tricky Installations
Of course, not every wall is a perfectly flat, easy surface. Putting a rail into a tight alcove or up against a bumpy, uneven wall calls for a bit more finesse.
-
Uneven Walls: Older houses are notorious for this – you’ll rarely find a perfectly straight wall. If you just tighten a bracket against an uneven surface, you risk twisting it, which compromises its strength. The solution is to use shims (small plastic or wooden packers) to fill the gap between the bracket and the wall. This gives you a solid, flat base to work with.
-
Alcove Installations: Fitting a rail wall-to-wall in an alcove is a fantastic use of space. Precision is everything here. Measure the alcove's width at the exact height you'll be installing the rail, as walls are often not perfectly parallel. I usually cut the rail about 5mm shorter than the measurement. This little bit of wiggle room makes it much easier to slot the rail into its brackets.
Crucial Safety Warning: If there's one mistake to avoid, it's skipping the stud-finding step on plasterboard walls. A standard wall plug is only meant for very light items. Fixing a clothes rail directly to plasterboard without anchoring it to a timber stud is a recipe for disaster. Always, always use a stud finder to locate the solid supports. It’s the only way to guarantee a safe and secure installation.
Taking a moment to think about these potential challenges will save you a lot of frustration down the line. That little bit of extra care in your prep work and choosing the right fixings is what separates a shoddy job from a solid, reliable hanging rail that will last for years.
Maintaining Your Hanging Rail for Long Term Use

Getting your hanging rail securely on the wall is a great start, but the job isn't quite done. A little ongoing care is the secret to making sure it stays strong and reliable for years to come. Think of it as a quick health check for your wardrobe system—a few simple checks can stop tiny issues from becoming big problems.
Every few months, it's worth giving the rail a gentle but firm tug. Does it wobble? Does it move at all? This simple test is the quickest way to find out if any of the fixings have started to work loose under the weight of your clothes.
Routine Checks and Adjustments
Even the most solid installation can shift slightly over time, thanks to vibrations and the constant change in weight from adding and removing clothes. A tiny bit of loosening is perfectly normal, but you want to catch it early.
Make it a habit to inspect each hanging rail bracket at least twice a year. Have a close look where the bracket meets the wall and where the screws go into their fixings. If you can see any gaps or the bracket isn't sitting completely flush anymore, it's time to reach for the screwdriver.
Gently tighten each screw until it feels snug again. The trick is not to overtighten—this can strip the screw head or damage the wall plug, which creates a bigger headache. You're just looking to restore that original, firm hold.
A Practical Tip: Pay extra attention to rails that are doing the heavy lifting, like the one holding all your winter coats, or rails in busy parts of your home. These are the most likely to loosen, so being proactive here will really extend the life of your setup.
Cleaning and Material Care
A clean rail and brackets not only look better but also last longer by preventing grime build-up and preserving the finish. How you clean them, though, really depends on what they're made of.
- Industrial Iron: For raw or black iron, the main thing to watch for is rust, especially if there's any moisture in the air. A quick wipe with a dry, soft cloth every so often is all it needs. If you spot any surface rust, you can gently buff it away with fine-grade steel wool before applying a very thin layer of wax to protect it.
- Polished Brass: Brass will naturally develop a patina over time, which can be a beautiful, aged look. If you prefer that brilliant, brand-new shine, a good quality brass polish and a microfibre cloth will bring its lustre right back.
- Stainless Steel: This is the low-maintenance champion. A simple wipe with a damp cloth is usually all you need to get rid of dust and fingerprints, keeping it looking sleek.
If you’re using covered storage systems, it’s also a good idea to check the covers themselves. For more on protecting your items this way, take a look at our guide on garment racks with covers.
Your Hanging Rail Bracket Questions Answered
Even the best-laid plans can hit a snag, and it’s completely normal to have a few questions pop up during an installation. Getting clear, practical answers beforehand is the key to keeping your project moving and ensuring the final result is safe, sturdy, and does the job properly. Let's tackle some of the most common queries I hear from people.
The demand for clever home storage is definitely on the rise, which means more and more people are looking for reliable hardware. While it's tricky to find specific stats for just hanging rail brackets, the wider European hangers market gives us a good clue. It's projected to grow at a steady 4.4% each year between 2023 and 2030, which points to a healthy demand in both homes and shops. You can actually read more about these market trends and see how they affect what's available here in the UK.
What Is the Maximum Weight a Standard Bracket Can Hold?
This is the big one, and the honest-to-goodness answer is that it's all about the entire setup, not just the bracket. A beefy, heavy-duty steel bracket might be rated for over 50kg, but that's only if you've anchored it securely into a solid brick wall or a timber stud.
Take that exact same bracket and fix it to plasterboard with the wrong plugs, and it could give way under as little as 10-15kg. The wall itself and the fixings you choose are the real heroes here. Always, always check the manufacturer’s guidelines and resist the temptation to overload the rail.
How Do I Install a Bracket on a Plasterboard Wall?
When you’re dealing with plasterboard, your number one goal is to find the timber studs hiding behind it. A simple stud finder is your best friend here. Locating these vertical supports and drilling your bracket directly into them gives you the most secure anchor point you can get.
But what if there are no studs right where you need the bracket? Don't just use standard plastic wall plugs – they simply won't hold and will eventually pull out. You need to reach for specialised plasterboard fixings. My go-to options are:
- Hollow Wall Anchors: These are clever little things that expand behind the board, creating a really solid grip.
- Toggle Bolts: These feature spring-loaded 'wings' that open up inside the wall cavity, spreading the load over a much wider area.
A Word of Warning: Using the wrong fixings on a plasterboard wall is the single biggest reason installations fail. Spending a few extra minutes and a little more money on the right anchors isn't just a recommendation; it's essential for a safe and long-lasting setup.
How Far Apart Should I Space My Brackets?
Getting the spacing right is crucial if you want to avoid that dreaded sag in the middle of your rail. As a general rule of thumb, I always advise placing brackets no more than 100cm (about 40 inches) apart for everyday clothes.
However, if you know you’ll be hanging heavy winter coats or a whole collection of suits, you need to be more conservative. I’d bring that spacing down to 60-80cm to be safe. And for any rail that’s longer than 120cm, a centre support bracket isn't optional—it's a must to keep things rigid and distribute the weight properly.
At Display Guru, we specialise in robust and reliable garment rails and hardware for both retail displays and home wardrobes. Explore our collection to find the perfect, sturdy solution for your space.