


9 Essential Tools for Sewing and Crafting Displays in 2025
The final presentation of a sewing or crafting project is as crucial as the creation process itself. A well-displayed piece not only showcases your skill but also respects the hours of dedication invested. For professionals, hobbyists, and retailers alike, the right tools can transform a beautiful creation into a stunning exhibit. This guide moves beyond basic techniques, focusing on the essential display tools and accessories that provide a professional finish and elevate your presentation.
We will explore a curated selection of resources, primarily available from specialists like Display Guru, offering practical guidance on how each item can enhance your work. From home studios to retail floors, this resource list delves into real-world applications, honest limitations, and implementation strategies. Furthermore, understanding the evolving market for handmade goods, as exemplified by discussions around Etsy's transformation and the value of authentic craftsmanship, underscores the importance of a polished final product. This article is designed to help you choose the best tools for your specific sewing and crafting needs, ensuring your masterpieces receive the attention they truly deserve. We will cover everything from foundational tools like cutting mats to advanced techniques such as intricate seam finishing.
1. Cutting Mats (Self-Healing Cutting Mats)
A self-healing cutting mat is a foundational tool for any serious sewing and crafting professional. These mats are constructed from multiple layers of a specialised PVC material designed to reseal after being cut by a rotary cutter or craft knife. This not only protects your worktable from damage but, crucially, preserves the sharpness of your blades by providing a forgiving surface. For any task requiring precision, from quilting to pattern cutting, these mats are non-negotiable.
Key Applications and Considerations
The utility of a cutting mat extends across various disciplines. A quilter might use a large 24x36-inch mat to efficiently cut multiple fabric strips, while a fashion designer relies on it for accurately trimming pattern pieces. Even card makers and paper crafters benefit from smaller mats for intricate, detailed work.
When selecting a mat, consider these practical points:
- Size: Choose a mat that accommodates your most frequent projects. A larger mat prevents the need to constantly reposition fabric.
- Storage: Always store your mat flat or hanging from a specialised rack. Warping is a common issue if it's rolled or stored improperly, rendering the grid inaccurate.
- Maintenance: Clean the mat with a soft cloth, mild soap, and cool water. Avoid harsh chemicals or heat, as they can degrade the self-healing properties. Regularly rotating the mat also ensures even wear across the surface.
The following chart breaks down the core features that make a self-healing mat an indispensable part of your workspace.
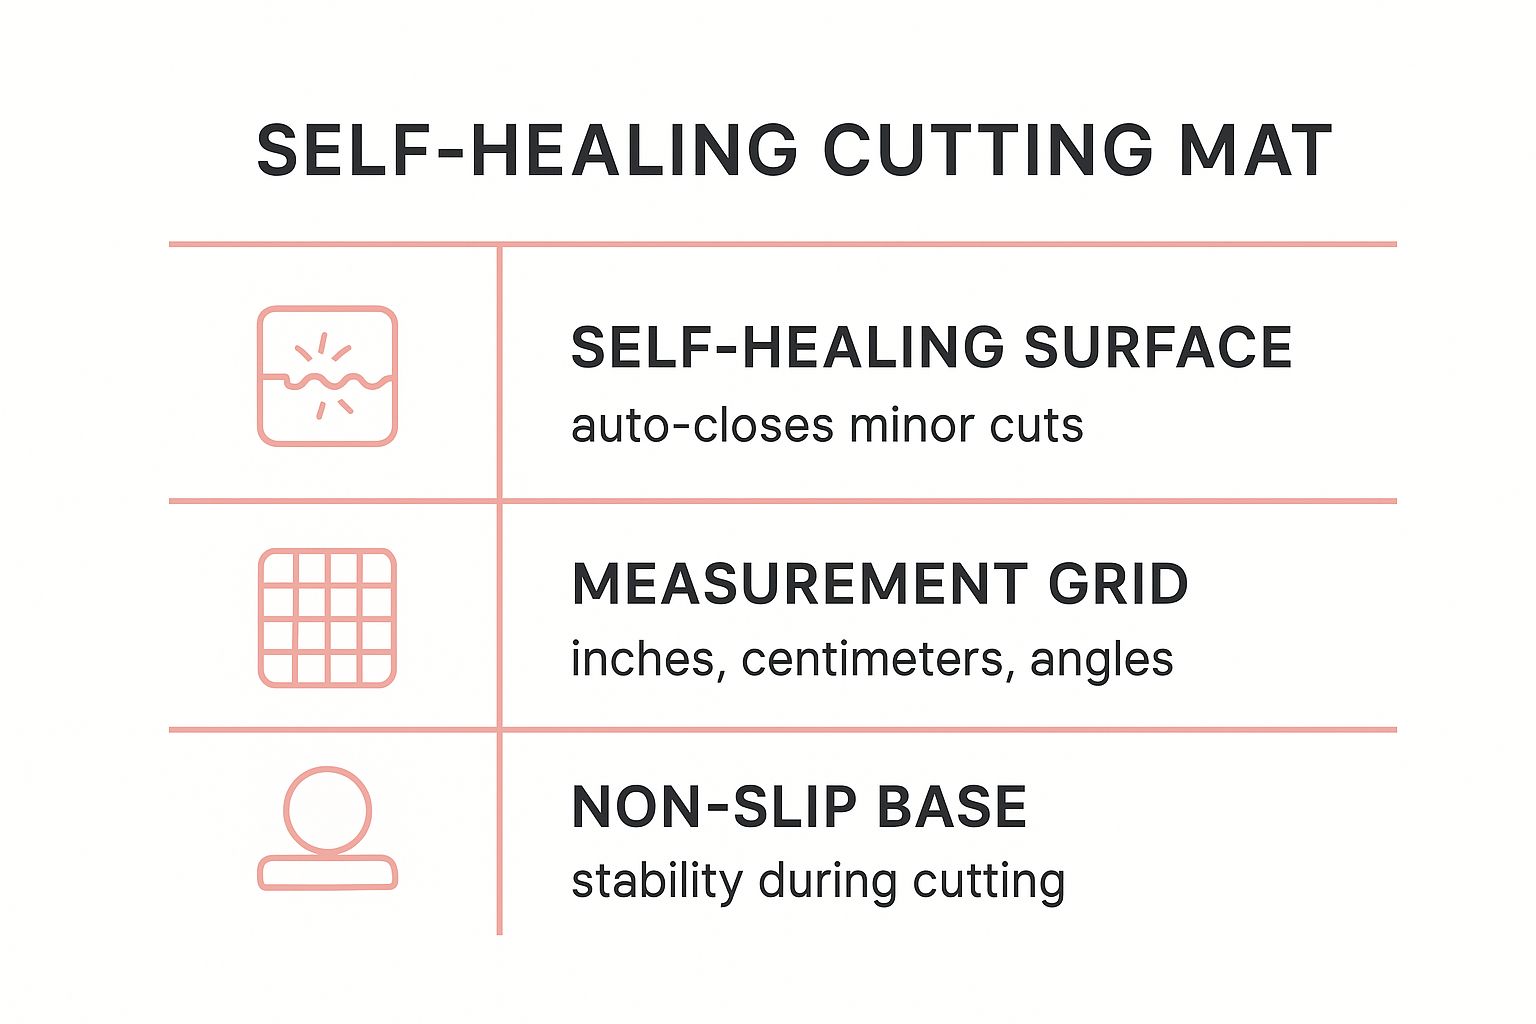
This visualisation highlights how the combination of a resealable surface, precise measurement grid, and stable base creates a comprehensive cutting system. Integrating a high-quality cutting mat is a key step in optimising your workspace; explore our guide on sewing room ideas for more organisational strategies.
2. French Seam Construction
French seam construction is a professional sewing technique that completely encases raw fabric edges within the seam allowance. This method creates a beautifully clean, polished finish on both the inside and outside of a garment, eliminating the need for an overlocker. The process involves sewing the seam twice: first with the wrong sides of the fabric together, and a second time with the right sides together, trapping the raw edge inside. For any sewer engaged in high-end sewing and crafting, mastering this technique is a significant step towards achieving a couture-level finish.
Key Applications and Considerations
The elegance and durability of a French seam make it ideal for specific applications. It is frequently used in high-end lingerie and silk sleepwear where seam comfort against the skin is paramount. Fashion designers often specify this technique for delicate, sheer, or lightweight fabrics like chiffon and organza to prevent fraying and maintain a transparent, clean aesthetic. It is also an excellent choice for children's clothing, as the enclosed seam is both gentle on sensitive skin and exceptionally durable.
When incorporating this technique, consider these practical points:
- Seam Allowance: Start with a wider seam allowance, typically 15mm (5/8 inch), to ensure you have enough fabric to properly encase the first seam.
- Trimming: After the first pass (wrong sides together), trim the seam allowance down precisely to about 3mm (1/8 inch). This is crucial to prevent raw threads from poking through the final seam.
- Pressing: Careful pressing is non-negotiable. Press the seam flat after the first stitching line, and then press it again after the second pass to achieve a crisp, professional-looking result without puckering.
The following video from Professor Pincushion provides a clear, step-by-step visual guide to executing a perfect French seam.
This visualisation demonstrates the two-step process that distinguishes this elegant finishing method. Integrating this and other advanced methods can elevate your work; explore our detailed overview of essential sewing techniques to expand your skillset.
3. Rotary Cutters and Rulers
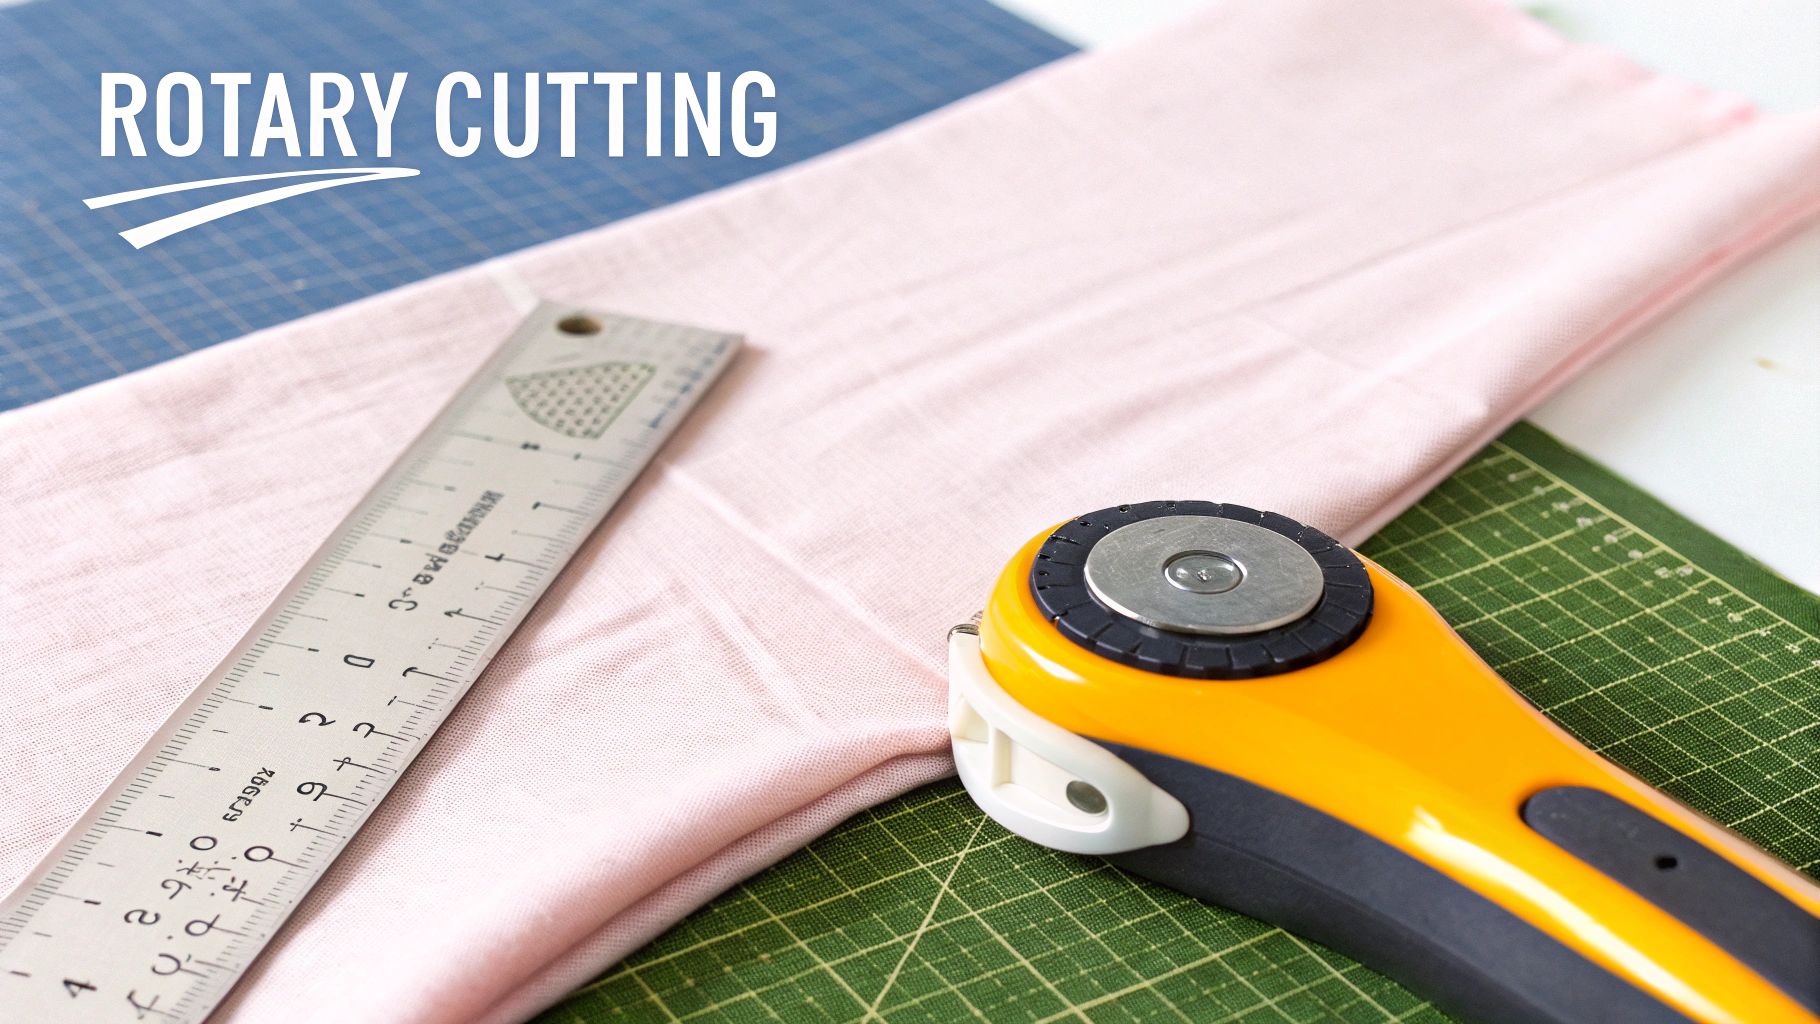
The combination of a rotary cutter and a specialised acrylic ruler represents a significant leap forward in precision for sewing and crafting. A rotary cutter, essentially a circular blade mounted in a handle, glides along the edge of a sturdy ruler to make perfectly straight, clean cuts through multiple layers of fabric. This system, originally popularised in the quilting world, provides unparalleled speed and accuracy, making it an essential tool for anyone serious about achieving a professional finish.
Key Applications and Considerations
The efficiency of this cutting system is transformative across various creative fields. Quilters can slice through eight or more layers of cotton to produce identical strips and squares for complex blocks. In garment making, it streamlines the process of cutting straight pattern pieces like waistbands, cuffs, and straps. Even crafters working with cardstock, felt, or vinyl find this method superior to scissors for achieving flawless edges.
When integrating this system into your workflow, consider these key points:
- Safety: Always engage the blade's safety guard immediately after a cut. A rotary blade is exceptionally sharp and requires constant vigilance.
- Technique: Use firm, even pressure and roll the cutter away from your body. Avoid a back-and-forth sawing motion, as this can lead to jagged edges and fabric snags.
- Maintenance: Replace your blade at the first sign of skipping or dragging. A dull blade requires more pressure, increasing the risk of slipping and damaging your fabric and mat.
- Compatibility: Only use thick, non-slip acrylic rulers specifically designed for rotary cutting. A standard ruler is too thin and poses a significant safety hazard as the blade can easily jump over it.
This cutting method requires a stable, flat surface to work effectively. Optimising your workspace with the right furniture is crucial for both safety and precision; discover our insights on choosing the perfect sewing and cutting table to complement your tools.
4. Pattern Matching and Notching Systems
A professional finish in garment construction is often defined by attention to detail, and no technique showcases this more than precise pattern matching. This system involves meticulously aligning fabric designs like plaids, stripes, or large-scale prints across seam lines. It also relies on a strategic notching system, using small marks on pattern pieces to ensure every section joins together perfectly. Mastering this is crucial for transforming a homemade garment into a high-end, bespoke-quality piece.
Key Applications and Considerations
The application of this system is what separates amateur from professional sewing and crafting. It's essential when creating a plaid shirt where the lines must flow uninterrupted from the shirt front to the pocket, or when aligning stripes across the princess seams of a dress for a seamless look. This technique can also be used creatively, for instance, to form chevron effects at the seams of a garment made from diagonally striped fabric.
When incorporating pattern matching into your projects, consider these points:
- Fabric Quantity: Always purchase extra fabric, typically an additional quarter to half a metre, to allow for the specific placement of pattern pieces.
- Accurate Placement: Use pattern weights instead of pins when laying out your pattern. Pins can slightly distort the fabric grain and print, compromising the final alignment.
- Cutting Precision: Before cutting, take a photograph of your complete layout. This provides a valuable reference point and helps prevent errors, especially with complex prints.
- Notching Method: Use tailor's tacks, chalk, or small snips within the seam allowance to mark your notches accurately. These guides are non-negotiable for assembling the garment correctly.
Properly executed pattern matching, guided by a robust notching system, is a hallmark of superior craftsmanship in the world of sewing and crafting. It demonstrates a deep understanding of fabric behaviour and garment construction, ensuring results that are both visually stunning and impeccably tailored.
5. Bias Tape and Binding Applications
Bias tape and binding applications represent a crucial finishing technique in both sewing and crafting, elevating a project from amateur to professional. Bias tape is a narrow strip of fabric cut on the bias-at a 45-degree angle to the selvage-which gives it inherent stretch and flexibility. This quality allows it to neatly encase raw edges, especially around curves like necklines and armholes, without puckering or bunching. It’s an essential skill for garment construction, quilting, and creating durable, decorative trims.
Key Applications and Considerations
The versatility of bias binding is evident across many disciplines. In quilting, it provides a durable and attractive edge that frames the entire piece. For dressmakers, it offers a clean, high-end finish on sleeveless tops or curved hems. It can also be used as a decorative element on children's clothing or to create functional ties and straps.
When incorporating bias binding into your projects, consider these tips:
- Consistency: For custom binding, use a bias tape maker tool to ensure your fabric strips are folded uniformly for a consistent width and professional look.
- Application: Always start and finish applying your binding at an inconspicuous point, like a side seam or underarm, to hide the join.
- Tension: Gently ease the binding around convex (outward) curves, but apply slight tension when sewing around concave (inward) curves to help it lie flat.
- Seams: Join your binding strips with a diagonal seam rather than a straight one. This distributes the bulk of the seam allowance, resulting in a smoother finish.
Careful planning and execution of these binding techniques are key to a successful outcome. To keep track of these detailed steps for larger projects, consider using our guide to developing a sewing project planner to organise your workflow.
6. Stabilizers and Interfacing Systems
Stabilizers and interfacing are the unsung heroes of professional garment construction and advanced sewing and crafting. These support materials are applied to fabric to add structure, prevent stretching, and provide a crisp finish. Ranging from fusible (iron-on) to sew-in varieties, they are essential for achieving a high-quality, durable result in projects like shirt collars, waistbands, and button plackets.
Key Applications and Considerations
The application of these systems is nuanced and project-specific. For example, a crisp, woven interfacing provides the necessary structure for a tailored jacket lapel, while a soft, knit interfacing stabilises a t-shirt neckline without compromising its stretch. In machine embroidery, tear-away or wash-away stabilizers provide temporary support to prevent puckering, ensuring a clean and precise stitch-out.
When selecting and using these materials, consider these critical points:
- Fabric Compatibility: Always match the weight of the interfacing to your main fabric. A heavy interfacing will overpower a lightweight fabric, while a light one will not provide enough support for a heavy material.
- Testing: Before applying to your final project, always test the interfacing on a scrap of your fashion fabric. This helps you check for compatibility, adhesion, and the final "hand" or feel.
- Pre-Shrinking: If your main fabric is washable, it is wise to pre-shrink your interfacing, especially fusible types, to prevent puckering after laundering.
- Application: Use a pressing cloth when applying fusible interfacing to protect your fabric from scorching and prevent a shiny finish. Grading the seam allowances of the interfacing helps reduce bulk for a smoother, more professional look.
Effectively managing your collection of interfacing and stabilizers is crucial for an efficient workflow. For tips on keeping these often-unruly materials in check, our guide on sewing room organisation ideas offers practical storage solutions. Mastering these support materials is a significant step toward elevating the quality of your finished work.
7. Colour Theory and Fabric Coordination
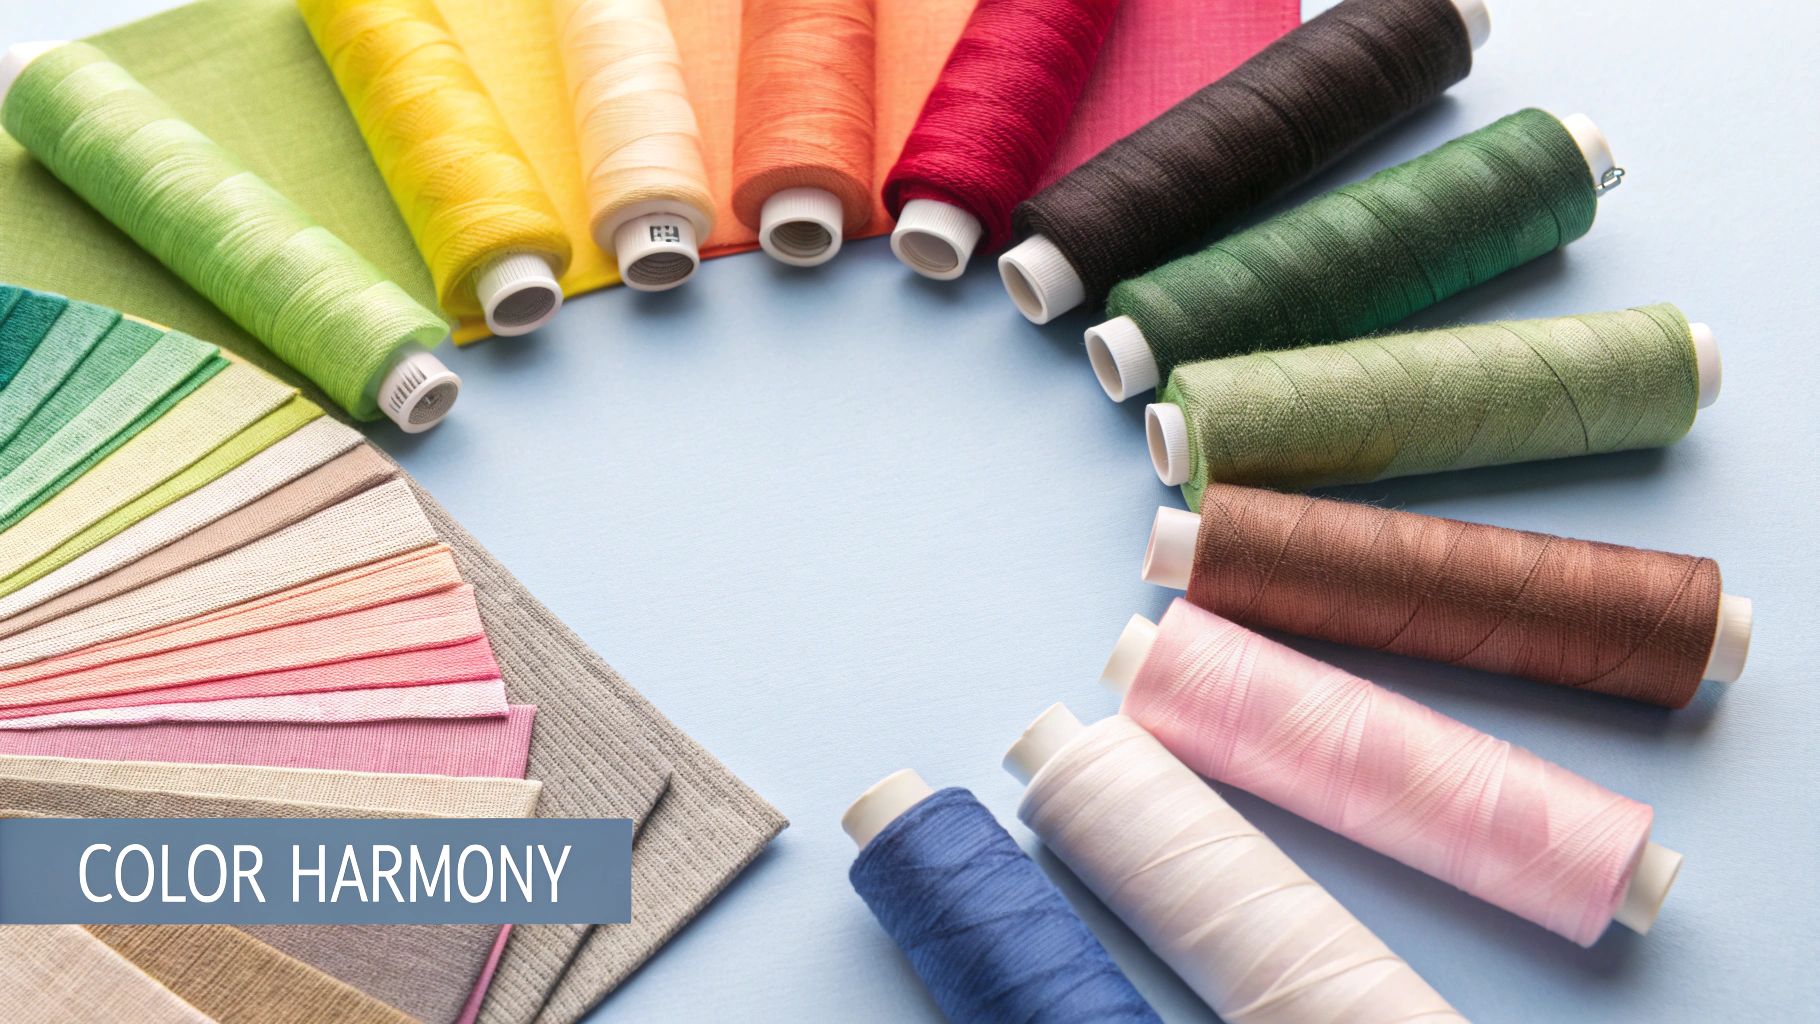
Understanding colour theory is not just an artistic principle; it is a systematic approach to elevating sewing and crafting projects from amateur to professional. This involves applying established concepts, such as the colour wheel, to make informed decisions about combining fabrics, threads, and embellishments. A mastery of colour coordination allows a creator to intentionally evoke a specific mood, create visual harmony, and ensure the final product is aesthetically compelling and coherent.
Key Applications and Considerations
The application of colour theory is universal in fabric arts. A quilter might use complementary colours like blue and orange to create high-contrast, dynamic blocks, while a garment maker could choose an analogous scheme of blues and greens for a sophisticated, harmonious dress. This knowledge is crucial for any sewing and crafting discipline where visual impact is paramount.
When planning your project's palette, consider these practical points:
- Find Your Anchor: Start with an inspiration piece, like a patterned fabric or a photograph, and build your colour scheme around its dominant tones.
- Balance with the 60-30-10 Rule: For a balanced look, use a dominant colour for 60% of the project, a secondary colour for 30%, and an accent colour for the remaining 10%.
- Test with Swatches: Before committing to large cuts of fabric, lay small swatches together to see how the colours and textures interact in different lighting conditions.
- Maintain a Colour Journal: Keep a record of fabric combinations that worked well. This becomes an invaluable personal resource for future projects.
8. Pressing and Ironing Techniques
Mastering pressing and ironing is a non-negotiable skill set that separates amateur sewing and crafting projects from professional-grade work. While often used interchangeably, these are distinct techniques: ironing involves sliding the iron, while pressing is a precise up-and-down motion. This strategic application of heat, steam, and pressure is used to set stitches, shape fabric, and create crisp, permanent finishes that cannot be achieved post-construction.
Key Applications and Considerations
The impact of good pressing is evident across all disciplines. A dressmaker uses a tailor's ham to press the curve into a princess seam, while a quilter carefully presses seams toward the darker fabric to prevent show-through. Even in bag making, pressing fusible interfacing creates structure and stability. This foundational step ensures every subsequent seam aligns perfectly and the final garment hangs correctly.
When integrating professional pressing into your workflow, consider these points:
- Set Stitches First: Before pressing a seam open or to one side, always press it flat as it was sewn. This melds the threads into the fabric fibres, securing the stitch.
- Use a Pressing Cloth: Protect delicate fabrics like silk or synthetics from direct heat and potential shine by using a pressing cloth. A simple piece of cotton organza or muslin works well.
- Test and Cool: Always test your iron's temperature on a scrap piece of fabric first. After pressing a section, allow it to cool completely before moving it to lock the shape in place.
These techniques, popularised by couture experts like Susan Khalje, are fundamental to achieving a high-quality finish in any sewing project. They are not an afterthought but a critical step throughout the entire construction process.
9. Seam Finishing Methods
A professional seam finish is the hallmark of high-quality garment construction, transforming a homemade project into a durable, polished piece. This crucial step involves treating the raw fabric edges inside a garment to prevent them from unravelling. The chosen method not only adds longevity and strength to the seams but also significantly enhances the overall appearance and feel of the finished item, making it a non-negotiable skill in both hobbyist and professional sewing and crafting.
Key Applications and Considerations
The application of a seam finish is determined by the fabric type, the garment's intended use, and the tools available. A sewer with a serger might use a four-thread overlock stitch for knitwear to provide a stretchy, durable edge. For an unlined wool jacket, a meticulous Hong Kong finish using bias tape offers a beautiful, high-end look. Even simple techniques like a zigzag stitch or using pinking shears can effectively manage fraying on stable woven fabrics.
When deciding on a finishing technique, consider these practical points:
- Fabric Choice: Lightweight, sheer fabrics may require a delicate French seam, while heavy wools can handle bulkier bound seams. Always test your chosen finish on a scrap first.
- Timing: For the cleanest results, finish your seam allowances as you construct each part of the garment, rather than waiting until the end.
- Pressing: Careful pressing is vital. Press seams flat first to set the stitches, then press them open or to one side as your pattern dictates, using the correct heat for your fabric.
The right finish elevates your sewing and crafting from functional to exceptional, ensuring your creations withstand wear and washing while looking impeccable inside and out.
9-Point Sewing & Crafting Resource Comparison
| Item | Core Features/Characteristics | User Experience/Quality ★ | Value Proposition 💰 | Target Audience 👥 | Unique Selling Points ✨ |
|---|---|---|---|---|---|
| Cutting Mats (Self-Healing) | Self-healing surface, grid markings, non-slip base | ★★★★☆ Durable, precise | 💰 Moderate-high, cost varies by size | Tailors, quilters, crafters | ✨ Auto-sealing cuts, double-sided grids |
| French Seam Construction | Encloses raw edges, strong seams, no extra finishing needed | ★★★★★ Professional, durable | 💰 No extra materials needed | Couture sewers, fine fabric users | ✨ Heirloom quality, ideal for delicate fabrics |
| Rotary Cutters and Rulers | Circular blades, ergonomic, safety features, multiple sizes | ★★★★☆ Efficient, precise | 💰 Mid-range, replaceable blades | Quilters, garment sewers | ✨ Cuts multiple layers quickly, ergonomic grip |
| Pattern Matching and Notching | Precise marks, color-coding, seam allowance adjustments | ★★★★☆ Complex but professional | 💰 Adds time and fabric cost | Advanced sewers, designers | ✨ Ensures perfect pattern alignment |
| Bias Tape and Binding Applications | Stretchy fabric strips, multiple folds, decorative & reinforcement | ★★★★☆ Versatile, decorative | 💰 Low-medium, reusable or pre-made | Quilters, garment finishers | ✨ Flexible finish for curves and edges |
| Stabilizers and Interfacing | Various weights, fusible/sew-in types, washable | ★★★★☆ Structural, professional | 💰 Adds material cost | Tailors, embroiderers | ✨ Fabric support enhancing durability |
| Color Theory and Fabric Coordination | Color wheel, pattern mixing, texture principles | ★★★★☆ Enhances visual harmony | 💰 Knowledge-based, no direct cost | All sewing & craft creatives | ✨ Builds confident, harmonious fabric choices |
| Pressing and Ironing Techniques | Heat, moisture, pressure control, specialized tools | ★★★★★ Essential for polished results | 💰 Low cost, requires equipment | All sewn garment makers | ✨ Shapes fabric, sets seams professionally |
| Seam Finishing Methods | Serged, zigzag, pinked, bound finishes, fabric-specific | ★★★★☆ Clean, durable interiors | 💰 Time and tool investment | Garment constructors, sewists | ✨ Prevents fraying, improves garment lifespan |
Final Touches: Mastering Your Display Craft
Our journey through the essential tools and techniques for professional sewing and crafting has revealed a fundamental truth: the final presentation is just as crucial as the creation itself. The quality of your work, from the precision of a French seam to the flawless application of bias tape, deserves to be showcased with equal care and professionalism. Mastering your display craft is not merely about aesthetics; it is about communicating the value, skill, and passion embedded in every fibre of your creations.
The resources we have explored, ranging from foundational self-healing cutting mats and rotary cutters to the nuanced arts of pattern matching and colour theory, are more than just items on a list. They represent a holistic system for achieving excellence. Each element plays a distinct role in elevating your work from a simple project to a polished, professional piece. Effective pressing techniques ensure crisp lines and a refined finish, while advanced seam finishing methods guarantee durability and a clean internal structure. These are the details that separate the amateur from the expert.
From Creation to Commerce: Your Next Steps
The transition from honing your craft to presenting it to a wider audience, whether in a retail setting, a design portfolio, or a market stall, requires a strategic mindset. It is about translating the quality you have meticulously built into a compelling visual narrative. By implementing the systems discussed, such as organised stabiliser storage and precise notching, you build a workflow that supports consistency and high standards across all your projects. This organised approach not only enhances the final product but also streamlines your creative process, freeing up valuable time and mental energy.
Consider this a pivotal moment to evaluate your current practices.
- Identify Bottlenecks: Which steps in your process consistently cause frustration or yield subpar results? Is it imprecise cutting, wrinkled seams, or mismatched patterns?
- Pinpoint Solutions: Match these challenges to the tools and techniques detailed in this guide. A high-quality tailor’s dummy, for example, could revolutionise your fitting process, while a professional garment rail can transform your studio or retail space.
- Commit to Improvement: Select one or two key areas for enhancement. Investing in a superior pressing system or mastering a new seam finishing method can have a ripple effect, improving the overall calibre of your work significantly.
Ultimately, the goal is to create items that not only function beautifully but also present immaculately. As you refine these skills, you may find yourself ready to take your creations to market. Deciding where to sell your finished goods is a critical business decision, and a detailed comparison like this guide on Shopify vs Etsy can help you determine the platform that best aligns with your brand and growth ambitions.
Embracing these display-centric tools and methodologies is an investment in your professional identity. It is a declaration that every aspect of your sewing and crafting journey, from the first cut to the final showcase, is executed with intention and excellence.
Ready to elevate your presentation and organise your creative space? Explore the complete collection of professional-grade display solutions at Display Guru. From adjustable tailor's dummies to heavy-duty garment rails, find the essential tools to make your work shine at Display Guru.