


Choosing Your Fashion Designing Mannequins
Behind every great fashion designer is a silent, tireless partner: the fashion designing mannequin. It’s more than just a stand-in for a human model; it’s the very foundation upon which a flat sketch begins its journey into a tangible, three-dimensional garment.
From Sketch to Stitches: The Role of a Mannequin
Think of a mannequin as the sculptor's armature. It provides the essential form, the curves and contours, that allow a designer to breathe life into an idea. Without this 3D canvas, you’re stuck working flat, guessing how fabric will actually drape, hang, and move on a real body. That guesswork is not just slow; it’s a recipe for fit and silhouette disasters.
The mannequin is the crucial bridge connecting a two-dimensional concept to a wearable, beautifully fitted piece of clothing. It lets you get your hands on the fabric, making instant adjustments on the fly. This saves an incredible amount of time that would otherwise be lost to endless fittings with live models, making it an absolute must-have for everyone from fashion students to seasoned pros.
This infographic breaks down the three core functions a mannequin plays in the day-to-day design process.
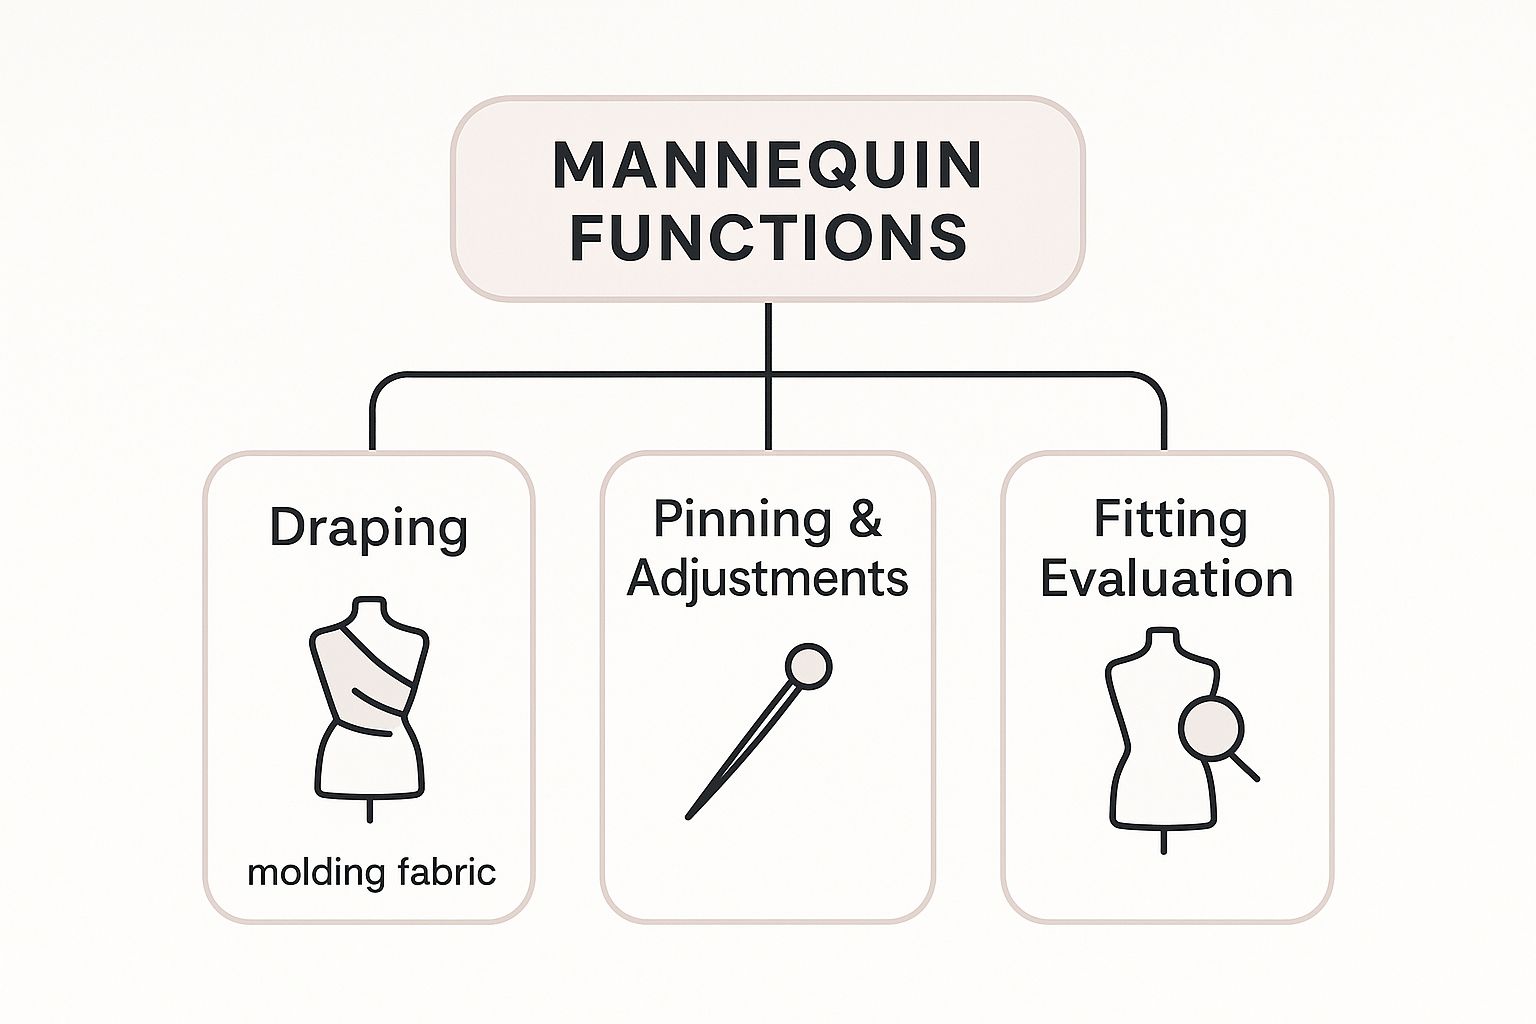
As you can see, the mannequin is central to draping new patterns, pinning for precise adjustments, and assessing the final fit. Its value is woven through the entire creation process, cementing its status as a true cornerstone of any professional design studio.
Getting to Know the Different Types of Mannequins
Choosing the right mannequin is a bit like picking the perfect canvas for a painting; the one you select directly influences the final outcome. Not all fashion designing mannequins are cut from the same cloth, and figuring out their distinct roles is your first step to a smoother design process and a more professional finish. Think of them less as static display pieces and more as active collaborators in your creative work.
The global mannequin market has certainly had its ups and downs, especially with shifts in retail demand. But for designers, their importance has never wavered. While shop displays might have seen a dip, the need for these forms in bespoke tailoring, pattern making, and visual merchandising keeps the industry ticking.
Professional Dress Forms
Often called the workhorse of any design studio, the professional dress form is what most people imagine when they picture a fashion designer's space. They’re typically covered in linen or canvas, creating a surface that’s firm enough to hold a shape but soft enough to be completely pinnable. This is crucial for draping and securing fabric with absolute precision.
One of the cleverest features you'll often find is collapsible shoulders, a simple mechanism that makes wrangling tight-fitting garments onto the form a whole lot easier. These forms are built to strict industry-standard sizes (like a UK size 10 or 12), giving you a reliable and consistent foundation for creating patterns that will eventually be scaled up for production.
For anyone serious about draping, developing patterns, or building ready-to-wear collections, the professional dress form isn't just nice to have—it's essential. Its robust build and standardised measurements bring consistency all the way from the initial idea to the final sample.
Adjustable Dress Forms
If professional forms are the reliable workhorses, then adjustable forms are the chameleons. These mannequins are ingeniously designed with dials or keys that let you expand or contract key measurements like the bust, waist, and hips. This flexibility makes them an absolute game-changer for designers creating custom clothing for individual clients, whose bodies rarely match a standard size chart.
Their versatility is a huge plus for home sewing enthusiasts and tailors who need to cater to a wide range of body types. Instead of cluttering your space with multiple fixed-size forms, a single adjustable model can adapt to each new project. To really master these flexible tools, take a look at our ultimate fitting guide for adjustable sewing mannequins.
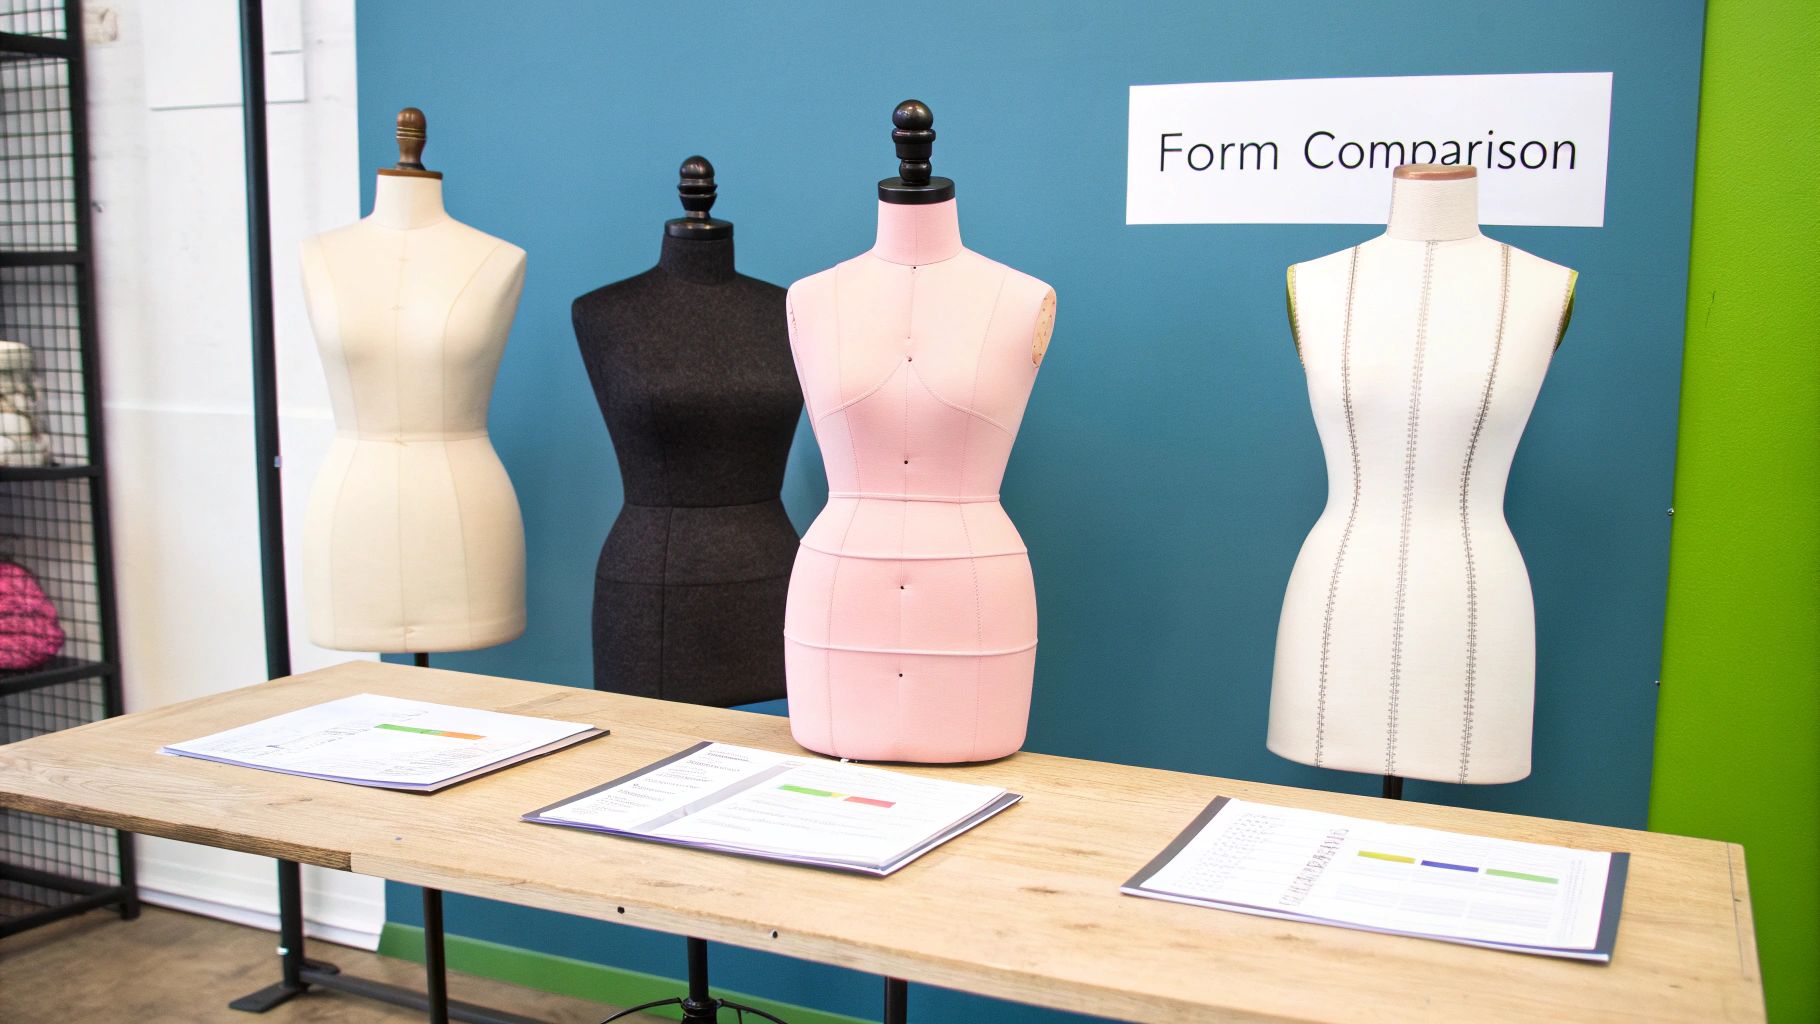
To help clarify the differences, here’s a quick comparison of the main mannequin types you'll encounter.
Comparison of Fashion Mannequin Types
This table breaks down the primary mannequin types, showing what they’re best for, their standout features, and who they’re designed for.
| Mannequin Type | Primary Use | Key Features | Ideal For |
|---|---|---|---|
| Professional Dress Form | Draping, pattern making, quality control | Pinnable surface, industry-standard sizes, collapsible shoulders | Fashion designers, pattern makers, production teams |
| Adjustable Dress Form | Custom fitting, alterations, personal sewing projects | Dials for changing bust/waist/hip sizes, lightweight | Bespoke tailors, dressmakers, home sewing hobbyists |
| Specialised/Scale Forms | Specific garment types, student work, prototyping | Bifurcated (legs), half-scale size, full body | Trouser designers, students, visual merchandisers |
Ultimately, the right choice comes down to the kind of work you do every day.
Specialised and Scale Mannequins
The world of mannequins extends far beyond the standard torso. There's a whole family of specialised forms designed for very specific jobs:
- Bifurcated Forms: These are mannequins that have legs, making them indispensable for designing and fitting anything from trousers and shorts to jumpsuits. You simply can't get the fit right on a standard torso.
- Half-Scale Mannequins: A brilliant tool for fashion students or designers working with a tight budget. These miniature forms, usually half the size of a standard mannequin, let you test out ideas and drape new designs quickly without using metres of expensive fabric.
- Full Body Forms: While not typically used for draping, full-body display mannequins are vital for the final stages. They help you see how a complete outfit hangs, moves, and coordinates—something a simple dress form can't show you.
The key is to match the tool to the task. A couturier will live and breathe by their professional dress form, whereas a bespoke tailor will get endless value from a high-quality adjustable model.
Selecting the Right Materials and Construction
When it comes to a fashion designing mannequin, what it's made of is just as crucial as its shape. The materials and build quality are what separate a simple display piece from a genuine professional tool that can withstand the rigours of a busy studio.
For hands-on draping and pattern-making, nothing quite beats the classic papier-mâché form covered in traditional linen. This combination gives you a surface that’s firm enough to work on but forgiving enough for pins to glide in smoothly. It holds fabric securely without you having to fight it, which is exactly what you need for precision work.
On the other hand, modern materials have their own advantages. In the UK, fiberglass is a major player, making up a huge 68.51% of the mannequin market's revenue in 2023. Its popularity comes down to being incredibly durable and easy to mould into realistic, detailed forms, making it perfect for retail displays where catching a customer's eye is everything. If you're interested in the numbers, you can dive deeper in this UK mannequin market report.
Core Features That Define Quality
Once you look past the surface material, it’s the smaller construction details that really tell you whether you’re holding a hobbyist’s mannequin or a professional’s workhorse. For a seamless design process, a few features are simply non-negotiable.
- Collapsible Shoulders: This is a brilliant feature. It lets the shoulder area compress, so you can slip tight-fitting garments on and off without stretching the fabric or, worse, damaging your sample.
- A Stable Base: Don't underestimate the stand. A wobbly mannequin is a constant frustration. A heavy-duty cast iron base is the gold standard for stability, keeping the form steady even when you're draping heavy fabrics. Wooden tripods look lovely, but they often can't offer the same solid footing.
- Pinnable Surface: The entire torso needs to be pinnable, not just a thin fabric layer over a hard shell. You need to be able to push pins in from any angle to get a secure hold for intricate designs.
A mannequin's construction is its promise of performance. A sturdy base and features like collapsible shoulders aren't luxuries; they are fundamental requirements for accurate, frustration-free design work and a worthy long-term investment. For a closer look at what makes a quality base, check out our insights on choosing the right dress form stand.
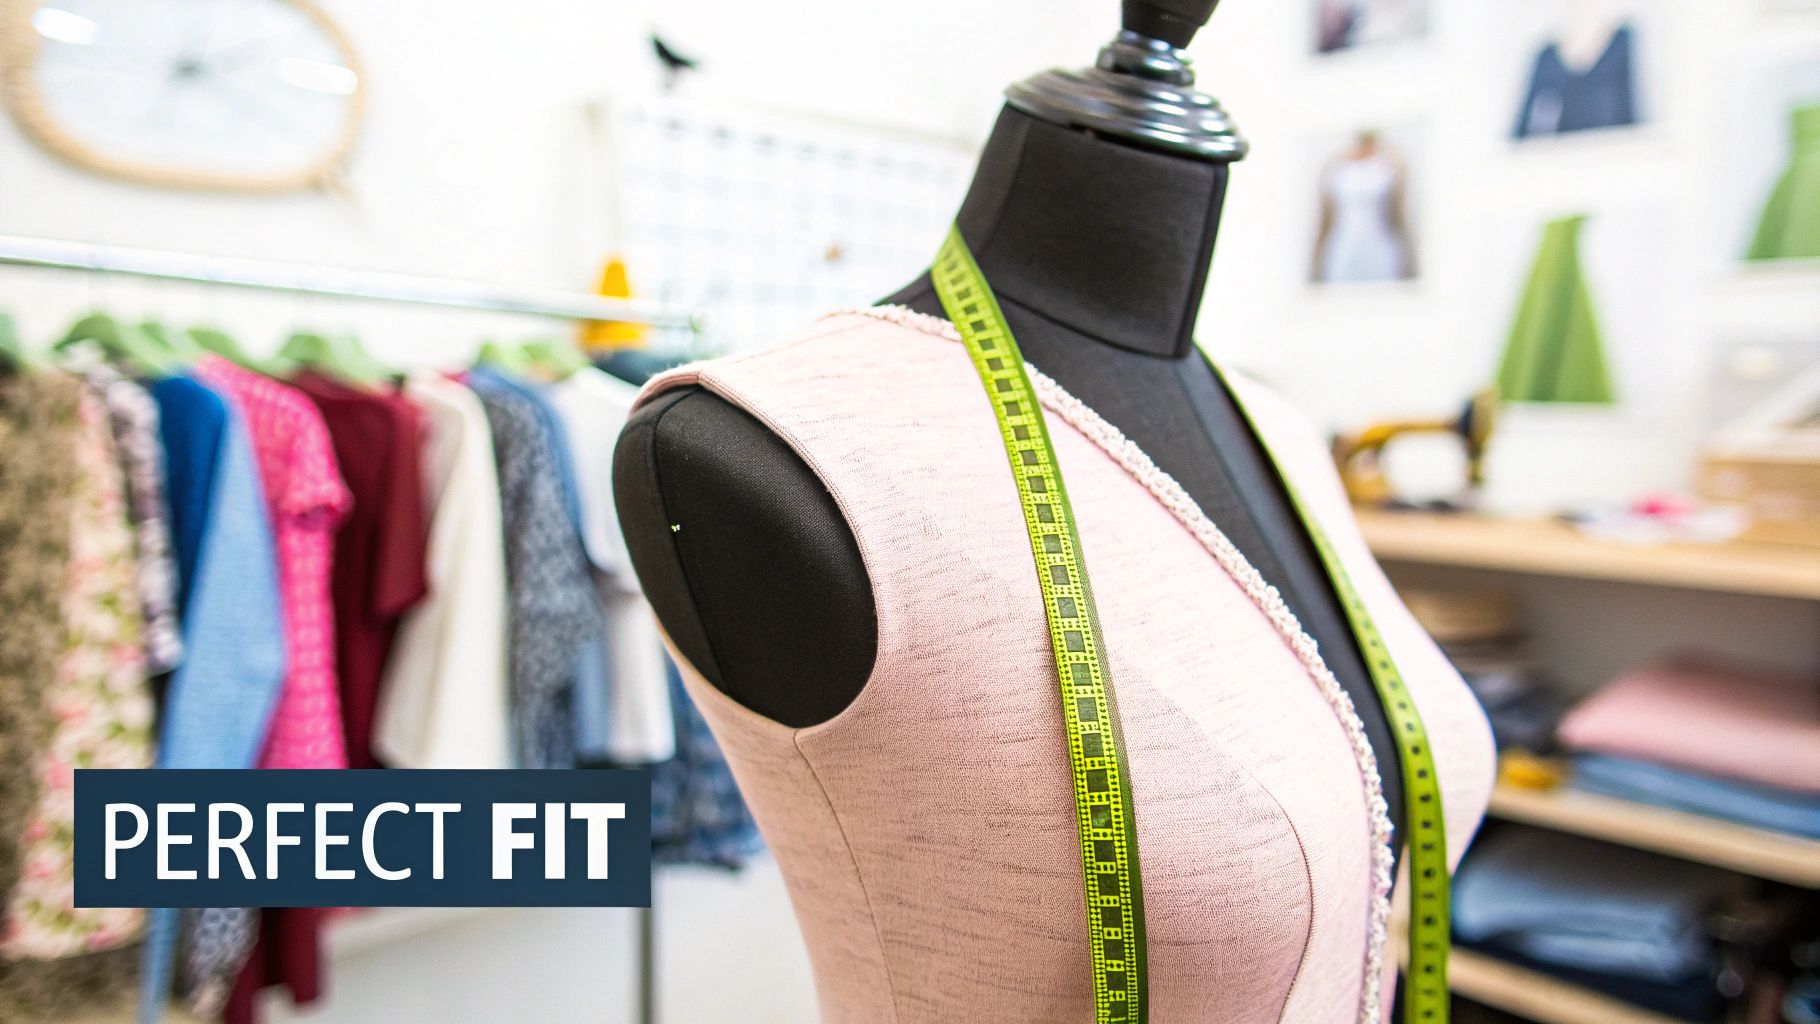
How to Choose the Perfect Size and Shape
Picking the right mannequin is one of the most crucial decisions you'll make as a designer. It's the silent partner in your studio, the foundation upon which every garment's fit and silhouette is built. Before you even glance at a size chart, you need a solid grasp of the three measurements that truly define a dress form.
These are the big three, the core numbers that determine how fabric will hang and how your patterns will translate to a real body.
- Bust: The measurement taken around the fullest part of the chest.
- Waist: Found at the narrowest point of the torso.
- Hips: Measured around the widest part of the hip area.
Getting these right is absolutely fundamental. For a deeper dive into taking these measurements correctly, take a look at our guide to standard mannequin measurements in our comprehensive article.
Standard Sizes Versus Custom Proportions
Most designers start their journey with a standard industry size, often a UK 10 or 12. This gives you a reliable, consistent baseline for creating ready-to-wear collections and sample pieces that can later be graded up or down for production. It's a tried-and-tested method.
But let's be honest, the real world is anything but standard. For bespoke work or fitting a specific client, a standard form is just the beginning of the conversation. No two bodies are the same, and a designer's real magic lies in their ability to work with unique proportions. This is where customisation transforms your mannequin from a generic tool into a precision instrument.
A standard mannequin gives you consistency for production, but a customised one gives you accuracy for a person. The ability to pad a form to match a client’s specific shape is what elevates good tailoring to great tailoring.
The most practical way to achieve this is by 'padding out' the mannequin. By adding layers of wadding or foam to specific spots—maybe the bust, the hips, or even the back to account for posture—you can perfectly mirror a client's unique shape. A snug stretch cover pulled over the top creates a smooth, pinnable surface and keeps all your padding securely in place.
This process lets you build up areas where your client differs from the standard form, turning your fashion designing mannequins into a true body double. It’s a hands-on skill that demystifies the custom fitting process, making it an essential technique for any serious designer.
Essential Draping and Fitting Techniques
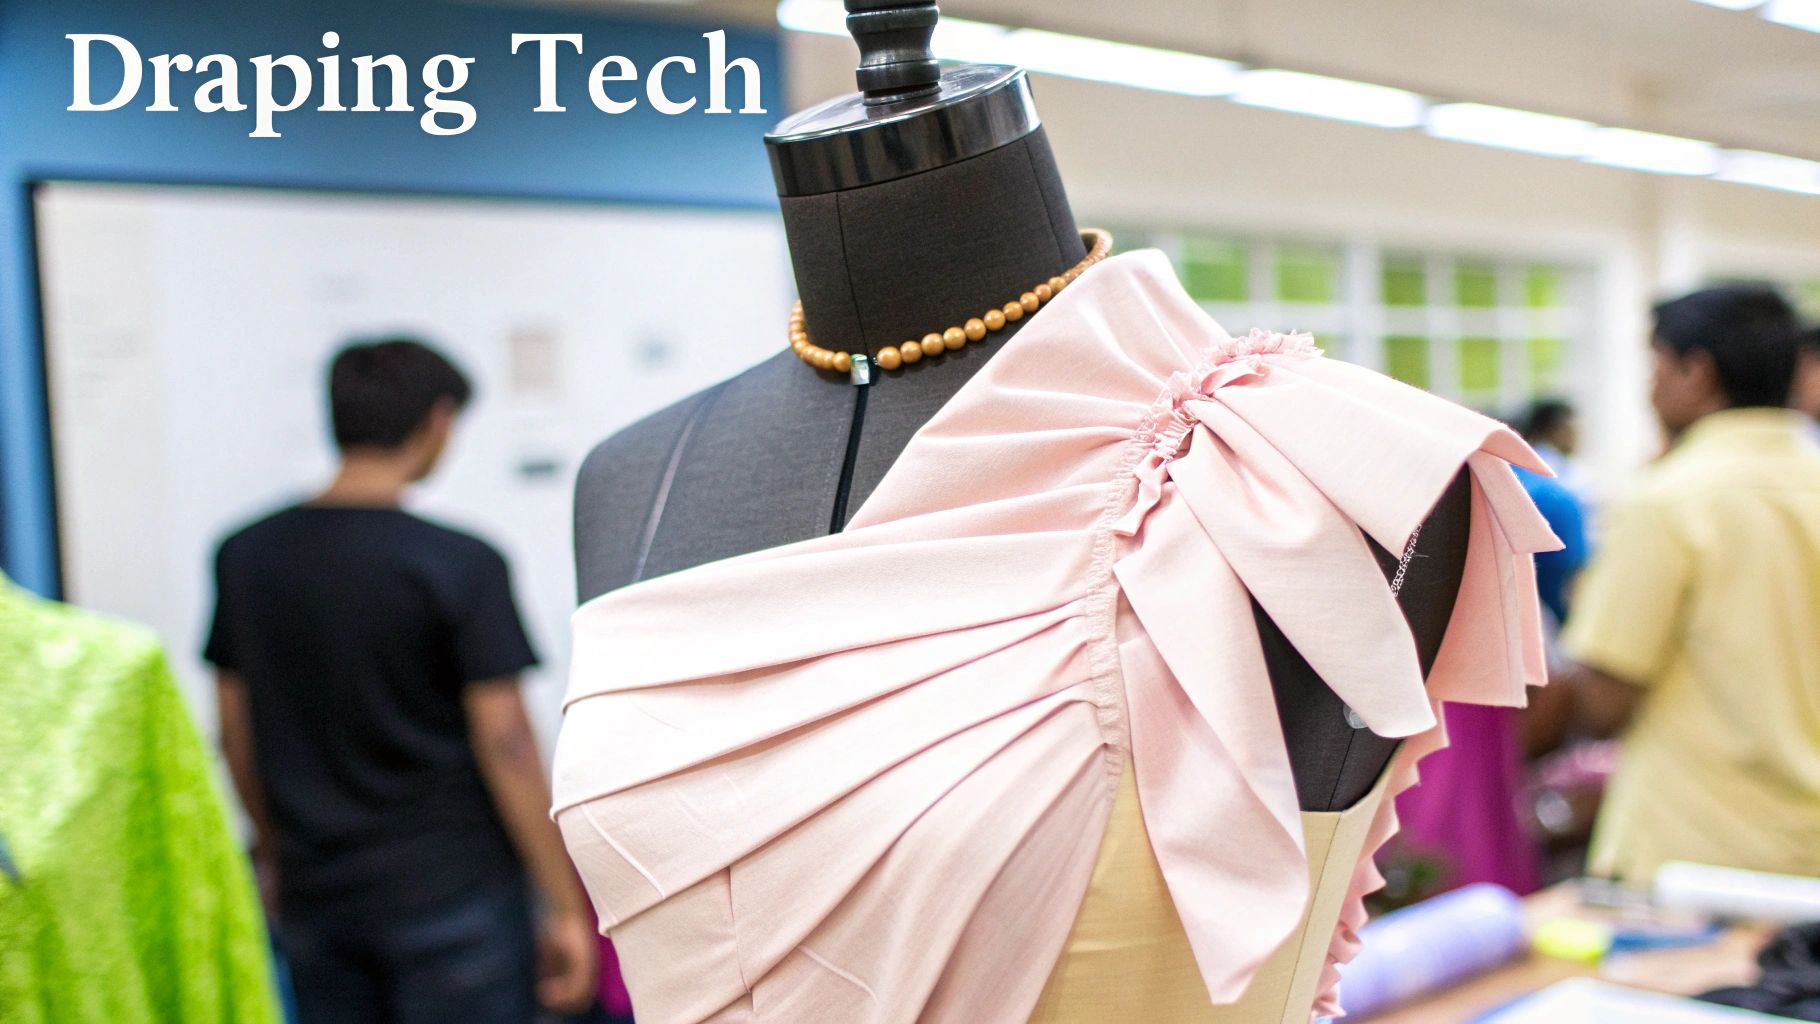
With your mannequin set up and ready to go, it stops being just a static form and becomes your silent partner in the design process. This is the point where the real magic happens, where you get to bring your two-dimensional sketches to life by sculpting fabric in three dimensions.
This technique is called draping—or moulage, if you want to get technical. It’s the art of working with fabric directly on the mannequin. Think of it less like sewing and more like sculpting. You pin, pleat, and smooth the material right onto the form to create your silhouette, establishing seam lines and perfecting the overall shape as you go. It’s an incredibly intuitive process that gives you instant visual feedback, something you just can't get from a flat paper pattern.
Creating Your Blueprint
To get that perfect, symmetrical finish, many designers will first map out the key contours of the design onto the mannequin using style tape. This creates a really clear visual guide, almost like a road map for your fabric.
- Centre Lines: A strip of tape down the centre front and back is crucial for ensuring the design is perfectly balanced.
- Style Lines: You can then mark out where you want elements like princess seams, the neckline, and armholes to sit.
- Key Points: Marking the bust, waist, and hip lines helps you maintain accurate proportions throughout the process.
Following this method essentially turns your dress form into a reliable blueprint for your pattern. Later, when you're fitting a nearly finished garment, the mannequin is invaluable for checking the balance and how the fabric hangs. You’ll immediately spot any pulling, twisting, or unevenness that’s easy to miss when a garment is laid flat, guaranteeing a truly professional fit.
Draping is really a conversation between you and the fabric, with the mannequin acting as the interpreter. It translates your ideas into a tangible form, allowing for a level of spontaneous creativity and technical precision that a flat pattern simply can't match.
These foundational skills are what will take a good design and make it great. If you're just starting out, getting comfortable with these techniques is a game-changer. For more practical advice, take a look at our introductory guide on sewing for beginners. Mastering draping and fitting is the key to ensuring your finished garments look and feel fantastic.
Caring for Your Mannequin
Think of your mannequin as a long-term partner in your creative work. It's a serious investment, and just like any other professional tool, it needs a bit of care to stay accurate, look good, and last for years. A little bit of maintenance goes a long way in keeping your fashion designing mannequins in top-notch condition.
Routine upkeep is pretty straightforward, starting with a simple clean. For forms covered in linen or canvas, a soft brush or a vacuum with the brush attachment is perfect for getting rid of dust and loose threads. Fabric dye stains and pin marks are part of the job, but you can often lift them with a damp cloth and a tiny drop of mild soap. Just remember to test a hidden spot first and let it air dry completely.
Protecting Your Investment
Beyond a quick wipe-down, it’s crucial to protect your mannequin from the elements. Keeping it out of direct sunlight is a big one, as prolonged exposure can fade the fabric and make it brittle over time. Likewise, damp environments can lead to mildew or even damage the form’s internal structure.
A well-maintained mannequin is a reliable tool that preserves the integrity of your work. Neglecting its care can lead to inaccurate fittings and compromise the quality of your finished garments.
The easiest fix is to store your mannequin in a clean, dry spot away from any windows when you're not using it. A simple dust cover is also a great idea for that extra layer of protection against dust and accidental knocks. If you have an adjustable model, it's worth checking the dials and mechanisms now and then. For more detailed advice, check out our guide to adjustable dressmaking dummies.
Finally, stay on top of any minor repairs. A wobbly stand? It often just needs the screws at the base tightened. A small tear in the fabric? A careful patch will stop it from getting worse. Taking care of these little things ensures your mannequin remains a sturdy and dependable assistant in your design studio.
Ready to find the perfect silent partner for your studio? At Display Guru, we offer a wide selection of professional-quality mannequins to bring your designs to life. Explore our collection at https://www.displayguru.co.uk and find the ideal form for your creative needs.