


A Guide to the Adjustable Dressmaker Form
An adjustable dressmaker form is your secret weapon for creating garments that fit like a glove, right from your own home. Think of it as your very own body double, a patient stand-in that lets you drape, pin, and fine-tune your creations without having to constantly try them on yourself. It's the key to taking your sewing from homemade to professional.
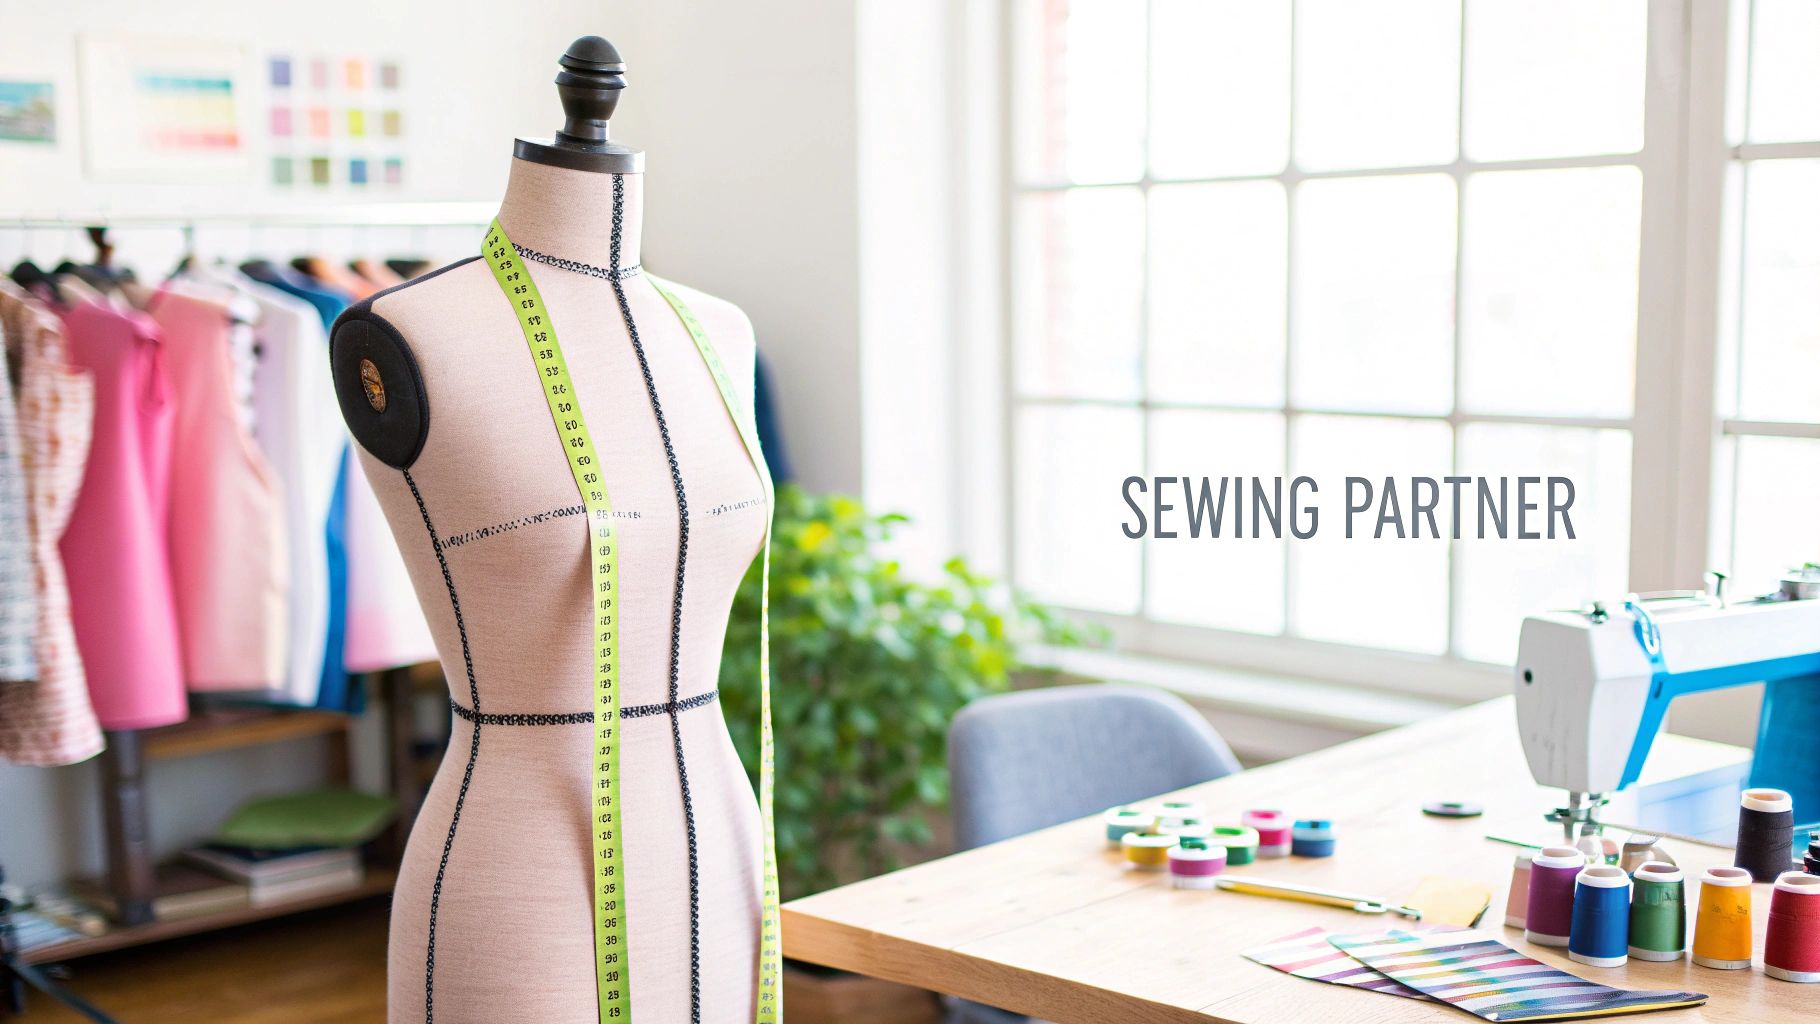
Your Essential Sewing Partner
If you've ever seen a sculptor work, they almost always start with a wire armature to build upon. An adjustable dress form is the sewer's equivalent—it provides the fundamental structure for your masterpiece. It helps you see exactly how fabric will hang and move on a real body, turning a flat pattern into a tangible, three-dimensional garment right before your eyes.
This modern tool is built on a long tradition of expert tailoring. The UK's clothing industry has seen incredible changes since the Industrial Revolution, but the one constant has always been the demand for a perfect fit. Even as machinery sped up production, skilled tailors continued to rely on dress forms to craft bespoke clothing. It’s a practice that remains central to high-quality garment making today.
From Hobby Tool to Professional Asset
An adjustable dress form is what elevates your work from a hobby to a craft. For sewing enthusiasts, it takes the frustration and guesswork out of fitting garments on yourself. For budding designers, it's an absolutely essential piece of kit for pattern drafting and draping experiments. Centring your workspace around this tool can massively boost your efficiency, which is a core principle of any well-planned sewing room setup.
A dress form isn't just a mannequin; it's a stand-in for your client or for you. It enables a level of precision and detail that's almost impossible to achieve when you're trying to be both the creator and the model.
With a dress form, you can confidently tackle more complex projects. Instead of simply tweaking commercial patterns, you can start creating your own from scratch. Being able to view your work in 3D from every angle is a game-changer for catching fit issues, like puckered seams or an uneven hem, before they're permanently stitched in.
Key Benefits at a Glance
Before we get into the nitty-gritty of dials and adjustments, let’s quickly cover why an adjustable dressmaker form is such a brilliant investment for anyone serious about sewing.
The table below gives a snapshot of the main advantages and how they'll directly impact your work.
| Benefit | Impact on Your Sewing |
|---|---|
| Achieve a Perfect Fit | Lets you replicate specific body measurements for truly custom clothing. |
| Improve Draping and Design | Gives you the freedom to create original patterns by draping fabric on the form. |
| Simplify Alterations | You can easily pin and tweak garments without the hassle of trying them on. |
| Check Garment Balance | Ensures seams are straight and fabric hangs correctly from every angle. |
| Enhance Efficiency | Dramatically speeds up your workflow with a reliable body double ready to go. |
As you can see, the benefits go far beyond just having a place to hang your unfinished projects. It’s a tool that genuinely improves your skills and the quality of your finished garments.
Anatomy of Your Dressmaker Form
To really get the most out of your adjustable dressmaker form, it helps to understand what makes it tick. Think of it less like a static dummy and more like a clever tool with interlocking parts, all designed to work in harmony. Getting to know each component is a bit like a musician learning their instrument—it's the first step to creating something beautiful.
Let's break down the main features that let you transform this standard shape into a precise body double for your sewing projects.
The most obvious parts are the torso sections and the adjustment dials. The body isn't one solid piece; it’s split into several panels, usually eight or twelve, which you can expand or shrink. These panels are controlled by a series of dials, typically found at the bust, waist, and hips. You’ll often find extra ones for tweaking the back length and neck, too.
Each dial is a precision control, letting you fine-tune specific measurements one by one. This clever design is what puts the "adjustable" in the name, allowing you to move beyond generic sizes and perfectly replicate a real, unique body shape.
The Foundation: The Stand and Pole
Underpinning the whole thing is the stand and pole, and their importance can't be overstated. A wobbly form is more than just an annoyance; it can throw off your pinning and draping, leading to wonky results. Most stands are either a sturdy tripod or a flat, weighted base for stability.
The central pole is just as vital. It lets you set the overall height of the form to match your own or your client's, ensuring your hemlines hang exactly where they should. A solid base is the unsung hero of countless successful projects. For a closer look at how different stands can affect your workflow, we have a helpful guide on choosing the right dress form stand.
Many poles also feature a simple foot pedal for height adjustment, letting you raise or lower the form without the awkward heave-ho. This is a real back-saver when you're switching between working on a bodice and a full-length skirt.
Advanced Features for Specialised Tasks
Beyond the essentials, some models come with extra features designed to make specific jobs much easier.
- Collapsible shoulders are a fantastic innovation. They let you squeeze the shoulder area inwards, making it a breeze to slip on tight-fitting garments without stretching or damaging the fabric. No more wrestling with a narrow-necked top!
- A hem marker is another brilliant tool. This is a little guide that clamps onto the central pole and can be moved up and down. It often has a chalk puffer or pins to help you mark a perfectly straight hemline all the way around a skirt or dress. It takes all the guesswork out of the process.
A dress form with specialised features like collapsible shoulders or trouser attachments isn't just a luxury; it's a strategic choice. Selecting a model with features that align with your primary sewing projects will drastically improve your efficiency and the quality of your finished garments.
For anyone who makes trousers or shorts, some forms come as bifurcated models (with separated legs) or have leg attachments. These give you a far more accurate shape for fitting tricky areas like the crotch, inseam, and thighs—something you just can't do on a standard torso-only form.
This chart shows how the number of adjustment points corresponds to the kind of projects a form is best suited for.
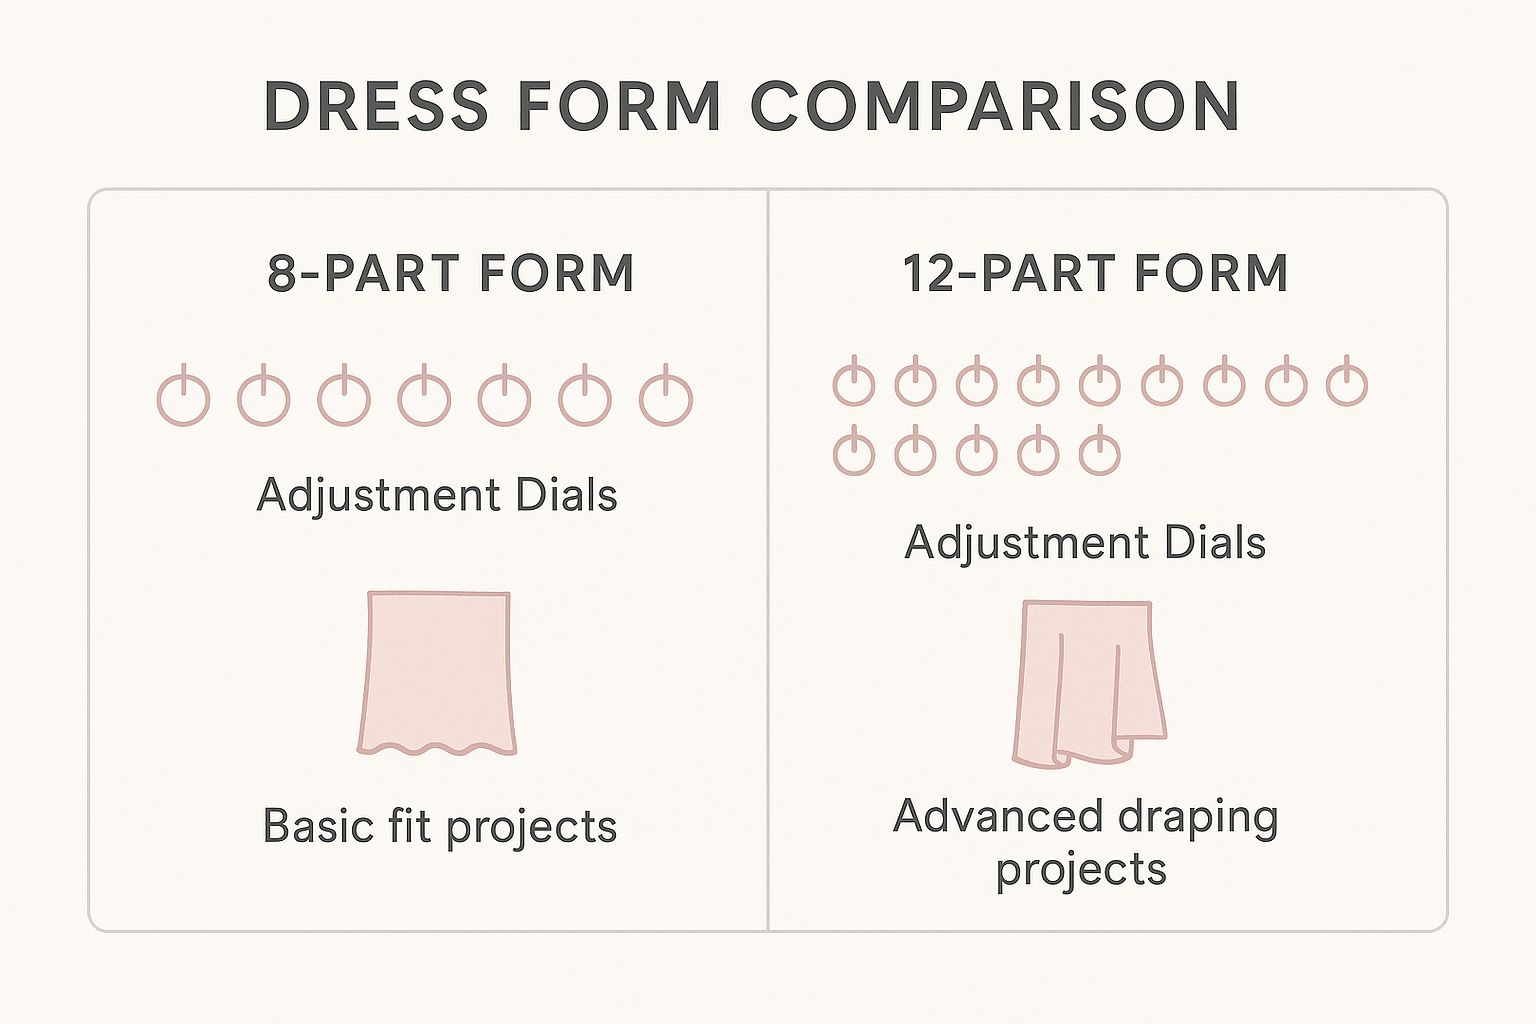
Ultimately, more adjustment points give you greater control, allowing for the subtle, detailed shaping that complex designs demand.
How to Choose the Right Dress Form
Choosing the perfect dressmaker form is probably the most important first step you'll take towards getting that genuinely bespoke fit. It’s about much more than just picking a size. You’re looking for a form that can truly become your body double, matching your unique shape and supporting your sewing ambitions.
Get this choice right, and your form will be a reliable partner for years. Get it wrong, and you're in for a lot of frustration and poorly fitting clothes.
The whole process starts with you and a tape measure. Before you even think about looking at models, you need a precise set of your own measurements. Make sure you get your bust, waist, hips, and that crucial back-waist length. These numbers are your map to finding the right size range.
Here’s a key tip: a dressmaker form shouldn't be used at its absolute tightest or widest settings. For the best results and stability, your measurements should sit comfortably somewhere in the middle of the form's adjustment range. This leaves you room to tweak it up or down, whether for natural body changes or for fitting clothes on someone with a similar build.
Material and Construction Quality
Once you've narrowed down the size, it's time to think about what the form is made of. Most have a fabric-covered exterior, but it's the core that really matters. You’ll generally come across two main types: a hard plastic shell or a solid foam body.
- Foam-backed fabric forms are fantastic for pinning. You can stick pins straight into the body from any angle, which is a massive help when you're draping fabric or doing detailed fits. This surface just feels more professional and grips the fabric beautifully.
- Plastic-bodied forms usually have a thinner, felt-like covering. With these, you can typically only pin into the gaps between the adjustable sections, which can feel a bit limiting. They are, however, often a more budget-friendly starting point.
The number of dials is also a big deal. An 8-part form gives you the standard adjustments at the bust, waist, and hips. For most home sewing, that's absolutely fine. But a 12-part form offers those extra dials, often for the upper bust and shoulders, which lets you create a much more detailed and accurate silhouette.
Comparing Dressmaker Form Features
To help you decide, it’s useful to see the key features side-by-side. Think about what you sew most often and match the features to those needs. This table breaks down the essentials.
| Feature | What to Look For | Best For |
|---|---|---|
| Adjustment Dials | 8-part for basic sizing vs. 12-part for detailed shoulder and bust shaping. | Hobbyists (8-part); Tailors and advanced dressmakers (12-part). |
| Body Material | Foam-backed for all-over pinning or plastic for pinning in the seams. | Draping and complex pattern making (foam); General fitting and alterations (plastic). |
| Exterior Fabric | A pinnable nylon or wool felt cover that grips fabric well. | Preventing fabric from slipping during fitting. |
| Stand and Base | Sturdy metal pole with a 4-star or 5-star base for stability; check for castors. | Heavy garments like coats or wedding dresses that need a stable base. |
| Hem Marker | An integrated, adjustable guide for marking even hemlines. | Skirts, dresses, and long coats where a level hem is critical. |
| Neck and Shoulders | Adjustable neck size and collapsible shoulders for easily dressing the form. | Fitting high-necked tops, blouses, and tight-fitting bodices. |
Ultimately, the best form is the one that best reflects the body you're sewing for and the projects you want to create.
Aligning Your Choice with Your Sewing Goals
What you love to sew should really guide your decision. Are you dreaming of wedding dresses, crafting tailored jackets, or just making casual trousers? Each type of project is easier with the right features. For a deeper dive, have a look at our complete guide on how to buy a dress form.
The goal isn't just to buy a dress form; it's to invest in a tool that mirrors your body and your creative vision. The right form removes guesswork, enabling precision and elevating the quality of every single garment you create.
This is more relevant than ever here in the UK. With so many people moving towards sustainability and custom-fit clothing, tools like these are becoming essential. A 2023 survey found that nearly 60% of UK consumers would happily pay more for sustainably made clothes, and over 30% are keen to repair or customise what they already own.
These attitudes are pushing a real shift towards more thoughtful, hands-on clothes making. By carefully thinking about your measurements, the right materials, and your own sewing projects, you can find a dressmaker form that becomes a true partner in your craft.
Setting Up Your Dress Form for a Perfect Fit
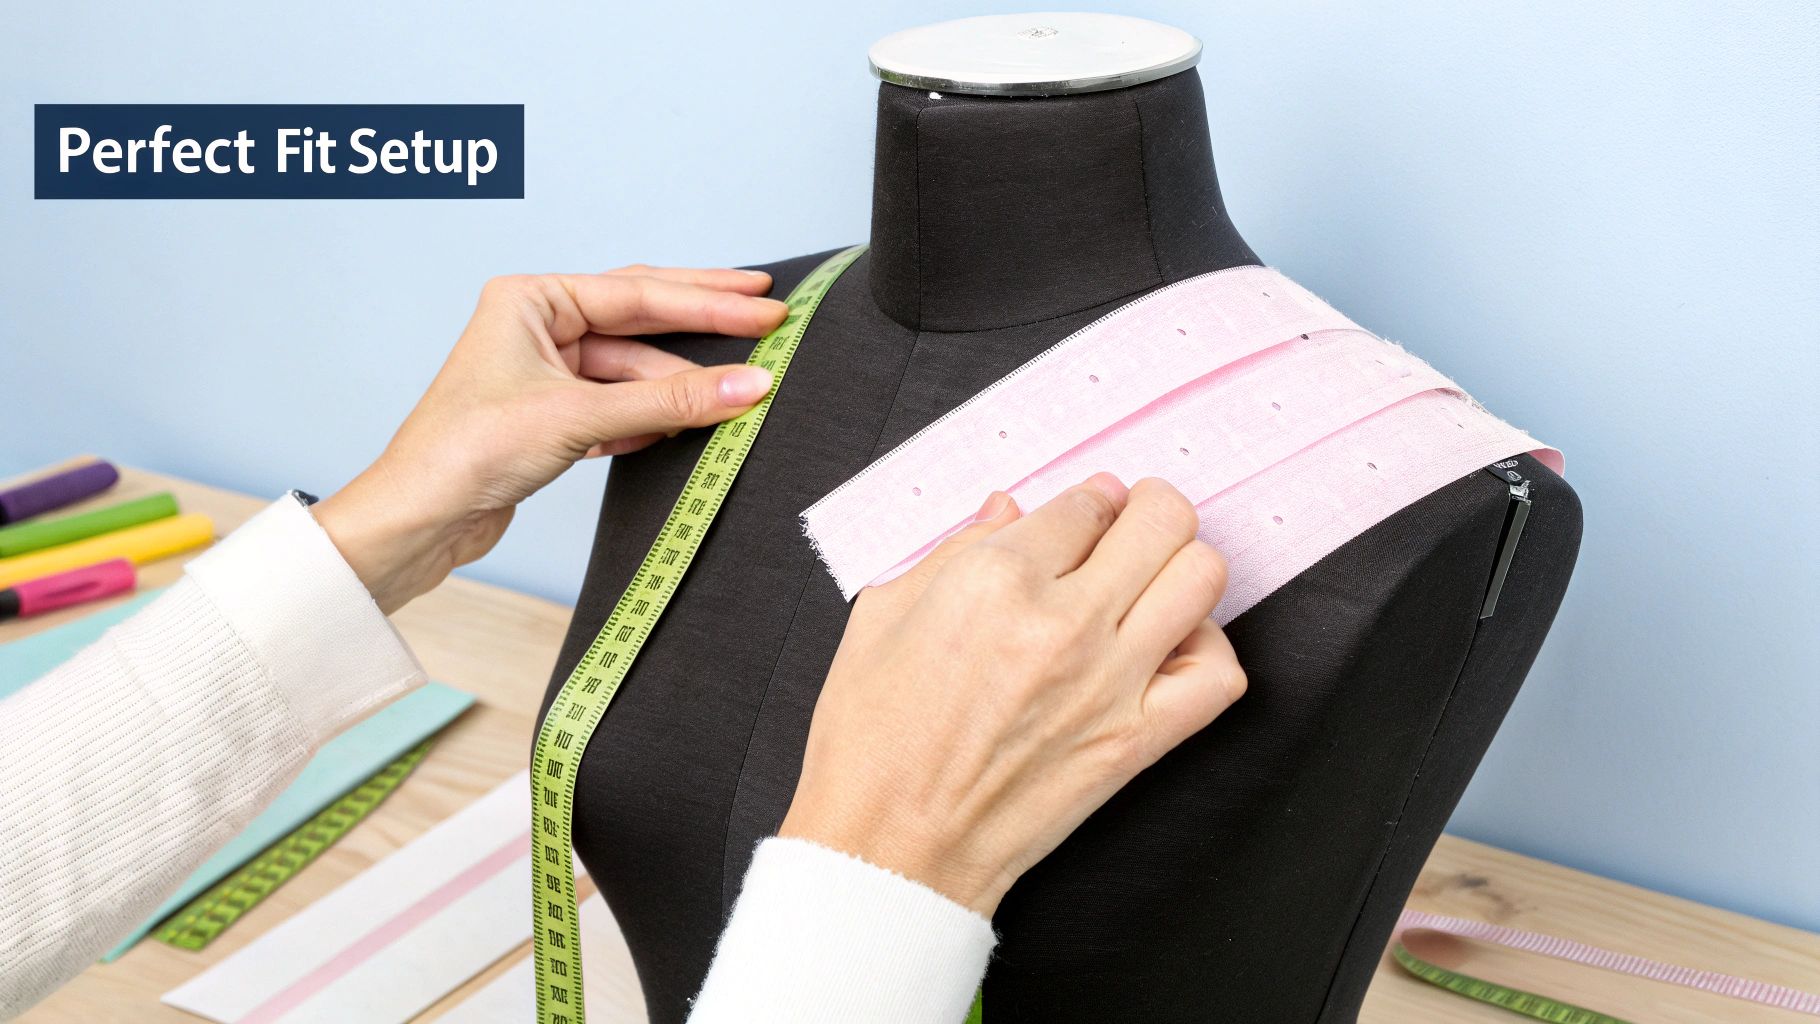
Unboxing your new adjustable dressmaker form is always exciting, but the real magic begins when you transform it from a generic mannequin into your own personal body double. This process really comes down to two key stages: first, dialling in your core measurements, and second, strategically padding it out to replicate your unique shape.
Think of it like creating a sculpture. The dials build the basic armature, but it's the padding that adds the lifelike, personal details.
The first job is to get your own measurements transferred onto the form. Before you even think about turning the dials, you need an accurate set of figures to work from. If you need a quick refresher, our complete guide on how to take body measurements for clothes will get you sorted. With your bust, waist, hips, and back-waist length measurements in hand, you're ready to start.
It's best to work methodically, adjusting each dial just a little at a time. Resist the urge to make one large adjustment at once, as this can put unnecessary stress on the internal mechanism. Instead, make small, incremental turns, moving from the bust to the waist and then the hips. This gradual expansion ensures the tension is even and gives you a much more stable final shape.
Mastering the Art of Padding
While the dials get you into the right ballpark, they can only ever create a standardised silhouette. Real bodies are wonderfully unique, with all sorts of curves, asymmetries, and postures that a set of dials just can't replicate. This is where padding becomes the single most important step in getting a truly perfect fit.
Padding is what allows you to mimic features like a full tummy, a rounded back, sloped shoulders, or even one hip that sits slightly higher than the other. Honestly, it’s the difference between a good fit and a flawless one. Without it, you’re just fitting your clothes to a robot, not to yourself.
The ultimate goal is to create a form that doesn't just match your measurements but also mirrors your posture and shape. A well-padded form lets you see exactly how a garment will hang on your body, flagging potential fit issues like pulling or awkward draping before you’ve even sewn a single seam.
You’ve got a few options for padding materials, and there’s something to suit every budget.
- Professional Padding Kits: Designed specifically for dress forms, these kits come with contoured foam pads for the bust, hips, tummy, and thighs. They’re already shaped to create a natural look, making them a brilliant choice if you want to get the job done quickly and smoothly.
- Shoulder Pads and Batting: Polyester quilt batting is a sewer's best friend and works wonderfully for building up larger areas without lumps. Layering up a few shoulder pads can also be a great way to replicate a full bust or add more definition to the shoulders.
- Everyday Materials: You really don't need to buy expensive supplies to get started. Old T-shirts, soft fabric scraps, and even bubble wrap can be used to build up specific areas. The trick is to add any material in thin, even layers to keep things smooth.
A Step-by-Step Guide to Padding for a Realistic Shape
To begin, pull a tight-fitting vest or an old leotard over your form. This will act as a 'skin' to hold all your padding securely in place. Now, take a look at the form and your own body and identify the biggest differences. Is your back more curved? Do you have a prominent tummy? Start there.
Begin adding your chosen padding material to these areas, securing it with pins or a light wrap of masking tape as you go. It's important to check your work often by measuring the padded area and comparing it to your own body. One of the best ways to check your progress is to stand next to the form and look at your combined profile in a mirror—it's the easiest way to see if you've matched your posture correctly.
Once you’re happy with the shape, pull a second vest or a specially made dress form cover over everything. This gives you a smooth, pinnable final surface to work on. Your well-padded adjustable dressmaker form is now a true custom-fitting tool.
It’s this kind of accurate foundation that becomes invaluable when you’re ready to tackle projects like making your own hoodie from scratch with a perfect fit. Now, you can start draping, fitting, and creating with total confidence.
Advanced Fitting and Draping Techniques
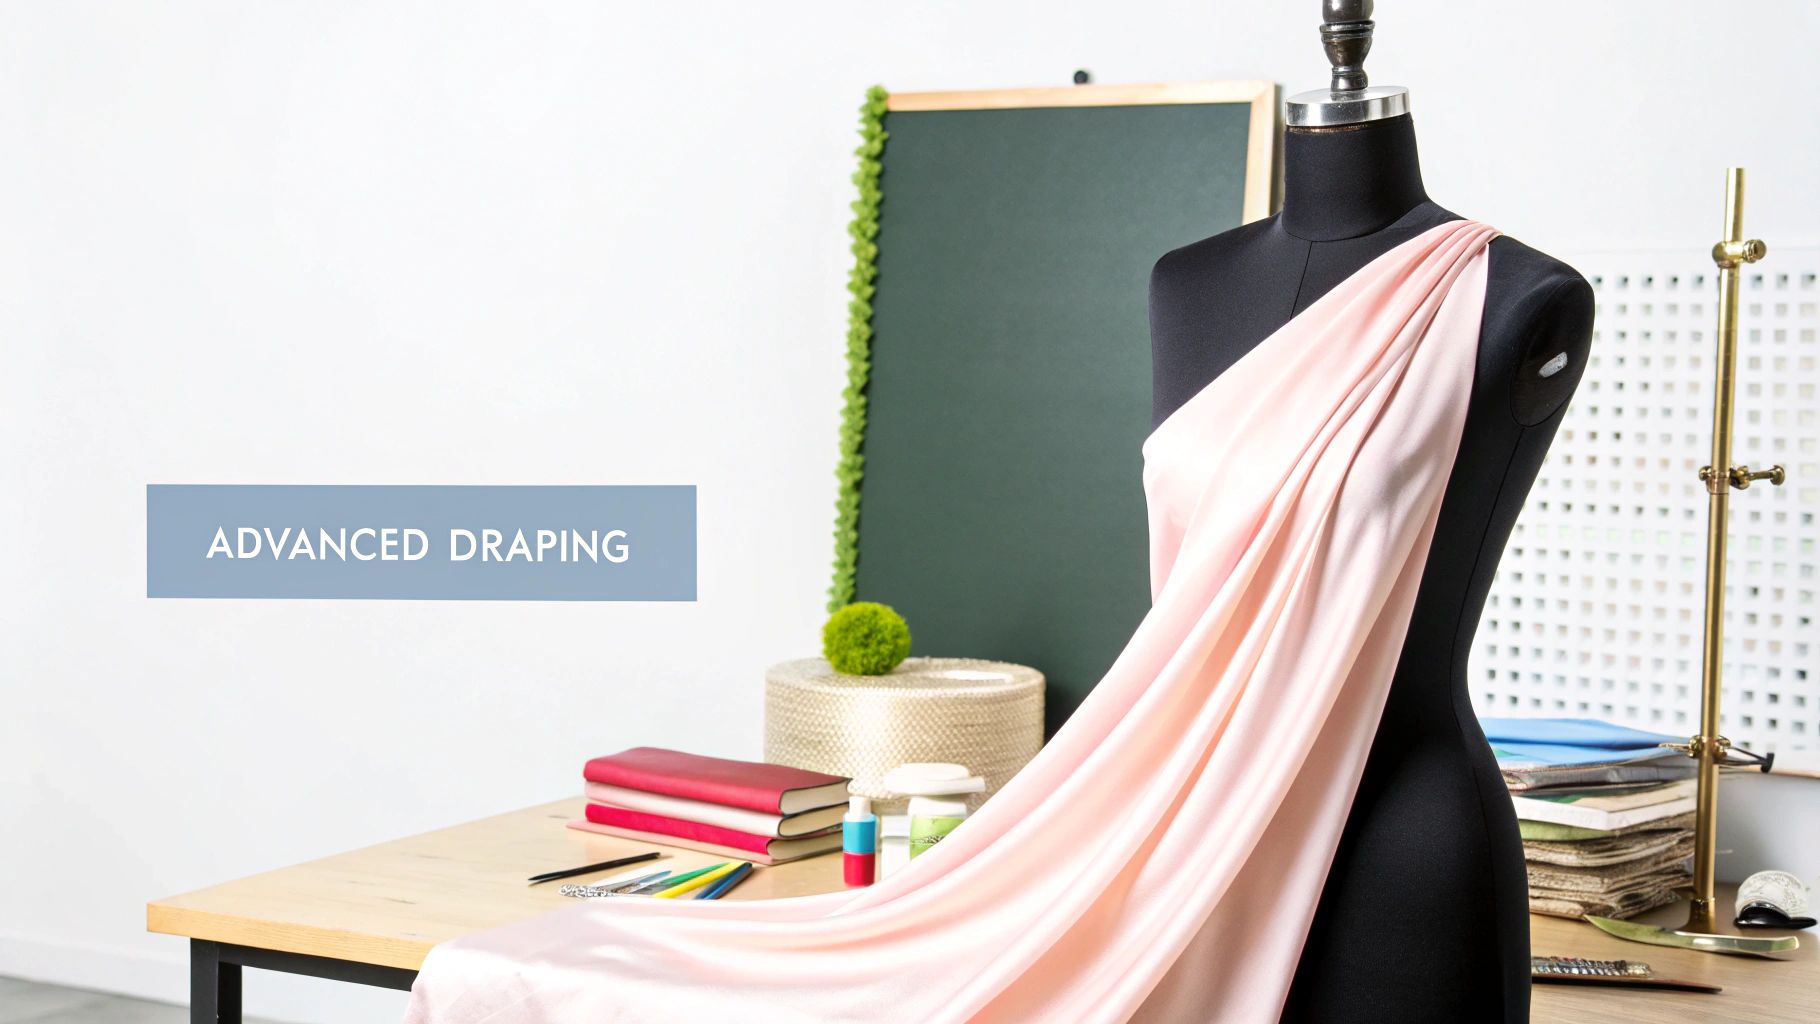
Once you've padded your form to perfectly match your measurements, you'll find it becomes more than just a fitting tool. This is where your adjustable dressmaker form truly comes into its own, becoming an active partner in the design process. It’s your ticket to moving beyond commercial patterns and starting to create completely unique garments from scratch.
Techniques like draping fabric directly onto the form let you almost sculpt with cloth, much like an artist working with clay. It's a hands-on approach, central to couture fashion, that shows you exactly how different materials will hang and fall before you ever make a single cut. Honestly, it's a wonderfully intuitive way to design.
The Art of Draping Fabric
Draping is simply the process of pinning and arranging fabric onto your dress form to develop a pattern. Instead of starting with a flat paper pattern, you’re creating the garment’s shape in three dimensions. You can mark seam lines and darts right onto the fabric, then transfer those markings to paper.
This technique is a lifesaver for:
- Creating organic designs with soft lines, gathers, and complex shapes that are a real headache to draft on paper.
- Working with tricky fabrics like silk or chiffon, helping you get a feel for their unique drape before you’re committed.
- Visualising the garment’s flow and making sure every design element sits exactly where you want it on the body.
The best part is the immediate feedback. You can see instantly if a neckline is too low or a dart is in the wrong spot, allowing you to make adjustments on the fly.
Checking Balance and Solving Fit Issues
One of the most valuable jobs for a dress form is checking the balance and hang of a garment. Even with a brilliant pattern, things can go slightly awry during construction. Popping your nearly-finished piece on the form helps you spot those subtle problems that are almost impossible to see on yourself.
Keep an eye out for twisting seams, especially on sleeves and trouser legs, which usually means the grainline is off. Check that side seams hang straight down, perpendicular to the floor, and that the shoulders are balanced without pulling. Your form is like an objective friend, pointing out these little flaws before they become big ones.
Using your adjustable dressmaker form for final checks is like having a professional fitter on call 24/7. It provides the impartial, 360-degree view needed to catch subtle imbalances and perfect the garment's hang, elevating the final quality from good to exceptional.
This kind of craftsmanship is what sets independent designers apart. The UK’s apparel production scene, while niche, is incredibly resilient, with countless small businesses built on this kind of precision. In London’s Fashion District alone, over 500 independent fashion businesses regularly use an adjustable dressmaker form for prototyping, a vital step in their focus on quality.
Perfecting Design Details
Beyond the overall fit, your form is essential for perfecting the little details that make a garment special. It gives you a stable canvas to position things like pockets, appliqués, and trim with complete accuracy. You can pin them in place, step back, and see how they look from every angle before committing to a stitch.
Matching patterns like plaids or large florals across seams becomes so much easier. You can align the fabric pieces right there on the form to ensure a seamless flow. As you get more comfortable with these techniques, even exploring various t-shirt collar styles can spark new ideas for necklines in your designs.
And finally, marking a perfectly level hem is notoriously difficult when you're wearing the garment. Using the form's hem marker—or even just a simple ruler and pins—guarantees a flawless finish every single time. For anyone just beginning to dip their toes into these more advanced skills, our guide on https://www.displayguru.co.uk/blogs/news/sewing-for-dummy offers a great foundation to build from.
Got Questions About Dressmaker Forms?
Even with the best advice, getting to grips with a new piece of kit like a dress form can throw up a few questions. From wrestling with which size to buy to figuring out why a dial is sticking, some challenges are pretty common. I've heard them all over the years, so I've put together some straight-talking answers to the most frequent queries.
Think of this as your go-to guide for those little "what if?" moments. We'll tackle the practical snags that can crop up, helping you move past any hurdle with confidence and get back to what really matters—creating beautifully fitted clothes.
I'm Between Sizes—Which One Should I Buy?
This is easily the most common dilemma I see: your measurements fall smack-bang between two sizes. It's a classic Goldilocks problem, but the solution is actually quite simple.
The golden rule is to always choose the smaller size. Why? Because it’s far easier to add padding to a smaller form to build it up than it is to work with a form that’s too big at its smallest setting. You can't make a form smaller than its minimum measurements, which means you’ll never get a true fit.
Starting with a smaller base gives you ultimate flexibility. You can methodically add layers of wadding or foam to specific areas—the bust, hips, or waist—to perfectly mirror your own unique curves. This is how you turn a standard form into a true body double.
This approach ensures your adjustable dressmaker form is a truly versatile tool, one that can adapt not just to your current shape, but to any subtle changes over time, too.
Can I Really Make Trousers on a Dress Form?
Another great question. The short answer is yes, but with a couple of caveats. A standard dress form is designed first and foremost for bodices, skirts, and dresses.
Where it really shines for trousers is in fitting the waist, hips, and seat—often the trickiest parts to get right on your own. However, the obvious limitation is the lack of legs. This makes it impossible to check the fit through the thigh and knee, assess the inseam, or see how the trouser leg hangs.
For anyone who makes a lot of trousers, a bifurcated form (one with legs) is a brilliant investment. But don't discount a standard form! You can still use it very effectively for the initial construction and to perfect the fit of the 'top block' of your trousers. You’ll just need to try them on yourself for the final leg fitting, but the form remains an invaluable partner for all that foundational work.
My Adjustment Dials Are Really Stiff. What Should I Do?
Stiff or sticky adjustment dials are a common gripe, especially when a form is brand new. Whatever you do, don't use brute force—you risk damaging the internal gears.
First, never try to make big adjustments in one go. The secret is to adjust all the dials incrementally and in sequence. Give one dial a small turn, then move to the next, and the next, working your way around the form until you gradually reach your target measurements. This approach distributes the pressure evenly and makes the whole process much smoother.
If the dials are still stubborn, check the manufacturer's instructions. Some suggest a tiny amount of a silicone-based lubricant. It's absolutely crucial to avoid oil-based products like WD-40, as they can degrade the plastic parts and could stain the fabric covering. A little patience and gentle, sequential turns are all you need for smooth operation.
How Do I Look After My Dress Form?
A little bit of care will go a long way in protecting your investment and keeping your dress form in top shape for years to come. A few simple habits are all it takes.
- Cover it up: When you’re not using it, pop a cover over your form. This protects it from dust and, more importantly, direct sunlight, which can fade the fabric and make it brittle over time.
- Keep it clean: A quick once-over with a lint roller or the upholstery attachment on your vacuum will keep dust and loose threads at bay. If you get a small mark, spot-clean it gently with a damp cloth and a mild fabric cleaner, but be careful not to soak the material.
- Ease the tension: For long-term storage, it's a good habit to turn the dials back towards their smallest settings. This releases the constant tension on the internal mechanisms, helping to keep them in good working order.
Ready to achieve that perfect, professional fit in your sewing projects? Display Guru offers a fantastic range of high-quality, adjustable dressmaker forms for everyone, from home sewing enthusiasts to professional tailors. Find your perfect sewing partner and take your craft to the next level by exploring our collection at https://www.displayguru.co.uk.