


Your Professional Guide to dress forms adjustable: Achieve the Perfect Fit
An adjustable dress form is far more than just a mannequin. For anyone serious about creating clothes, it's an indispensable partner in the studio – a stand-in for the human body that can be tweaked and tailored to mimic specific dimensions. At its core, it gives you a customisable framework to build upon, letting you adjust key areas like the bust, waist, and hips. This means you can achieve a perfect fit across a huge range of body shapes without cluttering your workspace with dozens of static forms.
What to Look for When Choosing Your Ideal Adjustable Dress Form
Finding the right adjustable dress form is a defining moment for any sewing enthusiast or professional tailor. Think of it less as a simple purchase and more as a long-term investment in the quality and precision of your work. The whole point of these forms is to accurately replicate a person’s measurements, making them absolutely essential for draping fabric, drafting patterns, and checking the fit of a nearly-finished garment.
While the market is flooded with options, there are a handful of core features that separate a genuinely helpful tool from a source of endless frustration. It’s all about focusing on how you’ll actually use it and how it will fit into your creative process.
Key Features for Professionals and Hobbyists
First and foremost, you need to look at the adjustment mechanism. The best dress forms adjustable systems rely on a series of dials, usually found at the bust, waist, and hip lines, which expand or contract different sections of the torso. A smooth, dependable dial system is what allows for those tiny, precise adjustments needed to nail a client's measurements. Some of the more advanced models feature as many as 12 separate dials, offering incredible control over the final shape.
Next up, a pinnable surface is a complete non-negotiable. A form that's covered in foam-backed fabric lets you pin your patterns and material right onto its body. This is crucial for draping, where you literally sculpt the fabric on the form to bring a design to life. Without a pinnable surface, a dress form is really not much more than a display dummy.
A stable stand is the unsung hero of a great dress form. A wobbly base can ruin an afternoon of delicate draping work and is, frankly, a bit of a hazard. Always look for a solid metal tripod or a base with castor wheels for a good mix of stability and mobility.
Considering Body Type and Material
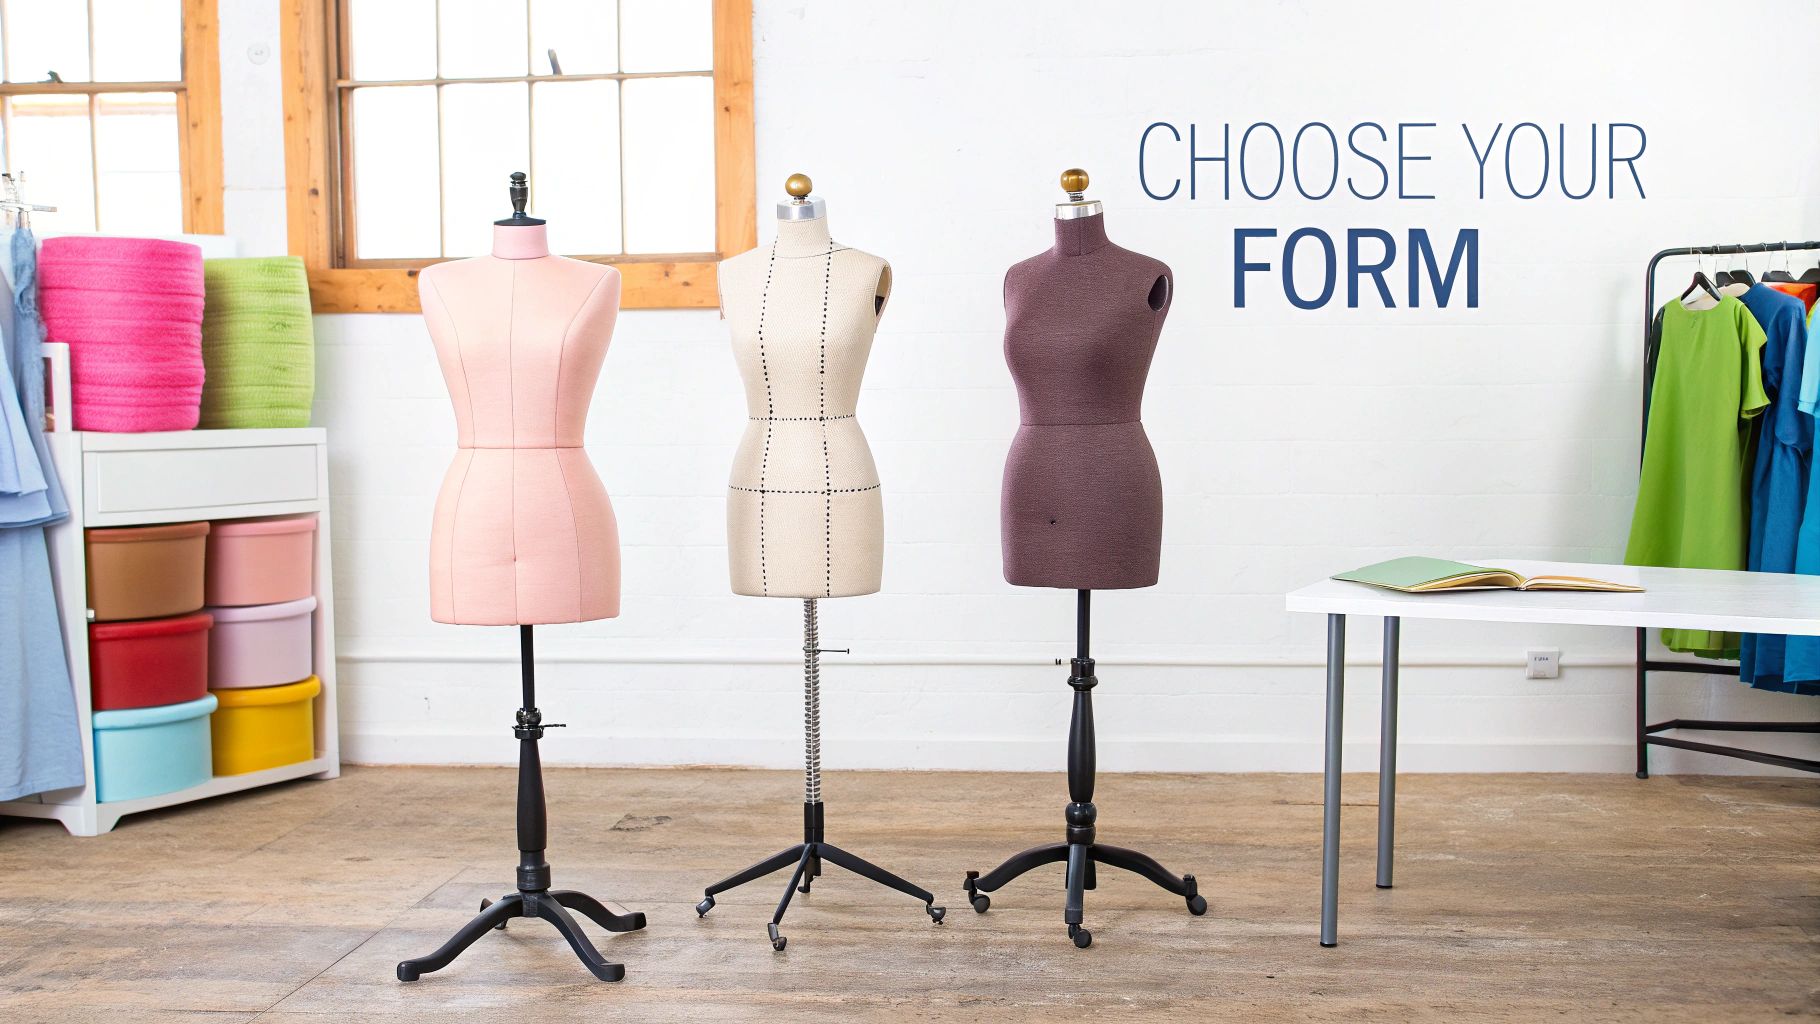
Adjustable dress forms aren't a one-size-fits-all solution. They come in different model types to give you a much more accurate starting point for your projects.
- Female Forms: By far the most common, these are available in standard, petite, and plus-size ranges.
- Male Forms: Specifically contoured for the male torso, they're the go-to for anyone tailoring menswear.
- Child Forms: Perfect for creating children's clothing, these usually come in sizes based on age ranges.
The material of the form itself is also a big deal. High-density polystyrene is a popular choice because it’s durable and takes pins beautifully. To really dive into the details before you commit, you can learn more about how to buy a dress form in our complete guide. Taking the time to make a thoughtful choice now will ensure your new creative partner serves you well for many years.
Understanding the Anatomy of a Dress Form
Before you can get the most out of any tool, you need to know how it works. An adjustable dress form is no different. It's a surprisingly sophisticated piece of kit, where every part plays a specific role in mimicking the human body. When you break it down, you'll find a sturdy core, clever adjustment mechanisms, and a solid base, all designed to work in harmony and bring your creative vision to life.
Think of the torso as the foundation of your work. The quality of this core section has a huge impact on how useful the form will be. Many professional-grade adjustable dress forms use high-density polystyrene for the body. This material hits the sweet spot: it’s lightweight enough to move around easily but tough enough to last. Most importantly, it's pinnable. You can stick pins straight into it to hold fabric, patterns, or tape measures in place, which is an absolute must-have for any serious draping or pattern making.
On the outside, you’ll usually find a tough fabric cover, often made of nylon or a jersey blend. This isn't just for looks; it provides a bit of grip to stop your fabric from sliding about while you work and protects the polystyrene core from daily wear and tear.
The Mechanisms of Adjustment
The real genius of an adjustable dress form is hidden inside. The internal expansion system is what allows you to change the form’s key measurements with precision. While the exact design can differ between models, most quality forms rely on one of two main systems.
The most common setup uses a series of dials—typically 10 to 12 of them—placed at the front, back, and sides of the bust, waist, and hips. Turning a dial moves an internal plate, which expands or contracts that part of the form's circumference. It’s a very direct and intuitive way to work, giving you fine-tuned control over each measurement point.
A different approach, though just as effective, is the central key-operated mechanism. With this system, you use a special key that fits into slots to turn an internal gear, expanding the form smoothly and evenly. The big advantage here is the uniform expansion, though you might have slightly less independent control over specific areas compared to a multi-dial model.
Whichever system your form has, the objective is the same: to create a symmetrical and accurate double of a specific body. The trick is to adjust everything gradually and evenly to avoid putting stress on the internal parts and to maintain a balanced, realistic shape.
The Stand and Its Importance
A dress form is only as reliable as the stand holding it up. The stand is all about stability and mobility, two things you can't do without in a busy workshop or studio. Knowing the difference between stand types will help you pick a model that truly fits how you work.
Two main types of stands are out there:
- Tripod Stand: This is the classic three-legged design. It provides a wide, stable base that's very difficult to knock over, making it a great choice if you're doing a lot of heavy draping. You’ll find them in traditional wood or more modern, durable metal.
- Round or Pedestal Base: This style has a single column rising from a flat, heavy base, which is often round or square. Its biggest plus is its smaller footprint, perfect for studios where every inch of floor space counts. Many also come with castor wheels, so you can wheel the form around easily.
No matter the style, a good stand should always be height-adjustable. This lets you bring the torso up or down to a comfortable working height and is essential for checking the drape and hem of long garments like dresses or trousers.
To help you see how these parts work together, here’s a quick breakdown of the core components and why they matter.
Comparing Key Dress Form Components
| Component | Primary Function | Key Benefit for Users |
|---|---|---|
| Pinnable Torso | Provides the main body shape and a surface to secure fabric. | Allows for direct pinning of patterns and fabric, essential for draping and fitting. |
| Adjustment Dials/Key | Expands or retracts sections of the torso to match measurements. | Enables precise customisation to replicate a wide range of body shapes and sizes accurately. |
| Height-Adjustable Stand | Supports the torso and allows its vertical position to be changed. | Offers ergonomic comfort and the flexibility to work on garments of any length. |
| Stable Base (Tripod/Pedestal) | Prevents the form from tipping over during use. | Ensures safety and stability, especially when working with heavy fabrics or intricate designs. |
Understanding how each part contributes is the first step. When you know what each component does, you can start to see how it all relates to getting the sizing just right. You can dive deeper into this in our guide to mannequin measurements. By getting to know the anatomy of your dress form, you'll turn it from a static dummy into a precise, indispensable partner for all your design and tailoring projects.
Selecting the Perfect Size and Type
Getting the size and type of your adjustable dress form right is probably the single most important decision you'll make. It’s a common and frustrating mistake to buy one that’s too big, simply because you can't shrink it down. On the other hand, starting with a form that's a little too small gives you a world of flexibility.
Think of this section as your practical guide to getting that choice right the first time. We’ll start with the basics of taking accurate measurements, cover the golden rule of dress form sizing, and then look at the different forms available for women, men, and children.
The Golden Rule of Sizing Your Dress Form
If you take only one piece of advice, let it be this: choose a size range that is slightly smaller than your own measurements (or those of your main client). This is the golden rule. Why? Because you can always add padding to build up a form, but you can never make it smaller than its minimum setting.
Let's say your waist is 30 inches. You'd be far better off with a form that adjusts from 24-31 inches than one that covers 30-38 inches. The smaller model gives you the space to pad out the hips, bust, or waist to perfectly match unique curves, slight asymmetries, or even posture. A form that starts at your exact measurements gives you zero room to manoeuvre for that crucial customisation.
Following this rule turns your adjustable dress form from a generic mannequin into a true body double. This diagram breaks down the key parts you’ll be working with.
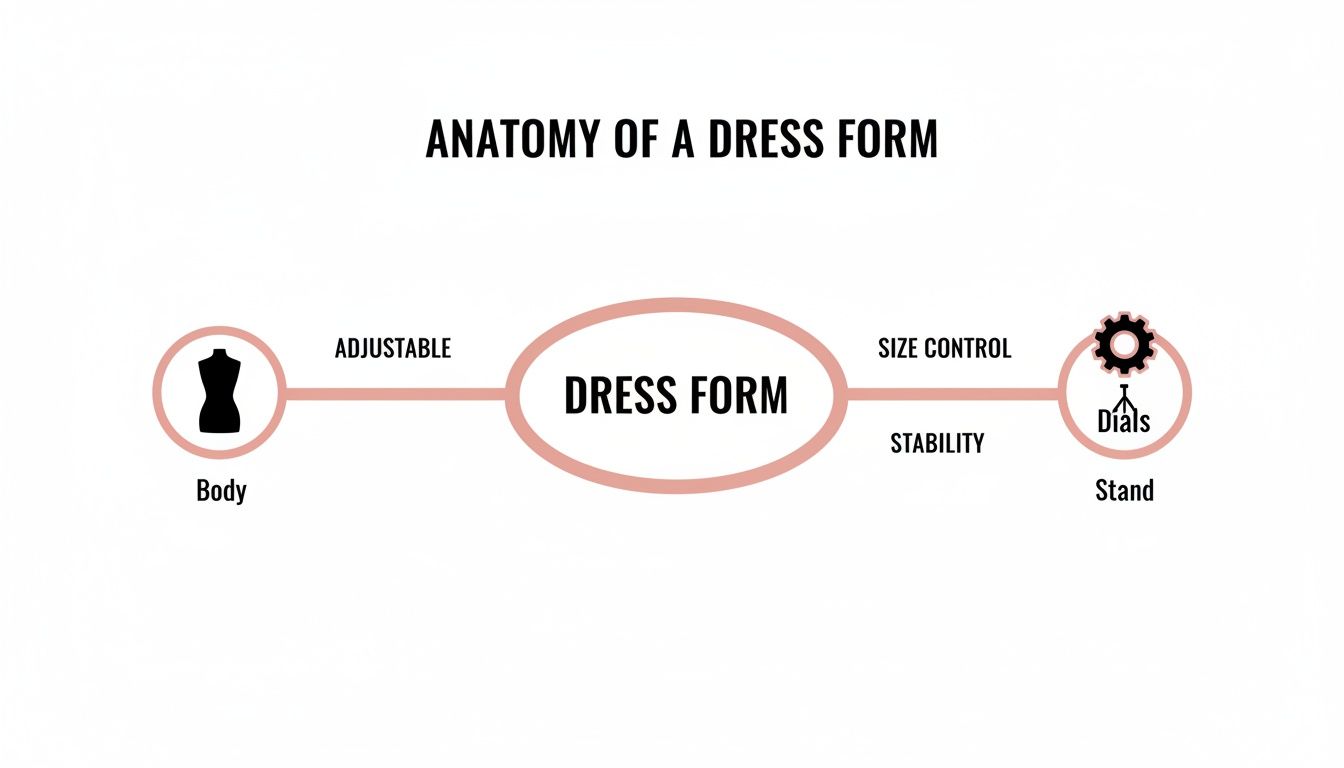
As you can see, the torso, adjustment dials, and stand all work in harmony to help you achieve that bespoke fit.
How to Take Accurate Measurements
To put the golden rule into practice, you need a solid set of measurements. Guesswork here will lead to a poor choice later, so take a few minutes to do this properly. Grab a flexible tailor’s tape measure for the best results.
Here are the key measurements you’ll need to jot down:
- Bust: Measure around the fullest part of your chest, making sure the tape stays level and parallel to the floor.
- Waist: Find your natural waistline—usually the narrowest part of your torso—and measure around it.
- Hips: Measure around the widest point of your hips and bottom. For many people, this is a bit lower than they initially think.
- Back Waist Length: This is a vital vertical measurement. Run the tape from the prominent bone at the base of your neck straight down to your natural waistline. Many good-quality forms allow for this adjustment.
Top Tip: Always measure yourself wearing close-fitting clothes or just your undergarments. This ensures the numbers you're getting are for your body, not your outfit. With these figures in hand, you can confidently start comparing them against the specs of different dress forms.
Exploring Different Types of Dress Forms
While the core function is the same, adjustable forms are designed with specific body types in mind. Picking the right category from the get-go gives you a much better foundation for your projects.
Female Dress Forms
This is by far the most common and diverse category. Since the market is dominated by womenswear, you’ll find the biggest selection here. In fact, women's mannequins and dress forms account for 52.8% of the global market share, a number that highlights the huge demand for fitting female clothing. Retailers lean heavily on these forms, especially plus-size models, to help sell everything from delicate dresses to supportive shapewear.
- Standard Sizes: Generally cater to UK dress sizes from 8 to 20.
- Plus-Sizes: Specifically engineered with fuller proportions to provide an accurate base for larger sizes.
- Petite Forms: These have a shorter torso length and are scaled for smaller frames.
Male Dress Forms
Absolutely essential for anyone working in menswear. These forms are shaped to reflect a typical male torso, with broader shoulders and a less pronounced hip-to-waist ratio. You simply can't get a jacket, shirt, or pair of trousers to hang correctly without one.
Children's Dress Forms
If you're making children's clothes, these are a lifesaver. They are typically categorised by age ranges (like 1-2 years or 6-8 years) and give you a reliable base for designing everything from christening gowns to school uniforms.
By taking careful measurements, sticking to the golden rule, and choosing the right type of form, you're setting yourself up for success. For a deeper dive, you might find our article on the best dress forms for sewing helpful.
Your First-Time Setup and Adjustment Guide
So, your new adjustable dress form has arrived. Unboxing it is exciting, but turning that box of parts into your perfectly customised partner-in-crime is where the real magic begins. Getting it right from the start is straightforward if you follow a logical sequence, and I’ll walk you through everything from the basic build to the finer points of symmetrical adjustment.
The good news is that the initial setup is usually less daunting than it looks. Most models will have the main torso already assembled, so your job is just to put the stand together and connect the two pieces. While the instructions might differ slightly from brand to brand, the core process is pretty much the same.
Assembling Your Dress Form
Your first goal is simple: create a stable, solid foundation. There’s nothing more frustrating than a wobbly form when you’re trying to drape fabric, and it can throw off the accuracy of your work.
Here’s how to get it assembled securely:
- Construct the Stand: Lay out all the parts. If you have a tripod stand, attach each leg to the central column and make sure the screws are good and tight. For a pedestal base, it’s a matter of securing the column to the heavy base plate.
- Attach the Torso: Now, carefully lift the torso and slide it down onto the pole of the stand. Most will have a simple locking mechanism or compression fitting that holds it firmly in place.
- Set the Initial Height: Adjust the stand so the form's shoulder line is at a comfortable working height for you. This will save your back later on, preventing you from having to stoop or constantly reach up.
With the form assembled and standing proud, you’re ready to get to the most important part: adjusting it to your exact measurements.
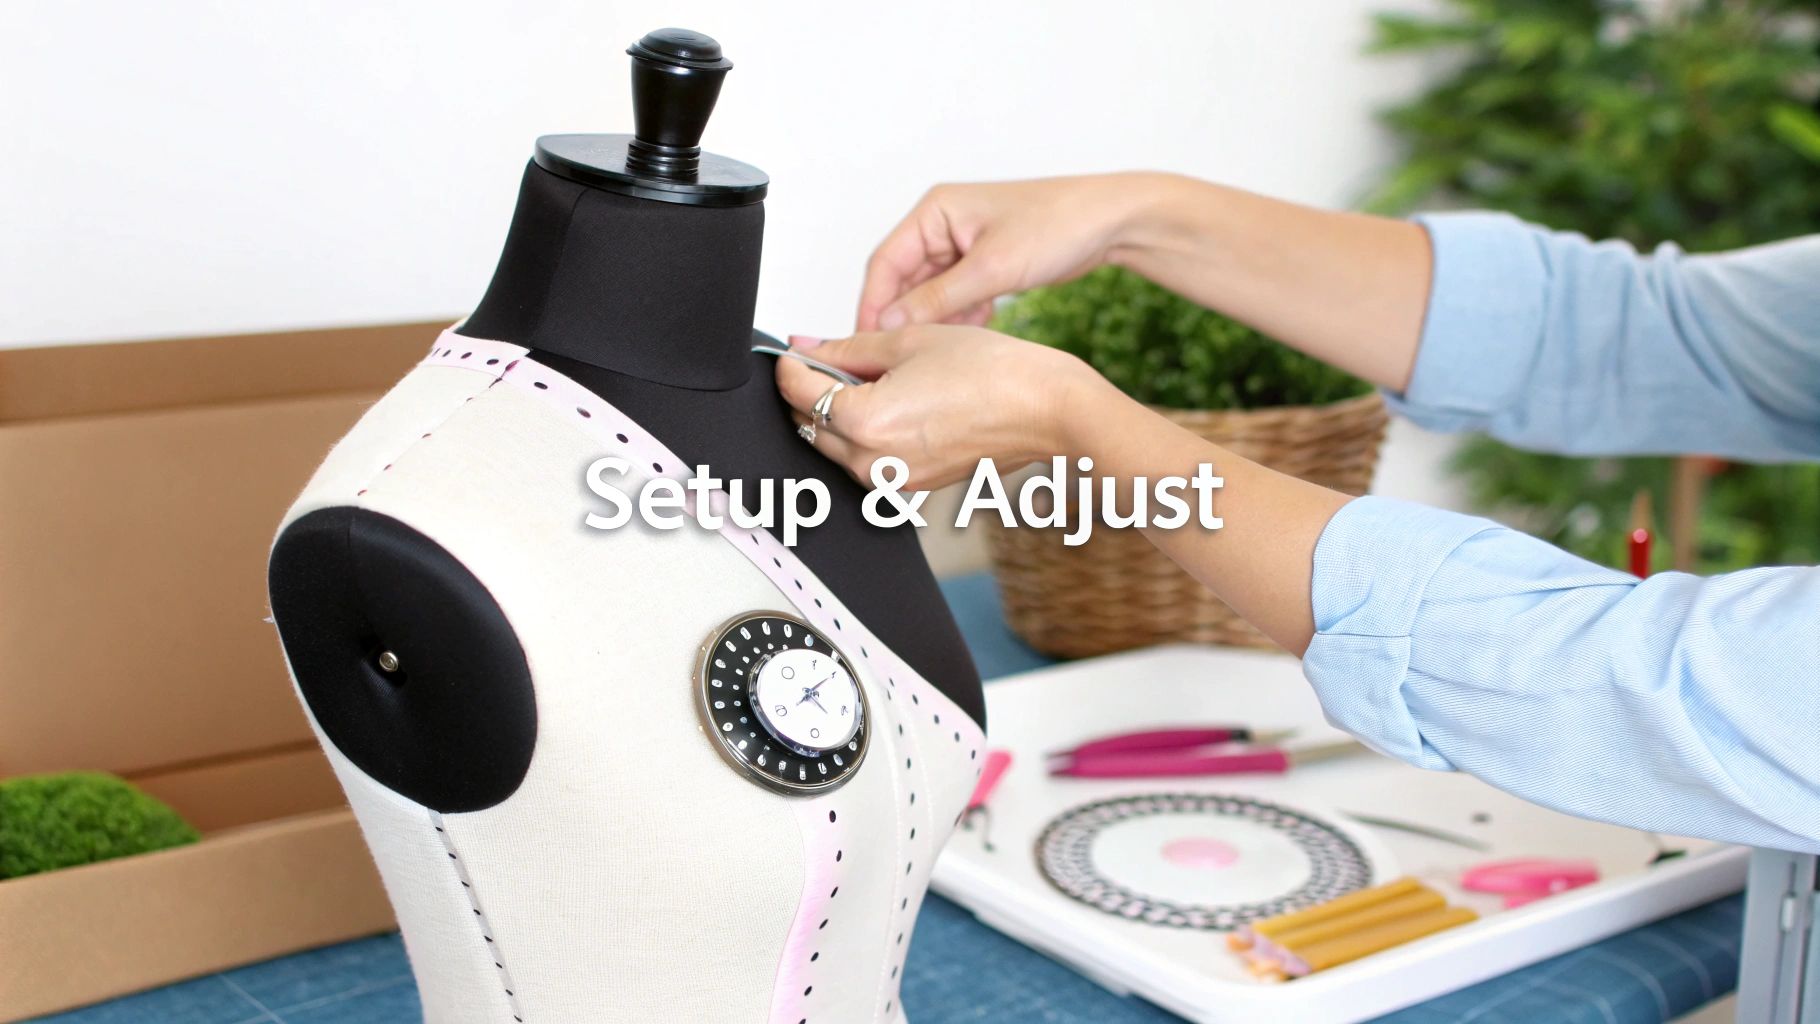
The Art of Symmetrical Adjustment
The absolute key to getting a great result with dress forms adjustable models is to work slowly, incrementally, and symmetrically. It can be tempting to crank one dial all the way to its maximum setting, but this is a mistake. Doing so puts a lot of strain on the internal mechanism and, more importantly, it won't give you a balanced, realistic shape.
Think of it like tuning a guitar – you don't tighten one string all the way while ignoring the others. You adjust each one a little at a time to create harmony. To start, you'll need a set of accurate body measurements. If you need a refresher, our guide on how to take body measurements for clothes is a great resource.
With your numbers handy, pick a measurement to start with, like the waist. Turn the front dial a little, then a side dial, then the back dial. Keep repeating this little-by-little sequence until you hit your target circumference. Trust me, this methodical approach is the secret to a professional finish.
The most common mistake beginners make is adjusting one side of the form completely before touching the other. This creates an uneven, lopsided shape and puts unnecessary stress on the internal gears. Always work in small, balanced increments across all related dials.
Mastering the Skill of Padding
While the dials get you into the right ballpark, padding is what truly creates a perfect body double. This is a non-negotiable skill for bespoke tailoring because it allows you to replicate the unique curves, contours, and even posture of a person in a way that mechanical dials simply can't.
To get started with padding, you’ll just need a few basic supplies:
- Shoulder Pads or Wadding: Perfect for building up areas like the bust, hips, or shoulders.
- A Fitted Knit Cover: A stretchy cover is essential for smoothing over all your padding and creating a single, pinnable surface.
- Plenty of Pins: You'll need these to hold the padding securely in place as you build up the shape.
Begin by identifying where the form’s shape differs most from the body you're matching. Perhaps it's a fuller bust, a slightly rounded back, or more pronounced hips. Layer and pin your wadding onto these areas, constantly checking with a tape measure as you go. Once you're happy with the shape, pull the fitted cover snugly over the entire form. This final step is what transforms your generic tool into a truly customised instrument, ready for high-end garment creation.
Advanced Techniques for Professionals
Once your adjustable dress form is set up and padded out, it’s no longer just a static stand. It transforms into an active partner in your creative process. For professionals, this is where the magic really happens. The form’s ability to change shape unlocks specialised techniques that can seriously boost your efficiency and the quality of your finished work, whatever your field.
From one-of-a-kind tailoring to eye-catching retail displays, the applications are as diverse as the experts who rely on them. Every dial you turn and every curve you pad out serves a purpose, turning a standard piece of kit into a bespoke instrument for high-level craft.
Use Cases Across Creative Industries
The real power of an adjustable dress form lies in its versatility. Different professions tap into this flexibility in unique ways to solve very specific problems, all in the name of precision and a better result for their clients or customers.
Let's look at how various experts put these forms to good use:
-
Bespoke Tailors: For a tailor, the goal is to create a true body double. After dialling in the basic measurements, they’ll use layers of padding to replicate a client’s unique posture—perhaps a slight stoop or one shoulder that sits a fraction lower than the other. This lets them drape and fit complex patterns with incredible accuracy without needing endless in-person fittings, which saves a huge amount of time for everyone.
-
Fashion Designers: Designers live and breathe rapid prototyping, and an adjustable form is their best friend. They can quickly change the form's dimensions to see how a single design looks on different body shapes, going from a size 8 to a size 16 in a single afternoon. This is absolutely vital when developing ready-to-wear collections that have to fit a wide range of real people.
-
Retail Merchandisers: In a shop, a well-dressed mannequin sells clothes. Merchandisers can set an adjustable form to the exact size of a garment, making sure it hangs perfectly without looking saggy or stretched. It creates a much more flattering and realistic display that helps customers see how the piece will actually look on a human body.
-
Costume and Theatrical Designers: Costumers often deal with historical garments that rely on specific underpinnings like corsets or panniers. An adjustable form can be padded out to mimic these foundational shapes, allowing them to build and fit intricate period costumes with true historical accuracy.
Maximising Precision for Custom Apparel
The rising demand for custom-made clothing has put a spotlight on the need for top-notch fitting tools. As more people turn away from mass-produced fashion, the ability to create a garment that fits like a glove becomes a real competitive edge.
The UK custom apparel market, for instance, is forecast to expand significantly from USD 112.10 million to USD 205.27 million by 2032. This surge highlights a clear consumer shift towards unique, made-to-measure clothing—a demand that professional-grade adjustable dress forms are perfectly positioned to meet.
This shift means that getting good at advanced padding and adjustment is no longer just a "nice-to-have" skill; it’s becoming fundamental to staying competitive. For those looking to sharpen their abilities, our guide on sewing for dummies covers foundational knowledge that can help build confidence. By getting the most out of your dress form, you can meet and exceed the expectations of an increasingly savvy clientele and secure your place in this growing market.
Maintaining Your Dress Form for Longevity
Think of your adjustable dress form as a serious investment in your craft. Just like any quality tool, a bit of regular care will ensure it performs beautifully for years. A simple maintenance routine is all it takes to prevent common problems, keep the dials turning smoothly, and protect the fabric surface.
This isn't a chore; it's just a small commitment to protecting your creative partner. Taking a few minutes every so often will keep the mechanisms working flawlessly and the body in prime condition for whatever project you throw at it next.
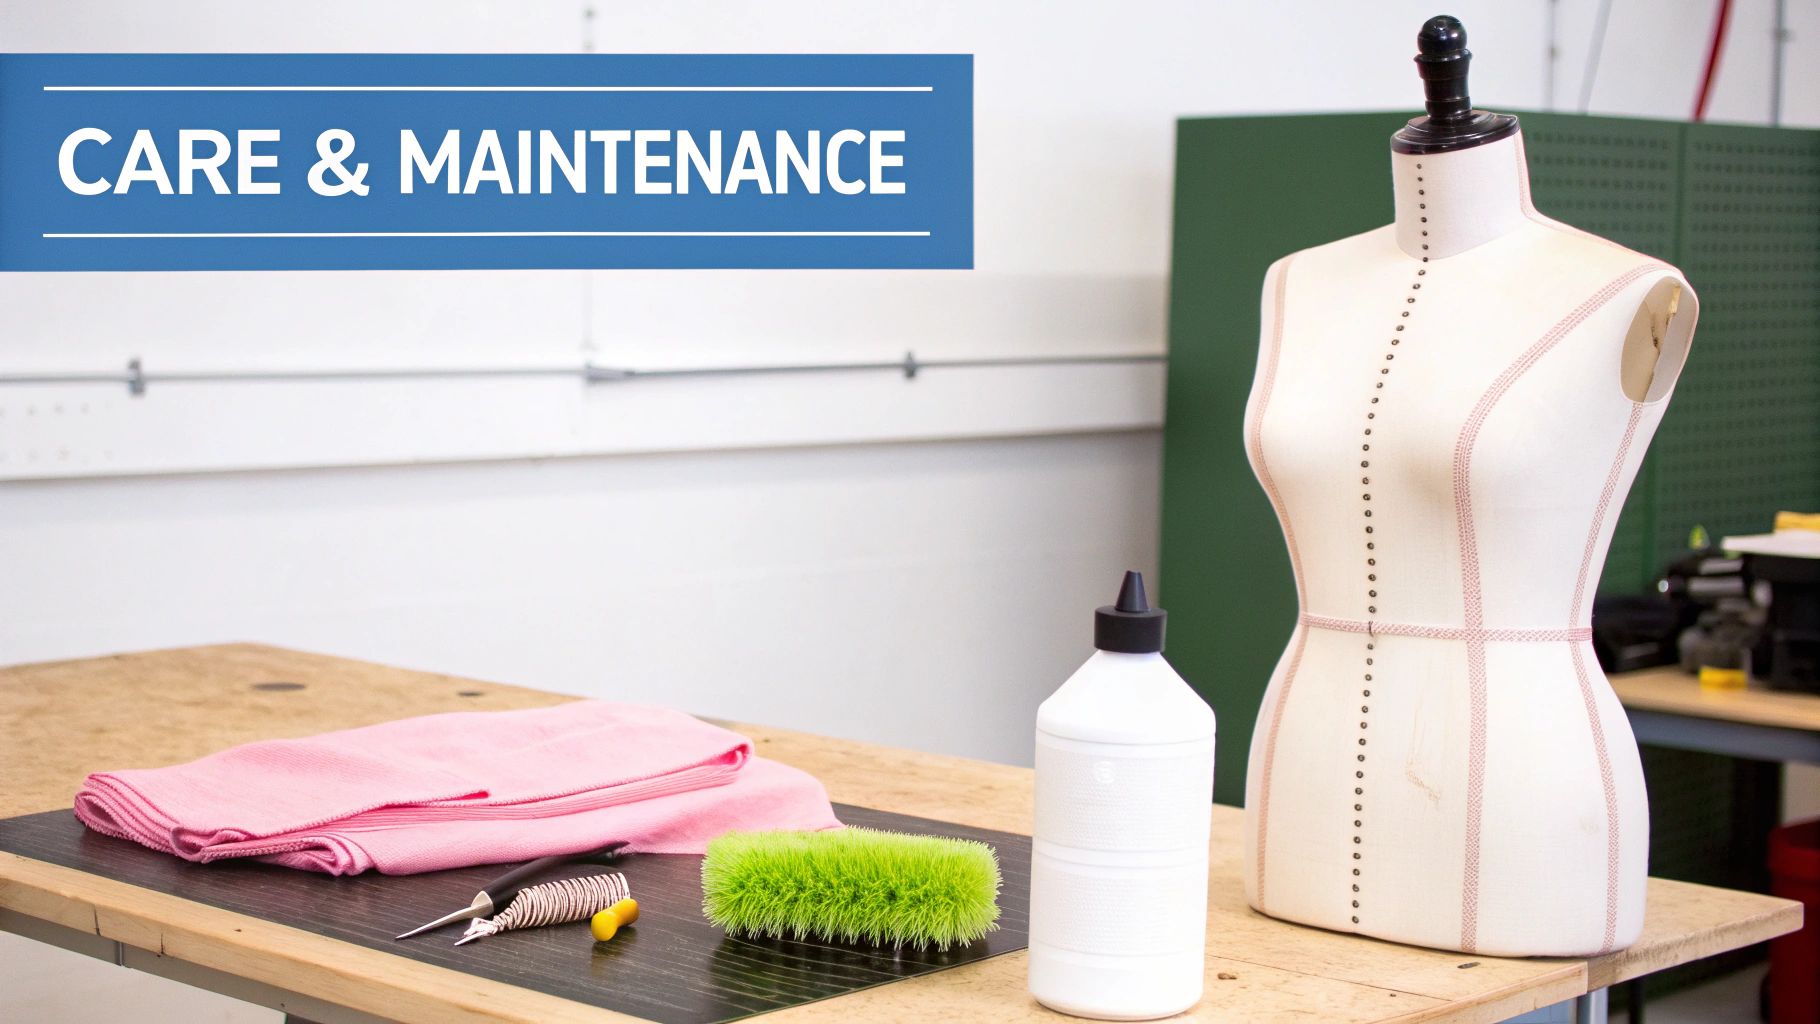
Routine Care and Cleaning
The easiest way to keep your form looking its best is through regular cleaning. Dust, oils from your hands, and stray threads will inevitably build up, so a consistent routine makes all the difference.
A lint roller is perfect for a quick once-over to remove dust and loose fibres from the fabric cover. If you spot any minor marks, tackle them with a slightly damp cloth and a very small amount of gentle fabric cleaner. It’s always wise to test this on a hidden spot first. Crucially, always allow the form to dry completely before you start draping or pinning again.
A great pro tip for keeping the internal mechanisms of your dress forms adjustable model in top shape is to use a light silicone lubricant on the adjustment gears once a year. It's a simple step that stops the dials from becoming stiff and difficult to manage.
Troubleshooting Common Issues
Even with the best care, you might run into a snag here and there. Don't worry—most common issues are quick fixes that will get you back to your project in no time.
Stiff or Stuck Dials
A dial that just won't budge is usually a sign of uneven pressure or that you've hit its maximum extension. First, double-check that you're adjusting all the dials for one measurement (like all the waist dials) together, in small increments. If it’s still stiff, the mechanism might just need a good clean and a bit of lubricant as we mentioned earlier.
Wobbly Stand
There's nothing more frustrating than a wobbly form when you're trying to work. It’s not just annoying; it can be unsafe.
- Check all connections: Go back to square one and tighten every single screw on the stand, from the base of the legs right up to the central pole.
- Find a level surface: Sometimes the issue isn't the form, but an uneven floor. Try moving it to a different spot to see if that solves the problem.
- Inspect for damage: Look closely for any bent metal parts or stripped screws. These might need to be replaced to get the stand back to being sturdy.
Frequently Asked Questions About Dress Forms
It's completely normal to have a few questions when you're looking to invest in a new dress form. After all, it's an essential tool for your craft. Whether you're a seasoned designer or just starting out, getting the right answers can make all the difference. We’ve pulled together some of the most common questions people ask when they're getting to grips with their adjustable forms.
Let's dive into the practical side of things—the questions that pop up once you've got it out of the box and are ready to start creating.
What Is the Main Difference Between a Sewing Mannequin and a Display Mannequin?
Think of it like this: a sewing mannequin, or what we call an adjustable dress form, is a working tool. You can stick pins in it, drape fabric over it, and adjust its measurements to get a perfect fit. It's built to be a part of your creative process.
A display mannequin, on the other hand, is purely for show. You’ll see these in shop windows. They're usually made of something like fibreglass, come in a fixed size, and are designed to make finished clothes look good. In short, a sewing form is for making clothes; a display mannequin is for selling them.
Can I Use an Adjustable Dress Form for Trousers?
Yes, absolutely. A standard torso-only form works beautifully for fitting the waist, hip, and seat of trousers and skirts. The real magic is in the adjustable stand—you can raise or lower it to let the legs of the trousers hang freely, which is crucial for getting the length and drape just right.
While you can find highly specialised forms with legs (known as bifurcated forms), for most projects, a standard adjustable torso gives you all the key reference points you need for a fantastic fit.
The golden rule for choosing a size is to always opt for the smaller option if your measurements fall between two ranges. You can easily add padding to increase dimensions, but you can never make a form smaller than its minimum setting.
What if My Measurements Fall Between Two Sizes?
This is probably the single most important piece of advice we can give: always go for the smaller size. It might seem counter-intuitive, but it gives you the flexibility to pad out specific areas to perfectly match your own shape or a client's measurements.
If you start with a form that’s already at or bigger than your smallest measurement, you have no room to manoeuvre. A smaller form acts as a solid base, a blank canvas that you can build on to create a truly accurate body double.
Are the Adjustment Dials Difficult to Turn?
On a well-made dress form, the dials should turn smoothly with a bit of firm pressure. The trick is to adjust them bit by bit, and in order. For example, if you're adjusting the waist, give each of the waist dials a small turn in sequence, rather than winding one dial all the way out before starting on the next.
This balanced approach ensures the form expands evenly and doesn't put any stress on the internal parts. If a dial ever feels stiff, it’s likely either reached its maximum point or just needs a quick wipe to clear out any trapped dust or fabric fibres.
Ready to achieve the perfect fit on every project? Explore our professional range of adjustable dress forms at Display Guru. Find your ideal creative partner today.