


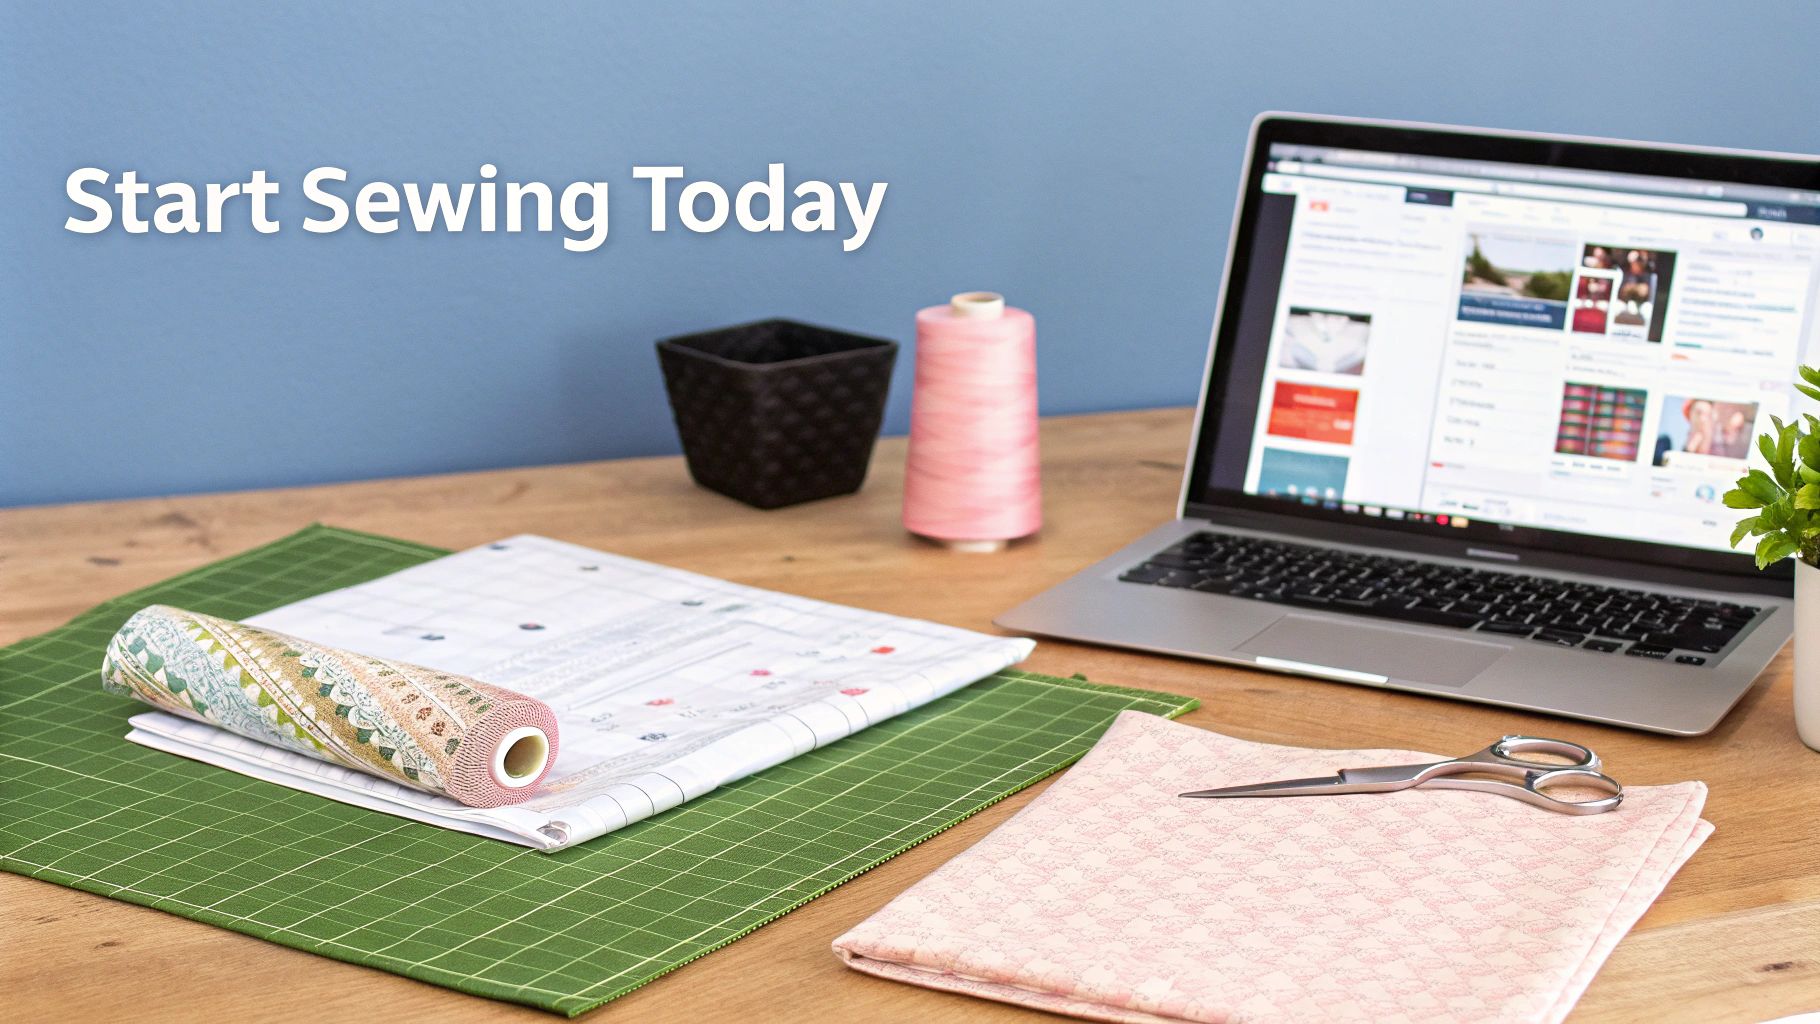
Beginner sewing patterns free - Find Free Patterns & Tips
Dipping your toes into the world of sewing is an incredible feeling, but you don't need to spend a fortune to get started. The internet is a treasure trove of high-quality beginner sewing patterns free of charge. Talented indie designers and even fabric companies often share these to help newcomers build their skills and confidence, one stitch at a time.
Why Start Your Sewing Journey with Free Patterns
The art of making your own clothes has well and truly made a comeback. It’s no longer just a niche hobby; it’s a mainstream creative outlet, largely fuelled by a collective shift towards sustainable fashion and a rejection of the throwaway culture. People are rediscovering the joy of creating something truly their own, something with a story.
This revival got a massive boost from popular culture. Here in the UK, shows like The Great British Sewing Bee were instrumental in putting dressmaking back in the limelight. After it hit our screens, retailers reported a huge jump in sewing machine sales, proving just how much inspiration we take from seeing that creativity in action.
Building Skills Without Financial Pressure
Let's be honest, when you're starting out, you're going to make mistakes. And that's perfectly okay! Using free patterns removes the financial sting, giving you the freedom to experiment, mess up, and learn without worrying that you've wasted money on a pattern you weren't ready for.
Key Takeaway: Think of free patterns as your training ground. They allow you to focus entirely on the craft itself—getting your straight stitches perfect or figuring out how to insert a zip for the first time—before you invest in more complicated paid patterns.
This hands-on approach is the best way to build a solid foundation. With each simple project you finish, your confidence will soar, and you'll start to intuitively understand how garments come together. To stay on top of your plans, consider using a good sewing project planner right from the start.
Discovering Your Personal Style
Another brilliant aspect of starting with freebies is the sheer variety on offer. You can explore different silhouettes and styles to figure out what you truly love to make and, more importantly, what you love to wear.
- Simple Tops and T-shirts: These are fantastic for getting to grips with finishing necklines and seams neatly.
- Easy Tote Bags: A tote is the perfect project for mastering straight lines and understanding how to construct a simple 3D object.
- Pyjama Bottoms or Shorts: This is a brilliant introduction to basic fitting and working with comfortable elasticated waistbands.
By trying your hand at these kinds of projects, you'll not only start building a handmade wardrobe but also begin to define your own unique style.
Finding and Evaluating Free Sewing Patterns
Diving into the world of online sewing patterns can feel a bit overwhelming, especially when you're on the hunt for something that’s both free and beginner-friendly. But don't worry, there's a treasure trove of genuinely fantastic patterns out there from talented designers and brands, all designed to get you started on the right foot. The real trick is knowing where to look and, more importantly, what makes a pattern worth your time.
The reality is that not all free patterns are made equal. Some are little more than a marketing gimmick with confusing instructions, while others are thoughtfully designed projects perfect for building your core skills. Let's focus on finding those gems.
How to Spot a Good Beginner Pattern
Before you even click the download button, a quick quality check can save you a world of frustration. A reliable beginner pattern will give you all the critical information upfront, so you know exactly what you’re getting into.
Here are a few green flags to watch for:
- A Clear Skill Level: Look for terms like "Beginner," "Easy," or "Confident Beginner" right on the pattern page.
- Specific Fabric Recommendations: A good pattern will guide you towards fabrics that are easy to work with, like stable cottons, chambrays, or linens.
- Finished Garment Measurements: This is a huge help. It’s a chart that tells you the final dimensions of the clothing, which helps you choose a size based on how you want it to fit, not just your body measurements.
- Detailed Instructions: The best freebies often link to a photo-heavy blog post or a full "sew-along" video, walking you through every single step.
If a pattern description feels vague or is missing these key details, it's probably best to keep looking. Nothing sours the joy of sewing faster than a poorly explained project.
Where to Find the Best Free Patterns
To get the best results, start your search with sources that have a reputation for quality. Indie pattern designers are a fantastic starting point. They often release a few free, simpler patterns as a way to introduce you to their drafting style. Think of brands like Tilly and the Buttons or popular sewing blogs like Melly Sews.
Fabric companies are another brilliant resource. Shops like Mood Fabrics offer a massive library of free patterns created to showcase their fabrics, and they usually come with pretty solid instructions. Because they're designed to sell fabric, these patterns are often well-tested and reliable.
My Favourite Tip: When you find a designer whose style and instructions you click with, sign up for their newsletter. They often share exclusive freebies with their subscribers and announce new releases, helping you slowly build a digital library of patterns you can actually trust.
Of course, once you've found your pattern, you need to make sense of all the lines and symbols. For a deep dive into deciphering the terminology, have a look at our guide on how to read sewing patterns.
To help you narrow down your search, I’ve put together a quick comparison of the most popular places to find free patterns.
Comparing Free Pattern Sources for Beginners
Choosing the right source can really shape your initial sewing experience. This table breaks down what you can expect from the main players in the free pattern space.
| Pattern Source | Pros | Cons | Best For |
|---|---|---|---|
| Indie Designers | High-quality drafting, very detailed instructions, and often a community for support. | The free selection is usually much smaller than their paid catalogue. | Learning proper techniques with a well-tested, reliable first project. |
| Fabric Brands | A huge and often trendy selection. Patterns are tested with specific fabrics in mind. | Instructions can sometimes be less detailed than those from a dedicated pattern company. | Finding modern, fashionable projects if you're already a bit confident. |
| Sewing Blogs | Massive variety of projects, often with step-by-step photos and personal sewing tips. | Quality can be inconsistent; some patterns may not be professionally tested or graded for size. | Unique or niche projects, and learning from a real person's process. |
Ultimately, exploring each of these sources will give you a feel for what works best for you. Don't be afraid to download a few and just read through the instructions before you commit to cutting any fabric.
Getting Your Pattern Ready for a Perfect Fit
A beautiful garment that fits like a glove is rarely a happy accident. It's the result of careful prep work that happens long before your fabric ever sees a needle. This is the stage—often rushed by excited beginners—where you turn a flat, two-dimensional beginner sewing patterns free download into something that will actually flatter your unique shape. Success truly begins here.
First things first, let's talk about printing your PDF pattern. Don't just print it from your web browser. Always open the file in a proper PDF reader and hunt for the printing instructions. The magic words you're looking for are 100% scale or "actual size". Printing with any other setting will warp the pattern pieces and throw everything off.
Most patterns have a small test square (usually 1" x 1" or 5cm x 5cm) on the first page. Just print that single page first and measure the square with a ruler. If it’s spot on, you're good to go and can print the rest. After that, you'll be assembling the pages like a big jigsaw puzzle, trimming the borders and carefully taping them together.
Choosing Your Size with Confidence
Now for the most critical part: measuring yourself properly. Please don't guess or just go by your high-street size, as sewing pattern sizing is a completely different world. You'll need, at a minimum, your bust, waist, and hip measurements. For a really thorough walkthrough, our guide on how to take body measurements for clothes is the perfect place to start.
Once you have your numbers, compare them to the pattern's size chart. It's incredibly common to find that your measurements span across two or even three different sizes. Don't panic! A smart approach is to pick the size that matches your largest measurement and then plan to blend, or 'grade', between sizes for a custom fit.
Getting a professional finish starts with accurate sizing. While we're talking about clothes here, the core principles of measurement apply to all sorts of sewing projects. This guide to understanding dimensions for a perfect fit offers some great insights into just how important precision is.
Visualising the Fit Before You Cut
This is where a tailor's dummy becomes your secret weapon. Instead of trying to imagine how those flat paper pieces will drape on a real body, you can see it happen right in front of you. An adjustable mannequin, like the ones we have at Display Guru, lets you dial in your exact bust, waist, and hip measurements to create a stand-in for your own torso.
Here's an example of the kind of professional-grade tailor's dummies available.
Having a dress form like this allows you to test-drive the pattern before you've even touched your good fabric.
Once your dummy is set to your measurements, you can pin the assembled paper pattern directly onto it. Honestly, this simple step is an absolute game-changer for anyone new to sewing.
Pro Tip: As you pin the paper pattern to your dress form, keep a close eye on the side seams, shoulders, and dart placements. You'll immediately be able to spot problems—a waistline that sits too high, a bust that looks too restrictive, or shoulders that are too wide.
This visual check lets you make adjustments right on the paper. You might decide to add a couple of inches to the hem, shift the position of a dart, or even realise you need a size 12 for your top and a 14 for your hips. Catching these issues now saves a massive amount of time and frustration down the line. It's the single best thing you can do to avoid wasting fabric and get a genuinely bespoke look.
Transferring Your Pattern to Fabric and Cutting
You’ve got your paper pattern all sized and stuck together, which means you’re at one of the most satisfying parts of the whole process: turning that paper plan into actual fabric pieces. The choices you make now, from the fabric you pick to how carefully you cut, really set the stage for your finished garment. This is the moment it all starts to feel real.
For your first few makes, choosing the right fabric is absolutely key. Trust me, you'll have a much better time if you stick with stable, non-stretchy woven fabrics. Think quilting cottons, chambray, or a nice linen blend. These materials don't wiggle and slide all over the place, which makes them a dream to mark and cut accurately, especially compared to slinky fabrics like silk or jersey.
This quick diagram breaks down the core process you'll follow before you even lay your pattern on the fabric.
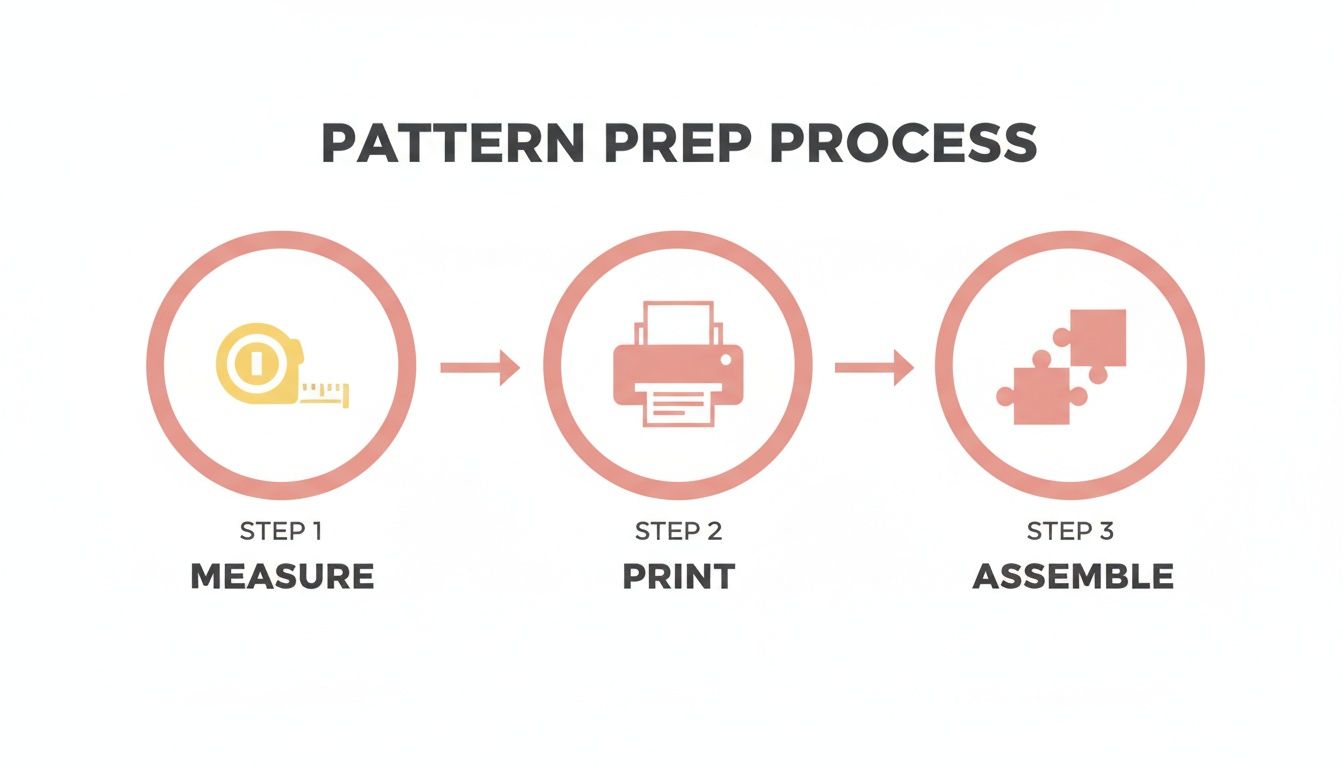
Getting these prep stages right—measuring, printing, and assembling—is what gives you a solid foundation for a successful project.
Laying Out and Marking Your Pieces
Before a single cut is made, you need to get your pattern pieces laid out on the fabric correctly. Look for the grainline arrow on each piece. This long, double-ended arrow is your most important guide; it must run perfectly parallel to the selvedge (the tightly woven, finished edge of the fabric). Getting this right ensures your garment hangs properly and doesn't twist strangely after you wash it.
To get it spot on, use a tape measure to check that both ends of the grainline arrow are the exact same distance from the selvedge. Once you're happy with the placement, pin the paper pieces down so they don’t shift.
Now it's time for marking. It’s so tempting to just cut around the pattern and call it a day, but you need to transfer every single marking from the paper to your fabric. Pay close attention to:
- Notches: These are little triangles or lines along the edges that act like a map, helping you line up different pieces of the garment perfectly.
- Darts: These are the wedge-shaped tucks that create shape, especially around curves like the bust and waist.
- Dots and Squares: These are placement markers, often showing you where to attach a pocket or place a button.
You can use tailor's chalk, a chalk wheel, or a disappearing fabric pen for this job. Being meticulous here will save you a world of confusion later on.
Achieving a Clean and Accurate Cut
Alright, it's finally time to cut. The secret to a really accurate cut is keeping your fabric completely flat and still. For beginners, a rotary cutter and a self-healing mat are often a game-changer. It's much easier than wrestling with scissors, which have a tendency to lift and distort the fabric as you cut. We go into more detail on why this setup is so helpful in our guide on choosing a cutting mat for sewing. A rotary cutter just glides through the fabric, leaving you with beautifully clean edges.
Crucial Tip: When you get to your notches, cut them outwards as little triangles pointing away from the main pattern piece, rather than snipping into the seam allowance. Snipping inwards is a common mistake that can weaken your seams and cause real headaches when you start sewing everything together.
Don’t rush this step. A precise cut is the first hallmark of a well-made garment and will make the actual sewing part so much smoother. Once everything is cut and marked, you’re ready to take your beautiful stack of fabric pieces to the sewing machine.
Mastering Your First Stitches and Seams
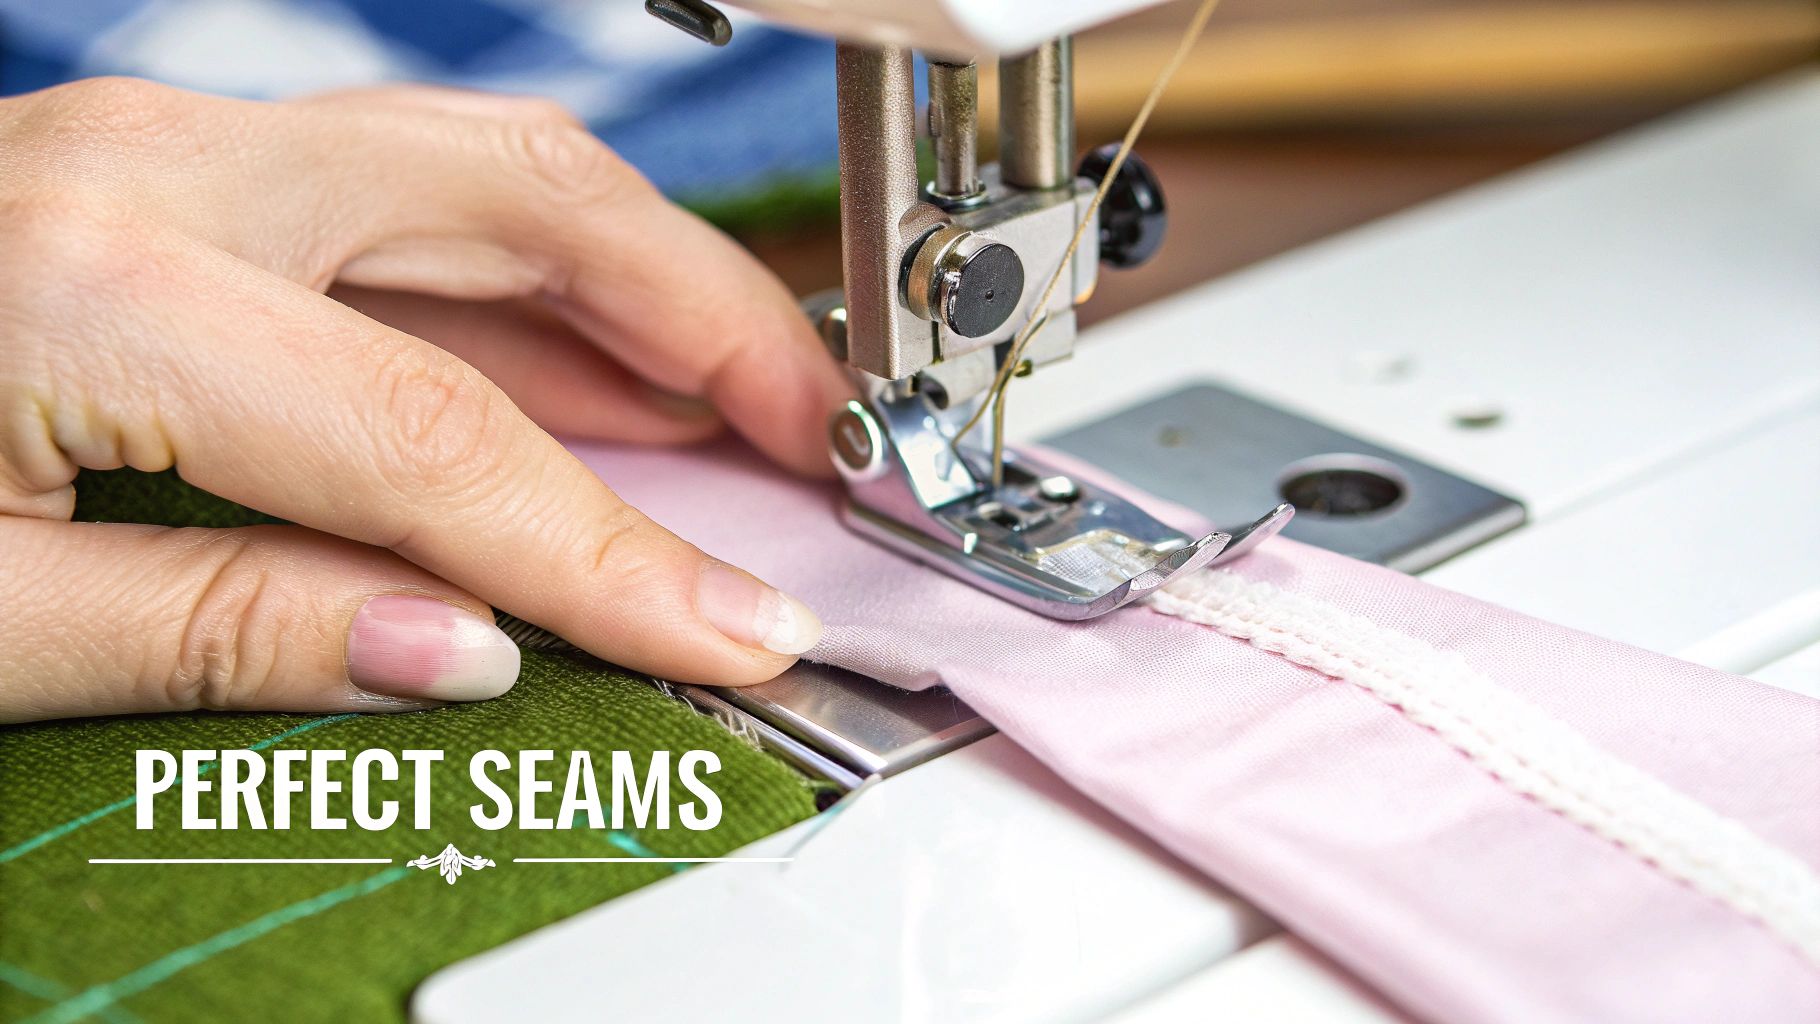
Alright, your fabric pieces are cut and ready to go. Now for the exciting part—bringing it all to life at the sewing machine. This is where you transform those flat shapes into something real. The two skills you're about to focus on, sewing a straight line and pressing a seam, are the absolute bedrock of everything you'll ever sew.
Take a deep breath and go slow. Your first project is all about accuracy, not speed. Concentrate on gently guiding the fabric, letting the machine's feed dogs do the pulling. It’s completely normal for your first few seams to be a bit wobbly, but you'll find your rhythm with a little practice. A simple tote bag, one of the most common beginner sewing patterns free online, is a fantastic way to get a feel for straight, consistent stitching.
The Golden Rule: Always Press Your Seams
If I could give just one piece of advice to every new sewer, it would be this: press every single seam right after you sew it. I’m not talking about giving the whole project a final iron at the end. I mean getting the iron out after each seam, setting the stitches, and pressing the seam allowances open or to one side. Honestly, this one habit will make the biggest difference in how your finished projects look.
Pressing as you go gives you that crisp, professional finish you see in shops. It helps seams lie flat and ensures everything lines up perfectly for the next step. If you skip it, you'll end up with bulky, puffy seams that just scream "homemade," and no amount of ironing later can truly fix them.
Key Insight: A well-pressed seam is the signature of quality work. It’s what elevates a project from looking amateurish to looking beautifully handmade. Your iron is just as important as your sewing machine, so keep it close.
Dealing with Seam Allowances
The seam allowance is simply the fabric between your line of stitches and the raw, cut edge. It’s a vital part of any pattern, and if you want to get into the nitty-gritty of it, our guide on what is seam allowance is a great place to start.
If you leave these raw edges as they are, they'll start to fray and unravel, especially in the wash. To make your creations last and keep the inside looking neat, you’ll want to 'finish' those edges.
For a beginner, there are a few very easy ways to get a tidy finish:
- Pinking Shears: These are scissors with a zigzag edge. A quick snip along the raw edge is the simplest way to stop fraying on stable fabrics like cotton. Super fast and effective.
- Zigzag Stitch: Your sewing machine almost certainly has a zigzag stitch setting. Just run that stitch along the very edge of the seam allowance, and it will lock the threads in place.
- Overcasting Foot: Some machines include this handy little attachment. It works with a specific overcasting stitch to wrap thread around the raw edge, giving you a finish that looks very similar to what you find on clothes from a shop.
Taking a few extra minutes to finish your seams will make your work look ten times better. It’s one of those small details that signals real care and attention, ensuring that even a project from beginner sewing patterns free of charge can look polished and professional.
Got Questions? We've Got Answers
Stepping into the world of sewing is exciting, but it's natural to have a few questions pop up. Let's tackle some of the most common queries I hear from new sewers, so you can start your journey with confidence.
What’s the Best Fabric for a First Project?
My golden rule for anyone starting out is to stick with a stable, non-stretch woven fabric. Think quilting cottons, chambray, linen blends, or even poplin.
These fabrics are incredibly forgiving. They don’t slip and slide around while you're cutting or stretch out of shape as you sew, which makes handling them a breeze. You'll find it much easier to master straight seams and get a clean finish.
It's so tempting to grab a beautiful satin or a comfy jersey knit for a first make, but trust me on this one. Save those for later. Starting with simple cottons will make the whole learning process far more enjoyable and way less frustrating.
Do I Really Need to Pre-Wash My Fabric?
Yes, one hundred percent! This is a step you should never skip. Most fabrics, especially natural fibres like cotton and linen, will shrink the first time they're washed.
You want that shrinkage to happen before you cut out your precious pattern pieces, not after you’ve lovingly stitched your garment together. Just wash and dry your fabric exactly how you plan to care for the finished item, and you'll avoid any sad, shrunken surprises down the line.
How Can I Tell if a Free Pattern Is Any Good?
This is a great question. The quality of free patterns can vary wildly, but there are a few tell-tale signs of a good one. Look for patterns from reputable sources, like well-known indie designers (such as Tilly and the Buttons) or established fabric companies (like Mood Fabrics).
A high-quality free pattern will almost always include:
- A clear skill level rating, like "Beginner" or "Easy".
- Detailed, step-by-step instructions, often with helpful photos or a link to a video tutorial.
- A chart of finished garment measurements to help you pick the right size.
When a designer provides this much information, it's a strong indicator that the pattern has been properly drafted and tested. It sets you up for success right from the start.
At Display Guru, we know that the right tools can completely change your sewing game. An adjustable tailor's dummy, for example, helps you see how a garment will truly fit and allows you to make precise adjustments with ease. It's the secret to turning a simple pattern into a perfectly tailored piece you'll be proud of. Explore our range of professional mannequins and see how you can elevate your sewing projects.