


Choosing Your Greeting Card Display Rack
The right greeting card display rack is far more than just shop furniture. I've seen it time and again: the right display is a silent salesperson, a critical merchandising tool that can genuinely shape your customers' experience and, ultimately, boost your sales.
Your choice really comes down to your unique space—whether you're working with a bustling high-street shop, a cosy boutique, or a compact market stall.
Matching a Display Rack to Your Retail Space
Before you even start looking at styles or materials, the very first step is to take a hard look at your physical environment. The perfect display rack is the one that fits your shop like a glove. I’ve seen retailers try to squeeze in a massive floor spinner that worked wonders in a spacious gift shop, only to find it completely overwhelms their more intimate setting.
This isn't just about filling an empty spot; it's about making that space work harder for you. A well-chosen rack can turn a dead corner into a destination, encouraging those impulse buys that make all the difference. The goal is to find a unit that complements your customer flow, enhances your brand’s look and feel, and shows off your cards to their best advantage without creating clutter.
Where Will Your Cards Live?
The first question is always the most important: where will the display actually go? The answer immediately narrows down your options.
If you have a large, open-plan store with wide aisles, you can easily accommodate a floor-standing spinner or a big, multi-tiered shelving unit. These are the workhorses of card display, offering the highest capacity. They’re ideal if you have an extensive collection or experience big seasonal rushes.
On the other hand, a boutique with limited floor space will get much more value from a countertop rack. Placed right near the till, these compact units are perfect for grabbing attention. They're brilliant for showcasing best-sellers or seasonal designs, turning your checkout area into an active selling zone while customers wait to pay.
And for those spaces where every square foot is precious, wall-mounted racks are a fantastic solution. They draw the eye upwards, making use of vertical space that would otherwise be wasted. This works especially well in narrow shops or behind a service counter, keeping your card selection visible without blocking pathways.
This flowchart gives you a quick visual to help you decide based on your layout.
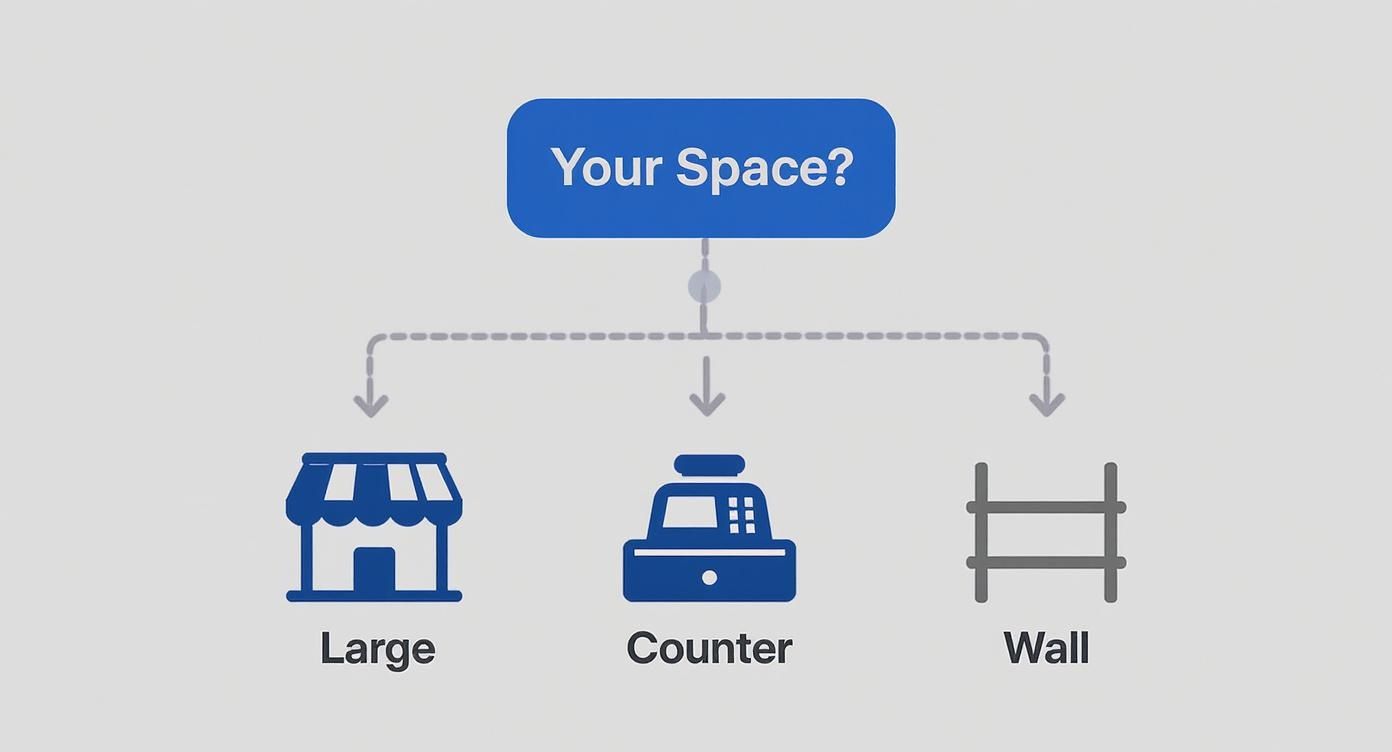
As you can see, there’s a natural display solution for every type of space, which really helps simplify that initial choice.
Let's break down the common types to make the decision even clearer.
Greeting Card Display Rack Type Comparison
Here's a quick comparison of the most common rack types to help you decide which is best suited for your space and needs.
| Rack Type | Best For | Space Requirement | Typical Capacity |
|---|---|---|---|
| Floor Spinner | Large, open retail areas with high foot traffic | High | 100-300+ card designs |
| Countertop | Checkout areas, small boutiques, market stalls | Low | 20-60 card designs |
| Wall-Mounted | Narrow shops, areas behind counters, small spaces | Minimal (uses vertical space) | 40-120 card designs |
| Tiered Shelving | Dedicated card sections, flexible product sizing | Medium to High | Varies widely by size |
Each of these has its place, but the key is choosing the one that will maximise your specific selling environment, not fight against it.
Does the Rack Fit Your Brand?
Beyond pure function, your display rack should feel like a natural part of your brand. Think of it as part of the decor. A rustic wooden stand, for instance, is a perfect match for a shop with an artisanal, handmade focus. The warm, natural material instantly communicates craftsmanship and quality.
Conversely, a sleek metal or clear acrylic rack projects a more modern, minimalist vibe. These are great for contemporary gift shops or galleries where you want the cards themselves to be the star of the show. I'm a big fan of acrylic in these settings because it creates an almost invisible display, allowing the vibrant colours and designs of the cards to truly pop.
Considering versatile storage and display solutions that can adapt as your brand or product line evolves is also a savvy move.
The UK greeting cards market is huge, generating around USD 1.74 billion in 2022. Traditional cards still hold the largest share, which just goes to show how vital those physical fixtures are. Every major retailer I know relies on a good greeting card display rack to attract shoppers and make the most of their precious shelf space.
How Many Cards Do You Need to Display?
Finally, let's talk numbers. How many different card designs do you plan to stock? Be realistic here, and don't forget to plan for those seasonal surges. A rack that looks perfect in July might be completely swamped come the Christmas rush. It’s always better to have a little extra room than not enough.
Also, think about your product range. Most racks are designed for standard-sized cards. But if you stock a variety of sizes—from small notelets to large, square designs—you'll need a display with adjustable or varied pocket widths. Nothing looks more unprofessional than a cluttered, overflowing rack where customers can't easily browse.
As you plan your layout, our guide on other types of display stands for retail might also give you some useful ideas.
Selecting Materials That Enhance Your Brand
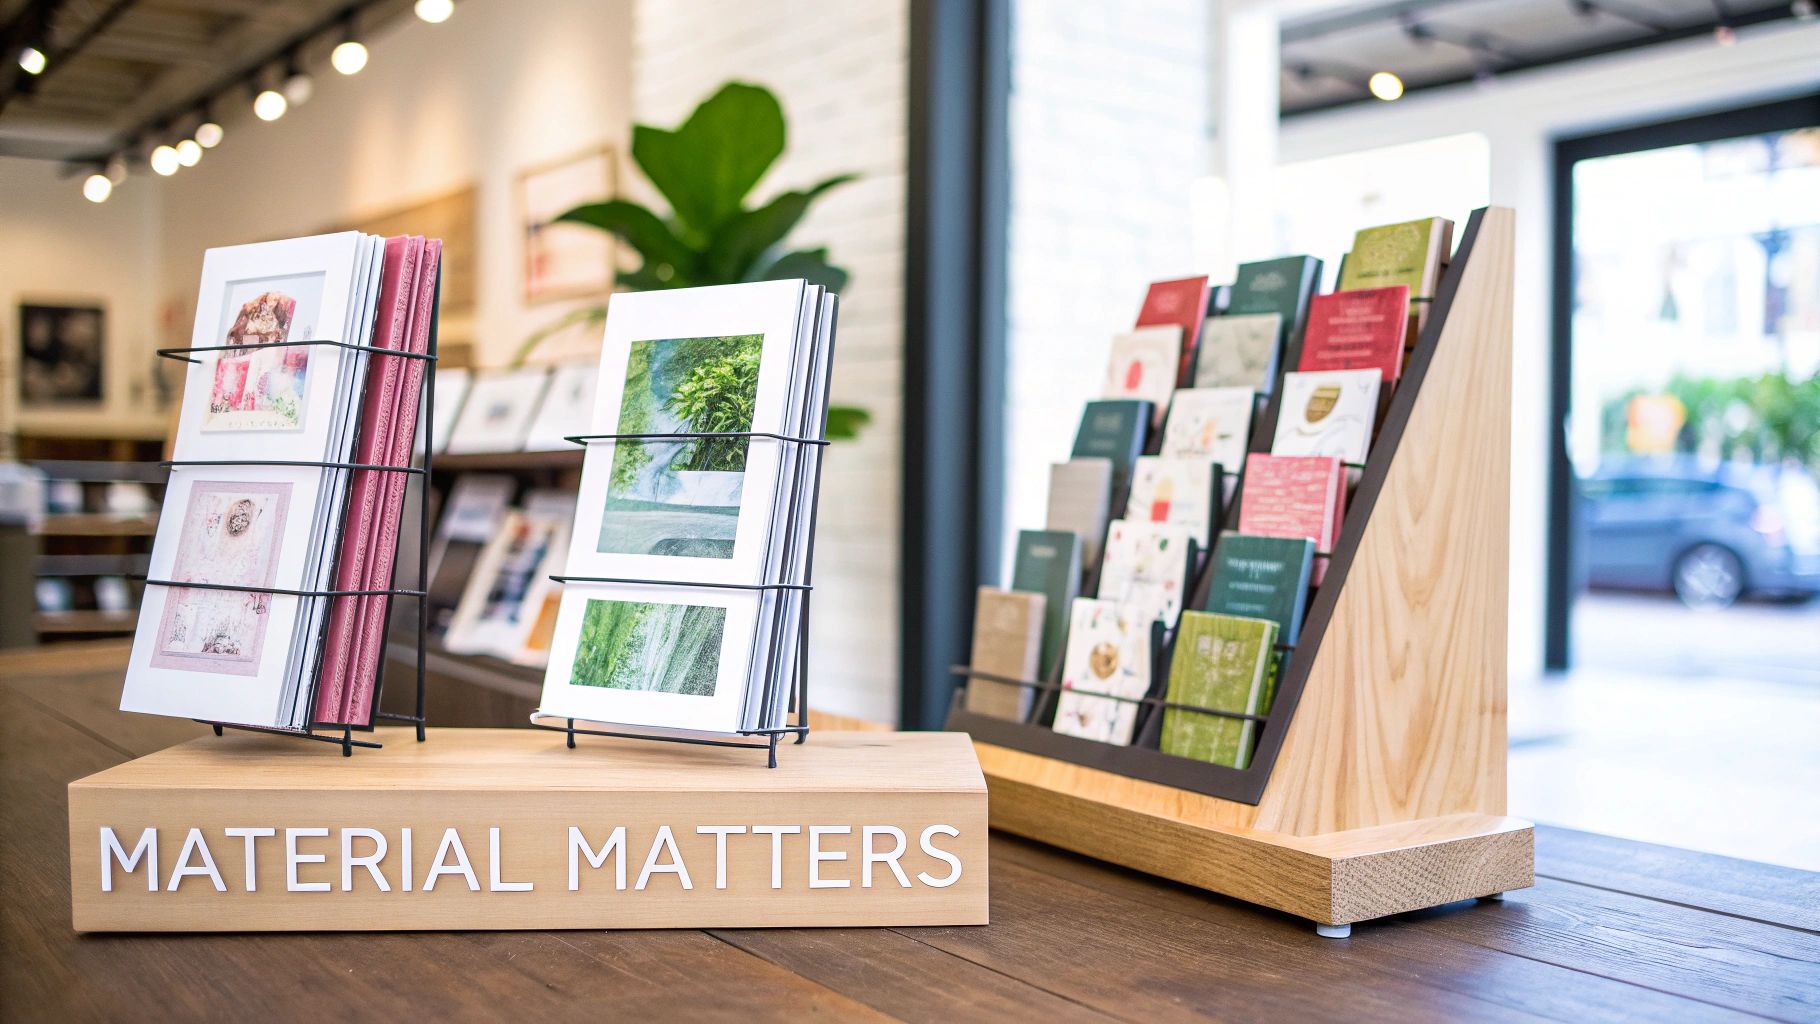
The material you choose for your greeting card display is one of the first things a customer will notice. It's not just a fixture; it's a silent brand ambassador, setting the tone for your entire shop before a single card is even picked up.
Think of it as part of your shop's story. Are you all about rustic, handmade charm, or do you have a clean, minimalist vibe? The right material doesn't just hold your cards—it reinforces who you are as a brand.
The Timeless Appeal of Wood
There's an undeniable warmth to wooden racks. They bring an artisanal, organic feel to a space, making them a perfect fit for cosy bookshops, craft-focused boutiques, or any retailer who wants to create a welcoming atmosphere. A light birch can feel bright and Scandi-inspired, whereas a deep walnut suggests quality and heritage.
Of course, there are practical points to consider. Wood can be on the heavier side and might need a bit more looking after to prevent scratches or fading. But for a brand built on authenticity, the visual payoff of a beautiful wooden display is often well worth it.
The Modern Edge of Metal
For a sharper, more industrial aesthetic, metal is a fantastic choice. Wireframe designs, in particular, are incredibly popular because they're strong, durable, and put the focus squarely on the cards themselves. Their slim profile means your products do all the talking.
Metal also offers brilliant versatility. Many systems are modular, so you can adapt your layout as your collection grows or seasons change. Plus, they can be powder-coated in any colour you can imagine, giving you a chance to splash your brand's signature hue across your fixtures. This combination of strength and style is why metal is also a go-to for other fixtures, like the various clothing display racks you see in retail.
The Understated Clarity of Acrylic
If you want your display to be almost invisible, acrylic is the way to go. Its crystal-clear transparency makes your greeting cards look like they're floating, which is perfect for showcasing vibrant, art-led designs that deserve to be the hero.
Acrylic is lightweight and a breeze to clean, though you do need to be careful to avoid scratches. Its minimalist look ensures it will never clash with your existing decor, making it a safe yet sophisticated option for galleries, museum shops, and modern gift stores.
Expert Insight: Don't underestimate the psychological impact of materials. Research into retail environments shows that natural materials like wood can create a calm, welcoming feel, often encouraging customers to browse for longer. In contrast, sleek materials like metal and acrylic are perceived as more modern and efficient.
Considering the Design Details
Beyond the main material, it's the little things that make a big difference. Pay close attention to the pocket depth. If it's too shallow, cards will constantly flop forward. Too deep, and you'll hide the beautiful designs you're trying to sell. From my experience, a depth of around 4-5 cm is the sweet spot for most standard A6 and 5x7 inch cards.
The overall structure of the display is just as important.
- Tiered Displays: These are brilliant for showing off the full face of each card, perfect for intricate illustrations. They invite a slower, more considered browsing experience.
- Spinner Racks: The classic space-saver. Spinners are interactive and can hold a huge amount of stock, encouraging customers to physically engage to see everything on offer.
- Flat Shelving: This gives you the most freedom. You can easily mix cards with other small items like pens, journals, or candles to create compelling little product stories.
Ultimately, your choice should be a natural extension of your brand, a practical fit for your space, and something that makes shopping a genuine pleasure for your customers.
Planning Your Layout for Customer Flow
A fantastic greeting card display in the wrong spot is simply a missed opportunity. I’ve seen it time and again: beautiful, fully-stocked displays tucked away in forgotten corners, completely failing to catch a shopper's eye. Strategic placement is every bit as important as the rack itself, turning it from a simple piece of furniture into a powerful sales tool that guides how customers move and shop.
The first thing to consider is more than just the rack's physical footprint. You need to account for what I call 'breathing room'—that essential space customers need to stop, browse, and pick a card without feeling rushed or crowded. A good rule of thumb is to allow at least 90 cm (about 3 feet) of clear space in front of any display. This keeps your aisles accessible, especially for those with pushchairs or wheelchairs, and makes for a much more relaxed shopping experience.

Finding the High-Impact Zones
Every shop has its own natural flow and high-traffic pathways. Your job is to spot these and use them to your advantage. Spend some time just watching how people move through your space. Where do their eyes naturally land when they first walk in? What routes do they take most often?
These high-impact zones are prime real estate for your greeting card display. A spinner rack near the main entrance can immediately capture interest, while a tiered display along a busy aisle guarantees maximum visibility. Don’t be afraid to experiment a little; move things around and see what works best for your specific layout.
The Power of Product Adjacency
Another incredibly effective strategy is placing your cards near complementary products. This technique, known as cross-merchandising, encourages additional purchases by presenting customers with logical pairings. Just think about what people buy alongside greeting cards.
- Near Gift Items: Positioning your card display next to your main gift section is a no-brainer. A customer buying a present is already in the perfect mindset to grab a card to go with it.
- With Stationery: Grouping cards with pens, journals, and gift wrap creates a cohesive 'gifting station', simplifying the whole shopping journey.
- At the Checkout: A small countertop display near the till is the ultimate impulse-buy engine. It’s perfect for seasonal cards or those last-minute "oh, I nearly forgot!" moments.
This simple bit of planning can genuinely lift your average transaction value. You can find more insights on creating effective product groupings in our detailed guide to general retail display stands.
A Quick Tip: Grab a piece of paper and draw a simple map of your shop floor. Mark out your main fixtures, doorways, and the typical customer path. This visual plan makes it much easier to pinpoint the most logical and effective spots for a new display before you commit to moving anything.
Considering Environmental Factors
Finally, don’t overlook the environment around the display itself. The right conditions can make your cards look irresistible, while the wrong ones can cause damage. Lighting is paramount. Make sure your rack is well-lit, either by natural light or focused spotlights, to make the colours and designs pop.
Be careful with direct sunlight, though. Over time, strong UV rays can cause the vibrant inks on your cards to fade, leaving your stock looking tired and old. A spot that gets bright, indirect light is the ideal compromise. By planning your layout with customer flow, product pairings, and the surrounding environment in mind, you truly set your display up for success.
Getting Your Display Assembled and Safely Secured
Getting your new card display out of the box and ready for customers shouldn't feel like a major project. The real secret to a smooth setup is a little bit of prep work before you even pick up a screwdriver.
First things first, unpack everything and lay out all the pieces. Take a minute to check the parts list against what you've actually got. It’s a lot less stressful to discover a missing screw now than when you’re halfway through building the thing. This simple step helps you get organised and makes the whole process go much faster.
Your Assembly Toolkit
Having the right tools ready will save you a world of frustration. While most flat-pack displays come with a little Allen key, a few extra items from your own toolbox can make a huge difference, particularly with the bigger, more substantial units.
- A decent screwdriver: A multi-bit one with Phillips and flathead attachments is a lifesaver.
- Rubber mallet: Brilliant for gently knocking pieces into place without chipping the finish.
- Spirit level: This is non-negotiable for wall-mounted racks. You need it to look professional, not wonky.
- Pliers: Always handy for holding onto small nuts or making tiny adjustments.
- A friend: Honestly, for the large floor-standing units, an extra pair of hands is the best tool you can have. They can hold things steady while you secure them, preventing a potential disaster.
My best advice is to follow the instructions step-by-step. A great tip is to avoid tightening all the screws fully right away. Leave them just a little loose until the very end; this gives you some wiggle room to make sure everything lines up perfectly before you lock it all down.
Securing Freestanding Displays
When it comes to any floor-standing display, especially the tall spinner racks, stability is everything. An unsecured rack can easily become a tipping hazard in a busy shop, which is a risk you just don't want to take with customers and staff around.
Many larger units will come with anti-tip hardware, usually simple brackets or straps to fix the display to a nearby wall. Always use them. It's a tiny bit of extra effort for a massive amount of peace of mind. If your display didn't come with any, you can pick up a kit from any DIY shop for a few quid. It's a very worthwhile investment.
Another quick win for stability is to think about weight distribution. Place your heavier card packs or gift boxes on the bottom shelves. This little trick lowers the display's centre of gravity, making it much more stable and less likely to wobble when people are browsing.
Safety should never be an afterthought. A secure, stable display not only protects people from potential injury but also safeguards your stock from damage and presents a more professional and trustworthy image to your customers.
Best Practices for Wall Mounting
Wall-mounted racks are fantastic for saving floor space, but they're only as secure as their installation. The single most important thing you can do is anchor the rack directly into the wall studs—the vertical wooden beams that make up the wall's frame.
The most reliable way to find them is with an electronic stud finder. You can also try the old-school method of knocking on the wall; you'll hear a solid, dull thud over a stud compared to the hollow sound of the space between them. In most UK homes, studs are spaced either 40 cm or 60 cm apart, so once you locate one, you can generally measure across to find the next.
After you've marked your stud locations, grab your spirit level to mark exactly where to drill.
- For plasterboard: If you absolutely have to mount between studs, you must use heavy-duty plasterboard fixings. Things like toggle bolts or winged anchors will grip the board from behind. A standard wall plug just won't cut it.
- For brick or masonry: This calls for a tougher approach. You'll need a masonry drill bit and robust wall plugs designed specifically for solid walls.
No matter the wall type, make sure your screws are long enough to go through the rack's mounting point, through the plasterboard, and deep into the stud itself. Taking these careful steps ensures your beautiful card display is also a safe and permanent fixture in your space.
Merchandising Your Cards to Drive Sales
Right, your greeting card display rack is assembled and in place. But it’s more than just a piece of furniture; think of it as your most dedicated, silent salesperson. The way you arrange your cards can genuinely be the difference between a passing glance and a sale. Great merchandising is a bit of an art, turning a simple fixture into an experience that pulls customers in.
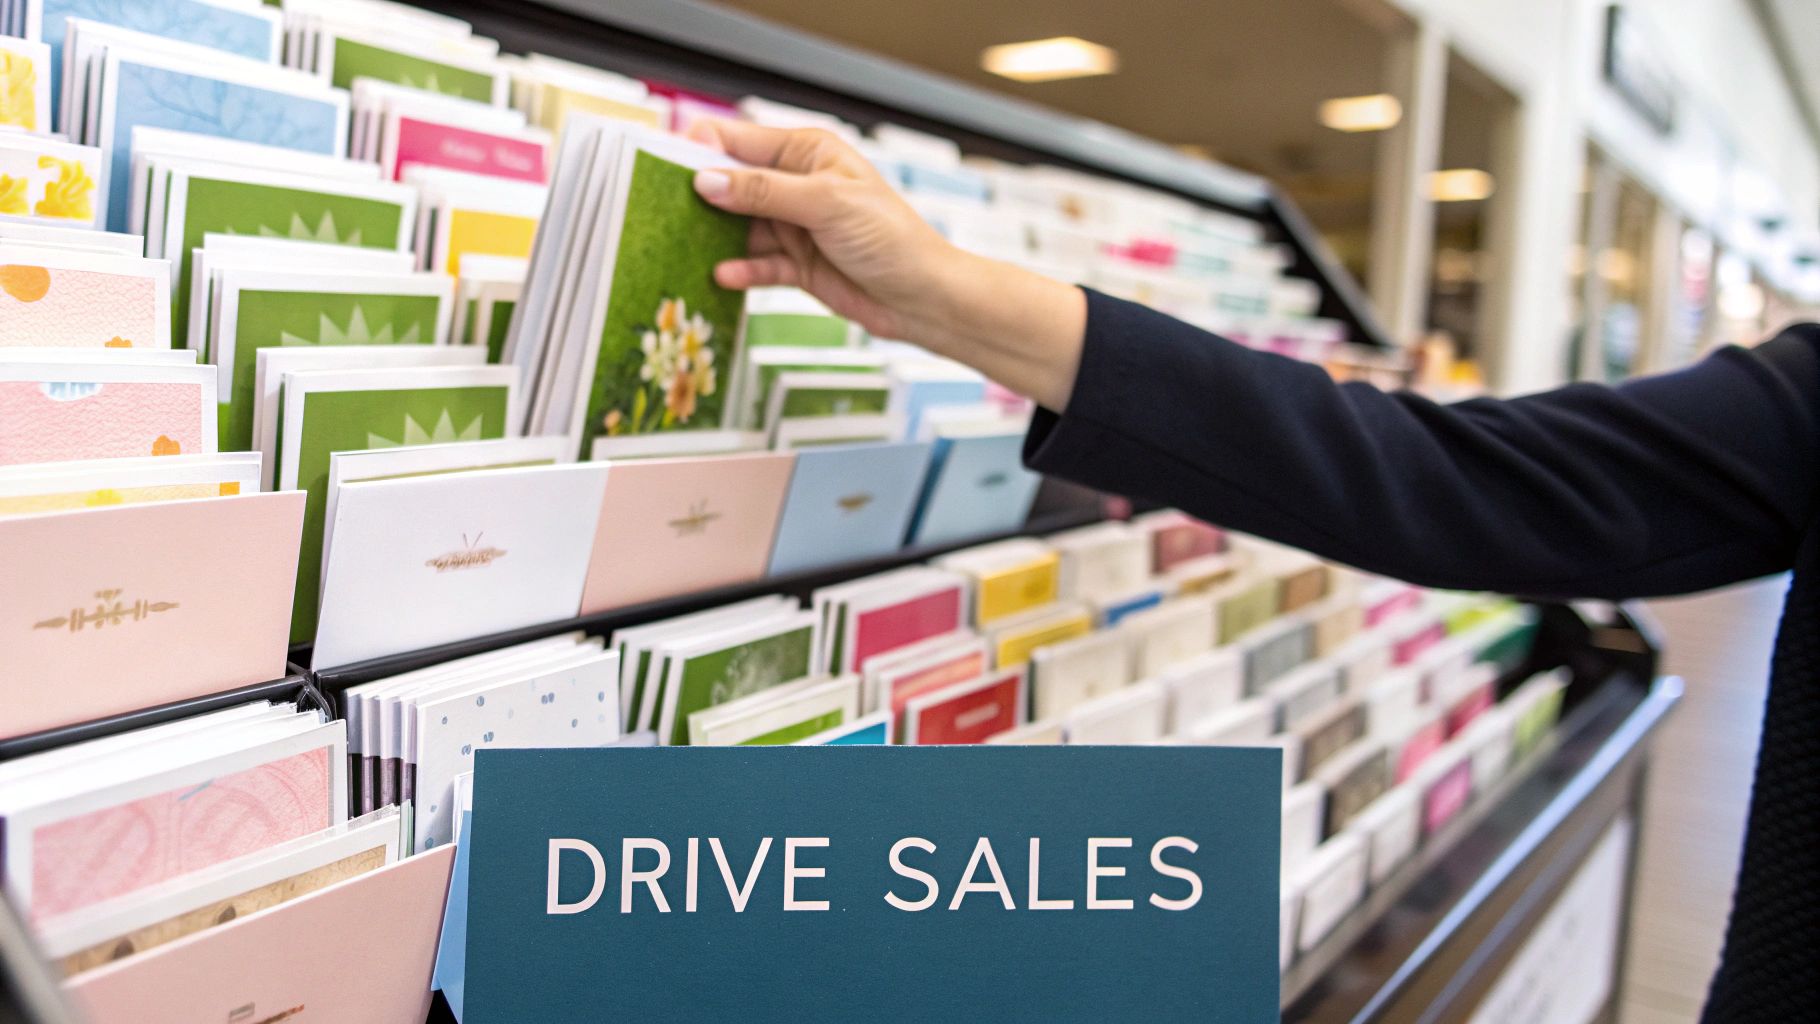
The ultimate goal here is to make browsing both effortless and enjoyable. When someone walks up to your display, they should find what they need quickly and maybe even stumble upon something else that catches their eye. This all starts with a clear, logical way of organising everything.
Creating Order From Chaos
Let’s be honest, a jumbled, disorganised rack is an instant turn-off for any shopper. The best approach is to group your cards in a way that makes sense to the person buying them. Get into their mindset—why are they here, what are they looking for?—and set up your display to give them the answer.
Here are a few tried-and-tested ways to categorise your collection:
- By Occasion: This is the classic for a reason—it works. Set up clear sections for Birthdays, Anniversaries, New Baby, Weddings, and Sympathy. Simple, easy-to-read signage is your best friend here.
- By Recipient: Inside broader categories like 'Birthday', you can get more specific. Create smaller groupings for 'For Him', 'For Her', 'For Kids', or even more personal ones like 'Mum' and 'Grandad'.
- By Theme or Tone: This strategy is brilliant for your general and 'just because' cards. You could have a section dedicated to humour, another for artistic or photographic designs, and one for more heartfelt, sentimental messages.
You don't have to stick to just one method. A mix-and-match approach can be really effective. Your main floor-standing rack might be organised by occasion, while a smaller countertop display could be dedicated entirely to funny cards to grab those impulse buys at the till.
The Psychology of Visual Merchandising
How your display looks is just as critical as how it’s organised. We’re all naturally drawn to things that are visually pleasing, and you can absolutely use this to your advantage. Strategic placement and a bit of colour theory can guide a customer's eye and put your most profitable products front and centre.
One of the most powerful things you can do is place your best-sellers at eye level. This is prime retail real estate. Any products positioned between a shopper's waist and their eyes get the most attention, so save this spot for your most popular designs or high-margin cards. A thoughtful layout enhances the customer experience in a physical card section and ultimately gets more cards in baskets.
Another fantastic visual trick is colour blocking. Grouping cards with similar colour schemes creates a striking, curated look that can draw people in from across the room. It just makes the whole display feel more intentional and professional. For a deeper dive, our guide on the core principles of visual merchandising guidelines has plenty more tips.
Greeting cards are a massive part of UK culture, with shoppers spending an estimated £1.5 billion on them every year. Women are the primary buyers, making up 85% of all purchases. This is a crucial bit of insight for retailers, shaping how they arrange their products and often dedicating that prime display space to designs and occasions that resonate most with a female audience.
Maintaining a Fresh and Inviting Display
Your work isn't done once the cards are on the rack. A top-performing display needs a bit of ongoing love and attention to keep it looking its best. A dusty, half-empty stand just screams "old, unwanted stock."
Try to build these simple tasks into your regular shop routine:
- Keep It Clean and Tidy: Give the rack and cards a regular dusting. Take a moment to straighten up any cards that have been put back messily.
- Rotate Your Stock: Don't let the same designs fade into the background. Move cards around, giving some of the lesser-seen designs a chance in the spotlight. It also keeps the display looking fresh for your regulars.
- Refill Promptly: A display with gaps looks neglected and unloved. As soon as a pocket sells down, get it topped up. This keeps the rack looking abundant, well-stocked, and ready for business.
By treating your display as a dynamic part of your shop, you ensure it continues to work hard for you, engaging customers and inviting them to explore everything you have to offer.
Common Questions About Greeting Card Displays
Even with the best planning, a few questions always pop up when you're setting up a new card display. Getting the right answers can make all the difference, helping you get the most out of your fixture and keep it looking fantastic for years. Let’s tackle some of the most common queries we hear from retailers and creators.
It's easy to wonder if a dedicated display is truly necessary, but the numbers speak for themselves. In 2024, the UK imported around US$87.77 million worth of greeting cards, a figure that shows just how much stock is moving through shops. That kind of volume needs a proper home, making a quality display rack a non-negotiable tool for any serious seller. You can dig deeper into the greeting card market in the United Kingdom to see the full picture.
How Do I Clean Different Rack Materials?
Keeping your display looking pristine is key, but how you clean it depends entirely on what it’s made of. Using the wrong product can cause real damage, so it's crucial to get it right.
-
Wood: For wooden racks, a quick dust with a soft, dry microfibre cloth is usually enough. If you’re dealing with something a bit more stubborn, dampen the cloth with a little water and a drop of mild soap. Always dry it straight away and steer clear of abrasive cleaners or too much water, as they can ruin the finish.
-
Metal: Metal displays, especially those with a powder-coated finish, are built to last. A damp cloth will handle most day-to-day cleaning. For anything sticky, a gentle all-purpose cleaner is perfectly fine. Just avoid harsh scouring pads that can scratch the surface.
-
Acrylic: This one needs a gentle touch to avoid scratches. Never reach for a standard glass cleaner, as the ammonia in it can make the acrylic look cloudy over time. Instead, stick with a specialist acrylic cleaner or just warm, soapy water applied with a very soft microfibre cloth.
Can I Customise My Display for Seasonal Events?
Absolutely—in fact, you really should! Adapting your display for big events like Christmas, Valentine's Day, or Mother's Day is a brilliant way to drive sales. The trick is to make your seasonal cards stand out without having to rearrange your entire shop.
One of the easiest ways to do this is with a smaller countertop rack right by the till. It’s the perfect spot to catch those last-minute impulse buys. If you have larger floor displays, try dedicating one side of a spinner or the top few tiers to seasonal stock. A bit of simple, temporary signage is all you need to draw customers' eyes.
One of my favourite tricks for making a seasonal display pop is using simple, thematic props. A few tasteful decorations, like some faux holly for Christmas or small hearts for Valentine's, can completely transform the feel of your greeting card display rack without much effort at all.
How Often Should I Rotate My Card Stock?
A fresh-looking display encourages repeat customers to stop and browse. As a rule of thumb, a light stock rotation every two to four weeks works wonders. This doesn't mean a complete overhaul, just a simple shuffle.
Move some cards from the lower tiers up to eye-level and shift your best-sellers to a slightly different position. It’s a small change, but it’s often enough to make regulars see your collection with fresh eyes. You’ll only need to do a major reshuffle a few times a year, usually when a big new collection arrives. For more ideas on effective product presentation, check out our guide on greeting card display stands.
At Display Guru, we provide the high-quality racks and stands you need to create a professional and inviting display. Explore our collection to find the perfect solution for your space at https://www.displayguru.co.uk.