


Your Guide to a Wall Mounted Hanging Rail
Staring at a wardrobe that just won’t close or an entryway piled high with coats? A wall mounted hanging rail isn't just another piece of hardware. It's a surprisingly simple, elegant solution that instantly reclaims precious floor space and puts an end to the chaos.
Think of it as the first step towards a calmer, more organised, and stylish home.
Why a Hanging Rail Is Your Secret Weapon for Organisation
Picture this: a home where everything has its own spot, instead of being crammed into a cupboard or draped over a chair. That's exactly what the right wall mounted hanging rail can do for you. It’s a classic piece of kit that punches well above its weight, turning cluttered corners into showcases of efficiency and style.
It’s easy to dismiss it as a simple bar, but it’s actually a brilliant organisational tool that can be used in countless ways. To see why it’s so effective, it helps to understand its place among general building material hardware. While many hardware items are purely about function, the hanging rail is one of the few that perfectly marries practicality with visual appeal.
More Than Just a Wardrobe Extender
The real magic of a wall mounted hanging rail is just how versatile it is. Of course, it’s a natural fit for expanding your clothes storage, but its usefulness goes far beyond the bedroom.
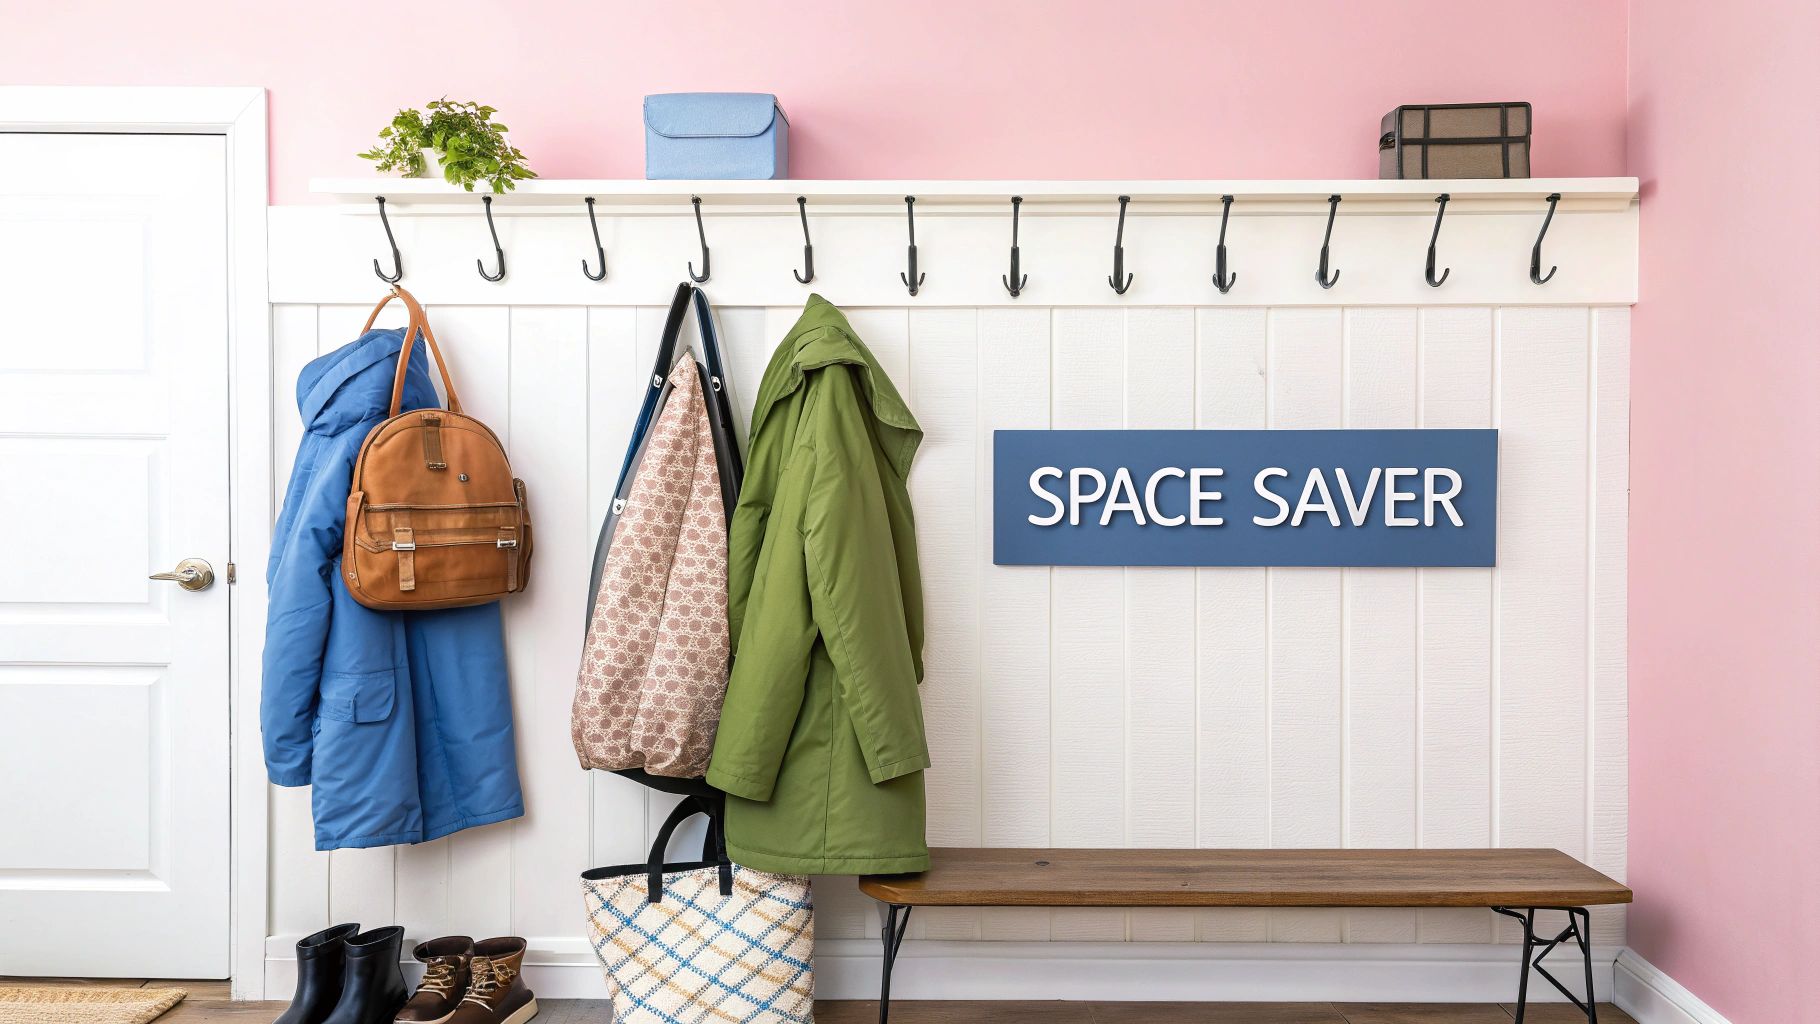
- In the Hallway: It creates a dedicated spot for coats, scarves, and bags, stopping that entryway pile-up before it even starts.
- In the Utility Room: Perfect for air-drying laundry, hanging freshly ironed shirts, or keeping mops and brooms neatly off the floor.
- In the Kitchen: Team it up with some S-hooks and you’ve got a rustic, practical rack for your pots, pans, utensils, or even little hanging herb pots.
- In Retail Spaces: It's a minimalist, highly effective way to display clothing and a core part of great visual merchandising. You can learn more about creating stunning displays in our guide on visual merchandising guidelines.
This simple device isn’t just about storage; it’s about creating systems. It encourages you to think about how you display your things, whether it’s planning your outfits for the week or keeping your most-used kitchen tools within easy reach.
By seeing the rail as both a practical tool and a design feature, you can unlock its true potential. It’s essentially a blank canvas for organisation, ready to be adapted to any room that needs a bit more order and personality. Let’s walk you through everything you need to know to make it happen.
Choosing the Right Materials and Styles
Picking the perfect wall mounted hanging rail is a bit like choosing a key piece of furniture. The material and style you land on will do more than just serve a practical need; they’ll help define the character of your space. It's a chance to either blend in with your existing décor or introduce a bold new accent.
To make a confident choice, it helps to get to know the language of the materials. Each one brings its own unique aesthetic, durability, and feel to the table, turning a simple storage bar into a thoughtful design element. Let's look at the most popular options and see where they might fit into your home.
Metals That Make a Statement
Metal is a classic choice for hanging rails, and for good reason—it’s strong and incredibly versatile. From raw, industrial pipes to sleek, polished chrome, there's a metallic finish to suit any interior.
- Industrial Black Iron & Copper: If you're aiming for a rustic, urban, or even a steampunk vibe, these are your go-to materials. Black iron pipe rails are phenomenally sturdy, making them perfect for handling heavy winter coats in a hallway. Copper provides a warmer, more refined industrial feel that develops a beautiful, unique patina as it ages.
- Sleek Stainless Steel & Chrome: For those with a more modern, minimalist style, you really can't go wrong here. The clean, reflective lines of stainless steel and chrome create a sense of light and space. This makes them a fantastic choice for contemporary bedrooms, bathrooms, and even chic retail displays.
Of course, the brackets holding the rail are just as important as the bar itself. They provide the crucial support but also contribute heavily to the final look. To get a better handle on how all the parts work together, you can delve into the specifics of selecting a clothing rail bracket to make sure your installation is both secure and stylish.
The Natural Warmth of Wood
Wooden hanging rails bring a touch of nature indoors, offering a softer, more organic look than their metal counterparts. They excel at creating a cosy and inviting atmosphere.
- Classic Oak & Pine: Oak is a timeless option, celebrated for its strength and stunning grain, which works just as well in traditional homes as it does in modern ones. Pine offers a lighter, more rustic charm that feels right at home in Scandinavian or farmhouse-inspired interiors.
- Modern Bamboo & Walnut: For a more contemporary twist, bamboo is a sustainable and lightweight choice with a clean, minimal appearance. On the other hand, darker woods like walnut can add a real touch of mid-century modern sophistication and luxury to a room.
Think of the material as the foundation of your rail's personality. A raw steel pipe tells a different story than a smooth oak dowel. The one you choose sets the entire tone.
Comparing Wall Mounted Hanging Rail Materials
To help you decide, here’s a quick-glance comparison of the most common materials, breaking down their looks, best uses, and how much care they need.
| Material | Aesthetic | Best For | Durability | Maintenance |
|---|---|---|---|---|
| Black Iron | Raw, industrial, urban | Heavy-duty storage, hallways, loft apartments | Very High | Prone to rust if not sealed; occasional dusting. |
| Copper | Warm, polished industrial, rustic | Boutique displays, feature rails, accent pieces | High | Develops a natural patina; can be polished to maintain shine. |
| Stainless Steel | Modern, minimalist, clean | Kitchens, bathrooms, contemporary bedrooms | Very High | Low; wipe with a damp cloth to remove fingerprints. |
| Oak / Walnut | Traditional, sophisticated, warm | Bedrooms, living areas, classic interiors | High | Occasional dusting; may require oiling or waxing over time. |
| Pine / Bamboo | Scandinavian, rustic, natural | Children's rooms, light-use areas, eco-conscious designs | Medium | Low; can be painted or stained to match décor. |
Each material clearly has its own story to tell and a job it’s best suited for. Your final choice will depend on balancing the look you love with the practical demands of your space.
Exploring Different Rail Designs
Beyond the material, the actual design of the hanging rail plays a huge part in its function and visual impact. The form you select should work with both your storage needs and the layout of the room.
Single Bar Designs
This is the quintessential minimalist option. A simple, straight bar is clean, unobtrusive, and incredibly effective for showcasing a curated collection of clothes or hanging everyday essentials. It’s a truly versatile choice that fits in almost anywhere.
Multi-Level Systems
For those who need more storage capacity but don't want to take up more horizontal wall space, a multi-level or tiered rail is a brilliant solution. These designs feature two or more bars set at different heights—perfect for separating trousers from shirts or for use in a child's bedroom where lower access is a plus.
Rails with Integrated Shelves
Combining a hanging rail with an overhead shelf is a masterclass in efficiency. This popular design gives you a dedicated spot for folded jumpers, shoes, hats, or decorative items. It maximises your vertical storage and creates a complete organisational hub all on one wall.
How to Select the Perfect Rail for Your Space
Picking out the right wall-mounted hanging rail is about so much more than just looks. It’s a decision that balances safety, everyday function, and how it fits into the very fabric of your room. Taking a moment to think it through will save you from common pitfalls, like ending up with a rail that sags under the weight of your winter coats or one that looks comically small on a big, empty wall.
The whole process really boils down to three key checks: figuring out its main job, measuring your space properly, and making sure your wall can handle it. Get these three things right, and you'll have a solution that’s not just secure and practical, but one that looks like it was always meant to be there.
Define Your Rail's Function and Capacity
Before you even start looking at different styles, the first question you need to ask yourself is, "What am I actually going to hang on this thing?" The answer changes everything, influencing the material, size, and even the type of screws you'll need. Think of it like buying a car—a little hatchback is perfect for nipping around town, but you’d need a proper van for a big house move.
A rail that's only holding a few lightweight shirts or a colourful collection of scarves has completely different demands than one expected to support a dozen heavy wool coats. The latter needs a much higher weight capacity and a far more robust build.
Let's break it down by common uses:
- Light-Duty Use: For laying out tomorrow's outfit, hanging tea towels in the kitchen, or organising a few bits of baby clothing. For these jobs, almost any material will do, and standard fixings are usually fine.
- Medium-Duty Use: This is your everyday coat rack in the hallway or the main rail for a capsule wardrobe. Here, you’ll want to look for sturdier materials like solid wood or industrial-style piping.
- Heavy-Duty Use: Think storing a whole family's worth of winter jackets, wet gear after a rainy walk, or a large amount of stock in a retail space. For this level of work, you absolutely need to look for a heavy-duty clothing rack with strong, wide-set brackets and professional-grade materials. To dig deeper, have a look at our guide on choosing a heavy duty clothing rack.
Measure Twice, Purchase Once
Getting your measurements right is the next critical step. It’s a classic mistake to skip this. A rail that’s too big will completely dominate a small room, while one that’s too small will just look lost and a bit useless on a large wall. The sweet spot is a size that feels proportional and leaves you enough room to actually use the space around it.
Start by measuring the total width of the wall you're planning to use. A good rule of thumb is to aim for the rail to take up between 50% and 75% of that wall section. This makes it look like a deliberate design choice, not an afterthought. Don't forget to account for "swing space"—the room your clothes need to hang without being squashed against another wall, a piece of furniture, or a doorway.
One thing people often overlook is the vertical space. Make sure you mount the rail high enough for your longest items—like dresses or long coats—to hang freely without bunching up on the floor. A height of around 1.5 to 1.7 metres from the floor is pretty standard, but always adjust it to what works for you and your wardrobe.
Understand Your Wall Compatibility
Finally, we get to the most important point for safety: you have to know what your walls are made of. This doesn’t just guide your choice of rail; it dictates the exact fixings you need to mount it securely. Trust me, putting a heavy rail up with the wrong fittings is a recipe for disaster.
In most UK homes, you’ll be dealing with one of two main wall types:
- Solid Masonry Walls: These are the sturdy ones—brick or blockwork, usually with a plaster finish. They can hold a serious amount of weight, making them perfect for heavy-duty rails. You'll need a decent drill with a masonry bit and the right kind of wall plugs to get a solid fixing.
- Plasterboard (Drywall): This is essentially a plaster-based board fixed onto a timber or metal frame, leaving a hollow space behind it. Plasterboard itself is quite weak and can't hold much weight on its own. To safely mount a rail, you must either screw it directly into the wooden studs hidden behind the plasterboard or use special plasterboard fixings, like toggle bolts or winged anchors, that are designed to grip the board from behind.
Failing to match your fixings to your wall type is the single biggest reason installations go wrong. Taking a few minutes to figure out your wall structure will ensure your wall mounted hanging rail is a safe, secure, and long-lasting feature in your home. This focus on proper installation is part of a bigger picture in UK home improvement. As more of us look for clever ways to maximise storage, the demand for well-designed solutions like these has soared, a trend reflected across the home organisation market. You can explore more insights on these evolving home organisation trends on intelmarketresearch.com.
Your Step-by-Step Installation Guide
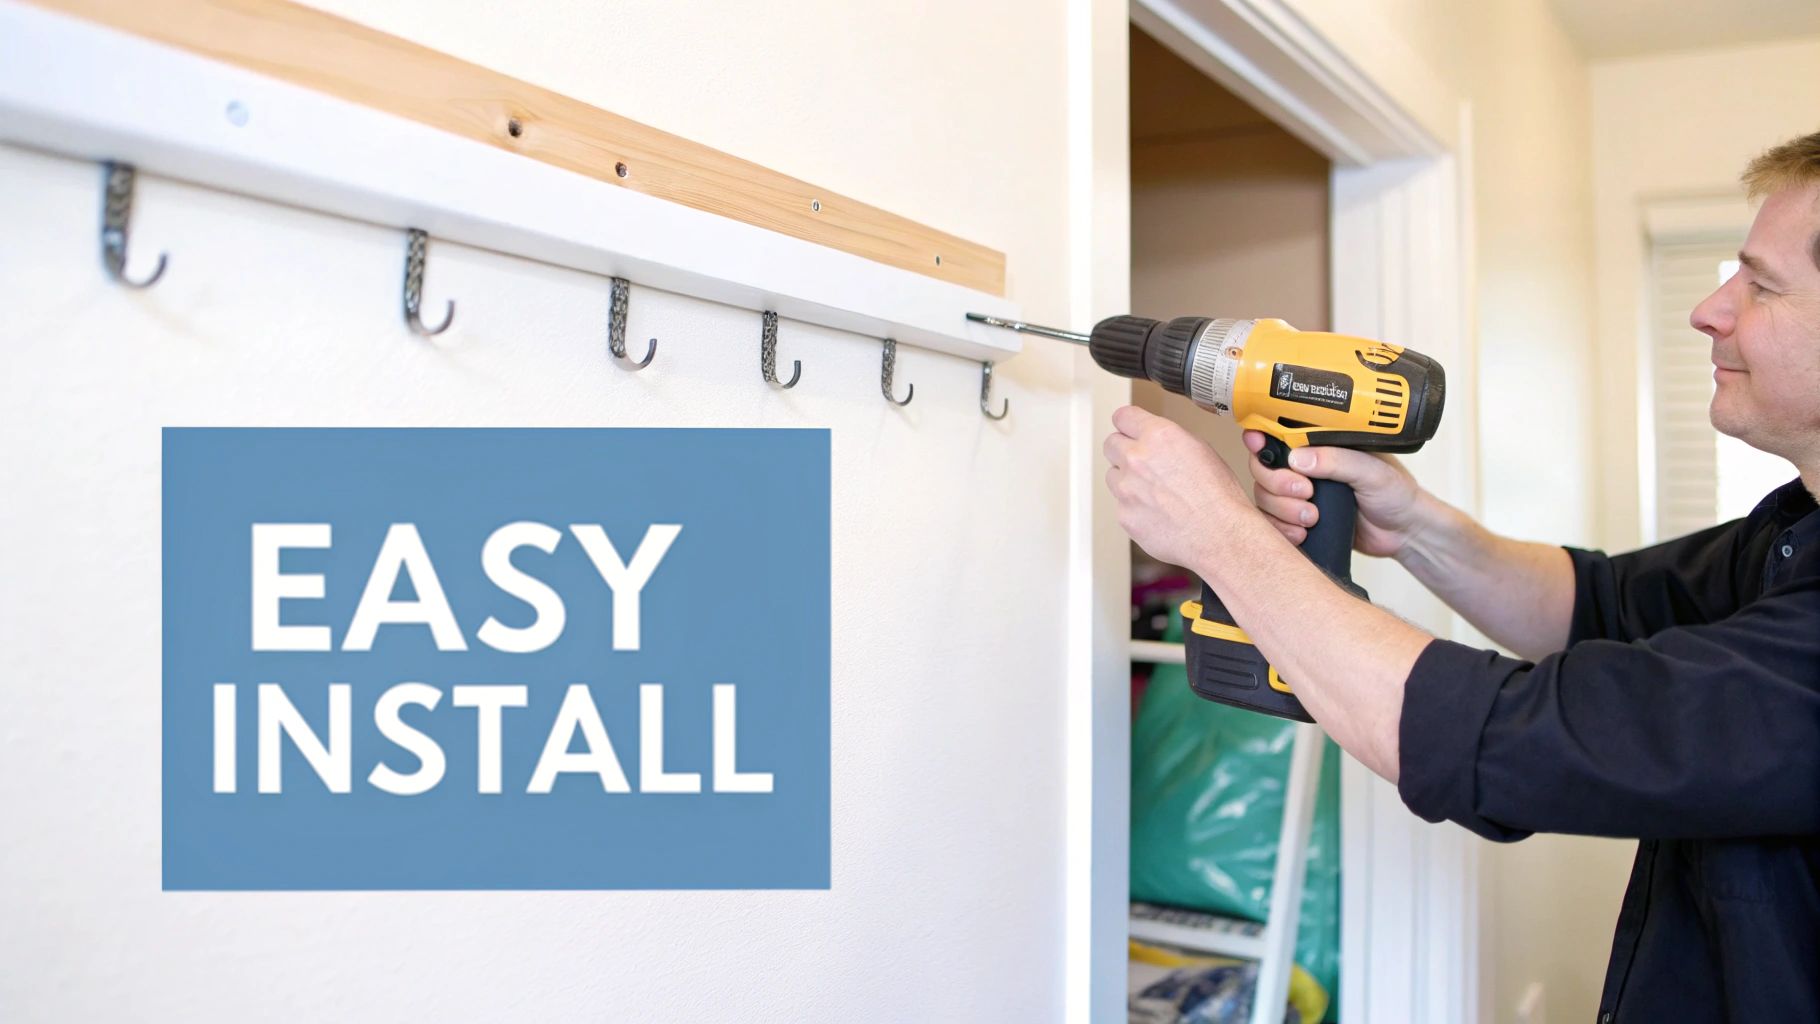
Putting up a wall-mounted hanging rail can feel like a job best left to the professionals, but honestly, it’s a project most people can handle with a bit of prep and a clear plan. Think of it like building flat-pack furniture – if you follow the instructions and take your time, the result is always worth it. This guide breaks it all down into simple, manageable steps, making sure your new rail is not only stylish but sturdy and secure.
Before you even think about picking up a drill, let's get everything in order. A successful installation is all about the prep work; I'd say it's 90% preparation. Getting your tools and materials ready beforehand saves you from that all-too-familiar, frustrating dash to the hardware shop halfway through the job.
Tools and Preparation Checklist
Lay everything out where you can see it and easily grab it. You wouldn't start cooking without getting your ingredients ready, and the same logic applies here.
- Your Wall-Mounted Hanging Rail Kit: This should include the rail itself, the brackets, and any screws the manufacturer has provided.
- A Power Drill: Absolutely essential for drilling the pilot holes.
- Drill Bits: You'll need one slightly smaller than your screw for the pilot holes, and a masonry bit if you’re going into brick.
- A Stud Finder: A small but invaluable gadget for finding the timber supports hidden behind plasterboard walls.
- A Spirit Level: This is crucial. A wonky rail is an instant eyesore, and this little tool is your best friend for getting it perfectly horizontal.
- A Tape Measure & Pencil: For getting your marks in exactly the right place.
- The Right Wall Fixings: This part is non-negotiable. Standard screws are great for timber studs, but you’ll need specific wall plugs for brickwork or plasterboard anchors if you're dealing with hollow walls.
Remember, the fixings that come in the box might not be right for your specific wall type. It’s always worth double-checking and buying the correct ones if you need to—it’s the single most important step for a safe, secure installation.
With your toolkit ready, it's time to get started. We'll break this down into four clear stages.
To help you visualise the thinking that goes on before you even start drilling, here’s a simple workflow.

This just sums up the three key questions—capacity, size, and material—that help you make sure you’ve got the right product for the job.
Step 1: Locate Wall Studs and Mark Your Placement
First things first, decide on the perfect height for your rail. A good rule of thumb is around 1.6 metres (63 inches) from the floor, which is high enough to hang most long coats and dresses without them bunching up.
Hold a bracket against the wall at your chosen height and use a pencil to mark through the screw holes.
If you have plasterboard walls, grab your stud finder. Glide it across the wall until it beeps, indicating it’s found one of the vertical timber beams. Your rail will be at its absolute strongest if you can fix at least one bracket directly into a stud. Mark the stud locations clearly.
Step 2: Check Alignment and Drill Pilot Holes
Now, place your spirit level on top of the first bracket mark. Extend it across to where your second bracket will go, and gently adjust it until the bubble is sitting perfectly in the centre. Now you can mark the screw holes for the second bracket, knowing your wall-mounted hanging rail will be perfectly level.
Next, choose a drill bit that’s slightly smaller in diameter than your screws. A handy little tip is to wrap a small piece of masking tape around the drill bit to mark the depth you need—this stops you from accidentally drilling too far into the wall. Carefully drill your pilot holes on each pencil mark.
Step 3: Attach the Brackets and Secure the Rail
If you’re fixing into a solid brick or block wall, gently tap your wall plugs into the pilot holes until they sit flush with the surface. For plasterboard, you'll need to insert your specialist anchors. As you work through this stage, always keep in mind the importance of safely securing furniture to walls to avoid accidents and ensure it stays put for years to come.
Hold the first bracket over the prepared holes and drive the screws in until it feels snug, but don’t tighten them all the way just yet. Do the same for the second bracket. Once both are loosely in place, pop the rail onto them and do one final check with the spirit level before tightening all the screws fully.
Troubleshooting Common Installation Problems
Even the most careful planner can run into a snag or two. Don't panic—most issues have a surprisingly simple fix.
- The drill hits something hard and stops: You’ve probably hit a metal pipe or electrical conduit. Stop drilling immediately. You'll have to choose a new location for your rail.
- The screw just keeps spinning and won't tighten: This usually means the pilot hole is too big, or the wall plug isn't getting a good grip. You might need to try again with a slightly larger plug and screw to get a secure fit.
- The wall is crumbling as you drill: This is quite common in older houses with traditional plaster walls. The best solution is to use self-drilling metal anchors, which are specifically designed to work in more fragile materials without causing more damage.
By following these steps, you can confidently get your rail up on the wall, creating a brilliant new storage spot that looks great. For more in-depth advice and different design ideas, have a look at our comprehensive guide to the hanging rail wall mounted collection.
Creative Ways to Style and Organise Your Rail
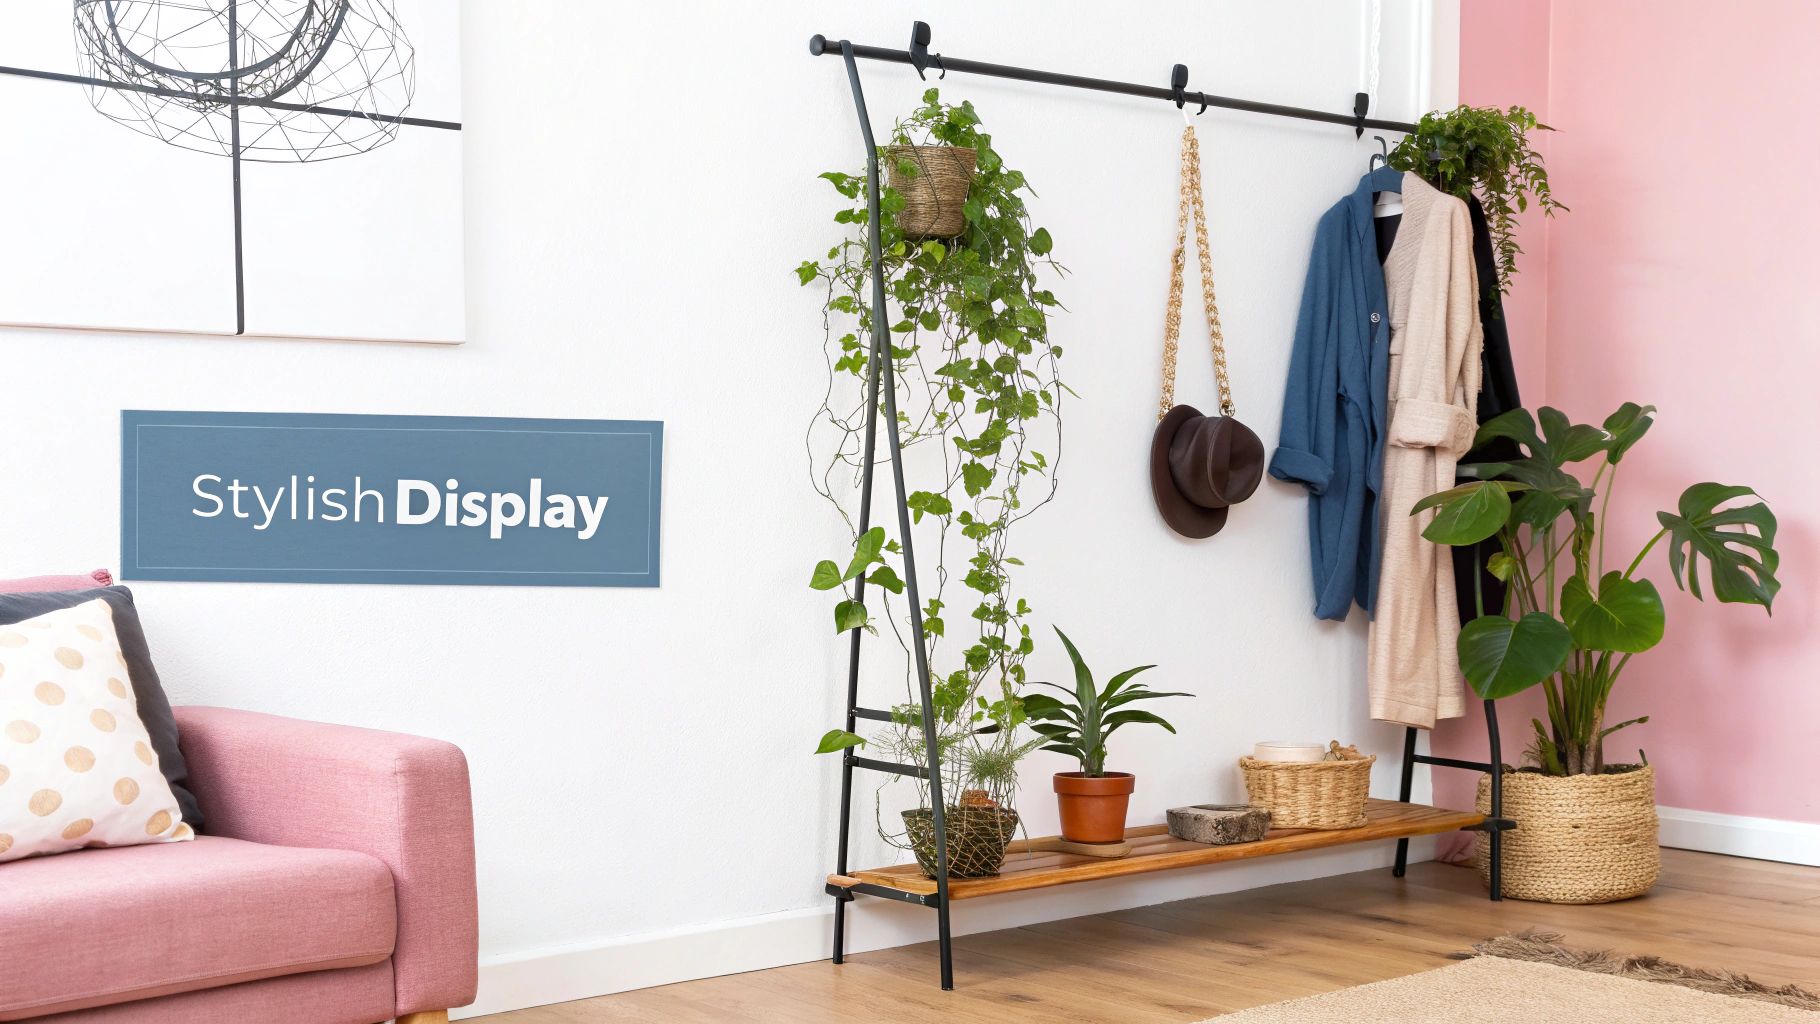
With your rail securely fixed to the wall, the fun part can really begin. It's time to look past its practical function and start treating your wall mounted hanging rail as a dynamic piece of décor. Think of it as a blank canvas, ready for you to express your style and bring a little more order to your life. This is about more than just storage; it's about creating a visually striking feature that elevates the entire room.
A bit of imagination is all it takes to turn your rail into a genuine focal point. It can tell a story about your tastes, your routines, and the things you love most. Let's look at a few ways you can transform this simple piece of hardware into a stylish statement in different parts of your home.
The Bedroom Open Wardrobe
A hanging rail in the bedroom can serve as a beautifully curated, open wardrobe. It's a fantastic way to put your favourite pieces on display or even just to plan your outfits for the week, saving you precious minutes on those hectic mornings.
- Create a Capsule Collection: Try using the rail to showcase a seasonal capsule wardrobe. Not only does this keep your most-worn items close at hand, but it also gently encourages a "less is more" approach. Grouping items by colour can create a wonderfully calm, boutique-like feel.
- The Outfit Planner: Why not dedicate the rail to planning your outfits for the week ahead? Hang complete looks together—from tops and trousers to jackets and accessories—to make your morning routine completely effortless.
This approach stops your clothes from being hidden clutter and turns them into a considered style statement. If you're looking for more inspiration, you can explore all sorts of creative clothes rail storage ideas that perfectly blend function and form.
The Hallway Welcome Station
Your hallway gives the first impression of your home, but it can so often become a dumping ground for coats, bags, and shoes. A wall mounted hanging rail can instantly bring a sense of calm and organisation to your entryway.
Instead of a clunky coat stand that takes up valuable floor space, a sleek rail offers plenty of storage while keeping the area feeling open and uncluttered. You can pair it with a slim bench or a shoe rack underneath to create a complete 'drop-zone'. Using stylish, uniform hangers will give it a polished finish, even when it's loaded up with heavy winter coats.
A well-styled hanging rail in an entryway acts as a silent host, offering a clear and convenient place for guests to leave their belongings. It signals a home that is organised, thoughtful, and welcoming from the moment someone steps inside.
The Versatile Kitchen Helper
The kitchen is another room where a hanging rail can be a real game-changer, especially in smaller spaces. With a simple rail and a handful of S-hooks, you can free up a surprising amount of drawer and counter space.
And you don't have to stop at just pots and pans, though that's a classic for a reason.
- Utensil Rack: Keep your most-used utensils like whisks, ladles, and spatulas right where you need them for cooking.
- Hanging Herb Garden: Use small pots with hooks to create your own vertical herb garden. Fresh basil, mint, and rosemary will be right at your fingertips.
- Mug and Teacup Display: Show off that collection of favourite mugs or delicate teacups, turning them into a charming and practical feature.
By putting these ideas into practice, you can turn your wall mounted hanging rail from a simple storage bar into a key part of your home’s design. It becomes a true reflection of your lifestyle, mixing practicality with personality in any room.
Long-Term Care and Maintenance Tips
Once your hanging rail is up and looking the part, a little TLC will go a long way. Think of it like any other quality piece of furniture in your home; a small amount of regular attention keeps it looking fantastic and doing its job properly for years. This isn't just about aesthetics—it's about making sure your investment remains sturdy, reliable, and safe.
After all, a rail that's constantly under load needs its fixings checked every so often to make sure it's still firmly attached to the wall. This is especially important for rails in busy hallways or commercial spaces that see a lot of action.
Material-Specific Cleaning Routines
Different materials call for different cleaning methods. Getting it wrong can mean accidentally damaging the very finish you chose so carefully, so it’s worth knowing the basics.
Here’s a simple guide to keep your rail in top condition:
- Metal Rails (Steel, Iron, Copper): A quick dust with a soft, dry cloth is usually all you need. For a more thorough clean, wipe it down with a damp cloth and a touch of mild soap, then dry it immediately to prevent water spots or rust. This is crucial for raw iron finishes.
- Wooden Rails (Oak, Pine, Bamboo): Dusting is your best friend here. If you need to tackle marks, use a cloth that’s just slightly damp with a pH-neutral cleaner and wipe it dry straight away. Steer clear of harsh chemical sprays, as they can strip the wood’s protective oils and varnish over time.
Keeping your rail in good nick also ties into a bigger trend. In the UK, there's a growing appreciation for durable, long-lasting home solutions made from sustainable materials. If you’re interested in how consumer habits are shifting, you can dig deeper into market trends in this report on Archive Market Research.
Periodic Safety and Structural Checks
This is probably the most important part of long-term care. A quick stability check every six months or so (more frequently if it’s holding a lot of weight) is a must.
A secure wall mounted hanging rail is a safe one. Taking just five minutes for a quick inspection provides lasting peace of mind and ensures your rail can continue to handle its intended load without risk.
Run through this simple checklist to keep everything solid:
- Gently Wiggle the Rail: Take hold of the rail at each end and give it a firm but gentle wiggle. There should be absolutely no movement or give where the brackets meet the wall. Any play is a red flag.
- Inspect the Fixings: Take a close look at the screws holding the brackets. Are they still tight and sitting flush? If any have worked themselves loose, simply tighten them back up with the correct screwdriver.
- Check the Rail-to-Bracket Connection: Make sure the rail itself is still securely fastened to its brackets. Some designs use small grub screws, often on the underside, which might need a quick tighten now and then.
By folding these simple steps into your routine, you’ll ensure your wall-mounted hanging rail remains a functional, beautiful, and completely safe feature in your home for the long haul.
Frequently Asked Questions
Even the most straightforward projects can throw up a few questions. When it comes to fitting a wall mounted hanging rail, a little bit of know-how can make all the difference. Here are the answers to the queries we hear most often, designed to give you clarity and confidence.
How Much Weight Can a Hanging Rail Actually Hold?
This is the big one, and the answer really depends on two things: the rail itself and how it’s attached to the wall. A lightweight rail simply screwed into plasterboard might only manage 5-10 kg – fine for a few shirts, but not much more.
On the other hand, a heavy-duty industrial pipe rail, when properly anchored into solid brick or timber wall studs, can easily take over 50 kg. That’s more than enough for a full collection of heavy winter coats. Always check the manufacturer’s guidelines for a specific number.
Can I Put a Rail on a Plasterboard Wall?
Absolutely, but you have to do it right. Plasterboard on its own is quite weak, so you can't just drill and screw into it. You have two solid options:
- Find the Studs: This is the best approach. Use a stud finder to locate the timber framework behind the plasterboard. Driving your screws directly into these studs gives you a rock-solid anchor point.
- Use Heavy-Duty Fixings: If the studs aren't where you need them, you’ll need special plasterboard fixings. Things like toggle bolts or winged anchors are designed to expand behind the board, spreading the load and creating a much stronger hold than a standard screw.
What's the Best Height to Install a Hanging Rail?
For most adult clothing, a good rule of thumb is to set the top of the rail between 1.6 and 1.7 metres (that's about 63-67 inches) from the floor. This height gives plenty of room for long coats and dresses to hang straight without dragging on the ground.
Of course, feel free to adjust this. You might want it lower in a child's bedroom or higher if you're planning a two-tier system with another rail below.
How Do I Stop Hangers from Sliding About?
It’s a common frustration, especially on smooth, sleek metal rails! A brilliant and simple trick is to wrap a few clear elastic bands tightly around the rail at intervals. They create just enough grip to stop hangers from bunching up, keeping everything neat and perfectly spaced.
Ready to find the perfect solution for your space? Explore our full collection of durable and stylish garment rails at Display Guru. Find your ideal garment rail here