


Tailors pressing ham: Master Flawless Seams
A tailor's pressing ham is one of those classic tools you see in a professional sewing room—a firmly stuffed cushion that helps you press and mould curved seams. It’s essential for things like darts, bust lines, and sleeve caps because it mimics the natural curves of the body, giving your garments a professional, three-dimensional shape you simply can't get on a flat ironing board.
Why a Tailor's Ham Is Your Secret Weapon for Better Sewing

If you’ve ever tried to iron a curved seam on a flat surface, you’ll know the frustration. You end up with unwanted creases, stretched-out fabric, or a flattened curve that you worked so hard to create. This is exactly where a pressing ham becomes one of the most valuable tools in your sewing kit.
The logic is simple: our bodies aren't flat, so why should we press our clothes as if they were? The ham acts as a stand-in for tricky areas like the hip, shoulder, or bust, giving you a firm, contoured surface to work on. It’s the tool that bridges the gap between flat pattern pieces and a beautifully fitted garment.
The Anatomy of a Professional Press
A quality pressing ham isn’t just a glorified pincushion; its design is deliberate and highly functional. Once you understand how it’s made, you'll see why it delivers such brilliant results.
- Two-Sided Fabric: Most hams have two different sides for a reason. One is covered in wool (often a classic tartan pattern), which is perfect for woollens and delicate fabrics. The wool’s texture gently grips the material and absorbs steam, preventing that dreaded shiny look while allowing for gentle shaping.
- Sturdy Cotton Side: The other side is typically made from a tough cotton drill or canvas. This side can handle higher iron temperatures, making it ideal for pressing fabrics like cotton and linen that need a really crisp finish.
- Dense Sawdust Filling: The ham is packed tightly with sawdust, and that's not just for tradition's sake. Sawdust creates a dense, firm surface that won't collapse under the weight of an iron. Unlike softer fillings, it holds its shape, allowing you to apply firm pressure and set your seams perfectly.
Using a tailor's ham fundamentally changes your approach to garment construction. It shifts the focus from just flattening seams to actively sculpting the fabric. Every curve and contour is preserved and even enhanced.
Achieving That Bespoke Finish
Ultimately, proper pressing is all about refining and shaping your garment. Without the right tools, you're fighting against the fabric's intended form. By making a pressing ham a regular part of your routine, you can finally say goodbye to puckered darts and distorted seams.
Your homemade creations will have a polished, professional look that truly rivals bespoke tailoring. It's a foundational piece of kit and a cornerstone of any well-organised workspace. If you're building out your creative space, have a look at our ideas for the perfect sewing room setup.
Choosing the Right Pressing Tools for Your Projects
Anyone who's serious about their sewing knows that the right pressing tool is just as important as the right fabric. Of course, a standard iron and board will get you started, but to achieve that truly professional, crisp finish, you need a more specialised set of tools. A quality tailors pressing ham is the cornerstone of any good pressing kit, but understanding its companions—like the seam roll or sleeve roll—is what really elevates your garment making.
Think of it as curating a toolkit where every item has a specific, vital role. A one-size-fits-all approach just doesn't cut it when you're aiming for that bespoke look. The density of the filling, the type of fabric on the cover, and the tool's specific shape all have a massive impact on how well you can mould and set your seams.
Beyond the Basic Ham
The tailor's ham is the undisputed champion for pressing curves like darts, princess seams, and hip lines. But other tools are designed to handle different challenges far more effectively.
Take the seam roll, for example. It’s a long, cylindrical cushion that’s an absolute lifesaver for pressing seams open on narrow pieces, like trouser legs or sleeves. Its tube-like shape means you only press the seam allowance, completely avoiding those tell-tale imprints on the right side of your fabric.
Then there’s the sleeve roll, which is smaller and more tapered. It’s been designed specifically to fit snugly inside a sleeve cap or a piece of children's clothing. If you try to force these smaller areas onto a large ham, you risk stretching the fabric out of shape or flattening the beautiful curve you’ve just sewn.
Investing in a few key pressing tools is an investment in your final product. A firmly packed ham offers the resistance needed to properly shape fabric, whereas a cheaply made one with soft batting will simply collapse under pressure, rendering it almost useless.
What to Look for in Quality Pressing Tools
When you're ready to build out your collection, the quality of construction is everything. A good tailor's ham or seam roll should feel incredibly firm—almost hard. It needs to be densely packed with sawdust, which is fantastic for absorbing heat and providing a stable pressing surface.
Here are a few things to keep an eye out for:
- Stuffing Density: Give the tool a good, hard squeeze. If it gives way easily, it won't provide the support you need when you're applying pressure with a hot iron. A well-packed ham should feel solid.
- Cover Fabric: Look for a dual-sided cover. You’ll usually find a wool side (often plaid), which is brilliant for gripping fabrics and absorbing steam, and a sturdy cotton drill side that can handle higher heat for getting a crisp finish on linens and cottons.
- Stitching: Examine the seams closely. They should be strong and tightly stitched to keep that dense filling contained, especially under the heat and pressure of regular use.
Understanding how different pressing aids work goes hand-in-hand with knowing your materials. For a deeper dive into how different fabrics react to heat and steam, especially when it comes to shaping, our guide on what interfacing is in sewing is a great resource.
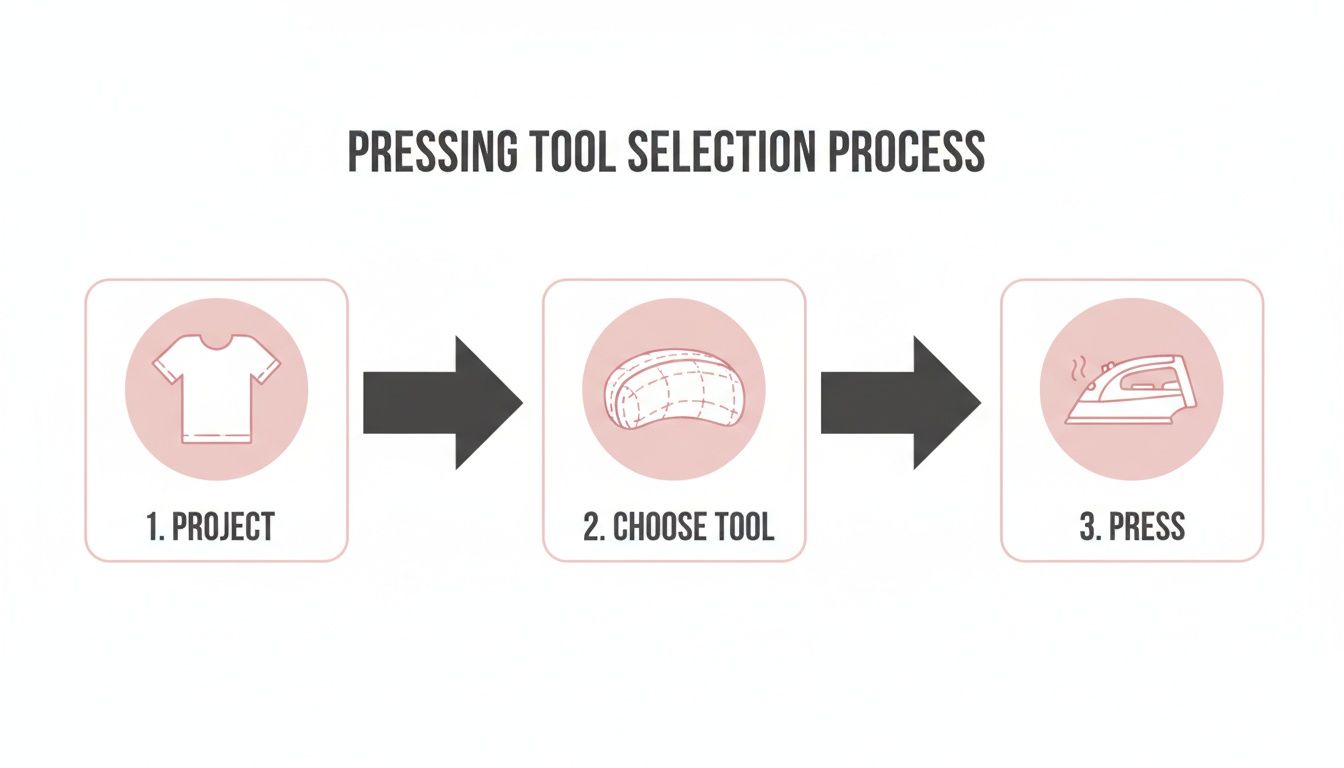
Pressing Tool Selection Guide
To help you decide which tool to reach for, I’ve put together this quick comparison table. Think of it as a handy cheat sheet when you’re setting up for a new project, ensuring you always have the perfect tool for the task at hand.
| Pressing Tool | Primary Use | Best for Garment Areas | Ideal Fabric Types |
|---|---|---|---|
| Tailor's Ham | Pressing and shaping curved seams and darts without flattening them. | Bust darts, princess seams, hip curves, collars, sleeve caps. | Medium to heavy fabrics like wool, denim, and corduroy. |
| Seam Roll | Pressing seams open in long, narrow areas like sleeves or trouser legs. | Sleeves, pant legs, long straight or slightly curved seams. | Most fabrics, especially those prone to seam imprints. |
| Sleeve Roll | A smaller, tapered version for pressing tight curves and narrow sleeves. | Sleeve caps, children's clothing, tight armholes. | Lightweight to medium-weight fabrics like cotton, linen, and silk. |
| Point Presser & Clapper | A wooden tool for achieving sharp points and setting crisp seams. | Collar points, lapels, cuffs, facings. | Tailored fabrics like wool suiting, tweed, and heavy cottons. |
Having these essentials in your sewing room will make a noticeable difference, helping you transition from homemade-looking garments to beautifully tailored pieces.
Mastering Essential Pressing Techniques With Your Ham
So, you’ve got a quality tailor’s ham in your sewing kit. Excellent. Now it’s time to see what it can really do. Making the leap from a flat ironing board to this wonderfully curved tool is a genuine game-changer, completely transforming how you handle fabric and shape your garments. It’s what separates clothes that look ‘homemade’ from those that have a truly professional, tailored finish.
The whole idea is beautifully simple: you press curved seams over a curved surface. This isn't just about getting creases out; it's about moulding the fabric to follow the natural lines of the body. You stop forcing fabric flat and start building in three-dimensional shape, which makes all the difference. With a bit of practice, you’ll be reaching for your ham for just about every curved part of a project.
Pressing Darts to Perfection
Darts are the very architecture of a fitted garment, and pressing them correctly is non-negotiable. A poorly pressed dart can leave you with a bulky, pointy, or puckered mess on the right side of your clothing. The tailor's pressing ham is your secret weapon for getting that smooth, seamless finish every single time.
Start by laying the dart over the ham, making sure the curve of the dart follows the curve of the ham. If you’re working on a bust dart, for example, you’d position the fabric so the ham fills the space where a bust would be. First, give the dart stitches a quick press flat as they were sewn. Then, fold the dart excess in the correct direction—that’s usually downwards for vertical darts and towards the centre for horizontal ones.
Now, using just the tip of your iron with a good puff of steam, press the folded dart into place. The ham’s firm surface provides the perfect resistance from below, while its shape encourages the fabric to take on that crucial 3D form. You’re literally building the intended shape right into the fabric, guaranteeing the garment fits as it should.
As you can see, choosing the right pressing tool isn't an afterthought; it's a key step that directly influences the quality of your finished garment.
Shaping Sleeve Caps for a Smooth Set-In
Let's be honest, setting in a sleeve can be one of the trickiest parts of sewing. More often than not, any puckers or lumps are down to a poorly pressed sleeve cap. Your ham is absolutely essential for pre-shaping the sleeve cap before you even think about attaching it to the armhole.
Take the top of the sleeve cap and gently ease it over the narrower end of your ham. Set your iron to steam and hover it over the fabric—don't press down just yet. Let the steam penetrate the fibres to make them more pliable. Then, use your hands to gently mould the fabric around the ham's curve. You’re creating a rounded shape that will slot beautifully into the armscye, which is a vital step for a clean, professional shoulder line.
The real secret to sleeve caps is working with steam and your hands, not brute force from the iron. You're aiming to shape the fabric, not flatten it. The ham gives you the perfect form to coax the fabric into its intended curve, which makes easing the sleeve into the armhole so much easier later on.
Taming Princess Seams and Other Curves
Princess seams, those elegant curves that run vertically over the bust, are another area where a flat ironing board just won’t cut it. Trying to press them on a flat surface will completely ruin their beautiful shape.
Here’s the right way to do it:
- First, press the seam flat as it was sewn. This helps to meld the stitches into the fabric fibres.
- Next, open up the seam allowances and lay the garment over the broad side of your ham, matching the curve of the seam to the curve of the ham.
- Finally, use just the tip of your iron to carefully press the seam open along that curve. The ham supports the fabric from underneath, stopping you from accidentally flattening out the shape you worked so hard to create.
This same approach works wonders for any curved seam, like those on a skirt yoke or along a garment's hip line. It's all about supporting the garment's intended shape to get a crisp, open seam that flows smoothly. For a deeper dive into garment construction, you might find our guide on essential sewing techniques helpful.
Achieving a Professional Collar Roll Line
A well-made collar should never lie completely flat. It needs a soft, gentle 'roll' to sit properly around the neck. Your tailor's ham is the perfect tool for building this shape into the collars and lapels of jackets and shirts.
Once you’ve constructed the collar, place it over the ham. You want to position it so the ham mimics the curve of a person’s neck and shoulders. Use your iron with plenty of steam to press the roll line, gently shaping the collar with your hands as you go. This encourages the collar to curve naturally, preventing it from standing up stiffly or collapsing into a flat, lifeless shape.
By getting comfortable with these core techniques, your tailor's ham will quickly become one of the most valuable tools in your sewing room. It's the key to moving beyond flat sewing and into the world of truly sculpted, beautifully fitting clothes.
Advanced Shaping and Professional Finishing Tips
Once you've mastered the basics of pressing a simple seam, you can get into the real craft of tailoring. This is where you stop just flattening fabric and start actively sculpting it into a garment that fits and drapes beautifully. Using a tailors pressing ham for these advanced techniques is less about getting rid of wrinkles and more about building three-dimensional shape and memory right into the cloth.
These are the professional methods that create the subtle, rolling curve of a bespoke jacket lapel or the perfect cup of a bodice. When you get these skills down, your work moves from being merely well-made to truly exceptional.
Sculpting Shoulders and Bust Cups
Getting that flawless shoulder line on a tailored jacket is a true mark of quality construction, and the ham is absolutely essential for it. Before you even think about setting in a sleeve, you need to shape both the sleeve cap and the shoulder of the jacket body. Simply drape the shoulder seam over the ham, then use steam and gentle pressure to create a soft, rounded contour that follows the natural shape of the body. This step is what ensures the jacket sits perfectly, without any pulling or awkward angles.
It’s a similar story for formalwear or lingerie. When you're pressing bust cups, the broad curve of the ham is the perfect mould. It doesn’t matter if you're working with delicate satin or a structured coutil; pressing the cups over the ham builds in that crucial shape for a smooth, supportive fit. If you skip this, the cups can look flat or pointed, which completely ruins the silhouette of the finished garment.
The Art of Steam Moulding
Steam moulding is one of the most refined techniques in a tailor's playbook. It’s all about shaping fabric without the iron ever touching it directly. This is non-negotiable for delicate materials or anything with a pile, like velvet, where the iron's heat and weight would crush the fibres and leave a permanent mark.
To do it, you hold the fabric over the curve of the ham and give it a few powerful bursts of steam from your iron, keeping it a couple of inches away. The combination of the hot steam and the ham's supportive shape gently coaxes the fibres into a new form. Then, you just use your hands to pat and mould the warm, damp fabric into place. As it cools and dries, it holds that new three-dimensional shape.
This technique is brilliant for things like:
- Shaping a velvet collar: It creates a perfect roll without damaging that delicate pile.
- Moulding wool felt for millinery: An absolute must for any hat maker.
- Setting the curve on a wool sleeve cap: It provides just enough gentle shaping for a smooth set-in sleeve.
Steam moulding really is the ultimate expression of ‘less is more’ in pressing. You’re respecting the fabric’s integrity while guiding it into the shape you want. This gentle persuasion gives you a much more organic and professional finish than you could ever get from just forcing it with an iron.
Pairing the Ham with a Wooden Clapper
For fabrics like heavy wool or crisp linen that demand a razor-sharp seam, heat and steam alone won't quite cut it. This is where a wooden clapper becomes your best friend. A clapper is just a small, smooth block of hardwood that you use right after pressing a seam.
The process is surprisingly simple but incredibly effective. Press your seam open on the tailor's ham with a hot, steamy iron. The moment you lift the iron, immediately place the clapper firmly down onto the seam. The wood instantly absorbs the heat and steam, trapping it and setting the seam with incredible crispness. The weight of the clapper holds the fibres flat while they cool, giving you the sharpest, flattest seams possible. This little trick is the secret behind the perfect lapels and pocket flaps you see on high-end tailored jackets. For a closer look at jacket construction, have a look at our guide on how to line a jacket.
Interestingly, the growing demand for well-fitted clothing seems to mirror other lifestyle trends. The UK meat market, for instance, has hit 4.9 million tons, with projections pointing to an annual growth of 5.03% through 2030. This is partly fuelled by a greater focus on protein-rich diets and health, which in turn leads people to seek out quality, custom-fitted clothes that flatter a well-maintained physique. By mastering these finishing techniques, you’ll be perfectly placed to meet that growing demand for garments that truly fit.
How to Care for Your Tailors Ham
A high-quality tailors pressing ham isn't just another tool; it's a sewing partner for life. With the right care, these things can last for decades. The secret is knowing how to handle them, especially since their traditional sawdust filling doesn't play well with water. A little bit of attention goes a long way in keeping your ham firm, clean, and ready for any project you throw at it.
The golden rule is simple: never, ever soak your ham. That tightly packed sawdust will act like a sponge, and once it's wet, you're on a fast track to clumping, mildew, and a musty smell you’ll never get rid of. All cleaning needs to be a surface-level job. For everyday dust and loose threads, a quick pass with a lint roller or a soft brush is all it takes.
Dealing With Spills and Stains
Of course, accidents are bound to happen in any creative space. If you do spill something on your ham, the key is to act fast.
Mix up a small paste with a bit of mild laundry detergent and a few drops of water. Using a clean cloth or even a soft-bristled toothbrush, gently work the paste into the stain. The idea is to lift the mark without forcing moisture deep into the ham.
Once you’ve treated the spot, take a separate, slightly damp cloth and wipe away the soap. You want to remove the residue, not drench the fabric. Then, just let the ham air dry completely before you press on it again.
Managing Steam and Odours
After a particularly intense steaming session, it's perfectly normal for your ham to feel a bit damp. If it feels a little too wet, simply stand it on its side in a well-ventilated spot and let it air dry naturally. Never be tempted to speed things up with direct heat like a hairdryer; you'll risk scorching the cover.
If you notice a musty smell developing, sunshine is your best friend. A few hours in a sunny, dry spot can work wonders, as the sunlight acts as a natural deodoriser. For more persistent odours, you can lightly sprinkle the surface with bicarbonate of soda, leave it for about an hour, and then vacuum it off thoroughly.
A well-cared-for ham is a dry ham. The biggest threat to its longevity is moisture, which can compromise the internal sawdust filling and lead to mould. Always prioritise air circulation, both during use and in storage.
For those minor scorch marks that sometimes appear with high heat, a little white vinegar can help. Gently dab the area with a cloth moistened with the vinegar to lighten the mark. It's always a good idea to test this on a less visible part of the ham first, just to be sure it doesn’t affect the colour of the fabric cover.
Proper Storage Solutions
When it's not in use, where you keep your ham matters. Tucking it away in a sealed plastic bag or a damp cupboard is a recipe for mildew. The best approach is to store it out in the open, perhaps on a shelf or inside a breathable fabric bag, where air can circulate freely.
Good storage habits are vital for all your sewing materials, not just your tools. For more inspiration on organising your workspace, have a look at our guide on effective storage for fabrics. Follow these straightforward tips, and your tailor's ham will be a reliable part of your toolkit for many years.
A Few Common Questions About Using a Tailor's Ham
Even the most experienced hands in the sewing room run into questions now and then. A tailor’s pressing ham looks simple enough, but a few queries pop up time and time again. Honestly, getting these small details right is what separates a good finish from a great one.
Let’s tackle some of the most frequent uncertainties. Once you understand the why behind the tool's design, you'll be able to use it with far more confidence and precision.
Can I Just Use a Rolled-Up Towel Instead?
Look, I appreciate resourcefulness in the sewing room, but this is one corner you really shouldn't cut. While a rolled-up towel might seem like a decent substitute in a pinch, it's missing the two things that make a tailor's ham work: firmness and shape retention.
A proper ham is stuffed incredibly tightly with sawdust, and for good reason. That dense filling gives you a solid, resistant surface to press against, which is essential for moulding fabric into shape. A soft towel just collapses under the weight and heat of the iron, failing to support the very curves you're trying to build. It also soaks up steam like a sponge, leaving you with a damp, sad-looking piece of fabric.
A true pressing ham isn’t just a soft cushion; it’s a purpose-built shaping tool. The resistance it provides is what sets seams and creates three-dimensional form—something a towel simply can't do.
Which Side of the Tailor's Ham Should I Use?
Most hams are cleverly designed with two different sides, and this is key to their versatility. Each side is covered in a material suited to specific fabrics and heat levels. Choosing the right one makes a huge difference and helps prevent damage to your cloth.
Here’s a simple way to remember it:
- The Wool Side (usually the plaid or textured one): This is your best bet for woollens, silks, and other delicate synthetics that can't take high heat. The slightly napped texture of the wool grips the fabric just enough to stop it from sliding around. It’s also brilliant at absorbing and distributing steam, letting you shape the material without leaving behind an ugly sheen.
- The Cotton Side (the smooth canvas or drill side): This side is built to take the heat. It’s the perfect partner for pressing cotton, linen, and other robust fabrics that need a really crisp, well-defined finish.
As a general rule, try to match the ham's surface to the fabric you're working with. If you're ever in doubt, start with the wool side and a lower iron temperature. You can always turn the heat up, but you can't undo scorch marks.
What if My Ham Gets Damp from the Steam?
It's perfectly normal for your ham to feel a bit damp after a heavy pressing session, especially if you're using a lot of steam. The thing you want to avoid, though, is letting it get completely saturated. The sawdust inside is incredibly absorbent, and too much moisture can lead to real problems down the line.
If you notice your ham feels more than just slightly damp, you need to let it dry out completely. Just stand it on its end in a warm, well-ventilated spot until it’s bone dry. This is crucial for stopping the sawdust from clumping together or, even worse, developing mould and that tell-tale musty smell.
A good habit to get into is using steam in short, sharp bursts rather than a long, continuous cloud. This gives the ham's surface a moment to breathe between shots of steam. Remember: a dry ham is a happy ham, and it’ll last you for years.
At Display Guru, we know that professional results start with professional tools. From tailor's dummies to essential pressing aids, we supply the quality equipment you need to bring your creative vision to life. Explore our collection at https://www.displayguru.co.uk.