


Your Guide to a Dressmaking Cutting Table
When you're setting up a sewing space, it's easy to pour all your focus (and budget) into the sewing machine. But let me tell you, the real unsung hero, the tool that can make or break your projects, is your cutting table. It's more than just a surface; it's the very foundation of precision.
A proper cutting table provides that stable, expansive area you need to lay out your fabric perfectly flat, which is absolutely essential for accurate pattern cutting and a professional finish.
Why Your Cutting Table Is Your Most Important Sewing Tool
Think of it like an architect's drafting board or a chef's prep station. Without a perfectly flat, stable, and correctly sized surface, every single step that follows—from pinning your pattern to the final stitch—is built on a shaky foundation. Many of us have made do with the dining table or even the floor, but those makeshift solutions often lead to fabric shifting, wonky cuts, and frustratingly wasted material.
This is where a dedicated dressmaking cutting table changes the game. It’s designed specifically to create the ideal environment for the most critical stage of making a garment: preparing and cutting the fabric. This is where precision is born.
The Bedrock of Accuracy and Efficiency
The right table makes sure your fabric lies completely flat, with no distortion. This is so important for matching up patterns and honouring the grainline, which in turn directly affects the final fit and drape of whatever you're making. It also has a massive impact on your workflow.
Let's break down the key benefits:
- Ergonomic Comfort: A table set at the right height—usually around 36 inches—saves you from the back and shoulder strain that comes from stooping. It means you can work comfortably for much longer.
- Improved Precision: A large, flat surface stops your fabric from hanging over the edges. That overhang can stretch the material and pull it out of shape, leading to inaccurate cuts before you've even started sewing.
- Increased Efficiency: Having a dedicated, clear space allows you to lay out entire patterns at once. This saves a surprising amount of time and reduces the mental load of trying to work in a cramped area. You can explore a variety of professional sewing and cutting table options to see how they can completely transform your setup.
This efficiency isn't just a bonus for home sewists; it's a cornerstone of the entire UK fashion industry. In a sector valued at roughly £72.3 billion, optimised cutting tables are crucial for manufacturers to minimise fabric waste and boost productivity. That level of precision is a key factor in staying competitive.
A great cutting table doesn't just hold your fabric; it holds the potential of your entire project. It's the silent partner that ensures your creative vision is realised with accuracy from the very first cut.
Choosing the Right Surface for Flawless Fabric Cuts
Think of your cutting table's surface as the unsung hero of your sewing room. It's more than just a place to lay your fabric; it’s the crucial partner to your rotary cutter or shears. The material you choose dictates everything—how smoothly your blade glides, whether delicate fabrics snag, and ultimately, how accurate your pattern pieces turn out.
Getting this right is the difference between a frustrating, wonky cut and a clean, professional start to your project. It’s a balance between durability, smoothness, and what your budget allows. Let's break down the common options to help you make a smart investment for your creative space.
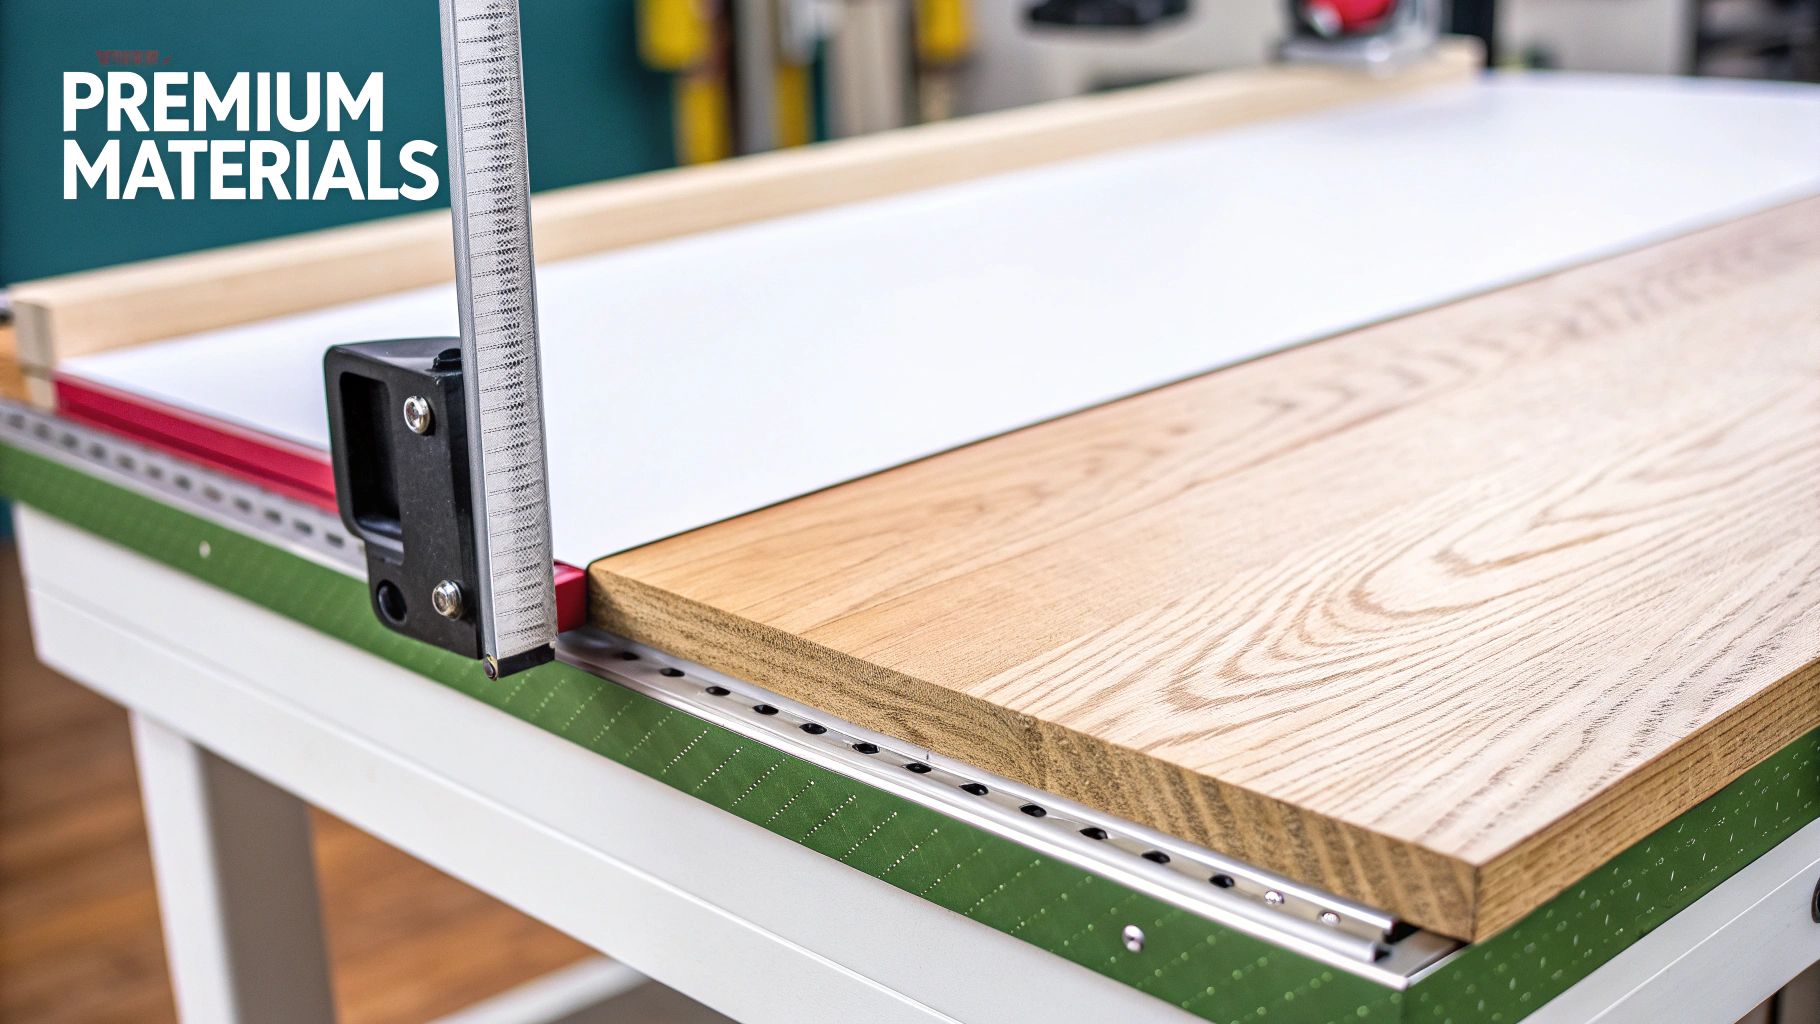
H3: Solid Wood: The Classic Workhorse
For generations, solid wood has been the traditional choice for sewing tables, and for good reason. These tables are incredibly durable, offering a classic aesthetic that can genuinely last a lifetime. A beautifully finished hardwood provides a smooth plane to work on, though it can pick up nicks and scratches from sharp tools over time.
Where solid wood really shines, though, is its sturdiness. It provides a heavy, stable foundation that simply won't wobble or shift while you’re concentrating on a tricky cut. While often a pricier option, its longevity makes it a worthwhile investment for any serious dressmaker.
H3: MDF and Laminate: The Modern, Practical Solution
Medium-Density Fibreboard (MDF) has become a hugely popular and affordable choice because it offers an exceptionally smooth, uniform surface. As an engineered wood product, it has no grain, which means there’s nothing to catch or pull at fine materials like silk or chiffon.
Laminate often takes this a step further by using an MDF core with a tough top layer. This surface is highly resistant to scratches and is completely snag-free. It's also a breeze to wipe clean of chalk marks and fabric dust. This practical combination of a flawless finish and everyday resilience makes laminate a brilliant option for a busy dressmaking table.
A great cutting surface should feel almost invisible—it works with you, not against you. A smooth, snag-free material like laminate prevents costly mistakes, while a sturdy base like solid wood ensures stability for every single cut.
To give you an idea of how different materials and designs come together, let’s look at how three common models stack up.
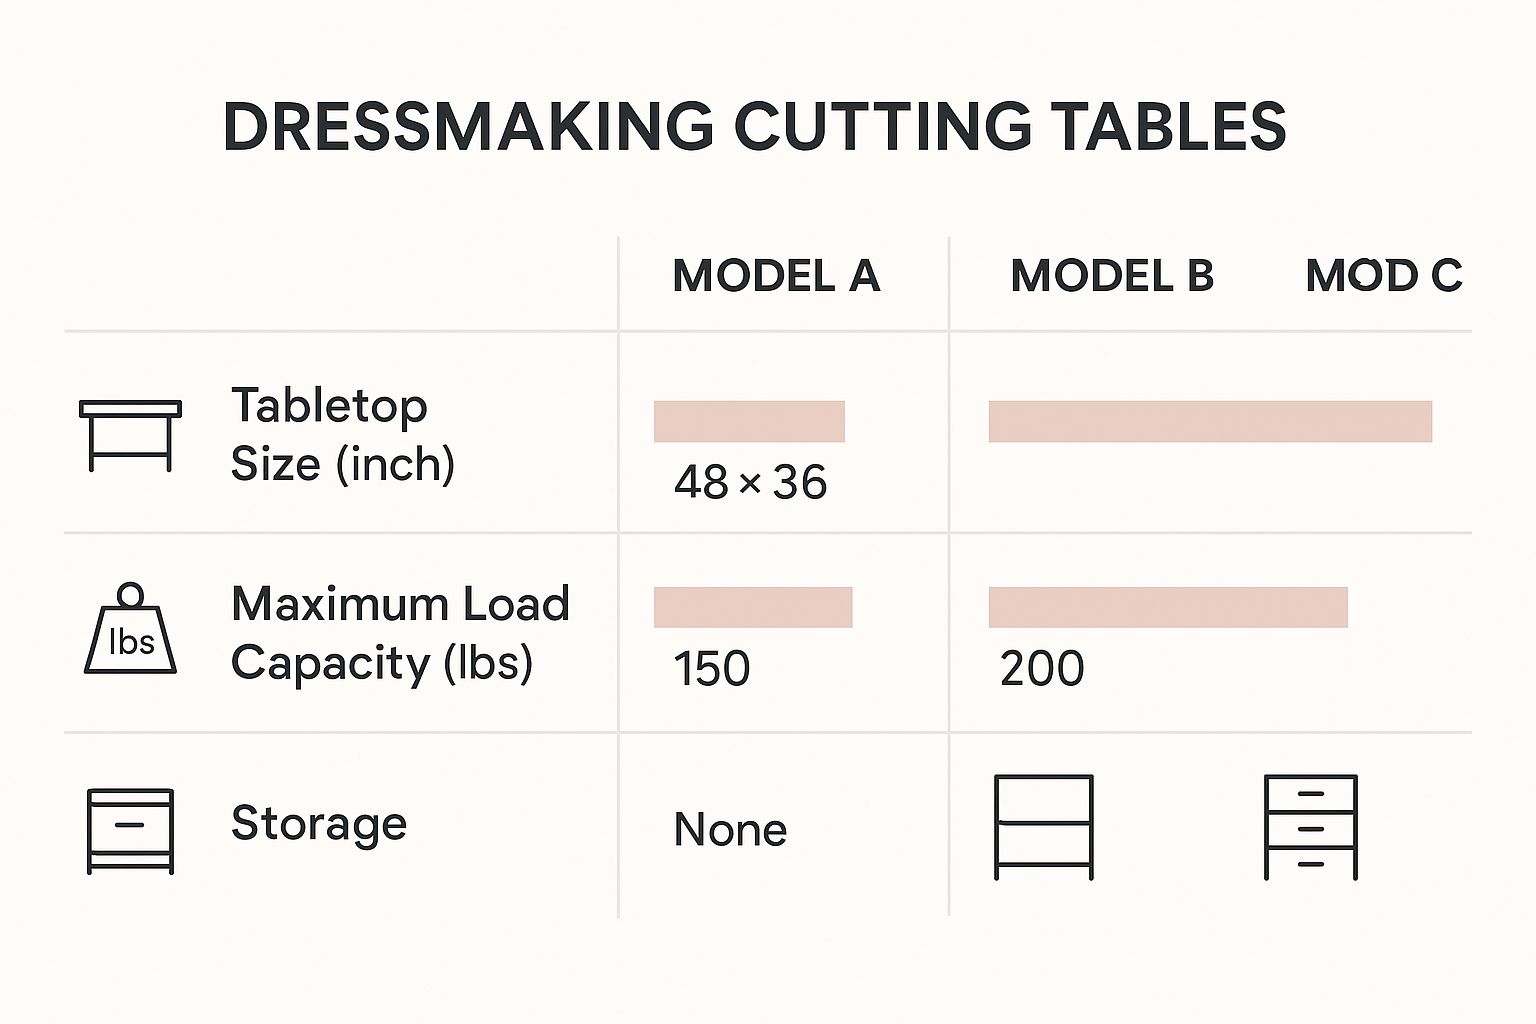
As you can see, features like built-in storage often mean a larger footprint, but the trade-off is greater stability for those bigger, heavier projects—a key point to consider for your own workspace.
H3: Comparing Common Cutting Table Surface Materials
Choosing the right surface can feel overwhelming, so I've put together a quick comparison table. It breaks down the main contenders, highlighting their strengths and weaknesses to help you match a material to your specific sewing needs.
| Material | Key Advantages | Potential Drawbacks | Best Suited For |
|---|---|---|---|
| Solid Wood | Extremely durable and stable; can be refinished; classic aesthetic. | Susceptible to scratches/nicks from tools; can be heavy and expensive. | Serious dressmakers and professionals looking for a lifelong investment piece. |
| Laminate | Very smooth, snag-free, and scratch-resistant; easy to clean; affordable. | Damage can be difficult to repair; can feel less premium than solid wood. | High-traffic sewing rooms and hobbyists needing a practical, low-maintenance surface. |
| MDF | Uniformly smooth surface with no grain; cost-effective; lightweight. | Prone to water damage if not sealed; less durable than laminate or solid wood. | DIY table projects and budget-conscious sewists working with delicate fabrics. |
| Plywood | Strong and relatively affordable; provides a large, seamless work area. | Surface can have splinters if not properly finished and sealed. | Garages or workshops where function and cost are prioritised over a fine finish. |
Ultimately, the best surface is one that supports your workflow without getting in the way. Whether it’s the steadfast reliability of wood or the easy-care nature of laminate, the right choice will make your cutting process smoother and more enjoyable.
H3: Don’t Forget the Essential Add-Ons
No matter which table you land on, the single most important accessory you can buy is a self-healing cutting mat. This is non-negotiable if you use a rotary cutter. It protects your table’s surface from deep grooves and extends its life for years to come.
But that’s not all they do. A good mat offers other huge advantages:
- Printed Grids: Most mats come with printed measurement grids, which are brilliant for aligning fabric and making perfectly straight cuts without constantly reaching for a ruler.
- Pinnable Surfaces: If you like to pin your patterns directly to your work surface, you can easily create one. Simply add a layer of cork board on top of your table.
A quality mat truly elevates any table into a high-performance cutting station. To find the right one for your setup, you can learn more about selecting the perfect cutting mat for sewing. It’s a simple addition that protects your investment and dramatically improves your accuracy.
Essential Features Every Great Cutting Table Needs
It’s not just the surface material that separates a decent table from a fantastic one. A truly great dressmaking cutting table feels like a natural extension of your hands—it supports your body and streamlines your workflow instead of getting in the way.
Getting these next few features right means you’re investing in more than just furniture. You’re investing in your own comfort, the precision of your cuts, and ultimately, the quality of your finished garments. Think of them as the non-negotiables for a serious sewing setup.
Ergonomic Height Is Non-Negotiable
First and foremost, let's talk about height. A standard dining table, which usually sits at about 76 cm (30 inches), is a recipe for disaster. It forces you to stoop and hunch over, which quickly leads to an aching back, sore shoulders, and a stiff neck. That kind of discomfort doesn't just cut your creative sessions short; it can lead to rushed, sloppy mistakes.
The sweet spot for a cutting table is counter height, typically around 91 cm (36 inches). This height allows most people to stand up straight, taking enormous strain off the body. If you can find a table with adjustable height, even better. It lets you dial in the perfect position for your own body.
Your table’s height directly impacts your physical well-being and stamina. A table that fits your body allows you to work longer and more accurately, making ergonomics a practical necessity, not a luxury.
The Right Size for Your Space and Projects
Next up is size. Choosing the dimensions of your table is always a balancing act between the grand scale of your projects and the physical limits of your room. You absolutely need enough space to lay out your fabric completely flat. If it drapes over the edge, it will stretch and pull, leading to distorted, inaccurate cuts.
For most garment makers, a table that’s at least 1.8 metres (6 feet) long and 1 metre (40 inches) wide is a brilliant starting point. That gives you plenty of room to work with most pattern pieces. If you're tight on space, don't despair—a foldable or gateleg table can be a lifesaver, giving you a large surface when you need it and folding away neatly when you don't. Exploring different cutting and sewing table configurations can spark some clever ideas for smaller studios.
Stability and Mobility: A Perfect Balance
Finally, pay close attention to the table's frame and base. A wobbly table is a dressmaker's nightmare. The slightest wobble can shift your fabric just as you're making a critical cut, ruining your piece instantly. The frame needs to be sturdy enough to stand perfectly still.
This brings you to a key choice between fixed legs or wheels, often called casters.
- Fixed Legs: These offer rock-solid stability. Once the table is in position, it isn't going anywhere, which is ideal if you have a dedicated space.
- Locking Casters: These give you the best of both worlds. You can easily roll the table out of the way to clean or rearrange your room, then lock the wheels firmly in place for a secure, unmoving workstation.
For most modern sewing rooms, a robust frame with high-quality locking casters is the most practical choice. It gives you that crucial stability without sacrificing the flexibility to adapt your space as needed.
Building Your Own Custom Cutting Table
If you can’t find a commercial cutting table that fits your space or your budget, why not build your own? Creating a DIY dressmaking table is a fantastic and practical solution that puts you in complete control. Building it yourself means you dictate the exact height, size, and features, creating a workspace that’s made just for you.
The best part about the DIY approach is its sheer flexibility. You don't need to be a master carpenter to create something brilliant. In fact, some of the most effective designs come from cleverly repurposing existing furniture, combining simple bits and pieces to create a stable, functional surface that’s every bit as good as a shop-bought one.
Simple and Creative DIY Ideas
One of the most popular DIY methods is ridiculously simple: use two sturdy bookshelves as a base. Many sewers swear by the IKEA KALLAX series for this. Just place two units parallel to each other and lay a large, smooth top across them. Instantly, you have a table at the perfect standing height, complete with tons of built-in storage for fabric, patterns, and notions.
Another great option is to give an old piece of furniture a new lease on life. That solid dining table you never use or a sturdy old desk can be raised to an ergonomic height with leg extenders or by building a simple riser platform. It's a cost-effective trick that transforms an unused item into the new heart of your sewing room. For a bit of professional inspiration, take a look at the features you’d find in a high-quality pattern cutting table and see which ideas you can work into your own design.
The goal of a DIY table isn't just about saving a bit of cash; it's about crafting a tool that's perfectly suited to your body and your workflow. Your custom table should solve problems, not create new ones.
Key Steps for a Successful Build
Whichever route you take, a few core principles will make sure your project is a roaring success. Follow these steps, and you'll end up with a table that's a joy to use and built to last.
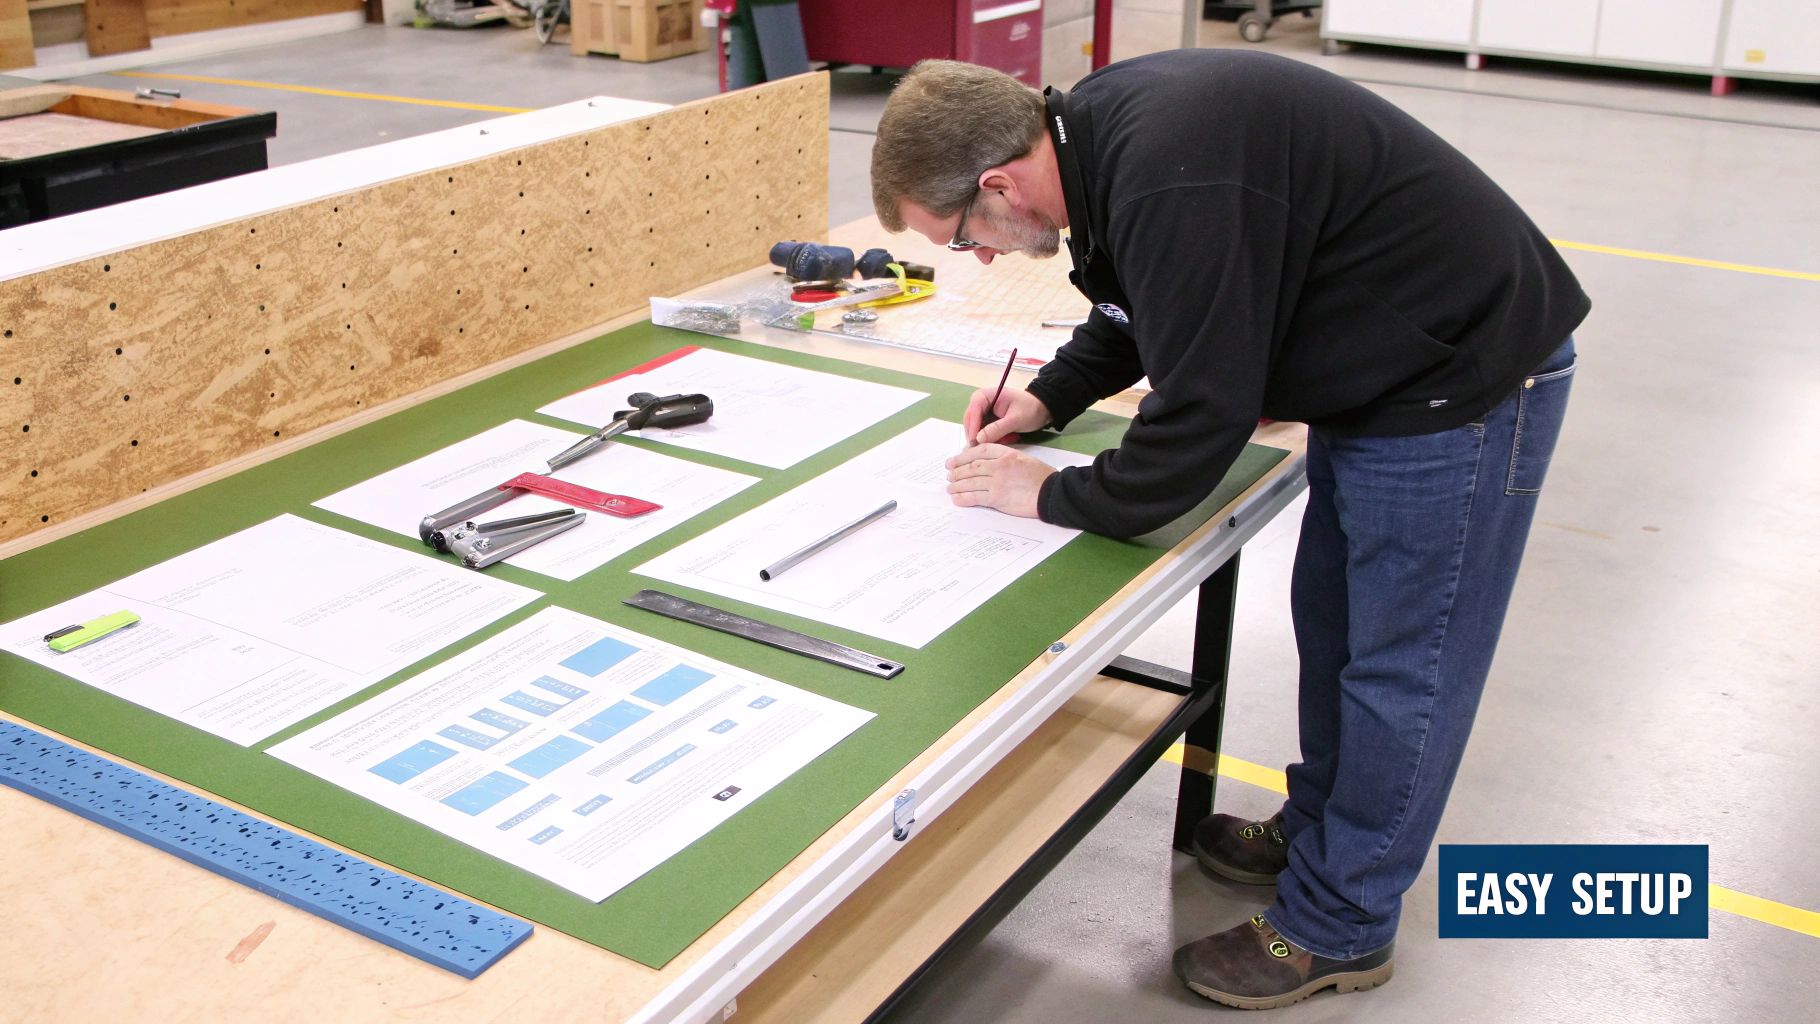
-
Measure and Plan Like a Pro: Before you do anything else, measure your space and decide on the ideal dimensions for your table. The most important measurement is your ergonomic height. To find it, stand up straight with your arms bent at a 90-degree angle, then measure from the floor to your palms. That’s the height your work surface should be.
-
Choose Your Materials Wisely: For the tabletop, a large sheet of MDF or high-grade plywood is a great choice—it’s smooth, sturdy, and won’t break the bank. Most hardware shops will even cut it to your exact dimensions for you. It's a good idea to finish it with a coat of durable paint or varnish to protect the wood and prevent your fabric from snagging.
-
Stability is Everything: Your base needs to be rock-solid. If you're using bookshelves, make sure you secure them to the tabletop with brackets. If you’re building a frame from scratch, use strong legs and add cross-braces to eliminate any wobble. An unsteady table is a recipe for wonky cuts and endless frustration.
By focusing on these fundamentals, you can build a custom cutting table that not only fits your space perfectly but also improves your accuracy and comfort for many years to come.
Keeping Your Cutting Table in Top Condition
Your dressmaking cutting table is one of the biggest investments in your sewing space, so it pays to look after it. A little bit of routine care will keep it serving you faithfully for years to come. Think of it like any other precision tool in your kit – its performance relies on keeping it stable, clean, and always ready for your next project.
The easiest win is regular cleaning. Fabric lint, stray threads, and chalk dust inevitably build up, creating a gritty surface that can stop your shears from gliding smoothly. For most laminate or MDF tops, a quick wipe with a lightly dampened microfibre cloth is all you need to handle the daily grime.
Protecting the Surface from Damage
The single biggest threat to your table's pristine surface is direct contact with your sharp tools. It might be tempting, but never use a rotary cutter or a tracing wheel directly on the tabletop itself. This is a surefire way to create permanent grooves and scratches that will snag delicate fabrics down the line.
This is exactly why a self-healing cutting mat is non-negotiable. It acts as an essential shield, absorbing every slice and protecting the surface underneath. A good quality mat not only preserves your table but also gives you a gridded surface for accurate measuring. You can dive deeper into choosing the right one in our complete guide to sewing cutting mats.
Think of your self-healing mat as the screen protector for your table. It takes all the daily wear and tear, keeping the valuable surface underneath in perfect condition for a fraction of the replacement cost.
Routine Stability Checks
There's nothing more frustrating than a wobbly table when you're trying to make a precise cut. It's a recipe for wonky pattern pieces. Every few months, take five minutes to do a quick stability check and catch any minor wobbles before they become a real headache.
- Check all fittings: Go around and give all the screws and bolts on the legs and frame a gentle tighten. The vibrations from a sewing machine and general use can cause them to loosen over time.
- Test for levelness: Pop a spirit level on the surface to make sure it’s perfectly flat. If it’s off-kilter, a few shims wedged under the legs will sort it out.
- Inspect caster locks: If your table has wheels, check that the locking mechanisms are working properly. They should hold the table firmly in place with no creep.
Got Questions? Let's Talk Cutting Tables
Even after you've weighed up all the options, a few common questions tend to surface when it's time to choose or use a dressmaking cutting table. It's worth getting these details right from the start, as it makes all the difference in creating a workspace that’s both comfortable and efficient. Let’s tackle some of the most frequent queries.
One of the first things people ask is about the height. Getting this wrong means you'll spend hours hunched over, which is a fast track to back pain. Think of good ergonomics not as a luxury, but as a core part of a sustainable, enjoyable sewing practice.
What Is the Best Height for a Dressmaking Cutting Table?
For most people, the sweet spot is standard counter height, which is about 36 inches (or 91cm). This height allows you to stand and work without stooping over your fabric. A good rule of thumb is to aim for a surface that sits roughly at your hip level. This position lets you apply steady, even pressure with a rotary cutter without straining your shoulders or back.
If the table will be shared or if you simply want the perfect fit, an adjustable-height model is a fantastic investment. It guarantees that anyone can find their ideal ergonomic setup.
Can I Just Use My Dining Table?
It's a tempting shortcut, but using your dining table isn't a great long-term plan. Most dining tables are only around 30 inches (76cm) high. That difference of a few inches forces you into an awkward, hunched posture that you'll definitely feel after a while.
Beyond the height issue, their surfaces aren't built for the job. Pins, sharp shears, and the pressure from a rotary cutter can leave permanent scratches and marks on a piece of furniture you'd rather keep nice.
A dedicated cutting table is built for purpose. It has the right height to protect your back and a durable surface that can handle the tools of the trade. Using the wrong furniture is a compromise that affects both your comfort and the accuracy of your work.
How Big Should My Cutting Table Be?
This really comes down to two things: the size of your room and the scale of your typical projects. For most sewing enthusiasts, a surface around 40 x 72 inches (102 x 183cm) is a brilliant starting point. It gives you enough space to lay out a good length of fabric without it draping over the edge and distorting your cut.
If you’re tight on space, a foldable table can be a game-changer. You get that generous workspace when you need it, but it can be tucked away neatly when you don't. On the other hand, if you’re a professional regularly working with wide bolts of fabric, a larger, permanent table will be a much more efficient setup.
At Display Guru, we understand that the right equipment is the foundation of great work. Find the perfect tools to build your ideal sewing studio. https://www.displayguru.co.uk