


Costume Measurement Guide for Accurate UK Fittings
Only 19% of women in a sample of 1,261 body scans matched the bust, waist and hip measurements used by high-street clothing, according to a 2025 UK analysis reported by The Interline. A dress size isn't a body, and it isn't enough information to cut a costume.
Why Costume Fit Starts with the Body
A useful costume measurement guide describes the wearer rather than trying to fit them into a label. Theatre costume teams, dressmakers, students and home makers all need the same foundation: identifiable landmarks, consistent measuring conditions and a record another maker can understand.
The UK's SizeUK survey illustrates why this matters. Conducted mainly between 2001 and 2002, it measured more than 11,000 people using body scanning and extracted 140 measurements, according to UCL's account of the national sizing survey. A body needs more description than a retail size can supply.
Workroom rule: The wearer's measurements are authoritative. A size label is only a starting point for choosing a bought garment or fitting form.
Build a measurement profile from girths, lengths, posture and movement requirements. Choose the measurement that controls the costume's greatest fitting risk, rather than automatically choosing the largest figure, and keep body measurements separate from garment allowances.
Before cutting cloth or ordering a base garment, measure the person in the intended foundation garments and note the shoes they'll wear.
Key Costume Measurements and Their Groups
Core costume measurements and what they control
| Measurement | Where it sits | Unit | Controls |
|---|---|---|---|
| Height | Crown to floor, footwear noted | cm | Proportion, hem and overall scale |
| Neck | Base of neck, snug rather than tight | cm | Collars and necklines |
| Shoulder width | Neck point to shoulder point, recorded as single-shoulder length | cm | Yokes and shoulder seams |
| Back waist length | Nape to natural waist | cm | Bodice and jacket length |
| Bust or chest | Fullest horizontal girth during normal breathing | cm | Bodices, shirts and jackets |
| Underbust | Level immediately beneath the bust | cm | Corsets and fitted bodices |
| Natural waist | Natural waist crease, abdomen relaxed | cm | Waist seams and belts |
| High hip | Upper hip below the waist, depth recorded | cm | Period hip lines and peplums |
| Full hip | Maximum circumference around hips and seat | cm | Skirts, trousers and petticoats |
| Upper arm | Fullest upper arm, arm relaxed | cm | Sleeve width |
| Wrist | Around the wrist bone | cm | Cuffs |
| Sleeve length | Shoulder point to wrist, elbow softly bent | cm | Sleeve length |
| Armscye | Around the intended armhole seam line, route noted | cm | Set-in sleeves |
| Rise | Waist through crotch, front or total route identified | cm | Trouser rise |
| Inside leg | Crotch to floor in costume shoes | cm | Trouser and tight length |
| Outside leg | Waist at side to floor in costume shoes | cm | Full trouser length |
| Foot length | Heel to longest toe, bearing weight | cm | Footwear |
| Head | Fullest circumference above brows and ears | cm | Wigs, hats and headpieces |
Copy these rows onto a working sheet, then tick the ones the costume needs. Leave unused rows blank rather than filling them with estimates.
The UK body-measurement guidance on BS EN 13402 describes a clothing-size framework based primarily on centimetre body dimensions. Use centimetres as the controlling unit throughout the production document; inches can sit alongside them as converted convenience values.
Girths establish space around the body
Girth measurements describe the space needed around a particular landmark. Bust or chest, underbust, waist and hip measurements aren't interchangeable, even when a loose costume appears to conceal those areas.
Most torso girths are horizontal. Neck, wrist, head and armscye measurements follow their defined anatomical routes, so don't force every circumference into a horizontal plane.
For fitted work, identify where the garment must close and where it must remain secure. A neckline that slips, a waistband that compresses the abdomen and a sleeve that grips the upper arm are different fitting problems, even if the costume closes successfully.
A muscular dancer, for example, might match a stock waist measurement but require a different upper-arm width. Recording only the waist would conceal the part of the body most likely to strain the sleeve.
Lengths position the costume
Lengths tell the maker where garment features belong. Back waist length positions a bodice waistline, shoulder length locates a shoulder seam, and sleeve length establishes the intended relationship between sleeve and wrist.
Name the route, not just the number. Single-shoulder length from neck to shoulder point isn't the same measurement as full shoulder breadth across the back, although workrooms sometimes call both shoulder width.
Trouser records need similar care. A crotch-to-floor measurement in costume shoes gives a useful body reference, but it isn't automatically the finished inside-leg seam or hem length.
Rise also needs a route description. Distinguish a front crotch length, a back crotch length, a total waist-through-crotch measurement and a seated crotch depth whenever the pattern requires them.
The profile includes more than tape figures
A professional sheet also needs information that can't be expressed as a circumference. Add fields for:
- Posture and balance: Note a habitual forward shoulder, pelvic position or seated working posture.
- Left and right: Separate figures where asymmetry affects shoulders, sleeves, legs or footwear.
- Movement: Describe the actual action, such as kneeling, partnering, sword work or reaching overhead.
- Production conditions: Include the date, agreed base layer and any relevant skin sensitivities or allergies.
The Royal Shakespeare Company's costume department reports taking more than 50 measurements from each actor, alongside allergy information. A small production doesn't need to imitate every field, but it should preserve the distinction between circumference, length and performance requirements.
Keep supplier charts in their proper role
For a bought ceremonial costume, use the supplier's own chart rather than translating from a familiar clothing label. Clerkmans provides a practical reference to find your cap and gown size; compare the dimensions the supplier requests with the wearer's record.
The same discipline applies to equipment. Understanding mannequin measurements helps you compare a form with a person without treating their labels as equivalent.
The chart supplies the figures. The maker still has to decide which dimensions matter most for the costume's cut, fastening and action.
Where to Place the Tape
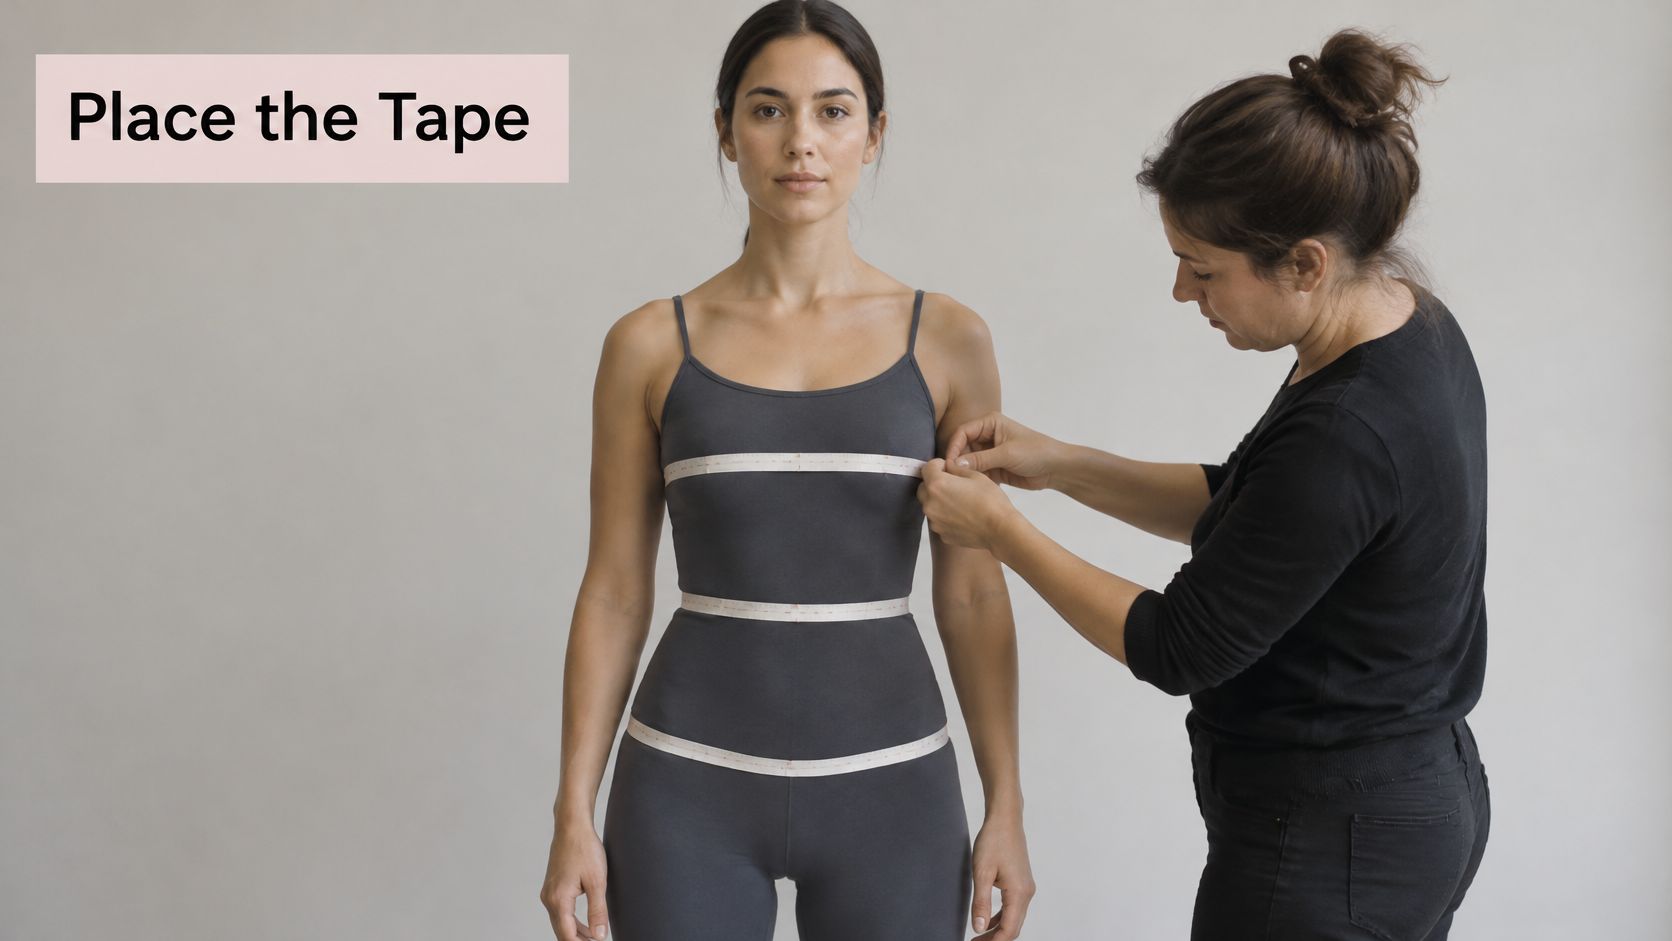
Ask the wearer to stand naturally, look forwards and let their arms rest. They should wear the agreed base layer and breathe normally, without lifting the chest or drawing in the abdomen.
Use a flexible dressmaking tape that lies flat without curling. The guide to sewing tape measures is useful when choosing a tool for curved body landmarks rather than straight construction measurements.
Find the torso landmarks before reading
Pass the tape around the fullest bust or chest, then check its route across the back. Lift the arms only to position the tape, and lower them before reading it.
Place the underbust tape directly beneath the bust. For the natural waist, ask the wearer to bend gently sideways and identify the crease, then return to a relaxed stance before measuring.
Tie narrow elastic around that waist landmark if several lengths will end there. Don't assume the waistband of their trousers marks the natural waist.
- High hip: Choose the upper-hip level required by the pattern and record its depth below the waist.
- Full hip: Find the maximum circumference around the seat, not merely the level of the hip bones.
- Abdominal prominence: Check whether a different horizontal level needs its own measurement rather than forcing it into the hip field.
For a choir or ceremonial robe, a full chest reading remains important even when the silhouette looks generous. ChoirBuy's chest-measuring guidance can help you avoid common robe sizing mistakes when comparing that reading with a supplier's chart.
Check the awkward routes
Measure the single shoulder from the neck-side point to the bony shoulder point. For back waist length, begin at the prominent bone at the nape and follow the centre back to the waist elastic.
For sleeves, keep the elbow slightly bent and follow the outside of the arm from shoulder point to wrist. A rigidly straight arm can leave the finished sleeve short during movement.
Take inside leg from crotch to floor and outside leg from the side waist to the same floor reference, using the intended shoes. Identify these as floor-reference lengths, leaving the final hem decision to the garment record.
Measure the head above the brows and ears at its fullest circumference. Measure foot length from heel to longest toe while the wearer bears weight.
Use a helper for the back, hips and armscye, and explain before touching or positioning the tape near sensitive areas. If the wearer prefers to place part of the tape themselves, agree how you'll check its route.
A corset shows why landmarks must remain distinct: underbust, waist and high hip describe separate levels. Substituting full hip for waist doesn't provide extra safety; it places volume where the corset needs a different shape.
Checks That Improve Measurement Accuracy
Accuracy means repeatable readings under agreed conditions, not the smallest number you can pull from the tape. A snug tape follows the body; a tight tape changes it.
The International Dance Supplies sizing guidance supports measuring with a natural posture, normal breathing, close-fitting clothing and a flat tape. Treat those conditions as part of the measurement rather than optional preparation.
Repeat the measurements with the greatest consequences
Take a fresh reading of bust or chest, waist, full hip, back waist length and inside leg. Remove and reposition the tape between readings, otherwise you may just reproduce the same placement error.
When readings disagree noticeably, investigate the cause before choosing a figure. Check the landmark, tape angle, breath, base layer and whether the wearer changed stance.
Don't average a visibly twisted reading into a sound one. Re-measure until you can explain the difference and reproduce the accepted result.
Measurement errors and the reading to keep
| Fault | Effect on the figure | What to keep |
|---|---|---|
| Tape pulled tight | Girth reads smaller than the uncompressed body | Snug reading without compressing flesh |
| Held inhale at the chest | Bust or chest inflated | Normal-breath reading, state noted |
| Bulky clothes under the tape | Girths include unwanted clothing bulk | Reading over the intended base layer only |
| Self-measured hip or back | Twisted or uneven tape gives an unreliable route | Second-person reading |
| One number for an uneven body | Conceals the difference between sides | Separate left and right figures |
| Stretched or curled tape | Readings become unreliable | Reading with a sound, flat tape, date recorded |
Keep the reading you can defend
Suppose a waist reading is smaller when the wearer braces their abdomen and larger when they relax. Neither averaging the figures nor choosing the smaller one solves the problem: the measuring conditions weren't consistent.
Ask the wearer to settle, breathe normally and let the abdomen rest. Repeat the reading without compression, then note that condition beside the accepted value.
A tightly pulled tape can produce an impressively tidy number and an unusable costume.
Use a helper rather than a mirror alone for back and hip measurements. Turning to inspect the tape can rotate the torso, change the route or lift an edge without the wearer noticing.
Also check the tool itself. Lay a suspect tape against a reliable ruler and replace it if the markings no longer agree, the ends are damaged or the tape won't lie flat.
An unexpected result isn't proof that the wearer was measured incorrectly. Once the reading is repeatable, retain it, even if it doesn't match a stock chart. Unusual proportions call for a fuller profile, not a more flattering number.
How to Record Each Measurement
A trustworthy sheet lets another maker understand a figure without having attended the measuring session. Each row needs a landmark name, accepted centimetre value and relevant conditions, with converted inches only where they're useful.
Avoid unexplained shorthand. Back length could mean nape to waist, shoulder to waist or a garment length; name the route so the pattern cutter doesn't have to guess.
Record the conditions that change the reading
Keep the main session details in the header, then add row-specific exceptions beside the relevant measurement. A seated back length, for example, needs its posture identified even if the rest of the sheet was taken standing.
The recording sequence below separates the landmark, value, optional conversion and conditions.
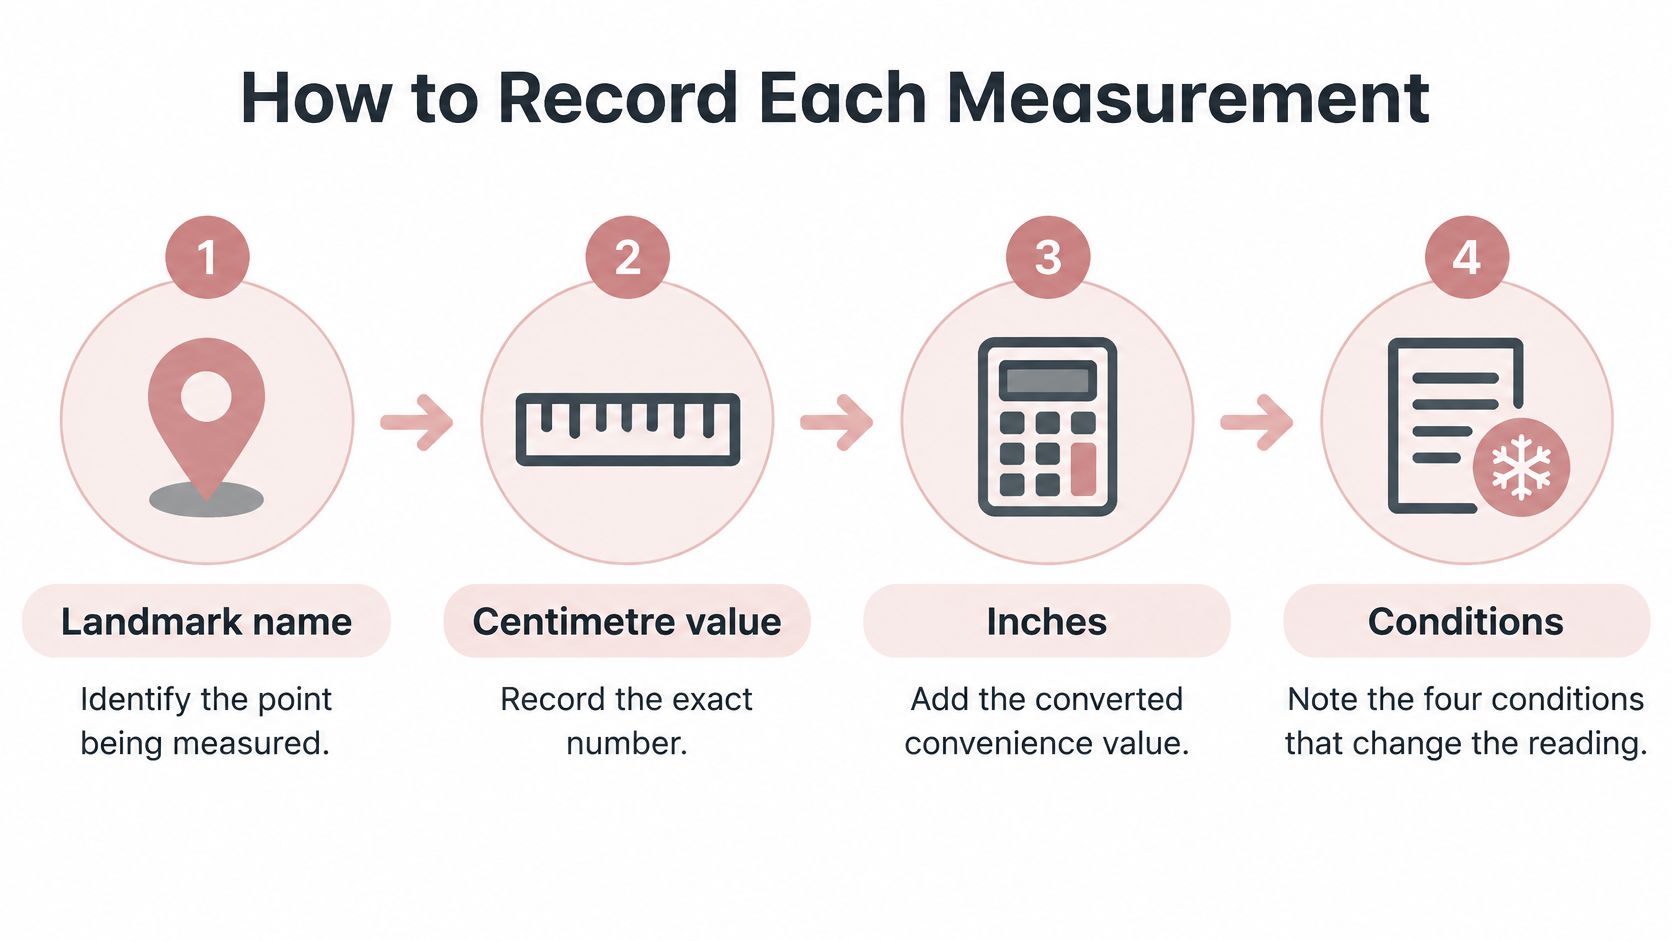
Record these conditions explicitly:
- Posture: Standing, seated or another agreed position.
- Breathing: Normal breathing for routine chest measurements, with any deliberate alternative labelled.
- Foundation garments: Identify the bra, corset, padding or other base layer used.
- Footwear: State whether shoes were worn and identify the intended pair where length is affected.
Name the measurer, date and tape type. If the workroom changes measuring tools or repeats a session later, those details help explain discrepancies.
Use a consistent recording sequence
- Confirm the agreed base layer before taking the reading.
- Read at the named landmark without compressing the body.
- Write the accepted value in centimetres.
- Add posture, breath, footwear and left/right details where relevant.
- Initial the row so another maker knows who accepted it.
Write directly onto the record rather than relying on memory after the session. If a measurement needs checking, mark it as provisional instead of allowing it to look approved.
Keep left and right fields for shoulders, arms and legs whenever the costume needs them. Record an asymmetry neutrally, describing what the maker needs to accommodate rather than treating the wearer as a problem.
Provide a separate space for relevant allergies or skin sensitivities when the record goes to wardrobe. Keep personal fitting notes accessible only to the people who need them for the work.
A printable header can read:
Production | Role | Wearer | Date | Measurer | Tape | Base layer | Shoes
Give later measuring sessions their own dated record. Do not overwrite an earlier figure, because the cutter may already have used it to draft or alter a pattern.
Profiles for Bodies Outside Standard Proportions
A person can match a chart at the waist and differ substantially everywhere else. Long torsos, prominent busts, abdominal volume, broad shoulders, muscular legs and asymmetry all require more information than height plus the main girths.
A measurement profile records how dimensions relate to each other and to the role. It doesn't describe the wearer as an exception to an otherwise correct size.
Choose the anchor by the fitting risk
The anchor measurement is the dimension you prioritise when choosing or developing the starting pattern. Choose it by asking what would make the costume fail: inability to close, restricted breathing, trapped arms, misplaced support or an inaccessible fastening.
For a close dance costume, girth can matter more than height when the chart gives conflicting sizes. The Morphsuits size guide offers a useful comparison with retail chart-based selection, but a performance costume still needs an assessment of the wearer's actual action.
The largest circumference isn't automatically the right anchor. A bodice that accommodates the bust but prevents an arm lift hasn't solved the fitting problem.
- Add shape information: Include front waist length as well as back waist length, shoulder measurements and upper-arm girth where needed.
- Measure in the working posture: Add seated torso lengths and seated waist behaviour for roles performed sitting.
- Describe the action: Record kneeling, combat, partnering, reaching and quick changes.
- Ask about access: Discuss mobility aids, preferred assistance, range limits and fastening positions with the wearer.
General descriptions such as those in a guide to body types for men can provide vocabulary, but they don't replace the measurements needed to draft a jacket or trousers.
Apply the profile to the costume
Consider a broad-shouldered performer wearing a narrow period jacket. A stock waist match tells you little about the upper back, sleeve head or upper arm, so those areas need their own figures and a movement test.
For a wheelchair user, record the torso in their usual seated position and discuss where fastenings can be reached comfortably. Check garment bulk against the chair and ask the wearer which areas must remain clear of wheels, supports or other equipment.
Don't require a standing measurement just because the sheet has always included one. Use the posture that supplies relevant fitting information, and record the method clearly.
Fit the costume to the person's working posture, not the person to the measuring sheet.
Move to a toile when conflicting girths require substantial pattern blending, or when posture and shape can't be represented adequately by the figures alone. Inclusive measuring is an ordinary production responsibility, and the wearer's feedback is part of the fitting evidence.
From Body Figures to Ease and Toiles
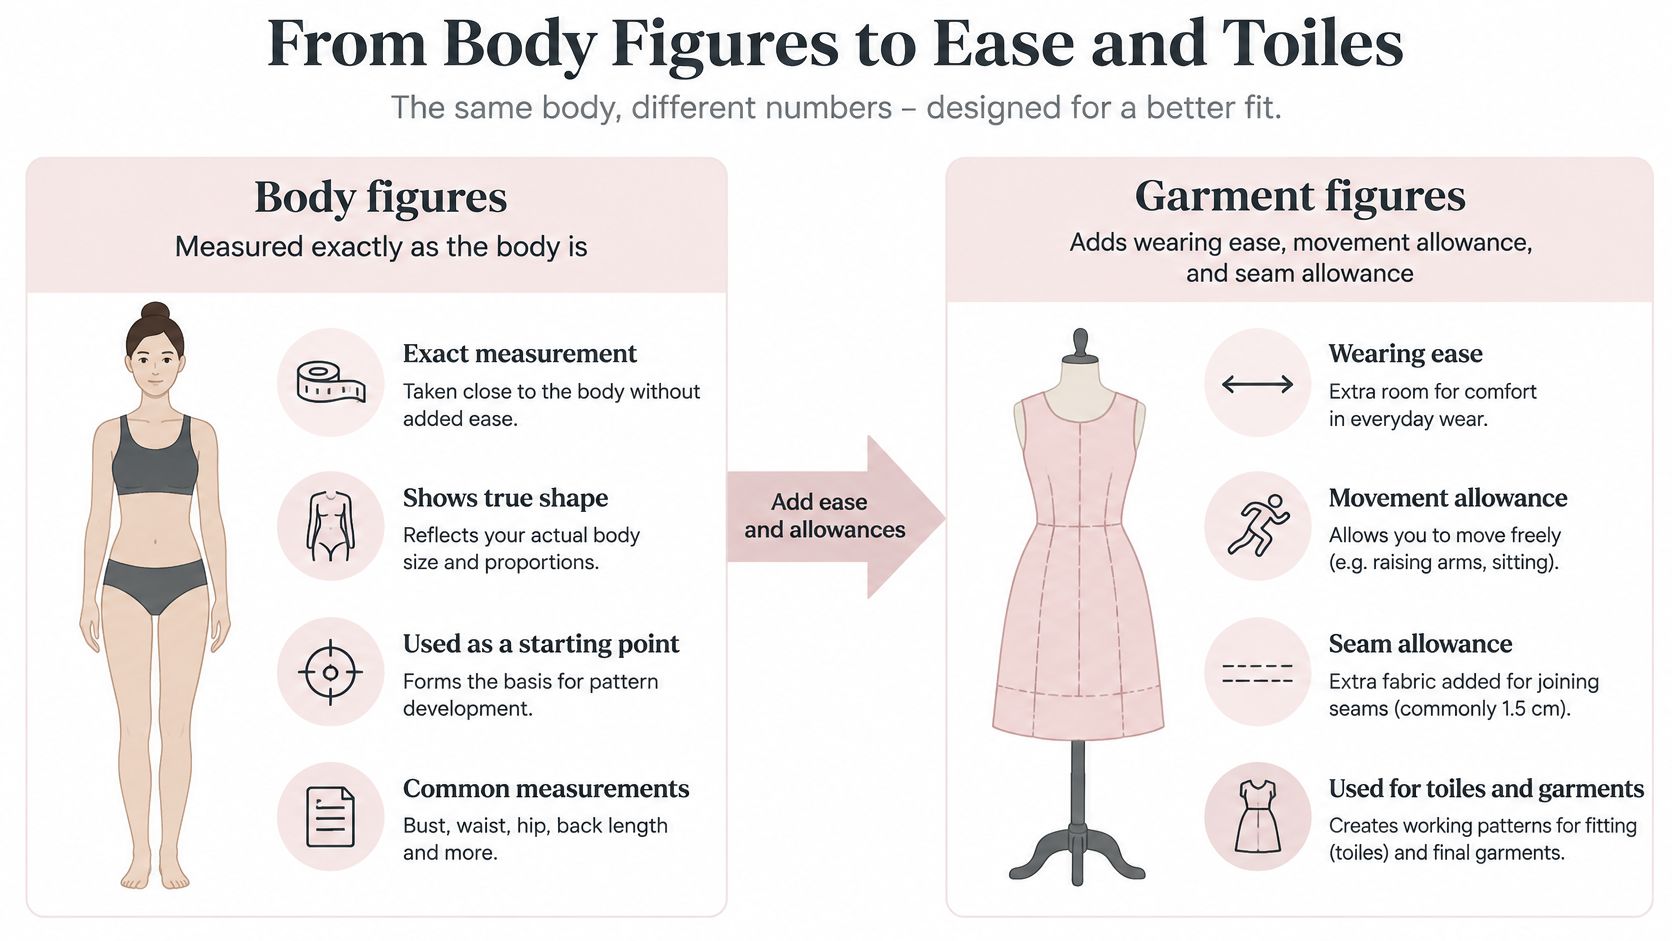
The body record and the garment specification answer different questions. The first describes the wearer under stated conditions; the second describes what you're making for them.
Don't alter a body figure to include comfort or movement. Doing so removes the reference you need when checking why a costume is too tight or too loose.
Separate fit allowances from construction allowances
| Record | What belongs there |
|---|---|
| Body figures | Accepted measurements, landmarks and measuring conditions |
| Garment figures | Intended finished dimensions, wearing ease, movement and silhouette decisions |
| Pattern construction notes | Seam allowance, hem allowance and relevant fabric preparation |
| Fitting corrections | Changes to the garment or pattern, with their reasons |
Wearing ease provides room for comfort. Movement allowance accommodates the action, while design ease creates the intended silhouette.
Seam allowance is different: it's material beyond the stitching line for construction, not usable space inside the finished garment. Keep it identified on the pattern rather than treating it as additional wearing room.
A close stretch dance costume may need little or no positive ease, depending on stretch, recovery and support. A woven jacket needs a different decision, especially where the performer reaches or lifts their arms.
A corset may deliberately reduce the natural waist, but that reduction belongs to the design specification. It must never replace the wearer's measured waist on the body sheet.
Test the decision in a toile
A toile, or mock-up, lets you test uncertain shape and allowance decisions before cutting the final cloth. Choose a trial fabric that gives a useful approximation of the intended garment's behaviour.
Baste the critical seams, identify fitting lines and use the recorded base layer and shoes. Ask the wearer to perform the action specified in their profile, rather than accepting a good standing photograph as proof of fit.
For example, a jacket toile might need extra bust room to permit an arm lift. The body bust figure remains unchanged; the larger finished circumference is recorded as a garment decision, with the movement requirement beside it.
A guide to loose-fitting clothes can help distinguish a deliberately generous silhouette from accidental excess. Adding room everywhere won't necessarily correct a misplaced armhole or an incorrectly balanced shoulder.
Check allergy and sensitivity notes before committing to closures, trims or finishing treatments. After fitting, transfer approved corrections to the garment specification and pattern, leaving the body record intact for comparison with a dress form.
Fit the Sheet on a Dress Form
Compare the wearer's bust or chest, waist and hip with the form's listed centimetre dimensions before choosing by size label. A form is a support for construction, not a substitute wearer.
Choose a base that can be brought towards the required shape with padding. A form that's too large in a critical area can't be pinned smaller.
Prepare the form for the wearer
Our female tailor dummies are listed in sizes 6/8, 8/10, 10/12, 12/14, 16/18 and 18/20. The sturdy polystyrene torso supports secure pinning for fittings and alterations; compare the listed dimensions with your sheet before selecting a size.
Use stable padding to build out the required areas, then mark the waist and other working lines. The guidance on a costume design mannequin can help you plan how the form will support the build.
- Compare the shape: Check front, side and back rather than matching circumference alone.
- Mark limitations: Note posture or left-right differences the form doesn't reproduce.
- Keep a confirmation fitting: If the performer can't attend during construction, arrange a wearer fitting before performance.
Make the final check on the person
Put the wearer in the recorded foundation garments and footwear. Check closures, balance and the high-risk fitting areas, then make corrections to the garment specification rather than rewriting the original body figures.
Finish with the role's movement: sit, lift both arms, walk, kneel or perform the agreed action as appropriate. The costume is ready only when the wearer can do the required work safely and comfortably.
Display Guru offers tailor dummies and body forms for supporting costume construction, pinning and alterations. Bring your completed measurement profile when comparing options, and visit Display Guru to check the current range and listed sizes before choosing a form for your workroom.