


Clothing Rail for Wall: Choose, Install, and Style with Confidence
A clothing rail for the wall is one of those brilliantly simple ideas that can completely change a room. It takes your storage vertical, freeing up precious floor space and transforming an empty wall into a stylish, functional display. It’s the perfect middle ground between practicality and great design, working just as well in a busy shop as it does in a minimalist bedroom.
Why Wall Mounted Rails Are Such a Smart Storage Solution
Let’s face it, floor space is a premium. Whether you’re a boutique owner trying to make a small shop feel open and inviting, or you're just trying to reclaim some space at home, every square foot matters. This is where moving your storage onto the walls really comes into its own. You instantly open up the room, creating a sense of space that a clunky wardrobe just can't match.
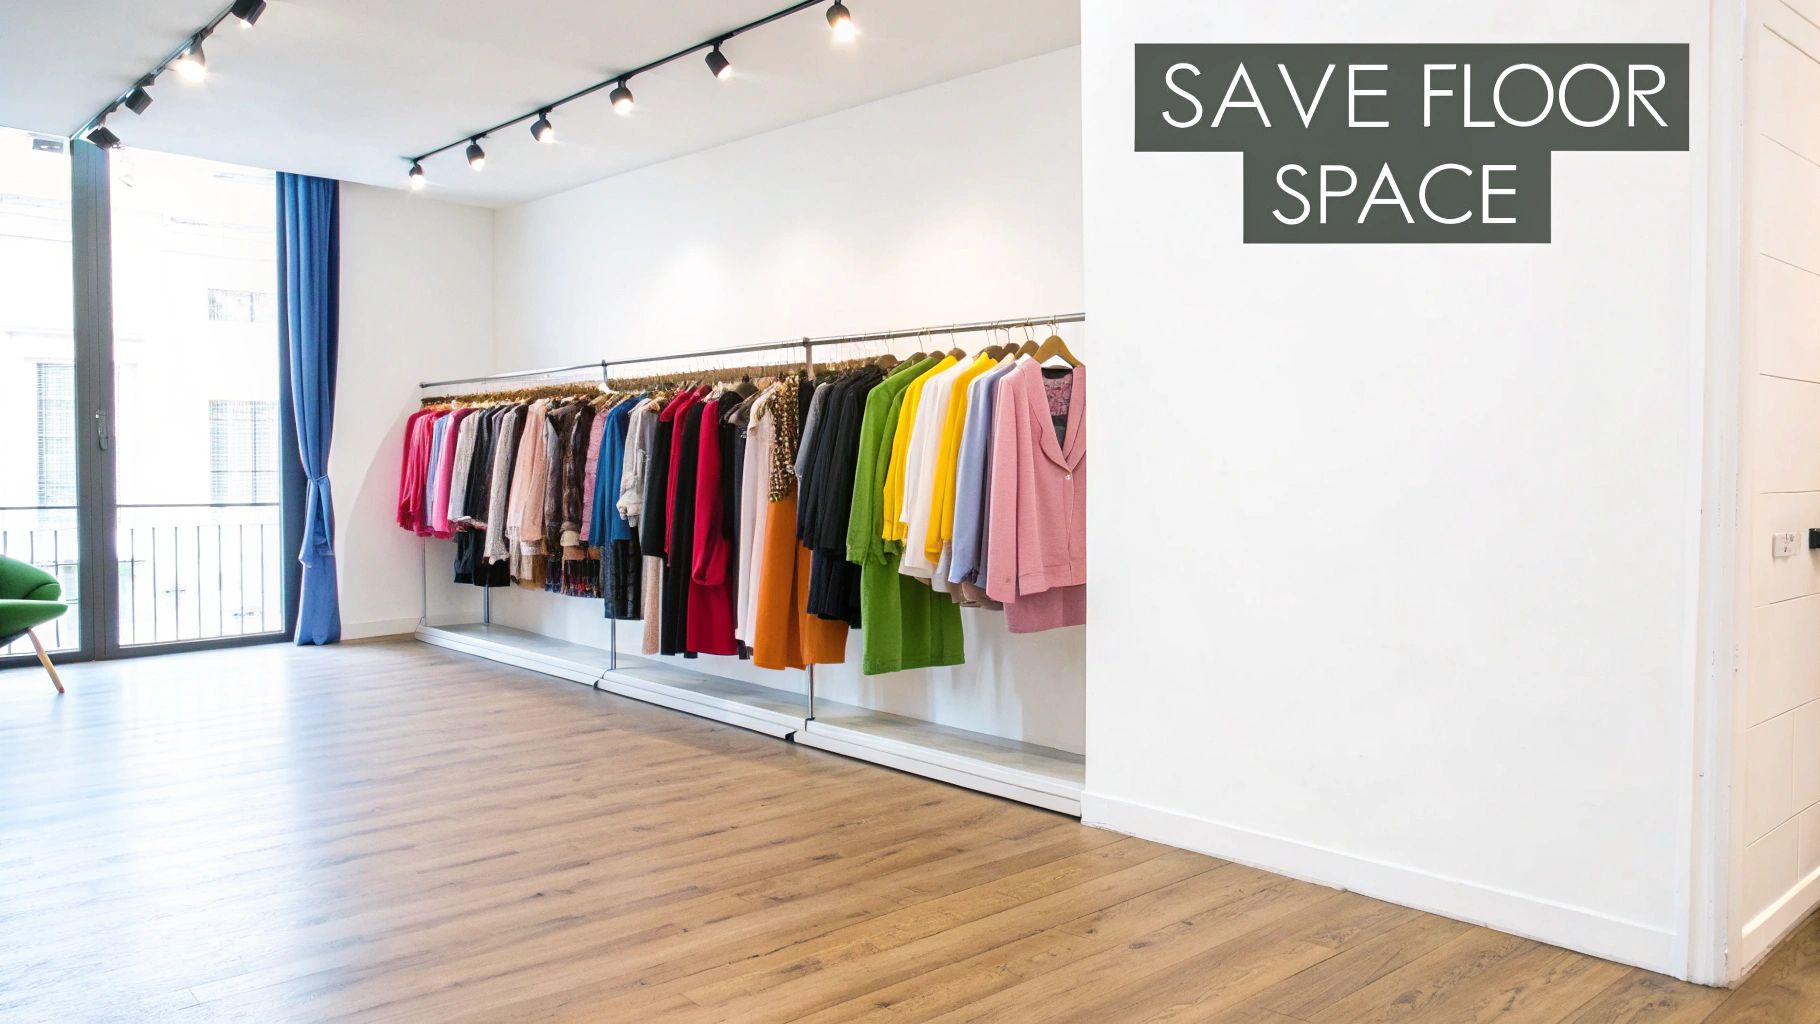
Think about it: instead of another piece of bulky furniture, a sleek rail turns a blank wall into a feature. In the competitive world of UK retail, this is a game-changer. With operational costs always on the rise, making the most of your space isn't just nice to have—it's essential. Our solutions at Display Guru are designed precisely for this challenge. You can take a look at our collection of versatile clothing wall racks to get a feel for the different styles that could work for you.
Maximising Retail and Home Spaces
In a shop, effective use of space is everything. The UK clothing retail industry—set to hit £50.0 billion in revenue by 2025—thrives on clever merchandising. Wall-mounted rails let you create eye-catching displays that pull customers in, all without making the floor feel crowded. For the UK's 10,231 clothing retail businesses, that’s a powerful strategy.
The benefits are just as compelling at home. Imagine turning a spare room into a walk-in wardrobe or creating a dedicated spot in your bedroom to plan your outfits. A wall-mounted rail helps you:
- Lay out your clothes for the week ahead, saving precious time in the morning.
- Display your favourite pieces like works of art instead of hiding them away.
- Carve out a neat area for guest coats by the front door.
The real beauty of a wall-mounted rail is its versatility. It can be a heavy-duty workhorse in a stockroom or the stylish centrepiece of a modern living space.
Ultimately, these fixtures deliver a professional storage solution that’s tough enough for constant commercial use yet chic enough for any contemporary home. They provide the ideal foundation for keeping your garments organised, accessible, and beautifully displayed.
How to Choose the Right Clothing Rail for Your Space
Choosing the perfect clothing rail for your wall isn't just about what looks good—it's about finding that sweet spot where style meets serious practicality. You need a fixture that can handle exactly what you plan to throw at it, whether that's in a busy shop or a quiet corner of your bedroom.
Your starting point is often the material. This single choice can define the whole look and feel of your space. An industrial black pipe rail, for instance, gives off a raw, urban energy that’s perfect for a modern studio or a retail space with a bit of an edge. On the other hand, polished chrome or a sleek brass finish offers a clean, minimalist aesthetic that feels much more contemporary.
This decision doesn't just influence the look; it's directly tied to the rail's strength and how it fits in with your existing decor.
Material and Load Capacity
Before you even think about style, you need to be brutally honest about load capacity. What are you actually going to hang on this thing? A few silk blouses and summer dresses require a completely different setup than a rail expected to support a dozen heavy winter coats, leather jackets, or a full stockroom's worth of inventory.
This is where the material's inherent strength really matters. Heavy-gauge steel is the workhorse of the industry, built to handle commercial-grade loads. It's the go-to for a theatre's costume department or a busy retail storeroom. For home use or a small boutique showing off a carefully selected collection, a lighter aluminium or decorative pipe rail will likely do the job beautifully.
Choosing the right material for your rail is a critical first step. It influences everything from how much weight it can hold to the overall style it brings to your room. This table breaks down some of the most common options to help you decide.
Wall Rail Material Comparison
| Material Type | Best For | Load Capacity | Aesthetic Style |
|---|---|---|---|
| Industrial Steel Pipe | Heavy retail use, stockrooms, winter coats, industrial-chic home decor. | High | Rugged, urban, industrial, modern farmhouse. |
| Polished Chrome | Modern boutiques, minimalist bedrooms, contemporary "open wardrobe" concepts. | Medium to High | Sleek, clean, reflective, contemporary. |
| Stainless Steel | Areas with high moisture (laundry rooms), commercial settings, clean-room environments. | High | Professional, hygienic, modern, durable. |
| Brass / Copper | High-end boutiques, vintage-inspired spaces, feature displays. | Medium | Warm, elegant, luxurious, classic. |
After weighing your options, you'll have a much clearer picture of what will not only support your clothes but also enhance your space.
The UK's fashion scene really puts a spotlight on these choices. Physical shops are still king for that hands-on experience, which means there's a huge demand for smart fixtures that boost the visual appeal without hogging precious floor space. As the market expands, so does the need for a versatile and reliable clothing rail for wall.
Finding Your Perfect Fit
When you match the rail to its true purpose, you’re investing in something that will serve you well for years. A small boutique might pick a short, understated rail to make a new capsule collection the star of the show. In contrast, a home-based fashion designer could need a long, heavy-duty system to organise an entire season's worth of handmade pieces.
Think about these real-world scenarios:
- Home Wardrobe Overflow: A simple, elegant chrome rail in a bedroom can create a stylish "open wardrobe" for your favourite outfits.
- Retail Feature Wall: A series of black industrial rails, mounted at different heights, can create a powerful, cohesive look that guides customers through a collection.
- Stylist's Studio: A robust, extra-long rail system is essential for organising client looks and needs to withstand constant, heavy use.
Here's a tip from experience: always overestimate your needs slightly. It’s far better to have a rail that's stronger than you think you need. It gives you peace of mind and ensures it stays secure as your collection inevitably grows.
Finally, don't forget the small but crucial components. A sturdy wardrobe rail end support is what keeps the whole setup stable and secure. These details make all the difference in the longevity of your installation. By thinking through these factors, you can confidently pick a rail that perfectly fits your space, style, and storage demands. For more inspiration, you might find our guide on https://www.displayguru.co.uk/blogs/news/clothes-pole-rail helpful.
Get it Right Before You Drill: Measuring and Wall Prep
A successful installation has very little to do with the final turn of the screw and everything to do with the prep work. This is the crucial stage that separates a rock-solid rail from a wobbly disaster that pulls half your plaster off the wall.
So, where do you start? First, you need to understand what you're drilling into. Is it a solid brick wall or hollow plasterboard? The answer changes everything, from the tools you need to the fixings that will hold your rail securely. A quick knock on the wall is a good first test. A hollow, drum-like sound suggests plasterboard, while a dull, solid thud usually means you're dealing with brick or blockwork.
Know Your Wall, Find Your Fixings
If you’re working with plasterboard, you absolutely cannot just screw the brackets straight into the board. It simply won't hold the weight, and it's a recipe for failure. Your mission is to find the timber studs that form the structural frame behind the plasterboard.
This is where a stud finder earns its keep. It's a small electronic tool that you slide across the wall, and it will beep or flash when it detects the dense wood of a stud. When you find one, mark its position lightly with a pencil. In most UK homes, studs are spaced at regular intervals, typically 40cm or 60cm apart, so finding one helps you locate the next.
For solid walls (brick or masonry), you have much more freedom in where you place your rail. However, you'll need a powerful drill with a masonry bit and the right heavy-duty wall plugs to get a secure grip.
Marking Up for a Flawless Finish
With your fixing points identified, it's time for precision. First, decide on the height. For hanging longer items like coats or dresses, a height of around 165-180cm from the floor is a good benchmark. Measure and mark this height for each bracket.
Now, grab a spirit level. You need to ensure those marks are perfectly level with each other. A wonky rail will always look unprofessional. Place the level against the wall, line it up with your marks, and adjust until the bubble sits dead centre. Then, draw a faint pencil line to connect them—this is your drilling guide.
Pro Tip: Stick a strip of masking tape along your pencil line. It gives you a clean surface to mark on, stops the drill bit from wandering when you start, and minimises the chance of cracking the surrounding paint or plaster.
Before you pick up the drill, there's one last safety check that is non-negotiable. Use a pipe and cable detector to scan the area you're about to drill. Hitting a hidden wire or water pipe is a dangerous and expensive mistake. This quick step ensures your new clothing rail for wall is installed safely and gives you complete peace of mind.
For a deeper dive into the hardware itself, our article covering the different types of wardrobe rails and fixings is a great resource.
Mounting Your Wall Clothing Rail Like a Pro
Right, you’ve prepped the wall and your markings are spot on. Now for the satisfying part – turning all that careful planning into a solid, reliable fixture. Let's get into the nitty-gritty of what separates a wobbly rail from one that’s rock-solid.
First up, drilling the pilot holes. A classic mistake is grabbing a drill bit that’s too big; your wall plug will just spin uselessly instead of gripping. You're aiming for a snug fit. Always use a masonry bit for brick or concrete, and a standard bit if you’ve hit a timber stud. Here’s a simple trick I always use: wrap a little piece of masking tape around your drill bit to mark the depth you need. It’s a foolproof way to stop yourself from drilling too deep.
Choosing the Right Wall Anchors
The wall plug, or anchor, is what really holds everything together. This is absolutely not a one-size-fits-all job. Matching the anchor to your specific wall type is crucial for a secure fit that won't let you down.
Get this part right, and you're golden.
- Solid Brick or Masonry: Heavy-duty plastic or nylon wall plugs are your best friends here. They expand inside the wall, creating an incredibly strong grip for the screw.
- Plasterboard (Drywall): Don't even think about using standard plugs. They'll pull straight out. You need special fixings like butterfly or spring toggle anchors that open up behind the board, spreading the load across a much wider area.
- Timber Studs: Great news – no plugs needed. You can drill your screws directly into the wood for the strongest possible hold.
Once your holes are drilled, gently tap the plugs in so they sit flush with the wall. Now it's time to fix the brackets. Hold each one in place and grab your spirit level one last time as you tighten the screws. You want them good and tight, but don't go crazy and overtighten – you could end up cracking the plaster or stripping the plug.
This simple workflow is key to getting the prep right before you even pick up a drill.
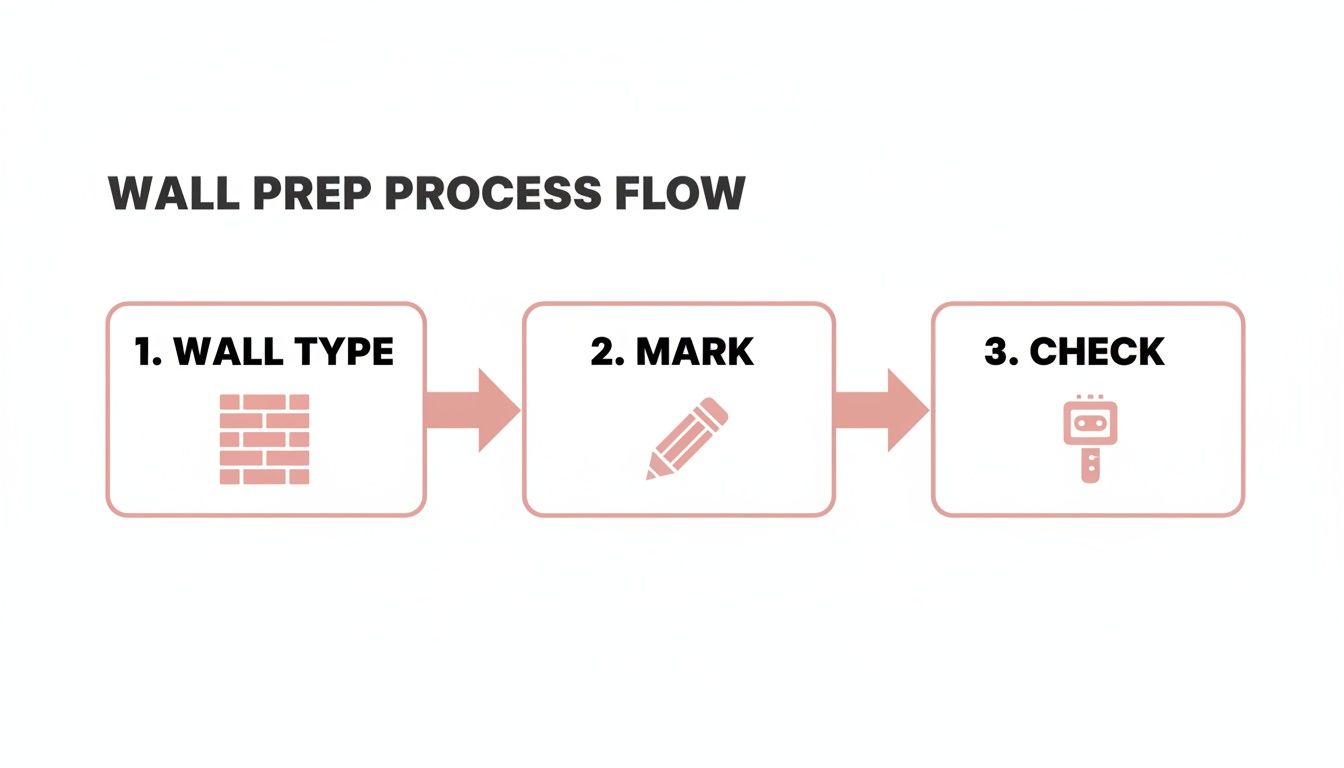
Nailing this sequence—wall type, precise marking, and a final check—is the bedrock of a professional-quality installation.
Final Checks and Building Confidence
With the brackets firmly mounted, you can slot the rail into place and secure it. But hold on, don’t start loading it up just yet. Perform a quick but vital weight test. Gently pull down on the centre of the rail, applying some of your body weight. It shouldn't budge, creak, or show any sign of strain. This little test gives you instant peace of mind that your hard work has paid off.
This attention to detail is what closes the gap between an amateur DIY job and a proper professional display. For today's hybrid retailers and home-based creators, an organised physical space is absolutely essential for driving online sales.
The UK's e-commerce apparel market is experiencing massive growth, projected to climb from USD 55,956.34 million in 2024 to an incredible USD 145,215.45 million by 2035. This boom means having organised physical stock is more important than ever. In fact, UK fashion influencers who use wall rails report setting up photoshoots 30% faster – a huge advantage when online channels make up 38.9% of all apparel sales.
Ultimately, a correctly mounted rail isn't just storage; it's a fundamental tool for your home or business. If you want to dive deeper into the specific hardware, you might find our guide on different types of clothes rail brackets useful. Taking the time to get these final steps right ensures your rail will serve you well for years to come.
Styling Your Rail for Function and Visual Appeal
Right, your rail is securely on the wall. Now for the fun part. A wall-mounted clothing rail is so much more than just a bit of storage; it's a design feature that can completely change the feel of a room. Think of it as a blank canvas, ready for you to showcase your personal style or, in a shop, your brand’s identity.

This fixture naturally draws the eye, so styling it with a bit of care makes a world of difference. By being selective about what you hang, you can turn a simple storage solution into a statement piece.
Merchandising Techniques for Retailers
In a retail environment, a wall rail is a seriously powerful merchandising tool. It's your chance to create little visual stories that pull customers in and subtly guide them through your collection. Ditching the 'everything on the rail' approach for a more curated display is key.
Here are a few proven strategies I’ve seen work time and again:
- Colour-Blocking: Grouping items by colour creates an incredibly clean and striking look. It’s not just visually appealing; it also makes it a breeze for shoppers to head straight for the shades they love.
- Tell a Story: Create a mini-collection based on a theme. Think "Weekend Getaway," "Summer Wedding Guest," or "Back to the Office." This helps people imagine how pieces fit into their own lives and often encourages them to buy a complete outfit.
- Frame a Mannequin: This is a classic for a reason. Place a rail on either side of a styled mannequin to show off other items that work with the main look. It’s a simple, effective way to upsell.
Creating an Open Wardrobe at Home
At home, your rail is a fantastic way to blend organisation with personality. The whole "open wardrobe" concept is ideal if you love your clothes and want to see them, rather than having them tucked away. It can turn the daily routine of getting dressed into something a bit more inspiring.
Use it to plan your outfits for the week—a real time-saver on busy mornings. It's also the perfect spot for airing out clothes that aren't quite ready for the wash. And if you're a creative type, a clothing rail for wall is the perfect stage for your best vintage finds or handmade pieces.
A well-styled rail is both a time-saver and a mood-booster. By keeping your most-loved items visible and accessible, you simplify your routine and surround yourself with pieces that bring you joy.
Essential Maintenance and Upkeep
To keep your rail looking sharp and working perfectly, a little bit of regular care goes a long way. The exact routine depends on the material, but a few general rules apply to most. For a deeper dive into clever storage solutions, have a look at our guide on how clothes rail storage can transform your space.
For general cleaning, a quick wipe with a soft, damp cloth is usually enough to get dust off finishes like chrome or black powder-coating. Just be sure to avoid any harsh, abrasive cleaners that could scratch the surface.
It's also a good idea to check the fixings every few months. Take a moment to make sure the screws are still tight against the wall, particularly if the rail is holding heavier items like winter coats. This simple five-minute check provides peace of mind and ensures your rail stays solid for years to come.
Your Wall-Mounted Rail Questions, Answered
Even the most straightforward projects can throw up a few last-minute questions. Before you start drilling, it’s worth running through the common queries we hear from customers. Getting these details right from the outset is what separates a professional, long-lasting installation from one that might cause problems down the line.
Let's tackle some of the practicalities that can make all the difference.
What Is the Maximum Weight a Wall Clothing Rail Can Hold?
This is probably the most important question, and the honest answer is: it's all about the weakest link in the chain. The capacity depends on three things working together—the rail itself, the fixings you use, and the wall you're mounting it on.
A heavy-duty steel rail, for instance, can be a real workhorse. If you anchor it properly into a solid brick wall or directly into the timber studs of a stud wall, it can easily handle 50kg or even more. That’s perfect for a dense display of retail stock or a whole family’s worth of winter coats.
But take that exact same rail and mount it to plasterboard with the cheap, standard plugs that came in the box? You'll be lucky if it holds 15-20kg. The rail is still strong, but the fixings and the wall simply can't take the strain. The lesson here is to always match heavy-duty fixings to your wall type—that's how you unlock the rail's true potential and keep it safely on the wall.
Can I Safely Install a Rail on a Plasterboard Wall?
You absolutely can, but you have to be smart about it. Plasterboard is basically just compressed gypsum powder between two sheets of paper, so it has very little structural integrity on its own. Using the wrong fixings is a recipe for a rail that rips right out of the wall.
To mount a clothing rail for wall on plasterboard and have it stay there, you need specialised hollow-wall anchors. Forget the little plastic plugs. You need something like:
- Spring Toggles: These clever fixings have metal wings that pop open behind the plasterboard, spreading the load across a much wider area.
- Butterfly Anchors: They work on a similar principle to toggles, creating a solid brace inside the hollow cavity.
- Heavy-Duty Self-Drilling Anchors: These are beefy metal anchors that bite into the plasterboard, offering a far more secure grip than plastic.
The gold standard for any plasterboard installation is to find the timber studs hidden behind the plaster. If you can screw your rail's brackets directly into that solid wood frame, you’ll have the strongest and most reliable anchor point possible.
What Is the Ideal Height to Mount a Clothing Rail?
There's no single "right" answer here, as the ideal height really comes down to what you'll be hanging. The key is to measure for your longest items.
If you’re planning to hang long coats, maxi dresses, or full-length trousers, a good starting point is to mount the top of the rail somewhere between 165cm and 180cm (about 65-72 inches) from the floor. This should give even the longest garments plenty of clearance so they aren't dragging.
For shorter items like shirts, tops, or trousers folded over a hanger, you can go much lower—around 100-120cm (40-47 inches) is usually perfect. This height is also great if you're thinking about creating a double-hanging system with a second rail installed higher up.
At Display Guru, we provide the durable, professional-grade rails you need to create the perfect storage solution for your home or retail space. Explore our full collection and find the ideal fit for your project at https://www.displayguru.co.uk.