


A Guide to Adjustable Dressmaker Forms for Perfect Sewing
Think of an adjustable dressmaker form as your silent partner in the sewing room. It's the essential link between a flat paper pattern and a garment that truly fits a three-dimensional body. It gives you a customisable canvas to drape, pin, and adjust fabric with a level of precision that just isn't possible when you're trying to fit clothes on yourself.
This guide will walk you through everything you need to know about these invaluable tools, ensuring you can achieve that flawless, professional finish you're after.
Your Essential Partner for Precision Sewing
For anyone serious about making clothes—from a bespoke tailor crafting suits to a dedicated home sewist—an adjustable dressmaker form is a cornerstone of their craft. It’s essentially a body double, giving you a stable, realistic shape to work on without the need for a live model to stand still for hours. This completely changes the game, taking sewing from a flat, 2D puzzle to a much more intuitive, hands-on art form.

Whether you’re meticulously recreating a client's measurements for a wedding dress or simply tailoring a high-street find to fit your own body better, the principles are the same. A dress form lets you see exactly how the fabric will hang, spot potential fitting issues, and confidently make changes long before you sew that final seam.
Bridging the Gap Between Concept and Creation
The real magic of an adjustable dressmaker form is its power to turn an idea into a tangible garment. It acts as a constant, reliable reference point from the first pin to the final press, which is why you’ll find one in every professional design studio and tucked into the corner of many a hobbyist's sewing room.
Using a dress form makes a world of difference:
- Pinpoint Accuracy: It lets you pin, mark, and check fittings with a precision that’s nearly impossible to get when working on your own body.
- Better Draping: You can really play with how different fabrics drape and fall, a vital part of the design process.
- Streamlined Alterations: Nailing the fit of seams, darts, and hemlines becomes a much quicker and more accurate job.
- A 360-Degree View: Seeing the garment from every angle as you work helps you catch any symmetry or balance problems early on.
The growing demand for these tools highlights just how crucial they are. In the UK, the mannequin market—which includes these essential adjustable dressmaker forms—was worth a hefty USD 278.2 million in 2023. Forecasts show it’s set to climb to USD 649.7 million by 2030, growing at a compound annual rate of 12.9%. This surge shows just how vital these forms have become in both the fashion and retail industries. You can explore more on the UK mannequin market projections.
A Foundation for Flawless Garments
Try to see your dress form not as a static dummy, but as a dynamic creative partner. It stands patiently while you perfect every last detail, from the turn of a collar to the line of a hem. Because it's adjustable, it can adapt to fit different clients or change along with your own measurements, making it a smart, long-term investment in your craft.
By providing a consistent and accurate physical representation of the human torso, an adjustable form removes the guesswork from the fitting process. This enables a level of precision that elevates the final quality of any garment.
In this guide, we'll dive deeper into the different types of forms available, what features to look for before you buy, and exactly how to set one up to perfectly match your measurements. Our aim is to give you the confidence to choose the right model—one that will not only improve your sewing but also fire up your creativity and help you get that professional finish, every single time.
Understanding The Different Types Of Dress Forms
Stepping into the world of dress forms can feel a bit overwhelming at first, but it really boils down to a few key types. These aren't just static mannequins for display; think of them as your silent, perfectly-proportioned partners in the creative process. Each one is built with a specific job in mind, whether it’s for the high-precision world of bespoke tailoring for women and unique pattern creation or for a home sewing enthusiast bringing their visions to life.

The first step is figuring out which style of form will best serve your projects. The main differences come down to how they adjust and what they’re made of, which directly impacts how you can use them day-to-day.
Dial-Adjusted And Panelled Forms
The most familiar type of adjustable form is the dial-adjusted model. Picture it as a kind of combination lock for the human torso. These forms have several dials—usually at the bust, waist, and hips—that you turn to expand or shrink different sections.
This clever mechanism lets you dial in a huge range of specific measurements. Many models even let you tweak the neck size and back-waist length, giving you a really customisable fit. It's no wonder they're a massive hit with home sewists and tailors who work with a variety of clients.
Then you have panelled forms. Instead of dials controlling an internal mechanism, these are built from multiple rigid sections, often eight or twelve. You adjust the form by moving these panels closer together or further apart. Some people find the gaps between the panels a bit tricky to pad out smoothly, but others love being able to see exactly where and how the form is expanding.
Core Materials And Pinnability
What the form is made of is arguably the most important feature, because it dictates how you can physically work with it. You're mainly looking at two options: fabric-covered plastic or solid polystyrene.
Most dial-adjusted forms have a tough plastic body that’s covered with a thin layer of foam and a fabric shell. This setup allows you to pin into the fabric cover at an angle, which is fine for marking seams or holding lightweight fabrics in place. Just remember, you can't push pins deep into the plastic itself.
On the other hand, a fully pinnable polystyrene form is made from a solid, dense foam from top to bottom. This means you can stick pins straight in, at any angle, and they’ll hold firm. It's an absolute game-changer for draping heavy materials, pattern-making directly on the form, or any job that needs a really secure hold.
A fully pinnable surface transforms a dress form from a simple fitting model into a true design tool. It provides the stability and flexibility needed for advanced techniques like draping and flat pattern making directly on the form.
The choice really hinges on how you plan to use it. If you need a little more guidance, our guide on choosing an adjustable mannequin for sewing dives deeper into matching a form's features to your specific sewing needs.
To help you decide, here’s a quick breakdown of the most common materials and what they offer.
Comparing Adjustable Form Materials
This table offers a side-by-side look at the materials used in dress forms, helping you pinpoint the best option for your studio and your projects.
| Material Type | Best For | Pinning Capability | Durability | Typical Price Point |
|---|---|---|---|---|
| Fabric-Covered Plastic | General sewing, alterations, and basic fittings | Shallow, angled pinning into the fabric cover only | Good for everyday use, but plastic can become brittle over time | £ - ££ |
| Solid Polystyrene (Pinnable) | Professional draping, pattern making, and design | Fully pinnable; pins can be inserted anywhere | Very durable, resistant to crumbling, and long-lasting | ££ - £££ |
| Fibreglass | High-end design, draping, and professional display | Often padded and covered for pinning, but body is rigid | Extremely durable and holds its shape perfectly | £££ - ££££ |
| Paper-Mache | Traditional bespoke tailoring and couture work | Pinnable surface that moulds slightly to garments | Can be delicate but is prized for its classic feel | ££££+ |
Ultimately, investing in a form with the right material for your work will save you countless headaches and make the entire creative process much smoother.
Stands And Stability
Finally, don’t overlook the stand. A wobbly dress form is a nightmare to work with, so a solid base is non-negotiable for accurate, professional results.
- Tripod Bases: These are a classic for a reason. With three points of contact, they distribute weight evenly and offer fantastic stability for when the form is staying put.
- Wheeled Caster Bases: If you’re constantly moving your form around the studio, a base with wheels is a lifesaver. Just make sure you get one with locking casters to keep it steady when you're working.
The stand's material, whether it's classic wood or sleek metal, also adds to its durability and overall look, so you can pick one that works for your space and your style.
How to Evaluate Key Features Before You Buy
Choosing an adjustable dress form is a big step, so it’s worth taking the time to understand what really matters. Getting it right means you’ll have a tool that becomes a trusted partner in your work for years to come. It’s not just about picking one that looks the part; you need to match its features to the kind of work you do. A bit of careful thought now will be the difference between a form that ends up as a clothes horse and one that truly elevates your craft.
Think of it like buying any specialist piece of kit. A chef would never pick up a knife without feeling its weight and balance, and a dressmaker shouldn't invest in a form without a close look at its core functions. From how it adjusts to how steady it stands, every single detail counts. Let's break down exactly what you should be looking for.
Adjustability Range
The whole point of an adjustable form is, of course, that it can change size. But there’s more to the adjustability range than meets the eye. You need to look closely at the minimum and maximum measurements for the bust, waist, and hips.
Ideally, your own measurements (or your client's) should land somewhere in the middle of this range, not right at the very top or bottom. This gives you room to manoeuvre, whether you’re making clothes for someone a slightly different size or allowing for your own body's natural fluctuations.
If you find yourself stuck between two sizes, the golden rule is always to choose the smaller form. It’s far easier to pad out a form to build it up than it is to work with a model that’s too big at its smallest setting.
Pinnable Surfaces
The word "pinnable" can be a bit of a trap, so it’s really important to know what you’re getting. A lot of adjustable forms have a thin layer of fabric over a hard plastic shell. On these, you can only slide pins in at a shallow, diagonal angle. This is absolutely fine for simple tasks like marking a hem or tacking lightweight fabric in place.
However, a truly fully pinnable form is a different beast altogether. These are usually made from solid polystyrene, which lets you push pins straight into the body from any angle you like. For anyone serious about draping, pattern making, or handling heavy fabrics like wool or denim, this is non-negotiable. Being able to pin deeply and securely gives you so much more creative freedom. For costume designers, it's absolutely essential. In fact, within the UK costume market, adjustable polystyrene models have been shown to enable 40% faster prototyping.
The distinction between a partially and fully pinnable surface fundamentally changes how you can interact with the form. One is for marking and fitting, while the other is a true canvas for design and construction.
Stand and Base Stability
There’s nothing worse than a wobbly dress form. It’s not just frustrating; it makes precision work almost impossible. The stability of your form all comes down to its stand and base. You'll generally come across two main types:
- Tripod Stands: With three points of contact, these offer a wide, stable footprint. They are a classic for a reason, providing rock-solid support for when you're working in one spot.
- Caster (Wheeled) Bases: If you’re constantly moving your form around your workspace, a base with wheels is a godsend. Just make sure the casters have a locking mechanism so you can keep the form steady once you start working.
The material of the stand—be it wood or metal—also plays a part in its long-term durability. Don't overlook this feature; a solid base is the foundation for all your work.
Size Categories and Hem Markers
Finally, think about the kind of garments you'll be making. Adjustable dressmaker forms come in a variety of specialised shapes and sizes beyond the standard female figure. You can find models for:
- Petite figures
- Plus-size bodies
- Male forms
- Children and even babies
Choosing a form that’s already designed for your target demographic means the proportions will be right from the get-go. Many forms also come with a built-in hem marker, a simple but incredibly useful attachment that helps you mark a perfectly even hemline around a garment. It's a real time-saver. To get a better sense of what to look for, check out our guide on how to buy a dress form you’ll actually use.
Getting Your Measurements Just Right
An adjustable dress form right out of the box is just a starting point. It’s a bit like a blank canvas. Its real magic only comes to life when you shape it into a true body double, and that’s a process of careful measuring and clever padding. This isn't just a setup task; it's the foundation of every successful garment you'll make.
Think of it this way: spending time getting the form right from the start saves you countless hours of frustration and fitting issues down the line. It turns guesswork into precision, ensuring every dart and seam you create is based on a real-world replica.
First Things First: Nailing Your Body Measurements
Before you even think about turning a dial on the form, you need a solid set of measurements from the person you’re fitting. Accuracy is everything here. These numbers are the blueprint for your entire setup, so grab a flexible tape measure and a notepad.
For the best results, have the person wear form-fitting clothes or just their undergarments. Ask them to stand naturally—no slouching or puffing out their chest! The tape should be snug against the body, but not so tight that it digs in.
Your Core Measurements:
- Full Bust: Go around the fullest part of the chest, making sure the tape stays level and parallel to the floor all the way around.
- Waist: Find the natural waist—that’s the narrowest part of the torso, usually a smidge above the belly button.
- Hips: Measure around the widest point of the hips and bottom. Again, keep that tape perfectly level.
These three are your non-negotiables, but to really capture a person's shape, you’ll need to dig a little deeper.
The Details That Make the Difference: Secondary Measurements
It's the secondary measurements that capture the unique landscape of a person's body—the vertical proportions and specific curves that the dials alone can't replicate. Getting these right is what makes a garment hang beautifully instead of just… fitting.
A few crucial ones to add to your list:
- Back Waist Length: Measure from that prominent bone at the base of the neck straight down to the natural waistline. This one is absolutely critical for getting the length of a bodice right.
- Shoulder Width: Measure straight across the back, from the bony point of one shoulder to the other.
- Bust Apex: This is the distance from the base of the neck down to the fullest point of the bust.
It's in translating these secondary measurements that the real customisation begins. A form set to the main bust, waist, and hip numbers is a good start. But a form that also matches the back length and shoulder width truly starts to resemble a specific person's posture and frame.
Setting Up Your Form: From Numbers to Shape
With your measurements written down, it’s time to dial in your dress form. My advice? Work through it methodically, one measurement at a time, to keep things clear. Let's start with the big three.
- Adjust the Dials: Gently turn the dials for the bust, waist, and hips. Expand the form in small, even increments and keep checking the circumference with your tape measure until you hit your target number.
- Set the Height: Adjust the stand so the form's shoulders are at the same height as the person's. This little step makes a huge difference, letting you work at a realistic and comfortable height.
- Adjust Vertical Length: If your form has this feature (and the good ones do), adjust the back waist length to match your measurement. This is a game-changer for achieving a balanced fit through the torso.
The aim here is to create the basic "skeleton" of the body shape using the form's mechanics. Don't stress if it looks a bit blocky or generic at this stage. That's what padding is for. If you're new to all this, it can be helpful to learn more about how to use an adjustable dressmaking dummy to get a feel for the basics.
The Art of Strategic Padding
Let’s be honest: no one is shaped like a standard mannequin. We have curves, asymmetrical spots, and postures that no set of dials can perfectly mimic. This is where padding transforms your adjustable dressmaker form from a tool into a true bespoke instrument.
First, I always slip a snug old t-shirt or a purpose-made dress form cover over the form. This gives your padding something to cling to.
Next, start building up the shape using polyester batting, wadding, or specially designed foam pads. You'll likely need to add padding to common areas like:
- The curve of a stomach
- The fullness of the hips or a prominent bottom
- The shape of the shoulder blades, especially for a rounded upper back
- The precise curve and position of the bust
Layer the padding on gradually, pinning it or using a bit of masking tape to hold it in place. Step back and check your work against your measurement chart often. Once you're happy with the overall shape, pull a final fitted cover over everything. This last step smooths out all your padding, creating a unified, pinnable surface and turning a collection of bits and pieces into your perfect body double.
How Dress Forms Are Used Across Industries
Far from being confined to a quiet sewing room corner, adjustable dressmaker forms are the unsung heroes of countless creative and commercial industries. Their ability to precisely mimic the human body makes them an essential tool, turning a designer's abstract vision into a perfectly fitted, tangible product. From high fashion ateliers to the high street, their impact is everywhere.
Think of them not as static props, but as active partners in the creation process. They act as a patient stand-in, allowing for hours of draping, pinning, and tweaking that would be physically impossible on a live model. This incredible versatility is exactly why they’re so valued across so many different fields.
The Heart of Bespoke Tailoring
In the world of bespoke tailoring, a perfect fit isn't just a goal—it's the entire point. Here, an artisan treats an adjustable dress form as a direct extension of their client. They'll spend time meticulously setting the dials and padding out the contours to create a flawless body double, giving them the confidence to drape fabric, sculpt silhouettes, and make tiny adjustments.
This process is absolutely fundamental to getting that impeccable fit. It’s also about efficiency. In the UK's clothing manufacturing sector, for example, it's been found that 75% of UK dressmakers rely on adjustable models to slash their alteration times by a staggering 30-50%. It’s a clear testament to their role in a competitive market.
Driving Sales in Retail Merchandising
Walk into any high-end clothing boutique, and you'll immediately see the subtle influence of a well-staged dress form. In retail merchandising, these forms are much more than just display stands; they are strategic sales tools. When a garment is presented on a form adjusted to ideal proportions, it simply looks more appealing. It helps customers instantly visualise how the piece will fit and drape on their own body.
A perfectly steamed blouse on a form looks infinitely more inviting than one hanging limply on a rail. This elevated presentation has a direct impact on sales, making the clothing feel more desirable and of a higher quality. To dive deeper into this visual strategy, you can explore the role of a mannequin in shops.
This diagram breaks down the simple but crucial process of turning a generic form into a precise body double.
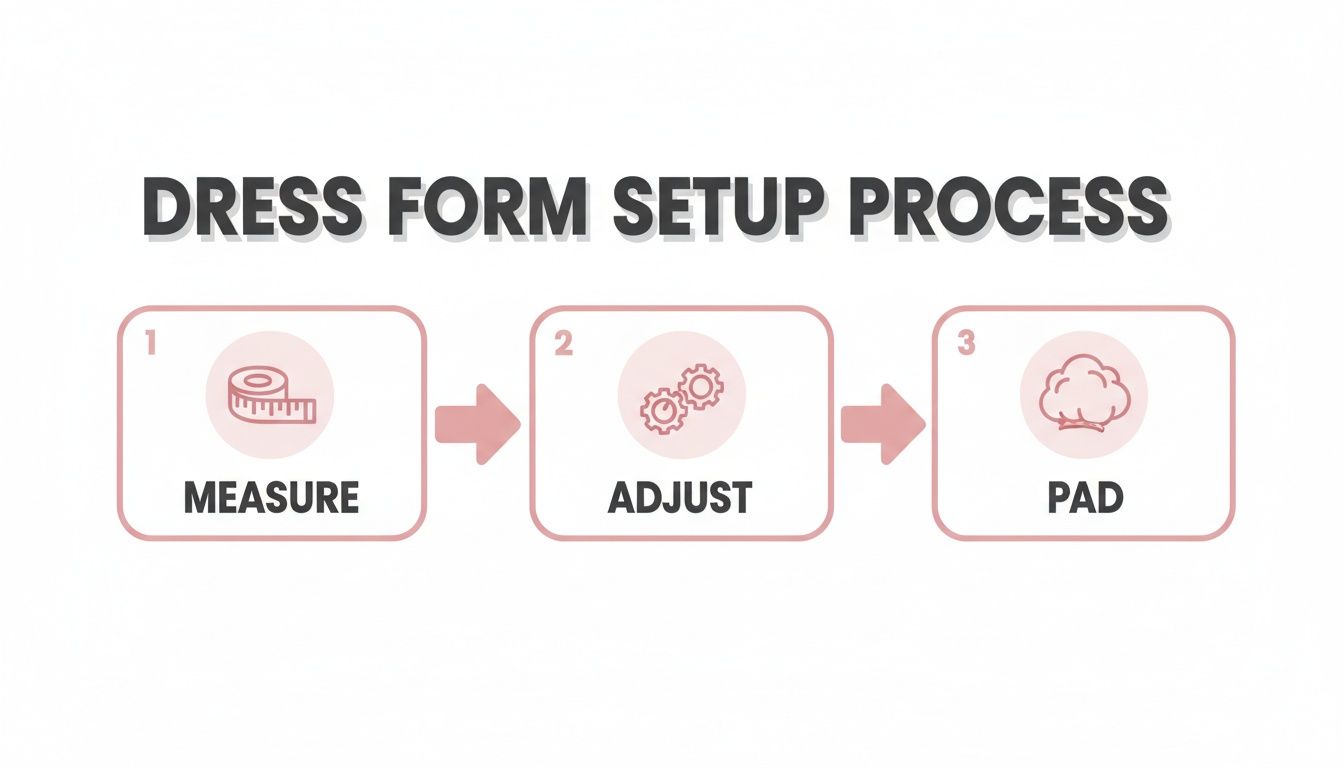
Each step here—measuring, adjusting, and padding—is vital. It’s all about building a solid foundation to ensure a garment fits exactly as you intend.
Crafting Worlds in Costume Design
For costume designers working in theatre and film, an adjustable dressmaker form is an indispensable ally. It’s the starting point for building complex, often fantastical, costumes from the ground up. The form becomes a stable base for sculpting intricate pieces, testing how heavy fabrics will move, and making sure the final costume is both comfortable and functional for the actor to wear.
In costume work, the dress form is more than a fitting tool; it's a structural armature. It supports the weight and complexity of historical or fantasy garments, allowing the designer to focus on artistry without worrying about practicality.
In specialised areas like historical costuming, forms are crucial for creating pieces with complicated internal frameworks. Take, for instance, the intricate structure of a corset. Building something like that requires a sturdy, accurate base to achieve historical accuracy and structural integrity.
Elevating the Craft for Home Sewing Enthusiasts
Finally, for the passionate home sewer, investing in a quality dress form often marks the moment a hobby evolves into a serious craft. It takes all the frustrating guesswork out of fitting on yourself and opens up a whole new world of professional techniques. All of a sudden, ambitious projects like tailored jackets or beautifully fitted dresses feel well within reach.
It truly empowers the home sewist to:
- Achieve a better fit: No more awkward twisting and turning to try and pin the back of a garment.
- Experiment with design: Drape fabric directly onto the form to come up with completely original patterns.
- Improve construction: Make sure every seam hangs straight and every dart is placed just right.
An adjustable form gives a hobbyist the same secret weapon as a professional, providing that reliable foundation needed to create garments that aren't just homemade, but beautifully handmade.
Got Questions About Your Dress Form? We've Got Answers
So you've chosen your dress form, you've got it set up, but now the real-world questions start popping up. It's completely normal. An adjustable dressmaker form is a serious investment in your craft, and getting comfortable with the day-to-day practicalities is how you'll truly get your money's worth.
Let's dive into some of the most common questions we hear from designers, tailors, and home sewers. Think of this as your go-to guide for those little "how do I...?" moments that can bring a project to a halt.
What’s the Best Way to Pad a Form for a Custom Fit?
Getting your form to be a true "body double" is where the real magic happens, and it's all about padding. The dials get you close, but padding is what captures a person's unique posture and curves. It’s more of an art than a science, but there's a reliable method.
First, pull a snug-fitting old t-shirt or some shapewear over the form. This gives your padding something to grip onto so it doesn't slide around. Then, start building up the shape using polyester batting or a dedicated foam padding kit. You're aiming to mimic the specific contours of the body, paying close attention to areas like:
- The natural curve of the stomach.
- The shape and projection of the hips and bottom.
- A rounded upper back or prominent shoulder blades.
As you add layers, secure them with pins or a bit of masking tape. It's a gradual process. Once you’re happy with the silhouette, pull a second t-shirt or a proper dress form cover over the whole thing. This final layer smooths out all the lumps and bumps, giving you a seamless, pinnable surface. The key is to keep checking your work against the real-life measurements as you go.
Can I Actually Use an Adjustable Form to Make Trousers?
You certainly can, but you need the right tool for the job. A standard dress form that stops at the hip just won't cut it for trousers. It gives you nowhere to check the fit, the drape of the fabric, or the inseam of the legs.
To tackle trousers properly, you'll want what's known as a bifurcated form—a model that includes legs. This gives you the full picture, letting you construct and alter trousers from the waistband right down to the hem. While some designers might rough out the waist and hip fit on a torso form before moving to a live model, anyone who makes trousers regularly knows that a full-leg or bifurcated form is the professional standard.
How Do I Choose the Right Size of Adjustable Form?
This is probably the most crucial decision you'll make, and it has absolutely nothing to do with ready-to-wear clothing sizes. Forget the "size 12" label on your jeans; we're talking about pure measurements.
The perfect form is one where your own measurements sit somewhere comfortably in the middle of its adjustment range. You don't want to be at the absolute smallest or largest setting. This gives you the wiggle room to work on projects for other people or to adjust for your own body's changes over time.
If your measurements fall right between two sizes, always, always go for the smaller one. It's a hundred times easier to add padding to build up a smaller form than it is to work with a form that's too big at its tightest setting.
This simple rule is your safety net. To get this right, you first need accurate measurements. For a step-by-step guide, check out our tutorial on how to take body measurements for clothes.
How Should I Look After My Dress Form?
With just a little care, your dress form will be your trusted assistant for years to come. Maintenance is straightforward. Give it a regular once-over with a lint roller or a soft, dry cloth to keep the fabric cover fresh and dust-free.
If you get a small mark on the cover, a gentle spot cleaner should do the trick, but be careful not to soak the fabric. One of the most important things you can do is keep the form out of direct sunlight. Over time, those UV rays will fade the fabric and can make any plastic parts brittle.
When you’re not using it, pop a dust cover or even just an old cotton sheet over it and store it somewhere cool and dry. If you ever need to pack it away for a while, just make sure to keep all the screws and fittings together in a labelled bag. You'll thank yourself later when it's time to put it back together.
At Display Guru, we offer a full range of professional-grade dress forms and display tools perfect for any creative or commercial project. Come and explore our collection to find the ideal partner for your studio or shop floor. https://www.displayguru.co.uk