



Visual Merchandising Training: Courses, Skills and Routes
You've rearranged the window, dressed the mannequin and moved the rail, but the display still feels unfinished. Or you're comparing courses and finding that an attractive portfolio, a recognised qualification and the ability to build a display during a busy trading day aren't quite the same thing.
Good visual merchandising training connects those pieces. You learn to explain a design choice, install it safely, make products accessible and judge the result. The right route depends on what you need to do next, whether that's improving a craft stall, joining a fashion retailer or taking responsibility for a store's presentation.
Qualification Levels and Entry Requirements Compared
| Qualification | Level | Typical entry requirement | Main focus |
|---|---|---|---|
| Level 2 Certificate in Fashion Retail | Level 2 | At least 2 GCSEs at grades 9 to 3 | Display foundations and fashion retail basics |
| Level 3 Diploma in Retail Skills (Visual Merchandising) | Level 3 | Commonly 4 or 5 GCSEs at grades 9 to 4 | Installation, colour, space planning and garment presentation |
| Level 4 Diploma in Merchandising for Fashion Retail | Level 4 | 1 or 2 A levels, a Level 3 diploma or relevant experience | Range planning and commercial merchandising |
| Level 4 Diploma in Visual Merchandising | Level 4 | 1 or 2 A levels, a Level 3 diploma or relevant experience | Branding, commercial analysis and performance evaluation |
The qualification levels and typical entry requirements above follow Careerpilot's visual merchandiser career guidance; read the entry column first, then compare the practical focus.
Start with your existing qualifications or experience, rather than choosing the highest-sounding course. The focus column is a syllabus-checking guide, not a promise that every provider teaches identical content.
What progression should look like
At foundation level, you need to understand the relationship between products, fixtures and customers. Look for exercises in grouping merchandise, presenting garments neatly and recognising why a display feels crowded or difficult to read.
A more developed practical course should ask you to turn an idea into an installation. That means measuring a space, working with colour, selecting suitable forms and making decisions when the available stock doesn't match your sketch.
At higher levels, ask whether you'll learn to justify those decisions commercially. Can you interpret a brand brief, compare display options and explain what you'd measure after installation? For fashion merchandising, check how much attention the course gives to range planning versus physical presentation. These are related disciplines, but they aren't interchangeable.
Read beyond the qualification title
Don't assume an advanced title guarantees useful digital teaching. Look for named activities involving digital floor plans, graphic layouts, spreadsheets and results analysis, rather than a vague reference to technology.
Ask to see an assignment brief and the assessment criteria. A task that requires a measured layout, installation evidence and an evaluation tells you more than a gallery of polished final photographs.
Practical rule: Match your starting point to the entry requirement, then match your intended job to the assessed work.
Entry rules and course availability can change between providers. Confirm the current requirements, qualification title and assessment arrangements with the college or training provider before enrolling.
The Skills a Visual Merchandiser Actually Needs
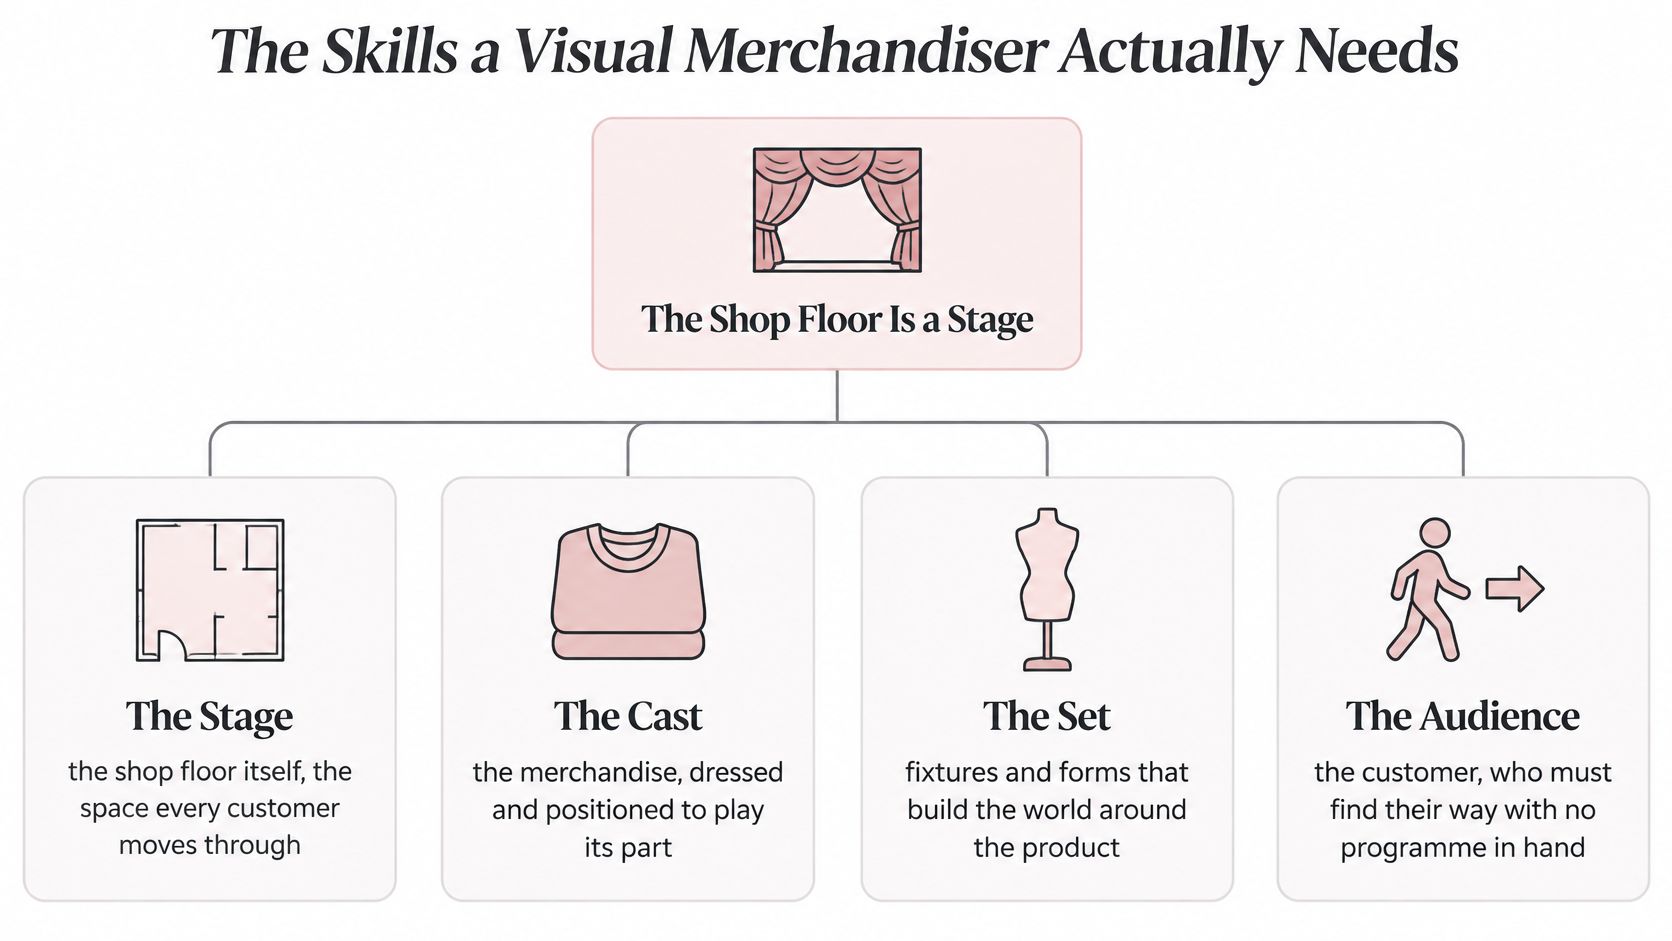
The shop floor is a stage: merchandise is the cast, fixtures and forms are the set, and the customer is an audience who must find their way without a programme. Unlike a theatre audience, though, customers move through the scene, touch the products and take parts of it away.
Say you're presenting a jacket with coordinating tops and accessories. The work begins before you dress the mannequin, because you need to decide what customers should notice, where they'll approach and how they'll reach the stock.
From first sight to product handling
- Space planning and sightlines: Stand at the entrance and along the main aisle. Check whether customers can see the focal product without a rail or sign cutting across it.
- Colour and composition: Group related tones and distribute visual weight. A dense block of dark garments can dominate a small accessory display unless you adjust the balance.
- Product hierarchy: Give the jacket a clear focal position, with supporting products close enough to make the outfit understandable. Eye-level emphasis is useful, but it isn't a universal height for every customer.
- Mannequin and body-form dressing: Smooth seams, align fastenings and shape garments without distortion. Use pins only on suitable surfaces, keeping points concealed and away from customer handling areas.
Keeping the display workable
Safe installation includes choosing stable bases, checking fixings and planning how to move rails and dump bins. Replenishment matters too: if customers remove the featured size, staff need a clear replacement arrangement rather than an empty focal point.
Brand consistency means another colleague can recreate the intended presentation from your instructions. Accessibility determines whether customers can use it, while post-installation evaluation tests whether the arrangement achieved its purpose.
For a clearer sense of how these responsibilities fit a junior role, use our guide to working as a visual merchandising assistant. Tailors, fashion students and costume teams also use garment shaping, proportion and presentation skills, even when their working surface is a fitting form rather than a shop window.
If you're moving from general retail work, the StoryCV guide to retail transferable skills can help you describe relevant experience. Bring examples of organisation, customer observation and problem-solving, then identify which technical skills you still need to demonstrate.
Training Formats and Which Route Suits You
UK visual merchandising training sits within a structured vocational pathway, not just informal learning beside an experienced colleague. The National Careers Service identifies college routes and relevant apprenticeships, including the Level 2 Retailer Intermediate Apprenticeship, Level 4 Retail Manager Higher Apprenticeship and Level 4 Buying and Merchandising Assistant Higher Apprenticeship.
These apprenticeships aren't interchangeable. Check the actual job duties and training content, because a retail management role won't necessarily provide the same display practice as a merchandising-focused position.
Compare the work, not just the delivery method
| Format | Best for | How it is delivered | Evidence it produces |
|---|---|---|---|
| College courses at the levels outlined above | Learners starting from school or college | Classroom teaching with assessed projects | Recognised certificate or diploma on successful completion |
| Apprenticeships in the retail, management and merchandising routes named above | Employees learning while working | Workplace practice plus structured study | Assessed workplace competence |
| In-house coaching and supervised installs | Store teams working to a clear brief | Demonstrations followed by observed installs | Sign-off checklist and supervisor feedback |
| Short online or one-day courses | Shop owners, home makers and hobbyists | Self-paced modules or workshops | Often a certificate of attendance; check whether practical work is assessed |
The government's learner-data service apprenticeship record listed the Diploma in Retail Skills (Visual Merchandising), reference 60040622, within a Level 3 Advanced Apprenticeship framework for 2022–23. That is a historical listing, not confirmation that the same framework is available for new enrolments today.
Choose for your situation
A school leaver should prioritise a college course with accessible entry requirements and genuine workshop time. Ask whether you'll install displays yourself or mainly produce mood boards and written projects.
An existing shop-floor employee should discuss an apprenticeship or scheduled in-house coaching with their manager. The important commitment is protected practice time and someone qualified to assess the work, not permission to help with seasonal changes.
A shop owner or home-based maker may need a focused short course rather than a lengthy qualification. Pair it with regular practical work and outside feedback, especially if the course only checks your understanding through quizzes.
A career changer with retail experience can investigate advanced study, but should check for gaps in digital planning, graphics and commercial analysis. Our explanation of what fashion merchandising involves helps distinguish range-related responsibilities from display execution.
For career context, Careerpilot, citing the Office for National Statistics, gives the UK average visual merchandiser salary in 2024 as £37,430. That's an occupational average, not a starting salary or a guarantee attached to a certificate.
Before buying equipment for practice, you can chat with our online operators, use Ask An Expert or browse our Questions & Answers. You can also text us on 01942 386640 or email sales@displayguru.co.uk.
Your next step is a one-page learning plan naming your chosen route, a weekly practical task and the evidence you'll retain.
How to Run Practical, Assessed Installation Training
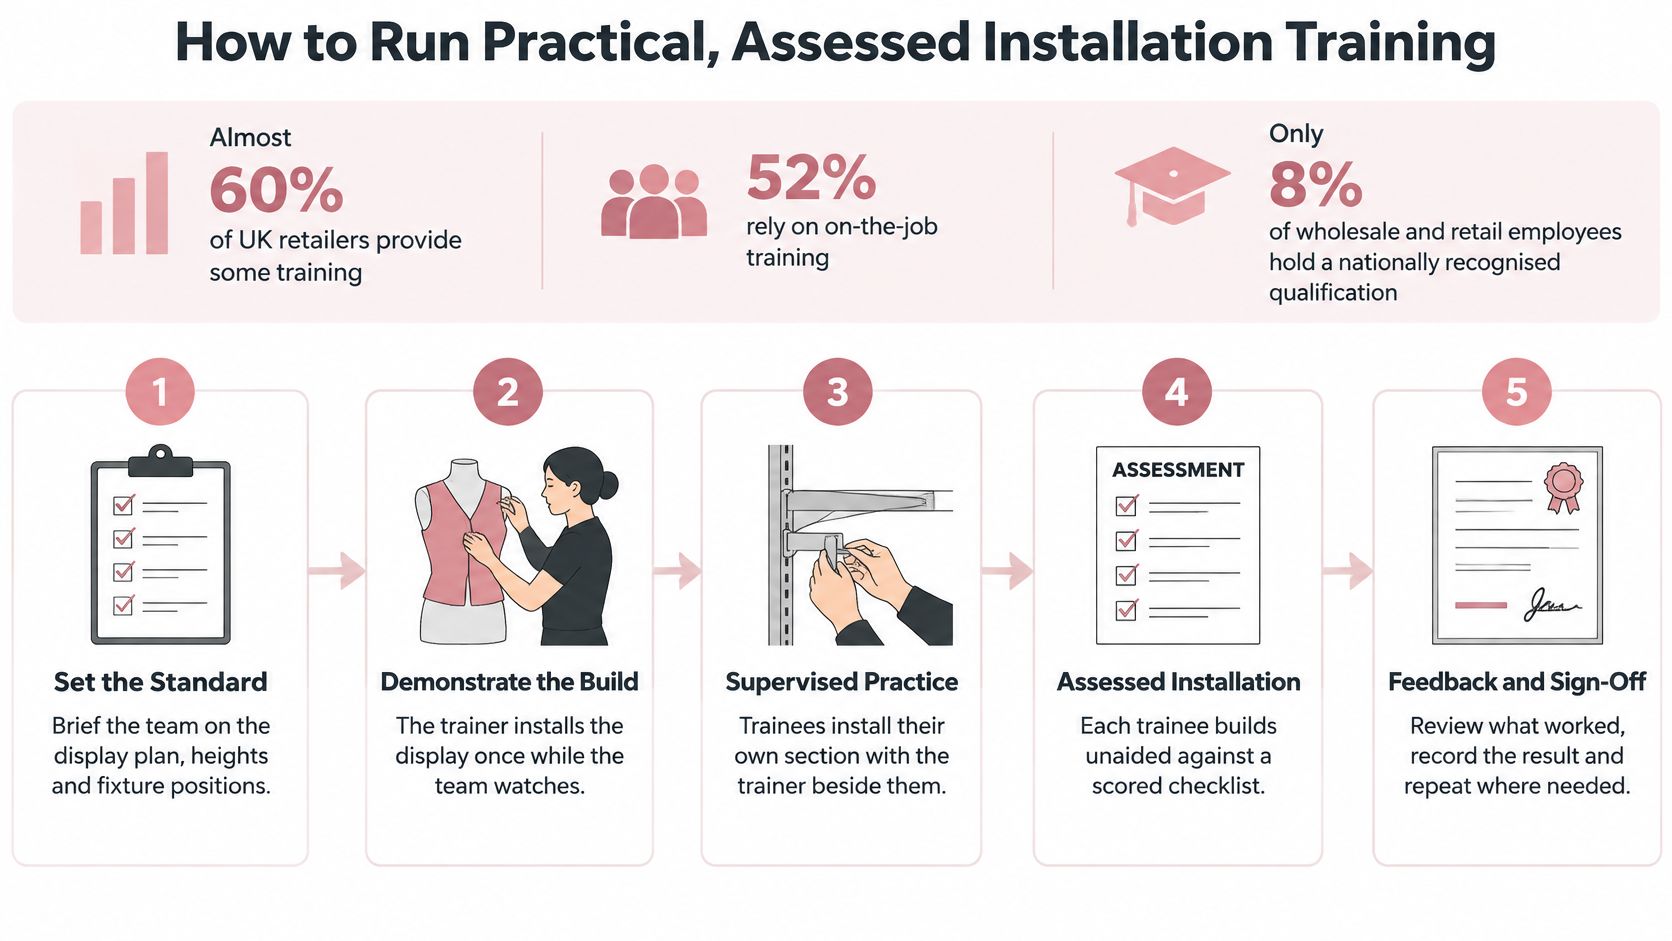
A trainee can help with a floor move and still be unable to repeat it under pressure. The government's retail skills evidence report recorded that almost 60% of UK retailers provided some training, while 52% used on-the-job training, yet only 8% of wholesale and retail employees had been trained to a nationally recognised qualification.
Those figures describe how often training happened, not whether anyone could prove competence. An assessed installation separates helping with a display from being able to plan, build, check and explain one independently.
Make the standard observable
Use the same sequence each time. A familiar order helps the trainee concentrate on judgement and gives different assessors the same evidence to score.
- Issue a written visual brief. Include the campaign purpose, product priorities, planogram or layout drawing, and required finish. Explain unfamiliar terms rather than assuming the trainee can interpret a reference photograph.
- Demonstrate the setup. Build the display while explaining why each position and fixing method was chosen. Treat this demonstration as supported rehearsal and keep it separate from the scored attempt.
- Ask the trainee to plan. Have them mark sightlines, measure the footprint and select correctly scaled equipment. Ask what they would change if a specified fixture or garment wasn't available.
- Observe garment presentation and safe handling. Watch the trainee dress a mannequin or body form, secure merchandise and check stability. Correct unsafe actions immediately, then record where further practice is needed.
- Test customer access. Check the approach route, product reach and sign visibility in the completed arrangement. An installation that matches the photograph still fails if customers cannot use the space.
- Record the customer's view. Photograph the set from the approach, beside the fixture and at product level. A close-up can show finish quality, but it cannot reveal whether a neighbouring rail blocks the display.
- Score against a competency checklist. Use clear outcomes such as competent, needs prompting and not yet competent. Give written feedback that names the action to improve rather than saying the display needs more impact.
- Complete a quality-control review. Compare the finished work with the brief and have the trainee explain any departures. Agree what can be signed off and what must be repeated.
A useful evidence record stays simple: the brief, the photographs, the score and the correction agreed with the learner.
Assess decisions as well as appearance
Build one controlled complication into the assessment, such as missing stock, a substituted garment or an awkward fixture position. Ask the trainee to explain each choice aloud so the assessor can distinguish personal taste from commercial reasoning. VideoLearningAI's scenario-based training explained offers useful context for creating exercises where learners must make decisions rather than copy instructions.
A display completed with constant prompting isn't evidence of independent installation competence.
Keep what visual merchandising in retail is meant to achieve in view while scoring the work. Repeating the assessment cycle with different products and constraints turns an experienced colleague's unspoken judgement into a standard the whole team can apply.
Accessibility Skills Most Courses Skip
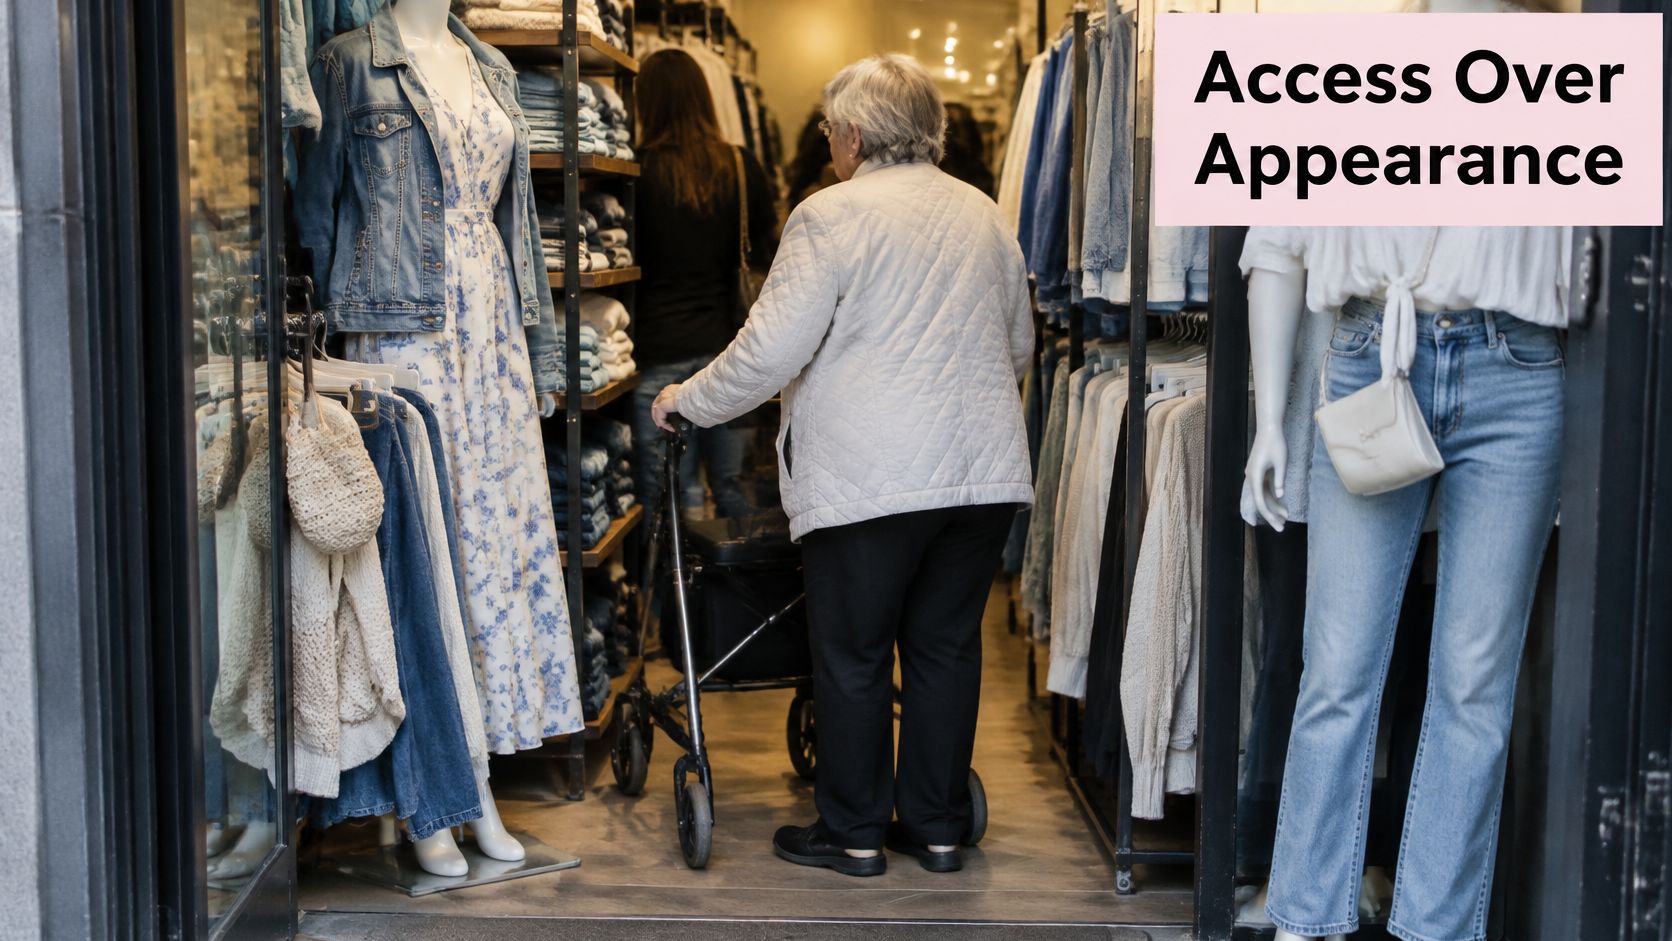
A striking display can make shopping harder when height, density or theatrical positioning takes priority over usability. A customer may admire the arrangement yet still be unable to identify a price, reach a garment or pass the mannequin base.
In the Research Institute for Disabled Consumers' Re-imagining Retail report, 58% of disabled shoppers reported that inaccessible shelving, displays or product labelling prevented them from identifying or retrieving products, and 33% experienced in-store wayfinding barriers, such as unclear signage or inconsistent layouts.
Teach an audit, not an assumption
A useful training exercise follows a customer task, such as finding a top, checking its size and retrieving it. Learners should inspect the whole route rather than assessing each fixture in isolation.
- Sightlines and reach: Can customers see the relevant products and retrieve them from comfortable positions? Don't treat a standing learner's reach as a universal standard.
- Clear routes: Check aisle space, projecting hooks and the full footprint of mannequin stands. Include the space needed to approach and turn, not just squeeze past.
- Readable information: Examine typography, colour contrast, glare and label placement. Decorative lettering shouldn't make prices or directions harder to understand.
- Consistent navigation: Keep category names and sign positions predictable. A promotional change shouldn't remove the cues customers use to find essential areas.
Test with customers
Invite disabled customers to try the task, with their agreement, and ask what made it easier or harder. Don't simulate someone else's disability and treat that as equivalent evidence.
Record whether participants can find, identify and retrieve products independently, where they request help and which obstruction causes difficulty. Change the layout and test again, without treating one person's preferences as representative of everyone.
Assessment standard: An attractive display that customers can't use still needs revision.
Representation deserves attention too, but it doesn't replace physical access. Our guide to plus-size mannequins and inclusive store displays addresses a related presentation consideration.
For shop owners, begin with movable obstacles: reposition rails, rotate forms and move dump bins away from turning points. Preserve an inviting display while keeping the customer's route and usable product access intact.
Turning Qualification Hours Into a Learning Plan
Consider a home-based maker preparing a craft-fair display and a junior employee hoping to secure a visual merchandising role in a fashion boutique. They might practise with similar garments, but they need different learning plans.
The maker needs a portable arrangement that makes the products understandable and easy to handle. The junior also needs evidence that they can interpret someone else's brief, work within constraints and respond to assessment.
Separate teaching time from independent work
The government's learning-aim record for a visual merchandising diploma lists approximately 251 guided learning hours and 530 hours of total qualification time. These describe the qualification's learning allocation, not a promise that every learner completes it on an identical timetable.
Guided learning covers teaching and supervised learning activity. Total qualification time also allows for independent preparation, study and assessment work, so don't budget only for attendance.
The maker could combine a short course with a weekly refresh of a tabletop display. The junior should arrange supervised installations and gradually take responsibility for planning, building and reviewing a complete brief.
Give each week a finished output
Choose a manageable task, such as presenting a garment with coordinating accessories. Change the learning emphasis each week: layout first, then garment finish, then instructions another colleague could follow.
Keep a portfolio containing:
- The brief: State the customer, product priority and intended outcome.
- Planning evidence: Retain sketches, measurements and the materials list.
- Installation photographs: Include before-and-after views taken from comparable positions.
- A results note: Explain what customers found easier, what sold and what you would change.
Don't claim a display caused extra sales if prices, stock availability or promotions changed at the same time. Record those conditions and distinguish observation from certainty.
Use our guide to industry best practices as a prompt when reviewing your own working methods. Ask your assessor to identify the weakest part of the evidence, then make that the focus of the next practical task.
A polished photograph shows the finish. A documented decision, tested on the floor and evaluated, shows how you work.
At Display Guru, we supply body forms, mannequins, garment rails and dump bins for practising garment presentation and building retail displays. Visit Display Guru to explore equipment for your next training brief, and use our pre-purchase support to check suitability before ordering.