


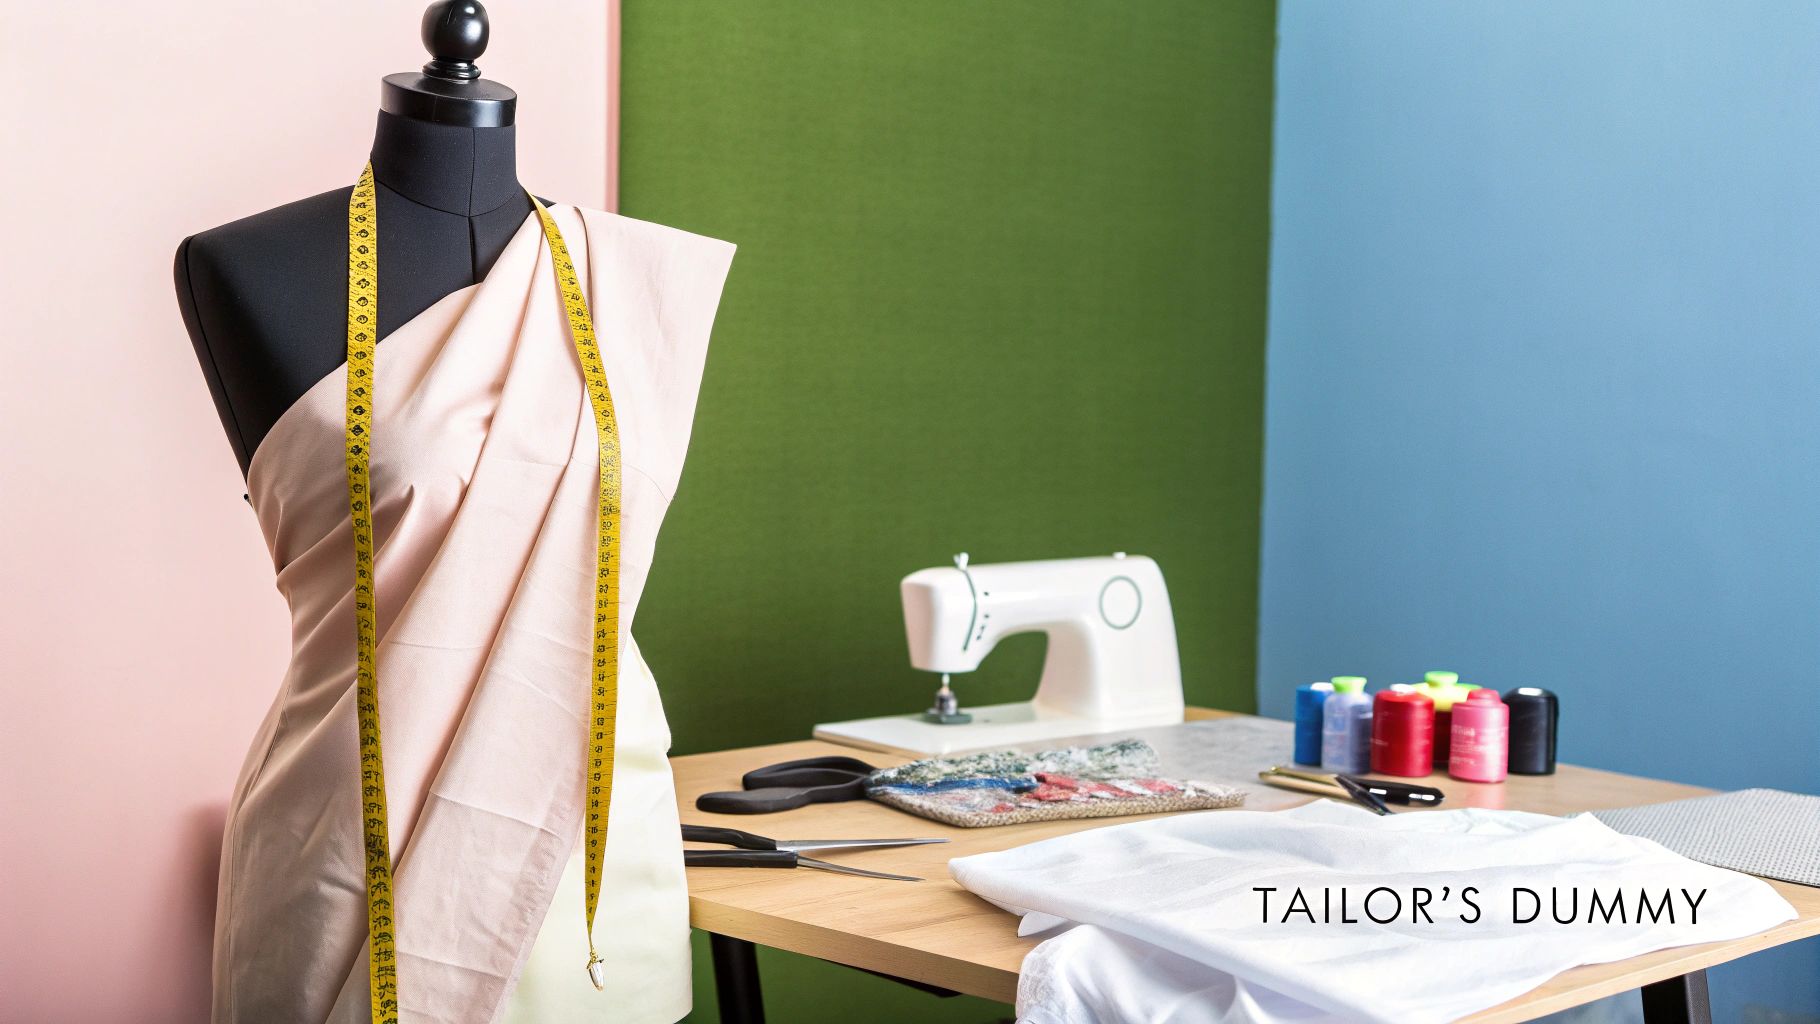
A Guide to Tailors Adjustable Dummies
A tailor's adjustable dummy is like having a silent, perfectly patient fitting partner right in your sewing room. It's an indispensable tool that helps you achieve that flawless, made-to-measure fit. These are incredibly versatile forms that you can dial to match specific body measurements, making them essential for draping new patterns, checking the fit of a work-in-progress, and hemming skirts with professional accuracy. Essentially, this one piece of kit replaces the need for a whole collection of fixed-size mannequins, saving you precious space and time.
Why an Adjustable Dummy Is a Sewer's Best Friend
Forget thinking of an adjustable dummy as just a display piece. It's a dynamic tool that genuinely changes how you make clothes. For anyone serious about sewing, from passionate hobbyists to professional dressmakers, it's what bridges the gap between a flat paper pattern and a real, three-dimensional body.
Being able to replicate a person's unique proportions transforms fitting sessions, which are often the trickiest part of the whole process. Instead of needing a live model to stand still for hours, you have a static stand-in ready to go whenever you are, 24/7.
Achieve Professional Precision at Home
The single greatest benefit is the sheer precision it introduces to your work. A properly adjusted dummy lets you see exactly how a fabric will drape and hang on a specific figure. This is absolutely critical for spotting and fixing fit issues—things like pulling across the bust, gaping at the neckline, or an uneven hemline—long before you cut into your final, expensive fabric.
- Slash Fitting Times: You'll dramatically cut down on the number of fittings you need with an actual person.
- Work Asymmetrically: It's easy to adjust one side of the dummy to be slightly different from the other, which is perfect for mirroring the natural asymmetries we all have.
- Improve Draping: You can create and tweak patterns directly on the form itself, a technique used by top designers to get their creations just right.
The demand for this kind of precision has never been higher. With the recent boom in home sewing, partly driven by a move towards more sustainable fashion, the need for professional-level tools has grown. In fact, recent trade data shows that UK imports of tailoring mannequins, including tailors adjustable dummies, shot up by around 15% each year between 2020 and 2023 as more people took up tailoring. You can read more about what’s behind this trend and the full benefits in our detailed article on adjustable dress forms for sewing.
An adjustable dress form is the ultimate problem-solver. It gives you the confidence to tackle tricky fitting challenges, like a full bust adjustment or a sway back, with an accuracy that's almost impossible to get when trying to fit a garment on yourself.
A Versatile Partner for Every Project
At the end of the day, the real value of an adjustable dummy is its incredible versatility. It's a single investment that adapts to countless projects and different bodies.
Whether you're crafting a bespoke jacket for a client with very specific measurements or just altering a dress for yourself, the dummy becomes your perfect body double. By getting to grips with what different models offer, you can choose one that will be a reliable, trusted partner in your sewing journey for years to come.
Choosing the Right Adjustable Dummy for Your Projects
Finding the perfect tailor's dummy among the dozens of options out there can feel like a mission. But it doesn't have to be. The best way to cut through the noise is to think about what you'll actually be making.
Are you crafting one-off pieces for a specific person, perhaps even yourself? Or are you designing a collection that needs to cater to a range of standard sizes? Your answer is the key to everything. For bespoke work, you'll want a dummy with a generous adjustment range that's easy to pad out for those unique body shapes. If you're running a business, durability and a solid match to standard UK sizing might be your top priorities.
Dial Systems and Sections: What Really Matters
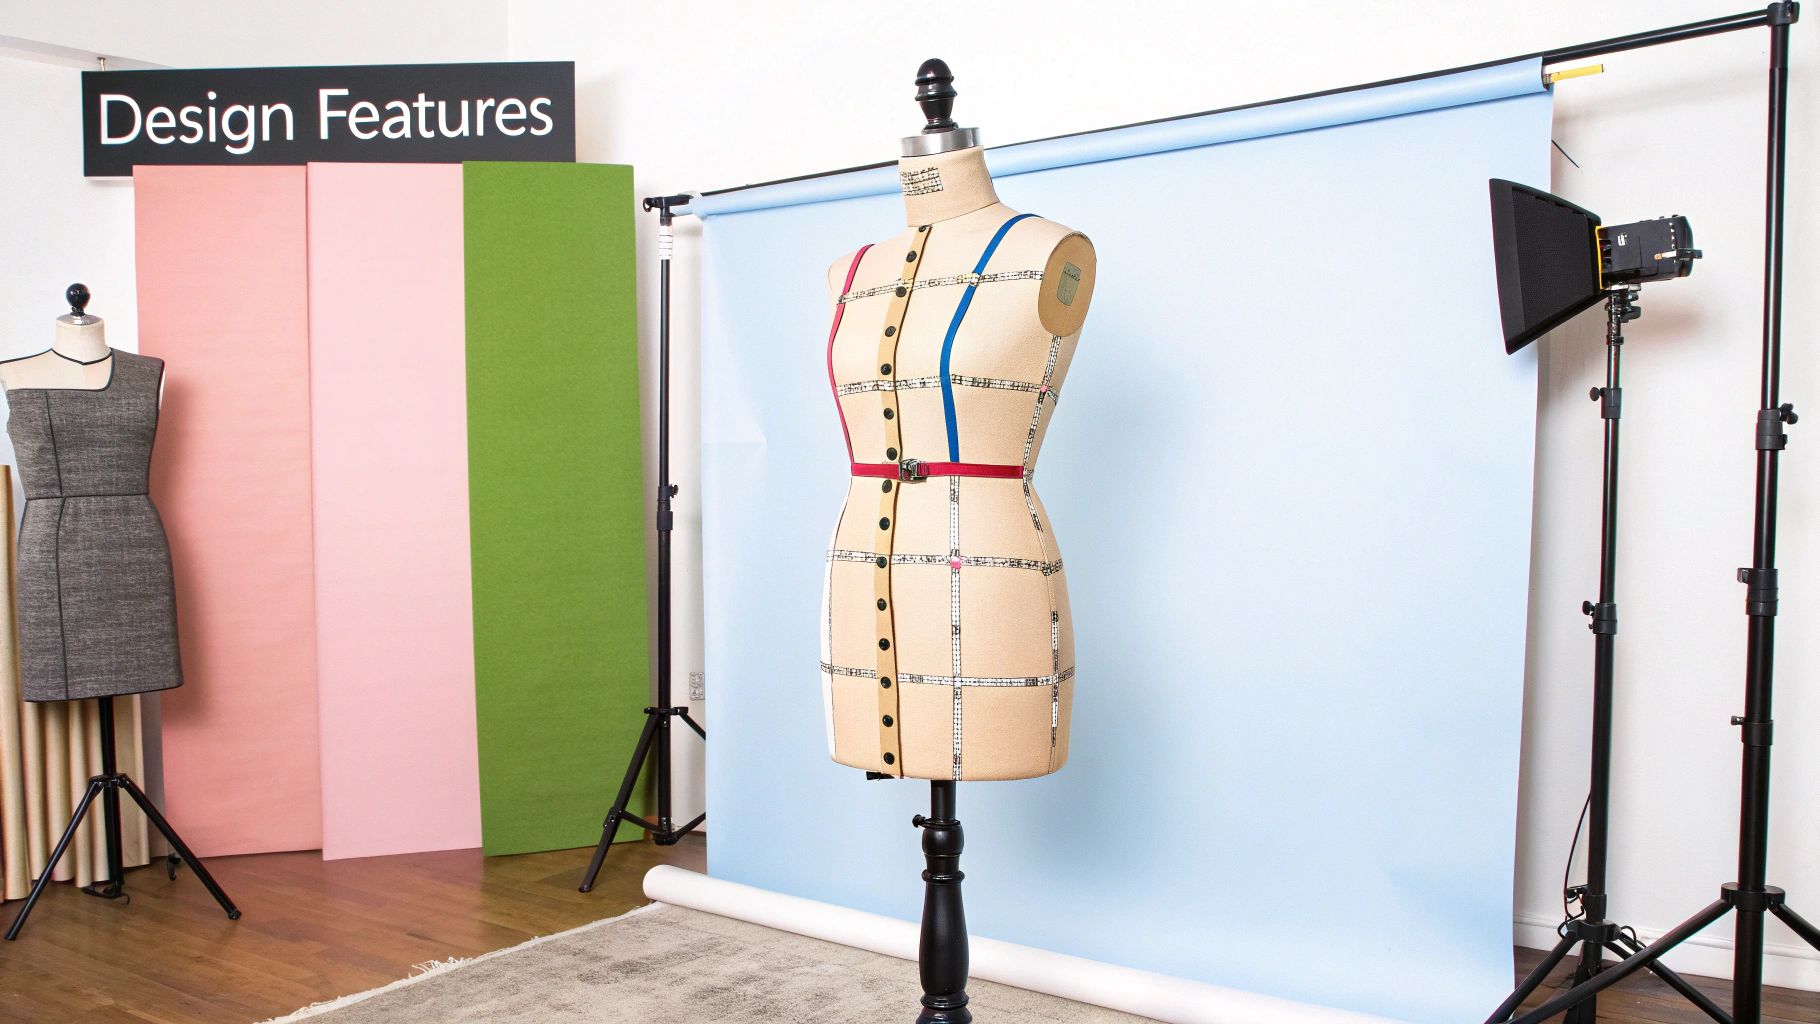
The magic of an adjustable dummy lies in its dials and wheels. These are what let you expand and contract the torso to get that perfect fit. The number of sections the body is divided into is a crucial detail here.
An 8-part body is a fantastic all-rounder, giving you control over the bust, waist, and hips. But if you’re doing more complex fitting—especially for trousers—or need to perfect the curve of the lower back and hips, a 12-part body gives you a level of precision that an 8-part model just can't match. It creates a much more realistic, anatomical silhouette.
Here’s a piece of advice I always give: always buy a dummy that's a little smaller than your target measurements. You can easily add padding to build up the bust or fill out the hips, but you can never shrink a dummy below its minimum size.
These systems have come a long way. Take a popular UK model like the Adjustoform Tailormaid. It typically has eight sections, but they're controlled by nine adjusting wheels and two dials. This gives you an incredible bust range of 84cm to 116cm and a waist from 66cm to 101cm, which covers UK sizes 6 to 22. That kind of flexibility means one dummy can work for multiple projects or clients, which is a huge plus for any professional.
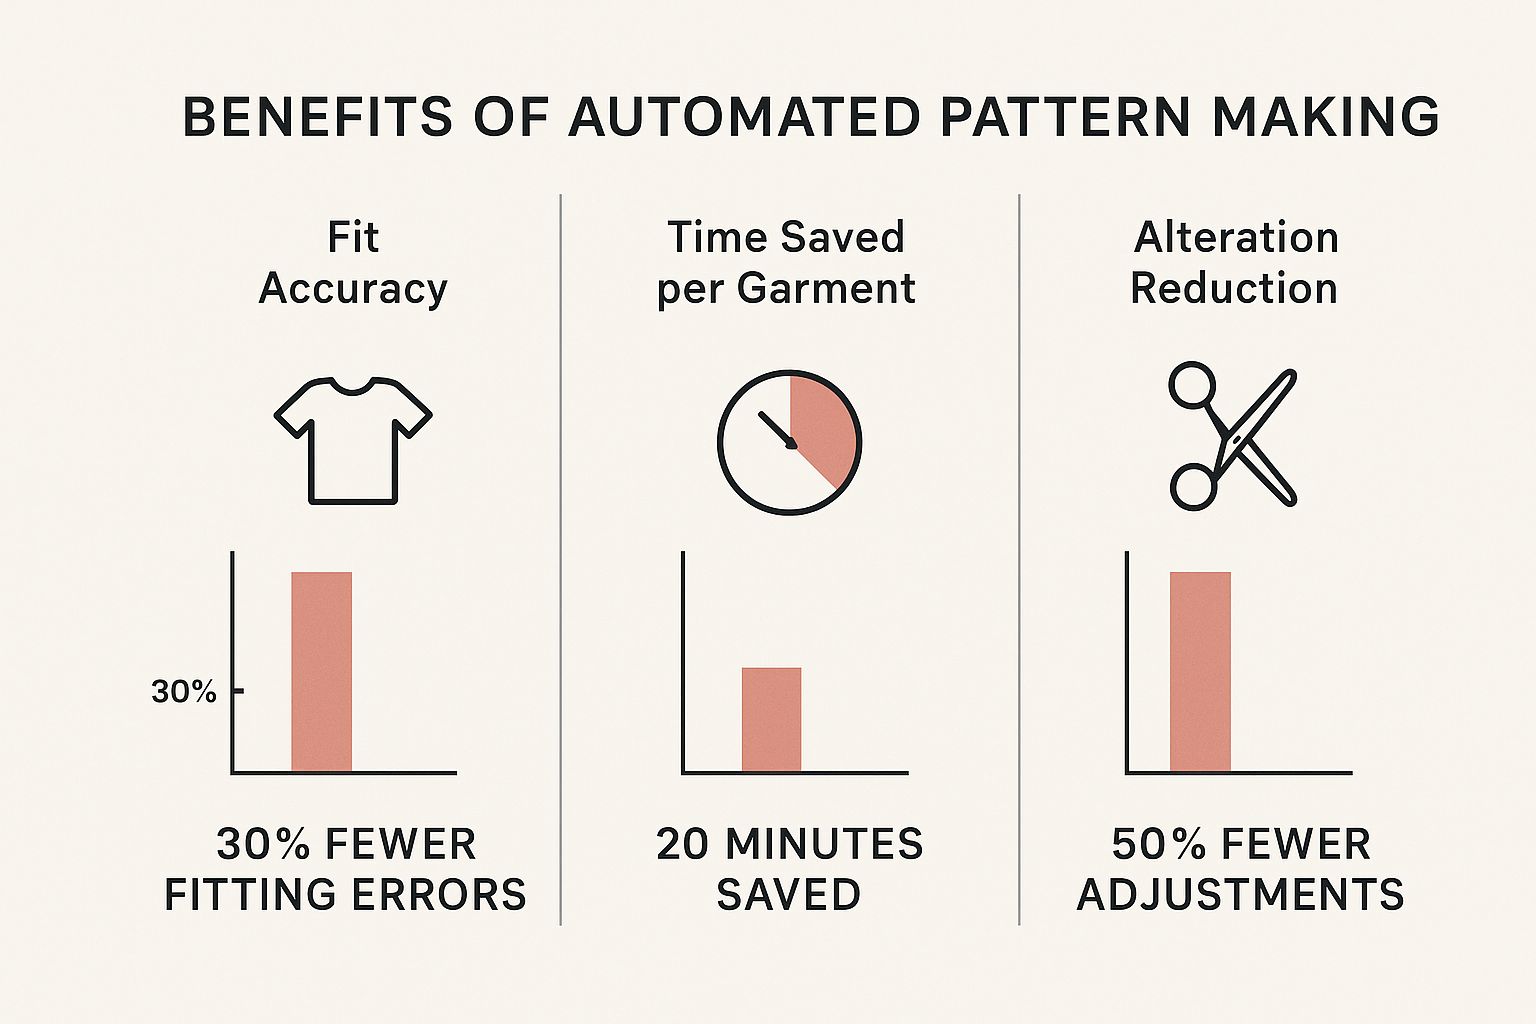
As you can see, investing in the right tool from the start pays dividends. The precision you get from a well-adjusted dummy means fewer fitting mistakes, less time spent pinning and re-pinning, and a sharp reduction in those frustrating post-sewing alterations.
To help narrow down your options, here’s a quick breakdown of what to look for when comparing models.
Adjustable Dummy Feature Comparison
| Feature | What to Look For | Why It Matters |
|---|---|---|
| Number of Parts | 8-part for general use, 12-part for detailed fitting (especially trousers and complex curves). | More parts offer a more nuanced, anatomical shape and greater control over specific body areas. |
| Adjustment Mechanism | Smooth, easy-to-turn dials or key-operated mechanisms. Look for at least 12 adjustment points. | A good mechanism allows for precise, small changes and ensures the settings stay locked in place while you work. |
| Measurement Range | A range that starts slightly smaller than your smallest size and extends beyond your largest. | You can always add padding to increase size, but you can't make a dummy smaller than its minimum setting. |
| Stand & Base | A sturdy, stable base (often a 4 or 5-legged stand) with locking castors. | A wobbly dummy is a nightmare to work with. A stable base prevents tipping and makes it easy to move around your workspace. |
| Body Covering | A pinnable foam-backed nylon cover. | This lets you pin fabric directly to the dummy, which is essential for draping and fitting. |
| Special Features | Look for extras like a hem marker, adjustable back-waist length, or a split waist for trouser fitting. | These features provide extra precision and make specific tasks, like setting an even hem, much faster and easier. |
Ultimately, choosing the right features comes down to the kind of work you do.
Matching Measurement Ranges to Your Needs
Before you even think about adding a dummy to your basket, grab your tape measure. Compare the dummy's full range—bust, waist, hips, and that all-important back-waist length—against the measurements you use most. A dummy is only a good investment if it can accurately mirror the bodies you're sewing for.
Think about these real-world scenarios:
- Bridalwear: You’ll need a dummy with a longer torso and very fine hip adjustments to properly fit the structured bodices and flowing skirts of wedding gowns.
- Menswear: Look for a male form with broader, adjustable shoulders and a straighter waist-to-hip ratio. This is non-negotiable for getting the fit of a jacket right.
- Children's Clothes: Don't try to make an adult dummy work. A dedicated child-sized dummy is the only way to get the proportions correct, as you simply can't scale an adult form down accurately.
At the end of the day, the best tailors adjustable dummies are the ones that feel like a natural extension of your hands. By focusing on the dial system, number of sections, and measurement range, you're not just buying a tool—you're investing in a reliable partner that will help bring your designs to life for years to come.
Assembling Your Dummy for Perfect Stability
There’s a real sense of excitement when you unbox a new tailor's dummy. It’s a blank canvas full of potential. But before you can get to the creative part, a solid and stable assembly is non-negotiable. If you rush this bit, you’ll end up with a wobbly, unreliable tool that’s more of a hindrance than a help.
Think of it like laying the foundations for a house. If they aren’t level and secure, everything you build on top will be askew. A properly assembled dummy is the dependable base you need for accurate draping, fitting, and hemming.
Securing the Base and Stand
First things first: the stand. This is the absolute cornerstone of your dummy's stability. Most tailors adjustable dummies come with either a tripod or a heavier pedestal-style base. If you have a tripod, make sure each leg is pulled out as far as it can go and locked securely. A single leg that isn’t fully extended is almost always the culprit behind a wobbly form.
Once the legs are sorted, it’s time to attach the main pole. Pay close attention to this connection point. You want to tighten the securing screw so it's good and firm, but don't go overboard and strip the thread. Give the pole a little wiggle – it shouldn't move at all where it meets the base.
A mistake I see all the time is people assembling their dummy on a plush carpet. The soft surface can easily mask a slight wobble. Do yourself a favour and build it on a hard, level floor like wood or tile to get a true feel for its stability from the get-go.
If you’re running into trouble here, our guide on choosing the right dress form stand has some great insights into what makes a base truly reliable for professional work. It's a useful read for troubleshooting common stability issues right from the start.
Attaching the Torso and Final Checks
With a rock-solid stand ready, you can now slide the dummy's torso onto the pole. Most forms have a receiver at the bottom for this. Make sure you push the pole all the way in; this creates a secure fit and a low centre of gravity, which adds to the overall stability.
Next, give the height adjustment a quick test. Loosen the collar, move the form up and down a few times, and then lock it at a comfortable working height. The lock needs to hold the torso firmly without any downward creep. If you notice it slipping, the collar probably just needs a simple tightening adjustment.
The last piece of the puzzle is the neck finial or cap. While it's mainly for looks, popping it on top completes the form and stops your fabric from snagging. Now for one final stability check before you get to work:
- Is it straight? Stand back and look at the dummy head-on. It should be perfectly vertical, not leaning to one side.
- Does it wobble? Give a gentle push on one of the shoulders. The dummy should feel solid, with very little sway coming from the base.
- Does it turn smoothly? If your model rotates, check that the movement is fluid, without any catching or looseness.
Taking a few extra minutes to follow these steps ensures your dummy isn't just put together, but properly set up for stability. It'll transform it into the dependable partner every dressmaker needs.
Creating a Perfect Body Double with Your Dummy
With your dummy assembled and standing ready, the real work—and the real magic—begins. This is where you'll coax the generic form into a precise replica of a human body, creating a true stand-in for perfect garment fitting. Getting this right comes down to a careful, methodical process that all starts with good measurements.
The bedrock of any great fit is an accurate set of numbers. If you're creating the dummy for yourself, it's always best to have a friend help you. For a client, take the time to measure with professional care. You’ll need the full bust, under-bust, waist, high hip, and full hip.
Don't stop there. For a truly accurate silhouette, you absolutely need the back-waist length (from the nape of the neck to the natural waist) and the shoulder width. If you need a quick refresher on the proper techniques, our easy guide on how to take body measurements for clothes will get you started on the right foot.
Systematically Transferring Measurements
Now you've got your list of measurements, but resist the temptation to just start spinning all the dials at once. A haphazard approach will lead to a lopsided, inaccurate form. The key is to be systematic.
Always begin with the largest circumferences: the bust, waist, and hips. These adjustments have the biggest impact on the dummy's overall shape. Turn the corresponding dials slowly, moving back and forth between the left and right sides. A few turns on one side, then a few on the other—this expands the form evenly and keeps everything symmetrical.
Keep your tape measure handy and check your progress constantly. Don't just trust the markings on the dials; they are often just general guides. Your tape measure is the ultimate source of truth here.
Professional Tip: When adjusting, I always recommend stopping just a centimetre or two short of the final measurement. The human body has a natural 'give' that a rigid dummy doesn't, and this little bit of wiggle room accounts for that, as well as the ease needed in a garment. A dummy expanded to its absolute maximum can result in clothes that feel uncomfortably tight.
Once the main circumferences are locked in, it's time to fine-tune the details.
- Back-Waist Length: Adjust the torso length to match your measurement. This is a crucial step that makes all the difference in preventing pulling or bagging in the bodice.
- Neck Circumference: If your model has a neck dial, adjust it now. It’s essential for getting collars and high necklines to sit correctly.
- Shoulder Width: Some of the more advanced tailors adjustable dummies have shoulder settings. If yours does, set it now. If not, don't worry—padding is your next stop.
Replicating Unique Contours with Padding
Let's be realistic: no adjustable dummy can perfectly mimic every unique curve and contour of a real person straight out of the box. That’s where padding comes in. This is how you elevate your dummy from a generic form to a true, lifelike double.
I find it easiest to start by putting a close-fitting t-shirt or a custom dummy cover over the form first. This gives you a smooth, pinnable surface and holds all your padding securely in place.
You can use all sorts of materials for padding, and I've used them all over the years:
- Quilt Batting: Fantastic for creating soft, general volume over the bust, hips, or stomach.
- Shoulder Pads: The obvious choice for building up square, prominent, or uneven shoulders.
- Foam Pads: These are great for more defined shaping, like creating a fuller bust (you can even put a padded bra on the dummy!) or adding more prominence to the hips.
Your goal here is to replicate the individual's specific shape, including any asymmetries or postural traits. If someone has a rounded upper back, you can add layers of batting between the shoulder blades. For a prominent stomach or a sway back, build up padding on the lower front torso or in the small of the back. Pin everything securely, stand back to check the silhouette from every angle, and keep measuring. Before long, you'll have a perfect stand-in ready for draping and fitting.
Keeping Your Adjustable Dummy in Top Condition
Your adjustable dummy is one of the most important tools in your sewing room, a real investment in your craft. And like any quality tool, it works best when you look after it. A little bit of routine care will keep it in prime condition for years to come, ensuring it remains a reliable partner for accurate measurements and countless creative projects.
Think of maintenance as a way to prevent common headaches like stiff dials or dust buildup. With just a small amount of attention, you can protect its longevity and keep everything functioning smoothly.
Routine Cleaning and Dust Prevention
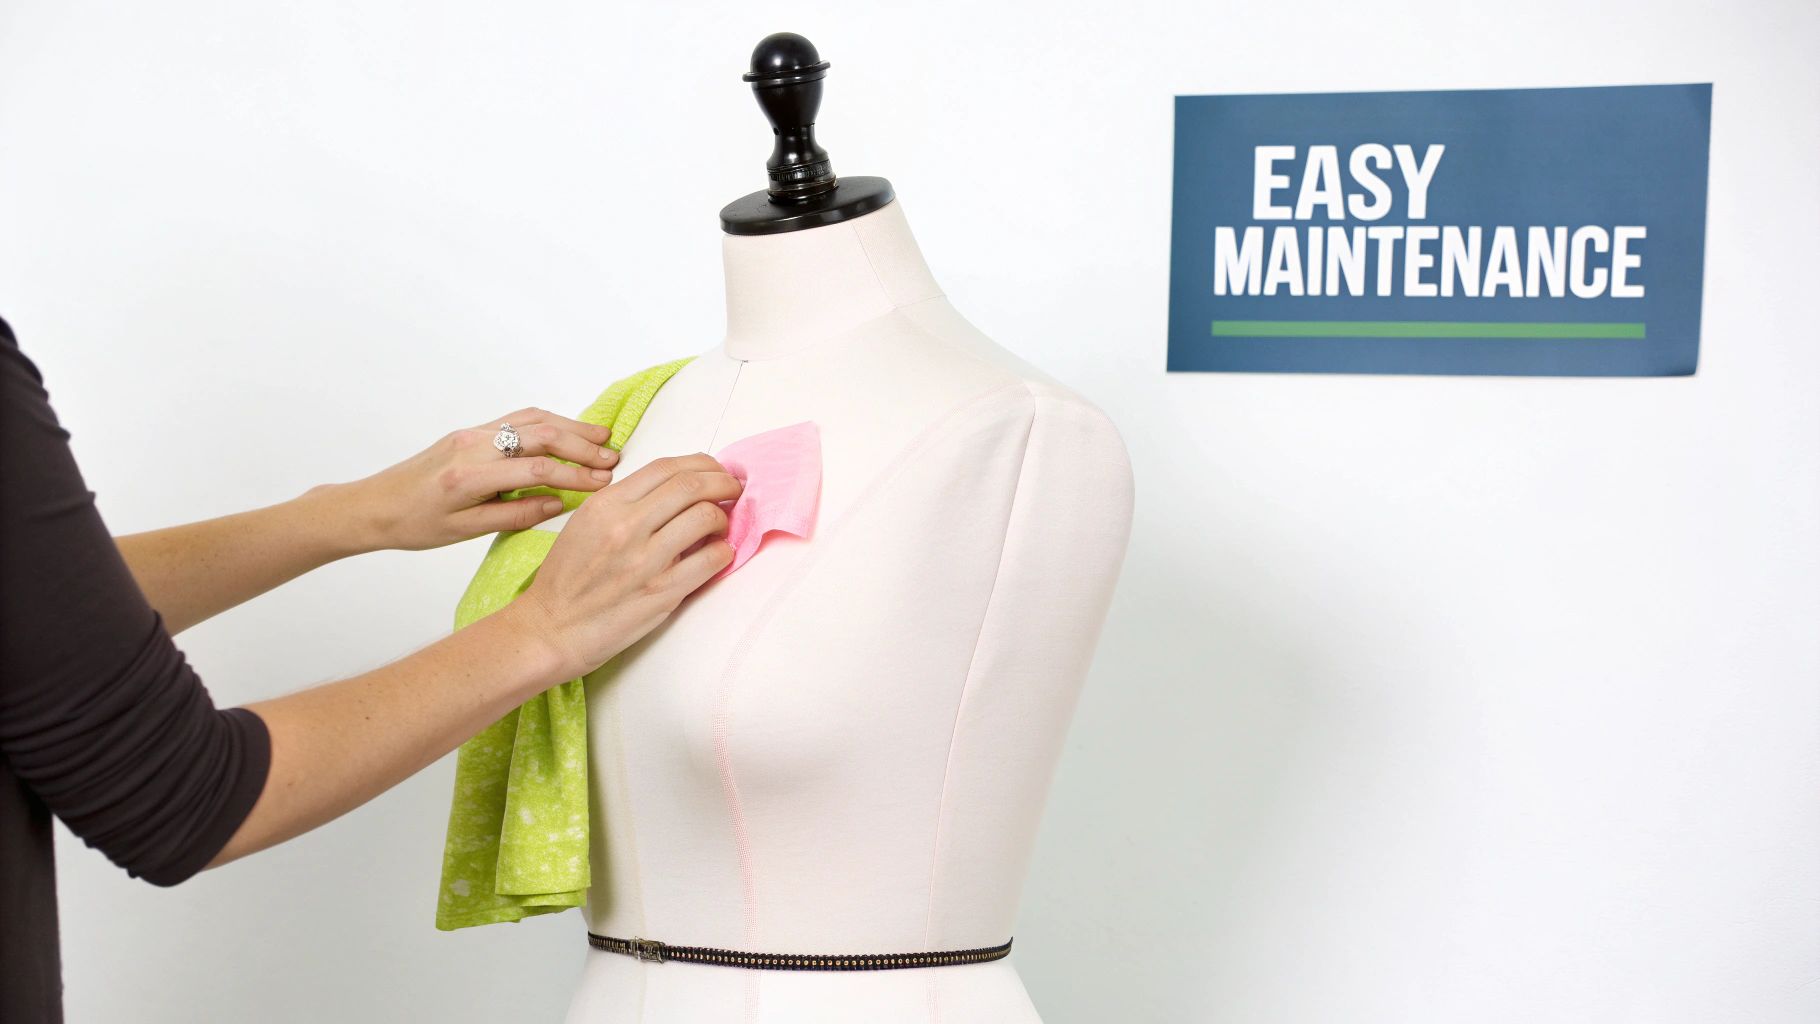
It’s no surprise that the fabric cover on your dummy becomes a magnet for dust, lint, and stray threads. The easiest way to keep it clean is with a quick pass of a lint roller or the brush attachment on your vacuum. This simple method is great for lifting surface debris without being harsh on the fabric.
If you spot any minor marks or smudges, a slightly damp cloth with a tiny bit of mild soap usually does the trick. I always recommend testing on a hidden spot first, like the underside. Be careful not to get the fabric too wet, as moisture could seep in and damage the materials underneath.
One of the best habits you can get into is simply draping a light sheet or a dedicated cover over your dummy when you're not using it. This one small action is your best defence against dust and can even prevent the colour from fading in the sun.
When it comes to storage, find a spot that’s dry and at a stable temperature. It’s best to avoid damp cellars or hot attics where humidity and temperature swings could harm both the fabric and the internal mechanisms.
Troubleshooting Common Mechanical Issues
After a while, you might find the adjustment dials on your tailors adjustable dummies feel a bit tight or make a slight squeaking sound. This is almost always down to a bit of dust and fluff getting into the works.
A quick blast with a can of compressed air around the dials and internal gears can often solve the problem by dislodging any trapped debris. If a dial is still stubbornly stiff, a tiny drop of silicone-based lubricant can work wonders, but always check the manufacturer’s guide first to make sure it’s recommended for your model.
Here are a couple of other common culprits and their fixes:
- Wobbly Stand: If the base feels unstable, take a moment to check that all the screws on the stand and where the pole connects are tight. They have a tendency to work themselves loose over time with regular use.
- Stiff Height Adjustment: The collar that locks the height can sometimes get stuck. A good clean to get rid of any dust and a light spritz of silicone spray on the pole itself will usually get it moving smoothly again.
Catching these little issues early means your dummy will always be ready and reliable when you need it. If you're looking to understand the nuances of different models, reading up on the best dressmaking dummy adjustable options can provide some really helpful perspective.
Common Questions About Adjustable Dummies
Even after you've chosen your dress form, a few practical questions almost always pop up as you start working with it. Think of it like breaking in a new pair of shoes – there's a small adjustment period. Let's walk through some of the most common queries I hear from dressmakers, from beginners to old hands, to help you sidestep those initial frustrations.
Getting these little details right early on makes a world of difference to your workflow and, ultimately, the fit of your garments.
Getting the Sizing and Posture Just Right
The biggest hurdle for many is simply choosing the right size to begin with, especially if your own measurements don't neatly fit into one of the manufacturer's boxes. This single decision impacts every project you'll use the dummy for, so it’s worth getting it spot on.
My measurements are between two sizes. Which one should I get?
Go for the smaller one. Every time. It’s a foundational rule in dressmaking that you can always add, but you can't take away. You can easily pad a smaller dummy up to match your exact measurements, but you can do absolutely nothing about a dummy that’s too large even on its smallest setting.
A bit of quilt batting, some foam shoulder pads, or even an old padded bra can be used to build up the bust, hips, or waist. This flexibility is crucial because it means you can replicate any body shape, not just a standard one. A dummy that’s too big is a creative dead end.
Expert Tip: Think of your dress form as a skeleton. Your job is to add the "flesh" with padding to make it a true body double. You can't start with a skeleton that's bigger than the person you're fitting for.
How do I get my dummy to match my posture?
Most dress forms stand unnaturally straight, but very few real bodies do. This is where strategic padding becomes your best friend. For someone with a rounded upper back, for instance, you'd layer batting across the shoulder blades. To mimic a sway back, you’d add a pad to the small of the back, just above the hips.
Once you’ve got the shape right, pull a close-fitting t-shirt or a custom-made cover over the whole thing. This gives you a smooth, unified surface to work on and is essential for making sure a garment will hang correctly on an actual person.
Day-to-Day Use and Troubleshooting
Once your dummy is set up and padded, you'll start using it for the real work: pinning, draping, and fitting. This is when a new set of practical questions tends to arise about the form's physical quirks.
Can I stick pins directly into the dummy?
Yes, but there's a technique to it. Most adjustable dummies have a foam-backed nylon covering that's made for pinning. The trick is to slide the pins in at an angle, almost parallel to the surface, rather than plunging them straight in. If you go straight down, you’ll hit the hard plastic shell underneath, which is a fast way to bend your good pins.
If you plan on doing a lot of intricate draping that requires deep, secure pinning, I'd strongly recommend making a thick, padded cover. It'll give you a much more forgiving surface and will protect both your pins and the dummy itself in the long run.
My fabric keeps catching in the gaps between the panels. What can I do?
Ah, the classic problem, especially when the dummy is dialled out to its larger settings. This is a really common annoyance, but the fix is incredibly simple: get a stretch cover. You can buy one ready-made, or just as easily, make one yourself from a large, stretchy t-shirt or a length of jersey fabric.
A snug cover creates a smooth, uninterrupted surface, completely eliminating those frustrating gaps. Your fabric will glide right over it, preventing snags and giving you a much more accurate idea of how the garment will truly hang.
At Display Guru, we stock a wide range of professional-quality tailor's dummies and display forms perfect for both serious dressmakers and passionate hobbyists. Our forms are built for the precision and durability your projects demand. Take a look at our collection at https://www.displayguru.co.uk and find the right fit for your studio.