




Dressmaking Cutting Tables: How to Choose and Set One Up
82% of UK garment-manufacturing firms employed fewer than 10 people in 2013, according to the University of Leicester report A New Industry on a Skewed Playing Field. A professional cutting area doesn't have to resemble a factory cutting room. It has to let a maker prepare and cut fabric accurately within the space they have.
For dressmaking cutting tables, bigger isn't automatically better. A broad top that blocks a bedroom doorway or forces you to stretch across fabric is a poor purchase. Choose the table around your body, your regular garments and the route each project takes through cutting, sewing, fitting and repair.
What a Dressmaking Cutting Table Does and Which Type Suits You
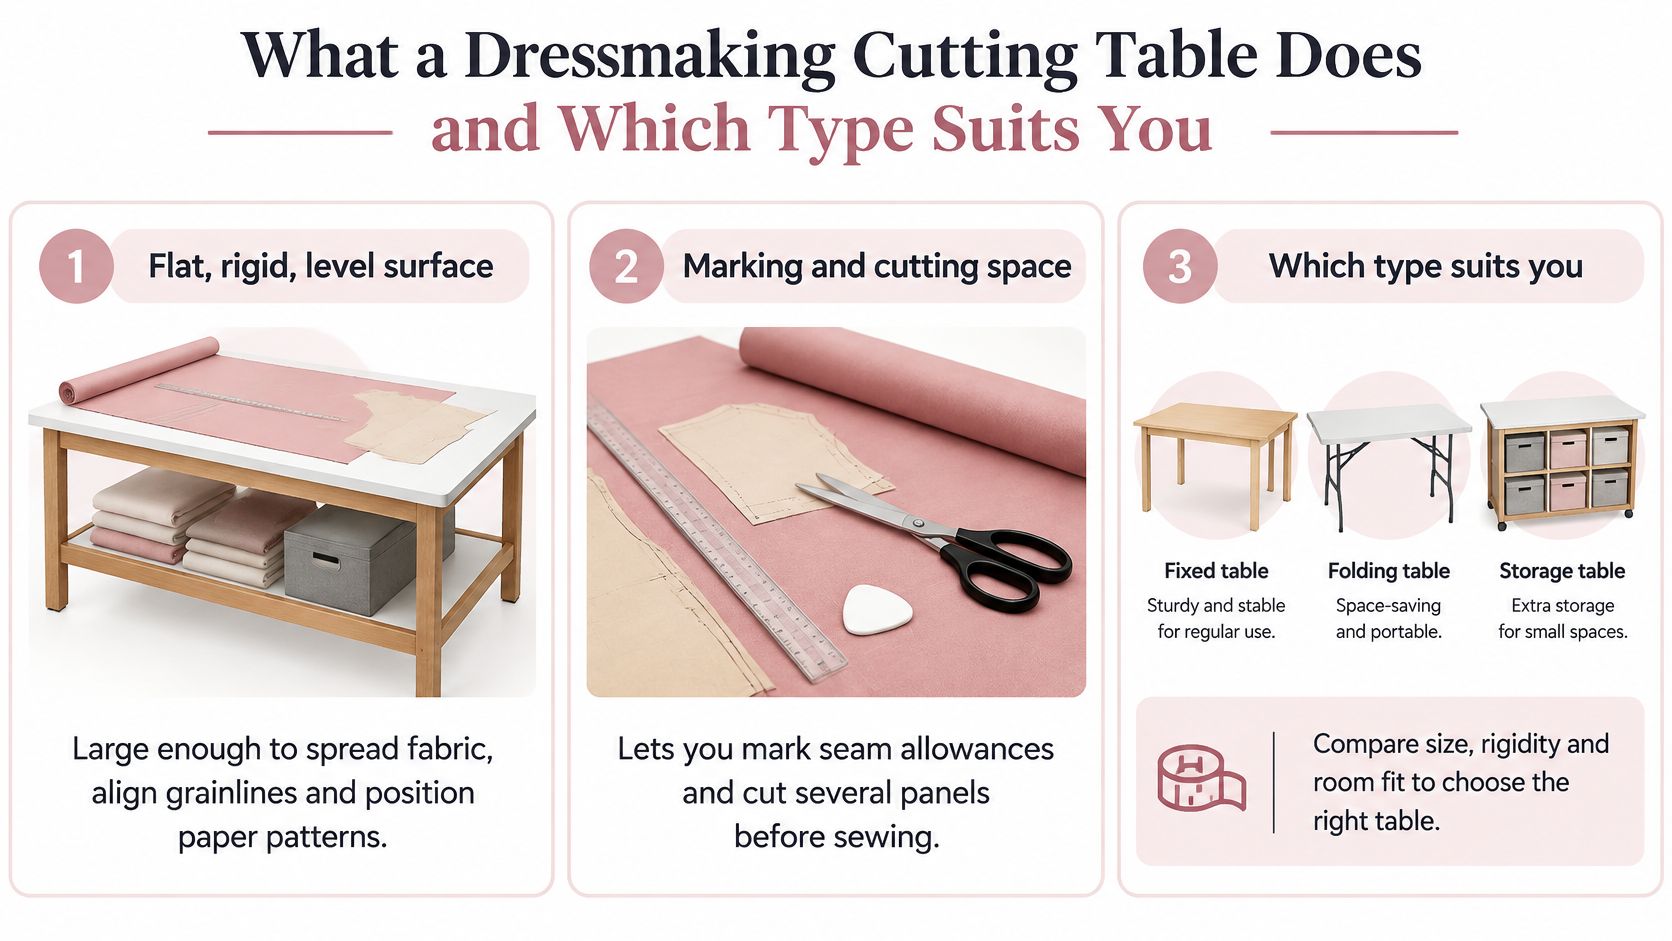
A dressmaking cutting table is a flat, rigid, level surface for spreading fabric, aligning grainlines, placing paper patterns, marking seam allowances and cutting panels before sewing. A bespoke tailor, costume department and kitchen-table sewist need those same functions, but not the same furniture.
Cutting table types compared
| Table type | Best for | Typical height | Footprint | Main trade-off |
|---|---|---|---|---|
| Fixed-height worktable | Dedicated studio with one regular cutter | Set to the regular operator's working height | Permanent floor area | Cannot readily accommodate different users |
| Height-adjustable table | Shared studios and several operators | Adjustable to suit the operator and task | Needs clearance for moving components | Greater cost, weight and mechanical complexity |
| Folding or drop-leaf table | Small home studio or shared room | Set by the frame when opened | Reduced when folded against a wall | Hinges and supports can be less rigid under heavy lays |
| Wall-mounted or hinged board | Very small room with compact rotary work | Fixed by mounting position | Minimal floor footprint when closed | Restricted depth and access, often unsuitable for full pattern layouts |
Choose for the work you actually cut
A fixed table makes sense when the room stays a workroom and the same person cuts most garments. An adjustable model earns its place when operators share the station or cutting tasks require different working positions.
Folding tables solve a different problem: giving the room back after sewing. Inspect the support beneath each leaf, not just the size of the open top. A wall-mounted board is a more restricted option, best reserved for supported rotary cutting rather than ambitious garment layouts.
Professional production still needs dependable cutting infrastructure. UK clothing production was valued at £158 million in June 2024, according to FashionCapital's manufacturing analysis. That doesn't mean a home maker needs industrial furniture, only that the essential preparation tasks deserve a proper surface.
Buying rule: Choose for the largest fabric lay you cut regularly, not the largest project you might attempt one day.
Before comparing models, write down:
- Available space: Include the area needed to open leaves and move around the working edges.
- Users: Decide whether the table serves a regular cutter or a changing group.
- Cutting method: Identify whether you'll use shears, a rotary cutter or powered equipment.
Setting the Right Height for Accurate, Comfortable Cutting
Surface height by cutting task
| Cutting task | Surface position | Reason |
|---|---|---|
| Pattern cutting with shears | Generally 50-100 mm below elbow height | Reduces shoulder elevation and awkward wrist positioning |
| Heavy or multi-layer lay needing downward pressure | Generally 200-250 mm below elbow height | Allows downward force without holding the shoulders raised |
| Mixed pattern and multi-layer work | Height-adjustable surface set per task | Accommodates changes in task and operator |
These offsets follow Health and Safety Executive guidance on working posture, which places manipulative work involving force and precision generally 50-100 mm below elbow height, and work requiring substantial downward force 200-250 mm below elbow height; it also recommends keeping frequently used items within approximately 450 mm of the operator's front edge.
Measure the person, not the furniture category
A product described as a standing cutting table isn't necessarily the right height for you. Your footwear, posture and cutting method matter more than the label.
Measure while standing naturally in the shoes you normally work in. Relax your shoulders, bend your elbow and have someone measure from the floor to elbow level. Subtract the relevant task offset, then account for anything that sits above the tabletop, including a thick cutting mat.
Test the result with scrap fabric and your usual shears. You should be able to guide the blades without lifting your shoulder, bending sideways or dragging your wrist across the edge.
- Shoulders: Keep them relaxed rather than raised towards your ears.
- Wrists: Look for a comfortable line through the forearm and hand.
- Trunk: Move your feet along the table instead of folding forwards over the layout.
- Pressure: If cutting requires excessive force, check blade condition and the thickness of the lay before changing furniture.
Make adjustment useful
For mixed work, check the table's actual adjustment range against the people using it. A mechanism that moves easily but never reaches your working position isn't useful.
Test stability at your intended height, especially near the upper end of travel. Raised legs can expose looseness that isn't noticeable when the table is lowered.
Keep shears, weights, chalk and the rulers you're actively using near the front working zone. Longer tools can live elsewhere between tasks. A table covered in equipment may be physically large but leave very little usable cutting space.
Choosing Size, Build Quality and Budget
Size the table from your work before choosing its place in the room. Lay out a familiar pattern on your usual fabric width and measure the area it occupies. Include room for pattern weights, marking and the movement of the shears, rather than measuring only the paper pieces.
A long coat front and a small repair panel make different demands. If full-length garments are routine, a short top creates repeated repositioning. If alterations dominate, a huge permanent table may consume space that would be more useful beside the sewing machine.
Check the complete structure
Depth needs particular care. A deep table is useful only if you can access the layout without leaning across it, or walk to the opposite side. A wall behind the table removes that second option.
Before ordering, check:
- Load rating: Include fabric, pattern weights, mats and stored equipment. Don't assume a substantial-looking top has a substantial frame.
- Unsupported spans: Press gently at the centre and near any extension joint. Visible flex is a warning.
- Delivery access: Measure doorways, stair turns and the route into the room, not just the final floor position.
- Assembly: Establish whether the top arrives separately and whether fittings remain accessible for tightening.
- Aftercare: Compare warranty terms and the availability of replacement hinges, feet or moving parts.
Spend on the weakness that matters
A straightforward fixed table usually avoids the expense of a lifting mechanism. However, a cheap top that bows or a frame that racks sideways can make careful cutting unnecessarily difficult.
If you already own a sound top, replacing the supporting structure may be more sensible than replacing everything. The guide to adjustable table legs helps identify what to consider when adapting an existing work surface.
Compare quotations on the same specification: usable length, depth, load rating, assembled weight, delivery format and assembly requirements. Decorative storage shouldn't disguise a weak cutting platform.
Features That Affect Cutting Accuracy
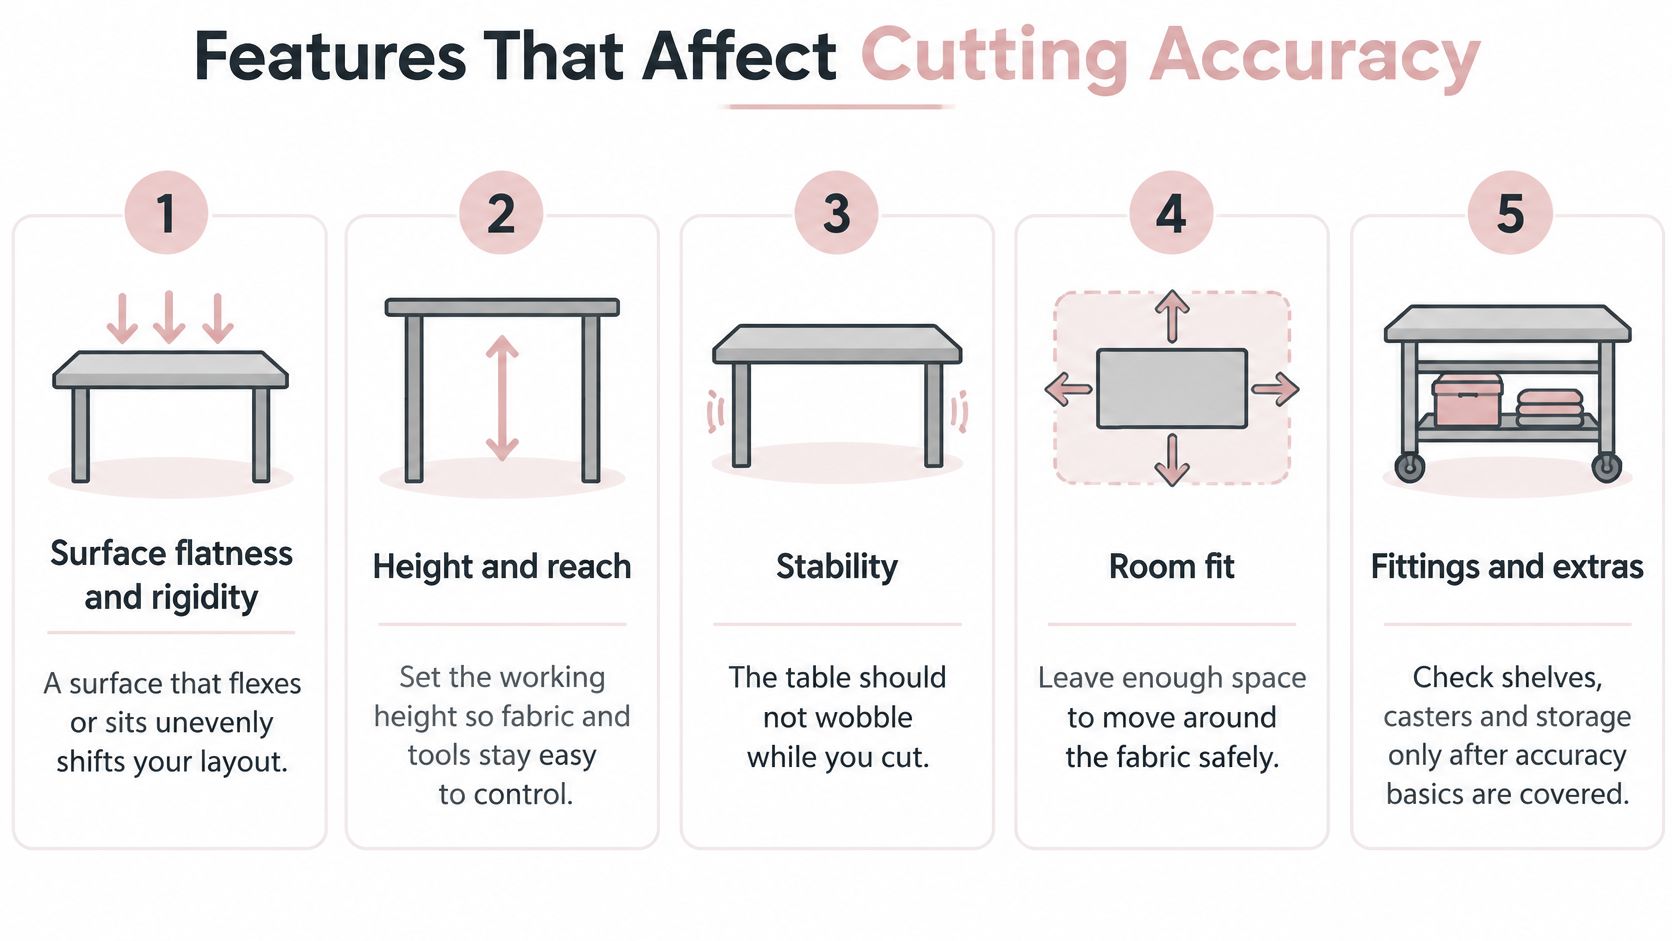
A table can have generous dimensions and still be awkward to cut on. Flatness, dependable references and resistance to movement matter more than an impressive outline.
Start with the surface and reference lines
Flatness and rigidity come first. Place a long straightedge across the top in different directions and look for gaps or rocking. Check extension leaves separately, then check their junction with the main surface. A ridge beneath lightweight fabric can disturb the lay even when the main panel is flat.
Measurement markings are helpful, but they need checking. Compare a printed grid against a trusted ruler before using it to position pattern pieces. Fabric grain still needs aligning by the cloth itself, not merely by matching a selvedge to a printed line.
Square edges provide useful references when preparing fabric and paper. Check corners with a dressmaker's square rather than assuming the top is accurately rectangular. A curved decorative edge may be attractive furniture, but it's a poor measuring reference.
For rotary cutting, select a suitable protective surface rather than cutting directly into the furniture. The guide to sewing cutting mats covers a component that should be chosen alongside the table, not added as an afterthought.
Control movement, shadows and clutter
Castors are valuable when you need to move the station, but the table must stay still while you work. Test the locks with gentle pressure in the direction you'll cut. Some locks stop the wheel rolling while still allowing the castor assembly to swivel.
Lighting should reveal the cut line without your hand or body casting a shadow over it. Try the lamp from your normal working position with dark fabric as well as pale cloth.
Storage belongs outside the path of the lay. A shallow drawer can hold chalk and pins, while a side rail can keep rulers upright without covering the surface.
A smaller table with rigid legs is a better cutting tool than a larger one that shifts beneath your hands.
Use this acceptance checklist before keeping a delivered table:
- Flatness check: Test the centre, edges and leaf joints with a straightedge.
- Grid check: Compare printed markings with a trusted ruler.
- Lock check: Apply gentle sideways pressure with castors secured.
- Light check: Inspect the actual cutting line for shadows.
- Reach check: Retrieve working tools without leaning over the fabric.
Safety Rules for Blades and Powered Cutters
Once a cutting table carries powered equipment, it becomes part of a machinery-safety arrangement. A stable top alone doesn't address moving blades, access by other people or safe blade changes.
The HSE's textile cutting machinery guidance advises clearly marked danger areas with access restricted by barriers, warning signals for moving blades on motorised or automatic tables, and automatic adjustable guards over exposed blade sections. It also advises correctly fitting five-finger chain-mail gloves during cutting and blade handling, alongside checks on fittings, guards and lighting and effective removal of fluff, lint and offcuts.
Establish the working boundary
Begin with who can enter the cutting area. In a shared workshop, someone carrying fabric shouldn't have to pass through the operator's active blade path. Barriers and clear markings need to protect the working area without obstructing escape routes.
Guarding must suit the equipment. Don't remove a guard because it catches an awkward lay, or treat a glove as a substitute for guarding. Resolve the fabric-handling problem and follow the machine's operating instructions.
For powered equipment, make safe isolation part of the blade-changing procedure. Prevent an accidental start before handling the blade, and keep the correct tools and protective equipment at the station.
Translate the precautions to a small workroom
Hand rotary cutters require a different arrangement from an automatic cutting table, but they still need deliberate controls. The guide to rotary blade cutters is useful when choosing the cutting method and its associated handling routine.
- Close the blade: Retract or cover it immediately after each cut, before putting the tool down.
- Protect the free hand: Keep fingers outside the ruler edge and projected cutting path.
- Support the fabric: Stop trailing cloth from pulling the lay towards the floor.
- Control access: Keep children, pets and anyone passing through away from the active station.
- Contain discarded blades: Use a secure, puncture-resistant container and arrange appropriate disposal.
Keep cleaning separate from cutting. Switch off and isolate powered equipment before clearing material near moving parts; don't brush lint away while a blade is running.
A written routine can be brief, but it should identify who changes blades, how equipment is isolated and where used blades go. Store replacement blades securely rather than loose in a drawer of frequently handled tools.
Fitting a Cutting Station into a Small UK Home
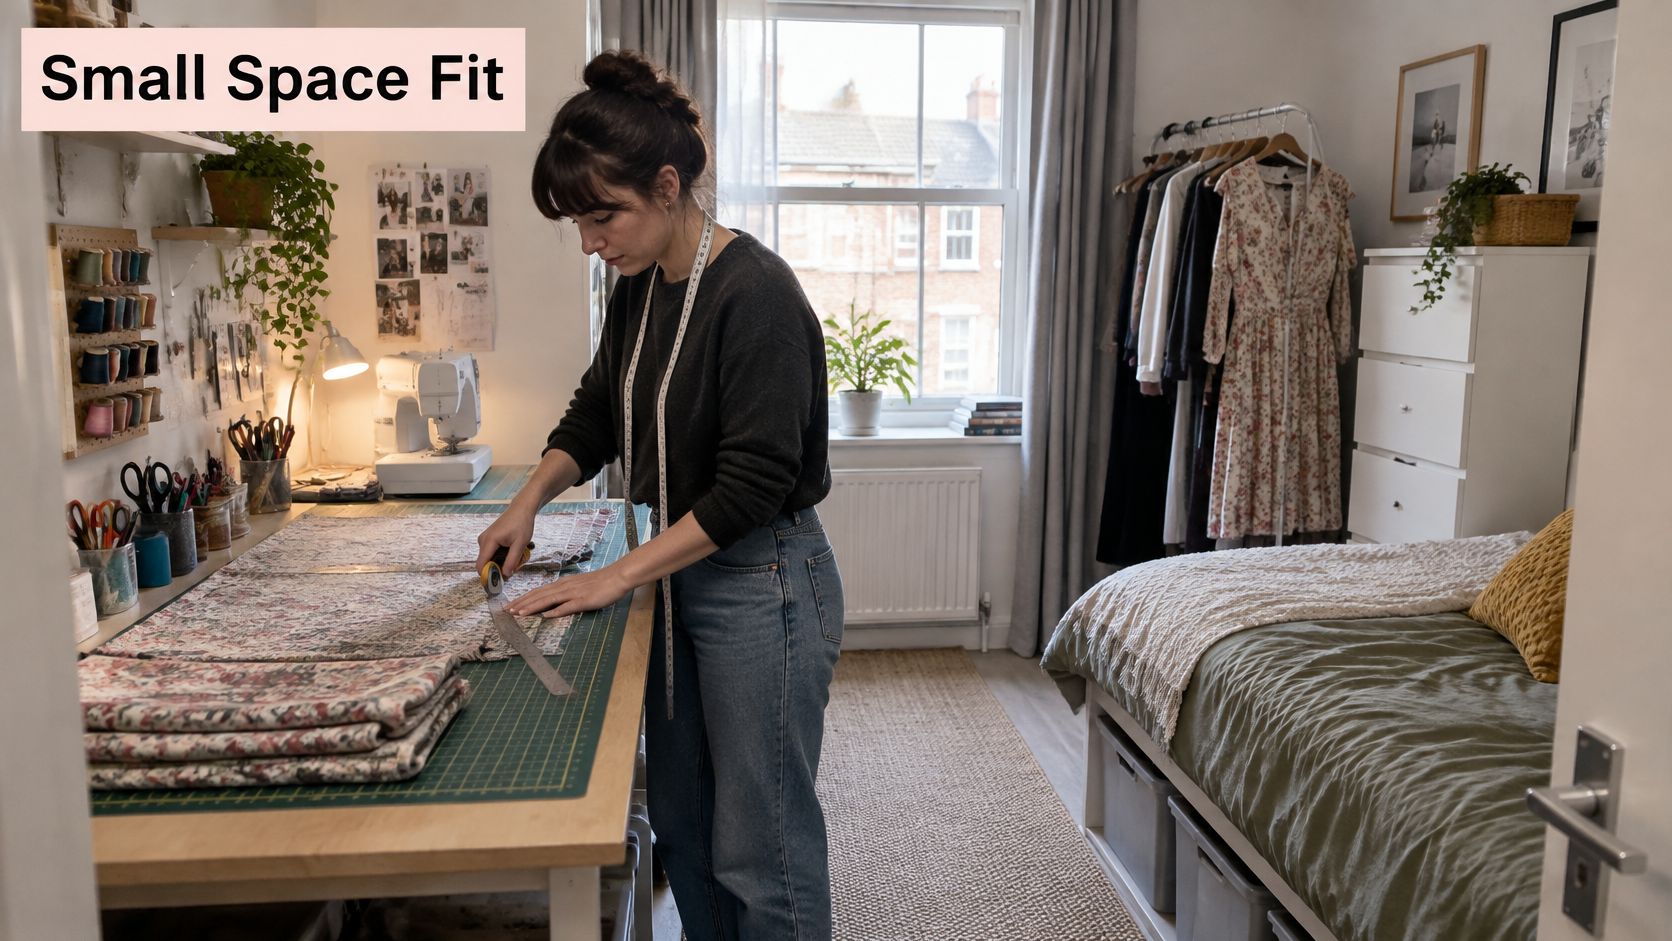
A maker in a rented flat may need the bedroom to accommodate sleep, clothing storage and sewing. A table that technically fits between the bed and wardrobe may still prevent the wardrobe opening or leave nowhere to stand while cutting.
Home working is central to this audience: 79% of surveyed UK crafters prefer crafting alone at home, according to Hobbycraft's Power of Making report. That makes room-sharing a practical buying constraint, not a minor inconvenience.
Test circulation before committing
Mark the proposed footprint on the floor with low-tack tape. Include open leaves, handles and projecting feet, then walk the route while carrying a folded length of fabric.
There isn't a useful universal clearance for every bedroom and every operator. Your minimum workable space must let you pass normally, turn with materials, open doors and drawers, and reach the exit without squeezing past a sharp corner.
Check the room in its cutting configuration:
- Movement: Leave access to the edges you use, not an inaccessible strip behind the table.
- Power: Position the lamp and sockets so cables don't cross your feet or hang into the lay.
- Parking: Make sure a mobile table has a genuine storage position and engage its locks before working.
- Noise: Consider motor vibration and shared walls before choosing powered equipment for evening work.
Match the furniture to the room's second job
Choose a fixed table for a dedicated workroom, a folding table where the surface must disappear, and a wall-mounted board for limited rotary tasks where the wall fixing is suitable. In rented accommodation, obtain permission before installing structural fixings.
A height-adjustable table suits shared users, but it doesn't automatically save floor space. Measure its base and cable requirements as carefully as the top.
Pattern layouts need enough supported depth and edge access to arrange garment sections. Compact rotary trimming can use less space, while pinning requires room to handle the fabric without catching it on nearby furniture. None of these tasks benefits from cloth hanging under tension off the edge.
In a small home, the largest table is often the wrong choice because it removes the space you need to use it.
Use the small sewing space ideas guide to plan surrounding storage without turning the cutting station into the room's permanent dumping ground.
Using a Cutting Table for Repair and Textile Reuse
The average UK resident puts 35 unwanted textile items into general waste each year, according to Brighton & Hove City Council. A repair station should make it straightforward to assess, save and recut garments, rather than provide somewhere to accumulate them.
Judge the table as a repair-workflow tool. Incoming clothing, clean pattern work and usable offcuts need distinct places, even if those places are trays that move on and off the same surface.
Give materials a clear route
Start with an incoming basket beside the table. Inspect garments there, photograph defects against a clear background and identify anything that needs cleaning before it reaches the cutting surface.
Move accepted garments through preparation in a deliberate order:
- Assessment zone: Record damaged areas, missing components and useful fabric sections.
- Clean preparation zone: Unpick seams and press on a suitable heat-protected pressing surface.
- Patterning zone: Position templates around damage, wear and existing seam lines.
- Cutting zone: Use a removable mat where the chosen cutting tool requires it.
- Offcut storage: Separate usable pieces from scraps awaiting an appropriate waste or recycling route.
Don't treat every damaged garment as dirty, or every clean garment as ready to cut. Check both hygiene and fabric condition before mixing material into your working stock.
Choose surfaces for changing tasks
A wipe-clean top is practical for inspection, chalk residue and sorting. A pinnable board suits certain pattern tasks, while pressing needs a purpose-made heat-resistant layer. Porosity alone doesn't make a tabletop safe for an iron.
Removable layers are more flexible than expecting the permanent top to do everything. Lift away the cutting mat before pressing, and let heat-protected surfaces cool before stacking them with other materials.
Offcut drawers should hold recognisable, usable pieces rather than an unsorted mass. Organise by fibre, weight or intended project, and use storage for fabrics to keep larger salvaged panels separate from small remnants.
Community sessions add another requirement: the station must be easy to clear between users. Removable trays, accessible fittings and replaceable surface layers help organisers reset the workspace without dismantling it.
A repairable frame and replaceable top can be better long-term value than a cheap unit that must be discarded when a hinge fails. That's a durability decision, not proof of a particular carbon saving.
Confirm Your Table and Set-Up Before You Buy
Before ordering, turn your preferences into a short acceptance specification. The right table should pass practical checks, not merely look suitable in a product photograph.
- Body fit: Record elbow height and the intended working surface position, including the mat.
- Room fit: Match the table type to the room's other uses and the people cutting there.
- Accuracy: Confirm flatness, dependable measurement markings and secure castor locks where fitted.
- Equipment: Establish the blade, guard and isolation arrangements for powered cutters.
- Delivery: Compare usable dimensions, load rating, weight, assembly and access into the building.
Keep fitting separate from cutting
A fitting form complements the cutting station rather than replacing any part of it. Our female tailors' dummies come in sizes 6/8, 8/10, 10/12, 12/14, 16/18 and 18/20, with a tripod or round base stand; their sturdy polystyrene construction allows secure pinning for garment fittings and alterations.

Compare shortlisted tables using the same written requirements. In a shared room, check whether the parked furniture blocks sightlines, and consider when any powered cutting equipment will be used.
Write down your space, your user and your cutting method, then choose the table type that satisfies all of them.
We offer pin-friendly tailors' dummies, body forms and garment rails to support fitting and organisation around your cutting station. Visit Display Guru to choose a fitting form and supporting studio equipment that leave your cutting surface clear for the next garment.