


7 Clever Small Sewing Space Ideas for 2025
In a world where space is a premium, dedicating an area to your passion for sewing can seem like an impossible dream. However, with strategic planning and clever solutions, even the smallest nook can be transformed into a functional and inspiring sewing sanctuary. This guide is designed for hobbyists, professionals, and everyone in between who is looking to maximise their creative potential within a limited footprint. We will explore seven ingenious small sewing space ideas that go beyond generic advice, offering actionable strategies to help you organise your tools, set up an efficient workflow, and create a space you love to work in.
From wall-mounted wonders to multi-functional furniture, these concepts will help you reclaim your space and focus on what truly matters: bringing your creative visions to life. We will also highlight how quality equipment, like the professional-grade garment rails and adjustable tailor's dummies from Display Guru, can be seamlessly integrated into even the most compact setups. This ensures your small space does not compromise on professional results, proving that a lack of square footage need not limit the scale of your creativity or the quality of your work.
1. Wall-Mounted Pegboard Organization System
When floor and desk space is at an absolute premium, the most effective strategy is to build upwards. A wall-mounted pegboard organisation system is a cornerstone of many efficient small sewing space ideas, transforming an empty wall into a highly functional, vertical storage hub. This method utilises perforated hardboard or metal panels, allowing you to create a completely customised layout with an array of hooks, shelves, baskets, and containers.
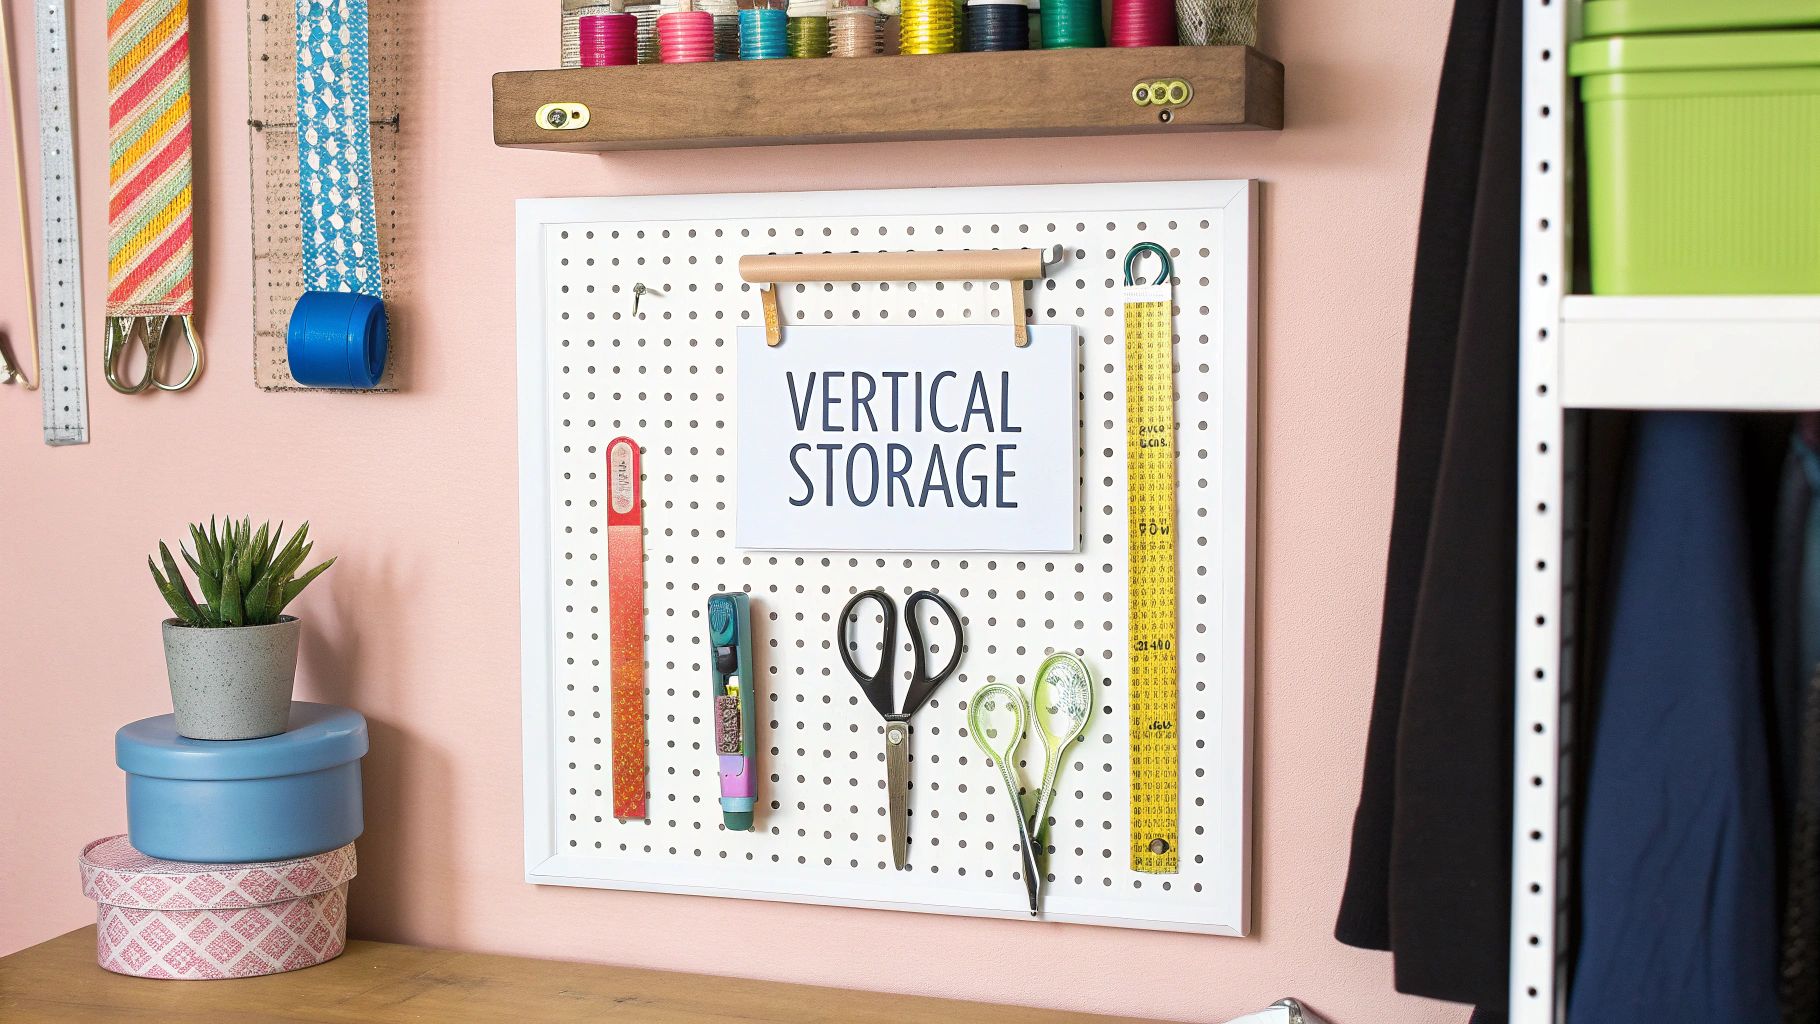
The primary benefit is immediate accessibility. By storing frequently used items like scissors, rotary cutters, thread spools, and rulers in plain sight, you eliminate the need to rummage through drawers. This “grab-and-go” approach streamlines your workflow, saving valuable time and reducing frustration. It’s a concept borrowed from professional workshops and retail environments, where efficiency is key.
How to Implement a Pegboard System
Implementing this system is straightforward. You can find ready-made solutions like the IKEA SKÅDIS system, favoured by home crafters for its clean aesthetic, or more industrial options like Wall Control’s metal pegboards, often seen in professional alterations shops.
Key Insight: The true power of a pegboard lies in its modularity. As your tool collection grows or your project needs change, you can instantly reconfigure the layout without any additional drilling or complex adjustments. This adaptability makes it a long-term, scalable solution.
Actionable Tips for Optimal Organisation
To maximise your pegboard's potential, consider these practical strategies:
- Group Similar Items: Create dedicated zones on your board. Keep all cutting tools together, group marking pens and chalks in another section, and dedicate an area to rulers and measuring tapes.
- Contain Small Notions: Use small bins or cups that hang from hooks to store loose items like buttons, bobbins, snaps, and seam rippers, preventing them from getting lost.
- Aesthetic Integration: Paint the pegboard to match your room’s colour scheme for a cohesive, professional look. This simple step elevates it from a purely utilitarian tool to a decorative element.
- Strategic Placement: Install the board at eye level above your main work surface. This ensures your most-used tools are within easy reach, enhancing ergonomic efficiency.
This vertical approach embodies principles of effective visual merchandising, where products are displayed for maximum appeal and accessibility. You can discover more about these display strategies to further refine your space's layout. A well-organised pegboard not only saves space but also inspires creativity by keeping your favourite tools visible and ready for your next project.
2. Foldable Murphy-Style Sewing Table
When a dedicated, permanent sewing table is a luxury you can’t afford, a foldable Murphy-style table offers the perfect compromise. This is one of the most transformative small sewing space ideas for multipurpose rooms, instantly converting a living area, guest room, or even a hallway into a functional sewing station. The table is mounted directly to the wall and folds down to provide a sturdy, full-sized work surface when needed, then folds back up to sit almost flush against the wall when not in use.
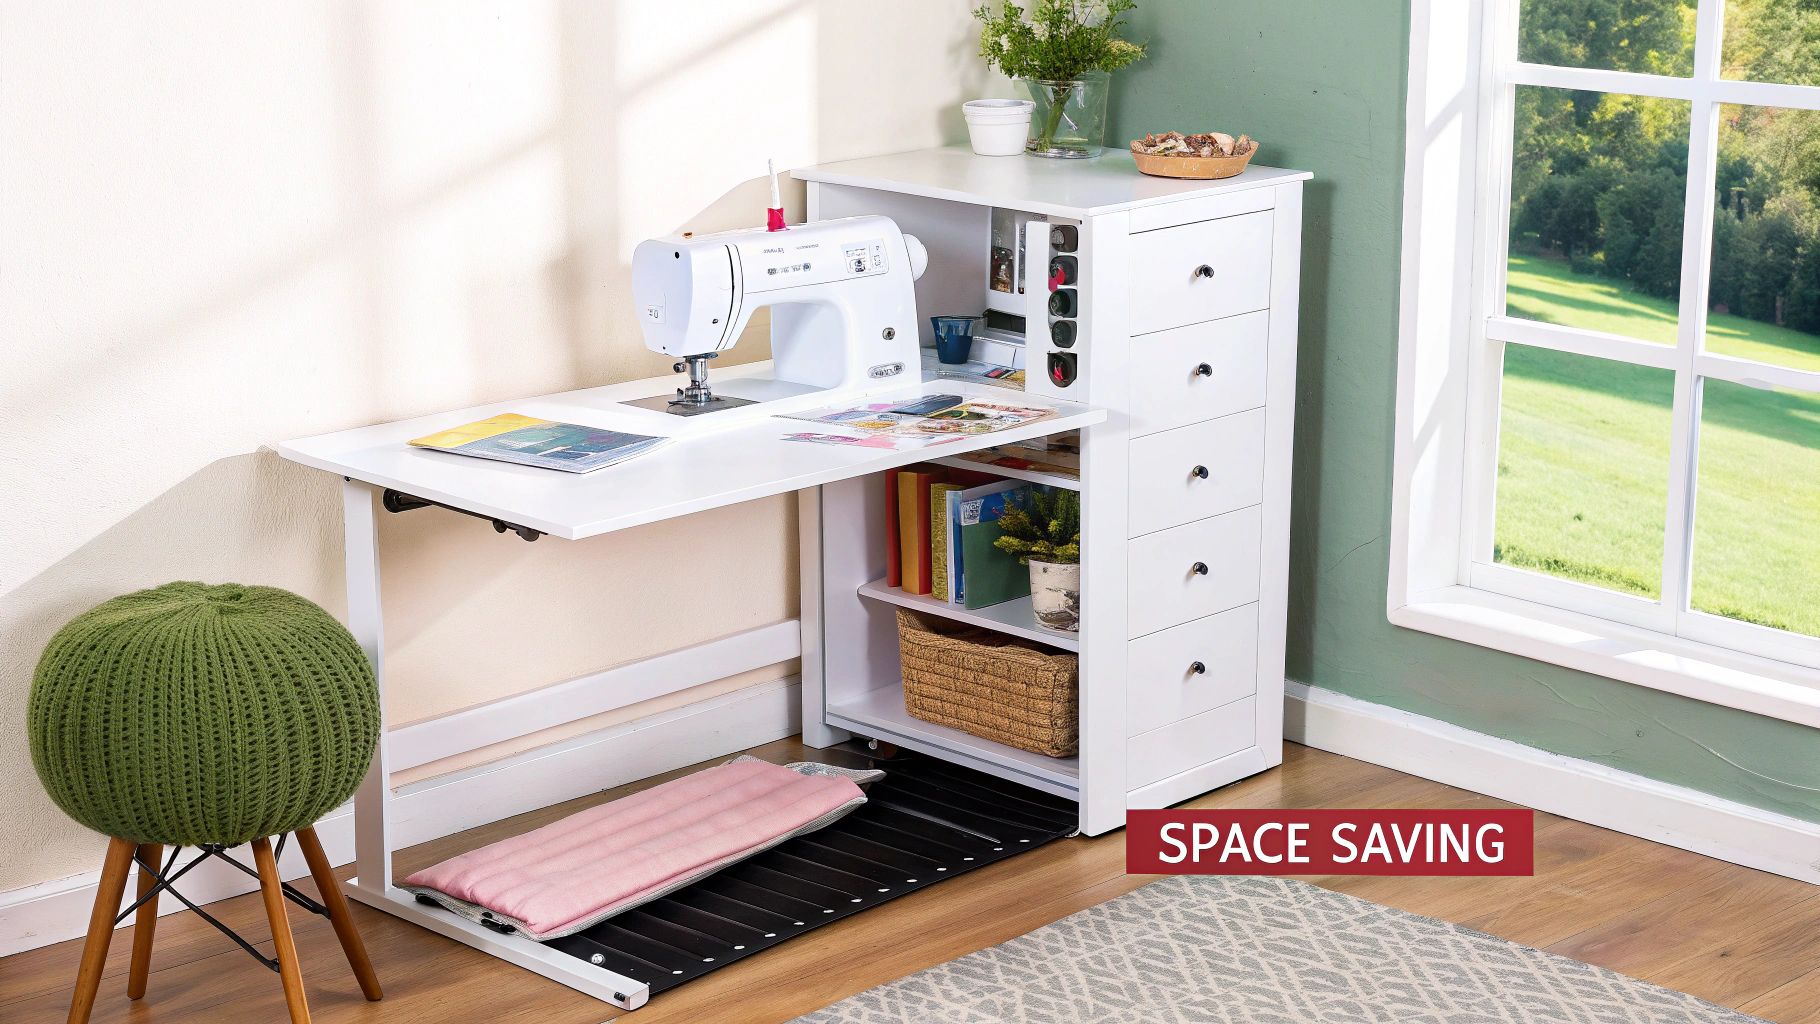
The primary advantage is its ability to provide a substantial workspace without permanently occupying valuable floor space. For sewers in studio apartments or those using a corner of a family room, this means you don't have to sacrifice your sewing passion for a lack of square footage. It addresses the common problem of having to clear a dining table for every project, providing a dedicated and stable surface ready at a moment’s notice.
How to Implement a Murphy-Style Table
You can find various solutions to suit different needs and budgets. The IKEA NORBO or BJURSTA wall-mounted drop-leaf tables are popular starting points for a DIY adaptation, while specialised furniture makers offer custom units, often with integrated shelving. These have become staples for small space living influencers and are frequently featured in tiny home design showcases.
Key Insight: The stability of a wall-mounted table is often superior to a flimsy, portable folding table. When correctly installed into wall studs, it can easily support the weight and vibrations of a heavy-duty sewing machine, providing a much more professional and comfortable sewing experience.
Actionable Tips for Optimal Setup
To get the most out of your fold-down work surface, consider these practical recommendations:
- Prioritise Stability: Before installation, use a stud finder to locate solid anchoring points. Ensure the wall can safely support the combined weight of the table, your sewing machine, and any pressure you'll apply while working.
- Set the Correct Height: Test the ideal ergonomic height by sitting with your machine on a temporary surface before you drill any holes. Mark this height on the wall to ensure comfortable posture and reduce strain.
- Enhance with Lighting: Install a slim LED strip light on the underside of the table or on the wall just above it. This provides direct task lighting exactly where you need it, which is crucial for detailed work.
- Incorporate Storage: Choose a model with built-in shallow shelves or add your own. When the table is folded up, these shelves can house essential notions, making it a self-contained sewing hub.
This solution proves that even the smallest homes can accommodate a proper sewing area, blending functionality with clever, space-saving design. You can see a creative implementation of this concept here:
3. Rolling Cart Organization System
For sewists whose projects move around the house or who need their supplies to be adaptable, a rolling cart organisation system is an unparalleled solution. These mobile, multi-tiered carts act as a portable supply station, offering a blend of storage and mobility that is perfect for dynamic small sewing space ideas. They can be wheeled directly to your sewing machine or cutting table and then neatly tucked away into a cupboard or corner when not in use.
This infographic summarises the core features that make a rolling cart an essential tool for compact crafting areas.
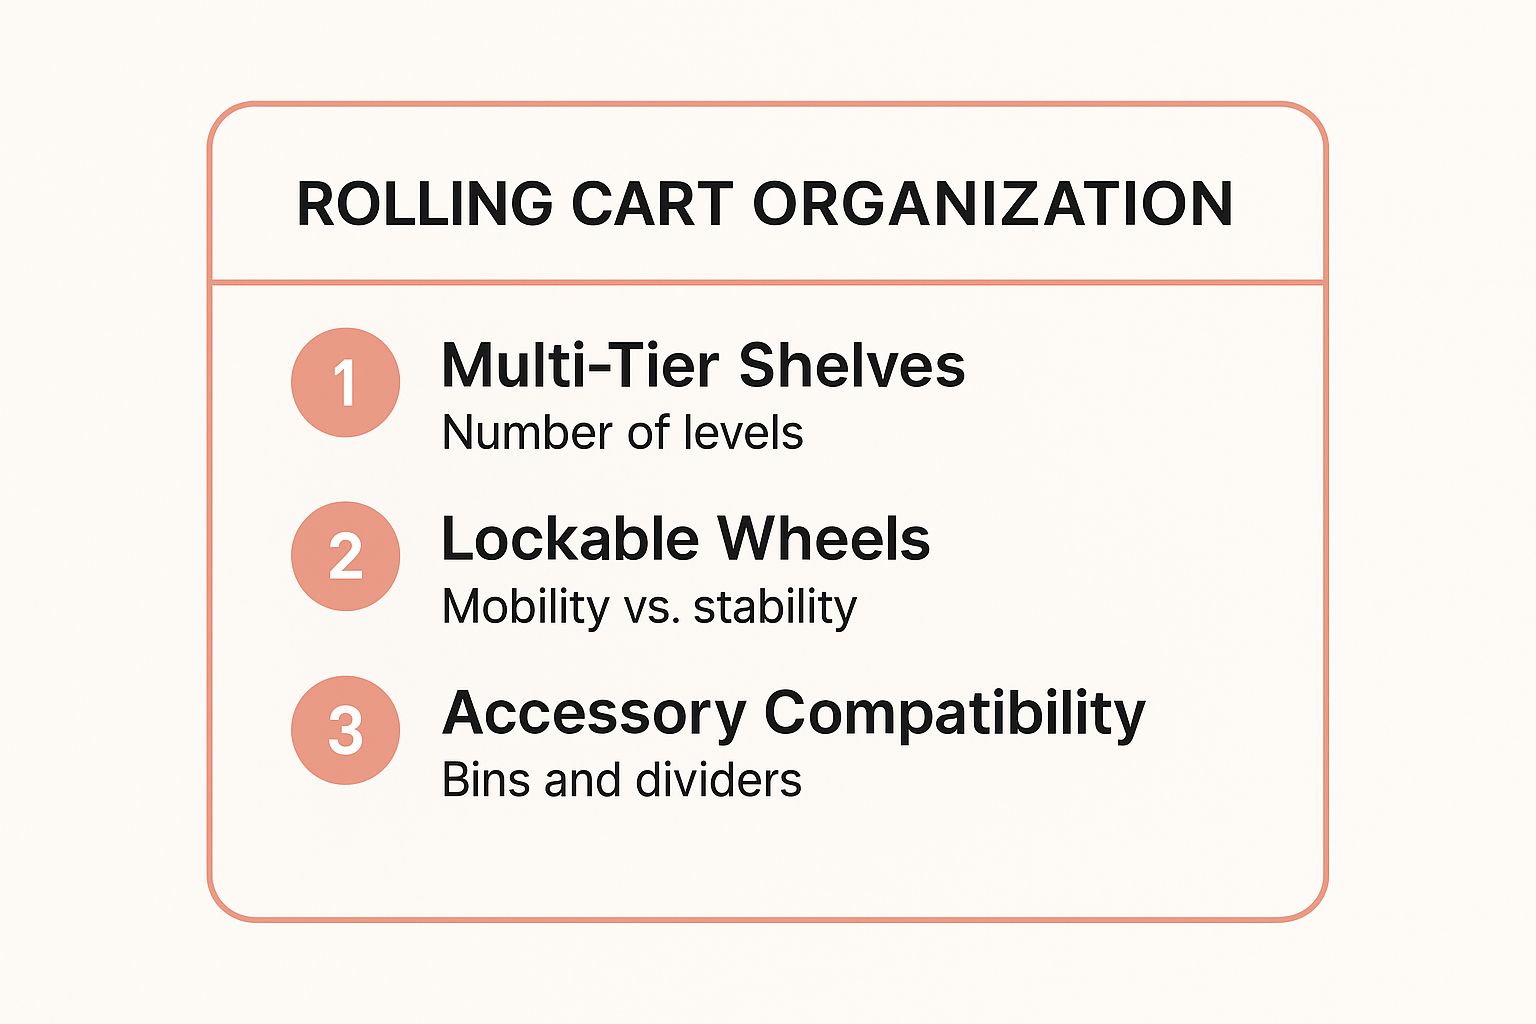
These features highlight the cart's inherent versatility, combining mobility with stable, customisable storage to suit any project.
How to Implement a Rolling Cart System
Implementing a rolling cart is as simple as finding a model that fits your space and needs. The IKEA RÅSKOG cart is a global favourite among crafters for its sturdy build and aesthetic appeal, but many other options exist, from repurposed medical-style carts to elegant bar carts. The key is to see it not just as storage, but as an active part of your sewing workflow, moving with you from station to station.
Key Insight: The true advantage of a rolling cart is its ability to centralise project-specific supplies. You can dedicate one cart to a quilting project and another to garment construction, keeping all necessary fabric, thread, and notions together to minimise setup time and maintain focus.
Actionable Tips for Optimal Organisation
To get the most out of your mobile storage, consider these practical tips:
- Categorise Tiers: Assign a specific purpose to each shelf. For example, use the top tier for tools currently in use, the middle for fabric and patterns, and the bottom for interfacing or larger items.
- Use Dividers and Bins: Employ small containers, trays, or drawer dividers to corral loose notions like bobbins, buttons, and pins. This prevents small items from getting lost or falling through the mesh shelves.
- Add Magnetic Strips: Attach self-adhesive magnetic strips to the sides of a metal cart to create a convenient spot for holding scissors, pins, and seam rippers.
- Create a Mobile Cutting Station: Place a small self-healing cutting mat on the top tier. This transforms the cart into an extra, movable work surface for trimming small fabric pieces or pattern blocks.
This concept of portable, organised storage is similar to how a portable clothing rack is used in retail to move inventory efficiently. By adopting this mobile-first approach, you create a fluid and highly efficient sewing environment, no matter how limited your space is.
4. Under-Stair Sewing Nook
Many homes, especially older Victorian and terraced houses, have unused architectural voids that are ripe for conversion. Transforming the often-wasted space beneath a staircase into a sewing nook is one of the most ingenious small sewing space ideas. This creative solution carves out a dedicated, functional workstation from an area that is typically relegated to storing forgotten items, turning dead space into a productive hub.
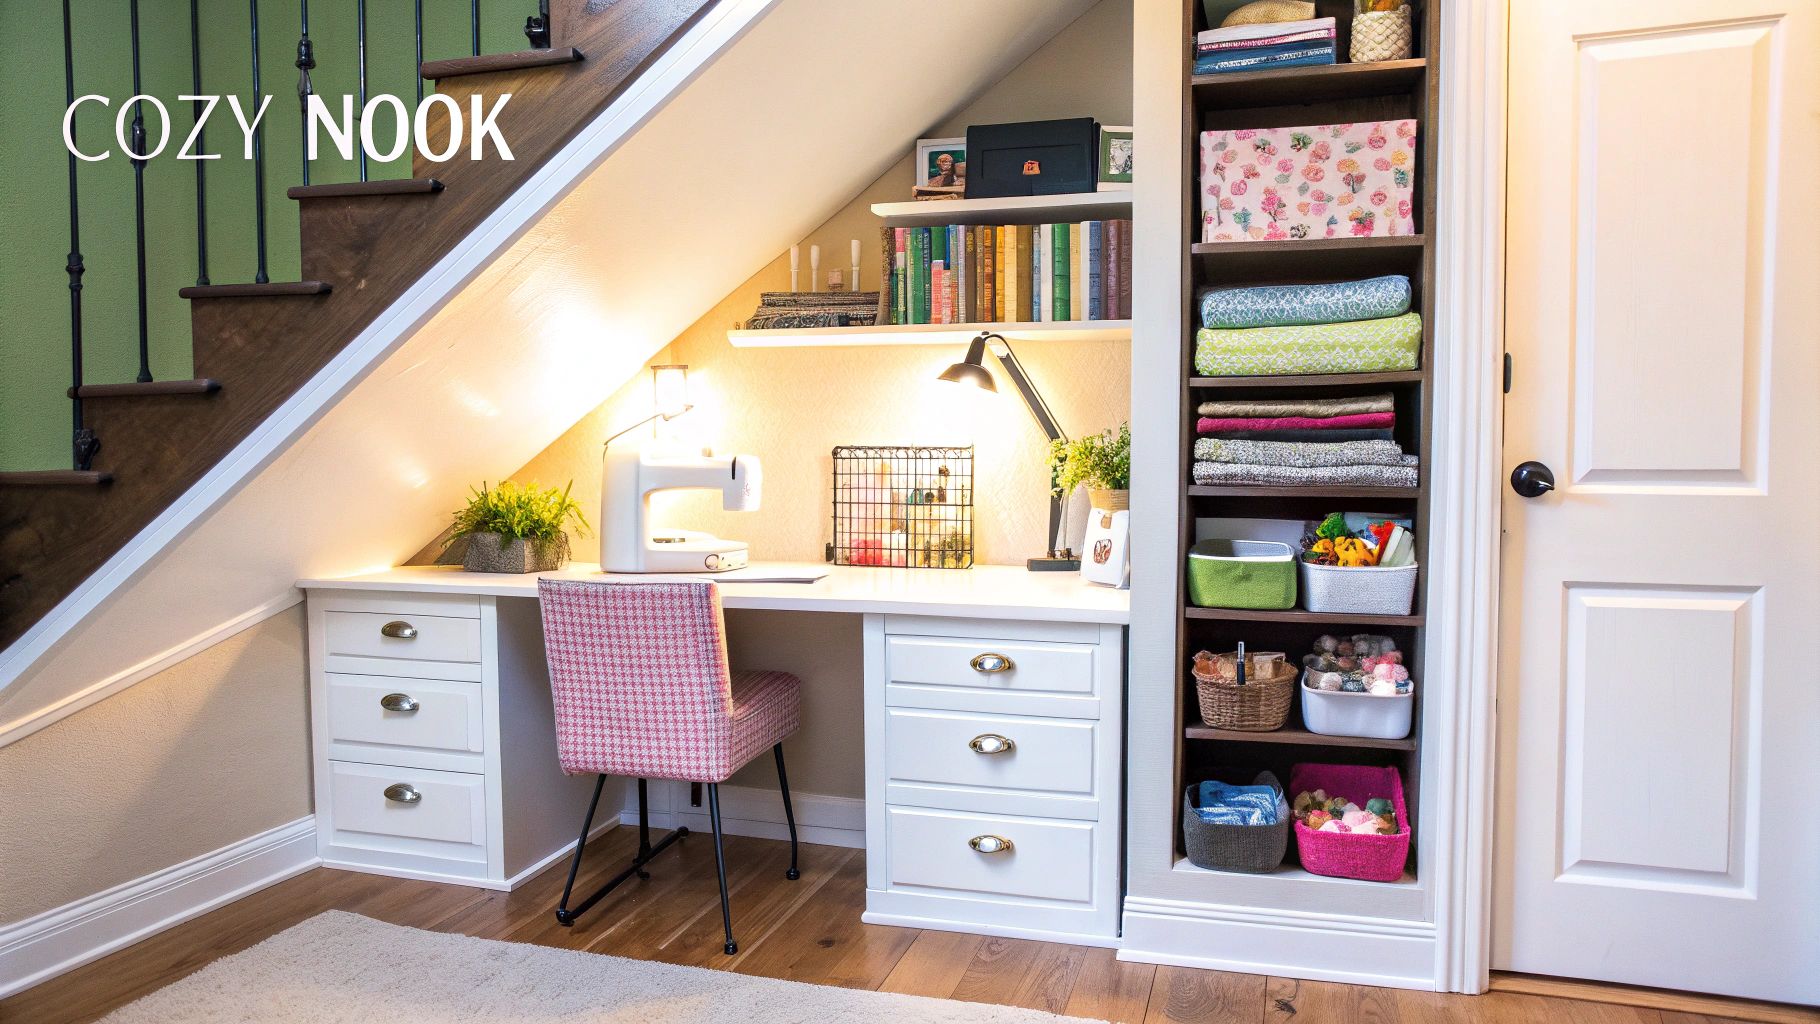
The primary advantage of this approach is its ability to create a distinct crafting zone without encroaching on primary living areas like a lounge or bedroom. Popularised by home renovation programmes and DIY bloggers, this concept demonstrates that even the most awkward architectural features can be optimised. From modern homes with sleek, custom-built solutions to tiny homes where every square centimetre counts, the under-stair nook is a testament to resourceful design.
How to Implement an Under-Stair Nook
Creating a sewing nook under the stairs involves careful planning. It can be as simple as fitting a pre-made desk into the space or as complex as commissioning custom-built cabinetry to precisely match the slope of the stairs. The key is to build a space that feels intentional, not just an afterthought.
Key Insight: The success of an under-stair nook hinges on making the space feel larger than it is. Strategic use of light colours, mirrors, and vertical storage solutions can counteract the enclosed nature of the space, creating an environment that feels open and inviting rather than cramped.
Actionable Tips for Optimal Organisation
To design a truly functional and comfortable under-stair sewing area, apply these strategies:
- Measure Meticulously: Account for the sloped ceiling when planning your desk height and shelving. Ensure you have adequate clearance for your head and to comfortably operate your sewing machine.
- Prioritise Task Lighting: Natural light is often limited in these spaces. Install layered lighting, including bright overhead lights and focused task lighting directly over your work surface, to prevent eye strain.
- Opt for Smart Storage: The depth of under-stair spaces can make standard shelves impractical. Install pull-out drawers or deep rolling carts that allow you to easily access items stored at the back.
- Consider Ventilation: If the space is enclosed or semi-enclosed, ensure there is adequate air circulation. This is important for comfort and for dissipating any fumes from fabric treatments or machine oil.
5. Armoire Sewing Cabinet Conversion
For those who need their sewing area to completely disappear when not in use, an armoire conversion is one of the most elegant small sewing space ideas. This method involves transforming a new or vintage armoire into a self-contained sewing station. It brilliantly conceals your machine, supplies, and works-in-progress behind closed doors, allowing your space to revert to a living room, bedroom, or home office seamlessly.
This approach offers a "sewing station in a box" solution, where everything has its designated place within a single, attractive piece of furniture. It’s ideal for multi-functional rooms where a dedicated craft corner isn't feasible. The beauty lies in its dual function: a beautiful piece of home decor when closed, and a fully-equipped workstation when open. Examples range from upcycled vintage TV cabinets to modern computer armoires repurposed for craft storage.
How to Implement an Armoire Conversion
Creating your own sewing armoire can be a rewarding project. Look for units with sufficient depth to house your sewing machine. Purpose-built sewing armoires from brands like Arrow or Koala are available, but a DIY conversion offers customisation. A key feature is often a sturdy, extendable shelf that slides out to create a comfortable sewing surface at the correct height.
Key Insight: The true advantage of an armoire is its compartmentalisation. By dedicating specific shelves, drawers, and even the inside of the doors to storage, you create an organised ecosystem that minimises setup and cleanup time, making it easier to start and stop projects.
Actionable Tips for Optimal Organisation
To turn a standard armoire into a highly functional sewing centre, consider these tips:
- Install Strategic Lighting: Armoire interiors can be dark. Install battery-operated, motion-activated LED strip lights under shelves to illuminate your work surface without needing complex wiring.
- Utilise Door Space: Attach magnetic strips or small hooks to the inside of the doors to hang scissors, rotary cutters, and other metal tools for instant access.
- Add a Pull-Out Shelf: Ensure the primary shelf for your sewing machine is at a comfortable ergonomic height. Reinforce it and install heavy-duty drawer slides so it can be pulled out for adequate legroom.
- Consider Mobility: If you might need to move the unit, consider adding heavy-duty casters to the base before you fill it. This makes cleaning and room rearrangement far easier.
This concept of creating a dedicated, self-contained unit is similar to designing effective retail display stands, where every component is placed for maximum efficiency and visual appeal within a defined space. An armoire conversion achieves this on a personal scale, providing a sophisticated and practical solution for any sewist.
6. Closet Sewing Room Conversion
For those seeking a completely self-contained and hidden workspace, a closet sewing room conversion offers the ultimate space-saving solution. This approach transforms a standard wardrobe or walk-in closet into a dedicated sewing nook, capitalising on its existing structure to create an efficient, three-dimensional workstation. By removing hanging rods and doors, you can install custom shelving, a built-in work surface, and targeted storage, turning an underutilised space into one of the most effective small sewing space ideas.
The primary advantage of this method is its ability to be concealed. When you're finished working, you can simply close the doors, instantly hiding any creative mess and restoring a clean, uncluttered look to the room. This makes it ideal for bedrooms, guest rooms, or living areas where a permanent sewing setup might feel intrusive. It establishes a distinct boundary between your creative process and your living space.
How to Implement a Closet Conversion
The conversion process involves retrofitting the closet's interior. A reach-in closet can house a fold-out desk, while a larger walk-in closet can be transformed into a comprehensive craft room complete with a permanent worktable and chair. The key is to build vertically, using the full height of the closet for storage.
Key Insight: The success of a closet conversion hinges on maximising depth and verticality. Rather than just placing a desk inside, think of the closet as a three-walled room. Install shelving above and below the main worksurface to store fabric, patterns, and notions, keeping the desktop clear for your sewing machine and active projects.
Actionable Tips for Optimal Organisation
To create a functional and comfortable closet sewing room, focus on these practical strategies:
- Prioritise Lighting: Closets lack natural light, so installing bright, colour-accurate LED strip lighting under shelves is essential. This eliminates shadows on your work surface and ensures you can accurately judge fabric colours.
- Ensure Proper Ventilation: Sewing machines can generate heat, and enclosed spaces can become stuffy. Ensure adequate air circulation, perhaps by leaving doors ajar during use or installing a small, quiet fan.
- Choose Smart Doors: If replacing old doors, opt for bi-fold or sliding doors. These maximise the opening width without swinging out into the room, which is crucial for preserving floor space in a small area.
- Select a Compact Stool: Use a small stool or armless chair that can be tucked completely inside the closet. This allows the doors to close fully, maintaining the "hidden" functionality of the space.
This method provides a private, organised hub that can be tailored precisely to your workflow. You can explore further sewing room ideas to find inspiration for shelving layouts and storage configurations that will work within your closet's dimensions. By dedicating an entire closet to your craft, you create a powerful micro-studio that supports focus and creativity.
7. Multi-Functional Furniture Solutions
For those whose sewing area must coexist with a living room, dining area, or bedroom, multi-functional furniture offers the ultimate in discreet integration. This strategy involves using furniture pieces that serve a primary domestic function while cleverly concealing a complete sewing station. These are among the most sophisticated small sewing space ideas, allowing you to hide your hobby in plain sight without sacrificing functionality or home aesthetics.
This approach moves beyond simple storage boxes to purpose-built items like ottomans with integrated sewing machine lifts or dining tables that reveal a dedicated sewing setup. The core principle is transformation: a piece of everyday furniture converts into a productive workspace and back again with minimal effort, preserving the dual-purpose nature of the room. It’s the ideal solution for maintaining a polished living space that is always ready for creative work.
How to Implement Multi-Functional Furniture
Leading brands like Horn of America and Koala have popularised this concept with high-quality sewing cabinets disguised as attractive sideboards or chests of drawers. You can find ottomans that house a sewing machine on an airlift mechanism, allowing it to glide up to the correct height for use. Other examples include coffee tables with flip-top surfaces that become a cutting mat, or even entire armoires that open up to reveal a fully organised sewing nook.
Key Insight: The success of this approach hinges on the quality of the conversion mechanism. A smooth, reliable, and easy-to-operate lift or slide is essential for encouraging frequent use. If the setup process is cumbersome, the furniture will likely remain in its non-sewing state.
Actionable Tips for Optimal Organisation
To make the most of your convertible furniture, consider these practical strategies:
- Verify Machine Compatibility: Before purchasing, ensure the cabinet’s lift mechanism can handle the weight of your specific sewing machine and that the internal dimensions accommodate its size.
- Prioritise Ergonomics: Test the sewing position. The height of the chair, the machine platform, and the available legroom should allow for a comfortable and ergonomically sound posture during long sessions.
- Maximise Integrated Storage: Look for models with built-in drawers, thread racks, and notion trays. A well-designed unit should hold not just the machine but also all the essential supplies for a complete project.
- Ensure Easy Access: Check that hidden storage is accessible even when the machine is in the stowed position. You should be able to retrieve a spool of thread or a seam ripper without fully deploying the entire station.
This concept of creating a "shop within a shop" is a powerful retail display technique, where a space can be quickly reconfigured for different purposes. You can learn more about these versatile shop display ideas to find further inspiration for your adaptable sewing space. By choosing the right piece, you invest in both a functional workspace and a seamless addition to your home’s decor.
Small Sewing Space Ideas Comparison
| Item | Implementation Complexity 🔄 | Resource Requirements ⚡ | Expected Outcomes 📊 | Ideal Use Cases 💡 | Key Advantages ⭐ |
|---|---|---|---|---|---|
| Wall-Mounted Pegboard Organization System | Moderate: Requires wall mounting and drilling | Low to Moderate: Basic materials and hooks | Efficient vertical storage, easy tool visibility | Small sewing areas, craft rooms needing accessible tool storage | Maximizes vertical space, highly customizable, inexpensive |
| Foldable Murphy-Style Sewing Table | High: Secure wall mounting, heavy-duty installation | Moderate to High: Quality materials and hardware | Full-sized work surface with fold-away convenience | Multipurpose rooms, tiny apartments where floor space is limited | Reclaims floor space fully, adjustable height, portable work surface |
| Rolling Cart Organization System | Low: No installation needed, plug-and-play | Low: Mobile carts with shelves and wheels | Flexible, mobile storage and extra work surface | Small spaces needing mobility, varied work locations | Highly mobile, inexpensive, multiple storage zones |
| Under-Stair Sewing Nook | High: Custom fitting and modifications required | High: Custom cabinetry, lighting, electrical work | Dedicated, compact sewing area using unused space | Homes with under-stair areas, maximizing architecture | Utilizes wasted space, cozy and enclosed workspace |
| Armoire Sewing Cabinet Conversion | High: Custom modifications and possible structural work | Moderate to High: Vintage or new furniture, lighting, storage additions | Self-contained sewing station hidden in furniture | Those needing concealed sewing space, multi-room flexibility | Conceals workspace, mobile, looks like regular furniture |
| Closet Sewing Room Conversion | High: Full renovation with shelving and electrical | High: Custom shelving, lighting, electrical installations | Fully dedicated private sewing room within existing closet | Maximizing storage in home, private and organized workspace | Dedicated space, maximizes vertical storage, closes off mess |
| Multi-Functional Furniture Solutions | High: Complex furniture with lifts and convertible parts | High: Specialized furniture, mechanical components | Hidden sewing workspace integrated into everyday furniture | Small or studio apartments, multi-use living spaces | Maintains room aesthetics, dual-function, hides equipment |
Stitching It All Together: Your Blueprint for a Perfect Small Sewing Space
Creating an efficient and inspiring sewing area is not a luxury reserved for those with sprawling studios; it is an achievable goal for any creative, regardless of square footage. The journey to a perfectly organised workspace hinges on a single, powerful principle: maximising every centimetre. By embracing the strategies we have explored, you can transform a challenging, compact area into a streamlined hub of productivity and creativity. The key is to shift your perspective from the limitations of your floor plan to the vast potential of its vertical and hidden spaces.
Recapping Your Path to an Organised Sewing Sanctuary
Throughout this guide, we have navigated a wealth of small sewing space ideas, each offering a unique solution to the common problem of clutter and constraint. Let’s revisit the core concepts that form the foundation of a masterful small-space transformation:
- Embrace the Vertical: Solutions like the wall-mounted pegboard and the armoire conversion demonstrate the immense power of thinking upwards. Walls are not just boundaries; they are prime real estate for storing tools, threads, and fabrics, keeping your primary work surface clear and ready for action.
- Prioritise Multi-Functionality: The foldable Murphy-style table and other dual-purpose furniture pieces are your greatest allies. A piece that serves as a cutting mat, a desk, and then folds away to reclaim your living space is the pinnacle of intelligent design for compact living.
- Uncover Hidden Opportunities: From the forgotten corner under the stairs to the underutilised closet, your home is likely filled with potential sewing nooks. These clever conversions prove that a dedicated, professional-standard sewing room does not require a dedicated room at all, just a bit of ingenuity.
Your Actionable Next Steps
The transition from inspiration to implementation is where your dream sewing space begins to take shape. Avoid feeling overwhelmed by the possibilities. Instead, approach the process methodically. Start by assessing your current space with a critical eye. Which of these solutions resonates most with your personal workflow and the architectural realities of your home?
Perhaps begin with a low-commitment, high-impact project, such as organising your supplies with a versatile rolling cart. Once you experience the immediate benefit of having your most-used items mobile and within arm’s reach, you will build the momentum needed to tackle a larger conversion. The ultimate goal is to craft a space that not only looks organised but feels intuitive, reducing friction in your creative process and allowing your talents to flourish. A well-designed small sewing space is more than just tidy; it is a catalyst for better, more enjoyable work.
Ready to elevate your newly organised space with professional-grade finishing touches? Explore the collection at Display Guru for sleek, durable garment rails and professional tailor’s dummies that bring a touch of studio quality to any room. Visit Display Guru to find the perfect pieces to complete your compact creative sanctuary.