




White Clothing Rack Guide for Retail and Home Use
You've bought a white clothing rack because your wardrobe, sewing room or shop floor needs more hanging space. Then the practical questions arrive. Will the rail sag under winter coats? Will the base fit beside a door? Is a double rail useful, or will it make a small room feel crowded? A clean white finish may have caught your eye, but space and weight should come before style.
A good rack supports garments safely, keeps stock accessible and helps a room look deliberate rather than overloaded. A poor choice creates wobble, crushed clothes, blocked walkways and unused floor area. This guide treats the white clothing rack as both a storage fixture and a visual merchandising tool, so you can match its construction, capacity and footprint to the work it must do.
Introduction to White Clothing Racks and Why They Matter
A boutique owner opens the shop before trading begins and finds yesterday's new arrivals leaning into one another on a narrow rail. The garments are difficult to browse, the hangers drag along the bar and a heavy coat has pulled one side lower than the other. In a home sewing studio, the same problem might appear as fabric samples, finished dresses and work-in-progress pieces sharing one overloaded rail beside the cutting table.
The rack itself isn't always the problem. The mismatch between rail design, garment weight and available floor space usually causes the trouble. A short domestic rail may suit a few shirts in a bedroom, while a commercial rail needs a stronger frame for dense stock runs, fittings or repeated movement around a shop.
White racks have become familiar in retail outlets, professional tailoring rooms, design studios and bedrooms because they perform several jobs at once. They hold clothing, create a boundary between areas and present garments in a calm, uncluttered frame. The light finish can also help a compact room feel brighter, while colourful garments stand out without competing with a dark or highly decorative fixture.
A freestanding unit, such as the type discussed in this guide to a portable clothing rack, can also change how a space works from one day to the next. A tailor might use it for fittings, a visual merchandiser for a temporary collection and a household organiser for seasonal storage.
Practical rule: Choose the rack for the garments and the room first. Choose the finish once those two decisions are clear.
The useful questions are straightforward:
- What will hang on it? Light tops and children's clothing place different demands on a rail from coats, denim or costumes.
- Where will it stand? Measure the floor area, nearby furniture, door movement and the route people need to walk.
- How often will it move? Castors help with flexible layouts, but fixed feet can provide a more settled base.
- How should it present clothing? A bedroom rack may prioritise neat storage, while a shop rack must support browsing and visual order.
Once those points are answered, the white colour becomes a practical design choice rather than the only reason to buy.
What Makes a White Clothing Rack Different
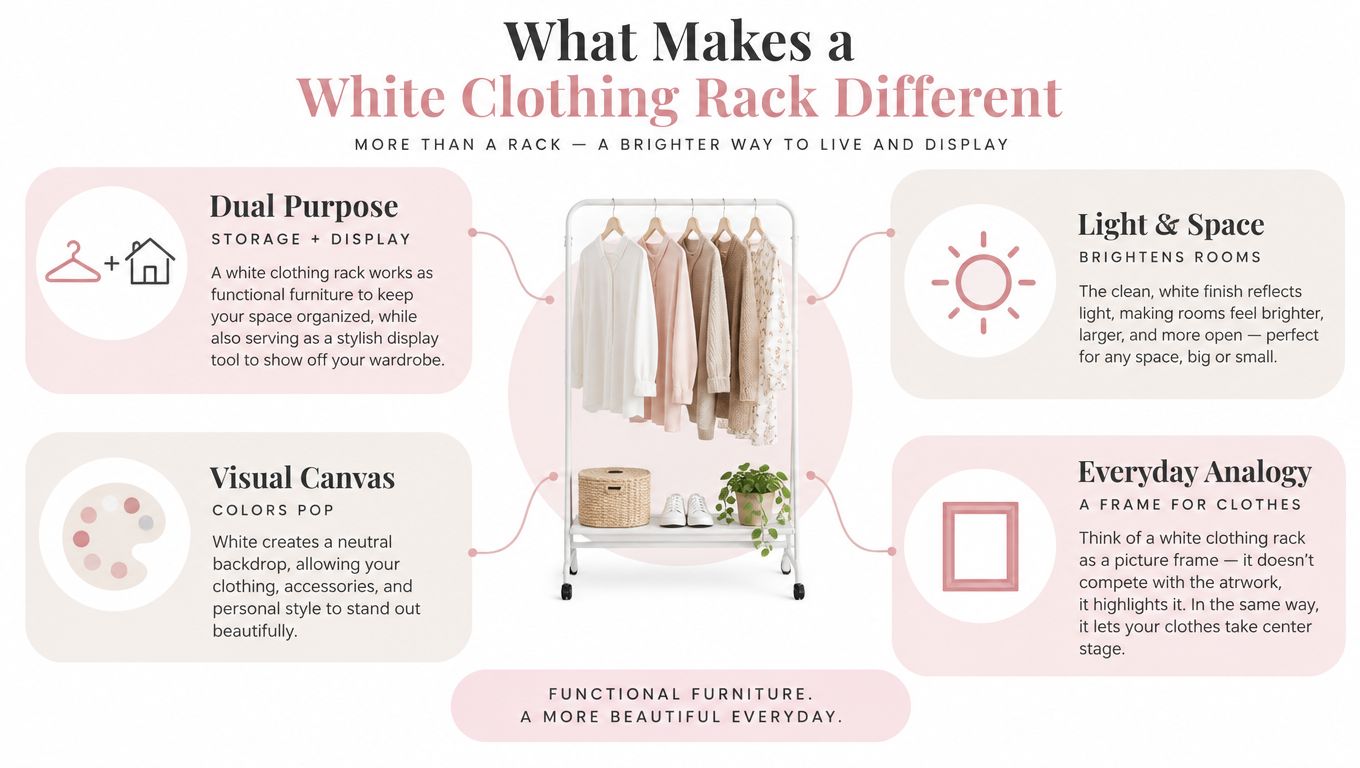
A white clothing rack is easiest to understand as a small piece of infrastructure for garments. Think of the hanging rail as a bridge. The bar carries a distributed load, the uprights transfer that load downwards, and the feet or castors spread it across the floor. If one part is weak, the whole arrangement becomes less stable.
The basic components are easy to identify:
- The rail carries hangers and needs enough stiffness to resist bending.
- The uprights set the hanging height and connect the bar to the base.
- The base controls stability by widening the support area.
- Joints and fittings hold the frame together and determine how much movement develops over time.
- The finish protects the metal and changes how the fixture interacts with light and colour.
White powder coating gives the frame a consistent, smooth appearance. In a bright shop, it tends to blend with walls and shelving more than a darker finish. In a bedroom or studio, that visual restraint can make the rack feel like part of the room rather than a separate industrial object.
Furniture and display tool
A wardrobe mainly stores clothing. A retail fixture must also communicate selection, colour and order. That difference affects the ideal shape. A rack used in a fitting room might need a compact footprint and a fixed position. A rack used for a launch display may need castors, a clean finish and enough clearance for customers to separate hangers easily.
A freestanding rail offers flexibility because you can place it where the current task happens. Wall-mounted systems save floor space but require a suitable wall and careful installation. Wardrobe-integrated systems can look built in, although they're less convenient when the layout changes.
White also works as a neutral visual canvas. Strong colours, prints and pale fabrics remain easy to distinguish against it, which helps a shop group garments by tone without introducing another dominant colour. For hanger choices that support a coordinated presentation, see this guide to the white clothes hanger.
The important distinction is simple. A rack isn't only a bar with legs. It's a frame that must carry weight, occupy space and present clothing at the same time.
Popular White Clothing Rack Styles and Construction Options
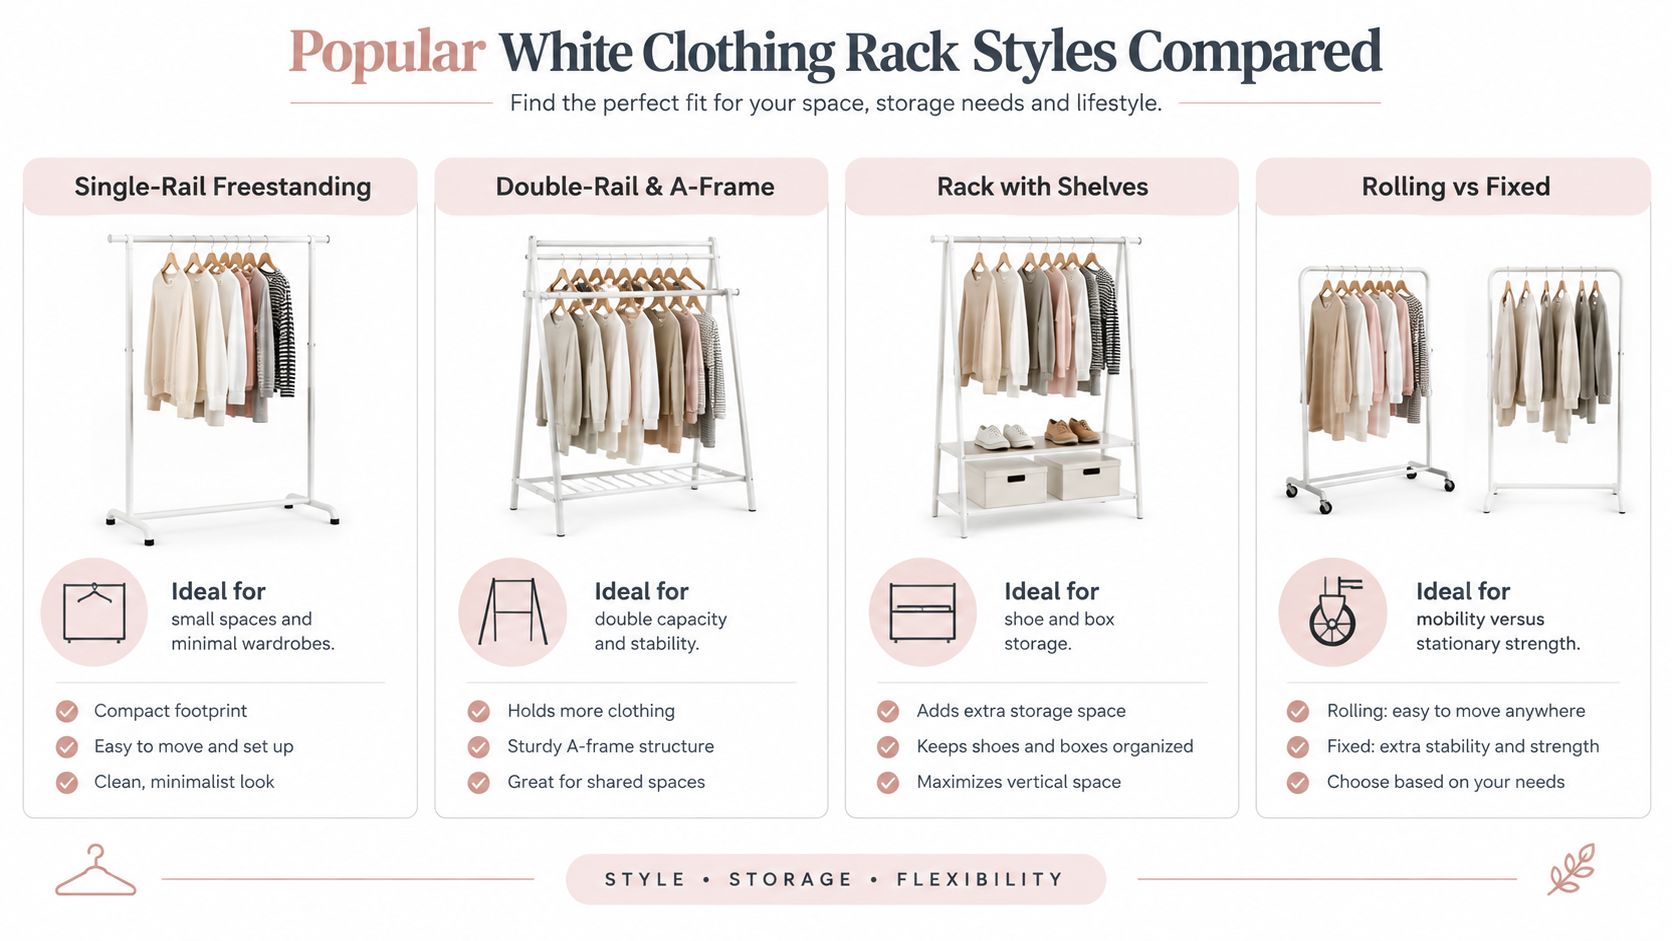
The right style depends on whether you need a compact hanging point, a mobile stock fixture or a storage system with more than one level. Product listings often make these formats look interchangeable, but their bases, joints and loading patterns can feel very different in daily use.
Single rails for focused storage
A single-rail freestanding rack suits a small wardrobe, a bedroom corner or a temporary fitting area. It's visually simple and usually easy to access from both sides. Check the base width before buying, because a narrow footprint may save space but can offer less resistance to side-to-side movement.
A-frame designs widen towards the floor and can provide a more settled stance. They're useful when a rack needs to look presentable in an open room, although the sloping supports may affect how closely it fits beside other furniture.
Double rails and added tiers
A double-rail rack creates more hanging levels, which can help separate shorter garments from longer pieces. The extra bar can increase usable storage, but it also changes the way you load and access the frame. Make sure long dresses, coats or costumes have enough vertical clearance rather than assuming every garment will fit comfortably.
Racks with an integrated shelf or shoe tier add a second storage function. Boxes, folded knitwear, shoes or sewing supplies can sit below the hanging clothes, reducing the need for another unit. The shelf does take up visual and physical space, so measure the full depth, not only the rail length.
Fixed, rolling and adaptable formats
Castors are useful for cleaning, layout changes and temporary retail displays. Locking wheels matter, because a rack that can shift as customers browse or as a garment is removed quickly undermines stability. Fixed feet make more sense where the rack should stay in one position and stability matters more than mobility.
Tension-mounted or wall-leaning options can work in constrained rooms, but they depend heavily on the wall, ceiling or surrounding structure. They shouldn't be treated as equivalent to a freestanding commercial frame.
For custom frames and modular builds, understanding scaffold pipe fittings can help you think about joints, connection points and how a design transfers force. The wider retail market contains options ranging from about £5 to £6 for low-cost rails to around £85 for larger or premium models, as noted in UK supplier retail guidance. Those prices don't tell you whether a rack suits your load or footprint, so treat them as a shopping range rather than a quality guarantee.
Load Capacity Stability and Sizing That Actually Matters
A white rack should be chosen by space and weight before colour. Start with the rail's load rating, then translate it into the clothing you plan to hang. A spread load means weight distributed along the full rail. A point load concentrates weight in one place, such as several heavy coats pushed towards an end. The same rack may handle the first arrangement comfortably yet bend or rock under the second.
Tube diameter affects stiffness. A UK benchmark for a heavy-duty clothes rail uses a 32mm industrial-grade steel frame, with a stated 50 to 200kg spread-load rating. Some white commercial models are independently SATRA-tested to 160kg and built to BS EN 16121, the furniture safety and strength standard for non-domestic storage use. These specifications appear in commercial clothes rail guidance from Displaysense. For a closer look at frame construction and intended loads, see this guide to choosing a heavy-duty clothing rack.
The mechanical reason is straightforward. Moving from common 19 to 25mm domestic rails to 32mm industrial tube increases resistance to bending and sagging. The larger tube does not make every rack suitable for every setup. Joints, welds, the base and the floor also transfer force, so inspect the whole frame when you expect dense stock.
Translate the specification into clothing
Garment count varies with length, fabric bulk, hanger shape and spacing. These estimates from UK supplier guidance are useful planning ranges, not promises for every collection.
| Rail Length | Light Garments Estimate | Heavy Garments Estimate | Load Tip |
|---|---|---|---|
| 2ft | About 20 to 30 | Around 15 to 20 | Keep heavy pieces separated and centred |
| 6ft | Roughly 60 to 80 | Around 30 to 40 | Use the manufacturer's spread-weight rating and avoid end loading |
The same guidance places heavy garments at around 15 to 40 thick garments, depending on rail length and stock type. Read that estimate with the weight rating. Hangers count too. Padded hangers add more load and occupy more rail space than slim plastic hangers.
Weight is only half the decision. Clearance matters too. If garments cannot slide freely, customers pull harder, fabrics crease and the rail receives uneven force.
Choose the longest rail that fits without narrowing the walkway. Allow height for the longest garment, and measure the complete footprint when the base projects beyond the hanging bar. In a studio, keep the rack clear of cutting, pressing and mannequin routes. In a shop, check the approach from both sides.
Stability also reflects loading habits. Begin at the centre, distribute similar weights across the rail and place the heaviest pieces low when the design permits. If the empty rack rocks, adding clothes will not correct it. Level the feet, inspect the joints and check for an uneven floor.
Styling and Visual Merchandising Ideas for White Racks
A white rack gives clothing the visual lead. That makes it useful in a shop, but it also means untidy spacing becomes more noticeable. Treat the rail like a gallery wall. The garments provide the colour and texture, while the rack supplies a quiet boundary.
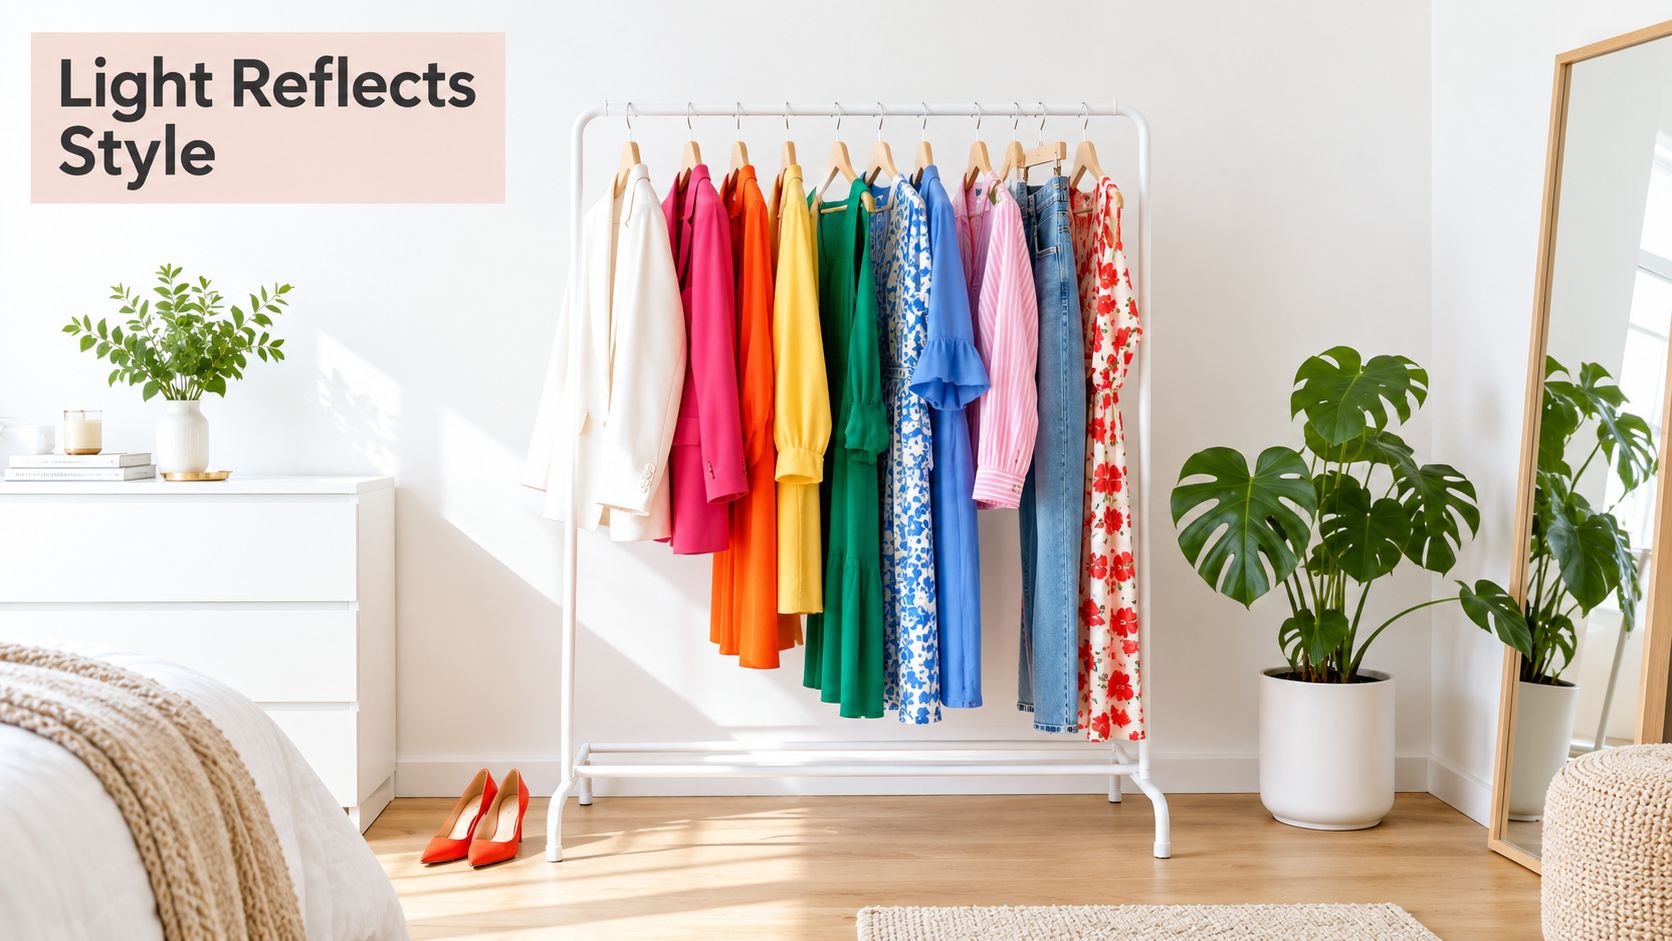
For a boutique display, group pieces by a clear visual logic. A tonal sequence can move from pale neutrals to deeper shades, while a collection built around one print might place the strongest item at the centre. Don't fill every available space. Negative space helps a hero garment look intentional and gives shoppers room to separate hangers.
A sewing studio benefits from a different arrangement. Keep finished garments on one side, works in progress on another and reference fabrics or trims in a nearby basket or shelf. White helps these categories remain visible without making the room feel like a warehouse. A mirror beside the rack can turn storage into a fitting point, while a directed light can show colour and texture more clearly.
In a rented bedroom, the rack can act as an open wardrobe without visually closing off the room. Choose a restrained number of garments, fold accessories into a lower basket and keep the floor beneath the rail clear. If the rack has a shelf, use matching boxes or baskets so the storage reads as one composition rather than a collection of loose objects.
Build displays that support browsing
Hang garments with the same type of hanger where possible. Keep similar lengths together, then use a small change in colour, texture or height to mark a new group. A white frame makes bright garments pop, but it also reveals dust and scuffs, so regular light cleaning protects the presentation.
The wider clothing market has experienced sharp changes. The ONS clothing retail sales time series records an annual change of -26.4% in 2020, followed by 17.0% in 2021, 20.5% in 2022 and 6.6% in 2023. For retailers, that history reinforces the value of fixtures that can support changing layouts, refreshed stock and restored in-store presentation.
This visual merchandising guidance can help you connect the rack with mirrors, signage, colour groupings and customer flow. A useful display should look attractive from a distance and remain easy to shop up close.
Here's a short visual reference for arranging clothing with clarity and balance:
Assembly Installation and Everyday Use Made Simple
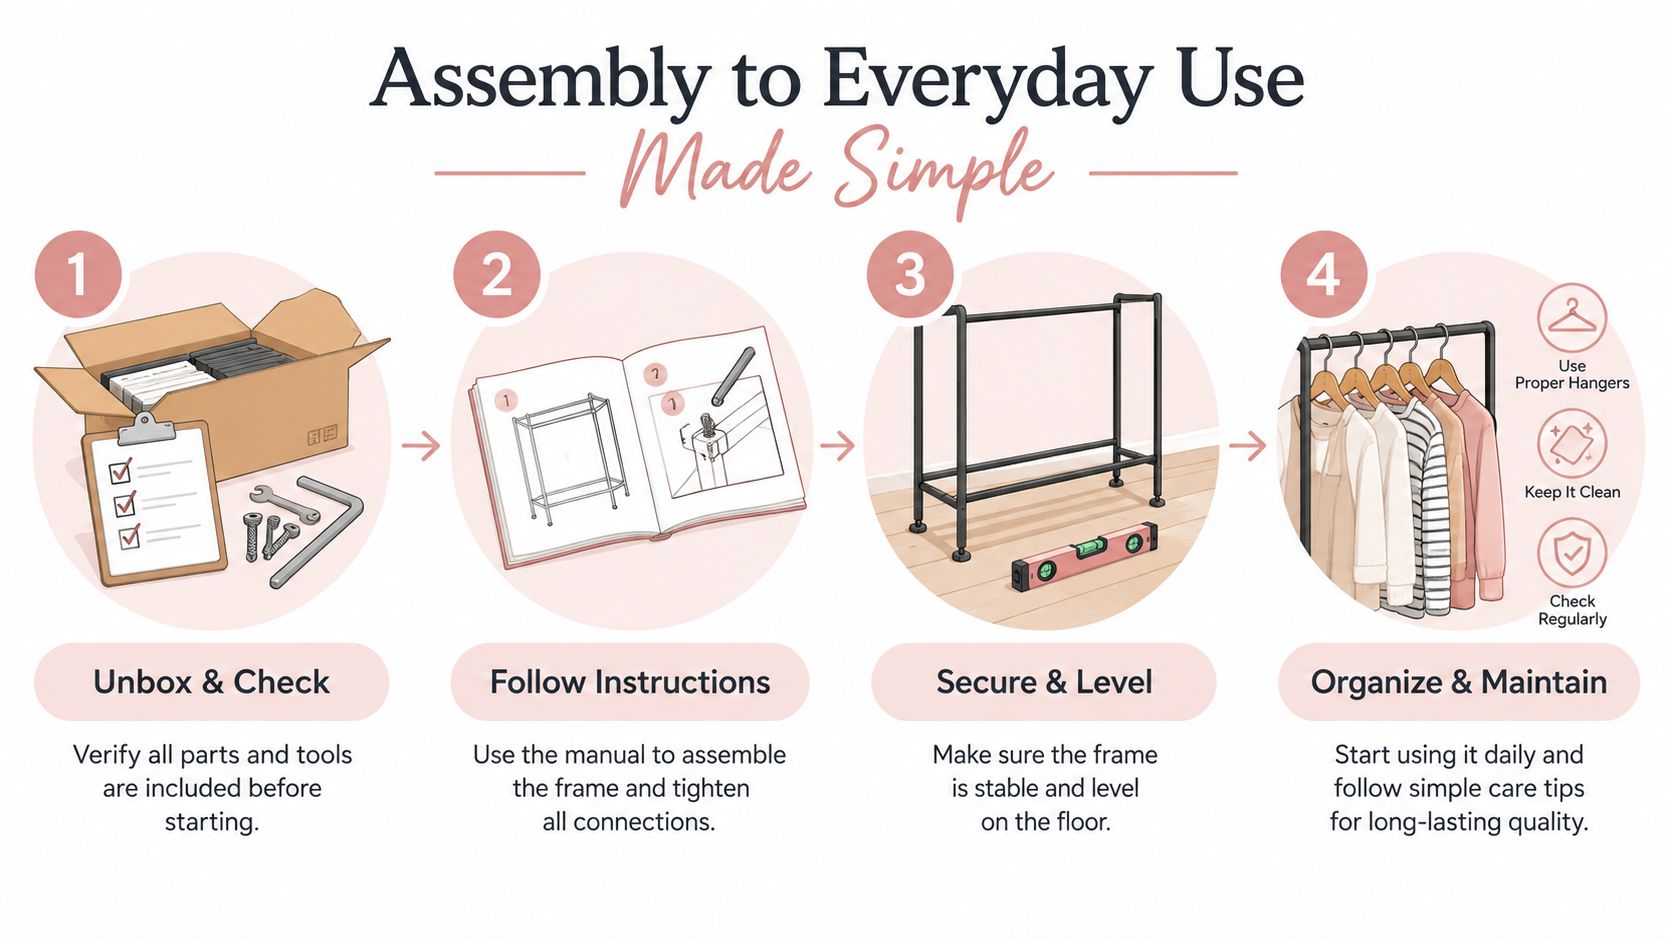
A stable rack starts before the first garment goes on it. Open the box on a clear floor, compare every component with the instructions and check the rail, uprights, base, fasteners, feet and castors. If a part looks bent or a thread doesn't engage smoothly, stop there rather than forcing the assembly.
Build the frame in a controlled order
Follow the supplied instructions, especially if the rack uses different fasteners for the uprights and base. Start each bolt or fitting loosely until the frame is complete, then tighten progressively. This approach gives the parts room to align and reduces the chance of building a frame that sits under tension.
Set the rack on its intended floor before final levelling. Uneven flooring can make a correctly assembled unit appear faulty. Adjust feet where available, lock the castors and apply a gentle push from several directions. The rack should remain settled without clothing on it.
Placement affects daily performance. Keep the frame clear of door swings, drawers and the working edge of a cutting table. Avoid heat sources and damp areas, and leave enough room to walk around the unit rather than turning it into a bottleneck.
Load and care for the finished rack
Add garments gradually. Put heavier pieces towards the centre, spread the remaining stock across the rail and watch for bending, movement or increased drag. Supplier guidance places a 2ft rail at about 20 to 30 light garments, while a 6ft rail may hold roughly 60 to 80 light items. For thick garments, the practical range falls to about 15 to 40, depending on length and stock type, according to UK clothes rail capacity guidance.
Keep a small gap between groups so you can remove one hanger without pulling several others. Rotate stock in a shop, move finished pieces away from active sewing areas and wipe the powder-coated frame with a soft, slightly damp cloth. Harsh abrasives can mark the finish and make future cleaning more difficult.
Choosing the Right White Clothing Rack for Retail Home and Studio
A retail rack earns its floor space by supporting browsing, replenishment and repeated handling. Look for a frame, a published spread-load rating, secure joints and locking castors if staff regularly change the layout. Matching finishes across multiple units can make a shop feel organised, but consistency shouldn't replace checking each rack's actual capacity.
Home users usually need a smaller footprint and quieter, simpler operation. A single rail may suit a bedroom corner, while a shelf-equipped design can combine hanging clothes with shoes or folded items. Measure the full base, not just the visible bar, and check that the rack won't interfere with wardrobes, radiators or doors.
A sewing studio needs access as much as storage. Place the rail close enough to the fitting area for finished garments, but not so close that hems, fabric lengths or people catch on it. Tailors and dressmakers may prefer a stable commercial-style frame when garments are bulky or repeatedly moved between fittings.
Use this final checklist before ordering:
- Match the load: Identify whether the rack will carry light garments, dense winter clothing, costumes or mixed stock.
- Measure the footprint: Include the base, castors, shelves and the clearance needed to walk and browse.
- Choose mobility deliberately: Locking castors suit flexible retail layouts, while fixed feet suit settled storage.
- Inspect the construction: Compare tube diameter, joint quality, base shape and any stated testing or standard.
- Plan the presentation: Decide whether you need one rail, two levels, lower storage or a neutral frame for colour-led merchandising.
Display Guru's range includes white garment rails, a white two-tier double garment rail and a white three-foot centre bar for creating a two-tier heavy-duty rail with additional height extensions. For a professional shop or studio, compare those features with your garment weight, working pattern and available room rather than choosing by colour alone.
Visit Display Guru to compare white garment rails and related display equipment for retail floors, tailoring rooms, costume work and home sewing studios. Use the product details to match rail format, capacity and footprint to the garments you need to organise.