



Shelf 5 Tier Sizes, Load Limits and Best Uses
You've cleared a corner of the stockroom, but the fabric boxes still sit beside the cutting table and the spare packaging blocks a cupboard. A five-tier shelf looks like the obvious fix, until you realise the tallest box won't fit between the shelves and the top level is beyond comfortable reach.
A useful unit must do more than fit the gap. Each tier needs a suitable load rating, enough usable space and a sensible retrieval route. When comparing a “shelf 5 tier” listing, judge the working space you can use, not the number of shelves in the photograph.
Typical Five-Tier Shelf Sizes at a Glance
A five-tier shelf is an upright unit with five horizontal storage surfaces. That description doesn't tell you its footprint, shelf spacing or usable capacity. Start with the format, then compare the manufacturer's dimensions against your stock and room.
Typical five-tier shelf sizes by format
| Format | Typical use |
|---|---|
| Compact wall or corner | Small studio or stockroom corner. Choose a width that clears adjacent fittings and a depth that keeps small containers visible. |
| Standard freestanding | Shop floor and general storage. Match the clear shelf width and depth to your everyday cartons or folded stock. |
| Wide display | Visual merchandising and fabric bolts. Check the unsupported span and whether the goods fit without projecting beyond the deck. |
| Heavy-duty | Workshops and bulk stock. Specify dimensions around the largest load, handling space and rated construction. |
There's no dependable standard size implied by the tier count. A tapered corner display and a rectangular stockroom rack can both have five shelves while offering very different working surfaces. Use catalogue dimensions for the exact model rather than treating a product photograph as a scale drawing.
Measure the working space, not just the frame
Record overall width, depth and height, then ask for clear shelf dimensions. Uprights, braces, shelf lips and recessed decks can reduce the space available for boxes. Adjustable shelf positions also matter: the outside height doesn't reveal whether your tallest container will fit.
For configurable wire systems, the Labs USA shelving configurator is a useful resource for exploring a layout before comparing it with your room measurements. Confirm the resulting specification with the supplier, including any feet, castors or other components that affect the footprint.
Use a tape measure and masking tape to mark the proposed base on the floor. Open nearby doors fully, pull out drawers and carry your largest stock container through the remaining route.
- Check above: Include lights, ceiling fittings and anything stored above the top deck.
- Check beside: Allow access to sockets, switches and neighbouring cupboards.
- Check in front: Leave room for the person, the load and any handling equipment, not just an empty walking route.
Shortlist a compact option and a larger alternative that both pass these checks. A slightly narrower unit can be the better purchase if staff can retrieve stock without turning sideways.
Metal, Wood and Laminate Compared
Choose the material that matches your space and budget, but don't use material alone to predict capacity. Shelf thickness, unsupported span, joints and bracing all affect performance.
Five-tier shelf materials, load and best use
| Material | Typical load per shelf | Strength and weight | Finish options | Best for |
|---|---|---|---|---|
| Metal frame with MDF shelves | Manufacturer's evenly distributed rating | Rigid frame; handling weight depends on construction | Painted or powder-coated frame; plain or decorative boards | Retail display and sturdy dry storage |
| Solid wood | Verified rating for the shelf span and joints | Substantial and often heavy to reposition | Natural, stained, painted | Boutique display and studios |
| Laminate or particleboard | Verified rating for the board and supports | Budget-friendly; long unsupported spans need scrutiny | Woodgrain, plain colours | Light storage, notions and packaging |
| Wire or chrome metal | Verified rating for the deck, posts and configuration | Open construction; small goods may need containers | Chrome, black and coated finishes | Stockrooms and boxed fabric storage |
The comparison below summarises the main material choices.
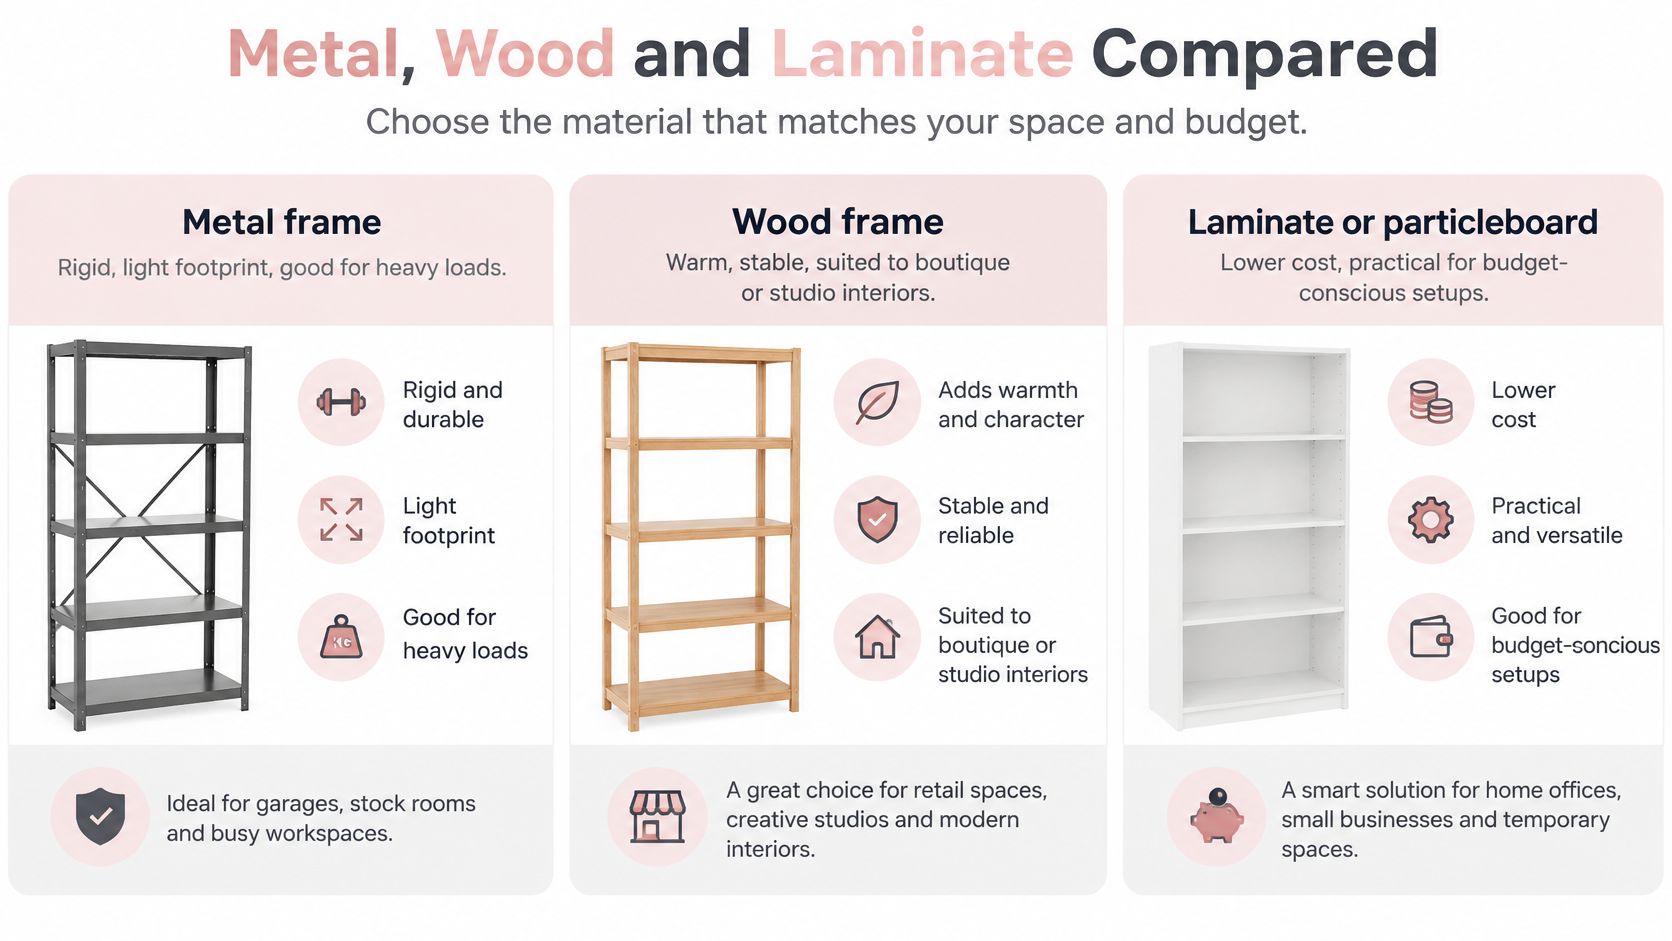
What each material does well
Metal frames with MDF decks can offer substantial capacity: in 2026, Wowcher listed a five-tier metal unit with MDF shelves rated at up to 175 kg each when evenly loaded. That's a model-specific example, not a rating for MDF generally. Keep unfinished boards away from damp conditions, and use this guide to MDF shelving boards when assessing deck suitability.
Solid wood suits customer-facing spaces where the fixture contributes to the interior. Inspect joints and the support beneath long shelves rather than assuming a thick-looking front edge guarantees strength.
Laminate or particleboard makes sense for lightweight packaged goods where appearance and purchase cost matter. Damaged edges and unsupported spans deserve attention. For a historical budget reference, Wayfair listed five-tier wall-display shelving from £23.99 in 2024, but price alone says nothing about suitability for stockroom loads.
Wire shelving lets you see through the unit and avoids a continuous solid deck. Use smooth containers or suitable liners where thread cones, delicate fabric or small notions could catch or fall through.
Finish is separate from stability. The discussion of seismic safety for commercial shelving from Simply Hospitality offers useful context on restraint, although it isn't UK installation guidance.
How Much Weight Each Tier Can Hold
The safe working load matters more than the tier count. A capacity headline is incomplete unless you know whether it applies to an individual deck, the complete frame or a particular shelf arrangement.
HSE storage guidance says storage systems should safely carry the intended goods, accommodate their dimensions and display their safe working load or rated capacity with any necessary loading configuration. Treat that combination as the specification, not just the largest weight printed on the sales page.
Check the complete loading arrangement
- Weigh the heaviest realistic contents. Use suitable scales for cartons, folded garments, fabric, tools and display accessories. Include containers, liners and anything else supported by the shelf.
- Find the rating for the individual shelf. Don't divide a whole-unit capacity by the number of tiers unless the manufacturer explicitly permits that calculation. Different shelf positions or components may have different restrictions.
- Read the distribution condition. An evenly distributed load spreads weight over the deck. A compact, dense box can stress a small area even when its total weight looks acceptable.
- Allow for changing stock. Avoid choosing a unit that only just accommodates today's contents. Leave practical headroom for replenishment and weighing uncertainty, but don't invent a universal safety percentage or use spare capacity to justify unsuitable loading.
- Check the complete unit. Add the planned contents across all tiers and compare that total with the frame and base rating. Include any configuration restrictions associated with shelf spacing, castors or restraint.
Practical rule: An underloaded shelf doesn't grant permission to overload another shelf.
Dense stock needs support across the deck. Don't assume a thin liner turns wire shelving into a platform for concentrated loads, and don't replace a damaged board with an apparently similar sheet without checking the specification.
For open-deck systems, the wire and chrome shelving guide can help you distinguish construction choices before you compare their stated ratings.
Make defects easy to report
Bowing, damaged uprights, loose connections, rocking or a developing lean require action. Stop using the affected storage, keep people clear where necessary and arrange safe unloading and assessment. Tightening a loose joint doesn't resolve a bent component.
Give the unit a visible capacity label that includes the permitted loading pattern. Keep its assembly instructions and product identification with your storage records, so replacement parts and future alterations can be checked against the correct specification.
Where Each Tier Works Best
Five tiers are five different jobs, not five equally useful storage levels. Allocate them by weight, retrieval frequency and the capabilities of the people using the unit.
Five-tier shelf uses by setting
| Setting | Typical items | Tier to use | Watch for |
|---|---|---|---|
| Retail display | Folded knitwear, accessories, boxed goods | Middle tiers within customers' comfortable view and reach | Overstacking and price cards obstructing shelf edges |
| Stockroom storage | Cartons, bulk fabric, packaging | Lower tiers for heavy stock | Heavy boxes left above comfortable handling height |
| Sewing studio | Notions, thread, patterns, interfacing | Middle tiers for daily supplies; upper tier for lightweight spare stock | Dust and fabric snagging on exposed edges |
| Costume or theatre store | Labelled costume pieces and props | Lower tiers for substantial props; upper tiers for light items | Retrieving overhead stock without suitable access equipment |
| Home studio | Fabric bolts and machine accessories | Lower tiers for bulky items | Containers projecting into walkways |
The London Metropolitan University office safety guide supports matching storage to users' capabilities, placing heavy or frequently handled goods between roughly knuckle and shoulder height, and using a stable step or platform for high shelves rather than climbing the unit.
Match the tier to the task
In a retail display, customers should be able to remove the item they want without dismantling a stack. Use the most accessible shelves for merchandise that needs handling, such as folded knitwear whose texture matters. A high display position may attract attention while remaining unsuitable for self-service.
In a stockroom, packaging can be deceptively awkward. An oversized carton might weigh little but still block the handler's view or require an uncomfortable reach. Split contents into manageable containers where that improves handling, and label them from the approach direction.
A sewing studio benefits from separating working supplies from reserves. Loose thread cones need trays or containers; folded interfacing needs a smooth surface; pattern boxes need enough clearance to slide out without scraping their lids. Shelf depth is wasted if daily supplies disappear behind spare stock.
For costume teams, separate soft pieces from props with protruding parts. A labelled box protects trims better than an exposed pile, while long hanging costumes belong on suitable rails rather than folded into a shelf arrangement that makes identification difficult.
Where the top tier stops earning its space
Consider a studio layout with spare fabric bolts at the base, pattern boxes above them, thread cones and interfacing within easy reach, and lightweight seasonal materials at the top. That arrangement gives the upper shelf a reserve-storage role instead of turning it into an overhead workstation.
The same unit becomes less useful if the seasonal box contains equipment needed every morning. Each retrieval now involves fetching access equipment, clearing its position and returning it afterwards. The nominal capacity hasn't changed, but the working arrangement has deteriorated.
A top tier that staff avoid using isn't useful capacity. Neither is one they reach by standing on the shelf below.
Run a trial during a normal working week. Note which upper-level items come down repeatedly, then exchange them with lighter, less frequently needed stock.
Five-tier units work well for grouped, containerised goods. They're the wrong answer for long hanging garments, bulky dress forms or heavy machines that need a dedicated working surface.
How to Assemble and Anchor the Unit
Build from the manufacturer's instructions, not from a similar-looking unit you assembled before. Shelf connectors, braces and restraint points aren't interchangeable between designs.
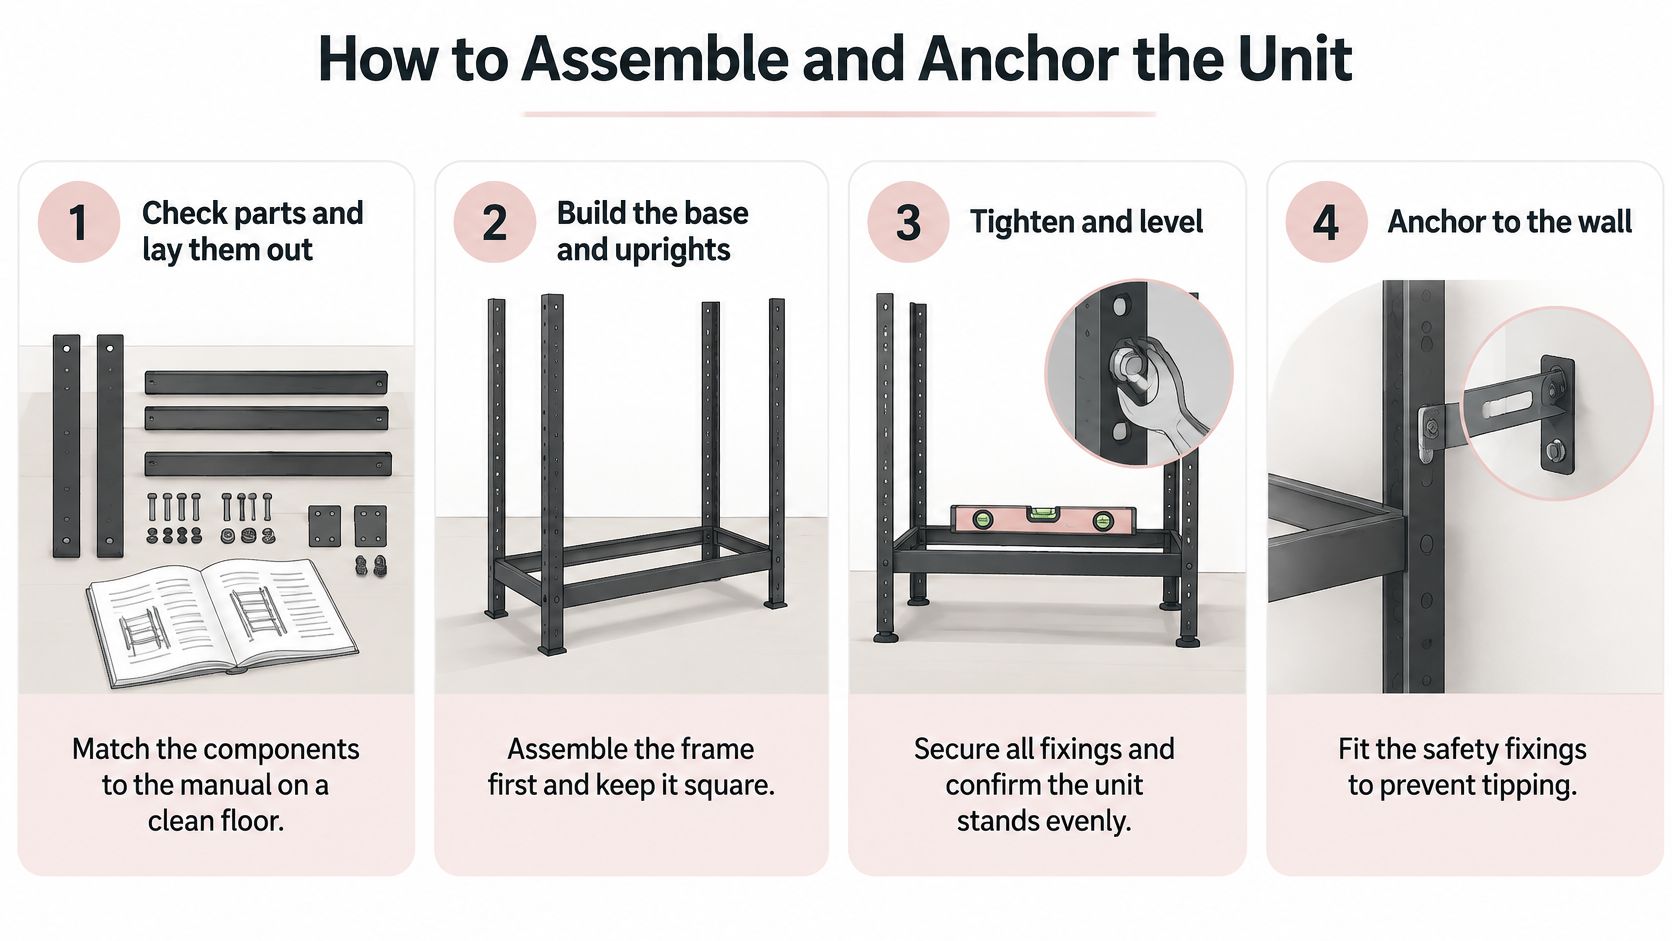
The illustration shows the broad sequence; the product manual determines the actual fixings and order.
Build square before loading
- Check and lay out the parts. Match components to the manual on a clean floor and inspect them for damage. Don't substitute a convenient bolt for a missing specified fixing.
- Assemble the base and uprights. Check squareness with a tape measure across the diagonals where the frame design permits. A twisted base makes later shelf connections difficult to seat properly.
- Fit shelves in the specified sequence. Where instructed, work upwards and tighten connections progressively rather than fully tightening one side first. Boltless connectors must be completely engaged, not merely resting in their slots.
- Level the base. Use a spirit level and the manufacturer's approved adjustable feet or packing method. Loose scraps under a foot can shift, leaving the unit rocking when stock moves.
- Install the required restraint. Use the designated anchoring points and fixings suitable for the wall substrate. Check for concealed services before drilling, and get competent help where the wall construction or fixing capacity is uncertain.
- Load progressively. Follow the specified loading arrangement and observe the unit as goods are added. A light trial load can reveal poor seating, but it doesn't prove the rated capacity.
- Set inspection reminders. Check connections after initial use and establish a documented inspection schedule suited to the environment and manufacturer's instructions. Staff should report impact damage or movement immediately rather than waiting for the next scheduled check.
Check the surrounding installation
Wall-mounted systems need their own assessment. A guide to slatwall and shelves is useful when comparing display arrangements, but the supporting wall and compatible brackets remain critical.
Before release for use: Check for rocking, unexpected creaking, incomplete connections and gaps where components should be fully seated.
Those checks help identify assembly faults. They don't replace the manufacturer's requirements or a competent assessment where the installation demands one.
Merchandising Within Each Tier
Give each display tier a clear organising rule: one category, colour family or price band. A customer should understand the grouping without reading every label. Reserve a distinct area for new or seasonal lines rather than scattering them among unrelated products.
This arrangement illustrates how open space can separate groups.
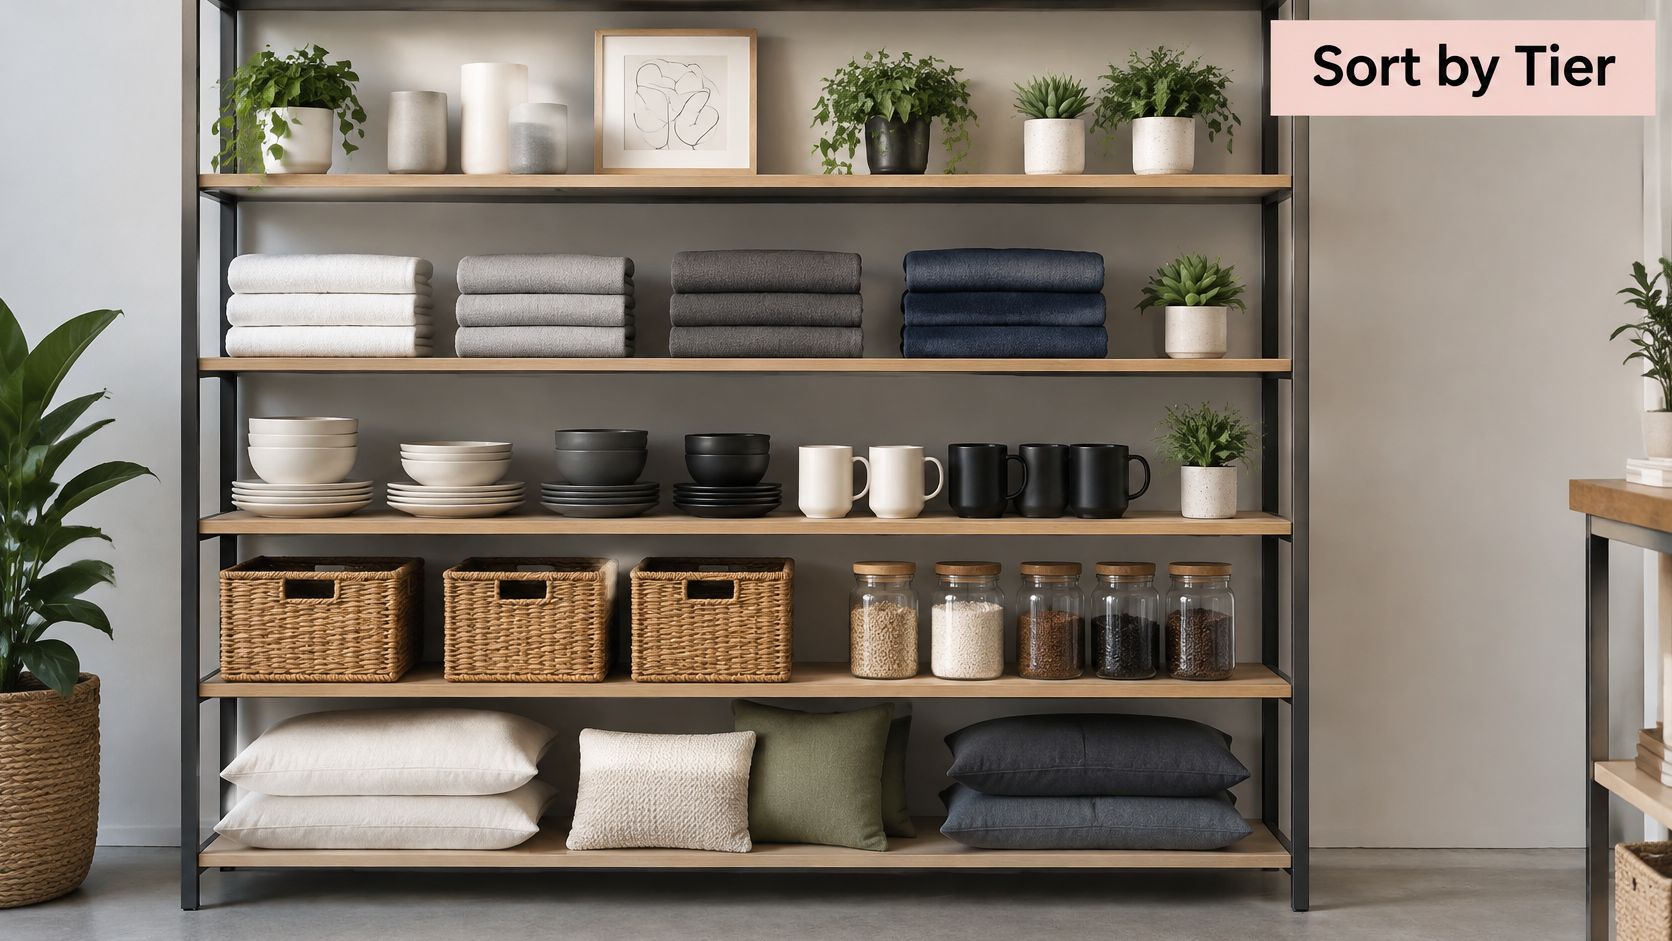
- Repeat a recognisable shape: Align folded stacks or matching boxes so customers can scan the assortment.
- Leave lifting space: Keep enough room between groups for a hand to remove an item without disturbing its neighbours.
- Face products towards the approach: Make labels readable from the route customers take, then replenish gaps and rotate stock during display checks.
Keep the shelf edge useful
Price cards should sit securely without covering merchandise or catching sleeves. For small boxed goods that need a retaining edge, compare shelving with a lip, while checking that the lip doesn't obstruct removal.
The common mistake is filling every deck to its front edge. Customers can't distinguish groups, and staff struggle to replace stock neatly. A securely positioned lightweight hero item or sign can give the top tier a display purpose without inviting customers to retrieve it.
Use this styling demonstration as a visual prompt, then adapt the arrangement to your merchandise.
Judge the finished display from the shop entrance. The unit should present one coherent assortment, with enough space to browse it, rather than a collection of leftover stock.
Confirm the Fit Before You Buy
Finish with a space-and-access audit, not a final glance at the product photograph. Record the footprint, clear shelf dimensions, door and walkway clearance, retrieval frequency and the space needed to position access equipment.
Calculate potential storage volume as clear shelf width × clear shelf depth × usable storage height. Use consistent units, and allow for hand clearance, container lids and stock that can't safely occupy the full opening. Empty air above an inaccessible box isn't productive capacity.
Apply the decision rules
- Choose five tiers when grouped goods fit the decks and everyday supplies remain comfortably accessible.
- Choose a lower unit or fewer tiers when heavy equipment dominates, handling space is restricted or overhead retrieval would become routine.
- Choose wall-mounted display when preserving floor space matters and the wall can support the specified installation.
- Choose a garment rail when hanging stock would otherwise be folded, hidden or repeatedly handled.
The guide to maximising small spaces can help you assess the wider layout rather than treating shelving as an isolated purchase. Compare storage gained with the effort required to retrieve each item.
Confirm dimensions, individual shelf ratings, whole-unit capacity and installation requirements in writing with the shelving supplier. Then retain only the models that pass your audit.
Our catalogue includes white and black shopfitting garment rails, accessories, dump bins and baskets, alongside body forms, full mannequins, furniture and other retail display products. Compare those alternatives with your shortlist when shelving alone doesn't suit the stock.
Display Guru offers garment rails, body forms, mannequins, dump bins and baskets for retail and studio layouts. Visit Display Guru with your measurements and stock list to compare display products that complement your shelving or provide a better home for hanging garments and bulky merchandise.