


A Guide to Clothes Rails for Walls
Are you tired of tripping over clothes and staring at a room with zero floor space? Wall-mounted clothes rails are a fantastic, space-saving fix that can turn that unused vertical wall space into storage that’s both functional and stylish. This simple bit of kit does more than just hold your clothes; it can genuinely become a feature that pulls your room's decor together.
Why Wall-Mounted Rails Are Such a Smart Storage Solution
Picture this: you walk into your bedroom or hallway and it feels open and clear, free from overflowing wardrobes and stray jackets. That's the real magic of installing a clothes rail on your wall. Instead of letting bulky furniture eat up your precious floor space, you're tapping into the vertical real estate that most of us forget we even have. It's an instant way to make any room feel bigger and a lot less chaotic.

Think about a traditional wardrobe—everything is hidden away, sometimes forgotten. A wall rail, on the other hand, puts your clothes on display, making them easy to see and grab. Not only does this speed up choosing an outfit in the morning, but it also nudges you to be a bit more thoughtful about your collection, encouraging you to keep only the pieces you genuinely love and wear. It’s a game-changer if you're aiming for a minimalist lifestyle or building a capsule wardrobe.
More Than Just a Place to Hang Things
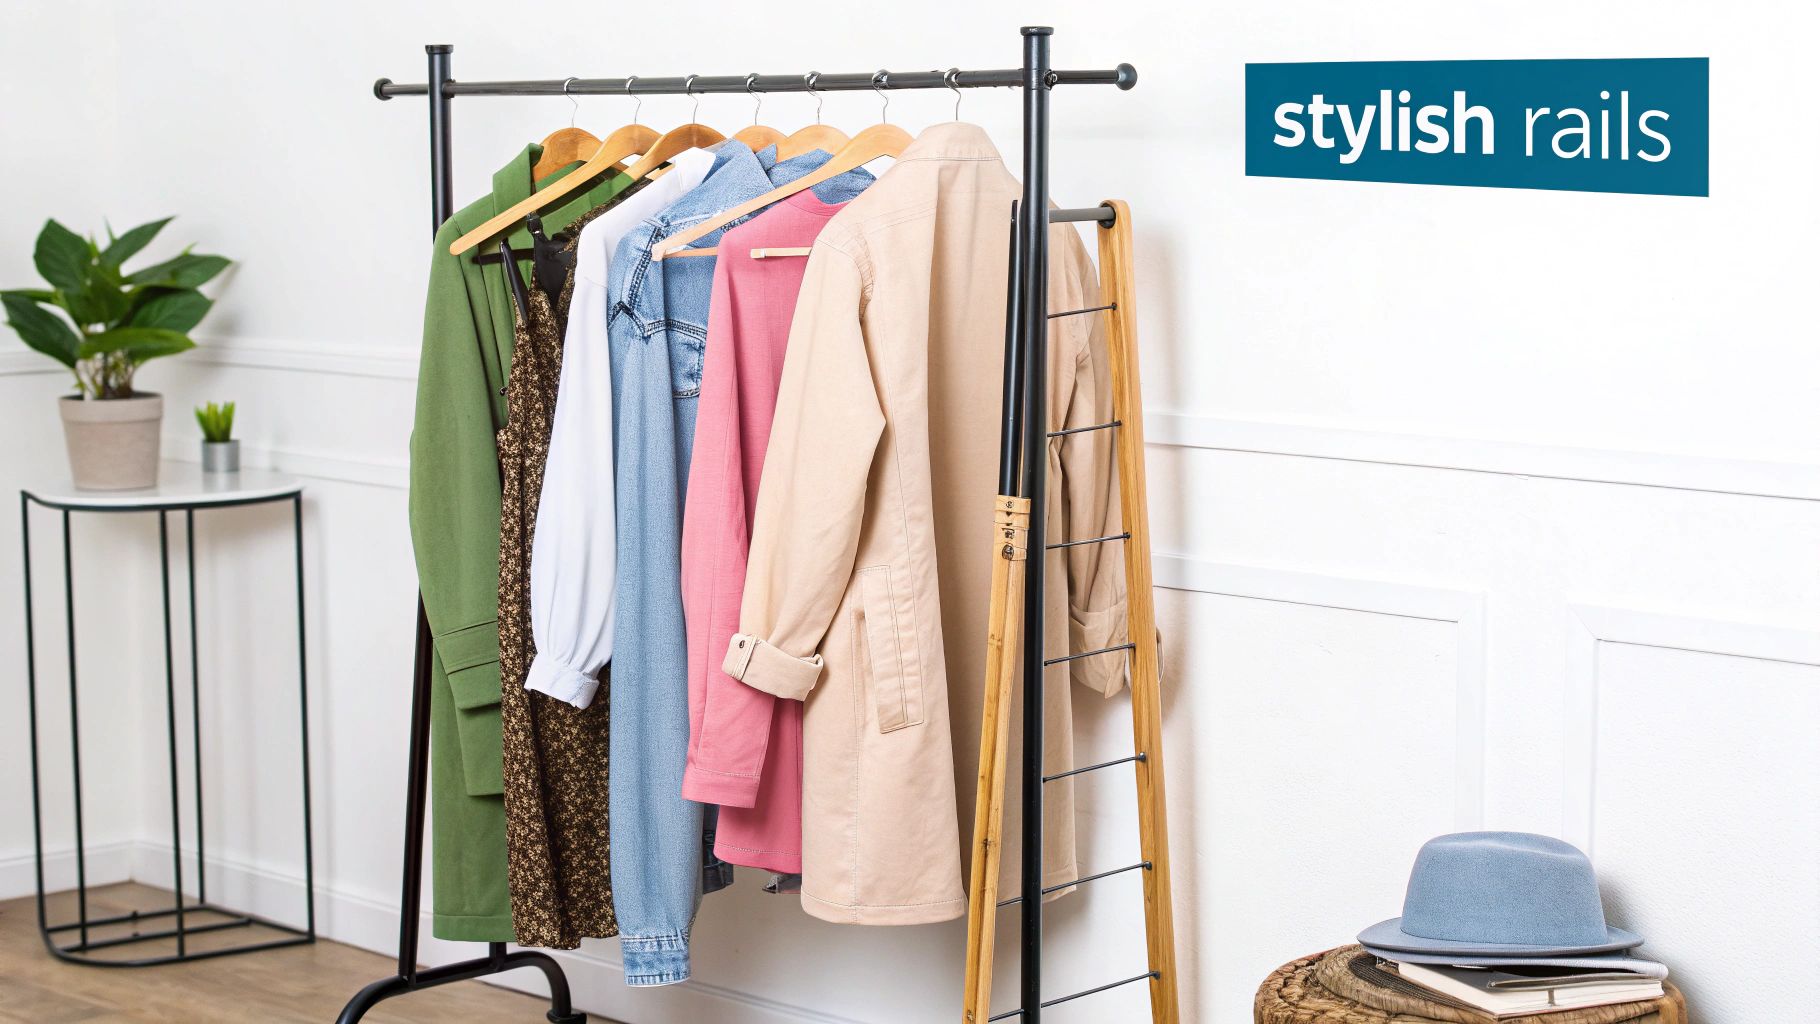
Beyond being purely practical, these rails are a deliberate style choice. An industrial-style pipe rail can lend a rustic, urban vibe to a loft apartment, while a slimline black or gold metal rail fits perfectly with a modern, clean look. They essentially turn your favourite clothes into a piece of art for your wall.
And their usefulness isn't limited to just one room:
- In the bedroom: They work beautifully as an open wardrobe, perfect for planning your outfits for the week or keeping your go-to items handy.
- In the hallway: It’s the ideal spot for hanging coats, scarves, and bags, keeping your entranceway neat and welcoming.
- In the laundry room: A practical rail is brilliant for air-drying clothes or hanging freshly ironed shirts.
When you mount storage vertically, you're not just clearing the floor; you're fundamentally changing how you use and see your space. It's a move away from hiding everything to displaying it with purpose, blending organisation with your personal style.
This guide is here to help you unlock that potential. If you're keen to dive deeper into making your storage work for you, exploring guides on closet organization systems can provide a broader perspective on functionality and aesthetics. For more specific advice, you can find a great overview right here: https://www.displayguru.co.uk/blogs/news/wall-mounted-clothes-rail. Now, let’s get into the details of choosing the right materials, getting the installation spot-on, and styling your new rail like a pro.
How to Choose the Right Wall Mounted Clothes Rail
Picking the perfect wall-mounted clothes rail isn’t about finding a one-size-fits-all fix. It’s more like choosing any other piece of furniture – it needs to work hard, but it also has to look right in your space. The best choice will feel like a natural part of your room’s design, not just a storage solution you settled for.
So, where do you start? First, think about its main job. Are you designing an open-wardrobe feature for your favourite outfits? Or do you need a heavy-duty workhorse in the utility room that can handle a mountain of wet laundry? Knowing this will point you towards the right style and material.
Assessing Your Style and Space
First impressions matter, so the visual style of the rail is a great place to begin. A rugged, industrial-pipe rail made from black steel instantly gives off an urban, edgy vibe. It’s a perfect fit for loft-style spaces or rooms with a more rustic, raw aesthetic.
On the other hand, a sleek, minimalist bar in a matte black or brushed gold finish offers a clean, understated look. These designs are brilliant for modern or Scandi-inspired rooms where simplicity is everything. They tend to fade into the background, allowing your clothes to take centre stage.
Take a look around the room. What else is in there? A shiny chrome rail can tie in with modern light fittings and door handles, while a wooden or copper rail introduces a warmer, more natural feel. The aim is to find clothes rails for walls that genuinely complement your existing furniture and colour palette.
Don’t just think about what the rail holds; think about what it says. A wall-mounted clothes rail is an active part of your interior design, influencing the mood and character of the entire room.
Functionality and Design Features
Looks are important, but so is practicality. Think about the little design details that will make your life easier. Some rails are simple, straight bars, but others come with clever features that add a ton of value.
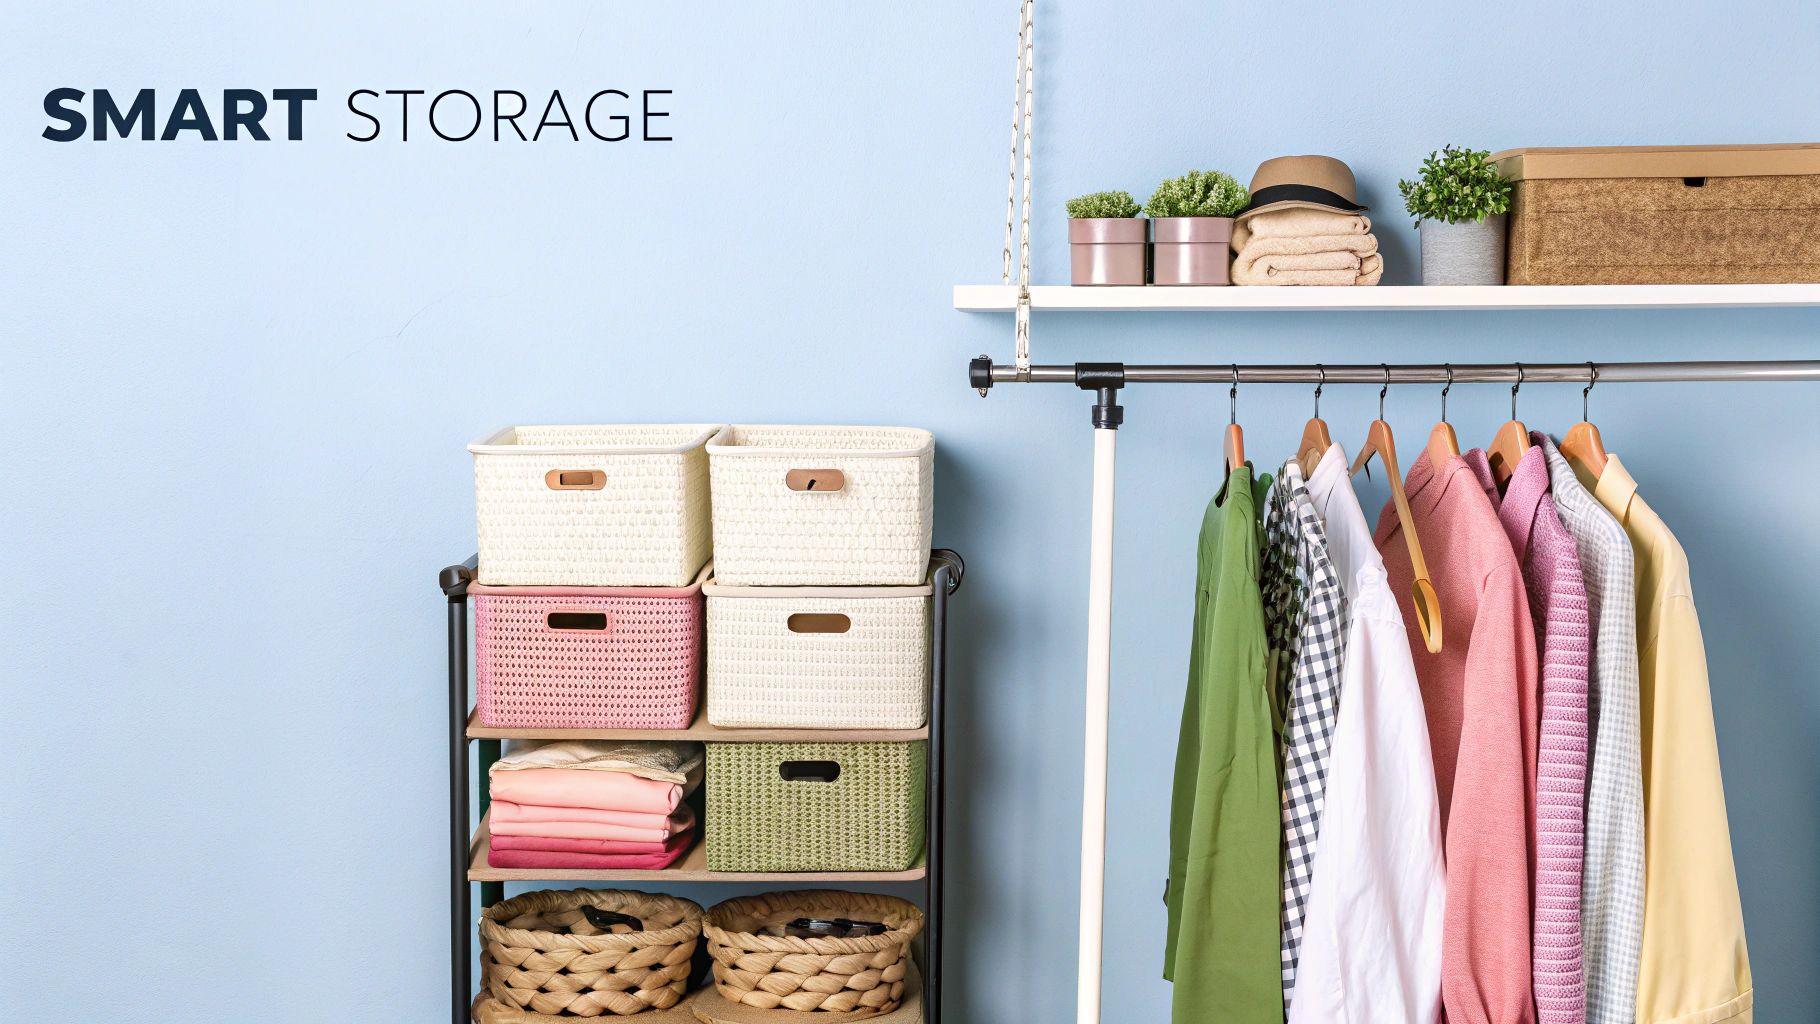
- Integrated Shelving: Some models include a built-in shelf, which is fantastic for storing folded jumpers, shoes, hats, or even a few plants. It’s a smart way to use vertical space.
- Variable Lengths: Check if the rail comes in different sizes or is extendable. This gives you the flexibility to get a perfect fit for your wall, whether you’re filling a small alcove or making a statement along a long wall.
- Accessory Hooks: Little extras like S-hooks or built-in end hooks are incredibly useful for hanging bags, scarves, and belts.
By balancing the look you love with the features you actually need, you’ll find a rail that not only sorts out your storage problem but also gives your room a real design lift. It’s all about striking that perfect balance.
Getting to Grips with Materials and Weight Capacity
The real secret to a dependable, long-lasting clothes rail boils down to two things: what it’s made of, and how much weight it can actually hold. Getting this right is the difference between a stylish, practical storage solution and a sagging rail that ends up damaging your wall. Let's look at the backbone of your rail to make sure it's not just good-looking, but properly built to last.
Think of it like a small suspension bridge; its strength isn't just in the beam itself but also in its anchor points. The material gives it its core durability and style, while the way it’s fixed to the wall dictates how much strain it can really take.
It’s no surprise we need sturdy storage. With the UK clothing market hitting around £64.5 billion in 2023, it’s clear we care about our wardrobes. All those clothes need a reliable home, which makes picking the right material for your rail more crucial than ever.
Common Materials and What They Offer
The material of your rail does more than just set the aesthetic; it's a huge factor in its performance. Each option has its own unique character, perfectly suited to different loads and interior designs.
- Industrial Steel: This is the workhorse. Usually found in black or galvanised finishes, steel offers incredible strength and that raw, urban look that works so well in modern spaces.
- Copper: If you're after a warmer, more refined feel, copper is a fantastic choice. It naturally develops a lovely patina over time, though it does need a bit of polishing now and then. It’s generally best for lighter collections.
- Wood: A wooden rail can bring a soft, natural, or rustic vibe to a room. It looks beautiful, but its weight capacity is usually less than its metal counterparts. It's perfect for a curated display rather than your entire winter coat collection.
Understanding Weight Capacity
This is the most critical part, and it’s where people often go wrong. A rail's weight capacity isn't just about the strength of the bar. It’s a measure of the whole system—the rail, the brackets, and, most importantly, the quality of the wall fixing. Overloading is the single biggest reason installations fail.
Think of the stated weight capacity as the manufacturer's promise. It’s the maximum load the rail is designed to hold, but only if it's installed correctly into a suitable wall. Ignoring it is like ignoring the weight limit on a lift—it’s a risk you don't want to take.
So, how do you figure out what you need? Start with a rough idea of how much your clothes weigh. As a general guide, around 10-12 heavy winter coats can easily weigh 20kg, while 30-40 shirts would be closer to 10-15kg.
Always check the product's specifications for its maximum load. If you have a serious collection of heavy-duty items like denim, wool coats, or suits, you’ll need a rail that’s genuinely up to the task. To find the right fit for a bigger wardrobe, take a look at our guide on heavy-duty clothes rails. Opting for a rail designed for a heavier load from the start gives you peace of mind and ensures your setup stays solid for years.
A Step-by-Step Installation Guide
Turning that flat-pack box into a sturdy, stylish feature on your wall is a lot simpler than it looks. With the right approach and a few basic tools, fitting a wall-mounted clothes rail is a genuinely satisfying DIY project you can knock out in an afternoon. Let’s break the process down into clear, manageable steps to get you a professional-looking result.
First things first, get your toolkit ready. Having everything you need within arm's reach from the start saves you from that frustrating mid-job search for a screwdriver.
- Essential Tools: You'll need a tape measure, a pencil, a spirit level, a drill with the correct bits, and a screwdriver.
- Safety Gear: Don't skip the safety goggles. They're crucial for protecting your eyes from dust and debris, especially when drilling into plaster or brick.
Prepare the Wall and Find the Studs
The most important job is figuring out what your wall is made of and where the strongest anchor points are. In most UK homes, you'll be dealing with either plasterboard (which sounds hollow when you tap it) or solid masonry like brick or blockwork.
For plasterboard walls, the gold standard is to fix your rail's brackets directly into the wooden studs – the timber framework hiding behind the plaster. A stud finder is your best friend here. Just slide it across the wall, and it'll beep when it locates a solid support. This gives you a far more secure anchor than relying on the plasterboard alone.
Measure and Mark Your Placement
Once you've found the studs, it’s time to decide on the perfect height for your rail. A good rule of thumb is around 165cm (65 inches) from the floor. This height is ideal for hanging longer items like coats and dresses without them bunching up on the ground.
Using your tape measure, mark this height on the wall where you've located your studs. Place one of the brackets against your first mark and grab the spirit level to make sure it’s perfectly vertical. Now, use your pencil to mark through the screw holes in the bracket. Do the same for the other bracket(s), but this time, use the spirit level between them to guarantee the rail itself will be perfectly level.
This handy image maps out the core installation process, from the initial measurements to fitting the final rail.

As you can see, a methodical approach is key. Measure, mark, then drill – in that order.
Drill Pilot Holes and Secure the Brackets
Now for the fun part: drilling. If you're going into wooden studs, pick a drill bit that’s slightly smaller in diameter than your screws. This creates a pilot hole, which stops the wood from splitting and makes driving the screws in a whole lot easier. For solid brick walls, you'll need a proper masonry bit and the right wall plugs, which usually come included with the rail.
A secure fixing is non-negotiable. The strength of your entire setup relies on how well the brackets are anchored to the wall. Take your time with this step to avoid any future wobbles or collapses.
Drill your pilot holes on the pencil marks you made. If you’re using wall plugs for a solid wall, gently tap them into the holes until they sit flush with the surface. All that's left is to line up your brackets with the holes and drive the screws in until they are pulled tight against the wall.
Once the brackets are solid, you can slot the rail into place and step back to admire your handiwork. For a deeper dive into securely mounting items, the principles in this guide on mastering bathroom mirror installation offer some excellent transferable tips.
Styling Your Wall Mounted Clothes Rail
With the installation out of the way, it's time for the fun part. A wall-mounted clothes rail is much more than just a place to hang things; think of it as a blank canvas, a chance to create a stunning visual feature that truly reflects your personal style.
It’s essentially an open-concept wardrobe that puts your favourite pieces on show. This not only makes getting dressed in the morning a bit more inspiring but also encourages you to be more thoughtful about your clothing collection. It's the perfect setup for curating a capsule wardrobe where every item is visible and easy to reach.
Create a Cohesive Visual Display
The easiest trick for creating that elegant, boutique-like feel is to organise your clothes by colour. Arranging everything in a gradient, perhaps from light to dark or through a spectrum of related shades, brings an immediate sense of harmony and order. It’s a simple move that transforms a functional rail into a deliberate piece of interior design.
Another approach is to group items by type. Keeping all your shirts together, then trousers, then dresses, makes finding what you need completely effortless. If you want a more dynamic look, you could even try arranging your outfits for the week ahead, turning the rail into a practical and inspiring styling station.
A well-styled clothes rail tells a story. It’s not just a collection of garments; it’s a curated display of your personal aesthetic, transforming everyday items into a form of decor.
The way we shop for clothes online is changing how we set up our homes. In the UK, even with some market ups and downs, ecommerce sales for textiles and apparel are projected to hit £21.01 billion in 2025. This habit of buying online fuels the need for smart, space-saving clothes rails for walls that look just as good as the clothes hanging on them. You can read more about UK fashion ecommerce trends.
Accessorise and Personalise Your Setup
To really make the rail your own, think beyond just the clothes. A few well-chosen accessories can elevate the entire setup and make it even more practical.
- Elegant S-Hooks: These are brilliant for hanging handbags, scarves, hats, or belts. Try to find hooks in a matching metal finish to keep the look consistent.
- Add a Shelf: Popping a minimalist shelf either above or below your rail instantly doubles your storage space. It’s the perfect spot for shoes, folded jumpers, or decorative bits like small plants and framed prints.
- Matching Hangers: This is a big one. Investing in a uniform set of hangers—whether they’re sleek black velvet, natural wood, or minimalist metal—is one of the fastest ways to create a clean, organised look.
By mixing and matching these ideas, you can customise your display to perfectly fit your space and style. For a bit more inspiration on putting together effective displays, take a look at our guide on choosing the right clothing display racks.
Common Installation Mistakes to Avoid
A successful DIY project isn't just about what you do, but what you don't do. When it comes to installing clothes rails for walls, even the sturdiest rail will let you down if it's not fitted correctly. Learning from a few common blunders is the secret to getting it right the first time.
The single biggest mistake? Using the wrong wall fixings. Think of them as the anchors holding everything together. A standard plasterboard plug just won't cut it in a solid brick wall, and you'll soon have a pile of clothes on the floor. Always, always match the fixing to your wall type – that means heavy-duty toggle bolts for hollow plasterboard and chunky, robust plugs for solid masonry.
Achieving a Professional Finish
Another classic slip-up is abandoning the spirit level. A rail that looks "level enough" by eye will scream "wonky" the moment you hang a few shirts on it. Taking that extra minute to get it perfectly horizontal is the difference between a DIY disaster and a professional finish. The same goes for height – hang it too low and your long coats will be sweeping the floor; too high and you'll need a stepladder to reach anything.
A more subtle but equally damaging mistake is overloading the rail. It's so easy to do, but consistently exceeding the manufacturer's weight limit puts immense strain on both the rail and your wall, leading to a gradual, sagging failure.
It’s no surprise we need good storage. With retail clothing sales in Great Britain hitting around £4.3 billion in a single month like October, our wardrobes are always expanding. You can see more data on UK retail trends on Statista.com. If you're looking for other ways to display your collection, have a look at our guide to clothing display stands.
Frequently Asked Questions
Even the most thorough planner has a question or two before they start drilling. Let's tackle some of the most common queries about wall-mounted clothes rails so you can get started with complete confidence.
How Much Weight Can a Wall Mounted Clothes Rail Hold?
This is the big one, and the answer isn't just about the rail itself. It’s a partnership between the rail's material and, crucially, how securely it's attached to the wall.
A heavy-duty steel rail bolted directly into solid brickwork or timber studs can comfortably hold 20-40kg or even more. That’s more than enough for a whole collection of heavy winter coats.
But take that exact same rail and fix it to plasterboard with the wrong plugs? The capacity drops dramatically, often to just 5-10kg. Always start by checking the manufacturer's specific weight guidelines.
Can I Install a Clothes Rail on a Plasterboard Wall?
Yes, absolutely. The key is using the right hardware for the job. Standard plastic wall plugs just won't cut it in hollow plasterboard; they’re almost guaranteed to pull out under load.
For a secure fitting, you need to use specialised plasterboard fixings. Some of the most reliable options include:
- Spring Toggles or Butterfly Anchors: These clever fixings open up behind the board, spreading the weight over a much larger surface area.
- Self-Drilling Metal Anchors: These are a step up from plastic plugs, screwing into the plasterboard to create a much stronger anchor point.
For the ultimate peace of mind on a plasterboard wall, your best bet is always to find the wooden studs hidden behind it. Screwing your brackets directly into this solid timber framework gives you the strongest possible hold.
What Is the Best Height to Hang a Wall Mounted Clothes Rail?
A great all-purpose height is around 165cm (or 65 inches) from the floor to the rail. This leaves plenty of room for longer items like dresses and coats to hang without crumpling on the floor.
But this isn't a hard-and-fast rule. Think about what you'll be hanging. If it's just shirts or trousers folded over hangers, you could easily go lower, perhaps around 100-120cm. Measure it out, consider your own reach, and see what feels most comfortable and practical for your space. For more ideas on creating effective storage, check out our guide on retail display stands.
At Display Guru, we provide high-quality garment rails designed for durability and style. Explore our collection to find the perfect solution for your space at https://www.displayguru.co.uk.