


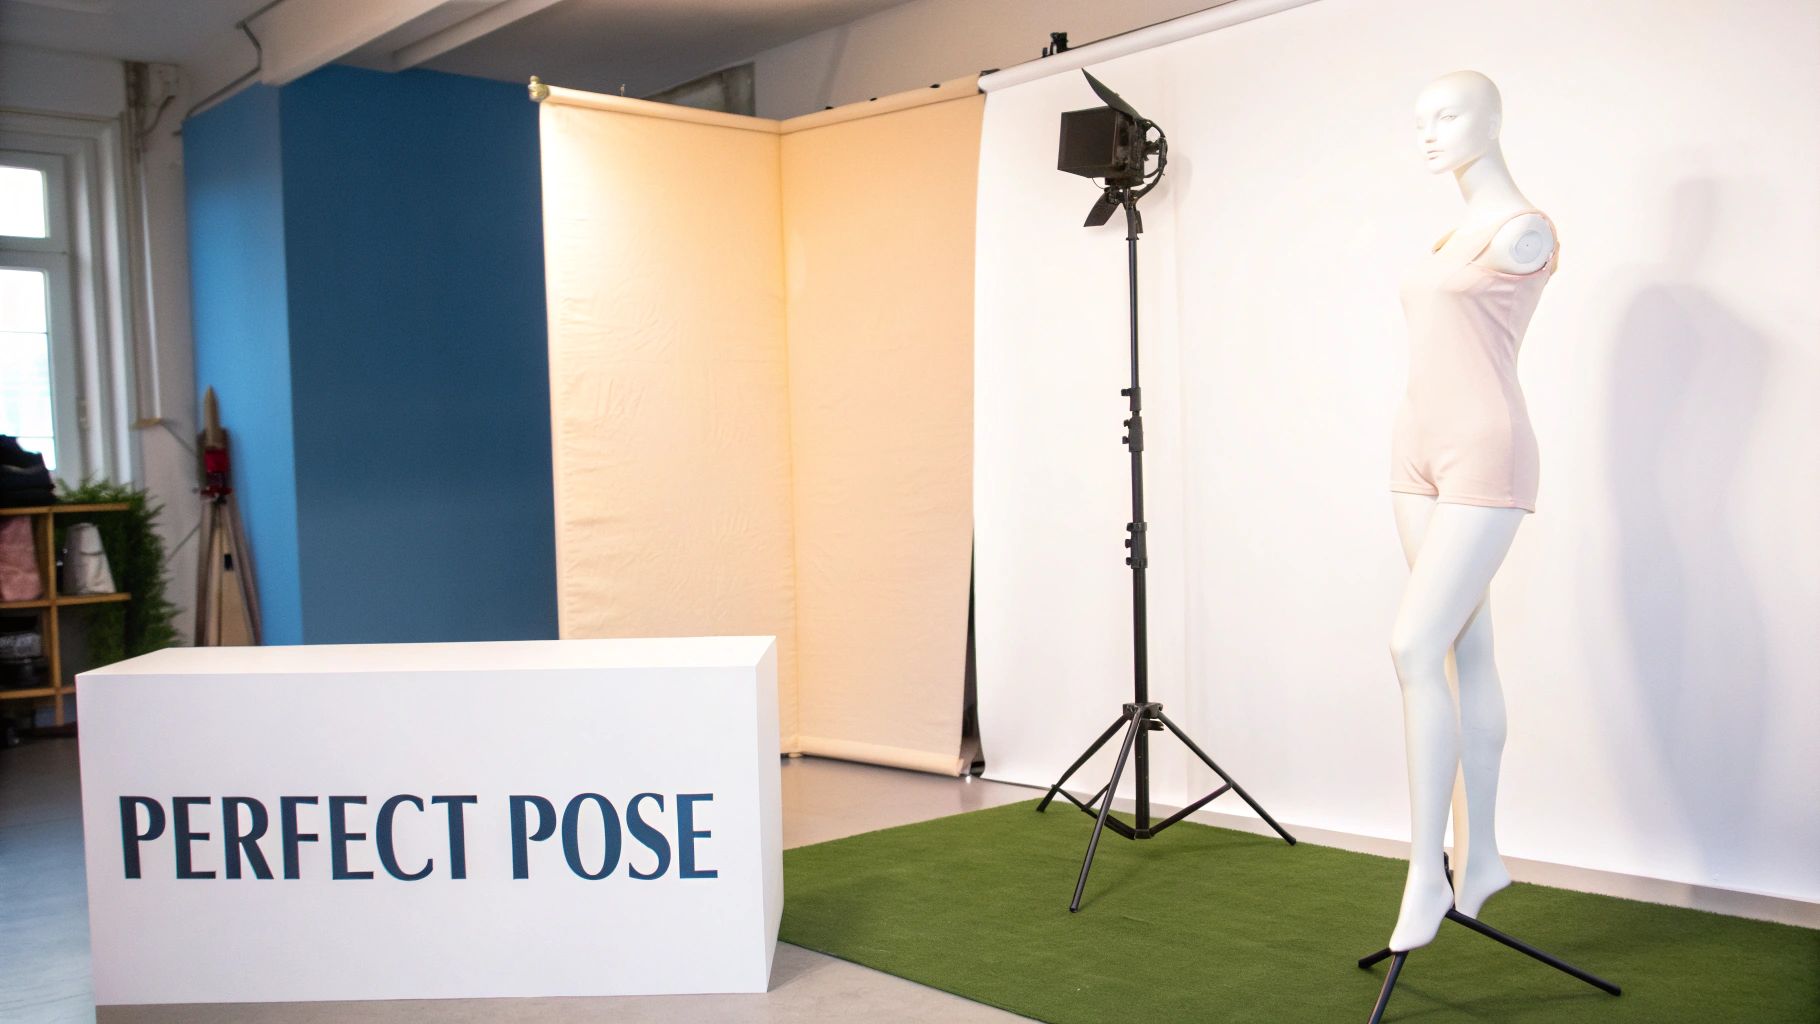
How to Dress a Mannequin Like a Pro
Dressing a mannequin is so much more than just putting clothes on a plastic form. It’s an art, really—a vital retail skill that can turn a simple garment into a story that grabs a customer's attention. Think of your mannequins as your best silent salespeople. When styled perfectly, they stop window shoppers in their tracks and show them exactly how an outfit could look and feel in real life.
Why Expert Mannequin Styling Is Your Secret Sales Weapon

A well-dressed mannequin does far more than just hold up an item of clothing. It's a powerful visual conversation starter that directly shapes how a customer sees your brand and whether they decide to step inside your shop. When you master how to dress a mannequin, you’re not just showing clothes; you’re creating an aspirational vision that helps people connect with the products on a much deeper, personal level.
This isn’t just about smoothing out wrinkles or buttoning up a shirt. It’s about building a narrative. The way you style a mannequin communicates your brand’s personality, makes intimidating fashion trends feel approachable, and can transform a simple piece into a must-have item.
The Psychology Behind a Killer Display
A thoughtfully styled mannequin works by tapping into a shopper's imagination, making it effortless for them to picture themselves in the outfit. It answers all those unspoken questions they have about fit, how to coordinate pieces, and what occasion they might wear it for. A great display quietly removes those little barriers to purchase before a customer even lays a hand on the fabric.
Here’s what a great display can do:
- Inspire Confidence: It shows how separate pieces come together to create a cohesive look, which often encourages customers to buy the whole outfit instead of just one item.
- Reflect Your Customer: The pose, the style, and even the type of mannequin you choose can hold a mirror up to your target audience, making the display feel instantly relatable. Promoting inclusivity is key here, and our guide on using plus-size mannequins for stylish displays has some great insights on this.
- Create Urgency: A stunning, fresh display makes an item feel new, exciting, and desirable, often prompting a much quicker decision to buy.
The Numbers Don't Lie
The impact of visual merchandising isn't just a gut feeling; it’s backed by serious industry growth. The UK mannequin market hit a value of roughly USD 278.2 million in 2023 and is on track to soar to USD 649.7 million by 2030. This boom highlights just how essential these silent salespeople have become in modern retail.
Ultimately, learning how to properly dress a mannequin is a direct investment in your brand’s story. It’s the crucial link between the clothes on the hanger and a customer’s imagination, and it’s something that will absolutely boost your bottom line.
Setting the Stage for a Flawless Display
Think of it like a chef's mise en place. Before you even think about draping a garment, you need to get your station in order. The most breathtaking visual display is built on this groundwork; skimp on the prep, and you'll end up with an amateur look that fails to capture anyone's attention.
Your first move is always choosing the right mannequin. It's not just a stand-in for a body; it's a critical part of your brand's story. A sleek, abstract form might be perfect for a high-fashion boutique, while a mannequin in a dynamic, athletic pose is far better for showcasing performance wear. The aim is to help the customer see themselves in the clothes.
This decision carries more weight than you might think. In 2024, the UK mannequin market was valued at around USD 109 million, a significant 13% jump from the year before. This shows just how essential these tools remain for brick-and-mortar retail. Understanding these trends can give your own display strategy a serious edge.
Creating an Efficient Workspace
With your mannequin selected, it’s time to set up your workspace. Nothing kills creative momentum faster than frantically searching for the right pin or wrestling with a tangled necklace mid-drape. It leads to frustration and a display that just feels… off.
Before you start, lay out everything you’ll need. Have it all within arm's reach.
- A complete set of pins, including both fine and heavy-duty options.
- A variety of clips and clamps to secure fabric.
- A powerful, quality steamer.
- All the final accessories: belts, scarves, jewellery, you name it.
This level of organisation is non-negotiable, whether you're working with a simple torso or a full-body form. For a more detailed look at the mechanics, our guide to using a mannequin with a stand is a great resource.
Let’s talk about steaming. This is the one step you can never, ever skip. Every single piece of fabric, from a silk camisole to a wool coat, must be perfectly steamed. Wrinkles and creases scream "I don't care" and instantly devalue the garment. A crisp, smooth finish is a silent signal of quality that makes the clothing infinitely more appealing.
The Power of Preparation
It's helpful to see this prep phase as part of the styling process itself. When you take the time to select the perfect form, meticulously steam your garments, and organise your tools, you're building a foundation for success.
This detailed approach creates a smooth, efficient workflow. It frees up your mental energy to focus on the artful part—the draping, the pinning, and the final styling touches that will bring your vision to life and stop customers in their tracks.
Draping and Fitting Garments Naturally
Now that you’ve prepped your workspace and steamed the garments, it's time for the real craft to begin. This is where you move beyond simply dressing a form and start telling a story with fabric. The ultimate goal is to make the fit look so effortless that the mannequin appears to have dressed itself.
A common rookie mistake is dressing the mannequin from the top down. Always, always start from the bottom and work your way up. Trousers, jeans, or a skirt go on first. If your mannequin has removable legs, this is a breeze. For those with fixed legs, you'll need to pop the torso off, slide the trousers on, and then carefully re-attach the top half. It’s an extra step, but it saves you from stretching waistbands or straining delicate seams.
This bottom-up principle is crucial for layering, too. Get the base layers on, then the shirt or blouse, and finish with any outerwear like a blazer or jacket.
Achieving a Bespoke Fit
With the clothes on the mannequin, your next task is to perfect the fit. This isn't just about making sure everything is on straight; it's about sculpting the garment to look truly aspirational. You want to eliminate any awkward bagging or pulling that detracts from the designer's original vision.
Your first point of focus should be the seams. For any top or jacket, the shoulder seams must sit squarely on the mannequin's shoulders—not drooping down the arm or creeping up towards the neck. In the same way, the side seams of a dress or trousers should run in a clean, straight line down the form’s sides.
Pro Tip: Use the palms of your hands, not just your fingertips, to smooth out larger areas of fabric. Gently sweep your palms across the chest of a shirt or the thigh of a pair of trousers. This coaxes the material into settling naturally against the form.
Some garments naturally demand more finesse. A structured blazer, for example, needs its lapels to lie perfectly flat and its shoulders to be precisely aligned before you even think about pinning. For a form-fitting dress, you need to work the fabric down the torso evenly on all sides, preventing any twisting or riding up.
For anyone using a mannequin to actually create garments, this precision is non-negotiable. An adjustable form can be a real asset here, and our ultimate guide on using an adjustable mannequin for sewing provides expert advice for achieving that perfect fit from scratch.
Garment Fitting Checklist
To guarantee a professional result every time, it helps to run through a quick mental checklist as you fit each garment. This simple habit helps you spot and fix minor issues before they become glaring problems in your final display.
| Check Point | Why It Matters | Pro Tip |
|---|---|---|
| Symmetry | Ensures the garment hangs evenly and looks balanced from the front. | Step back frequently. Look at the mannequin from a distance and from multiple angles. |
| Seam Alignment | Correctly aligned seams are an immediate indicator of a high-quality, professional fit. | Check that shoulder, side, and inseams are straight and fall where they should on the body. |
| Closure Alignment | Prevents unattractive puckering around buttons, zips, and other fastenings. | Always fasten all closures to see how the garment sits before you begin pinning it into place. |
| Fabric Tension | Avoids stretching delicate fabrics or creating unnatural, stressed pulling lines. | The garment should skim the mannequin's body, not be stretched tautly across it. |
Remember, draping and fitting are iterative processes. You’ll find yourself adjusting, smoothing, and readjusting multiple times to get it just right. It’s this meticulous attention to detail that elevates a standard display into one that truly sells the clothes—and makes a customer stop in their tracks and think, "I want to look like that."
Mastering Invisible Pinning and Tucking
The real secret separating an average display from professional visual merchandising? It’s all in the pinning. This is where you become a sculptor, using the mannequin's form to shape the garment, banish any unflattering bagginess, and truly sell the fit.
The entire process is an exercise in subtlety. You want the pins to be completely invisible, making the customer believe the garment just is that perfect. Naturally, the fabric you're working with will dictate your approach.
Pinning Techniques for Different Fabrics
When you're handling lightweight silks or chiffons, you need a delicate touch. I always reach for very fine, sharp pins—think ‘sequin’ or ‘lill’ pins. Their tiny size won’t leave noticeable marks or snag the delicate material. The trick is to place them discreetly inside an existing seam or hide them under a fold.
Heavier materials like denim, corduroy, or thick wool are a different story. For these, you’ll need something with more backbone. Standard dressmaking pins with a sturdy metal or plastic head give you the strength and grip you need to hold the fabric firmly without bending. You can afford to be a bit more forceful, but the principle of keeping them hidden never changes.
The golden rule I’ve learned over the years is to always work along the seams. Pinch the excess fabric at a side seam or along the back, create a neat fold underneath itself, and drive the pin straight through all the layers into the mannequin. This keeps the front of the garment looking absolutely pristine.
Advanced Fitting Methods
Once you're comfortable with the basics, you can start experimenting with more advanced methods. These are the techniques that give high-end retail displays that polished, aspirational feel.
One of the most effective tricks in the book is the ‘fish-tail’ pin. It’s perfect for tailoring the back of a shirt or blouse to get that crisp, fitted silhouette.
- First, gather all the excess fabric at the centre of the lower back.
- Next, fold this gathered material into a neat, vertical pleat.
- Secure it with a row of pins running right down the length of the pleat.
- Finally, tuck the resulting "tail" of fabric up and underneath the shirt's hem. From the front and sides, it’s completely invisible.
This single technique can transform a standard, boxy shirt into something that looks custom-made—a detail shoppers definitely notice. Mastering this is especially crucial when fitting menswear. For more specific guidance, our tailor dummy male guide can help transform your fitting game.
This visual flow shows the basic sequence for building an outfit on the form, ensuring each layer complements the next.
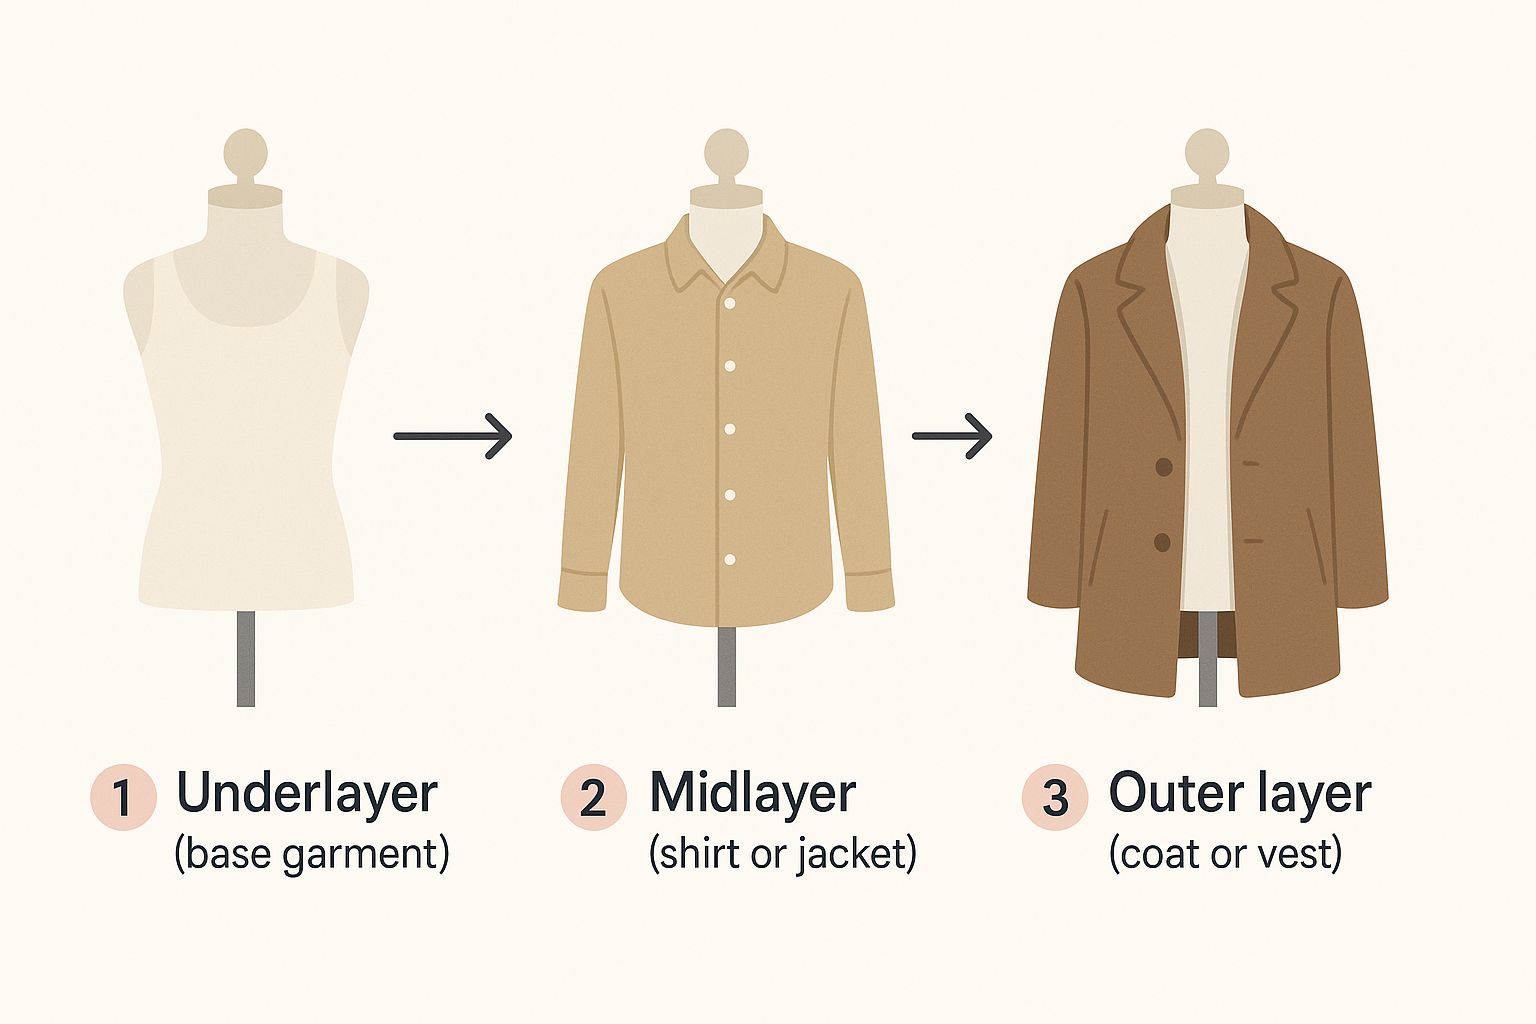
As the diagram shows, a well-dressed mannequin always starts with a solid foundation. Each layer you add builds upon the last to create a complete, cohesive look.
Ultimately, dressing a mannequin is about creating an illusion of perfection. By using the right pins and techniques to discreetly tuck and sculpt, you gain full control over how the fabric drapes and falls. This meticulous attention to detail is what makes an outfit look its absolute best, turning a simple garment into a truly powerful sales tool.
Bringing the Look to Life with Styling

You’ve done the hard work of fitting and pinning the garment, creating a flawless canvas on your mannequin. Now for the fun part. This is where you breathe personality into the display, moving beyond simply showing a piece of clothing to creating a complete, aspirational look that speaks directly to your customer.
Accessories are your best friends here. A well-placed belt, a casually knotted scarf, or a statement handbag can completely transform an outfit. They provide context and personality, but more importantly, they show customers how to build the entire look themselves. This is how you drive those crucial add-on sales and really showcase your brand’s eye for style.
The Art of Strategic Accessorising
Great accessorising isn't just about throwing on extra items; it’s about deliberate storytelling. Before you reach for a necklace or a bag, take a moment to ask yourself, “What story is this outfit telling?” Is this a look for the office, a relaxed weekend away, or a glamorous evening out?
Every single accessory you choose should support that narrative. Imagine you're styling a 'city break' theme with a great pair of jeans and a classic trench coat. You'd naturally lean towards a crossbody bag, perhaps hooking a pair of sunglasses onto the collar, and placing some simple trainers at the mannequin's feet. Each piece reinforces that casual, on-the-go vibe.
Now, contrast that with a 'wedding guest' display. The approach is entirely different:
- A Clutch Bag: You’d swap the everyday tote for a small, elegant clutch.
- Delicate Jewellery: Chunky, casual pieces are out. Instead, you’d opt for a fine necklace or sophisticated earrings.
- Elegant Footwear: A pair of heels placed nearby instantly elevates the scene and completes the formal story.
Mastering this skill is vital in the UK fashion retail world. As of 2023, the industry employed around 880,000 people in clothing retail alone. And with physical stores still driving approximately 74% of retail clothing sales by value, creating compelling mannequin displays that stop people in their tracks has never been more important. You can find more insights on the role of mannequins in the UK market on bonafideresearch.com.
Creating Visual Harmony
Beyond telling a story, good accessorising is grounded in the basic principles of visual design. You need to think about balance, colour, and texture to make sure the final look feels cohesive and appealing, not cluttered or distracting.
One of the most important things is to establish a clear focal point. If you’re using a bold statement necklace, keep the other jewellery minimal. If a brightly coloured handbag is the hero piece, let it pop by styling it with more neutral tones. The aim is to guide the customer’s eye, not overwhelm it.
My personal rule is what I call the 'one thing too many' check. Once I think I'm finished, I take a step back and ask, "If I had to remove one accessory, what would it be?" More often than not, removing that one final item is what pulls the entire look together. Simplicity can be incredibly powerful.
Don't forget to play with different textures and layers. A fine silk scarf can introduce a touch of softness to a structured blazer, while a leather belt can add a grounding contrast to a flowy dress. Layering delicate necklaces or bracelets also adds a sense of depth and personal style. It’s these subtle, thoughtful details that turn a mannequin from a static display into a genuine source of inspiration.
Answering Your Top Mannequin Styling Questions
Even seasoned professionals run into tricky situations when styling mannequins. After years in the business, you start to see the same problems crop up again and again. Here are my answers to some of the most common questions I get asked, along with some practical, real-world advice.
How Do You Put Trousers on a Mannequin with Fixed Legs?
Ah, the classic fixed-leg dilemma. This is especially common with older models or those in a specific, stylised pose. Trying to force a pair of trousers over static legs is a surefire way to stretch the fabric or even damage the waistband. Don't do it.
The professional trick is simple: detach the torso from the legs first. This gives you easy access. You can then slide each trouser leg on without a struggle and pull them up to the waist. Once they're sitting just right, you can carefully re-attach the torso to the leg base. For tougher fabrics like denim, I find it helps to scrunch up the trouser leg first, much like you would a pair of tights, which makes sliding it on much smoother.
What Are the Best Types of Pins to Use for Mannequins?
The right pin can make or break your display. Honestly, it's that important. For delicate materials like silk or chiffon, you absolutely must use very sharp, fine pins. I always keep a good supply of ‘Sequin’ or ‘Lills’ pins; they're short, sharp, and leave virtually no mark.
For heavier fabrics like wool, denim, or thick cotton, you’ll need something with more heft. Standard dressmaking pins with a metal or plastic head give you the grip you need and won't bend under the pressure. My number one rule? Always use new, sharp pins. A dull pin will snag and pull threads, potentially ruining the garment. It’s also wise to have a mix of pin lengths in your kit.
The key takeaway here is to match the pin to the fabric's weight and weave. Using a heavy pin on a delicate garment is a recipe for permanent damage. On the flip side, a tiny pin just won't hold the shape of a thick winter coat.
How Often Should I Change My Mannequin Displays?
This really comes down to your shop's footfall, how often you get new stock, and your overall marketing calendar. A high-traffic window display is your most powerful visual tool, so it needs to stay fresh. I'd recommend refreshing it every one to two weeks. This keeps your storefront looking current and lets you highlight your latest arrivals.
For the mannequins inside your store, you have a bit more breathing room. Restyling them every two to four weeks is a good rhythm. The smartest approach is to time these changes with seasonal shifts, major holidays like Christmas or Easter, or specific sales promotions. It keeps customers engaged and can even create a subtle sense of urgency.
My Mannequin's Arms Keep Falling Off—What Can I Do?
This is probably one of the most common and frustrating problems out there! It's usually just down to simple wear and tear on the arm fittings over time.
First, do a quick check. Make sure the arm is actually locked securely into the shoulder socket. Sometimes it just needs an extra firm twist until you feel it click satisfyingly into place.
If the fittings themselves are worn, a great temporary fix is to wrap a small amount of masking tape around the male end of the fitting. This adds just enough thickness to create a tighter, more secure connection. For a more permanent solution, it's worth contacting the manufacturer to see if they can supply replacement parts. Also, knowing the right mannequin measurements and size charts can help you identify if you're working with correctly proportioned parts in the first place.
Pro Tip: Always try to dress the arms before attaching them to the torso. This minimises the stress you put on the joints and can prevent the fittings from wearing out prematurely.